RSS
 

Posts Tagged ‘Ideas’

10 Ideas to Instantly Improve Your Photography Composition

14 Apr

It is an illusion that photos are made with the camera; they are made with the eye, heart and head. – Henri Cartier-Bresson

My photography training took place back in the early 90s, at an intense technical photo school in California. I love tech in all forms, and I love reading my camera manual. I love the precision and procedure of processing my own colour film, and I love learning the ever-advancing skills on photo software – I am a total tech nerd. But technical knowledge will only get you so far; it’s really the second part of the story in photography. Photography composition is the first part.
EPESTENIDEASDPS 01

The first part is your vision of what you want your photography to be, and learning the ability to compose compelling images. Your technical knowledge will only give you the ability to execute your vision, and make the most of the composition that you have created. It can’t replace the ability to see and to compose stunning compositions.

So all things should flow from a good composition. And when we are learning about composition I like to keep in mind that quote that may or may not have been spoken by Picasso (it’s under dispute on the internet): “Learn the rules like a pro and break them like an artist.” Rules, guidelines, ideas about composition will give you a place to start, help develop your skills and propel you out of a rut. But they should not be followed slavishly or forever.

Here are my ideas on what you can do to make your compositions more captivating. But, bear in mind that creating totally unique compositions comes down to creating your own style . So don’t be swayed too much by other photographers’ advice on this subject. Photography is an examination of the world through your eyes, it’s totally subjective, totally about connecting with what inspires and excites you. Just pick up ideas that make sense and motivate you.
EPESTENIDEASDPS 02

To practice, pick one concept from below that jumps out. Don’t take all these ideas and try to incorporate them into your photography all at once. Pick one and really embrace it – then the results will come.

So here are my 10 favourite tips on how you can instantly improve your composition.

1. Light

“Light makes photography. Embrace light. Admire it. Love it. But above all, know light. Know it for all you are worth, and you will know the key to photography.” George Eastman

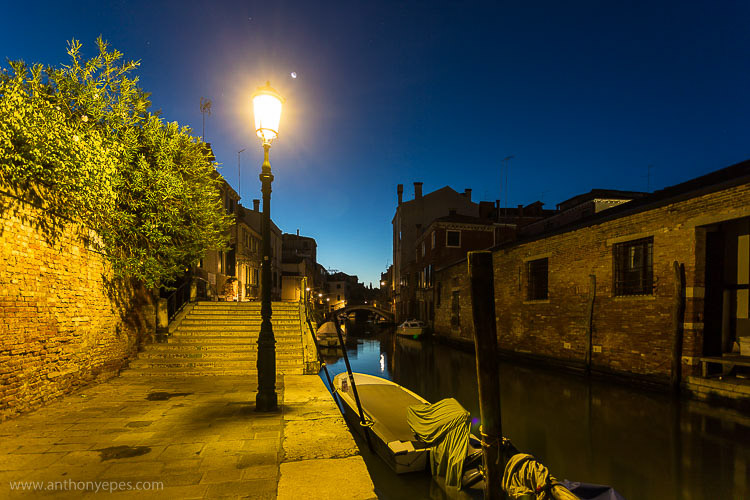
For me more than anything, photography is about light, and learning to identify interesting light is one of the best skills to learn. Light that is doing something interesting, or is beautiful or colourful; will take a good subject and turn it into something completely amazing.

Light is my starting point when I am taking photos. It is the thing I consider first, and what affects me the most when deciding what to photograph. Look for light doing strange and wonderful things – creating long shadows, diffused light falling over a broken wall, reflecting, creating bursts of colour. Look for the colour of light, too: the cool blue light before dawn, the cold, almost transparent light of a winter’s afternoon, the rich orange light of near twilight – and how that affects your subject. Think always: how can I get the best out of the light that I am photographing?
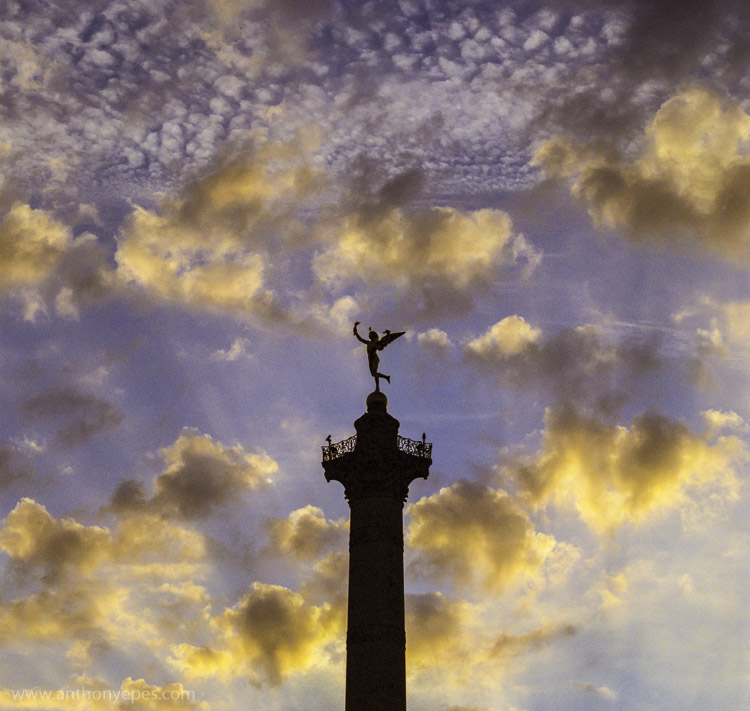
EPESTENIDEASDPS 03

In the photograph above, the beautiful light is obvious. I have used the silhouette of the column, to contrast the dappled light which is illuminating the clouds beautifully. This contrast makes the light look spectacular because it’s showing off its range of colours and depth against the heavy dark column.

Learning to notice light in all its forms and colours is an excellent way to improve your compositions.

When you see a subject you wish to photograph, look at the light around it. If it’s not interesting light – if it’s flat, boring, or draining the sense of colour – have a look at what else is happening with the weather. Maybe you can wait for clouds to pass, come back later or earlier in the day, see if you can organize the composition to incorporate light from other sources. It doesn’t have to be natural light. Artificial light, and particularly the play of natural and artificial light, can make an inspirational combination.

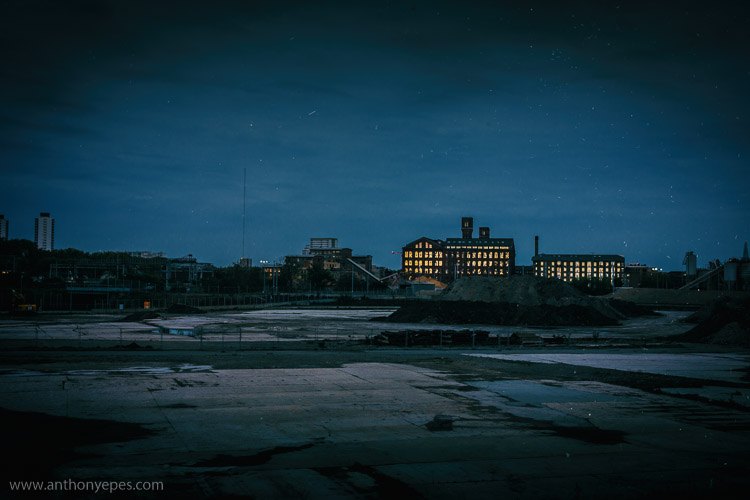
Here’s another photo where the main subject is the light, but this one is more subtle. The absence of light is most pronounced in this shot, and then all of sudden the glow of dawn light is reflected in the windows. Again, there is a contrast of darkness against light.
EPESTENIDEASDPS 04

There is lots of negative space in this photo, an overload of industrial blandness, wastelands. And then these two buildings and the sudden glow of the charming light.

2. Simplicity: think in threes

“The ability to simplify means to eliminate the unnecessary so that the necessary may speak.” Hans Hofmann

Simplicity is often very hard to accomplish, and can be more challenging than more complex compositions. I find there can be a misunderstanding about how to achieve simplicity in your photos. People often think it’s about taking a photo of one subject. But actually I rarely take photos which contain only one subject. Usually there has to be one subject with at least one, but usually, two supporting elements. So I like to say – think in threes.

Humans love to think in threes – (breakfast, lunch, dinner; past, present, future; and small, medium, large). We like to find rhythms and patterns in everything.
EPESTENIDEASDPS 05

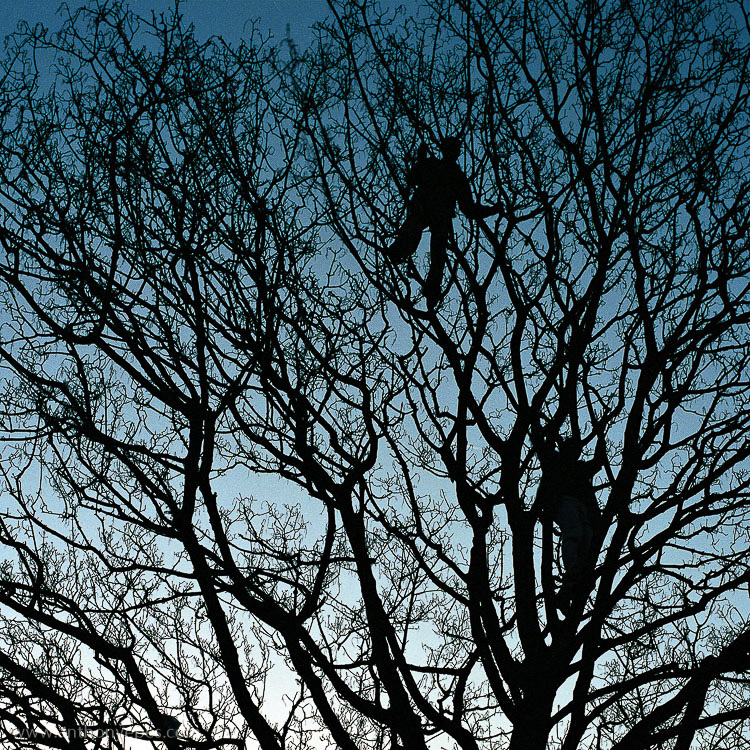
This photo above is a very good example. How many elements make up this photo? Well, first you have the beautiful blue gradated sky, then the wild, chaotic pattern of the bare branches. That’s all very nice, but it’s the third element that is the subject, and that really makes the photo – the two men blending into the branches, while creating distinct human shapes. The photo without any one of the elements wouldn’t be as interesting.

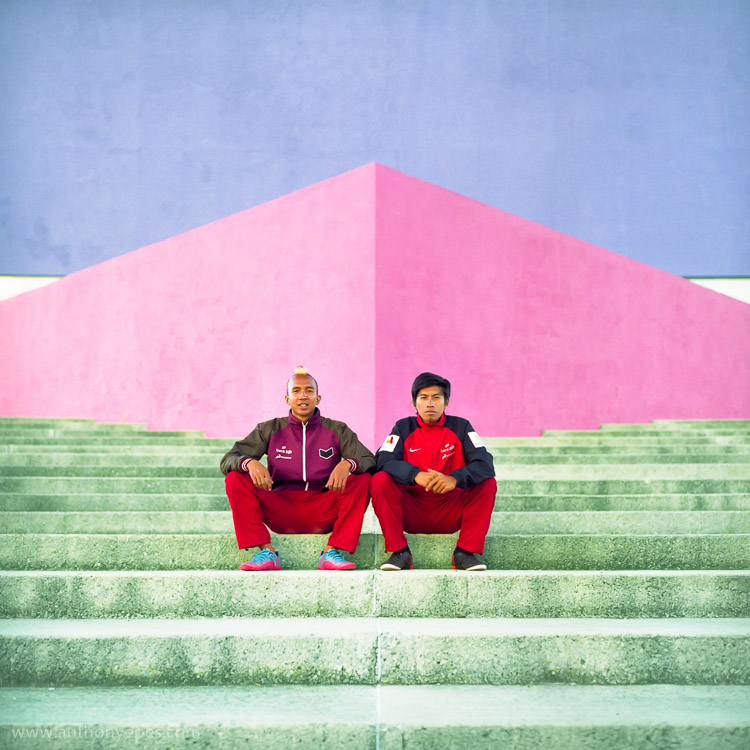
I am a particular fan of very simple compositions when photographing people and I often use plain and colourful backgrounds. In the photo below, again there are three strong elements: bright pastel colours, the two guys and the strong lines.
EPESTENIDEASDPS 06

It also works when photographing pigeons! Another photo with three elements: the grey, slightly dishevelled pigeon, the wash of colour, and the texture and lines of the wet paving stones.
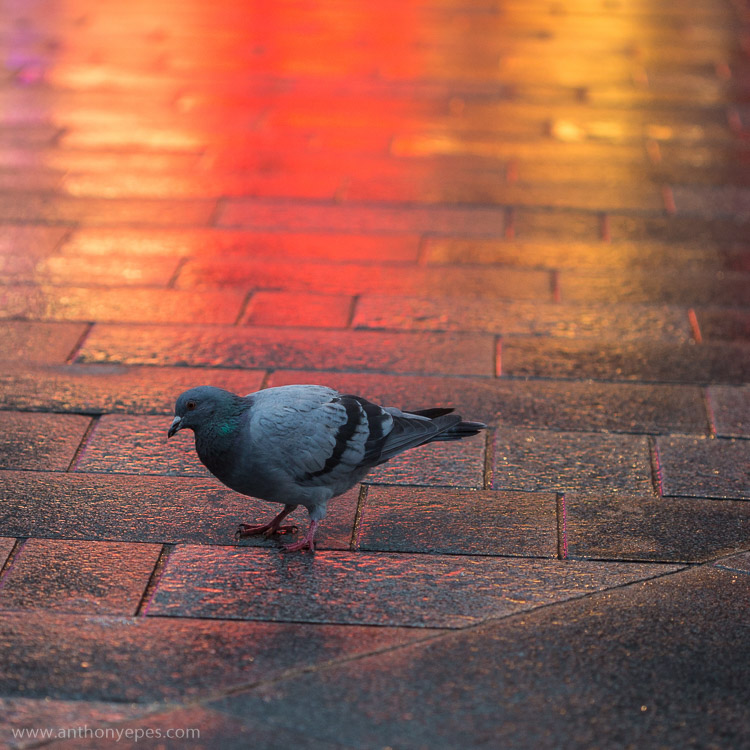
EPESTENIDEASDPS 07

3. Move your feet

When you are looking at a professional photographer’s work, one thing that they do more than an amateur photographer is move. You may have a killer shot laid out before you, but you still have to find the killer angle that will make the shot really special. Every shot has a perfect angle, and it’s your job to find it. If you are shooting a subject you love and then look at your images and are disappointed with what you find, I guarantee it’s because you haven’t found the perfect angle.

Get up on that roof, lie on the floor, move your feet around until what you see in frame is the best possible angle, the best possible position you can manoeuvre yourself into. Get dirty if you have to. This requires patience (and good knees), and patience is one thing I think most amateur photographers need to develop more of.
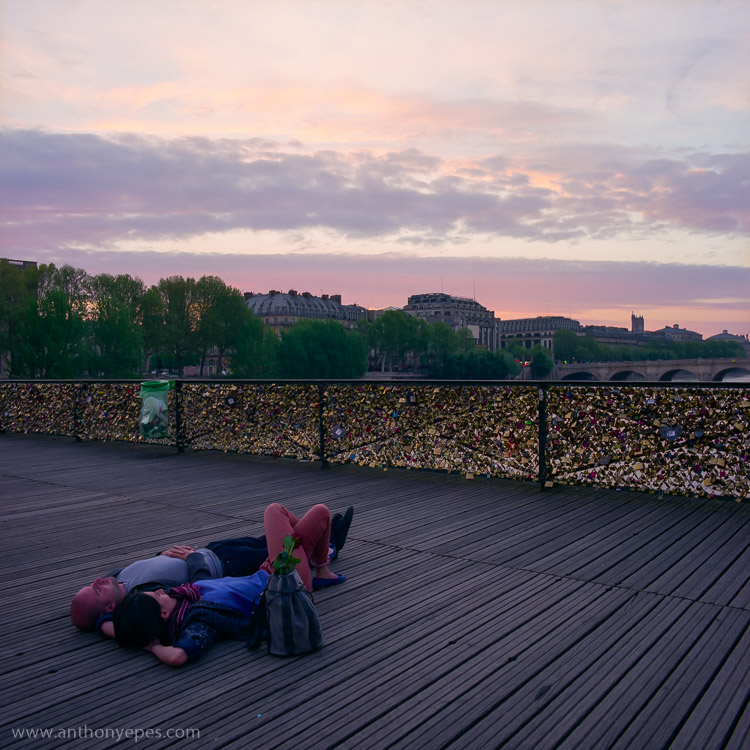
EPESTENIDEASDPS 08

There is one particular culprit in our kit that discourages us to move, and makes many of us lazy – a zoom lens. This should NEVER be a replacement for moving around a scene and finding the best angle. Do not fall into the trap that just because you have the subject in frame you can just zoom in to get it. Compose your best possible shot in frame, zooming in only if it’s totally the right thing to do , and not as a default option for moving. My best advice for zooming is pick a focal length, then move your feet and find the angle you need.

4. Get closer

Robert Capa said – “If your pictures aren’t good enough, you are not close enough.”

This concept reminds me of when I once read about a famous chef, who believes that the difference between home cooks and professionals is that home cooks are afraid of heat, and don’t turn their gas hobs up high enough. It’s the same with photography – obviously!
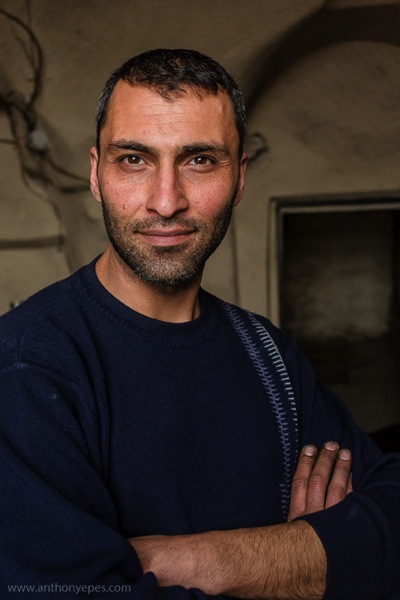
EPESTENIDEASDPS 09

If you feel yourself not wanting to get closer, then this is definitely an idea you should explore. You will almost be able to notice in your images that barrier of fear you set up of getting closer because there will be a distance to your subject. Push through that fear, and your images will benefit from more intimate images. The iconic travel photographer Steve McCurry always photographs subjects within a few feet of himself. For him that is the distance that feels most intimate. That is his style.

Take a deep breathe, hold your fear in check, and just get closer. Investigate as though nothing is holding you back.

5. Build your photo

When I am out wandering around looking for things to shoot, I am looking for elements that I can combine. Often it starts with one thing; it could be anything – an odd looking person, a beautiful shaft of light, a piece of amazing graffiti on a pockmarked concrete wall. If one thing strikes me, I start to look around to find something else to build on that first element to make it more interesting.
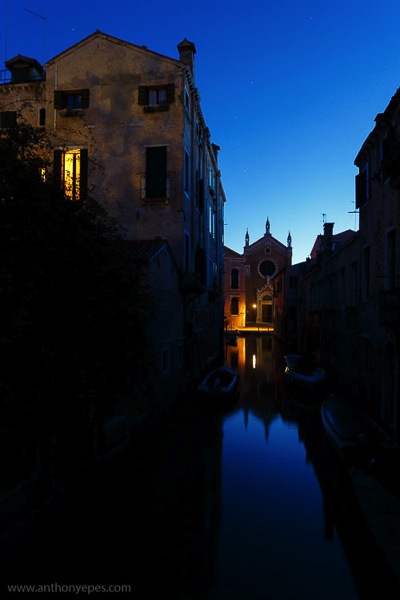
EPESTENIDEASDPS 10

In this photo above I think you’ll agree that if you took away the light in the window you’d have a perfectly lovely shot. But that light is what makes it work. It’s that additional element, creating another layer of depth, and providing an echo almost of the church light of the same colour. I passed this spot on many mornings and often took this particular shot, but one morning the window light was on and it changed it from a beautiful scene into a great image.

6. Look behind you

I shoot in places where I often find myself surrounded by other photographers – the Eiffel Tower at Dawn, sunset on Westminster Bridge – and it continuously stuns me that almost every (or even every) photographer will be pointing the same way and shooting the same thing. Now of course a purple pink sunset over the Houses of Parliament is gorgeous – but that light will also be doing incredible things to everything around you. So, while everyone is going nuts at the obvious, do something different – turn around, walk down that alley way, do what everyone else is not doing.

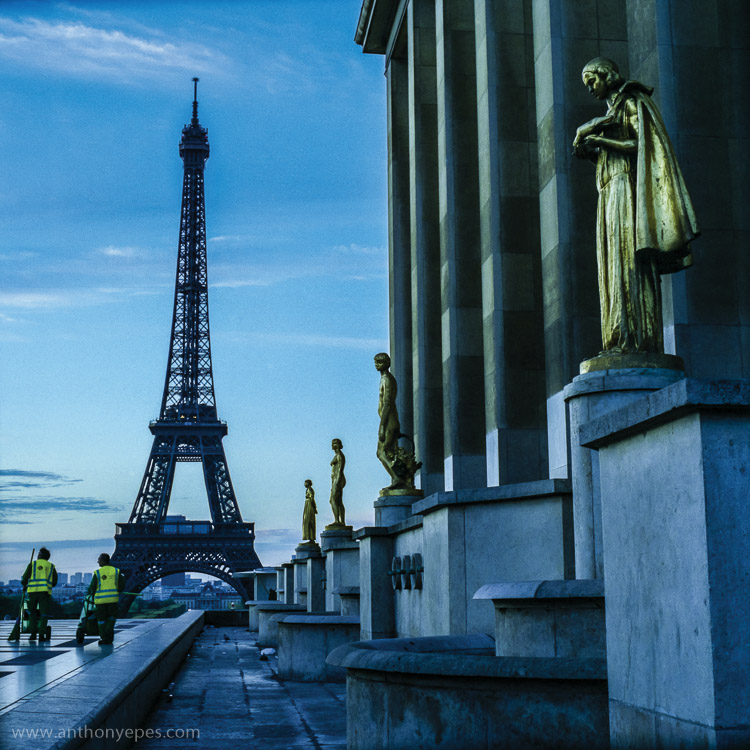
When I was in Paris I was intimidated about shooting the city. It’s the most visited city on earth (hence the most photographed). It is a small city and much of what’s amazing to photograph has been shot to death. I wanted to shoot the Eiffel Tower differently. Here is one shot I liked. You’ve got opulent gold, beautiful dawn sky, the iconic Eiffel Tower – all pretty so far – but then you have this injection of something that most photographers would have avoided – the cleaners.

Have the patience to explore other angles.
EPESTENIDEASDPS 11

The streets cleaners are a vivid contrast against the opulent gold, and while I kept the iconic Eiffel Tower in the shot, it’s really only as a background. Paris is obsessed with tidying itself, so this is also a nice little comment on the city.

7. Simplify your kit (and get really familiar with it)

I think most people generally have too much kit. If you have a lot and you don’t use it daily or even weekly, you’re not going to have that intimate knowledge of how it responds to situations and subjects. Try reducing to just one lens for a while and really get to know it.

When you have a lens that you know exactly what it will do in every situation, you’ll be able to execute even more interesting compositions, as you aren’t leaving things to chance. Chance is something that professional photographers will go out of their way to avoid.

8. Find beauty in the mundane

It’s easy to get a spectacular shot when you have a spectacular subject. But to make simple, boring, or mundane things look interesting – now that’s a challenge! But it’s a challenge I invite you to take up, because it’s an amazing way to train your eye to reveal the beauty of any subject.

This for me is a good example. There are three things that are interesting in this photo (can you guess?) You have the bold colours, and then a little bit of light falling on the wall to create a contrast, and the lines. Now if light was falling on the whole wall, or if there was no light at all, the photo would be totally boring. But can you see how just three simple elements working together can make a photo?

EPESTENIDEASDPS 12

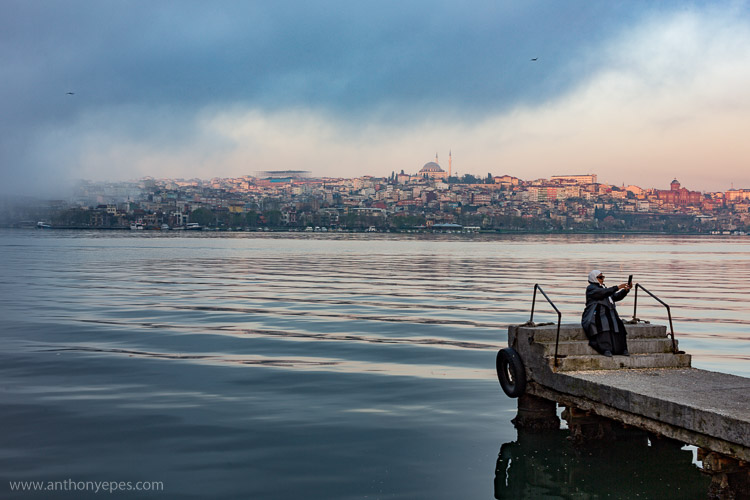
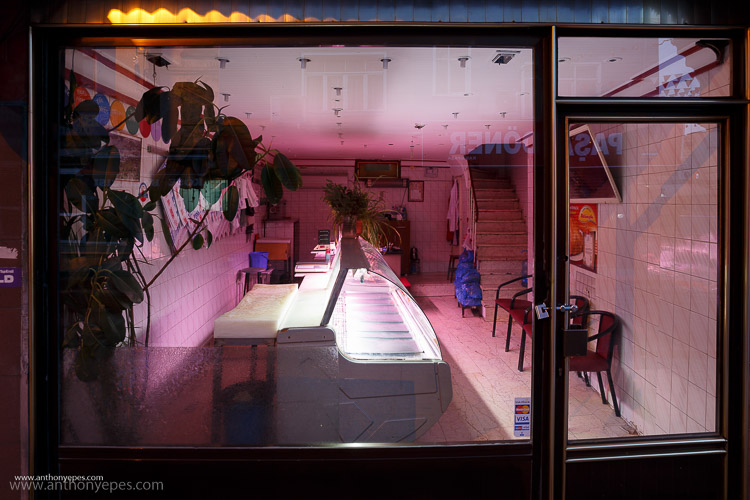
And as I am obsessed with colour and light, I admire this shot.
EPESTENIDEASDPS 13

It’s part of a longer story I am working on in Istanbul at dawn, but to me it shows that there is no subject that isn’t worthy of attention from your camera.

9. Pre-visualize

I love my digital camera, but I also still use film, and now that I’m mainly digital I appreciate the discipline and grounding I received from training in film. I use these skills to help me now.

One super important skill that will really help your compositions is pre-visualizing. It’s a skill you had to have when you shot film, because otherwise you were just shooting randomly.

Pre-visualizing is, “the ability to anticipate a finished image before making the exposure” (Ansel Adams said that, not me). What I love about this, is that it’s about creating space between seeing a shot, and taking it. It’s about being prepared, thinking through what you want to capture, looking at all of the elements of light, positioning, etc., and then picturing in your mind what the final image will look like. For example, imagine your final output was a print. Imagine the print in your hands. What would it look like? If you can see it clearly then your are pre-visualizing. If not, then keep working at it until you see the image in your head. When you have a solid picture in mind, take the shot.
EPESTENIDEASDPS 14

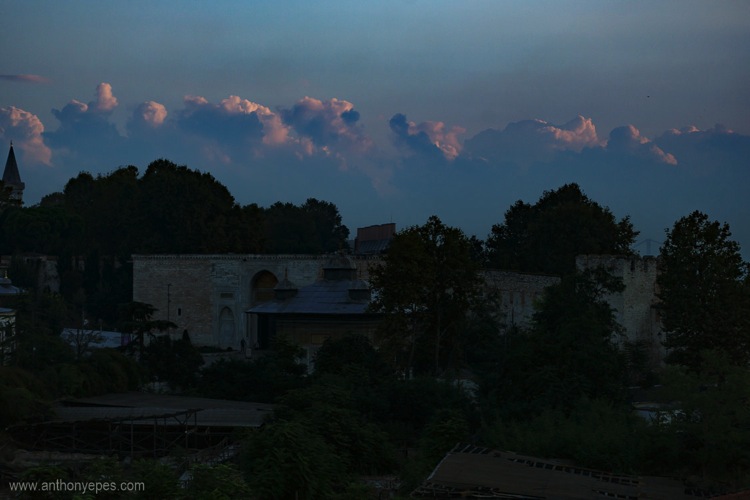
You can also use pre-visualization when you think about timing. A lot of landscape photography is really about waiting around for the perfect moment, that great light. Here is one situation (above) where I knew the scene had potential, but was pretty flat, and if nothing else happened it wouldn’t be interesting. So, I waited for the sun to rise just that little bit more and ping, the clouds were filled with pink light giving the photo more depth.

10. Look for patterns
EPESTENIDEASDPS 15

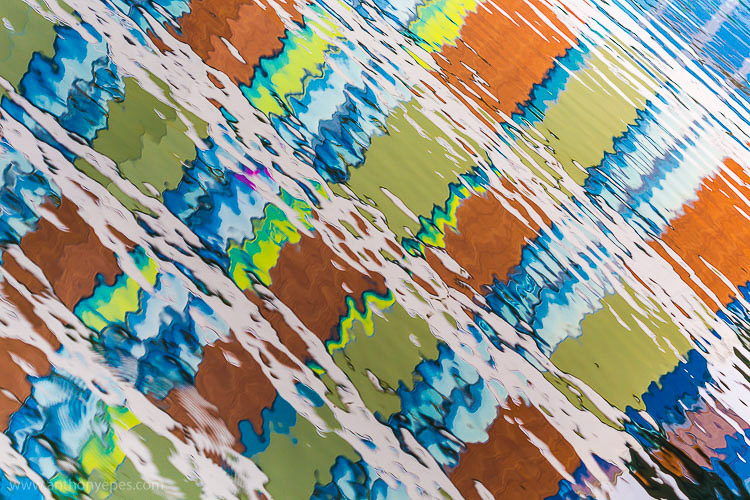
Patterns come in many forms, and are extremely pleasing to the eye. A pattern is anything that is repetitive, that turns your subject from its innate quality, into something more abstract. So people will look and respond more to the pattern and shape that it makes, and less to the subject itself.

“Whatever emotional response a single design element arouses is multiplied when it is repeated in a pattern.” – Bryan Peterson

Patterns are particularly effective when you fill the frame with your subject, and totally cut off the rest of it. These are particularly interesting to look at.
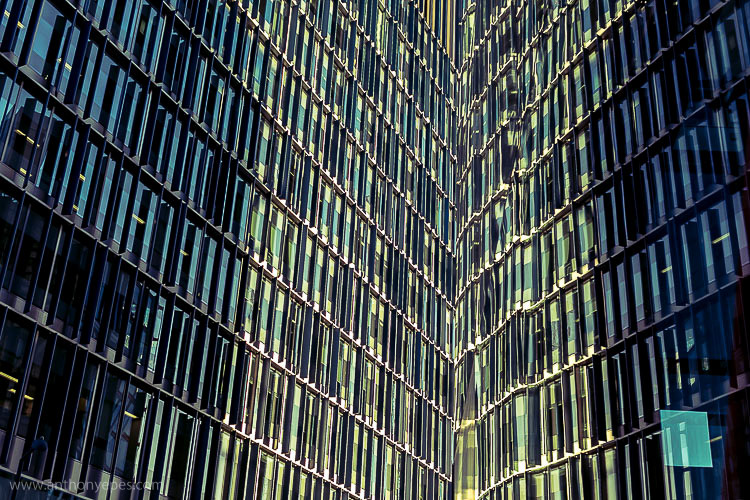
EPESTENIDEASDPS 16

Another way to create patterns is reflections. I love playing with reflections. Anywhere you have a bit of water, even just rain on the street, or shiny surfaces, you have the ability to play with reflections.
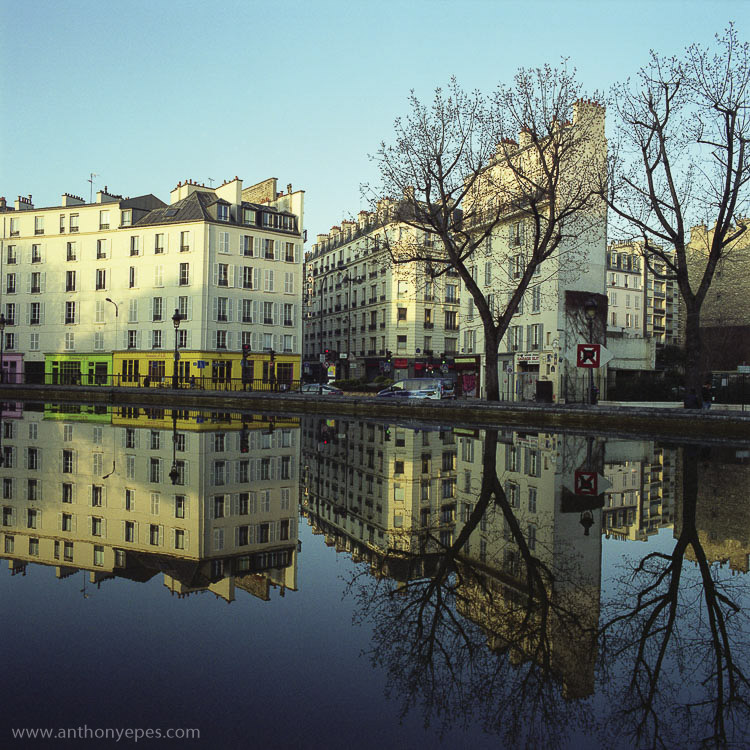
EPESTENIDEASDPS 17

Once you start looking out for patterns you’ll start seeing them everywhere.

Time to practice

I’d love to know what you think of these ideas, and if you put any into practice. Which compositional techniques do you use to enhance your photos?

googletag.cmd.push(function() {
tablet_slots.push( googletag.defineSlot( “/1005424/_dPSv4_tab-all-article-bottom_(300×250)”, [300, 250], “pb-ad-78623” ).addService( googletag.pubads() ) ); } );

googletag.cmd.push(function() {
mobile_slots.push( googletag.defineSlot( “/1005424/_dPSv4_mob-all-article-bottom_(300×250)”, [300, 250], “pb-ad-78158” ).addService( googletag.pubads() ) ); } );

The post 10 Ideas to Instantly Improve Your Photography Composition by Anthony Epes appeared first on Digital Photography School.

Digital Photography School

 
Comments Off on 10 Ideas to Instantly Improve Your Photography Composition

Posted in Photography


Designing for Disaster: 15 Ideas for Preparedness & Response

10 Mar

[ By Steph in Design & Products & Packaging. ]

disaster design pop up 2

Aesthetics may not be the first consideration when it comes to emergency items like survival kits, post-disaster housing and relief supplies, but good design can make the difference between clunky, inefficient objects that hamper adequate response and the items that save as many lives as possible, as quickly as possible. Often created after designers witnessed disasters close to home, many of these solutions attempt to build preparedness into our daily lives, making it easy to grab a minimalist kit by the door or pack up a panicked pet at the last minute.

Pet Earthquake Emergency Bag

disaster design earthquake pet

disaster design earthquake pet 2

disaster design earthquake pet 3

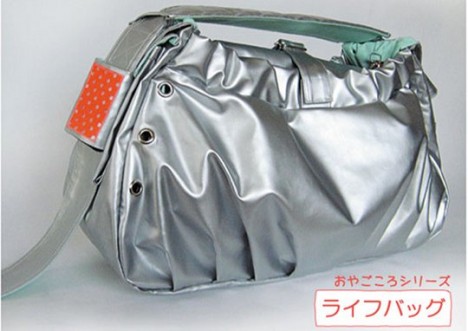
Have you thought about what you’d do with your cat or small dog if a disaster hit and you had to flee on foot? Transporting them in a standard pet carrier would be cumbersome and maybe even impossible. Enter the Pet Earthquake Bag Kit, created in response to the last major earthquake in Japan. Special pockets and straps make it possible to carry up to two household pets. It come sin two sizes and includes a human/pet emergency kit with water, treats, bandages and calming oils.

Minim-Aid Emergency Kit
disaster design minimaid

disaster design minimaid 2

disaster design minimaid 3

disaster design minimaid 4

disaster design minimaid 5

disaster design minimaid 6

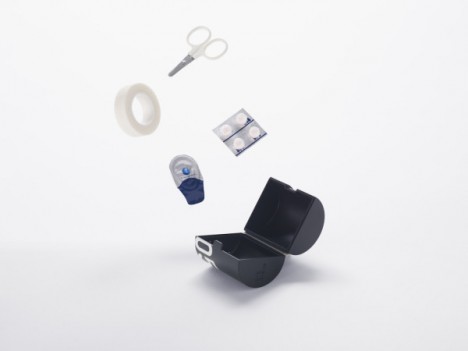
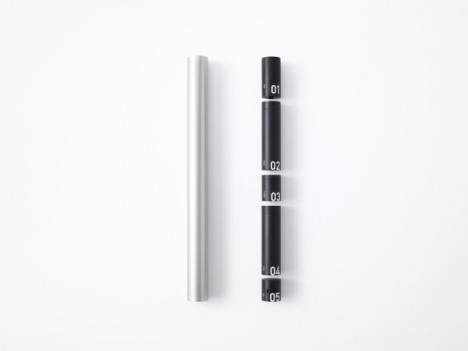
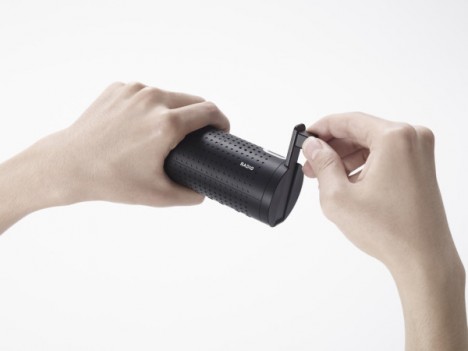
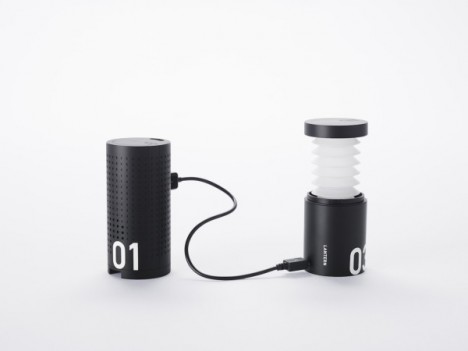
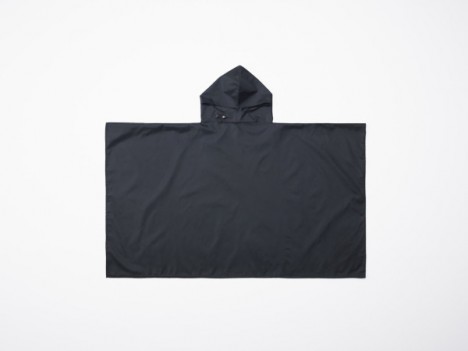
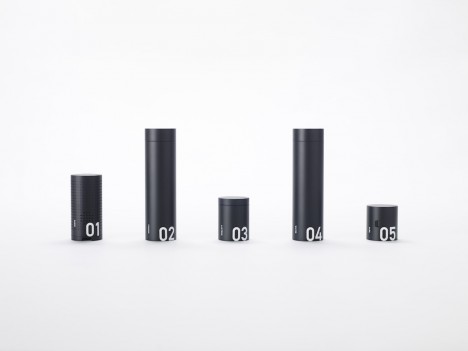
This slim and minimalist stainless steel tube kit by Nendo takes up very little space hanging in a closet or on a hook by the door, but contains a raincoat, radio with gadget charger, lantern, drinking water and whistle. Waterproof and capable of floating, it would be easy to grab and carry at the last minute.

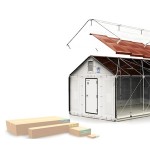
Reaction Housing System Flat-Pack Emergency Shelters
disaster design reaction 1

disaster design reaction 2

disaster design reaction 3

disaster design reaction 4

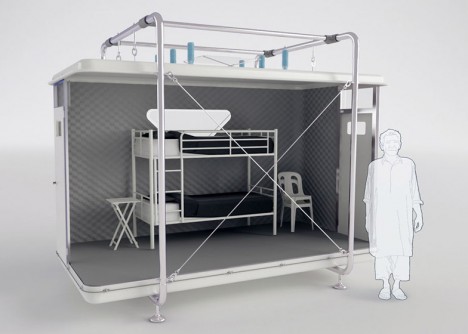
Stackable and easy to ship, the Reaction Housing System is made up of two easy-to-assemble pieces that can be used alone for a single unit or connected to multiple units. Each one can be configured as a living space or office and contain single beds that fold down from the wall and portable power generators. Twenty of them can be stacked on one semi-truck or C-130 Hercules plane, and 1,940 could be moved across the country on a freight train to house 7,760 survivors as quickly as possible. At $ 5K each, they’re far cheaper than most other solutions, like the ones FEMA currently uses.

Life Desk
disaster design life desk

disaster design life desk 2

disaster design life desk 3

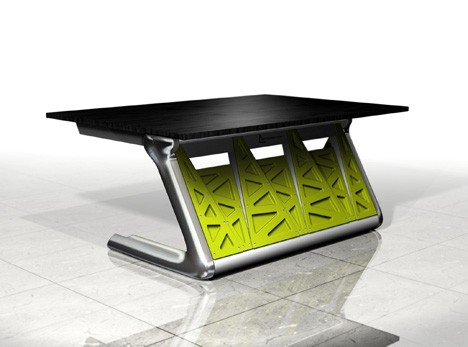
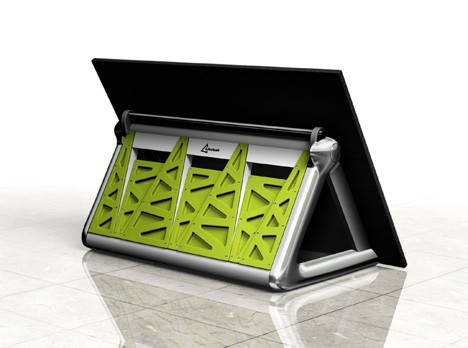
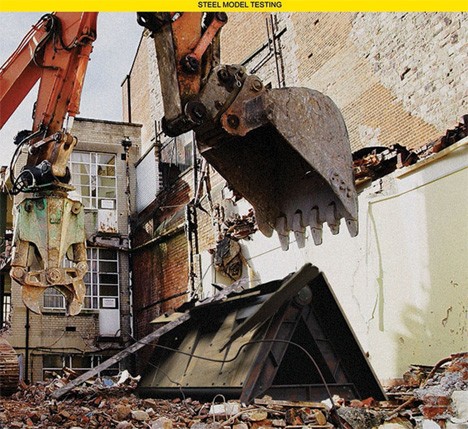
The Life Desk was developed after a number of students were seriously injured or killed by the tables they were hiding under during earthquakes in China. The heavy duty high-strength-steel and nylon desk provides a long-lasting work surface for students and can be quickly folded for shelter in an emergency.

PATCH Urban Survival Kit
disaster design patch 1

disaster design patch 2

disaster design patch 3

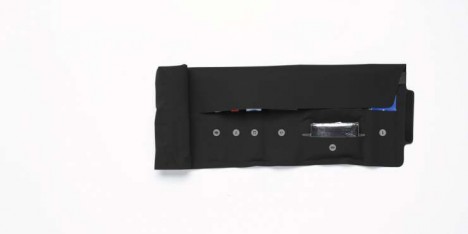
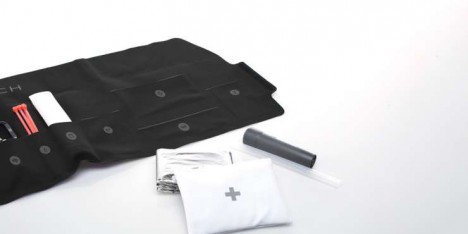
Looking like a small thermos on a key fob, PATCH is an urban survival kit designed specifically for city dwellers in the 21st century, containing all the core elements of a first-aid kit and adding a phone charger, multi-tool, zip ties, emergency blanket and other items you’d be likely to need if some kind of disaster made your surroundings unsafe.

Next Page – Click Below to Read More:
Designing For Disaster 15 Ideas For Preparedness Response

Share on Facebook


[ By Steph in Design & Products & Packaging. ]

[ WebUrbanist | Archives | Galleries | Privacy | TOS ]


WebUrbanist

 
Comments Off on Designing for Disaster: 15 Ideas for Preparedness & Response

Posted in Creativity


The Modern Cyclist: 14 Bold Bike Ideas & Innovations

11 Feb

[ By Steph in Design & Products & Packaging. ]

bike postale

Minimalist frames, technology-equipped accessories, 3D printing and lots of multi-functionality make bikes more convenient, safe, fun and beautiful, as proven by these 14 cycling concepts and innovations. With modular parts, commuter-friendly features and designs that make racing more fun for casual cyclists, bikes get a functional makeover for the modern age.

Archont Electro E-Bike
bikes archont

bikes archont 2

bikes archont 3

Isn’t this bike a beauty? The Archont by Ono features the profile of a vintage motorcycle, but it’s an electric bicycle with a handcrafted stainless steel frame and 29-inch front wheel. The curvaceous cruiser has a 72-volt battery with a range of 99 kilometers and can go up to 80 km/h.

fUCI Bike: Fast Road Bike for Non-Racers
bike fuci

bikef uci 2

bike fuci 3

bike fuci 4

Most racing bikes are designed to the standards of the UCI (Union Cycliste Internationle), the governing body of every major bike tour in the world, to keep the races fair. But not everyone who wants a fast bike wants to compete in official races, and there are lots of fun features their bikes could have without these regulations. Designer Robert Egger presents fUCI (eff UCI), which has a larger back wheel, electric motor in the hub, a storage space in the wheel and a smartphone mount.

Recoiling Plume Mudguard
bike plume mudguard

bike plume mudguard 2

bike plume mudguard 3

This mudguard has literally got your back when it starts raining, keeping you from getting splattered. With a rubber mount stretching to fit any standard seat post size, the simple add-on absorbs shock so it won’t automatically fold up when you hit a bump. Resistant to rust and corrosion, it suspends over the real wheel or retracts within seconds.

Sno-Bike
bike snow

bike snow 2

Combining two entirely separate sports, the Sno Bike concept by Venn Industrial Design Consultancy features a Z-shaped tensile frame linking a rear wheel to a single ski controlled by the handlebars. How would it actually handle in real-life conditions? It’s impossible to say, since it’s just a concept, but it looks like fun.

Shibusa Bicycle with Swappable Electric-Assisted Parts
bikes shibusa

bikes shibusa 2

This sleek black modular bike can be boosted with electric components or made back into a regular bicycle just by swapping a few parts. The award-winning Shibusa design eliminates the bulkiness associated with many electric bikes for a “hassle-free commuter” offering plenty of flexibility. Modular components include a stand-alone bike light, battery pack, storage rack and charge monitor.

Next Page – Click Below to Read More:
The Modern Cyclist 14 Bold Bike Ideas Innovations

Share on Facebook


[ By Steph in Design & Products & Packaging. ]

[ WebUrbanist | Archives | Galleries | Privacy | TOS ]


WebUrbanist

 
Comments Off on The Modern Cyclist: 14 Bold Bike Ideas & Innovations

Posted in Creativity


Find Love Through Your Lens: 3 Ideas for a Valentine Photo Shoot

09 Feb

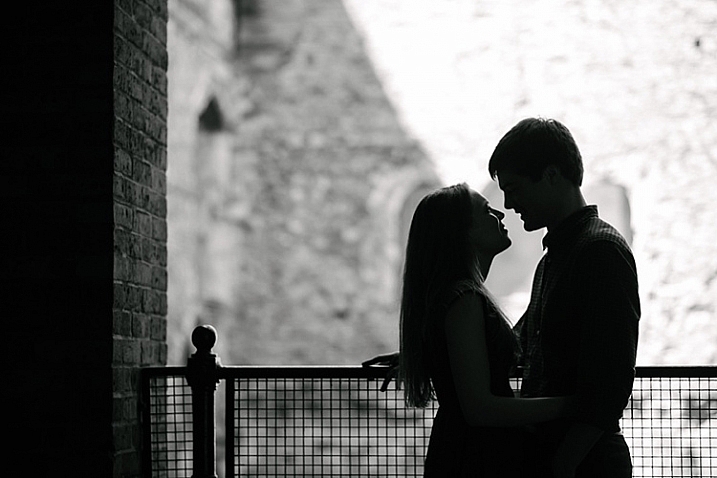
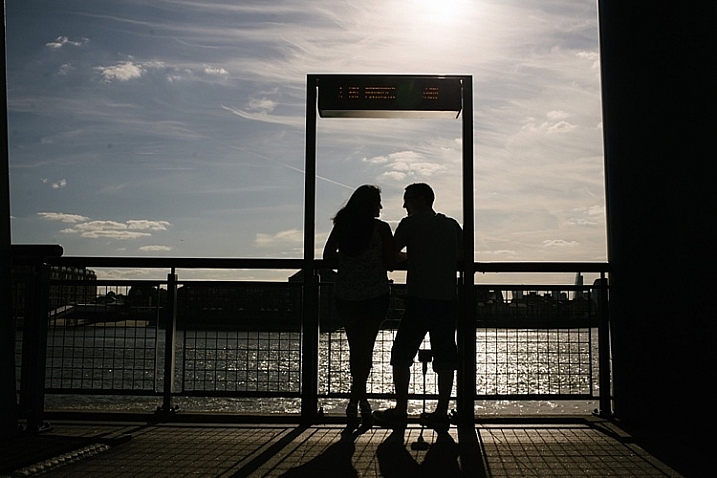
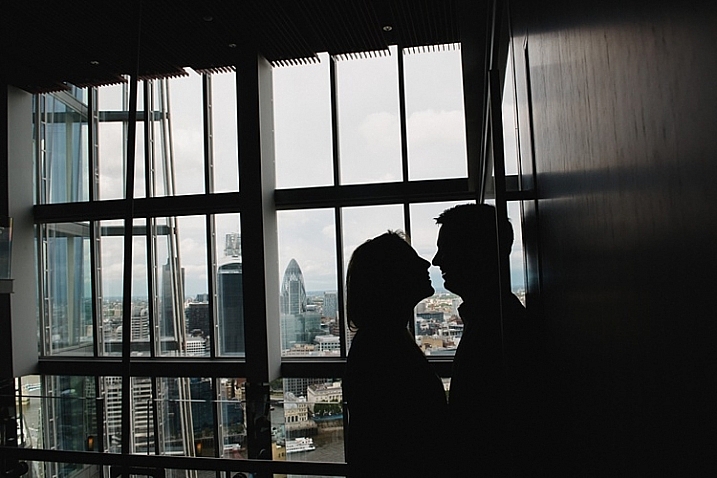
Editor’s note: Valentine’s Day is a good opportunity for aspiring portrait photographers to practice love story and romantic / family photo shoots. Below you can find three practical tips and ideas for a Valentine photo shoot from our regular writer, a portrait photographer, Barbara Stitzer. *** Ahhh, Love. It can be giddy, maddening, complacent, jealous, warm and gooey, and downright Continue Reading

The post Find Love Through Your Lens: 3 Ideas for a Valentine Photo Shoot appeared first on Photodoto.


Photodoto

 
Comments Off on Find Love Through Your Lens: 3 Ideas for a Valentine Photo Shoot

Posted in Photography


5 Creative Ideas to Improve and Inspire Your Photography

08 Feb

If you are a photographer who takes pictures day in and day out, perhaps because it is your livelihood or you are a keen hobbyist, there are times when you may want to digress from the day to day, and do something new on your day off. You can do this purely for the fun of it, or to set yourself some new learning challenges. This is a good practice to implement regularly because it pushes you to think outside the box, hone your skills, enlarge your vision, and challenge your creativity.

Here are some creative ideas on what you can do to take a break or depart from the usual, even just for a day.

layering-creative-photography-tip-01

1 – Vertical only please

These vertical images below were taken from a beach summer holiday when I decided to do this particular photography challenge, purely as a fun visual exercise in composition. All I had was a D700, a 35mm f/1.4 lens, and a few meters of beach.

vertical-photography-tip-01

Photographing solely in the vertical orientation can be quite tricky. Your view and vision are more constrained. If you are photographing a landscape scene for instance, with the vertical orientation you are limited to pretty much the sky or the earth.

vertical-photography-tip-02

vertical-photography-tip-03

Things that you are always used to seeing in a landscape (horizontal) format will look different, and therefore you will begin to see with a fresh eye. This forces you to look for more intriguing views and items to photograph, as well as to compose in such a way that the photograph is still interesting, despite the limited width.  You could be confronted with some quite unnerving compositions which make the picture more striking, or at the very least elicit an unusual or unexpected reaction.

vertical-photography-tip-04

vertical-photography-tip-05

2 – No eyes allowed

It is said that the eyes are the window to the soul. This challenge is to try and capture a someone’s personality, without photographing their entire face. There are many more things to a person than just a face. For this challenge focus on anything but the eyes, and see how much of the person’s personality you can capture.  You can focus on physical aspects, clothes, or objects that the person loves.

personality-photography-tip-01

personality-photography-tip-03

Some people have developed icons of themselves: things they are known and recognized for. For example, someone who always wears sunglasses on their head, or a person who only wears striped socks, or someone’s tattoo or jewellery style. Find something distinctive about the person. You can also focus on actions. Perhaps the person is adventurous or has a fun-loving, bigger-than-life personality.

persosnality-photography-tip-08

You may want to ask them to do something they love, or hold something that reflects their persona, and find a way of capturing that without photographing the face. Focus on the running motion of their feet, or waving hands, or a big smile cropped in an interesting composition. Color could be another thing. Ask the person to wear their favorite color and find a location that has the same tones.

persosnality-photography-tip-09

You can also set something up that reflects the quirkiness of the person, or choose a location that does the same. A country-loving person might be walking in muddy boots, on a long road that seemingly leads to nowhere. Give it some thought with a person in mind, and you may be surprised how many ideas you can come up with that will potentially truly capture their personality.

personality-photography-tip-07

3 – Through a glass, darkly…

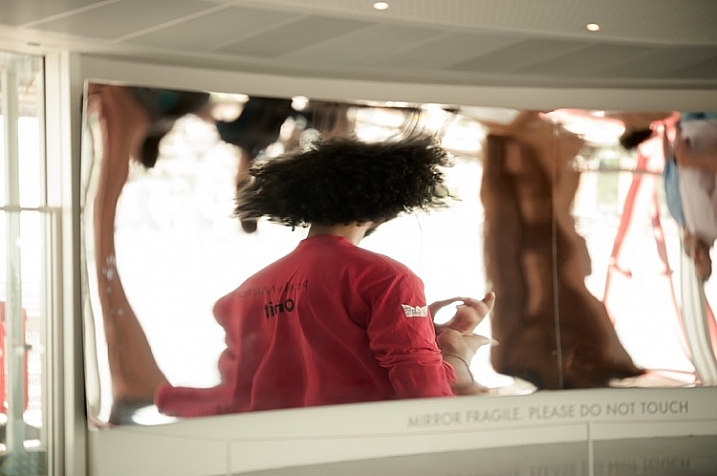
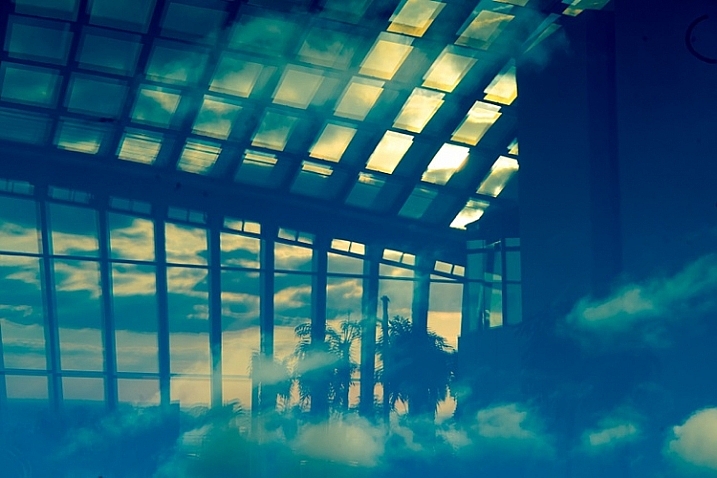
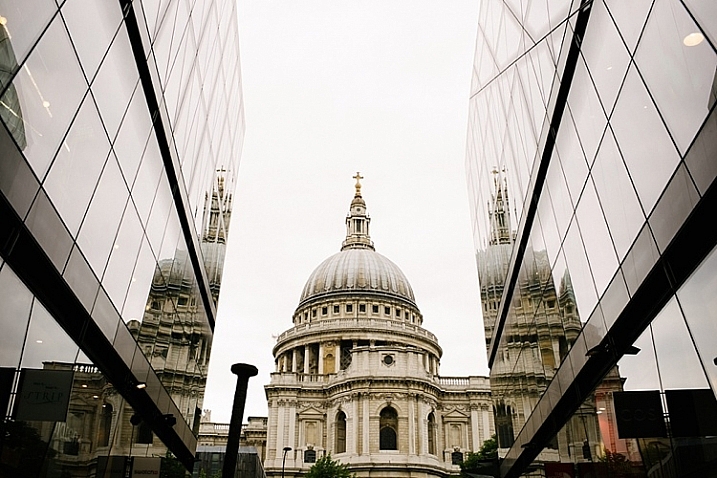
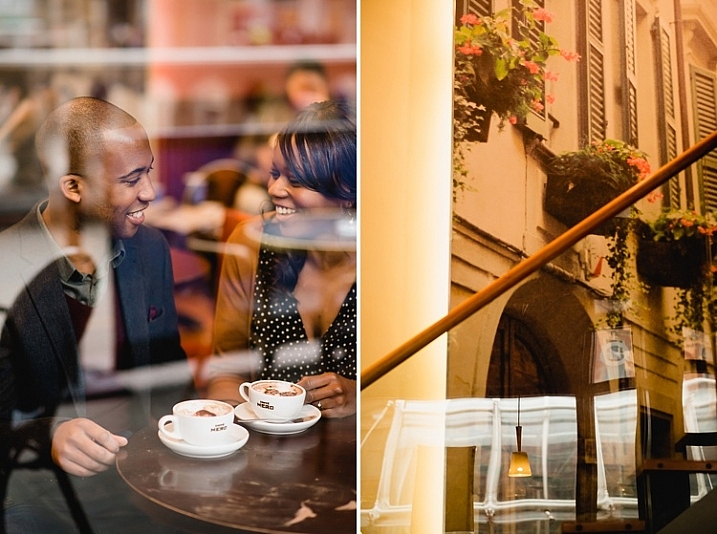
Consider utilizing reflection to make your images more enthralling and thought-provoking. You can impose a rule that you can only photograph a reflection and never the person or the object, or you can use both subject and reflection for a refreshing take on an image, making them more captivating.

reflection-photography-tip-01

reflection-photography-tip-01

reflection-photography-tip-02

Some reflector ideas include: mirrors and shiny reflective objects, water, reflective glass or plastics, windows – even clear windows can have reflections. Raindrops can be great reflectors although you may have to pull out your macro lens to capture the reflection. Photographing reflections can open up a whole new world, such as seeing and capturing surreal or abstract images with the blending of forms and colors, as well as igniting your imagination, and filling you with a new sense of wonder.

relfection-photography-tip-04

relfection-photography-tip-04

relfection-photography-tip-06

4 – Black is the new hue

Silhouettes are fun to photograph, and not that difficult to execute. But the bigger challenge is to find a striking silhouette concept. The main thing to remember is to find good contrast – a very bright background, preferably bigger than the subject, and put the subject in front of the light area. Expose for the bright background so that your subject is so severely underexposed that they look very dark or black.  Here is a really good article with a simple step-by-step guide on how to take stunning silhouettes.

silhouette-photography-tip-01

silhouette-photography-tip-02

silhouette-photography-tip-03

5 – Layering

Layering is a really subtle, but extremely effective, photographer’s trick to convey depth, mystery, and mood in a photograph.  It is especially useful if you are a photojournalistic or documentary photographer, as it makes the viewer feel that they are looking through someone else’s lens, and are present in the moment but inconspicuous, much like a fly on the wall.

layering-photography-tip-01

layering-photography-tip-02

There are three basic things to remember when composing a photograph with layering in mind: foreground, middle ground and background.  Most of the photographs we see often have two layers – the subject and the background.  Incorporating a foreground in your composition not only adds three-dimensionality to your photograph but also makes it more visually compelling.

layering-photography-tip-03

Choosing the right foregrounds can be used to frame your subject – as a leading line to direct attention to your subject, therefore making your image more dynamic, or as a tool for emphasis and composition amongst many others. There are times when finding an obvious foreground is next to impossible. One solution is to physically hold an object, such as a leaf or paper, in front of your lens just enough to be in the frame, but not to obscure the subject.

layering-photography-tip-04

layering-photography-tip-04

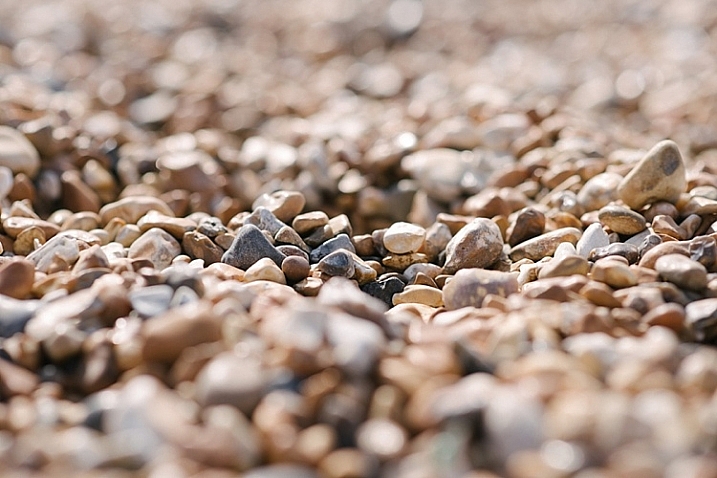
You can also layer by simply using your lens and the effect of a very wide aperture such as f/1.4. By employing your lens’s ability to blur the foreground, while keeping the middle ground in sharp focus, and then blur the background again, can make an otherwise dull image enchanting. Even something as simple as a patch of stones or sand can look layered using this technique.

layering-photography-tip-06

I hope you will enjoy doing these creative challenges. Do you have other creative photography ideas to share? Please do so in the comments below.

googletag.cmd.push(function() {
tablet_slots.push( googletag.defineSlot( “/1005424/_dPSv4_tab-all-article-bottom_(300×250)”, [300, 250], “pb-ad-78623” ).addService( googletag.pubads() ) ); } );

googletag.cmd.push(function() {
mobile_slots.push( googletag.defineSlot( “/1005424/_dPSv4_mob-all-article-bottom_(300×250)”, [300, 250], “pb-ad-78158” ).addService( googletag.pubads() ) ); } );

The post 5 Creative Ideas to Improve and Inspire Your Photography by Lily Sawyer appeared first on Digital Photography School.

Digital Photography School

 
Comments Off on 5 Creative Ideas to Improve and Inspire Your Photography

Posted in Photography


35 Super Valuable and Affordable Gift Ideas for Photographers

15 Dec

It’s just a couple of weeks before Christmas and many of you are probably struggling to complete the holiday shopping on time. As always, Photodoto is here to help! If you have photography buffs on your list, this round-up of affordable gift ideas for photographers will definitely come in handy. In this collection you’ll find some of the best digital Continue Reading

The post 35 Super Valuable and Affordable Gift Ideas for Photographers appeared first on Photodoto.


Photodoto

 
Comments Off on 35 Super Valuable and Affordable Gift Ideas for Photographers

Posted in Photography


5 Holiday Photography Ideas to Shoot More and Get Less Stress

19 Nov

Ahhh, the Holidays, that time of year when everyone is happy and feeling great. Tensions are low, everyone is totally relaxed, and since there’s so much copious free time, everyone wants to get their family pictures taken. Well, that statement might be a little bit off, but I have to say, I love shooting holiday pictures. Just in case the Continue Reading

The post 5 Holiday Photography Ideas to Shoot More and Get Less Stress appeared first on Photodoto.


Photodoto

 
Comments Off on 5 Holiday Photography Ideas to Shoot More and Get Less Stress

Posted in Photography


The More the Merrier!Group Photo Tips and Ideas

05 Nov

What’s better than a photo of a loved one?

A group photo of a BUNCH of loved ones!

But simply standing around and saying cheese? Yawn. We rounded up group photo ideas that will have everyone running, dancing, and more.

Whether you’re shooting pics of your pals or preparing for family holiday cards, you’ll get a kick out of these ideas and their unique results!

(…)
Read the rest of The More the Merrier!
Group Photo Tips and Ideas (658 words)


© Taylor for Photojojo, 2015. |
Permalink |
No comment |
Add to
Group Photo Tips and Ideas”>del.icio.us

Post tags:


Photojojo

 
Comments Off on The More the Merrier!Group Photo Tips and Ideas

Posted in Equipment


Blind Ambitions: 11 Assistive Ideas for the Visually Impaired

12 Jun

[ By Delana in Conceptual & Futuristic & Technology. ]

technology concepts for the blind

Technology to assist visually impaired people is progressing far beyond the dog and cane. These technology concepts  – all of which are still in the design stages and not available for purchase – could someday bring the world into focus for those who can’t necessarily see it unassisted.

The Tactile, Temperature-Enhanced Wristwatch

rub-feel-know-watch-concept

Watches for blind folks are all about feeling, rather than seeing, the time. This concept from designer Jung Hoon Lee is known as the Rub Feel Know watch. It puts a rather unusual twist on the expected raised bumps on the watch face. The hour hand is represented by an indentation near the center of the watch. The minute hand is a small bump which is situated closer to the outside of the face.

temperature-watch-for-the-blind

If feeling the positions of the indentation and the bump doesn’t give enough haptic information, there is another helpful element. The hour indicator feels warm when you touch it, and the minute hand feels cool – along with the concave and convex indicators, the temperature lets users feel exactly what time it is.

The Finger Mounted World-Seeing Camera

eyering

The 3D-printed EyeRing, developed by a team at MIT, is worn on the finger like a ring. It’s equipped with a tiny camera, a processor, a Li-ion battery, and a Bluetooth module.

eyering-2

To identify an object, the user only has to point the EyeRing at it and then press a small button on the side of the device. It snaps a picture, which it then sends to the user’s smartphone. After giving it a simple voice command, the app can then identify colors, currency, text, or price tag information and relay the information to the user’s Bluetooth earpiece.

The concept still needs a lot of development to be viable as a real-world product, but the creators think that they’ll be able to produce the module at a consumer cost of less than $ 100.

The Solar-Powered Retinal Implant That Could Restore Sight

solar-powered-retinal-implant

Retinal implants are nothing new, but current iterations aren’t perfect. They’re often painful and need to have a physical link between the implant and a pair of sunglasses – an arrangement that doesn’t sound pleasant at all. Researchers at Stanford took the traditional retinal implant idea a step further by making the implant wireless.

The user still needs to wear sunglasses which contain a small camera. The camera projects images directly onto the user’s retina so – while they won’t be able to see perfectly – it will restore at least some of their vision. As a bonus, the entire setup is solar-powered so there’s no need to wear a bulky battery.

The Smart-Talking, Walk-Guiding Brick

blind-guider-concept

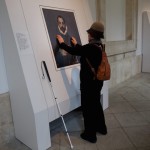
Using a white cane to navigate sidewalks is a huge help to people who can’t see well enough to navigate by sight alone, but the cane can’t tell you where you are or how to get to your destination. The Blind Guider concept works by embedding “smart bricks” into city sidewalks that work with sensors on an electronic cane.

guide-brick

The cane comes with a Bluetooth earpiece that fits into the cane’s top when not in use. When the earpiece is in use, it relays information from the smart bricks. Each brick is equipped with an RFID tag that transmits information when the cane makes contact. It tells the user what intersection they are standing at and, when moved around to other parts of the brick, can give information about the surrounding areas as well.

visually-impaired-guide-brick

Using this system, visually impaired walkers could easily find their way around a city with minimal knowledge of its layout. It seems that this product is just a dream, though, because the infrastructure needed to make it work would be expensive and complex for cities to install.

Next Page – Click Below to Read More:
Blind Ambitions 11 Game Changing Visual Assistive Concepts

Share on Facebook


[ By Delana in Conceptual & Futuristic & Technology. ]

[ WebUrbanist | Archives | Galleries | Privacy | TOS ]


WebUrbanist

 
Comments Off on Blind Ambitions: 11 Assistive Ideas for the Visually Impaired

Posted in Creativity


5 Creative Macro Photography Ideas that Really Work

25 May

Editor’s Note: This is part a series on macro photography this week. Look for a new one each day. The next newsletter will have them all if you miss any!

Here are 5 quick creative tips to help you with your macro photography:

1) Use Flash for Tiny Details

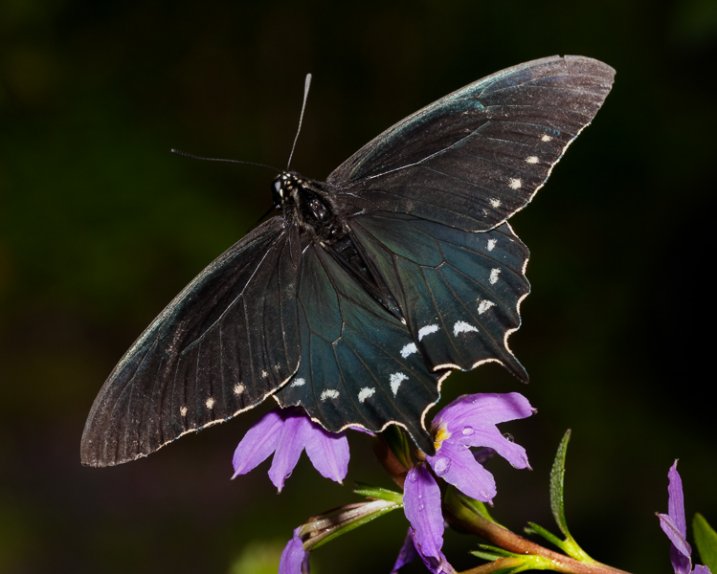
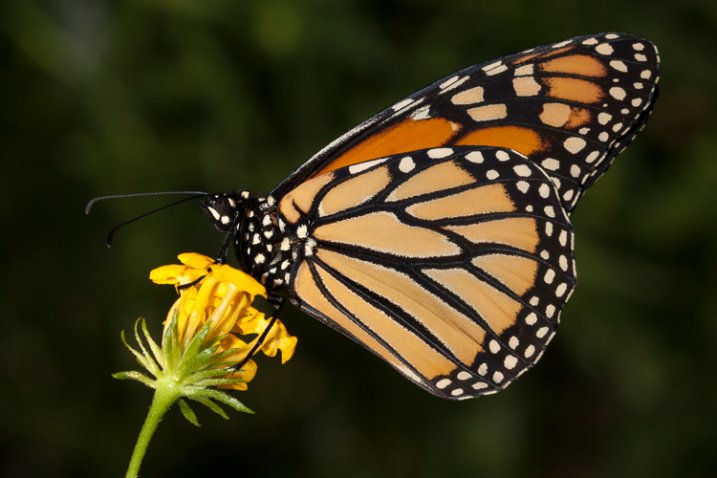
While a macro lens with a 1:1 (one to one) ratio is a terrific tool for close-up work, so too is an external flash. Contrary to what some photographers will tell you, it doesn’t necessarily have to be a ring light for successful results. The trick is to reduce the flash output to approximately -1.75 in TTL mode. This will illuminate the finer detail in your macro work such as a butterfly’s antennae. Should you need even less light, cut the flash intensity further to -2 or -3 stops.

1_butterfly_with_flash
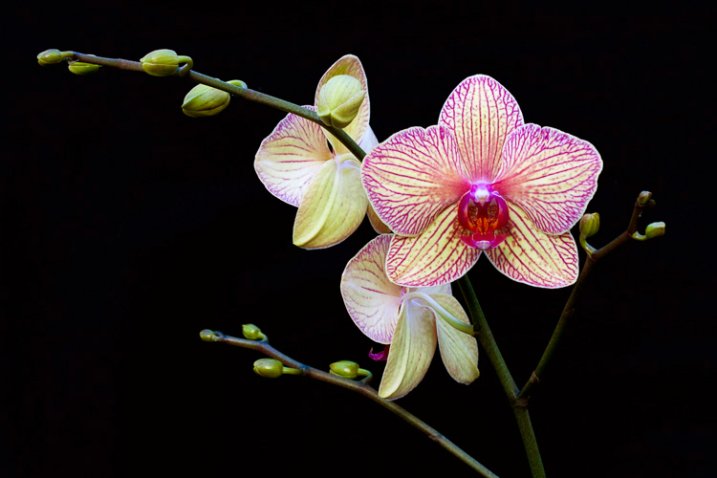
There are times when you’ll want more depth of field to keep the entire subject sharp. This can be problematic, however, as more of the scene remains in focus and can be distracting. Rather than opting for a shallow depth of field, consider using flash. With it, you can illuminate the subject, enjoy great depth of field, and render the background really dark, or even black. To do this, position yourself so there is at least six to 12 inches of separation between the subject and the background. Your reduced flash will effectively expose your macro subject without reaching what’s behind it.

2_orchid_flash

2) Shoot Through a Flower Petal

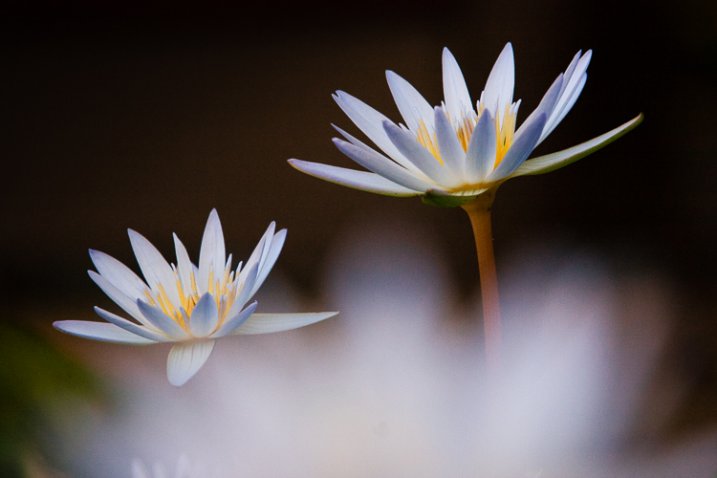
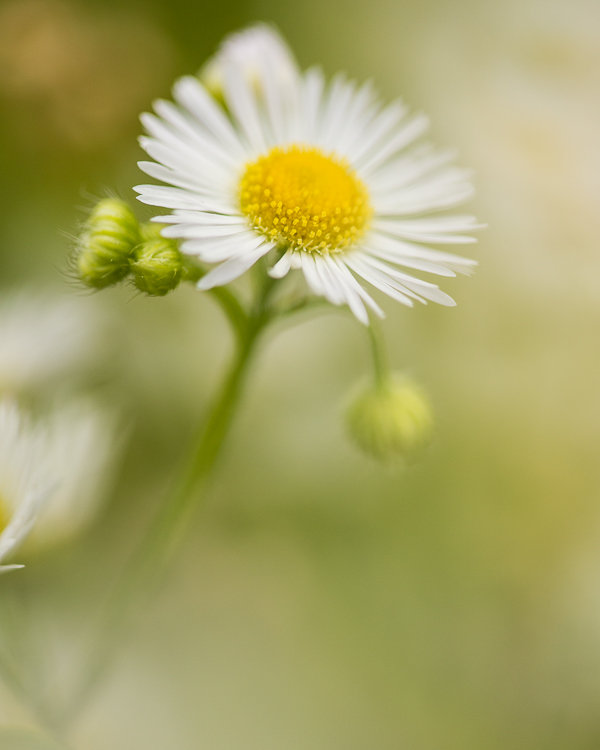
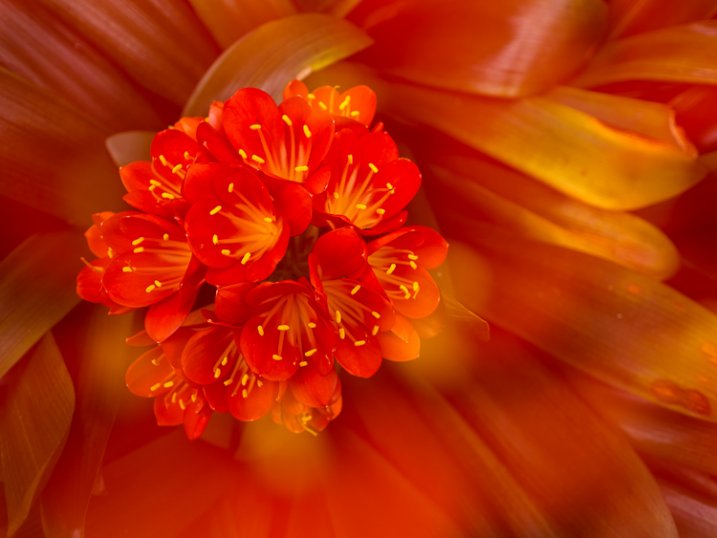
Go beyond the routine snapshot by adding a layer of visual interest to your macro captures. By shooting through a flower petal or leaf, you can create a soft wash of color while keeping the main subject in sharp focus. The technique is simple but yields a sophisticated look that’s reminiscent of an impressionist painting. For this particular method, you may prefer the freedom of shooting without a tripod. By working handheld, it’s easier to position the camera directly into the patch of flowers.

3_shoot_through_petals

Start with your widest aperture, preferably around f/2.8. Locate a flower that’s in front of your subject, and place your lens approximately one inch away from it. Don’t worry if it largely blocks the main subject, as the extremely shallow depth of field will render it nearly transparent. The closer your lens is to the front flower, the more out of focus it will become. Carefully compose so that you can still see your subject in the background. Finally, move your single active autofocus point to the flower you want sharpest.

4_shoot_through_petals

3) Switch to Manual Focus

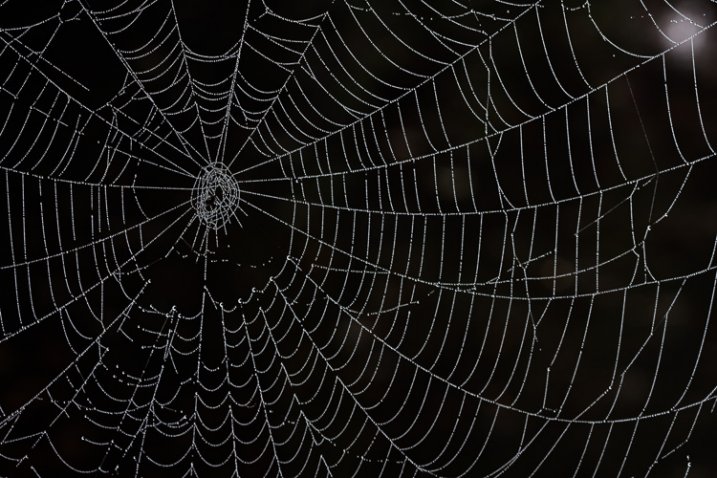
Autofocus is highly effective for the majority of shooting opportunities. In extreme close-up situations however, it can struggle to find its mark. This is particularly true with ultra fine details such as a delicate spider web. A better alternative is to use manual focus aided by Live View or focus peaking. These options take the guess work out of manual focus, allowing you to view the scene at extreme magnifications. At 5x or 10x magnification, it leaves no doubt that something is sharp. On some camera models you can even couple the enlarged view with focus peaking. This works by outlining the portion of subject that’s in focus. While it’s possible to do this handheld, a stable tripod will improve your accuracy.

5_spiderweb

4) Mind the Background

When shooting macro images, the importance of clean background can not stressed enough. If the area behind your subject is cluttered, it draws attention away from your main point of focus. Rather than taking the first vantage point offered, try composing with your feet. This is a deliberate process that forces you to slow down and explore the subject from all possible angles.

6_butterfly_background

Filling the frame with your subject can be an effective way to eliminate distracting backgrounds. With the close focusing ability of a macro lens, you can carefully arrange the scene to only include the flower. This enables you to work with small apertures such as f/16 for maximum depth of field. With sharp detail throughout the frame, there are no areas of soft focus to detract from the subject. For a more dynamic look, try using the rule of thirds instead of a bulls-eyed composition.

7_fill_frame

5) Experiment

There is something serendipitous about in-camera double exposures that is lost when methodically stacking images in Photoshop. Making exposures this way builds a sense of anticipation that is normally not present in digital photography, with today’s camera’s featuring “instant everything”. Instead, you take the first image, look at it on the LCD and hold that visual in your mind while searching for a second scene to best compliment it. After capturing that, you have to wait a few seconds for the camera to reveal your creation. In that brief pause, suspense builds, and anything seems possible, much like the days of waiting for your film to be processed. Of course with a technique like this, there will be a few misses. Nevertheless, the results can be quite interesting when you get it just right.

OLYMPUS DIGITAL CAMERA

Another creative option is to experiment with slow shutter speeds and intentional camera movement. You don’t even need a macro lens to try it, just a basic zoom. Start by filling the frame with the flower and make sure it’s in focus. For this you can be at the longer end of your focal range. Press the shutter all the way down and start the exposure, then immediately zoom out to a wide-angle perspective. You can also reverse the process, starting with a wide angle and zooming in. The following settings are a baseline to get you started.

  • 1/6th of a second for the shutter speed.
  • f/22 on the aperture.
  • A very low ISO around 100.
  • Based on the existing light you may have to adjust these for the best results.

OLYMPUS DIGITAL CAMERA

Do you have any additional creative tricks to share? Please do so in the comments.


macro-coverWant to learn more about macro photography? Check out Ed Versosky’s Introduction to Close-Up & Macro Photography ebook – just $ 10 (over 30% off) this week with coupon code: DPS. You will need to enter the code to apply the discount.

googletag.cmd.push(function() {
tablet_slots.push( googletag.defineSlot( “/1005424/_dPSv4_tab-all-article-bottom_(300×250)”, [300, 250], “pb-ad-78623” ).addService( googletag.pubads() ) ); } );

googletag.cmd.push(function() {
mobile_slots.push( googletag.defineSlot( “/1005424/_dPSv4_mob-all-article-bottom_(300×250)”, [300, 250], “pb-ad-78158” ).addService( googletag.pubads() ) ); } );

The post 5 Creative Macro Photography Ideas that Really Work by Chris Corradino appeared first on Digital Photography School.

Digital Photography School

 
Comments Off on 5 Creative Macro Photography Ideas that Really Work

Posted in Photography