RSS
 

Posts Tagged ‘Ideas’

6 Ideas for More Creative Landscape Photography

26 Jun

In the following article, you will learn how to do creative landscape photography using a variety of different techniques.

The level of technical skill in photography these days is amazing. A quick Google search for any given location will show well-composed photos, taken during the correct lighting conditions, and edited to perfection. The number of people capable of taking these perfectly crafted photos is also increasing, and therein lies the problem. The number of people with similar photos diminishes all the others when placed together. What’s the solution to this? If you still want to take a photo of a particular landscape consider other creative approaches to photographing it.

So what’s the solution to this? If you still want to take a photo of a particular landscape consider using some other creative approaches to photographing it. Read on for six ideas to help you do better and more creative landscape photography.

6 Ideas for More Creative Landscape Photography - long exposure

This photo has used a long exposure to flatten the water. It’s also the same image used for the 360-degree panoramic image below.

#1 – Infrared Photography

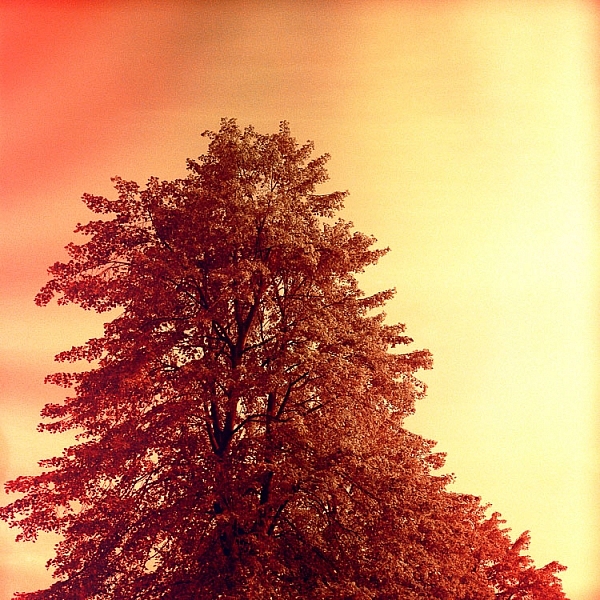
Infrared photography is great fun to experiment with and has been around along time. This particular form of photography uses, as the name suggests, infrared light to capture images. Now you can’t see the infrared spectrum with your eyes, but your camera sensor or special infrared film can.

When using a digital camera you will either need to adjust the White Balance in camera or use post-processing to bring out the signature infrared look (note you can also get an old camera body converted especially for capturing infrared images). What is the infrared look? These photos have dark black skies, bright white foliage and often they have still water caused by a long exposure. In order to take this type of photo with a digital camera you will need a filter or a reconditioned camera.

6 Ideas for More Creative Landscape Photography - infrared

Infrared is a lot of fun if you’re prepared to put the time into learning this technique.

#2 – Aerial Photography

One of the best angles in photography is a high angle looking down, this can lead to some great creative landscapes. The advances in drone technology have seen many people take amazing photos from the sky, though the consumer-level drones still don’t produce the highest quality still images. There are a few options if you want to try out aerial photography yourself.

  • Airplanes – Yes get the window seat of your plane, and take photos from the sky. Ensure you have a high shutter speed, remember you’re plane is moving fast so you need a fast shutter speed to get a sharper image.
  • Drones – The consumer drone will get you great angles, and images with good enough quality for online sharing, but not for printing. The professionals use larger drones that allow their dSLR to be attached to them.
  • Hot air balloons – It’s a great experience to take a hot air balloon ride, and the photos can be incredible. Even more extreme is attaching a camera to a weather balloon, and sending it up almost into space!
6 Ideas for More Creative Landscape Photography - aerial photo

A great angle if you can get it is overhead for a creative landscape. This photo was taken from a hot air balloon, but a drone would also get an angle like this.

#3 – Refraction

The concept of refraction to use light bent through a glass object is essentially how your lens puts an image onto your camera sensor. You can create this effect with spherical glass objects, or even ones filled with water. The image inside the refracting object will be upside down, and a vast amount of the scene behind the ball will be captured.

This is an interesting way to capture a creative landscape because the image inside the ball the image has the characteristics of a fisheye lens. Using a lens with a long focal length will compress the scene.

6 Ideas for More Creative Landscape Photography - refraction

This scene of St Paul’s Cathedral was captured inside a crystal ball, using the refraction technique.

#4 – Shoot a 360-Degree Panorama

This creative landscape idea utilizes post-processing to create a tiny planet effect. The effect is similar to the refraction idea, in that you are creating a globe, however, the look is very different.

To create this photo you will need a panoramic landscape image. If you’re a purest, then the panoramic landscape will be created by rotating the camera through 360 degrees. Once you have your panorama it needs to be reformatted into a square image, flipped upside down, and then the polar coordinates filter should be applied in Photoshop. To find this filter go to filter > distort > polar coordinates.

6 Ideas for More Creative Landscape Photography - 360-degree pano

This photo was turned into a tiny planet. It has the feel of a 360-degree panoramic photo.

#5 – Long Exposure

The different types of images that are possible with long exposures will lead to a burst of creative landscape photography. All you need is a tripod, and a camera capable of taking long exposure photos. The effect of long exposure is to make things move. The main subjects are car light trails, water, and cloud movement. Now, of course, astrophotography is also long exposure, but you’ll learn about that next.

  • Car light trails – These are produced by taking photos that are generally five seconds or longer. An overhead angle from a bridge or tall building is often best for shooting car trails, but photos from street level also look nice.
  • Water – Anywhere there is moving water, a long exposure can look nice. When photographing waterfalls the white water becomes like silk, with exposures over two seconds. The sea and its waves can be flattened by using long exposures over 10 seconds.
  • Cloud movement – Clouds moving across the sky make for a dreamy look in your photo, to achieve this you’ll need lots of clouds, with some clear sky. The faster the clouds move the easier it is to capture this movement. A sturdy tripod is important here, clouds move faster on windy days, so you need the camera to be still.
6 Ideas for More Creative Landscape Photography - long exposures

It’s a lot of fun to play creatively with traffic light trails in a photo. The photo of Big Ben in London is a popular one.

#6 – Astrophotography

One of the most popular forms of photography for those interested in landscapes is astrophotography. The latest cameras help you capture starry skies, with better noise performance at high ISO levels. Recent excursions to the deserts of Dubai and the coastline of southern England revealed a phalanx of photographers interested in this kind of photography. The most popular types of astrophotography are capturing the Milky Way, or showing the rotation of stars around the pole.

  • The Milky Way – Positioning the Milky Way in your frame can create a dramatic and creative landscape photo. This is the subject of a whole different article. The basics are to shoot at the constellation of Sagittarius between March and October in the northern hemisphere. Use the largest aperture you have, with exposures generally being 25 seconds long, and an ISO of 6400 or greater.
  • Star trails – The aim here is to point your camera at the north or south pole, and capture the earth’s rotation during a long exposure. The photo can be an ultra long 15-minute exposure or a series of shorter ones. The best method is to take multipl30-secondnd exposures, and then stack them together. StarStax is a good piece of software that will help you create this type of photo.
6 Ideas for More Creative Landscape Photography - Milky Way

Shooting the Milky Way is hard to photograph, so the chance of your photo being more unique is higher if you can do it.

Which creative landscape will you make?

There are many creative landscape photography ideas, which one will you choose to try out? There are other ideas we’d love to hear about as well, how did you make a creative scene your own?

In this article, I stuck strictly to still photos, but experiments with video allow for time-lapse or cinemagraphs as well. Please share your examples of the above styles that you’ve done, and tell us why and how you create your shot.

The post 6 Ideas for More Creative Landscape Photography by Simon Bond appeared first on Digital Photography School.


Digital Photography School

 
Comments Off on 6 Ideas for More Creative Landscape Photography

Posted in Photography


5 Non-Portrait Ideas For Photographing Kids

15 Apr

When it comes to photographing kids, we spend a lot of time discussing how to capture images of them smiling naturally and looking at the camera. Of course, every parent wants that sort of image of their child or children, and learning how to cultivate those genuine reactions is an important skill for any photographer to have.

photographing kids

That said, full-face portraits are just one small type of people photography. When it comes to photographing kids in particular, if you only capture that style of image, you’re missing out on a whole lot! Here are five things not to miss when it comes to photographing your children!

1. Little Details

photographing kids - details

Fingers. Toes. Eyelashes. When it comes to photographing kids, don’t forget to capture the little details! Years later, a photo of dirty feet will bring to memory hours spent playing in the backyard. Mismatched fingernails will remind parents of the “I’ll do it myself!” years of budding independence. These aren’t (typically) the photos that make it onto Christmas cards or Facebook profile images, but they are images that parents will be thankful for down the road.

photographing kids - details

2. Silhouettes

photographing kids

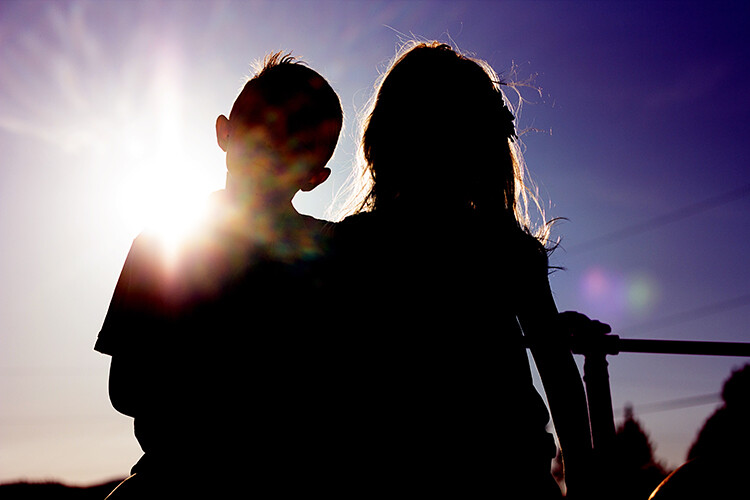
It’s amazing how much body language can convey in a photo, and that’s never more evident than in the case of a silhouette. I love capturing silhouettes of kids because they highlight body language and details in a different way than a full-face portrait does.

In a standard portrait, the wisps of hair take a backseat to adorable toothless smiles. I love a good toothless grin, but I want to remember the cowlicks and hair wisps as well. I want to remember the way that the kiddos sat on top of a fence so close to each other that not a single ray of light was able to sneak through.

photographing kids - silhouette

Don’t forget to try silhouettes from a number of different facial views. Try them with the kid facing away from your camera. Try them with the kiddo facing the camera head-on. Definitely, try them in profile! Again, it draws attention to the little details like the shape of their nose and their facial features.

3. Their Little Quirks

photographing kids - quirks

This category is one instance where you’ll be at a huge advantage if you’re photographing your own children (or close relatives) because you know your kids best.

You know the silly way they sit on their feet while they’re eating. You know the way they press their hands into their face while they’re making up a “once upon a time” story. Only you know the goofy faces that they make and you also know the way that one kiddo always tries to photo-bomb the other. You already know the funny little quirks that your own kids have, so make sure to photograph them!

Take it from me, you won’t remember them as well as you think you will, and someday you’ll be grateful for the reminder.

photographing kids

4. Sleeping

photographing kids

This is a category of images that is easy to forget about, but I really try to make an effort to occasionally photograph my kids while they’re sleeping. The other day, my first grader fell asleep unexpectedly. She has the tendency to act older than she really is in a lot of different ways, so my expectations for her tend to be pretty high.

I grabbed my camera and snapped a few photos because I was struck by how young she looked while she was sleeping. Nearly every time that I make the concerted effort to photograph my kids while they’re sleeping, I find myself thankful for the reminder that even though they may act older than their ages, the truth is that they’re still little.

5. Different Angles and Facial Views

photographing kids

As I look through the many, many photographs that I’ve taken of my children, there are very few images that are shot from unusual angles and different facial views. Anytime I find an image that’s shot in silhouette, I’m always pleasantly surprised! There aren’t many of them, but I’m always pleased to come across them because they capture a different sort of expression than full-face images. In my experience, kids aren’t typically photographed in profile very often, and I think it’s such an important aspect in capturing their personalities!

Similarly, I always try to get down to their level when I’m photographing kids. That’s usually a good thing, but on occasion, it’s nice to have an image that’s shot from above, below, or other non-traditional angles. Make an intentional effort to photograph your children from a variety of different perspectives – you won’t regret it!

Over to you

Please share your tips for photography kids below as well as your images. I’d love to see them.

The post 5 Non-Portrait Ideas For Photographing Kids by Meredith Clark appeared first on Digital Photography School.

Digital Photography School

 
Comments Off on 5 Non-Portrait Ideas For Photographing Kids

Posted in Photography


15 Photography Ideas to Boost Your Creativity

21 Mar

Doing photography exercises brings forth new opportunities to improve your skills, hone in on your craft and who knows, even guide you in the direction of finding a new genre that you love more than anything in the world! Here are 15 creative ideas to take you out of your comfort zone, and guide you in your quest to boost your creativity.

Get out there and put your own spin to each of these prompts. Bonus points if you have never tried any of these before. When you push yourself to get comfortable being uncomfortable, to step outside your comfort zone, to try new things, and to give yourself the permission to fail – you also give yourself the chance to figure out who you want to be when you grow up!

#1 – Add emotion to your images

15 Photography Exercises to Boost Your Creativity

I absolutely adore this image. There’s nothing like laughing with unabashed happiness on your wedding day!

Choose to evoke emotion in your images – either in the eyes of the beholder or in the eyes of the beheld (a.k.a your subjects). When you want emotion from your subjects, ask for it. There is nothing more uncomfortable for your clients than a photographer who is silent behind the camera while continuously clicking the shutter.

Most clients are not professional models and generally, they are quite camera shy and self-conscious. It is our responsibility as the photographer to direct, educate, and interact with our clients to make them comfortable in front of our lens.

If you are shooting landscapes or still lifes, aim to create emotion in your images that move your audience to feel something. Be it a serious case of wanderlust viewing a travel photo from an exotic locale, or insane hunger when looking at your food images!

15 Photography Exercises to Boost Your Creativity

Sometimes staged photos take a turn of their own and present opportunities for different perspectives!

#2 – Try some motion blur

There are many different ways to achieve motion blur. I associate motion blur with the effect of capturing movement in a frame. You can either capture movement in your subject or by moving yourself or the camera (e.g. panning). For me, the easiest way to achieve motion blur is to slow the shutter speed and show some movement of the subject. Motion blur adds an interesting artistic element in your images if done right. One tip, use a tripod for optimal effect.

15 Photography Exercises to Boost Your Creativity

When fog was our constant companion on a beach camping trip in the pacific northwest, I chose to use it to my advantage to create an eerie effect with motion blur – in the waves and the people walking along the beach!

15 Photography Exercises to Boost Your Creativity

Panning image courtesy of dPS Editor, Darlene.

googletag.cmd.push(function() {var gpt_slot = googletag.defineSlot( “/1005424/_dPSv5in-post-mobile(300×250)”, [300, 250], “pb-ruleset-mobile-ad-0” ).addService( googletag.pubads() );ruleset_mobile_slots.push( gpt_slot );});

googletag.cmd.push(function() {var gpt_slot = googletag.defineSlot( “/1005424/_dPSv5in-post-mobile(300×250)”, [300, 250], “pb-ruleset-desktop-ad-4” ).addService( googletag.pubads() );ruleset_desktop_slots.push( gpt_slot );});

#3 – Go macro

Traditionally macro photography has been associated with floral and fauna. But resist the urge to get out into the garden to find the smallest ant to photograph. Instead, think of macro as a great way to isolate details in an image.

15 Photography Exercises to Boost Your Creativity

As a wedding photographer, I love using my macro lens to capture unique ring shots for my couples. And of course, nothing like highlighting the snow (I live in Chicago!).

#4 – Find reflections

As the name suggests, try and find mirror images or reflections, either with mirrors or with water, of your subject and shoot creatively.

Reflections of people in water image - 15 Photography Exercises to Boost Your Creativity

It really helps if your subjects are great sports and willing to get into the water for a shot like this!!

#5 – Shoot out of focus

Whether it’s an unlucky accident or intentional, I love out of focus images. Remember these creative exercises are simply an attempt to create something you are proud of. There are no right or wrongs, they are all just ways to stimulate your creative juices.

#6 – Wabi-sabi – embracing imperfection

As per Wikipedia, wabi-sabi represents Japanese aesthetics and a Japanese world view centered on the acceptance of transience and imperfection. The aesthetic is sometimes described as one of beauty that is “imperfect, impermanent, and incomplete”.

There is something innately beautiful in imperfections. That feeling of being alive and being human and living life to the fullest, versus living in the proverbial glass house where nothing is out of order. The best way to think of wabi-sabi is to look for imperfections in your everyday.

15 Photography Exercises to Boost Your Creativity

I love everything old and vintage. They always tell me stories of a different, more interesting time and place!

15 Photography Exercises to Boost Your Creativity

#7 – Double exposures

Ding a double exposure is a carry-over from the old film days and it is a super creative way to take your images from boring to wow! In its simplest form, it is a way to superimpose two images onto a single frame. The good news is that you don’t need a film camera to create double exposures. Some of

Some newer DSLRs have a multiple exposure setting as a tool for creative photography. It takes a little bit of reading but once you get the hang of it, I promise, you will be hooked. We also have a great article in the DPS archives that talks about the techniques of multiple exposures How to do Multiple Exposures In-Camera.

15 Photography Exercises to Boost Your Creativity

googletag.cmd.push(function() {var gpt_slot = googletag.defineSlot( “/1005424/_dPSv5in-post-mobile(300×250)”, [300, 250], “pb-ruleset-mobile-ad-1” ).addService( googletag.pubads() );ruleset_mobile_slots.push( gpt_slot );});

googletag.cmd.push(function() {var gpt_slot = googletag.defineSlot( “/1005424/_dPSv5in-post-mobile(300×250)”, [300, 250], “pb-ruleset-desktop-ad-5” ).addService( googletag.pubads() );ruleset_desktop_slots.push( gpt_slot );});

#8 Diptych

A diptych is a concept of placing two images side by side so that they add context to each other and tell a complete story. When choosing images to form a diptych, pay close attention to light, tones, and exposures. Typically I compose my diptychs to include a big picture image and a detail shot of an element of that image.

15 Photography Exercises to Boost Your Creativity

My focus with dyptics is to dig deeper into my stories…focus on the details along with the big picture.

#9 – Triptych

Similar to diptych, a triptych is a concept of placing three images side by side so that they collectively tell a story.

15 Photography Exercises to Boost Your Creativity

Especially with tryptics, pay special attention to the order and orientation of the images. At times this might limit the placement of the images in a certain order.

#10 – Shooting through objects

I love shooting through objects, it adds an element of interest and depth in the foreground. You can really take this up a notch by using every day elements like leaves, branches, fabric pieces and ever glass to create some cool artistic effects in your images.

15 Photography Exercises to Boost Your Creativity

15 Photography Exercises to Boost Your Creativity

#11 – Different perspective

The next time you find yourself shooting the same subject the same way, take a step back and rethink your strategy. Are you a 100% vertical shooter like me? Then force yourself to take a horizontal frame. Are you always looking at details? Then use a wide-angle lens and force yourself to take in the big picture. Do you always shoot at a narrow aperture so as to get everything in focus? Then dial down your aperture and shoot at the widest possible setting (based on your lens) to focus in on one detail of the whole image.

15 Photography Exercises to Boost Your Creativity

Personally, I tend to shoot closeup and focus on the details a lot more than I do the big picture. So I have been forcing myself to do just that…and I love when I get diversity of 50-50 in my vertical and horizontal orientation shots! Bonus point to you if you can spot the subject here!!

#12 – Burst of color

It’s a beautiful, colorful world out there. Get out and photograph it. Don’t be afraid of the bold bright colors, but definitely be aware of which colors work and which ones don’t quite translate well in imagery. Train your mind to look for certain colors and patterns and before you know it, you will have a collection of colorful images that make you happy.

15 Photography Exercises to Boost Your Creativity

15 Photography Exercises to Boost Your Creativity

I just loved the pop of color from my husband’s red jacket as he walked along the lakeshore with the Olympic mountains in the background.

#13 – Monochromatic

This is the exact opposite of #12 where your challenge is to look for and shoot a black and white image. You can either convert the image to B&W in post-processing or change the setting on your camera (depending on the make and model) to shoot monochromatic in-camera.

googletag.cmd.push(function() {var gpt_slot = googletag.defineSlot( “/1005424/_dPSv5in-post-mobile(300×250)”, [300, 250], “pb-ruleset-mobile-ad-2” ).addService( googletag.pubads() );ruleset_mobile_slots.push( gpt_slot );});

googletag.cmd.push(function() {var gpt_slot = googletag.defineSlot( “/1005424/_dPSv5in-post-mobile(300×250)”, [300, 250], “pb-ruleset-desktop-ad-6” ).addService( googletag.pubads() );ruleset_desktop_slots.push( gpt_slot );});

The key here is to look for patterns and compositions that work well in black and white. A point to note is that processing is very subjective, as is black and white imagery. There are no right or wrong images, but here are a few articles to help you take great monochrome images.

  • How to Create Good Black and White Portraits
  • 6 Tips to Help You Make Better Black and White Landscape Photos
  • Avoid These 5 Common Mistakes in Black and White Photography
  • A Guide to Black and White Conversion in Photoshop
  • A Guide to Black and White Conversion in Lightroom
  • Improve Your Middle of the Day Photos By Doing Black and White

15 Photography Exercises to Boost Your Creativity

15 Photography Exercises to Boost Your Creativity

#14 – Pattern play

Take the time to look around and see if you are able to find any natural patterns around you. These can be either man-made or natural. Facades of buildings, windows, parking lots, and landscapes all provide many opportunities to capture repeating patterns. Capture them in an interesting way to highlight those patterns.

15 Photography Exercises to Boost Your Creativity

#15 – Shadow play

Shadow play is most prevalent in situations when the sun is high in the sky creating harsh shadows on the ground, on buildings and directly unto the subject. But magic with light also happens indoors. Learn to embrace this high contrast between shadow and sun and try to capture some creative angles.

Dramatic light Images Shadow play - 15 Photography Exercises to Boost Your Creativity

Conclusion

I hope these exercises have proven to you that there isn’t any lack of creativity prompts in and around you. You just have to look for them anytime you feel stuck or find yourself creating the same or similar images again and again. Keep these prompts in the back of your mind, use them, combine them, mix them up – the possibilities are endless!

googletag.cmd.push(function() {var gpt_slot = googletag.defineSlot( “/1005424/_dPSv5in-post-mobile(300×250)”, [300, 250], “pb-ruleset-mobile-ad-3” ).addService( googletag.pubads() );ruleset_mobile_slots.push( gpt_slot );});

googletag.cmd.push(function() {var gpt_slot = googletag.defineSlot( “/1005424/_dPSv5in-post-mobile(300×250)”, [300, 250], “pb-ruleset-desktop-ad-7” ).addService( googletag.pubads() );ruleset_desktop_slots.push( gpt_slot );});

The post 15 Photography Ideas to Boost Your Creativity by Karthika Gupta appeared first on Digital Photography School.


Digital Photography School

 
Comments Off on 15 Photography Ideas to Boost Your Creativity

Posted in Photography


4 Refraction Ideas to Use Your Creativity

23 Feb

The application of science to photography is a great way of getting creative results with your work. The camera itself is, of course, a product of scientific endeavor. One that brings everyone here to learn more about it. Inside the camera are a series of optics that use refraction to render the image onto your camera sensor, though refraction can be used even more creatively in photography.

googletag.cmd.push(function() {
mobile_slots.push( googletag.defineSlot( “/1005424/_dPSv5topic-rhs(300×250)”, [300, 250], “pb-ad-124309” ).addService( googletag.pubads() ) ); } );

To take refraction photographs you will need to find an object that produces this effect, such as a glass ball. The effect happens when light passes through an object of denser mass, and the light is bent as it goes through.

4 Refraction Ideas to Use Your Creativity

Flags such as the Union Jack make great subjects for refraction.

Objects that cause refraction

Any transparent object that has a different mass to air will cause refraction. The most useful objects that refract are those which are spherical. While it’s possible to get refraction through transparent plastic objects, for the best image quality you’ll want to be shooting through glass.

As you can read in my previous article: 7 Tips for Doing Crystal Ball Refraction Photography, glass balls are a favorite for this type of effect, though not everyone has one on hand. There are other objects that you can use for refraction such as; wine glasses, marbles, and water drops.

7 Tips for Doing Crystal Ball Refraction Photography

This photo was taken through the bottom of a drinking glass. The bobbles at the bottom refracted the light.


1 – Refraction using a glass ball

The glass ball is probably the most popular item used in refraction and is what you immediately think of if someone says refraction photography. This is a great piece of extra kit to have in your camera bag and can do wonders for creating a unique looking landscape photo.

The ball can also be good for architecture and even portrait photos if you now how to use it properly. You need to think of the ball as an external fish-eye lens. The ball then needs to be carefully placed on a wall, so it’s elevated to the same level as the object you’re shooting.

7 Tips for Doing Crystal Ball Refraction Photography

The ferris wheel is refracted inside this glass ball, the bokeh shapes compliment the scene well.

2 – Marbles are small glass balls, great for refraction!

A smaller alternative to a glass ball is the marble. Photographing a marble is in many ways the same as photographing its larger counterpart. The key difference is that it’s much smaller, and using a macro lens becomes important. There are a few key points you need to consider when photographing a marble versus a glass ball.

  • The glass may not be as good quality, leading to a poorer image inside the marble.
  • There will be more distortion and a smaller sweet spot where the image is clear.
  • The weight is significantly less making them much easier to carry around.
  • The small size often makes them easier to place on a surface without falling off, they sit in smaller divots.
  • You will need a lens capable of macro photography to best photograph with marbles.
7 Tips for Doing Crystal Ball Refraction Photography

The much smaller size of a marble enables you to place it in otherwise inaccessible locations.

3 – Make a splash with water droplets

A glass ball is not the only medium you can use to create refraction, water makes a great alternative. The key to using water in this way is photographing it as a droplet. There are a few ways to do this, you could try all of them!

  • Water droplet photography – If you’ve never tried this type of photography before I highly recommend it, it’s a lot of fun. Introducing a background image such as a flag will lead to that object being refracted inside the water drop!
  • Tap droplet photography – This is almost identical to the first example, this time you capture the droplet mid-flight. Once again you will want to have a background image behind the water drop. Follow the steps recommended in the water droplet article, and replace the water bag with a tap and voila. Here are some great examples of this type of photo.
7 Tips for Doing Crystal Ball Refraction Photography

These water droplets were placed on glass using a syringe, with the flag of Malaysia is behind them.

  • Naturally occurring water drops – Water drops on spider webs, or on flower petals are spherical, and will therefore refract. So get out there after it’s rained, or if you’re not patient there is always the not so natural watering can or syringe to create your own.
  • CDs and water drops – Placing water drops onto a CD using a syringe will create a great effect. Think of all those mini rainbows! To take this type of image you will need to place water droplets on a CD. Then compose your image, and turn the lights off. Finally, move a flashlight around the CD during a long exposure, doing light painting.
  • Water droplets on glass – This is similar to placing water drops on a CD, but you will use a strobe to light up the scene. Place your water drops onto a glass pane, with your image in the background below it.
7 Tips for Doing Crystal Ball Refraction Photography

The drop of water from a tap is caught mid-flight.

4 – Make that wine glass multi-task!

The real reason wine glasses are round is because they can be used for refraction photography! Okay, they are for wine, but that doesn’t mean photographers can’t use them as well.

The spherical nature of this type of glass means filling them with water will allow you to see a refracted image inside the glass. The wine glass is, of course, better than the glass ball for placing on a flat surface, as it’s not going to roll off. You can use a wine glass in portrait photos as well. In that scenario, the wine glass acts as a great prop, which also shows the refracted image in the background.

7 Tips for Doing Crystal Ball Refraction Photography

This wine glass filled with water shows the effect of refraction.

Get out and give refraction a try

There are multiple ways you can go about starting a series of refraction photos, and this type of photography makes a very interesting project. Let’s see your work if you have taken these types of photos before.

Are there any other refraction type photos you can recommend? Those who have never tried this technique before, give it a go! The community looks forward to seeing your photos, and it could become your project for the year!

The light is refracted through these water droplets when placed on a CD.

googletag.cmd.push(function() {
tablet_slots.push( googletag.defineSlot( “/1005424/_dPSv4_tab-all-article-bottom_(300×250)”, [300, 250], “pb-ad-78623” ).addService( googletag.pubads() ) ); } );

googletag.cmd.push(function() {
mobile_slots.push( googletag.defineSlot( “/1005424/_dPSv4_mob-all-article-bottom_(300×250)”, [300, 250], “pb-ad-78158” ).addService( googletag.pubads() ) ); } );

The post 4 Refraction Ideas to Use Your Creativity by Simon Bond appeared first on Digital Photography School.


Digital Photography School

 
Comments Off on 4 Refraction Ideas to Use Your Creativity

Posted in Photography


10 DIY Valentine Ideas Featuring Your Photos

10 Feb

There are a certain three little words everyone wants to hear this Valentine’s Day.

But aren’t 1,000 words even better?

Use a photo (they’re worth 1,000 words!) to make a Valentine this year, and you’ll say so much more than “I love you.”
(…)
Read the rest of 10 DIY Valentine Ideas Featuring Your Photos (385 words)


© laurel for Photojojo, 2017. |
Permalink |
No comment |
Add to
del.icio.us

Post tags:


Photojojo

 
Comments Off on 10 DIY Valentine Ideas Featuring Your Photos

Posted in Equipment


Bright Ideas for Dark Art: Murals by Skurk Play Tricks with Light & Night

24 Oct

[ By WebUrbanist in Art & Street Art & Graffiti. ]

painted-angler-fish-art

The deep sea anglerfish is a disturbing monstrosity that uses lights to lure in its prey and is the featured backdrop of a recent work of graffiti best experienced at night.

day-lit-night-art

Existing wall lamps serve as the lures in this case, while the fish itself is positioned to swallow up anyone brave enough to venture down the stairs from above.

night-light-painting

Hailing from New Zealand but living in Bergen, Norway, street artist Skurk hand-cuts stencils and paints large-scale murals around different themes but often involving light and shadow. The works are also site-specific, made to interact with and respond to conditions in a given physical context.

sillhouette-art

In some cases, his silhouettes seem to be cast like shadows. In other instances, the idea of electrical lighting takes various forms, like a bulb being plugged into an available (vent) socket.

light-socket-art

Share on Facebook


[ By WebUrbanist in Art & Street Art & Graffiti. ]

[ WebUrbanist | Archives | Galleries | Privacy | TOS ]


WebUrbanist

 
Comments Off on Bright Ideas for Dark Art: Murals by Skurk Play Tricks with Light & Night

Posted in Creativity


7 Ideas to Inspire Your Creativity

06 Sep

When I’m stuck in a rut and not feeling like my photos are that amazing, it usually just takes going to a beautiful new place or going out when the light is incredible to get my back on the path of being excited about taking photos. But not always. Sometimes I need some added inspiration for my creativity. Can you relate?

Inspire Your Creativity - red tred

Sometimes I think all the busyness of my mind, the client who wants something yesterday, the endless emails that needs answering, the toilet that needs fixing in my studio, take over that part of my brain that is flowing and waiting to take photos. It’s almost like these tasks put a huge stopper on my creative flow.

When this happens I like to turn to minds wiser than my own. Over the years I’ve come across ideas that have sparked something in me, helping me to look at the world in new and different ways. Just remembering these ideas when I am down in the depths of not-creating, usually helps to jumpstart my mind and get me back into creating again.

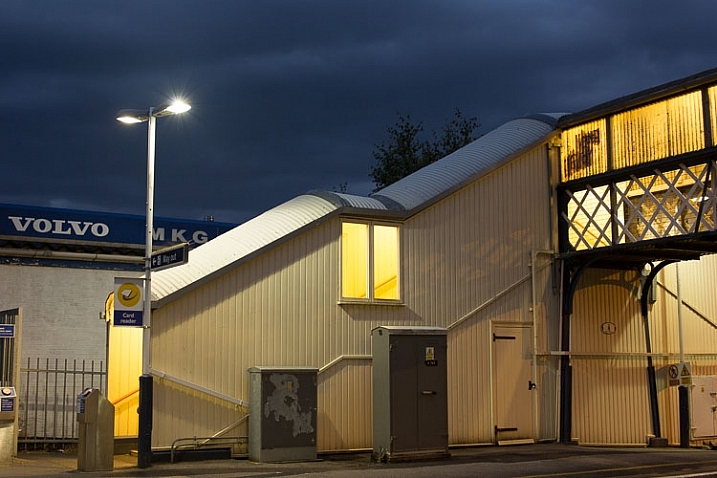
Inspire Your Creativity night shot

I love hearing advice about creativity from all sources, because it is an act regardless the medium. From singers (“Sometimes you have to play a long time to be able to play like yourself.” Miles Davis) to painters (“Art washes away from the soul the dust of everyday life.” Picasso), everyone has something illuminating to share about the creative act.

Here are some of my favourite ideas to inspire creativity:

1. Look for indirect inspiration (via Ernst Haas)

I love looking at other photographers’ work. I like to put myself into a place where I am inspired by other people’s creative visions. But when I am stuck in my own photography, looking at other photographer’s work is probably the worst thing to do.

Funny enough, my favourite photographer of all time – Ernst Haas – agreed! He warned against seeking too much direct inspiration, as it:

“leads too quickly to repetitions of what inspired you,” and instead he recommends you should: “refine your senses through the great masters of music, painting, and poetry. In short, try indirect inspirations, and everything will come by itself.”

So fill your life with beautiful, joyful, and interesting things. Things that make the hair on the back of your neck tingle.

Inspire Your Creativity

2. Beware the barrenness of a busy life (via Socrates)

Let’s just assume something: our work and your life responsibilities are an endless flow of stuff, and you will never get it all done. Ever. It’s impossible. So stop trying, and give yourself permission to just wander, percolate, get bored. Day dream and do all those awesome things that eventually lead to creativity.

So given that it’s endless, how about deciding that in order to have a happy life, one that is rich with fulfilment and fun and adventure, you have to break free occasionally. Because it’s so satisfying.

Socrates said: “Beware the barrenness of a busy life.”

Think about the things that really make you feel fulfilled and inspired. Things that nourish you deep down, that make you feel happy to be alive. You need more of that and less of the constant emails – right?

Turn off the faucet of tasks and prioritize being creative.

Inspire Your Creativity square image

3. Kill perfectionism (via Anne Lamott)

When I start a photo project I am visited by that evil force – perfectionism. (It visits me towards the end too, and usually in the middle, in that vast sea when I am unanchored and often unsure of where to go next. It always catches me when I am feeling most vulnerable). I start to worry – “What if my best shot is behind me, what if I’ll never shoot anything amazing again, what if, what if…!?”

And, wow, is perfectionism easy to get sucked into. It’s something on which we believe, that we’re just being super focused. When in fact:

“At its root, perfectionism isn’t really about a deep love of being meticulous. It’s about fear. Fear of making a mistake. Fear of disappointing others. Fear of failure. Fear of success.” – Michael Law

Inspire Your Creativity people photo

That’s why you have to kill it, because perfectionism will stop you in your tracks. It will stop you before you even get started.

Perfectionism often appears when you’ve cleared everything out of the way and are ready to get down to it. You’ve turned off your phone, cleared the diary, extracted yourself from the ever flowing font of responsibilities. When you are faced with the actually doing.

But what happens if you give into it, and keep giving in to it and never get started?

“Oh my God, what if you wake up some day, and you’re 65, or 75, and you never got your memoir or novel written; or you didn’t go swimming in warm pools and oceans all those years because your thighs were jiggly and you had a nice big comfortable tummy; or you were just so strung out on perfectionism and people-pleasing that you forgot to have a big juicy creative life, of imagination and radical silliness and staring off into space like when you were a kid? It’s going to break your heart. Don’t let this happen.” – Anne Lamott

Inspire Your Creativity street scene

So how do we deal with this beast? Weirdly what seems to work the best for me, is to say to myself, “It doesn’t matter if what you do is terrible, just do it.” In fact I slightly encourage myself to be terrible, so that I have removed all that pressure to achieve something amazing. Therefore I’ve killed perfectionism at the root (because perfectionism is a desire to either be perfect or pretty amazing).

Then once I’m out the door and taking photos, I’ll fall into the flow and forget all about that horrible perfectionism. Most of the time I’ll even end up with some pretty good shots! Getting started is better than never striking out. Or as Seneca said:

“It is not because things are difficult that we do not dare, it is because we do not dare that they are difficult.” – Seneca

Inspire Your Creativity park sunlight

4. Make creativity a habit (via Maya Angelou)

I read this quote to my 10 year old son the other day because he had started writing a story. After an initial burst of enthusiasm he said his inspiration had disappeared and he didn’t want to carry on.

“In writing, habit seems to be a much stronger force than either willpower or inspiration.” – John Steinbeck.

Although this may be about writing, it is totally true of any creative pursuit. That is because:

“You can’t use up creativity. The more you use, the more you have.” – Maya Angelou

I love that quote because it shows that making an active effort to be be creative on a regular basis (whether it’s every Sunday afternoon, each morning for an hour at 6am, or Wednesday evenings) will guarantee that you will generate more creativity. It’s all about making the time to do it. Because, by the way, there is never the right time, or enough time for everything else. Even professional photographers, like me, need to literally carve out time to be creative.

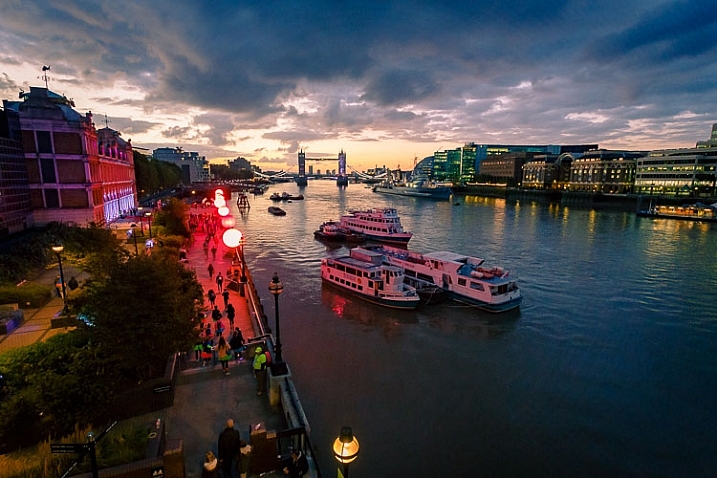
Inspire Your Creativity London at night

5. But on the other hand….destroy your other habits (via Henry van Dyke)

“As long as habit and routine dictate the pattern of living, new dimensions of the soul will not emerge” – Henry van Dyke

Because our brain is a very helpful entity, wanting to make our lives as simple as possible (thank you brain), it creates habits very quickly. Although that makes it easy to get up in the morning, make breakfast, get ready for work, get to work and do your job without actually thinking about it too hard, or making any huge decisions – this is terrible for your creativity.

Why?

Because most of the activities you do are by habit. That includes 70-80% of the thoughts you have today, you had yesterday (and will have tomorrow. Scary!) Which means you are for the most part living your life on autopilot. So if you want to create something new, in fact just the act of creating is by nature doing something new, you have to abandon those habits that keep you thinking and living the same way over and over again.

To be aware is to not be locked in habit, or lost in a sea of your ever-revolving thoughts. So take a new route to work, change your morning routine, take a walk in the evening – anything that wakes up that mind of yours and gets you doing and thinking in new ways.

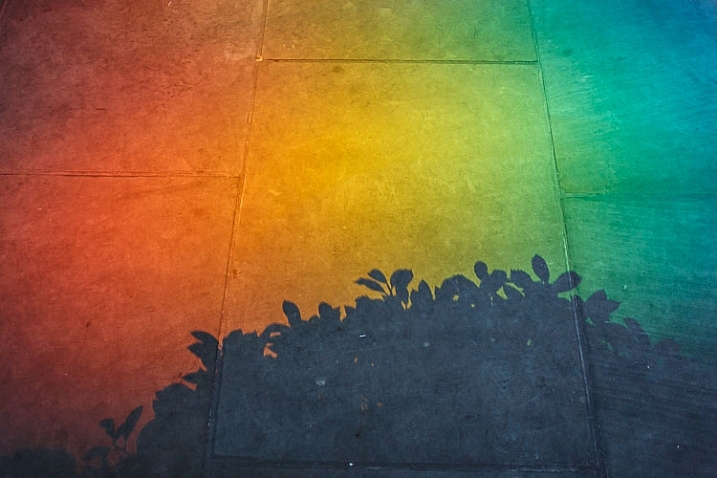
Inspire Your Creativity rainbow

6. Your mind is made of play-doh (via Gandhi)

On my workshops many people come with preconceived ideas of what they are good at, and most definitely what they are not good at. Although I agree we all have predispositions to being naturally good at certain things, what science is now learning about the brain, is that it can continue to learn, change, adapt and evolve throughout your whole life.

“New research shows many aspects of the brain remain changeable (or “plastic”) even into adulthood.” – Wikipedia

How exciting is that? So when Gandhi said this:

“Man often becomes what he believes himself to be. If I keep on saying to myself that I cannot do a certain thing, it is possible that I may end by really becoming incapable of doing it. On the contrary, if I have the belief that I can do it, I shall surely acquire the capacity to do it even if I may not have it at the beginning.” – Gandhi

Inspire Your Creativity night shot

Not only was he totally right, but he was showing us that when we put our minds to something, and really focus and concentrate, we can learn and create whatever we want. As Thomas Edison said:

“If we all did the things we are really capable of doing, we would literally astound ourselves.”

So not being good at something now, or not being a very technical or creative person should not limit you. If you want to be more creative – go out there and work at being creative. If you want to become a technically adept person – do it! Everything is possible if you believe (that’s science saying that, not me).

When I get stuck with the things I struggle with photographically, I remember that I need to not give in to that thought, and instead push through with what I want my photography to be.

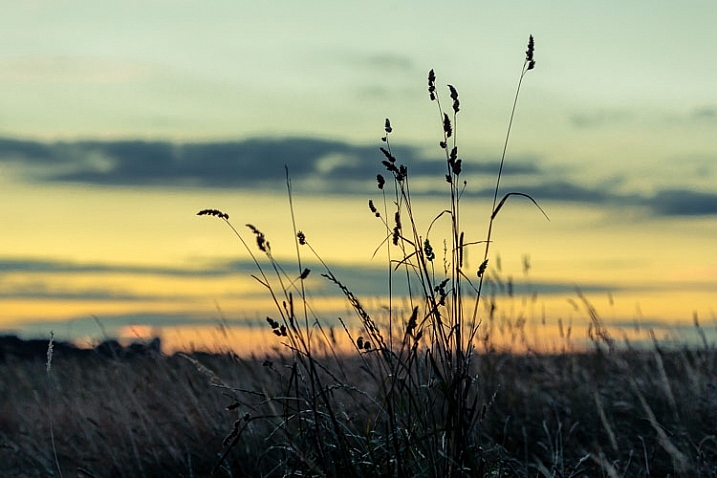
Inspire Your Creativity sunset

7. Dreaming with your eyes wide open (via Ernst Haas)

Being open and creative is something that all children excel at, but it is often squeezed out of us as we grow up. Children are amazing at making connections between disparate ideas; they have an openness and freedom to look at things without thinking, “I can’t think that, I can’t do that, I can’t try that, I’m not good at that.”

So as you were creative as a child, you can be creative again!

It’s about opening yourself up to the wondrous magic that is in the world all the time. Take a walk with a three year old, and it won’t be in a straight line. It will take four or five times longer, or more! Children are not goal-orientated, they are all about noticing that beautiful flower or funny face in the shop, a piece of colourful glass on the floor, or a ladybird!

Inspire Your Creativity canal

Haas calls it “dreaming with your eyes wide open”. I love that it’s about shaking off the shackles of that adult training. So just look, wander, get lost, daydream. That’s when you start seeing things that you’ve blocked out in your ordinary day to day life.

Finally, I think many of us have become a culture aimed towards being too goal-orientated, so used to spending our time achieving things, and exchanging our time for achievement. But while it’s important to regularly take time to be creative, it doesn’t always have to lead to an outcome. Just the act of being creative, or looking, is fuel for the fire, even if it never leads anywhere. In fact let’s just throw outcomes out of the window, and get involved in taking photos for the sake of taking photos.

I think being creative is an incredible way to live, because it’s not just being locked into doing stuff, achieving stuff, focused on outcomes. It’s about being in wonder and awe of life.

Inspire Your Creativity quote fog

I think Henry Miller summoned it up perfectly when he wrote:

“The aim of life is to live, and to live means to be aware, joyously, drunkenly, serenely, divinely aware.”

googletag.cmd.push(function() {
tablet_slots.push( googletag.defineSlot( “/1005424/_dPSv4_tab-all-article-bottom_(300×250)”, [300, 250], “pb-ad-78623” ).addService( googletag.pubads() ) ); } );

googletag.cmd.push(function() {
mobile_slots.push( googletag.defineSlot( “/1005424/_dPSv4_mob-all-article-bottom_(300×250)”, [300, 250], “pb-ad-78158” ).addService( googletag.pubads() ) ); } );

The post 7 Ideas to Inspire Your Creativity by Anthony Epes appeared first on Digital Photography School.


Digital Photography School

 
Comments Off on 7 Ideas to Inspire Your Creativity

Posted in Photography


Mood Boards: Communicate Your Ideas To Your Creative Team

23 Jul

This is the time to hear out others opinions (if you’re open to them, which


Fashion Photography Blog

 
Comments Off on Mood Boards: Communicate Your Ideas To Your Creative Team

Posted in Uncategorized


Mood Boards: Communicate Your Ideas To Your Creative Team

18 Jul

Communicate Your Ideas Clearly With Your Team Using Mood Boards


Hey FashionPhotographyBlog.com readers,

Last time we discussed planning a shoot, getting inspired and finding your creative team. Today we’re going through how to effectively communicate your photography vision for the shoot with your team members and get the most out of them in terms of collaboration.


This is the time to hear out others opinions (if you’re open to them, which it’s always good to be) and really hammer down the details. When reaching out to your team, it’s standard protocol to provide them with a mood board.


What is a mood board? Essentially, it’s a collection of images to serve as inspiration and direction for how the shoot is to be pulled together. Typically, it’s a page (can be more) that compiles images and ideas which allows everyone to be on the same wavelength. Often it’s a good idea to include keywords and color references. If you’re not the kind to make a mood board, you can also compile images into a folder to send to your team but it’s the norm to compile it all on a single board.


On a mood board I tend to include inspiration for hair, makeup and styling along with an idea of how I want the image to look in the end. Sometimes this last bit will be a drawing or an image that has the same type of color scheme I’ll end up applying. Anything it takes to get your idea across. Don’t overcomplicate it.


The mood board is then followed up with emails (meetings or phone calls) to clarify any questions, hear out any suggestions and really communicate the idea to be portrayed. Jocelyne and I spent the next week exchanging numerous emails, deciding exactly which clothing to use, which trends to reference, what type of accessories to incorporate, etc. She would show me clothing which I would sort through and show images to Matt. Together we all made decisions which clothing to work with and which to forget about. No stone was left unturned.


*** It’s important to be involved with choosing which clothing you’re going to shoot. Especially if you are working with a new stylist or one that is just starting out in the field. Often times people will listen to what you say but pull clothing that suits their vision, not yours. There have been several times that I’ve showed up to a shoot to find awful clothing that was not at all what was described in the mood board. Sometimes you just have to learn the hard way. Being hands on is the only way to guarantee results that perfectly match your vision.


On the day of the shoot, make sure when your team gets there they have a clear idea of what is to happen for the day. I always take ideas and advice from my creative team but ultimately it comes down to the final concept and what is going to work best. If someone is giving you trouble on set and trying to override your ideas, pull them aside and speak with them. Don’t make it an awkward thing. “I respect your ideas but I don’t necessarily see it working with the overall concept for this shoot,” is all it takes.


Pardon for the quickly thrown together mood board – I couldn’t find the original.

Mood board


So that’s how you can get the most out of your creative team using mood boards. I hope that helps. If you have any suggestions you would like to share on how you use mood boards, please feel free to leave it in the comment section below. We’d love to see it!


Now that everyone on your creative team is onboard with your photography vision it’s now time to shoot it & wrap it up in post production. Stay tuned, because next time I will be sharing with you my tips for making the time during the shoot and after the shoot in post production run smoothly.


Until then – 

Alana


IMAGE SOURCE:

Feature image & image 1: courtesy of Alana Tyler Slutsky


Fashion Photography Blog

 
Comments Off on Mood Boards: Communicate Your Ideas To Your Creative Team

Posted in Uncategorized


10 Ideas for Photographing Nature in your Backyard

17 Jul

Have you noticed how many photographers are fascinated with the natural world? Even if we specialise in another genre, few of us can resist a gorgeous flower, or a branch of autumn leaves.

One of the best things about photographing nature is that it is so accessible. You needn’t travel far to find it, because it’s all around you. You may take it for granted because you see it every day, but your own backyard is treasure trove. Every hour of every day and every season, bring something new.

image showing photographing nature in your backyard

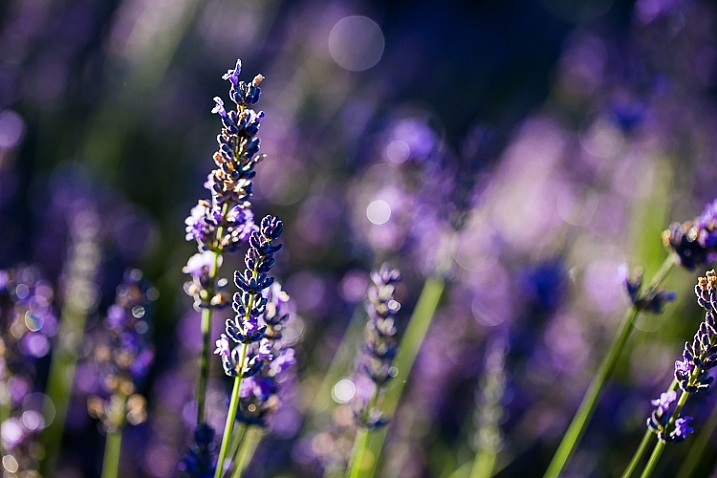
Summer lavender: ISO 100, f/3.5, 1/200th

Backyard needn’t be taken literally here. If you don’t have a backyard, you’ll find plenty of nature to photograph just by wandering the streets or public parks and gardens.

Tech details: All of the photographs in this article were shot on my Canon 5D Mark III. Unless otherwise stated, I have used my Canon macro 100mm f/2.8 lens. I have included details of ISO, aperture and shutter speed settings.

#1 – Flowers and leaves

Flowers and leaves are often the first things that come to mind when we look for subjects in our own backyards. They offer an endless variety of colours, shapes and textures for you to photograph. You could create a collection based on a single colour scheme, or try to find as many different leaf or flower shapes as possible.

iso 640, f4, 1/100 sec

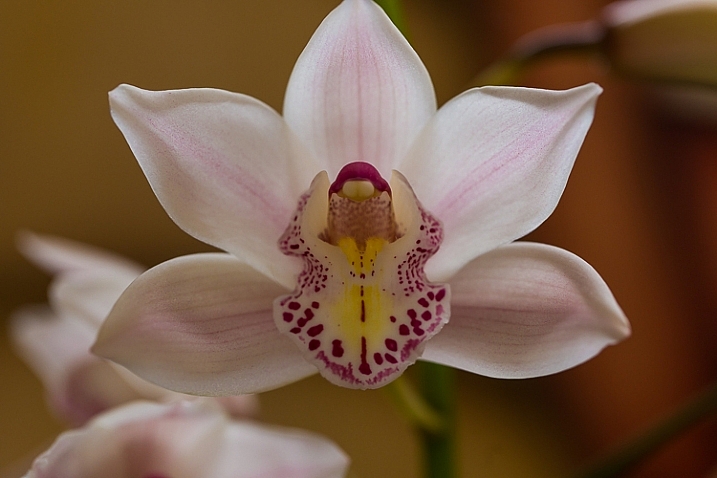
Cymbidium orchid: ISO 640, f/4, 1/100th

image showing photographing nature in your backyard

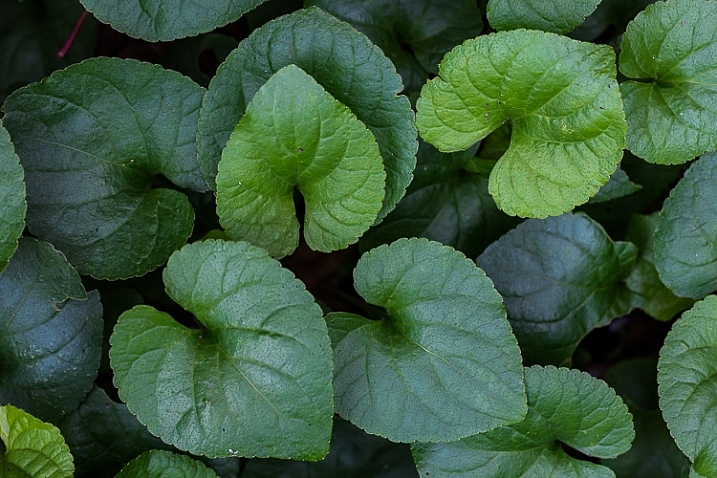
Violet leaves: ISO 800, f/8, 1/30th

image showing photographing nature in your backyard

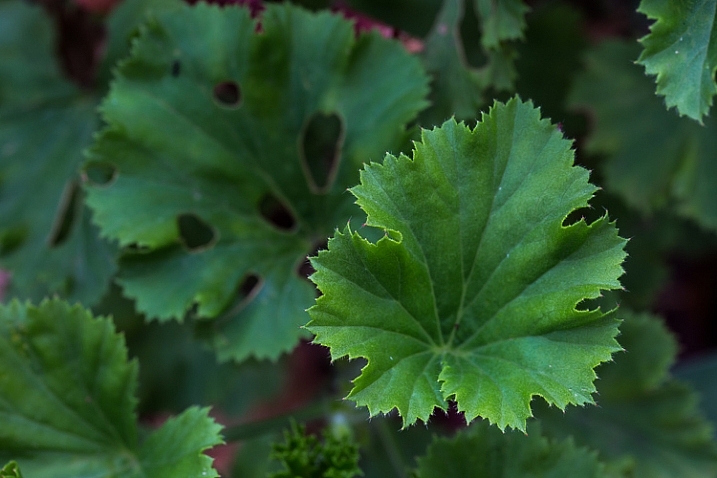
Geranium leaves: ISO 320, f/8, 1/40th

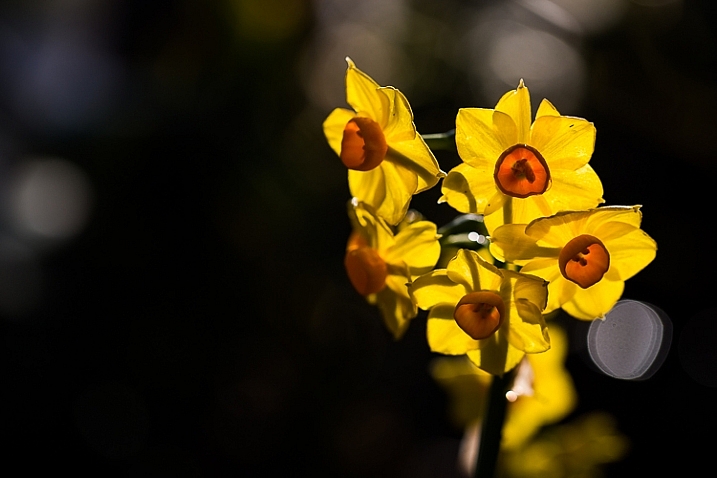
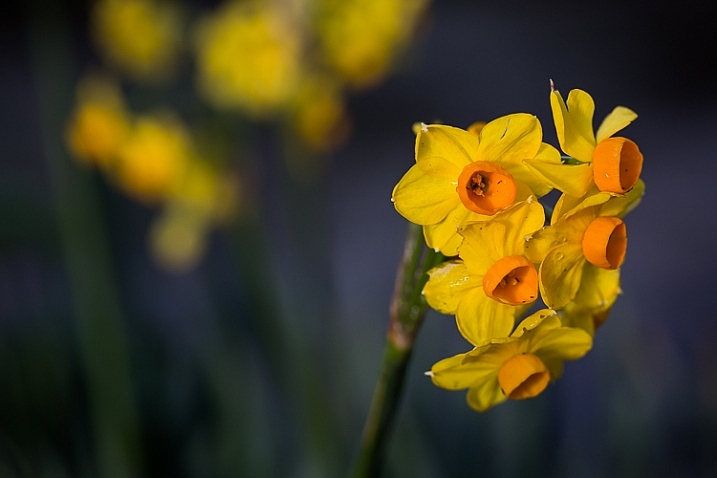
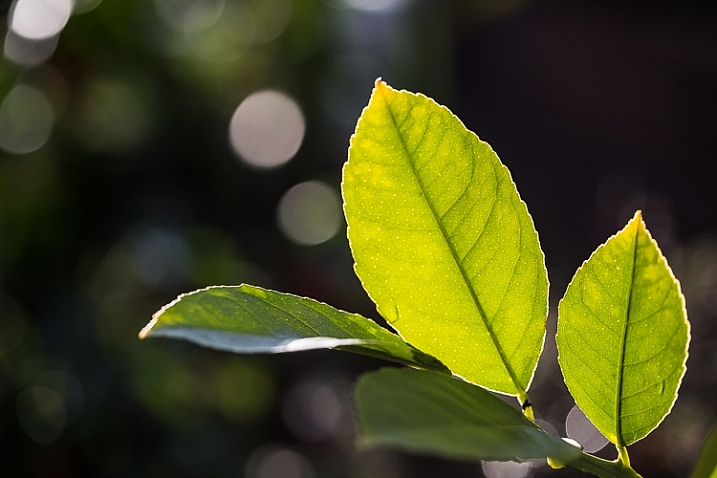
Experiment with different lighting and conditions. I love backlighting for leaves and flowers, as it creates a luminous, almost three-dimensional effect, and you can see details such as veins. Some shapes look better with strong, directional light, and I love how colours are enhanced in the wet.

image showing photographing nature in your backyard

Erlicheer daffodils BACKLIT: ISO 100, f/4, 1/640th

image showing photographing nature in your backyard

The same flower shot with the sun on my back: ISO 100, f/4, 1/800th

image showing photographing nature in your backyard

Backlighting a leaf reveals details you wouldn’t see if you lit it directly : ISO 100 f/4, 1/250th

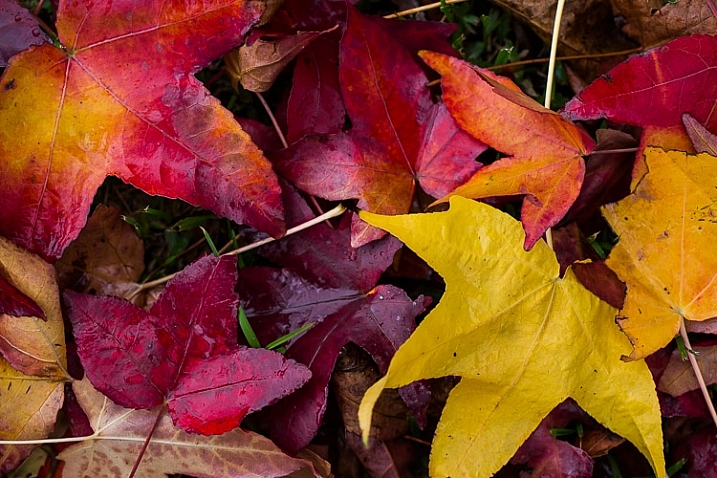
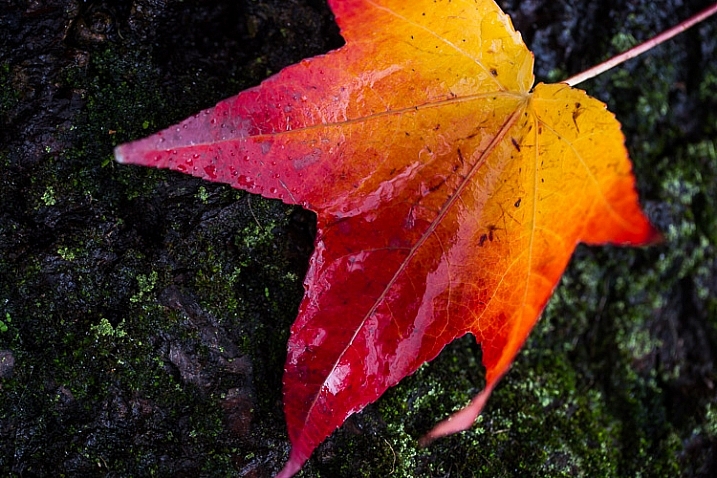
Flowers are seasonal, and in temperate zones, spring and summer offer the widest variety. There are still flowers to be found in winter, although you may need to look harder. Don’t forget that weeds, such as dandelions ,are also beautiful! Autumn (fall) provides the greatest colour spectrum in leaves.

image showing photographing nature in your backyard

Liquidamber leaves photographed en masse: ISO 640, f/4, 1/80th

image showing photographing nature in your backyard

A single leaf isolated against a dark background: ISO 640, f/4, 1/30sec

#2 – Fruit, berries and seed pods

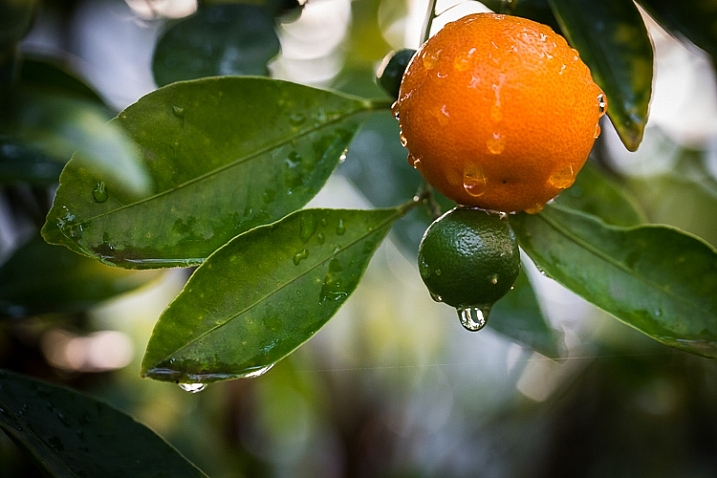
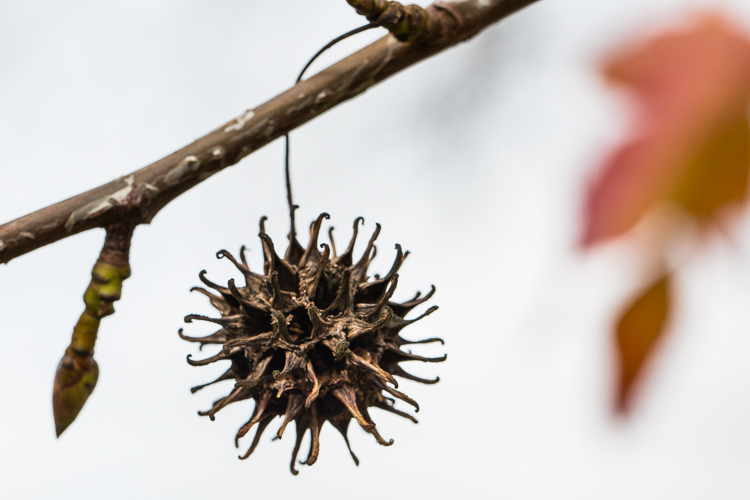
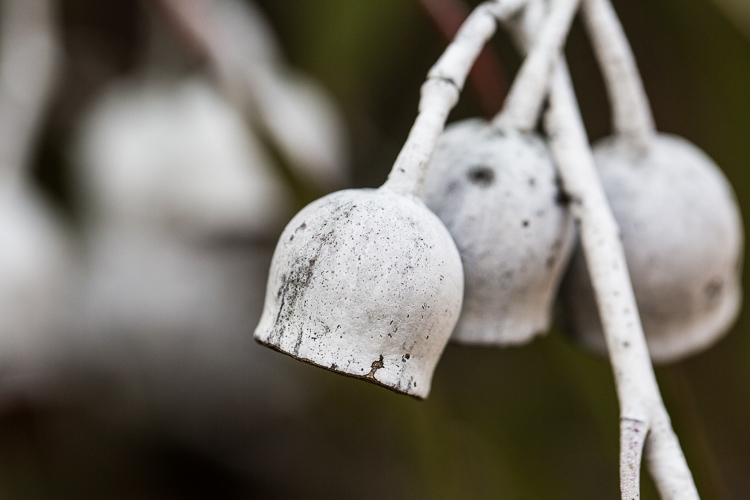
When the summer flowers disappear, fruits and berries are nature’s way of providing for birds and animals throughout the colder months. Many berries and seed pods ripen towards the end of autumn, bringing colour to the winter garden. Citrus trees bear fruit in winter, and persimmon trees lose their leaves to reveal branches of shiny orange fruits. Think also of acorns, pine cones, and nuts.

image showing photographing nature in your backyard

Kumquat: ISO 2500, f/4.5, 1/50 sec

photgraphing nature in your backyard

ISO 800, f/8.0, 1/500th.

photgraphing nature in your backyard-4

ISO 500, f/5.0, 1/1250th.

photgraphing nature in your backyard-3

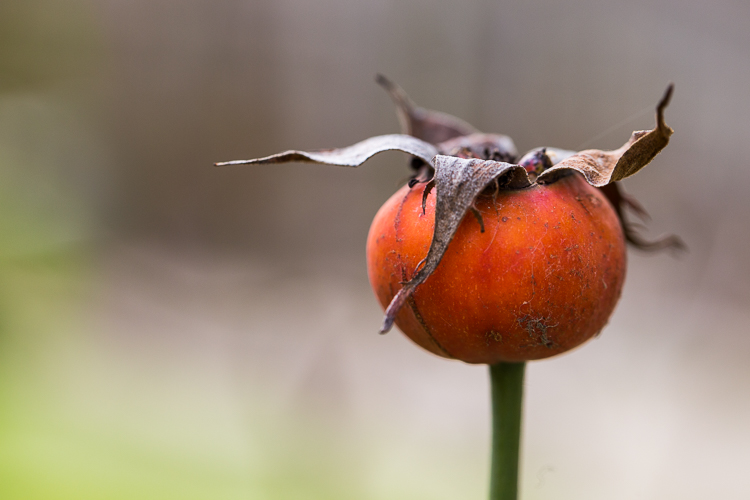
Orange rosehip: ISO 500, f/5.0, 1/160th

photgraphing nature in your backyard-2

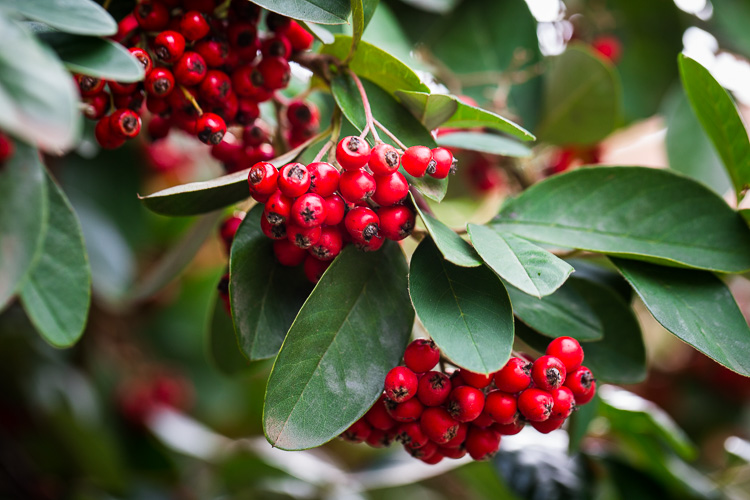
Bunches of red berries: ISO 500, f/5.0, 1/100th.

#3 – After the rain

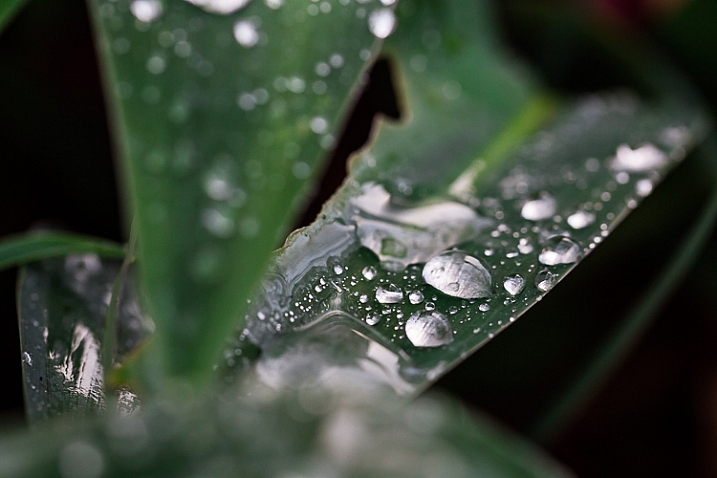
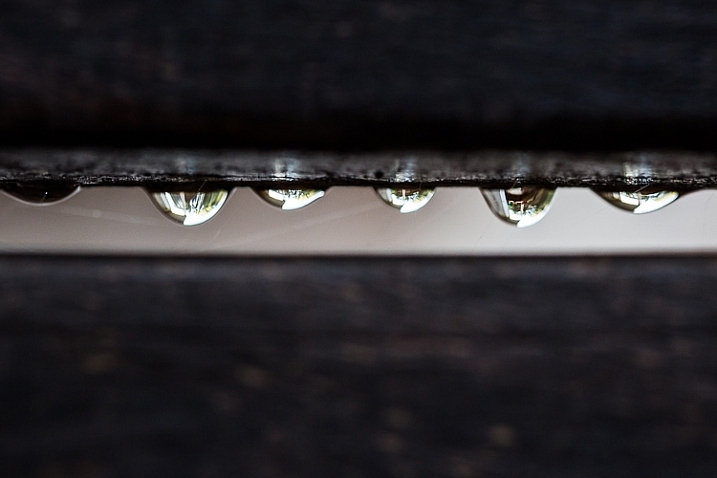
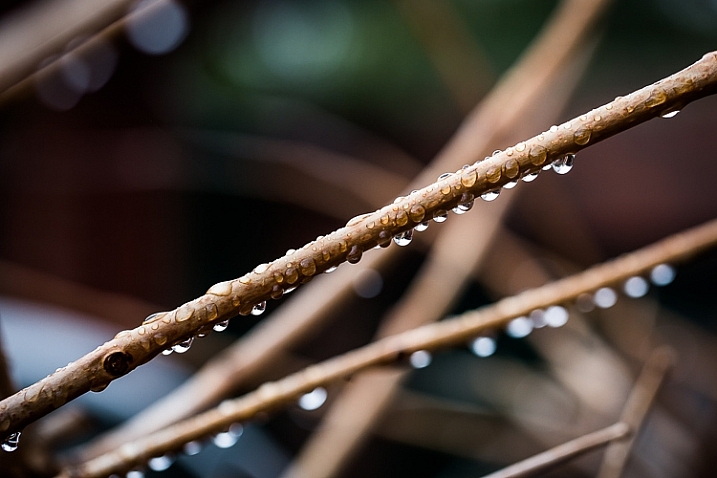
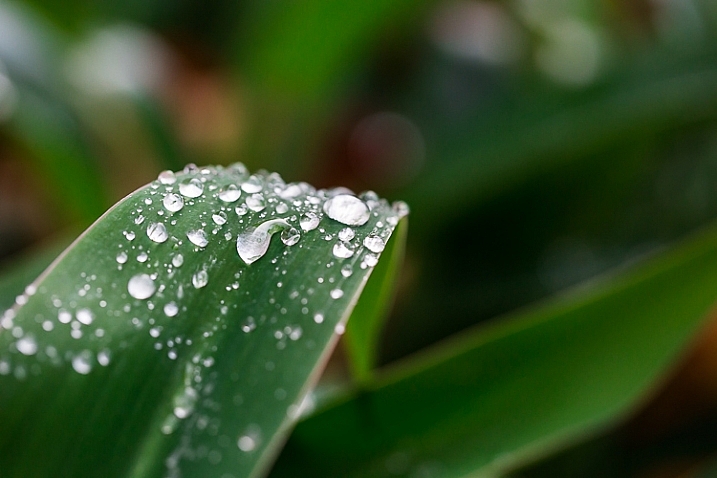
Raindrops are fascinating through the lens. Try photographing them from various angles, and in different lighting. When photographing a single droplet, or a string of them, isolate them by keeping the background uncluttered. You can do this by creating distance between the droplets and the background, and using a wide aperture to ensure it is blurred. Notice also how water sits in nice round droplets on some types of leaves, but on others it disperses.

image showing photographing nature in your backyard

Arthrododium leaves after rain: ISO 800, f/4.5, 1/80 sec

image showing photographing nature in your backyard

Raindrops hang from the slats on the back of a garden chair: ISO 1000, f/4, 1/125 sec

image showing photographing nature in your backyard

ISO 640, f/4, 1/125 sec

image showing photographing nature in your backyard

ISO 1000, f/4, 1/125 sec

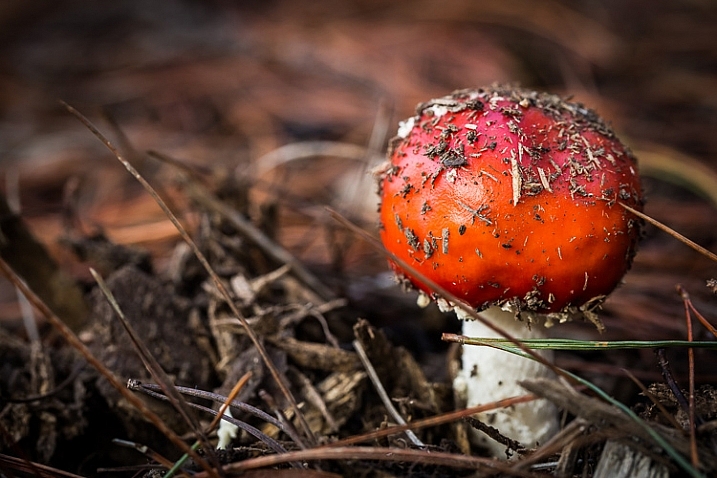
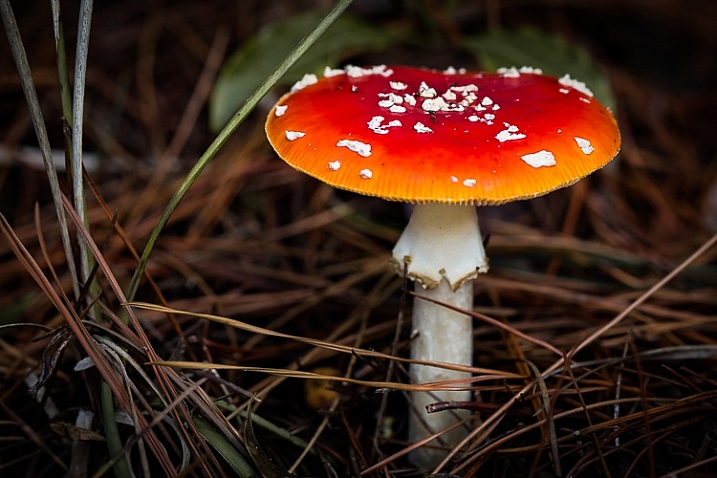
#4 – Mushrooms, toadstools and fungi

These are abundant in autumn and winter, but some species pop up throughout the year after rain. Look in damp, mossy places, on the sides of trees and log piles for them.

My personal favourites are the red toadstools with white speckles. They are evocative of fairy tales and magic, and their colours are a nature photographer’s dream!

image showing photographing nature in your backyard

Toadstool: ISO 1000, f/6.3, 1/250 sec

image showing photographing nature in your backyard

ISO 1000, f/6.3, 1/160 sec

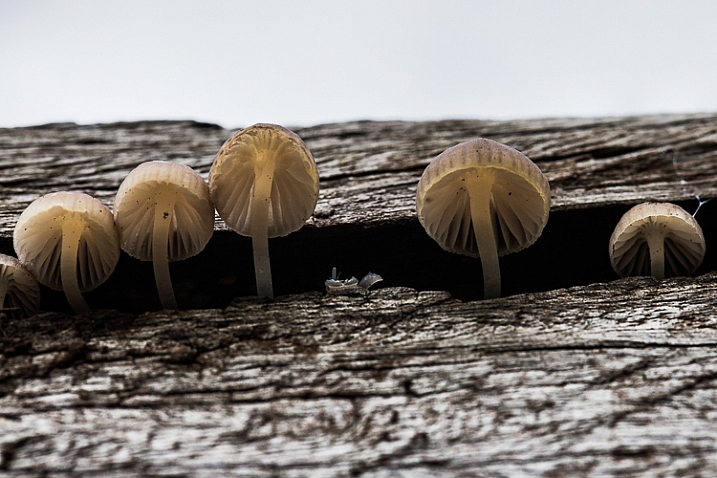
Don’t ignore the tiny, dull-coloured mushrooms and fungi. The ones in the photo below were growing in a crevice in the side of my herb garden. You can see by the scale of the woodgrain how tiny they were. From above, they were nondescript, but when I lay on the ground beneath them and shot into the backlight, they became translucent and I could see their delicate structure.

image showing photographing nature in your backyard

These tiny mushrooms were no bigger than the fingernail on my pinky finger! ISO 800, f/8, 1/160 sec

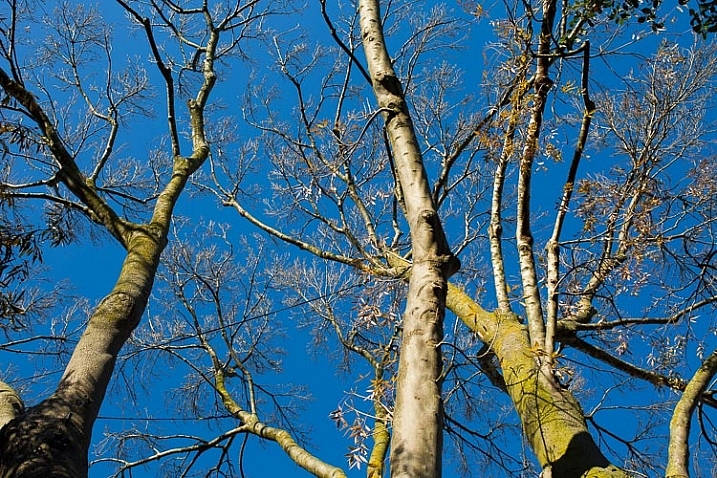
#5 – Look up . . . look down

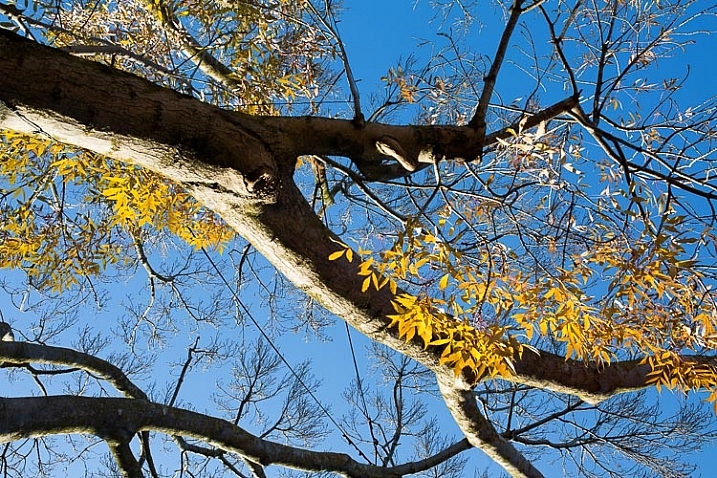
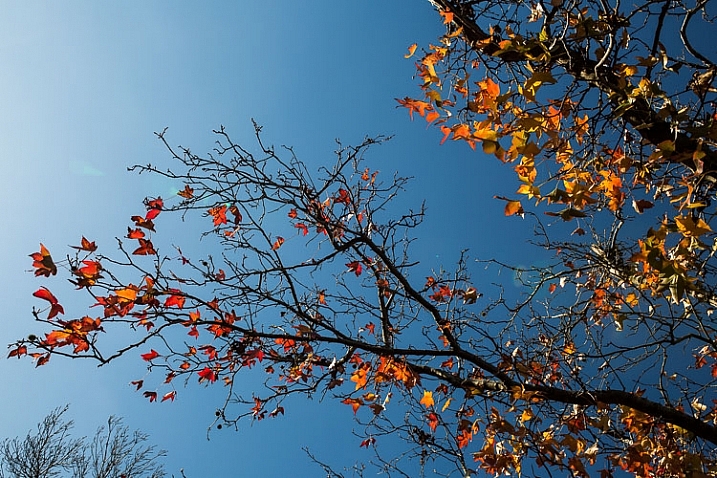
We have a ginormous tree in our backyard. It was probably planted when our house was first built in the 1920s, and its canopy is as big as the footprint of the house. One of my favourite things to do in the warmer months is to put a picnic rug on the lawn, and lie on my back gazing up into its branches. It is free therapy!

Watching the leaves change from bright spring green through to darker green in summer, the first blush of colour in autumn, through to rich claret just before they drop, never ceases to delight me. I have photographed it time and time again through the seasons. Even lying on the ground with my 35mm lens, I can only capture a small portion of the canopy.

image showing photographing nature in your backyard

Sigma 35mm Art lens, ISO 160 f/11, 1/60 sec

image showing photographing nature in your backyard

Sigma Art lens 35mm, ISO 160, f/11, 1/100 sec

If you are lucky enough to have trees in your garden, try standing or lying directly underneath them and shooting up into the branches. Notice how the light changes from early morning, throughout the day into late afternoon and evening. Branches, whether they are naked or covered with leaves, contrast beautifully against a blue sky. They are equally stunning at sunrise and sunset, and on a moonlit night.

image showing photographing nature in your backyard

Sigma Art lens 35mm: ISO 200, f/11, 1/200

If you haven’t any trees, look for interesting cloud formations to photograph. You can create a collection of skies to use as Photoshop overlays, to add interest to other outdoor photos such as portraits. Look for vertical cloud formations, fat white fluffy ones, and those lovely soft colours around the edge of the clouds at dusk and dawn.

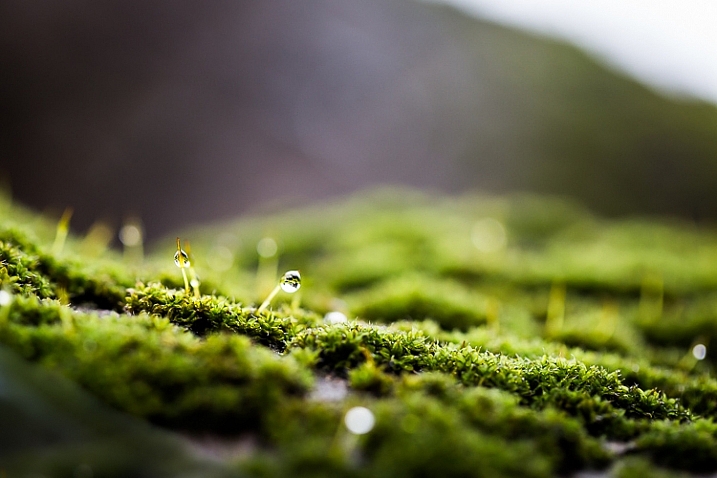
Down on the ground are a million microcosms in the moss, the lawn, between the paving stones, and the fallen bark and leaves. You won’t see them until you get down to ground level, so lie flat on your tummy and peer into another world.

image showing photographing nature in your backyard

Macro world: the moss on a tree trunk. ISO 640, f/4, 1/40 sec

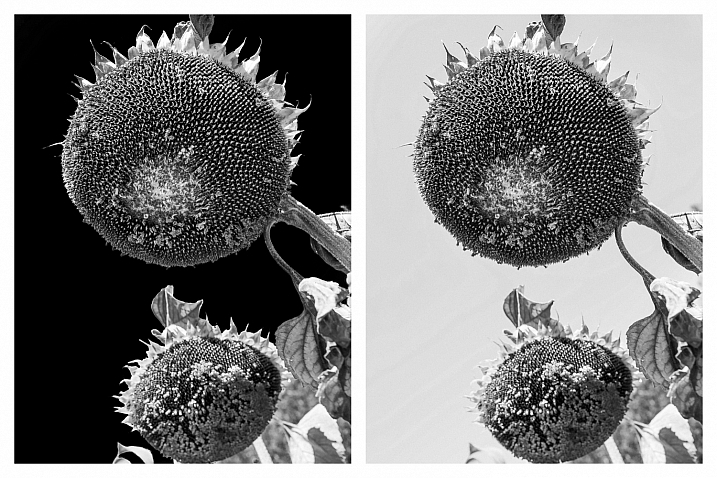
#6 – Black and white beauty

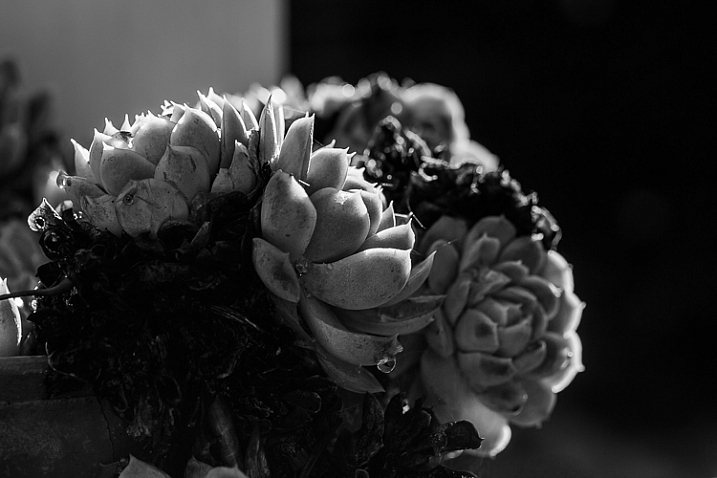
We tend to think of colour photography when we think of nature, but don’t dismiss the idea of black and white. Nature provides sculptural shapes and contrasting textures that make great black and white subjects. If you have succulents or cacti in your garden, they are often more interesting in black and white than they are in colour (except on those rare occasions when they flower). Ditto with white flowers against a dark background. Smooth pebbles, rough bark, snail shells, acorns and pine cones all look fabulous in black and white. Try strong, directional lighting, and a high contrast edit.

image showing photographing nature in your backyard

When I converted this file to B&W in Lightroom, I played with the sliders in the HSL panel. The photo on the left has the blue slider pulled all the way down to -100 to darken the blue sky. On the right, the blue slider is set to zero.

image showing photographing nature in your backyard

ISO 100, f/8, 1/100th. Converted to B&W in Lightroom.

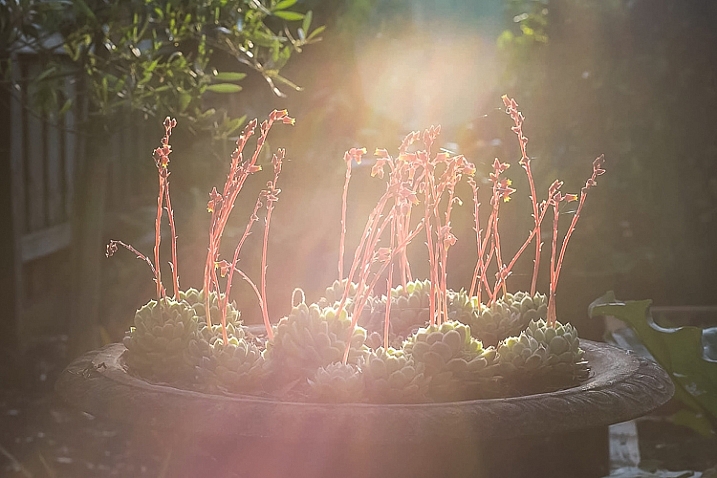
#7 – Experiment with sun flare and haze

Your backyard is one of the best places to experiment with effects and new techniques. Firstly, you become familiar with how things look at various times of the day, and throughout the seasons. Secondly, you don’t need to travel far, so you can respond to anything on a whim. If you spot something amazing while you’re sipping on your morning coffee, you needn’t even get out of your pyjamas to capture it!

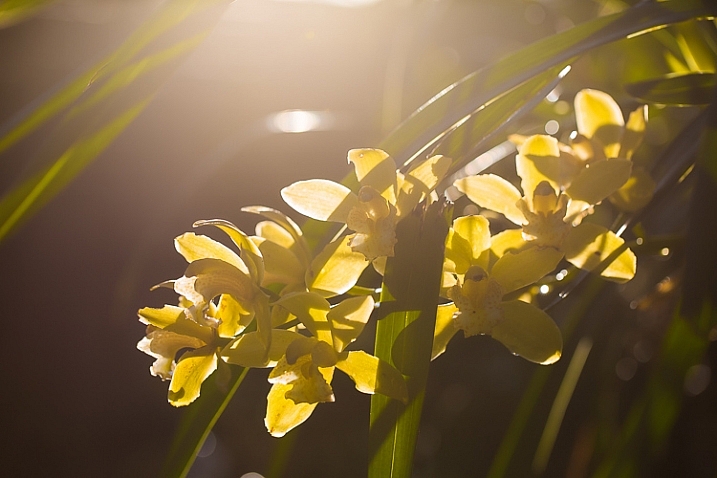
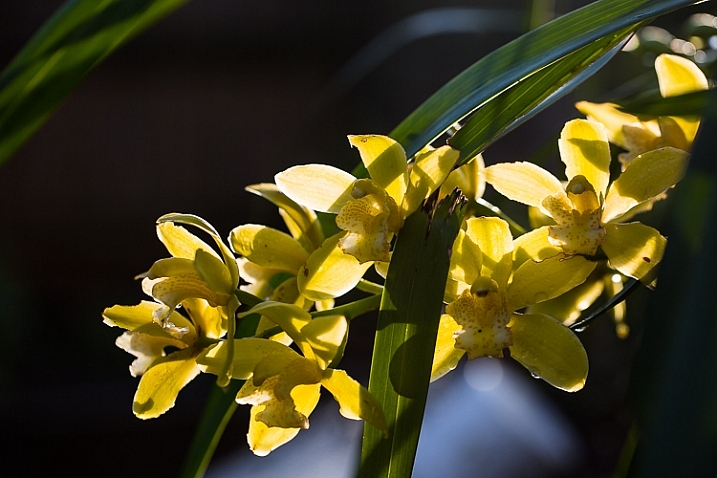
The subjects in the two photographs below are both visible from my desk. Every morning last summer, I noticed how this shaft of hazy sunlight would hit the planting of succulents on the pedestal, so I knew exactly what time to capture it at its best. Also sitting at my desk, I saw how the sun caught this spray of orchids just after the rain, and I rushed outside with my camera.

image showing photographing nature in your backyard

Canon 85mm lens, ISO 100, f/4, 1/800th.

image showing photographing nature in your backyard

Shot with sun flare and no lens hood: ISO 100, f/4, 1/1000 sec

image showing photographing nature in your backyard

For comparison, this is the same scene shot with a lens hood to cut flare: ISO 100, f/4, 1/320sec

#8 – Snails, bugs and spiders

For nine months of the year, there are a million creepy-crawlies in my backyard. Butterflies, cicadas, crickets, praying mantis, caterpillars, moths, bees, wasps and spiders (I could happily do without the latter two). At the time of writing this article, it is winter in Melbourne, so most bugs are hiding or dormant.

#9 – Birds and other wildlife

I’m going to preface this paragraph with honesty. Confession #1: photographing wildlife of any kind requires more patience and a longer telephoto lens than I possess. Confession #2: I have the greatest admiration for those who do it. I have a Pinterest board just for animal photos (you’ll notice a clear bias towards squirrels) and on 500px I follow a number of photographers, one of whom only photographs squirrels!

Editor’s note: our own Will Nichols specializes in photographing squirrels.

The kinds of animals and birds you’re likely to find in your backyard obviously depends on which part of the world you live in, and how built-up your neighbourhood is. You will know which kinds of critters visit your backyard, and what their habits are. With that in mind, find a spot where you won’t be too conspicuous, and be prepared to wait. If you’re using a long lens, you might consider using a tripod or monopod to avoid camera shake. Have your ISO and aperture all set to go, with a fast shutter speed to freeze motion. If you have been watching the animal or bird’s behaviour over several days or weeks, it may be possible to focus roughly on the area you expect them to appear – for example, the birdbath.

Also read: Guide to Attracting Critters to Your Garden for Backyard Wildlife Photography

#10 – Portraits in nature

Nature provides us with the perfect canvas for portraiture. Look for a bank of flowers, a bed of autumn leaves, or just a green hedge – the colours in nature never seem to clash.

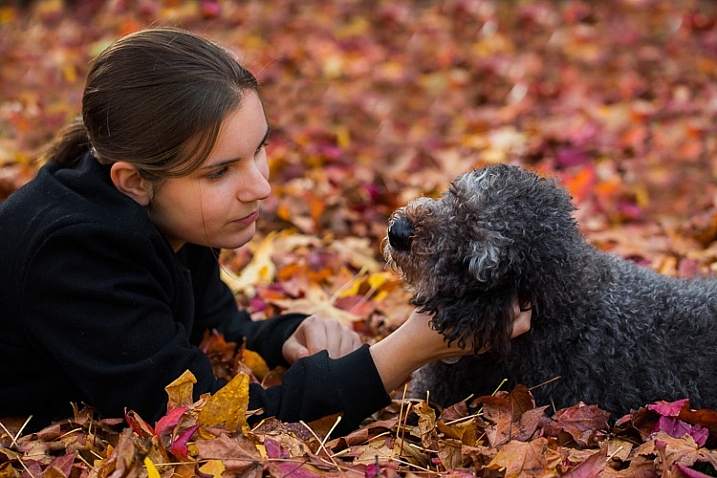
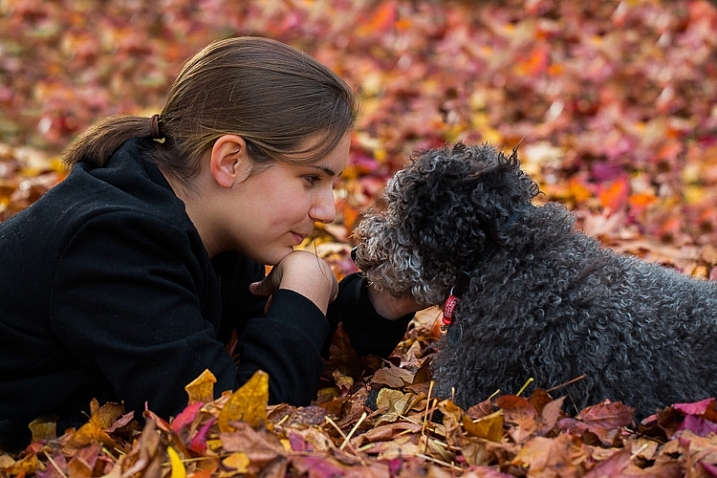
When photographing children and pets in particular, I almost always prefer an outdoor location over a studio. My eldest daughter usually runs a mile when she sees the camera, but the chance to roll around with the dog in these glorious leaves was clearly too much for her to resist.

I love how the soft hues flatter her skin tone. If you are shooting outdoors with lots of colours, such as flowers or autumn leaves, take care with your subject’s outfit. These portraits might been too busy if my daughter had been wearing a patterned outfit.

image showing photograph nature in your backyard

Not even teenage daughters can resist these leaves! ISO 320, f/4, 1/400 sec

image showing photographing nature in your backyard

ISO 320, f/4, 1/320 sec

Let’s hear from you!

So there you have it – plenty of inspiration to get outdoors and photograph nature in your own backyard. It’s time to stop reading and get out there with your camera. Please share your backyard nature photographs in the comments below … especially if they involve squirrels!

This week we are doing a series of articles to help you do better nature photography. See previous articles here:

  • 3 Habits Every Outdoor Photographer Should Develop to Avoid Missing Shots
  • 5 Tips for Better Nature Photography
  • 27 Serene Images of the Natural World
  • Weekly Photography Challenge – Nature

googletag.cmd.push(function() {
tablet_slots.push( googletag.defineSlot( “/1005424/_dPSv4_tab-all-article-bottom_(300×250)”, [300, 250], “pb-ad-78623” ).addService( googletag.pubads() ) ); } );

googletag.cmd.push(function() {
mobile_slots.push( googletag.defineSlot( “/1005424/_dPSv4_mob-all-article-bottom_(300×250)”, [300, 250], “pb-ad-78158” ).addService( googletag.pubads() ) ); } );

The post 10 Ideas for Photographing Nature in your Backyard by Karen Quist appeared first on Digital Photography School.


Digital Photography School

 
Comments Off on 10 Ideas for Photographing Nature in your Backyard

Posted in Photography