The post The Rule of Space in Photography: A Comprehensive Guide (+ Examples) appeared first on Digital Photography School. It was authored by Megan Kennedy.
In this article, I’m going to answer all your questions about the rule of space in photography:
What it is. How it works. And how you can use it for amazing results.
Specifically, by applying the rule of space to photography, you can embrace the quieter moments in visual imagery – and you can amplify the impact of your subject by balancing positive and negative compositional elements.
Let’s dive right in.
Canon 5D Mark II | Canon EF 50mm f/1.8 II with extension tubes | f/2 | 1/8000s | ISO 500
What is the rule of space in photography?
The rule of space in photography is a method of incorporating visual absence to give a subject room to breathe.
Although the rule of space is more like a guide than a rigid rule, it is a handy compositional device. It’s a great way to add a sense of vastness, depth, and/or motion to a photograph.
Why is the rule of space important?
To understand the rule of space, we first need to take a brief look at positive and negative space.
Photographers use the terms positive space and negativespace to contrast impactful and more subtle areas in a photograph.
Generally, positive space refers to specific subjects that command a viewer’s attention. Negative space, on the other hand, is less visually demanding and provides a frame for the main event in an image.
For example, in the image below, the clouds represent positive space, whereas the sky and dark shadows create the negative space that frames the main subject:
Canon 5D Mark IV | Canon EF 24-105mm f/4L IS USM | f/10 | 1/500s | ISO 100
So where does the rule of space in photography fit in?
In general terms, the rule of space governs the use of negative space within an image. By understanding the nature of the rule of space, a photographer can harness the intent of a subject, as well as add depth and perspective to the image.
The rule of space is important because it aids a photographer in articulating the energy of a photograph – and it guides the viewer’s eye by sculpting key visual events and affording the subject more room to move.
Working with the rule of space: the basics
To work with the rule of space in photography, first consider the behavior of your subject.
Ask yourself: What is the subject doing? Is it moving or stationary? How does it occupy space?
At the same time, visualize what you want to convey in the photograph. Is it movement? Perspective? Depth? Narrative?
The nature and behavior of your subject plus your intent should together determine how you apply the rule of space.
Perspective
One of the main ways the rule of space can impact a photograph is through perspective. Abundant space around a subject can make the subject appear smaller or larger depending on the camera angle.
For example, a subject photographed from a high angle, surrounded with minimal detail, can seem smaller and more immersed in negative space:
Canon 5D Mark IV | Canon EF 24-105mm f/4L IS USM | f/5.6 | 1/200s | ISO 100
Conveying momentum
The rule of space in photography can help you create the impression of movement.
To convey action, the rule suggests that space should be left either in front of or behind the subject (or both).
For example, if a subject is moving across a scene, you can aim to capture both the subject and the negative space surrounding the subject. The extra space conveys the subject’s movement, adding the momentum a tight crop may lack.
Allowing a subject room to move adds momentum. Canon 5D Mark II | Canon EF 24-105mm f/4L IS USM | f/10 | 1/640s | ISO 250
Adding depth
The rule of space in photography is not limited to highly active subjects; it works for stationary subject matter, too!
For example, in portraiture, your composition can be governed by pairing the gaze or gesticulations of the subject with negative space. A subject’s gaze naturally directs our attention – we want to see what the subject sees.
But when a gaze is met by negative space, the viewer’s eye will often naturally return to the original source of the gaze. The rule of space provides an organic way of adding depth and directing viewer attention.
You can also use the rule of space with non-human/animal subject matter – based on their movement, perceived gesticulations, and extensions. By following the momentum, composition, or behavior of a non-human subject, you’ll find ideal placements for negative space.
In the example below, I surrounded several blossoms with negative space; this additional room suggests growth and depth. It also highlights the detail in the individual florets.
Leaving extra room around specific flower heads to articulate their elemental composition is one way to emphasize non-human subjects through the rule of space. Canon 5D Mark II | Canon EF 50mm f/1.8 II with extension tubes | f/2.5 | 1/1250s | ISO 200
Rule of space challenges
The process of applying the rule of space to photographs is not that difficult in itself. However, a tendency to cram each image with as much visual information as possible can get in the way of exploring negative space.
Instead, deliberately and mindfully take a minimalist approach. You can also zoom out or physically take a few steps back from a subject to refocus on the rule of space.
Tips and techniques for working with the rule of space
Here are a few tips for working with the rule of space:
Tip 1: Use other compositional rules, too
Applying the rule of space to your photography doesn’t have to come at the cost of other compositional rules.
In fact, combining compositional tenets with the rule of space in photography can increase the chances of creating a successful photograph.
Compositional rules such as the rule of thirds, leading lines, depth of field, and repetition can all be used in conjunction with the rule of space to create engaging imagery.
Canon 5D Mark IV | Canon EF 24-105mm f/4L IS USM | f/5 | 30s | ISO 100
Tip 2: Let it breathe
The rule of space is all about giving a subject or a scene room to breathe.
So step back, zoom out, or even try a wider lens; that way, you can add a sense of spaciousness to your photos.
Tip 3: Experiment with different camera settings
Your choice of camera settings can help follow the rule of space more effectively.
For instance, you might use a shallow depth of field to surround a subject with negative space. You could also try using a slow shutter speed and panning your camera while leaving space before or after a subject to amplify movement.
You can amplify perspective with the rule of space in photography. Canon 5D Mark II | Canon EF 100-400mm f/4.5-5.6L IS II USM | f/5.6 | 1/125s | ISO 200
The rule of space in photography: conclusion
The rule of space aims to create a mindful harmony of positive and negative space.
And by applying this rule, you can emphasize and frame positive subject matter while generating an evocative balance of weight and weightlessness within an image.
So the next time you’re out with your camera, remember the rule of space – and do what you can to apply it in your images!
Now over to you:
Have you been using the rule of space in your photos? How are you going to change your compositions to improve your use of space? Share your thoughts (and photos!) in the comments below.
Rule of space FAQs
What is the rule of space?
In visual art, the rule of space guides your inclusion of negative space within an image.
What is negative space?
Generally, negative space refers to areas in a photograph that are not occupied by the main subject matter. Often, negative space serves as a frame to emphasize the key subjects in an image.
How do photographers use the rule of space in composition?
The rule encourages photographers to make use of negative space. There are many ways to do this. You can focus on coupling subjects with negative space by selecting minimalist backdrops, or you can pair the gaze of a portrait subject with additional negative space.
Who are some photographers that use the rule of space?
There are countless photographers who make use of the rule of space. For example, photographers Martin Parr and Helen Levitt made striking use of the rule, as well as Hiroshi Sugimoto, Michael Kenna, and Eric Kim.
When can I break the rule of space in photography?
Photography is all about developing personal creative instincts and approaches. That’s why compositional rules can be broken. The rule of space in photography is simply a guide – so if an image looks better without extra space, then go with your instincts. And if you aren’t sure, try taking a series of photos with different spatial approaches and analyze the results.
The post The Rule of Space in Photography: A Comprehensive Guide (+ Examples) appeared first on Digital Photography School. It was authored by Megan Kennedy.
The post A Lighting Ratios Guide: How to Make (or Break) Your Portraits appeared first on Digital Photography School. It was authored by Darlene Hildebrandt.
Want to take your portraits to the next level with lighting ratios?
You’ve come to the right place.
Because in this article, I’m going to share everything you need to know about lighting ratios for amazing portraits, including:
What lighting ratios are
Basic ratios for portrait photography
Tips for using ratios
(And much more!)
So if you want to become a portrait photography master, then let’s get started.
What is a lighting ratio in photography?
As a math term, a ratio is a comparison of one thing to another.
So when calculating lighting ratios, you measure the light falling on the light or highlight side of the face and compare it to the light falling on the shadow side of the face.
For instance, if you have twice as much light falling on the highlight side of your portrait, then the lighting ratio would be 2:1. If you have four times as much light falling on the highlight side of your portrait, then the lighting ratio would be 4:1.
But how exactly do you measure light?
While you can do it with the built-in meter in your camera, it is much easier and more accurate to use a handheld incident light meter. You see, your in-camera meter takes a measurement of the light reflecting off your subject – whereas a handheld meter can measure the amount of light falling on your subject and therefore gives you a more accurate value.
Lighting ratios: key concepts
To properly measure and understand lighting ratios, you need to know a few things.
First, light is measured by f-stops. The aperture dial on your camera generally goes up in 1/3-stop increments, though the full stops for aperture are f/1, f/1.4, f/2, f/2.8, f/4, f/5.6, f/8, f/11, f/16, f/22, f/32, etc.
(A simple way to remember all the numbers is to memorize f/1 and f/1.4; all the other pairs are doubled from these with a few rounded off.)
You also need to understand that shutter speeds are also representative of f-stops, with the full stops at 1s, ½s, ¼s, 1/8s, 1/15s, 1/30s, 1/60s, 1/125s, 1/250s, 1/500s, 1/1000s, etc. Shutter speed full stops are easier to remember as they are generally doubled (with a couple instances of rounding, such as 1/8s to 1/15s).
Finally, know that each full stop is double (or half, depending on whether you go down or up) the amount of light compared to the previous one.
For example, if you are shooting at f/4 and want to shoot at f/5.6, you will need to double the amount of light to get an equivalent exposure (you’ll need one more full stop of light). If you want to narrow your aperture by 2 stops, you’ll need to add 2×2 – or 4 – times more light. Likewise, 3 stops correspond to 8 times more light (2x2x2) and so on.
Knowing this, you can figure out how to create and measure ratios. In the next series of photos, I will demonstrate four different lighting ratios and how they were achieved.
1:1 ratio
A 1:1 ratio is even lighting.
In other words, there is no difference in the meter readings on both sides of the face. As you can see in the photo above, 1:1 lighting is very flat, and it can be achieved in a couple of different ways.
First, you can use fill flash and make the flash equal to the main light source. This is harder to achieve until you’ve had some practice, and you’ll often end up overpowering the light with flash.
Secondly, you could use a reflector. It will need to be very close to the subject, and the goal is to eliminate all shadows on the subject’s face.
This is a 1:1 ratio, and it’s pretty easy to see and recognize visually.
2:1 ratio
As the numbers suggest, a 2:1 ratio occurs when one side has twice as much light compared to the other.
So knowing that plus what you know about f-stops, we can set up this lighting ratio.
First, put your subject into the light where you are going to photograph them.
Using a light meter, measure the light falling on the side of their face closest to the light source (i.e., the highlight side). Let’s say that measures f/8. (Keep your shutter speed the same for all measurements to maintain consistency.)
Then bring in your reflector and use the light meter again, but this time measure the light falling on the side of the subject’s face that is farther away from the light source (from here on in, this will be referred to as the shadow side).
Note: If you are using a handheld meter, make sure to shield it from excess light that comes from the other side of your subject. So if you are metering the shadow side nearer the reflector, shield the meter so the main light source isn’t hitting it.
Now, you know that your highlight side has a reading of f/8. To achieve a 2:1 lighting ratio, you’ll need to get your meter to read f/5.6 (which is one stop less light) on the shadow side. So adjust the reflector distance until the meter settles on f/5.6.
Also, it may help to study the image above and recognize the contrast range from the highlight to the shadow side of the face. It’s subtle, but you should be able to see it.
4:1 ratio
A 4:1 ratio is double a 2:1 ratio. So if 2:1 featured twice as much light – or one stop – how much light will a 4:1 ratio require?
The answer is four times as much light (2×2), which is a 2-stop difference from the highlight side to the shadow side of the face.
I teach an available light class, and I always recommend working with natural light before you advance on to speedlights. With available or natural light and a reflector, it is much easier to learn and practice lighting because you can see what happens as you make changes (WYSIWYG). Flash is harder to predict as you can’t see it without actually taking a photograph.
So if our main light (the window) is still at f/8, what should be the value of our fill light/reflector (or the shadow side) to achieve a 4:1 ratio? Let’s do the steps again: f/8>f/5.6>f/4.
Therefore, two stops less than f/8 is f/4 (and this is the desired measurement to create a 4:1 ratio). Look at the photo above and compare it to the 2:1 image; do you see how the shadow side is getting darker?
8:1 ratio
The last ratio we’ll look at is 8:1.
The 8:1 ratio requires 8 times as much light, or 3 stops, on the highlight side of the face compared to the shadow side.
As you can see in the image above, 8:1 lighting is quite dramatic, and anything greater than 8:1 will not hold much detail on the shadow side of the face at all.
In fact, prints have a maximum contrast range of 4-6 stops, so unless you want one side of the face overexposed or the shadows pure black, I suggest keeping your lighting ratios at 8:1 or smaller.
Note that an 8:1 ratio can be a bit tough to create. You may need harsher lighting and possibly a black reflector to add blacks into the shadow side (rather than reflecting light onto it).
We calculate it the same way as above: if 4:1 is 4 times the light, then 8:1 will be 8 times the light, or 3 stops.
So if we are still at f/8 on our highlight side, we need to get our shadow side to read: f/8>f/5.6>f/4>f/2.8.
How to use lighting ratios
Now that we have this knowledge of ratios, let’s put it to use! Remember: The ratio can add to the success of your portrait, or it can ruin it.
If you look at the example images again, pay attention to how the mood of the image changes with the ratio. Notice how the higher ratios create more drama and power. Notice how the lower ratios are softer and more innocent.
Generally somewhere between 2:1 and 4:1 is the commonly used ratio for most portraiture. It’s enough to create three-dimensionality on the face, but not too much to create unattractive, deep shadows. I personally like a 3:1 ratio (1.5 stops) or a 4:1 ratio, myself.
For a child or baby, you often want a lower ratio because the softer result goes well with the subject matter. But a grizzled old cowboy with weathered, wrinkled skin and unkempt whiskers looks much better with 4:1 or 8:1 lighting. Why? He’s rougher, tougher, and can handle the increased contrast, plus it’s suitable for his look.
If you’re worried about not owning a handheld meter, you don’t necessarily need to go out and buy one. I’d only suggest you do that if you plan on getting into studio lighting. Otherwise, just practice seeing the difference between the various ratios (which is why I suggest natural light), and if they aren’t a perfect 4:1 or 8:1 or whatever, then it doesn’t matter. Just learn to recognize when it’s too strong and when it’s too weak for the effect you want to create.
Here’s another example of ratios at work. None of it is right or wrong, but which do you think is the most appropriate ratio for my subject? Figure that part out, and you’ll be ahead of the game!
My first shot had no reflector, and I found the shadows too dark and the overall portrait too contrasty. So I brought in a reflector for the next shot.
This is the second image I took, this time with a silver reflector. I found the ratio to be almost 1:1, and I wanted a bit more drama for a man’s portrait.
For this last image, I switched to a white reflector and backed it off a bit to get a ratio that I was happy with.
Note: I’d like to thank my subject, Gabriel Biderman from B&H Photo Video, for these shots.
Lighting ratio tips
Now that you understand the lighting ratio basics, let’s take a look at some quick tips that’ll make your photos look better.
First, get your subject out of the sun. Shooting in bright sunlight makes it almost impossible to control your ratios, plus the light won’t be desirable or flattering on the subject’s face. Use natural light from a window with indirect lighting (no direct sun coming in) if you can. And if the sun is streaming in, try adding sheer curtains or even stretching a white bed sheet across to diffuse the light.
Second, here are some lighting ratio starting points:
For babies and small children, use a lower ratio like 1:1 or 2:1. Children move so quickly that keeping them in the light and facing in the right direction is exceedingly difficult, and even light helps mitigate this issue.
For women, use a medium ratio like 2:1 or 3:1.
For men and business portraits, use a slightly stronger ratio, such as 4:1 or 6:1.
For artists, bands, and other dramatic portraits, use a higher ratio.
Finally, keep in mind that there are no steadfast rules on how to do ratios in portraiture. Like everything in photography, it’s about learning the techniques, then using them as suggestions while you experiment and find your own style or voice.
For instance, can you put 8:1 lighting on a glamorous movie star or 1:1 lighting on a coal miner? Absolutely!
(I’ll even give you some homework that’ll prove both ratios can be effective if they are done well.)
Homework and action steps
Your homework assignment is to research the following photographers. Tell me how they broke the general rules I’ve mentioned above, yet still had great success and amazing images:
George Hurrell
Richard Avedon
Yousuf Karsh
Those three photographers right there are some of the greatest portrait artists to ever live. Learn from them.
A lighting ratios guide: conclusion
Now that you’ve finished this article, you know all about lighting ratios – and you know how to use them for stunning results.
So what’s the next step?
Practice! If you simply dedicate a few minutes per day to working with portrait lighting, you’ll become a master in no time at all.
Now over to you:
What do you think of these lighting ratio concepts? Will they help you in your portrait photography? Share your thoughts (and images) in the comments below!
The post A Lighting Ratios Guide: How to Make (or Break) Your Portraits appeared first on Digital Photography School. It was authored by Darlene Hildebrandt.
Ansel Adams once said, “you don’t take a photograph, you make it.” Fortunately, with tools like Adobe Photoshop and Lightroom, producing that perfect image is a much less daunting task nowadays. Still, it can be hard to keep up with all the updates and changes. Have you ever fallen in love with a preset that you want to use in Continue Reading Photodoto
Comments Off on Ultimate Guide to Using Lightroom Presets in Photoshop
The post A Beginner’s Guide to Light Modifiers (For Stunning Portraits) appeared first on Digital Photography School. It was authored by Gina Milicia.
Light modifiers are a powerful way to shape or control light.
And with the right approach, you can use modifiers to achieve beautifully lit, gorgeous portraits.
In this article, I’m going to share everything you need to know about modifiers. I’ll take you through all the most popular modifiers – and I’ll explain precisely what they do and why you might want to use them.
By the time you’re done, you’ll be a light modification expert!
Let’s get started.
Are light modifiers really necessary?
Technically, you can do portrait photography without modifiers. You can shoot with a subject and an unmodified flash.
However, a naked flash produces hard light and harsh shadows, which I think look really unflattering.
That’s why I rarely work without some sort of diffusion modifier. It softens the light, softens the shadows, and gives you a flattering end result.
Nobody is ever going to tell you, “Wow, I love the way your hard lighting has captured and enhanced every single pore, line, and blemish on my skin. I actually look ten years older. Thanks!”
Hence, it’s often a good idea to start with soft, carefully modified lighting.
There are, of course, many really cool uses for hard lighting, and some photographers can make it look brilliant. I’m just not one of them. I like to control the light and only illuminate certain areas of my shot.
Therefore, for me, modifiers are absolutely essential.
A quick note about light modifier costs
Every kind of light modifier will have a top-of-the-line version and a really cheap version.
The main difference is that the cheaper versions won’t be as durable. This becomes important when you’re using them every single day.
So once you become an experienced studio photographer, it makes sense to invest in high-quality modifiers.
When you’re learning to use modifiers, however, I recommend choosing cheap versions. They’ll perform just fine, and you’ll save yourself a lot of money.
How to choose the perfect modifier for a photoshoot
Different modifiers affect the light in different ways.
Some modifiers broaden the beam to soften the light. Other modifiers narrow the beam to harden the light.
So when selecting a modifier, ask yourself:
What kind of lighting am I trying to create?
If you’re after the soft, diffused effect you’d get from an overcast sky, you might want to consider one of these modifiers:
If you want the soft light produced by early morning, twilight, open shade, or overcast skies, then choose a modifier that produces soft light such as a scrim, umbrella, or a softbox.
But if you want a harder light source like the sun on a cloudless day, try one of these modifiers instead:
As a general rule of thumb, if you are after hard light, then opt for a gridspot, beauty dish, Fresnel light, or even a naked flash.
Note that, if you’re shooting outside or near windows, your choice of modifier should depend on the ambient light. Harsh sunlight should be combined with hard modifiers, and cloudy light should be combined with soft modifiers.
Make sense?
When picking a modifier, it’s also important to consider the mood you’re after. Soft light gives ethereal, beautiful portraits, whereas hard light tends to be more intense, in-your-face, and dramatic.
Now let’s take a look at the different light modifiers in much greater detail, starting with:
The umbrella
An umbrella creates a quality of light that is soft, abundant, and very forgiving.
Umbrellas are a great choice if you want to light a large area with flat, even lighting. Because umbrellas are easy to use and relatively cheap, they are a good beginner’s light modifier.
On the other hand, umbrellas tend to over-light scenes, spreading lots of light around.
Lots of light. All over the place. Like a hose with its spray nozzle set to “everywhere.”
So think of umbrellas as an only-use-in-case-of-emergency style of lighting. If you overuse them, things tend to get a bit ugly.
An umbrella throws light everywhere.
Types of umbrella light shapers
There are a few types of umbrellas you should consider:
Silver/gold reflective umbrella: These babies throw light everywhere. They are great for lighting large groups of people. The silver umbrella will give you a slightly cooler light while the gold umbrella creates warmer light. Both produce a slightly harder result than the white reflective umbrella.
White reflective umbrella: This umbrella creates soft light with slightly less spread and contrast than the silver and gold reflective umbrellas. Because the style of light allows people to move around a lot while staying in a consistently even source of light, white umbrellas are great to use when you are shooting groups and couples under pressure, such as for an event.
White shoot-through umbrella: These are perfect as your first light modifier, as they diffuse and spread light quite evenly.
White shoot-through umbrella.
Umbrellas are a great first light modifier
When my children were young, I taught them how to ride bikes using training wheels. The wheels boosted their confidence. After a while, I took the training wheels off, and they rode on two wheels as if they’d been doing it all their lives.
I think using flash with an umbrella is the same. Use an umbrella as a learning tool until you get your balance, then move on to a better bike.
A final note on umbrellas
Umbrellas are great for indoor lighting.
But they’re tricky – and even downright dangerous – to use outside.
I’ve had countless (expensive) lights blown over when using umbrellas. So if you must use them outdoors, then please make sure you have somebody holding them or sandbags to keep them in place.
The scrim
After you’ve ditched your umbrella training wheels, the next step is to work with a scrim panel.
A scrim is a square or rectangular frame with a fabric diffusion material stretched across, like this:
Scrims are a really cool way to create large areas of soft, diffused light as if you’re shooting next to a large window or have clouds over the sun. And they’re great for diffusing flash, continuous light, and sunshine.
Remember: The larger the light source, the softer the light.
In fact, of all the light modifiers, a scrim is probably the most versatile and a must have in your kit.
This is a piece of equipment that you can easily make yourself. I used a DIY scrim for my first 10 years as a photographer.
The softbox
Softboxes are low-cost and versatile modifiers that create a beautiful, soft, easily controllable light source.
If I could only pick one light modifier to take to a deserted island, it would have to be the softbox. Small, medium, or large, this little puppy is my go-to light source for 80% of my shoots.
Why? The quality of light is soft, flattering, and malleable. Changing the angle and proximity of the softbox to the sitter easily changes the hardness of the light and the direction of the shadow.
It’s one of the light modifiers that most accurately recreates the effect of soft daylight coming through a window. I think what I like most about this light modifier is that it’s subtle. Highlights gently merge into shadows.
This image of a racecar driver, Glauco Junior Solleri, was taken using a speedlight and a small Lumiquest softbox:
For the above photo, I only wanted to light Glauco’s face and let the background fade to black. If I had used an umbrella, I would’ve sprayed light everywhere, illuminating the entire background and killing my moody vibe.
In fact, I think I love this light modifier more than Nutella.
(There! I said it.)
Softbox options
I use a few different kinds of softboxes depending on where and what I’m shooting.
If I’m doing a studio shoot, I love using a softbox with a white reflective interior. The white interior creates a softer look, and this particular softbox has an extra layer of diffusion on the inside, adding even more softness to the light.
Some photographers remove the interior panel because they like the added contrast of harder light, but I prefer less contrast.
You can also increase the spread and contrast of your light by using silver or gold interior panels.
The beauty dish
The beauty dish differs from other light modifiers because it gives you a distinctive circular, soft-contrast light, which is perfect for lighting faces and defining bone structures such as cheekbones and chin lines.
Beauty dishes also create a circular catchlight in your model’s eyes, which looks quite natural.
(You can see why these modifiers are popular with fashion/beauty and celebrity photographers.)
The downside of beauty dishes is that the falloff from light to dark is very rapid, so you’ll often get shadows under your model’s chin and nose. You can compensate for the shadows by adding a fill board, like a white reflector, to reflect light up into your subject’s face.
The beauty dish I have was pretty cheap, which goes to show that you don’t need to shell out a lot of money for every piece of equipment. I like mine because it works with my speedlight, my Elinchrom monolight, and my battery flashes.
I like that kind of versatility in equipment because it means I have more options on the day of the shoot and less to carry around!
Why should you use a beauty dish?
A beauty dish gives you a certain look. It will light a small area and flatten out your model’s features.
Beauty dishes make people look great, but you need to light your model in a very specific way – from above – to really pull it off.
The gridspot
The gridspot is a bit of kit you can use in conjunction with a speedlight, monolight, or battery-operated flash. The width of the grid and the size of the holes will affect the width of the light beam hitting your subject.
A gridspot creates hard, focused light. I love to use gridspots in the same way I use beauty lights.
Here are some portrait images I did with Australian actor Scott McGregor, showing lighting without a gridspot (left) and with a gridspot (right):
Why should you use a gridspot?
I like using gridspots because they create a similar light to beauty dishes. The light is a bit harder, but gridspots are perfect for single portraits; you can pop light onto someone’s face and shoulders without impacting the background mood.
Gridspots are also perfect for outdoor use as they won’t get blown about.
Beauty dish with a gridspot.
Fresnel light
A Fresnel is a light modifier that can be focused. They were first used in lighthouses, then the technology was developed in continuous lighting for movies and television.
The Fresnel light modifier gives a soft, crisp, and very distinct look to portraits.
In this photo of Australian actor Robbie Magasiva, I’ve placed the Fresnel light slightly to camera right to create a shadow. I’ve softened the light with an umbrella to increase the amount of daylight fill.
Fresnel lighting is soft and crisp, reminiscent of 1940s portrait lighting. It’s a style that has become really popular lately, particularly with fashion and editorial photographers.
The downside of this type of lighting is that it’s pretty expensive.
Octabox
Octabox with the front panel in.
An octabox is what you’d get if a softbox and an umbrella merged into one.
An octabox serves up soft light just like a softbox. But it spreads its light around more, just like an umbrella.
Octaboxes are fantastic for lighting large groups evenly. Plus, they give round catchlights.
Here are two different ways to use the Rotalux Deep Octabox. The image on the left of actor Firass Dirani is shot with a deep octabox as a beauty dish. The light source is hard and drops off rapidly under Dirani’s chin to add contrast; this not only defines and sculpts his features but also gives the image an edgy look.
The image on the right, of actor Harley Bonner, is shot using the same Rotalux Deep Octabox. But this time, I’ve added the interior and exterior baffle to give a much softer light, and this blends in with the muted light and low-key feel I was going for.
I don’t own a standard octabox because I’m not a huge fan. But my Rotalux Deep Octabox offers more directed lighting and is a match made in heaven for lighting single portraits.
Octabox with interior baffle exposed.
Octabox as a beauty dish.
Mixing modifiers
Model credit: Fat Tony and Co. Image courtesy of Nine Network Australia.
I often mix my lighting modifiers to make my images more interesting.
In this television promotional shot I did for Fat Tony and Co., I used a medium-deep octabox as my main light and a gridspot as a hair light. I also added an umbrella for fill light on camera left because the deep octabox alone was too moody, and I wanted more detail in the shadows.
So don’t be afraid to use several different modifiers in a single shot!
A beginner’s guide to light modifiers: conclusion
Well, there you have it!
You’re now ready to use light modifiers like a professional.
So grab a modifier or two, start shooting, and have fun!
Now over to you:
Which of the light modifiers on this list appeals to you the most? Which is your favorite? Share your thoughts (and example images!) in the comments below.
The post A Beginner’s Guide to Light Modifiers (For Stunning Portraits) appeared first on Digital Photography School. It was authored by Gina Milicia.
The post Abstract Street Photography: The Essential Guide appeared first on Digital Photography School. It was authored by Anthony Epes.
Want to know how to capture beautiful abstract street photography?
You’ve come to the right place.
While I am not a traditional street or abstract photographer, I love shooting in cities – and I love how street and abstract photography allow for so much fun and exploration.
So in this article, I’m going to share some tips, tricks, and ideas to enhance your abstract street photos.
And hopefully, the next time you’re out, you can capture some awesome photos of your own!
What is abstract street photography?
There is no one definition of abstract street photography, which is a relief. That way, you can make the genre your own.
For me, abstract photography means that you are removing the context of the subject so that what you’re looking at isn’t always clear. In abstract photography, you are re-forming the world to make your own subjects, making things that are not what they appear to be in real life.
And abstract photography is also most significantly about the emotion of the image – what mood, feeling, or atmosphere are you creating?
“Photography isn’t about seeing, it’s about feeling…If you can’t feel what you’re looking at, then you’re never going to get others to feel anything when they look at your pictures.”
– Don McCullin
Now, street photography often involves capturing candid moments of life out on the street. I like to keep the idea of street photography pretty broad, though – to include any imprint of humanity, any aspect of life, whether we see people or not!
Ultimately, when we take the idea of abstract photography out onto the street, we can have a lot of fun capturing the spontaneous, often chaotic, ever-changing nature of humans and life.
We can let our imaginations run wild and recreate the world around us.
So let’s get started!
Abstract street photos take work
Before I dive into my tips and tricks for abstract street photography, there is one thing I want to clear up:
Abstract street photography takes real work.
People sometimes presume that, because abstract street photos look simple, capturing great shots is easy, and that you don’t have to work hard to get a good result.
I would counter that taking an interesting photo is challenging in every genre – and perhaps even more so in abstract street photography, because there are no confines, no rules, nothing to aim for. Everything in your images is a reflection of what you can see in the world.
Your imagination is essential
For me, abstract street photography is pure imagination, because you are creating something almost from nothing. It relies on your ability to see the world creatively, not realistically.
Most of us are caught up completely in the real world, the things we have to do, the places we have to go, our responsibilities and tasks. So it’s easier to take a nice portrait than to go out and shoot something where you almost need to detach yourself from the real world that you live in and enter a state of pure creative imagination.
Abstract street photography is about capturing a feeling
The most important skill you should develop is the ability to be present in the moment when you are out shooting.
We love to escape the moment with continuous thoughts about the past and the future, about what emails we need to write, what we need to say to our annoying neighbor, what happened yesterday at work, etc.
We can also get too involved with thinking about how we are shooting – are we in the right spot, should we go somewhere else, did we bring the right lens?
But while some analysis of what we are doing is essential, it can also stop us from experiencing and seeing what’s happening all around us.
When we are fully in the present moment, and not thinking or planning, we can really appreciate our experience, and we can connect more fully to what’s happening around us.
When we see a brooding sky that gives an ominous feeling, we can capture that. When we see something weird and a little gross on the floor that intrigues us, we are more likely to notice it.
And if we see a man walking to work looking a little downcast, we can capture it:
And by being totally in the present moment, we are more likely to bring the feelings of what it’s like to be there and see what we are seeing into our photos.
Abstract street photography is your interpretation of the world
Photography helps me become more of who I am. It helps me see more of the world and really encourages me to pay attention. When I shoot, I allow myself free reign to follow my curiosity.
Abstract street photography is one of the most fun and joyful photographic genres. For me, it’s about playing, about just walking around and looking at things while thinking:
Thatreminds me of what I think the texture of the moon is like.
Or:
Those dark shadows make me think of a spooky story I read as a child.
Or:
A part of that sculpture looks like an elegant painting.
I am particularly fascinated by things I find at my feet. I have endless photos of weird things I’ve seen: crushed, burned burger buns, smashed fruit, accidental paint drippings, and more. I am entranced by these oddities.
“I really feel sorry for people who think things like soap dishes or mirrors or Coke bottles are ugly, because they’re surrounded by things like that all day long, and it must make them miserable.”
– Robert Rauschenberg
Find what entrances you out in the world. Find what makes you go, ooh, that’s super interesting!
The more curious you are, the more you’ll find. And the more it will become your photography, your interpretation of the world.
Composition in abstract street photography
How can you create beautiful abstract street compositions?
It’s useful to draw from all of the traditional compositional rules and techniques, such as negative space, leading lines, and the rule of thirds. But I’d like to mention a few other guidelines that are particularly useful when we are creating abstract street photos, starting with:
Reduction
I often like to say that composing a photo is more about removing and reducing what is in the frame. It’s extremely easy to overcomplicate your photos, to have complex backgrounds, to include elements that detract from your subject, to not notice things in the corner of the shot.
This is particularly true with street photography, because there is always so much going on in the city. Yet we often don’t actually notice all of the visual information because our brain spends a lot of time blocking most of it out. If we noticed everything, it would be very overwhelming for us. Our brain can only deal with so much, so it’s selective about the information allowed inside.
But when we are shooting, our camera notices everything! So we can end up with unwanted elements, or not really see the complexity of the background until afterward.
Ultimately, we have to be really aware and conscious of what we are placing in the frame.
When out with the camera, I encourage you to ask yourselves:
What can I remove from this photo? What is unnecessary? What distracts from the subject?
Textured glass is an awesome abstract element to play with – combining subtle, pretty colors, the light streaming through, and interesting textures from the glass.
Breaking the world down into elements
One way to really help your brain deal with the visual complexity all around you – and to help your eyes compose beautiful, striking, and intentional photos – is to look at the world not as one mass of things, but as many elements.
When you break the world down into elements, you see a collection of shapes, lines, forms, etc. And you don’t see the world in 3D surround sound where everything is joined together.
Can you look around at your environment now and see each thing as one singular element? Try it! It’s an exercise that helps you become more intentional about what you are placing in your frame.
Celebrating the purity of light, form, and shape
I love abstract photography because you can focus on the singular elements of light, shape, and form.
Shapes can be fascinating as shapes, not as anything else:
When we focus our attention on something small that holds our interest, we can find fascinating worlds to photograph.
“The moment one gives close attention to anything, even a blade of grass, it becomes a mysterious, awesome, indescribably magnificent world in itself.”
– Henry Miller
What does the photo below make you think of?
How about this one?
Color
As you can see, I am not a black and white street photographer. I am an unashamed lover of color, and I love to celebrate all that color brings to our world.
My favorite photographer of all time, Ernst Haas, said:
“Color is joy. One does not think of joy. One is carried by it.” And I couldn’t agree more.
Abstract street photography is almost an excuse for me to just celebrate the power and joy of color. To let colors attract my attention and totally dominate the photo.
Texture
Being out on the streets is an invitation to explore so many fascinating textures.
Some of my favorite textures are the crumbling walls, torn posters, and disused locations of the forgotten parts of our cities.
Capturing textures gives such a feeling of realness to an image, as if the viewer can just reach in and feel the roughness of the wall, the coldness of the pipes, and the grain of the wood.
When we notice the world as a series of different textures, your photos gain plenty of depth. You’re giving people more of a sense of what it feels like to stand where you are standing, and what it feels like to look at what you are looking at.
Humor
Street photography is filled with humor. This is natural, given how much we humans love to do strange and funny things.
Humor is also a really fun thing to play with when you are doing abstract photos.
For instance, you can try disconnecting things from themselves:
Or you can just look for humorous objects:
Here, I see an alien looking up at me from the floor! This phenomenon is known as pareidolia, where you see a face or an image of something that isn’t really there.
Abstract street photography ideas
The best way to embed knowledge is to practice what you’re learning. Information is often retained only briefly if we don’t make the effort to implement it.
And here’s another reason to practice:
So you can take the ideas and knowledge you find interesting and make them your own. For me, it’s super important that I’m not confined in my photography, and that I’m not restrained by other people’s ideas of what’s right or wrong, good or bad.
Street art is one of my favorite things to shoot. I love to find new street art when I am out.
So use these ideas as starting points to leap off in your own direction. Maybe take two ideas and see what happens. Or just do an in-depth exploration of one!
Pareidolia
The Cambridge Dictionary describes pareidolia as “a situation in which someone sees a pattern or image of something that does not exist, for example a face in a cloud.”
Photographing pareidolia is a fun challenge; it’s about finding things that look like other things.
Easiest for me is to find faces or animals in completely unrelated subjects.
Is this a crocodile? Is it a smiling alien?
Reflections
I love shooting reflections because they offer so many opportunities to create really cool images.
But while reflections create naturally busy images, still be conscious of what you are placing in the frame so the whole composition looks pleasing to you, not just chaotic.
I love reflections that look almost real. You’ll think it’s a shot of the street – but on second glance, you see all kinds of things going on in the layers of reflection. Like in life!
Silhouettes and shadow
When we are shooting silhouettes and shadows, especially of people, we can capture some really amazing, pure expressions – because we don’t have the details of what the subjects look like.
I shot this one in Istanbul, and I love to wonder what was happening. Was it a morning greeting? An argument? A heated political discussion?
Here, I’ve gone more abstract and I’ve put two shadows together:
What are the objects? Who knows? What do they look like? That’s for your imagination to decide.
Abstract self-portraits
We always have a subject when we are shooting ourselves, right?
I didn’t use to enjoy taking self-portraits, but it’s something I do more now. Why?
Because I can experiment and not worry about what the subject thinks!
Take yourself to interesting places, then do self-portraits that play with reflections, color, and light. It will help you understand so much more about photographing people.
Plus, if you’re like me – the main photographer in your family group – at least you’ll finally have photos of yourself!
What’s at your feet?
Ever since I discovered Ernst Haas when I was young, I realized that anything could be my subject. All I had to do was be fascinated by it. That was the only requirement.
From that point on, I shot all kinds of road markings and things at my feet, as Ernst Haas did.
I find this exciting because it elevates everyday, mundane objects into something that can be beautiful (beauty in the mundane!).
We rarely pay close attention to things like the streets we are walking on, yet they offer so much possibility!
We know what this is, but it becomes something a little different when we disconnect it from its environment. A letter “F” in thick yellow paint, with the rough texture of the gravel pushing through and some pretty light.
Perspective
We can use perspective in a really cool way with abstract street photography. We can find unique perspectives that present our subjects differently and make the subject look unexpectedly different.
I especially like to shoot upward and disconnect parts of buildings or things I see above me from their whole. The viewer then sees the shapes, the colors, and the textures without any knowledge of where or what it is.
This is a roof in Morocco. I was looking around a building, and then I looked up. Seeing dark shapes through the thin perspex roof was really interesting to me. Looking up is just as important as looking down at your feet!
Abstract street photography: conclusion
Hopefully, you now feel equipped to capture some beautiful abstract street photos!
So go out, explore, and have fun with your abstract photography.
Now over to you:
Do you have any abstract street photography you’d like to share? Do you have a favorite tip or trick from this article? Share your images and thoughts in the comments below!
The post Abstract Street Photography: The Essential Guide appeared first on Digital Photography School. It was authored by Anthony Epes.
The post Composition in Photography: A Complete (and Modern) Guide appeared first on Digital Photography School. It was authored by Ana Mireles.
If you’re looking to learn about composition in photography, you’ve come to the right place.
In this article, I’ll cover what composition is, and I’ll explain how to use it to make your images eye-catching and unique.
So whether you’re a beginner photographer learning the basics or a more experienced shooter who wants to improve, read on to find out some of the most effective composition tools, concepts, and guidelines available!
What is composition in photography?
Composition in photography refers to the position of elements inside the frame and how they interact with each other.
Ultimately, composition is about the visual structure of your image.
Why is composition important?
The composition of your photograph impacts the way it’s perceived by others. When you choose what to fit inside the frame and what you leave out, where to position each element and so on, you’re capturing a scene with your unique vision.
That’s why it’s important to carefully compose your photos!
Basic techniques and concepts for composition in photography
We are instinctively attracted to images with a good composition.
Why?
Because we find them harmonious or interesting!
However, we are not as naturally skilled at creating stunning compositions.
That’s why photographers have developed basic compositional guidelines and concepts that can quickly improve photo compositions – without requiring years of experience.
Starting with:
The rule of thirds
You’ve probably heard about the rule of thirds – or at the very least, you’ve seen it. That’s because most cameras, including the one on your smartphone, have a rule of thirds grid overlay.
The rule of thirds grid is formed by four lines – two vertical and two horizontal – placed at an equal distance from each other and the photo edges (so the frame is divided into thirds).
Like this:
But what actually is the rule of thirds?
It’s a guideline stating that you should position compositional elements along your gridlines – and that the focal point of your composition should sit at one of the gridline intersection points.
You can follow this rule in both portrait and landscape orientation, and it works for all types of photography. For example, if you are doing a full-body portrait, you should often place the subject toward one of the gridlines and not in the center.
And when you’re photographing a landscape, you should put the horizon toward the top or bottom third of the image and never in the middle.
Note that the rule of thirds is a guideline, not a true rule. Once you’ve mastered it, I recommend trying to violate it with other concepts – such as symmetry, or with even more complex techniques such as the golden ratio (discussed below).
Leading lines
Leading lines direct the viewer through the image, like this:
When you read a text in English, you automatically start at the top left. Then you continue toward the right until the end of the line.
The same thing happens in photography. When we see an image, we also “read” it. Your eye goes from one element to the next – in order to view details and understand the story that’s being told.
That’s where the leading lines come into play: They guide the eye through the image.
Leading lines can be present or implied, and they can be straight or curved. For example, a leading line can be a curvy road getting lost in the mountains. This will compel viewers to follow the road, pulling them into the image.
Texture
Texture is often overlooked as an element of the composition. You can use it to create contrast between two elements – one that is smooth and one that is rough, for example.
You can also use texture to create interesting shapes and leading lines, or to add interest to an otherwise dull subject.
To work with textures, you need to consider the type and direction of the light. A hard light that comes from the side will emphasize the texture. A soft light coming from the front flattens the surface.
Color
Color is a key consideration for composition in photography. There are so many color harmonies that you have endless possibilities!
You can use complementary colors to create contrast and make your subject stand out. And you can bring together apparently unrelated elements that are united via a color scheme.
A good way to learn and understand color palettes is Adobe Color. You can use this tool even if you don’t have an Adobe subscription.
Simply select a color wheel with different color harmony rules, such as monochromatic, complementary, etc. You can also upload a photograph to extract the color scheme or gradient. And to stay updated, you can browse trends based on Adobe Stock and Behance.
My favorite tool in Adobe Color is Explore, where you can input a concept or a mood and see the colors that represent it (with multiple examples from the visual arts).
Shape
As photographers, we’re used to thinking of ways to add depth to a two-dimensional surface.
Because of that, it’s easy to overlook the importance of shapes. Yet when you’re composing your images, you can use shapes to establish a careful arrangement.
Think of a cake being photographed from the top; that’s a circle. If you cut out a slice, then you’re adding a triangle to the composition.
Every shape gives a different feel to our photographs. For example, squares convey stability, while circles make you think of movement and energy.
That’s why posing a group for a corporate portrait usually means forming squares or rectangles, whereas family portraits are often posed in triangles or dynamic shapes.
A good way to practice shape-based composition is by using shadows or shooting silhouettes. That way, you take out any three-dimensionality and focus only on the shape of objects.
Symmetry
Symmetry is defined as something that is exactly the same on both sides, such as a mountain peak or a tree trunk.
And it can work great in art – as long as you use it carefully.
Note that, in art, a scene is rarely 100 percent symmetrical. Instead, you’ll end up with scenes that are almost symmetrical and are well-balanced on both sides.
Like this lake photo:
The trees and water aren’t perfectly symmetrical, but they’re close, and the overall scene has a feeling of balance.
Take a portrait as another example. If you photograph a face perfectly centered in the frame, your image will be symmetric. It won’t matter if the subject has a birthmark on one of their cheeks, or that one of their eyes is slightly lower than the other – the symmetry will dominate.
One of the reasons we find symmetry so appealing is because we often find it in nature. And psychologically speaking, symmetry offers a sense of order that makes us feel at ease.
(A great way to play with symmetry in your photography is by shooting reflections or patterns!)
Contrast
Another important concept that can enhance your composition is contrast.
Since we are talking about photography, the first thing that comes to mind is contrasting light, such as low key photography. Here, you capture a very dark image where only a small detail is highlighted (which makes for a highly dramatic result).
However, tonal contrast is not the only type of contrast you can use to improve your compositions. You can also use color contrast (as discussed earlier), juxtaposition, and conceptual contrast (which pairs opposite ideas or aesthetics).
Advanced composition in photography
Once you’ve mastered the basics of composition, it’s time to challenge yourself and move on to more advanced techniques.
Here are some of the most popular tools to consider:
The rule of space
The rule of space tells you to leave space in front of the subject, especially if it’s a moving subject. The idea is that the viewer needs enough room to imagine the subject carrying on the action that it’s performing.
For example, if a duck is paddling away, you would put significant space in front, like this:
And according to the rule of space, if you photograph a person who’s running to the right, you should place them on the left side of the frame (and vice versa).
But remember that there’s an exception to every rule, especially when it comes to composition. So if you want to add tension or intrigue the viewer, try violating the rule of space!
The complicated thing about composition is that you must choose to apply or break the rules depending on the message you want your image to convey.
The rule of odds
The rule of odds is based on the principle that people find it more interesting to see odd numbers. While even numbers show stability and work well for symmetric compositions, odd numbers allow the eye to flow through the image.
So according to the rule of odds, you should include odd numbers of items in your compositions.
I recommend you use this rule when it fits the situation, much like you would with shapes. If you want a dynamic composition, you use triangles, diagonal lines, and odd numbers. And if you prefer stability, you can choose straight lines, squares, and even numbers.
In any case, the important thing is to use the rules to your advantage and take control of your compositions.
When you’re shooting food or products, it’s often easier to follow the rule of odds.
But following the rule of odds isn’t as easy when you’re photographing a family of four; you can’t just decide to exclude one of them!
(Though when you’re facing this situation, you can arrange the group so the viewer sees one plus three instead of four.)
Triangular composition
In the first part of the article, I talked about using shapes to compose your images.
But did you know that the most popular shape in composition is the triangle?
You can create triangles with poses in portraits, mountains in a landscape, or a church tower on your travels.
However, if you want to up your game a bit more, you can use golden triangles. This composition technique divides the frame first with a line that connects one corner with the opposite one, then adds two smaller lines coming out from each of the remaining corners.
Like this:
Ideally, you would place the most important elements of the composition where the lines intersect. To achieve this, you may have to tilt your camera; this is called a Dutch angle (aka the Dutch tilt, German tilt, or Batman angle).
That’s why it’s not always possible to use the golden triangle guideline (or, at least, it’s not always the best choice!).
The golden ratio
The golden ratio is a mathematical term that was later applied to art and eventually photography. It equates to 1.618, and there are two ways it can be applied to photographic composition:
As a grid or as a spiral.
The golden grid (aka the Phi Grid)
The Phi Grid divides the frame into nine blocks, just like the rules of thirds.
However, this grid doesn’t follow a 1:1:1 ratio – which means the blocks are not the same size. Instead, the grid is 1:0.618:1, so you get smaller blocks toward the center, like this:
This composition tends to be more natural, as the golden ratio is also found in nature. It also has a better reputation than the rule of thirds, which many consider to be amateurish – a first step that should be quickly outgrown for more complex techniques.
The golden spiral (aka the Fibonacci spiral)
For this composition tool, you should follow a spiral whose growth factor is the golden ratio.
It looks like this (though note that it can begin at any corner of the frame):
This spiral is found in natural structures such as sunflowers, pine cones, seashells, etc. You can also find it in many artworks and buildings because many artists have used it throughout the centuries.
To train your eye, you can print or draw a golden spiral, then use it to study the photographs from Irving Penn or Henri Cartier-Bresson, who both used the golden spiral to achieve astonishing results.
Composition in photography: conclusion
Now that you know most of the popular composition tools, you can use them to dramatically improve your images!
I know it’s a lot of information, but composition in photography will become more intuitive as you get more practice.
My suggestion is to keep it simple at first and practice the tools one by one.
Once you get comfortable with each composition guideline, you can combine them to achieve a more complex result.
And remember:
These are just guidelines you can use as you see fit to find your own artistic vision.
Now over to you:
Which of these composition techniques is your favorite? Which do you plan to use in the future? Share your thoughts in the comments below!
Composition in photography FAQs
How do I emphasize my subject?
To emphasize an element in your photograph, you need to draw the viewer’s attention to it. You can use composition techniques, such as leading lines, to achieve this.
Is the rule of thirds the most important composition rule in photography?
No, the rules of composition don’t have a hierarchy. Instead, rules work better in different situations, and the best technique for one photograph can be wrong for the next one.
Can I improve my composition by photographing with a smartphone?
Yes, these rules apply to all types of photography, including mobile and video. If you want some help getting started, most camera phones have a grid overlay that follows the rule of thirds. You can enable/disable it in the settings section. Alternatively, you can install a camera app that supports different types of grids (such as A Better Camera).
How can I improve my composition in Lightroom?
You can use Lightroom’s overlays to improve the compositions of your photos. To use these, select the Crop tool from the Develop panel. Make sure that the Overlay is enabled. Then press the “O” key to toggle between all the available overlays.
Can I break the rules of composition?
Absolutely! Even though some of them are called rules, they are only guidelines, tools, and techniques to help you achieve better results. There’s always flexibility to experiment. It’s important to know the rules before you break them, though!
The post Composition in Photography: A Complete (and Modern) Guide appeared first on Digital Photography School. It was authored by Ana Mireles.
Are you struggling to capture incredible shots in a humid atmosphere? This is the story of almost every photographer. If you have worked in sweltering temperatures, you might be familiar with the preparations and care your camera needs to prevent condensation. Humidity and your camera are rivals. Photographers need to store their cameras and lenses in an ideal storage humidity Continue Reading Photodoto
Comments Off on A Guide To Camera Lens And Humidity: Protecting your Equipment
The post A Beginner’s Guide to Working With Flash Off-Camera appeared first on Digital Photography School. It was authored by Gina Milicia.
I spent the first three years of my photography career avoiding the use of off-camera flash.
Why?
Because I couldn’t wrap my head around the concepts and science behind it.
I tried to cover up my struggles by saying things like “I’m a natural light photographer,” or “I really don’t like the aesthetics of flash photography.”
But I eventually – reluctantly! – invested in a flash for my first Nikon. This was the ’90s, pre-digital, pre-autofocus, and pre-TTL. I had to calculate how much power to use via a chart on top of the flash.
Each photoshoot I went on that required flash was preceded by a sleepless night filled with anxious dreams about turning up to the shoot naked. And the thought of having to use flash also had a mild to moderate laxative effect on me.
Luckily, those days are long gone and shooting flash off-camera has never been easier! In this tutorial, I’ll show you the quick and easy steps I take to shoot portraits using off-camera speedlights.
The gear essentials
If you’re going to use off-camera flash, here’s what you’ll need:
1. Speedlights
I use speedlights most often when I’m traveling and need light, portable flashes, when I’m working on location without access to power, or when I’m working in small, confined locations where studio flashes would be too powerful or cramped.
I work with two Canon speedlights. A great alternative if you are looking to save a few bucks is the Yongnuo YN560 IV. It has a very similar look to Canon speedlights as well as Nikon’s SB speedlight series.
2. Remote triggers
Remote triggers allow you to fire speedlights when they’re not mounted to your camera. As you can imagine, this is essential when using off-camera flash.
The cheapest and most reliable way to fire your speedlights off-camera is by using a sync cord — basically, you connect your speedlight to your camera via a long cable.
The drawbacks of using a cable are that it reduces the distance you can be away from your flash, and it can create a tripping hazard. That said, I still carry a couple of spare sync cables in my kit; remote triggers do fail from time to time, and the sync cords have saved me on a few occasions.
The next option for firing off-camera flashes is cheap infrared triggers. These do the job of setting your flash off remotely, but they’re sensitive to bright sunlight and affected by external factors such as alert lights on emergency vehicles and forklifts, etc., so they can go off without warning. I started out with a $ 30 set of triggers and used them for a couple of years before trading up to PocketWizards, which I’ve been using for the last eight years.
3. Light stands
Speedlights don’t float in the air – which means you need something to hold them up!
Now, there are three options when it comes to mounting speedlights off-camera:
First, you can use a light stand. Light stands vary in price from $ 20 to $ 200+ dollars, depending on the make and construction.
Second, you can use a GorillaPod and mount your speedlight to a door or place it on top of something near your model.
Third, you can mount your speedlight to an extension pole (or monopod) and have someone hold the light above your model. I like to do this because it gives me more options when shooting, and it also means there aren’t any light stands that get in the way of my shot.
4. Light shapers
Using a speedlight as a bare light source creates a very hard style of lighting similar to harsh sunlight. This looks great in certain situations, but I prefer to soften and control the light source with a small or medium softbox. This creates a much softer, more flattering, and more realistic-looking light source.
A good softbox to start with is the LumiQuest Mini Softbox. It’ll attach to your speedlight with velcro and can fold flat for easy storage.
5. Camera with a hot shoe
Finally, you will need a camera that works in Manual mode. It must also have a hot shoe.
Note that the “hot shoe” is just a square bit of metal on top of the camera that an external flash or wireless trigger slides into.
Working with off-camera flash
Once I got over my fear of off-camera flash, I started to believe that great portraits needed artificial lighting regardless of the environment. I often added two or three lights to my portrait shoots because I thought that anything less was lazy or unprofessional. I actually felt guilty when I shot with natural light because I thought it was cheating.
Fortunately, I’ve gotten over those thoughts. Here’s what I know now:
Finding great light and being able to use it are learned skills – and so is knowing when to use fill-flash in a portrait.
Nowadays, whenever I set up portrait shoots, I always look for opportunities to use great natural lighting first. It’s the most beautiful and flattering light for portraits, so if it ain’t broke, no need to fix it.
Having said that, there are many times when natural lighting is only just okay or even terrible – and sometimes a portrait needs more mood or drama than the available light can provide.
The following is an example of how I used off-camera flash to light a heavily backlit image. My objective was to create a shot that looked naturally lit. This technique can be used for any portrait that requires off-camera fill flash.
In the first shot (A), you can see that my model was heavily backlit, which makes a great silhouette but not such a great portrait.
For the second shot (B), I attempted to correct the lighting by increasing my ISO, which overexposed the background and brought more detail to the motorbike, but leaves the model’s skin tones flat, dull, and underexposed. It also added extra noise to the shadows. At this stage, I could have used a reflector to bounce light back onto the model to help create better skin tones.
Finally, for the third shot (C), I used an on-camera flash. As you can see in my example, the Canon speedlight did an okay job of lighting my model, given that I was about five meters (sixteen feet) away using a 200mm lens.
But the thing I don’t like about using flash on-camera for portraits is that it tends to make the subject look unnatural and have a flat appearance. On the other hand, by using a flash off-camera, you can control the direction and amount of light going onto your model to achieve a more natural look.
Which leads me to my off-camera flash setup:
Here’s a bird’s-eye view of my setup.
My speedlight was positioned approximately one meter (three feet) from the model. I set it at a 45-degree angle because I wanted to make my model look like he was lit from the side.
I was working with a 70-200mm zoom lens set to a focal length of 200mm because I wanted to blur all the details in the background.
My camera was approximately six meters (20 feet) from my model.
My ISO was set at 100, and my aperture was set to f/4. I was working at f/4 rather than wide open at f/2.8 because I find it very difficult to make eyes look sharp at f/2.8 at that distance and in such extreme lighting conditions.
Setting up the gear
Setting up speedlights and radio slaves.
For this motorbike model shoot, I mounted my speedlight to a light stand via an adapter and used a small LumiQuest Softbox to soften and shape my light.
To manually adjust the flash output of your speedlight, first switch the setting from its default of TTL to M (Manual mode). I recommend you start with the following settings:
First, if you’re shooting in full sunlight and you need an aperture of f/16 or higher, use a power setting of 1/1 (full).
If you are shooting at f/2.8 or f/4, start at around 1/16-1/32 power.
The diagram above is based on Canon’s 580EX II speedlight. For any other flash, check your manual for instructions on how to increase and decrease power. It should be very similar.
Now take a look at how I set my flash power:
Flash set at 1/32 power is underexposed, skin tones look muddy, and there’s no detail in the blacks.
Flash set at 1/16 power is starting to look better.
Flash set at 1/8 power is looking good, but I prefer slightly brighter skin tones.
Flash set at ¼ power is the correct reading for the look I was going for.
Flash set at ½ power gives slightly overexposed skin tones, which is perfect for many portraits, as it creates a very flattering light (no model will ever tell you they love seeing all the detail in their pores and skin tones!).
Flash set at full power is overexposed; there’s very little detail in the skin tones and the blacks are too light (gray).
A step-by-step guide to how I lit this shot with off-camera flash
Now that you know how to set up your flash and how to determine a good exposure, I’d like to run through my motorcycle photoshoot.
How did I get a nice final result?
Let me take you through the step-by-step process:
My ambient reading was f/4 at 1/125s with ISO 100.
Take an ambient reading to determine the correct exposure for the background (without any flash). In this case, my ambient reading was f/4 at 1/125s and ISO 100. This exposure was set for the entire shoot.
Ask yourself if adding flash will improve or detract from the shot. In this case, the answer is a definite yes – it will improve the shot.
Bring in your flash and set it up as per the diagrams above.
The quickest and easiest way to figure out the best flash power settings is to use a light meter. (If you don’t have a light meter, you can still work with off-camera flash. It will just take a bit longer to work out your exposure.) I believe a light meter is an essential tool in good portrait photography, and I would never leave home without one. When you use a light meter, you know you’ll end up with the most accurate readings and lighting becomes easy. I suggest you set up your lights per the diagram above, start at a power setting of 1/32, and gradually increase your power in small increments (1/32, 1/16, 1/8, 1/4, etc.) until you get your desired result.
Set your light meter to non-sync and press the button on the side of the meter. The non-sync button will flash on and off indicating that it’s ready. If you don’t have an assistant, I suggest taking a radio slave off-camera and using it to test-fire your flash so you can take a reading. Hold the meter in front of your subject’s face and point the sensor dome toward the camera.
Keep increasing or decreasing the amount of light until you have it a half stop to one stop over the ambient setting.
If you want a clean, beauty-style shot with lots of shadow detail, add one stop of fill-flash and shoot at your ambient meter settings.
This is something I strongly urge you to practice with as many patient friends, family members, and pets as possible. That way, you can build up your confidence and really get to know your equipment.
And here’s my final image:
Glauco Junior Solleri. Vespa courtesy of Glow Studios.
Notice the different background? It’s from a shoot I did in St Mark’s Square, Venice last year. I merged the two images together using Photoshop.
Working with off-camera flash: Conclusion
Now that you’ve finished this article, you should be ready to capture some beautiful shots using off-camera flash!
So make sure you have the right equipment. And make sure you follow my process carefully.
You’ll come away with amazing results.
What are your experiences working with off-camera flash? Have you tried it? Does it intimidate you? Share your thoughts in the comments below!
The post A Beginner’s Guide to Working With Flash Off-Camera appeared first on Digital Photography School. It was authored by Gina Milicia.
The post Fine Art Landscape Photography: The Complete Guide appeared first on Digital Photography School. It was authored by Rick Ohnsman.
Perhaps you’ve heard the term fine art landscape photography.
But is fine art landscape photography something you should aspire to make? And what distinguishes a fine art photograph from a snapshot?
In this article, I’m going to explain everything you need to know about fine art landscape shooting. I’ll start by explaining what it actually is – and I’ll go on to give you plenty of tips you can use to improve your own landscape photos!
Let’s get started.
What is fine art landscape photography?
Some terms are hard to define, and fine art photography falls into that category.
“There are always two people in every picture: the photographer and the viewer.”
— Ansel Adams
That said, fine art photography is less about the subject and more about the photographer. Your goal in fine art landscape photography is not to simply to show your viewer what you saw; it’s to communicate how it felt to be there and how the scene made you feel.
It was subzero the morning I made this shot in Yellowstone National Park. I added a blueish tone to help the viewer experience the cold I felt when making the image.
“Photography for me is not looking, it’s feeling. If you can’t feel what you’re looking at, then you’re never going to get others to feel anything when they look at your pictures.”
— Don McCullin
So how do you communicate feelings through photographs?
Here are some tips to consider when capturing fine art landscape photography.
This image is a favorite because of how it “feels.” I think it does a nice job of conveying the cold, wet, foggy atmosphere of a morning in the Columbia Gorge of Oregon, a place where the fog often hangs thick.
1. Think about what would make your image unique
Have you ever been making a landscape photo at a location where other photographers are lined up next to you also working the scene?
Most of us have.
The question to be asked is:
How will your photo be different, unique, special? What is it about your image that will stand out? How can you put your unique signature on the shot?
The choices you make to create an image that is uniquely yours matter. Any cook can follow a recipe, and if a dozen cooks all work from that same recipe, the dishes will be essentially indistinguishable. The gourmet chef making their signature dish, however, will strive to make the meal unique.
And as a fine art landscape photographer, your objective ought to be the same.
Almost everyone loves a sunset photo, probably because of how they make us feel. Injecting feeling in your landscape photos is a large part of what takes an image into the “fine art” realm.
“Great photography is about depth of feeling, not depth of field.”
— Peter Adams
2. Be intentional and deliberate
When the light is rapidly changing, a landscape photographer might need to move quickly. However, most landscape photography can be done at a slow and thoughtful pace.
Rather than simply seeing a scene, positioning your tripod, shooting first and asking questions later, do the opposite. Before even touching your camera, thoughtfully observe the scene. Slow down.
Ask yourself what first attracted you to the scene. How does it make you feel? How can you best compose the shot? What if you moved higher, lower, to a different vantage point, used a different lens? What can you do to best capture your feelings in the frame?
The morning light, the fog, and the forest all combined to make it a magical morning when I had the opportunity to shoot in the Groton State Forest in Vermont.
Never be a one-and-done shooter. Take advantage of the instant playback capability of your camera, evaluate your image, and decide what might be better.
Then make a few more shots.
While he’s not a photographer and not talking about fine art landscape photography, famed hockey player Wayne Gretsky still offers advice photographers would do well to remember:
You miss 100 percent of the shots you never take.
Wayne Gretsky
3. Practice previsualization
You will know your skills are growing as a photographer when you can see your photograph before you even put your eye to the viewfinder.
Eventually, you should previsualize your finished image, have the vision, and then simply use the camera as an instrument to capture that vision.
It’s a beautiful loop:
The more you photograph, the better you become at seeing – and the better you become at seeing, the better your photographs will become.
I had been to this location many times, and so I had a good idea of what I wanted when I went there to make this blue hour image. I helped it a little more with a split-toned edit.
“The camera is an instrument that teaches people how to see without a camera.”
— Dorothea Lange
But while previsualization is important, fine art landscape photography should always be open to serendipity: those unexpected moments when the light changes, the angels sing, and the miraculous appears for a brief moment for you to capture.
There have often been times when I’ve previsualized a shot, got set up, and waited for the light, only to have something amazing appear behind me out of the blue.
Practice working with your camera controls so that, when such a moment occurs, you can respond quickly and get the shot.
I was busy making the first shot, which was nice and even had a rainbow. Then I turned around and there was a second great opportunity. Always be ready for that serendipitous moment.
4. Fine art landscapes aren’t just monochrome
Google “fine art photography,” and you will mostly see black and white (monochrome) images. Due, perhaps, to its long existence, as well as a good number of early photographers for whom black and white was the only option, monochrome photographs may outnumber color images in the world of fine art.
But that’s not to say that color images can’t also be considered fine art photographs.
Circle back to our definition: Fine art photography is more about the artist/photographer and their vision than the content of the photograph. Whether color or monochrome, the best way to portray a vision will depend on the maker’s intent.
I had already decided this photo of an old snag should be monochrome when I made it. You can see the color version is just okay. The split-toned monochrome shot better exemplifies a fine art image.
“What I love about black and white photographs is that they’re more like reading the book than seeing the movie.”
– Jennifer Price
Now, bear in mind the strengths of black and white photography. Without the addition of color, monochrome images rely more on the basics, the “bones” of a good photo: line, shape, form, tone, and texture.
Black and white images are typically simpler, with greater attention paid to the subject. Sometimes, a monochrome image can convey a look or mood better than its color counterpart.
I like both the color and black and white versions of this shot and think either could be classified as fine art landscape photography.
When deciding whether an image might be best in color or black and white, the fine art photographer needs to come back to the objective, and ask themselves:
Which version best conveys the feelings and vision I had when making the image?
That, and not some notion that fine art photographs are always monochrome, should dictate the direction the photographer takes.
One advantage of monochrome is that it can get down to the “bones” of a good image – line, shape, form, tone, and texture – while stripping away color that would distract from those basics.
5. Don’t be afraid to alter reality
We talked about fine art photography being less about an accurate interpretation of a subject and more about the photographer’s feelings and vision.
So who says you can’t completely change your image to better convey those things?
Techniques like long shutter speeds to blur moving objects and very fast shutter speeds to totally freeze rapidly moving objects are right at home in fine art photography.
Learn how to use long shutter speeds to take your images from simple snapshots to fine art photography.
So is purposely blurring scenes with intentional camera movement (ICM) and using special digital tools to give an image a “painterly” look.
Infrared photography or other techniques that shift colors? Sure!
Art is totally subjective, and so is fine art landscape photography.
How you choose to portray a scene is your prerogative, where the “right way” is whatever best communicates your feelings and message.
I wanted to do two things with this image: Emphasize the cold, which I did with a white balance skewed toward the blue tones, and emphasize the frozen, static ice against the flow of the river, which I did with a long shutter speed. Use your camera as a tool to capture your vision.
“I really believe there are things nobody would see if I didn’t photograph them.”
— Diane Arbus
Go abstract with your fine art photography and give abstract images a try. Intentional camera movement (ICM) can give you some beautiful results.
6. Experiment with interpretive editing
I’ve read much about the phrase “getting it right in camera,” something with which I both agree and disagree. Yes, I do believe one should master their camera controls so as to get the best possible exposure of an image while in the field.
I made this shot of Grand Fountain Geyser in Yellowstone National Park a little earlier in the evening. In post-processing, I took the color toward the cooler tones.
Yes, making the best possible image in the field is important. Never should an editing session be a rescue mission where you try to overcome mistakes made when shooting. Fixing an image in Photoshop is an option, but usually not a good one.
A little later in the evening, I made this second shot, and I edited it with warmer tones!
However, enhancing an image with dodging, burning, or any of dozens of other editing techniques is the mark of a skilled fine art photographer. Using editing skills to further interpret an image, to convey feelings and intent, is part of the craft.
People who like to brag that their images are unedited and straight-out-of-camera have likely never studied the work of perhaps the most renowned landscape photographer of all time, Ansel Adams. He didn’t have the advantage of digital editing software to edit his images, yet that didn’t deter him.
Take a look at some of his before and after images, and you will marvel at how much change there was between the camera-captured negative and the final print.
I was going for an Ansel Adams-like editing style with this shot of “Moonlight Over the Eastern Sierra.” How’d I do?
7. Put in the time
Fine art landscape photography isn’t done in a hurry.
I’ve seen software makers claiming their programs will allow you to work faster using artificial intelligence. While these programs have come a long way, I’m not convinced that they can yet equal the quality of old-school human intelligence and a more careful, though slower, style of editing.
You might be able to get some interesting results with a one-click preset, but will it result in an image that communicates your unique vision? If you replace a sky with something “canned,” it might be more dramatic, but is it still your photograph?
Artificial intelligence (AI) editing is making inroads, but what’s wrong with taking your time, using human intelligence, and learning to edit the old-school way?
I also have to ask: What’s the hurry?
I enjoy photo editing, seeing where I can take an image with some thoughtful work. I know there are those that don’t care for editing, and I guess that’s okay. I just believe that most carefully-crafted art takes time.
I have used such software on occasion, and so can you. But rather than just learn the tricks of the trade, how about putting in the time and effort to learn the trade itself?
If fine art landscape photography that has your own personal style and signature look is your objective, there are no shortcuts. One-click presets will only make your work look like everyone else’s!
“Once you learn to care, you can record images with your mind or on film. There is no difference between the two.”
— Anonymous
8. See(k)ing the light
I enjoy various kinds of photography, from table-top still life and macro photography to flash-lit work and especially landscapes. What differentiates landscape photography from many of these other genres is the lighting, the degree of control the photographer has over the scene, and the ease of creating the desired look.
I can previsualize the look I want for a tabletop still life shot, set it up on the kitchen counter, light it, make adjustments, and tweak until I get the shot I like.
Not so for landscape photography.
Instead, I must travel to the area I want to photograph, be there when the weather is cooperative, the light is right, the foliage is in season, and everything else (none of it in my control) all comes together. If it ever does.
But this is also the joy of fine art landscape photography.
Sometimes you just gotta wait…and wait…and wait some more. It had been overcast all day, but just a few moments before sunset, as the sun neared the horizon, the sky broke out with this unique light. I love the mood of this Oregon coast shot.
It might mean sitting patiently in the pre-dawn chill, hoping the clouds come in just right and the sunrise hits just so. You might hike miles to get to that overlook for a sunset that never comes, or get lucky and have a sudden thunderstorm come in over the canyon with dramatic clouds and lightning.
The lack of control is part of the attraction of landscape photography, the knowledge that luck really is when preparation meets opportunity.
“My life is shaped by the urgent need to wander and observe, and my camera is my passport.”
— Steve McCurry
So if you want to be a great fine art landscape photographer, then you’ll have to work at it. You’ll need to sacrifice a bit, get up before sunrise, stay well after the sun has set, hike into difficult spots, seek places drive-by photographers will never see, and strive to be different with your images, capturing not just what you see, but what you feel.
A stormy, moody sky and a weird, twisted tree reaching for the light. I like the feel of this shot, which I call “The Creature Rises.”
9. Shoot to a theme
Sometimes, a good way to stimulate your creative juices is to shoot to a theme. Rather than simply grabbing your gear and going to a location to do some landscape photography with whatever you see, decide that you’re going to make all of your images fit a theme.
Visually describe a concept or maybe make photos as if you were doing an article on a place or a single subject. Then, use the “visual vocabulary” that are your photographs to describe and define that subject.
Add your own style as a fine art landscape photographer to determine what you want your viewer to know and feel about your subject.
I like the serene feeling of these fallen autumn leaves floating in the still, dark waters of a river eddy. I spent over an hour working this theme and making many images.
“The whole point of taking pictures is so that you don’t have to explain things with words.”
— Elliott Erwitt
10. The print is the performance
Today, most photos that are made are probably never printed. Instead, they’re viewed only on monitors or LCD screens, and sometimes projected. In the film days, photographers had no such options. After shooting and developing their film, they were only halfway to being able to show their photograph to viewers. Prints were mandatory.
Ansel Adams viewed it this way:
The negative is the equivalent of the composer’s score, and the print the performance.
– Ansel Adams
When discussing fine art landscape photography, I must raise the question:
Can a photograph be considered fine art if it is only viewed on a monitor and never printed?
If you’ve spent any time at all in a photo gallery and closely looked at printed photographs, you will know there is no comparison between seeing a printed photograph and seeing that same image on a monitor. Prints can render so much more detail, color, and tone.
Even the type and texture of the paper or other substrate on which a photograph is printed can make a huge difference.
Finally, when viewing photographs on a screen, the light is produced by the screen itself, whereas when you view a print, the light is reflected. It changes the way you view the shot.
This is a nice image on-screen, but to really appreciate it, you’d have to see a print. Then, depending on the paper type, or maybe even as a print on acrylic or aluminum, it would really pop.
So to repeat my question in a different way:
Must a photograph be printed to be considered fine art?
I could argue either side, but I must confess that I’m a big proponent of printing. Yes, learning to make good prints yourself is a whole other skill, and not an easy one to learn. Simply getting the color and brightness of a printed image to approximately match what you see on your monitor is a challenge.
But I would argue that learning to print is part of the photographic craft.
You might also choose to hand off your photos to a professional printer whose specialty is knowing how to get the most from your image. That’s okay, too. I guess my point is that the difference between a printed fine art landscape photograph and the same image viewed on a monitor is almost as great as the difference between going to a concert and just watching one on TV.
“Fine art prints created by the artist, or the artist’s collaborator, are important because they best represent the artist’s vision. Images displayed on digital devices are subject to the non-uniform nature of different displays and they may appear radically different than the artist intended.”
– Mac Holbert
11. Your photos are about you
What you see, what attracts your eye and your camera, and how you choose to interpret a subject says a lot about you.
Even if you haven’t consciously defined a “photographic vision” for yourself, chances are good that, if you review your archives, you will be able to identify commonalities in your work.
Hopefully, you will have developed a rating system (perhaps color coding or star rating as can be done in Lightroom) so you can determine which photos you consider to be your favorites. Take some time to look through your best shots and perhaps make some notes about defining styles, features, or techniques.
What are you consistently doing that works, and what signature style do you have?
“Only photograph what you love.”
— Tim Walker
The predawn shot on the left required shivering in the cold of a mountain morning. The mist was hanging low over Little Redfish Lake in Idaho. In the shot on the right, I can still feel the crisp autumn air and the sound of the rustling leaves in the aspen grove. Hopefully, a viewer will get some sense of those moments in my images.
Focus specifically on your landscape images and look for commonalities. What has worked well? What hasn’t worked? How can you find ways to build on your successes and also further define and develop your personal style so that your images communicate with your viewer?
“We are making photographs to understand what our lives mean to us.”
— Ralph Hattersley
When considering the subject of fine art landscape photography, you may be asking, “Does my work measure up? Am I good enough that my photographs could be considered fine art? Do I belong in the elite club of fine art photographers?”
I would suggest that what constitutes a fine art photograph is less about the quality of the image, and much more about the photographer’s success communicating something to the viewer.
I know the backstory behind this image, but you, as a viewer, don’t. Does this image speak to you? What does it say? What do you think and feel when you see it? Good photographs speak to the viewer.
“Good photographs are like good jokes. If you have to explain them, they aren’t very good.”
Anonymous
If you want to be successful in fine art landscape photography, or any other genre of photography, for that matter, teach your photos to speak for themselves. If they were displayed in a gallery without you there to say a word, what would they say to a viewer? What would a person feel when viewing them?
Yes, a photo can be worth 1000 words, maybe more. But it has to speak for itself!
Fine art landscape photography: Conclusion
Now that you’ve finished this article, you know all about fine art landscape photography.
And you know how to create some beautiful fine art landscape shots of your own!
So get out and get shooting. Best wishes in your photographic endeavors!
The cold blue of an Idaho winter day with just a pop of red on a distant barn. This one says a lot about me, where I live, what I love, what images I like to make. What do your photos say about you?
Fine art landscape photography FAQs
What is fine art photography?
This Wikipedia description sums it up nicely: “Fine-art photography is photography created in line with the vision of the photographer as artist, using photography as a medium for creative expression. The goal of fine-art photography is to express an idea, a message, or an emotion.”
Must an image be black and white to be considered a fine art photograph?
While many photographers choose to use black and white when making fine art landscape photos, and while traditional images were made that way, it’s not a requirement. The photographer should choose whatever representation best conveys their intention for the image.
How can previsualization help me make fine art photographs?
Good photos are made in the mind, and the camera then becomes a tool for capturing what the photographer has already “seen.”
Must a photograph be printed to be considered “fine art?”
No, but a print can do much more to convey the photographer’s message to the viewer as a tangible, physical object with much greater subtlety of color, tone, and higher resolution. Further, while every display device will affect how the image is seen, a print retains the look of the image as the photographer intended. Printing is also part of the art and craft of photography.
If you could only give one tip about making fine art landscape photographs, what would that be?
Determine what you want your viewer to see, think, and feel when looking at your image, and imbue your photograph with those qualities such that it can speak on its own to the viewer.
The post Fine Art Landscape Photography: The Complete Guide appeared first on Digital Photography School. It was authored by Rick Ohnsman.
The post Frame Within a Frame Photography: A Guide appeared first on Digital Photography School. It was authored by Kevin Landwer-Johan.
Frame within a frame photography is a creative technique that works in many genres of photography. But what is it, and how can you use it for amazing photos?
In this article, we’re going to take a look at this composition “rule” – which you can apply very obviously or even very subtly in your photographs.
Frame within a frame photography is all about positioning your main subject so it’s framed by something else within the scene.
You can use anything you like for this. For instance, you might use a full rectangular frame, like a door or a window. You could even use an actual picture frame.
But frame within a frame photography is not limited to structures that completely surround your subject.
You can incorporate body parts and tree limbs as frames. Using rocks, plastic bags, or mannequins can be an effective way to add a frame within a frame. These things may occur naturally, or you can bring them in as props to include in your compositions.
In this first photo of the welder (above), I’ve used a hole cut in the steel to encircle the worker. There are also more holes in the panels behind him, though it’s the front hole that acts as the main frame.
In this second shot, however, while the gate pillars do frame the young monks, the contrast of the shadow on the wall also helps to frame the main subject.
Here’s a third example where I have used frames both in front of and behind my subject. By lining up the front and rear windows in the train carriage, I have managed to carefully frame the young woman.
Depth in frame within a frame photography
The woman on the train (above) is also an example of how using frames within a frame can help create an enhanced sense of depth in your compositions.
This becomes even more exaggerated when you use a shallow depth of field. Blurring the frame shows that the frame and the subject are at different distances from the camera (and it also helps draw the viewer’s eye to your subject!).
For instance, look at the photo below. The white pillars on either side of the dancer and the circular shape behind her head frame her well. And the shallow depth of field helps create actual depth in the image.
Take a look at the photo above. Are the people walking in front of or behind the large palm trees? The trees create a nice frame, but because the key elements are silhouetted, there’s no visual information to reference depth.
Composing with existing and created frames
Some frames are more obvious than others. Unfortunately, more obvious frames tend to be a bit too common in photographic compositions – to the point that they become clichéd.
So instead of using obvious frames, access your imagination. Look for unusual elements you can incorporate into your compositions. These can sometimes create interesting frames around your subjects.
Frames don’t have to be physical; you can always use light and shadow as a frame. Look for areas of contrast that surround what you’re focusing on. Carefully position yourself and your subject to maximize the effect.
Out-of-focus elements can also be used to create frames. When you have an object in the foreground that doesn’t form a complete frame around your subject, simply choose a wide aperture setting and make sure the foreground object is close enough to your camera. You’ll get a rather abstract form that can frame the subject and help lead the viewer’s eye into your picture.
Take a look at the image below. Do you see how the blurred vegetation creates a frame around my subject?
Practice looking for frames, and you’ll begin to see them everywhere. Study the work of other photographers and see how they work with frames. Do a quick image search online for examples, and you’ll soon see how imaginative some photographers are with frames!
Then go out with a camera. Like anything, the more you do frame within a frame photography, the easier it becomes. Set yourself the task of creating a frame within a frame every time you head out to shoot.
That way, you’ll begin to train yourself to see situations where you can incorporate this compositional technique into your work.
Frame within a frame photography: Final words
Frame within a frame compositions are a great way to focus the viewer’s eye on your subject – and a great way to add depth to your photos.
So make sure you get out and practice! As I explained, the more you practice, the sooner you’ll be creating stunning frame within a frame photos.
Now over to you:
Have you ever tried frame within a frame photography? Do you have any framing tips? What are your favorite frames? Share your thoughts in the comments below!
The post Frame Within a Frame Photography: A Guide appeared first on Digital Photography School. It was authored by Kevin Landwer-Johan.


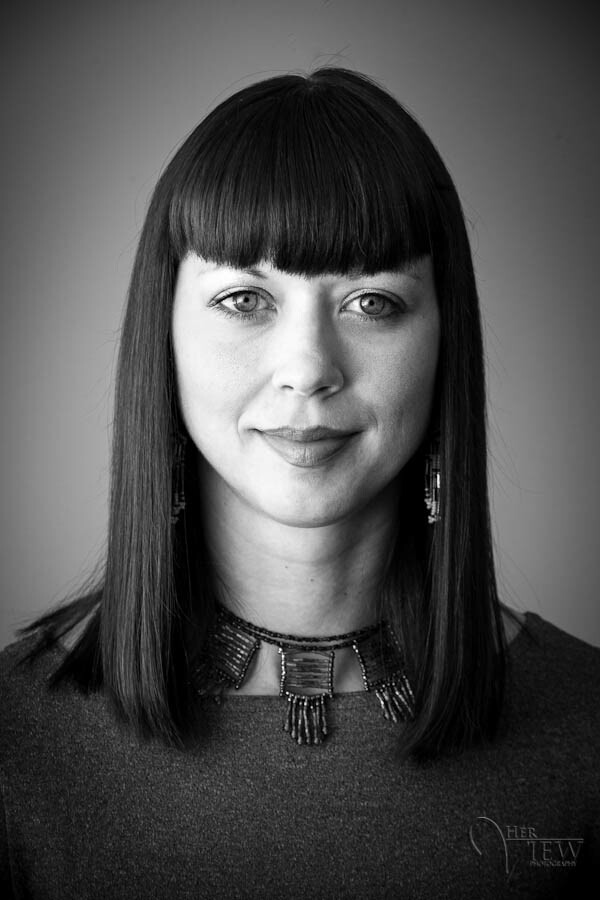


You must be logged in to post a comment.