RSS
 

Posts Tagged ‘Guarantee’

Rental marketplace ShareGrid owner’s guarantee covers all equipment up to $20,000

26 Aug

Film, photography and production equipment rental marketplace ShareGrid has introduced a $ 20,000 owner’s guarantee that covers all equipment against damage, theft, loss and fraud, including voluntary parting (theft by the renter).

‘Our goal has always been to make ShareGrid the safest way to rent your equipment to other people, and today we’re excited to offer even more protection to our users’ said Marius Ciocirlan, co-founder and CEO of ShareGrid. ‘For years, we’ve been the only marketplace to offer instant coverage against Voluntary Parting. With the ShareGrid Owner Guarantee, we’re taking this a step further and including protection against voluntary parting automatically. Best of all, it’s completely free for all our members.’

‘Voluntary parting’ or theft by the renter is typically not covered in the rental industry but is luckily also extremely rare. ShareGrid says only one in 10,000 rental transactions are affected, thanks to heavy investment in security technology and personnel. At 0.02 percent ShareGrid competitor KitSplit’s voluntary parting rate is double that of ShareGrid’s but still very low in absolute terms.

ShareGrid’s Owner Guarantee offers protection for all rentals of equipment up to $ 20,000 in value and is included automatically. Terms are very similar to KitSplit’s equivalent policy but ShareGrid does not have the latter’s 20 percent deductible, making it the slightly more attractive offer.

Articles: Digital Photography Review (dpreview.com)

 
Comments Off on Rental marketplace ShareGrid owner’s guarantee covers all equipment up to $20,000

Posted in Uncategorized


Peer-to-peer rental platform KitSplit launches comprehensive owner’s guarantee

26 Aug

Peer-to-peer equipment rental platform KitSplit has expanded its insurance cover for equipment owners. Gear that is rented out via the platform is now also covered for theft by the renter, in addition to previous coverage which included damage, loss and theft from the renter.

‘The trust of our community and the safety of their gear is of utmost importance to us. With the Owner Guarantee, and our improved vetting, we are excited to give our owners even more peace of mind, ” said Lisbeth Kaufman, CEO and co-founder of KitSplit. ‘Trust has been a focus of ours from day one, and we’re excited to build the safest way to rent cameras in the industry.’

Previously theft from the renter, or ‘voluntary parting’ as it is called in the industry, was excluded from coverage which according to KitSplit is industry standard. KitSplit says that in the past voluntary parting on KitSplit has been very rare at about one case in 5000 rental transactions. Still, when it happened the consequences for equipment owners could be very painful.

In addition to the expanded insurance coverage, the company uses a proprietary 40 point risk vetting system to ensure only trustworthy professionals can offer and rent equipment on the platform. You can find more information on the KitSplit website.

Articles: Digital Photography Review (dpreview.com)

 
Comments Off on Peer-to-peer rental platform KitSplit launches comprehensive owner’s guarantee

Posted in Uncategorized


5 Tips to Guarantee Great Road Trip Photos

10 Dec

The post 5 Tips to Guarantee Great Road Trip Photos appeared first on Digital Photography School. It was authored by Simon Ringsmuth.

1 - 5 Tips to Guarantee Great Road Trip Photos

Few things say “Midwest United States” like hay bales and rolling hills. You won’t find scenes like this on most interstates and major highways though.

For some people, the idea of taking a road trip can seem like a dull proposition. One fraught with mundane scenery and near-endless hours of staring out of the window watching the world outside whiz by at 70 miles an hour. However, with a little planning and creativity, you can turn any long car ride into a precious opportunity for amazing pictures.

The countryside you are traveling through may seem uninspiring. You may have already made the drive dozens or even hundreds of times. Still, there are a few things you can do to set yourself up with some fantastic photos, of which to be proud, at the end of your journey.

Take the road less traveled

I live about 400 miles from my parents and siblings, so I end up making the drive back to my old stomping grounds a few times a year. The easiest route to take involves a turnpike, followed by hundreds of miles of interstate. Due to the speed limit being higher, and the drive straighter, I don’t have to slow down every 20 minutes to pass through a small town. However, when it comes to photo opportunities, this type of travel precludes a lot of good chances for picture-taking.

2 - 5 Tips to Guarantee Great Road Trip Photos

I was driving down a highway when I saw this dirt road off to the side, so I pulled over and got a picture while also taking a minute to stretch my legs.

Interstates and other thoroughfares are great for getting to your destination quickly, but not so great for photos. Instead of taking the quick and easy path, as Yoda might say, look for alternate routes to your destination. Alternative routes that may not be as fast but are far more photogenic.

Pull up your preferred mapping software, or unfold a physical map, and look for highways or other types of two-lane roads. When you are driving down these types of roads, you pass by scenery that is more interesting than you find on the interstate.

Moreover, you also have the luxury of being able to pull over and stop without causing a traffic jam.

Plan your photos

When taking a road trip, have an idea in mind of the types of pictures you want to take. Keep a sharp eye out for those opportunities when you are on your drive. Hoping to find something interesting along the way to your destination may work out, however, planning ahead to photograph something specific, is likely to achieve much better results.

3 - 5 Tips to Guarantee Great Road Trip Photos

On this particular drive I wanted to take pictures of windmills and sure enough, once I had that thought in my mind I started noticing windmills all over the place.

The Baader-Meinhof phenomenon is a weird trick your brain plays on you. When you start taking notice of one particular thing, say a specific type of car or style of clothing, you start seeing it everywhere. This concept comes in handy on road trips. While you may not know what you are going to encounter along the way, you can plant the seeds for some great photos with a little mental preparation in advance.

For instance, on a recent drive back home, I pulled out a map and found some slower, but more interesting, highways to take. I told myself to look for windmills along the way. I couldn’t recall ever seeing windmills before.

However, given that I was going across the midwest United States, I felt sure I would end up going past at least a few. I was stunned when, as the hours ticked by on my drive, I kept passing one after the next and ended up with some excellent pictures as a result.

4 - 5 Tips to Guarantee Great Road Trip Photos

Try applying this method next time you’re on a road trip. You might be equally surprised at how well it works. Before you leave, think of a particular subject or type of picture you want to take. Then look at how often you see those opportunities along the way. Things such as dilapidated barns, weathered billboards, old bridges, tall cacti, mountainside vistas, or even dirt roads can all be exciting subjects for road trip photos.

If you plant these seeds in your mind, by the time you reach your destination, they could very well grow into fascinating and beautiful photos.

Time of day is paramount

Sunlight can make or break almost any type of photo. The same holds true when it comes to making images on a road trip. The journey you are taking might be perfect for some sunrise or sunset shots, but those aren’t going happen if you set out at noon! It might seem too simple to mention, but just knowing that your photos are dramatically affected by the sunlight affects your departure time and helps you plan accordingly.

5 - 5 Tips to Guarantee Great Road Trip Photos

There’s about a two-minute window for getting sunrise shots like this. Plan your drive accordingly.

If you aren’t sure what type of pictures you want to capture on your road trip, plan to leave at least 30 minutes before sunrise. You may see something compelling. Alternatively, if you know you are going to pass by a particular photo location, make sure you get a good picture of it by adjusting the timing of your trip. That way you maximize the chances of getting good light in that particular spot.

6 - 5 Tips to Guarantee Great Road Trip Photos

Allow more time than you need

If I take the interstate to get back to my hometown and plan on stopping only once, I can make the trip in about six and a half hours. However, that’s not how I prefer to make the drive. Taking less-traveled roads and stopping half-a-dozen times for possible photo-ops, I usually get there in seven-and-a-half hours. So, when planning for the drive, I always allow at least eight hours for unexpected photo opportunity stops.

One of the worst situations a road-trip photographer encounter is coming across a stunning sight or landmark only to realize they don’t have enough time to stop and take a picture. Give yourself some wiggle room by adding an extra half-hour into your drive schedule. Make sure that time is not a limiting factor.

Having extra time is also an excellent excuse to get out, stretch your legs, and see the scenery even if you’re not sure of the photographic possibilities.

7 - 5 Tips to Guarantee Great Road Trip Photos

On one recent drive to see my folks, I ended up driving past a vast field of beautiful sunflowers by accident. The lighting wasn’t great, but I stopped for some pictures nonetheless. I made a mental note to go back to the same spot on my return drive. Not knowing how long I would need, I made sure to build in plenty of extra time on my drive and achieved the shot you see above. This extra time gave me the ability to pull over a few hours later to capture this shot of an oil pump and wind turbine.

8 - 5 Tips to Guarantee Great Road Trip Photos

Don’t worry about your gear

At this point, you might be thinking about how to apply some of these tips on your next drive. However, you may not think you have the right gear for the job. On the contrary, the nice thing about road trip photos is you probably already have the camera equipment you need to take great photos. Something as simple as a mobile phone camera is enough to capture sweeping landscapes or beautiful countrysides.

9 - 5 Tips to Guarantee Great Road Trip Photos

I shot this with some expensive camera gear but based on the exposure settings (f/4, 78mm, 1/180 second, ISO 220) a nearly identical image could have easily been taken with a basic DSLR with a kit lens.

Don’t let your camera gear, or lack of it, hold you back from taking good photos the next time you are in a car for hours on end. Fantastic shots are achievable with a mobile phone, a DSLR, or anything in between. If you have a tripod, go ahead and bring it because you never know when it might come in handy. However, don’t stress over whether your camera is good enough.

As you develop your skills, you may find yourself gravitating towards a particular lens, or camera depending on the shots you like to take. Things such as lighting, planning, and taking less-popular roads achieve better results than merely buying a new camera.

10 - 5 Tips to Guarantee Great Road Trip Photos

I took this shot on a road trip with a simple point-and-shoot camera, and all it required was some good light and an observant eye.

What about you? Do you have any favorite tips or tricks for getting good pictures while out driving? Share your thoughts in the comments below!

The post 5 Tips to Guarantee Great Road Trip Photos appeared first on Digital Photography School. It was authored by Simon Ringsmuth.


Digital Photography School

 
Comments Off on 5 Tips to Guarantee Great Road Trip Photos

Posted in Photography


Street Smart: Theft-Proof Bike Comes With Recovery Service Guarantee

01 Jun

theft proof smart bike 8

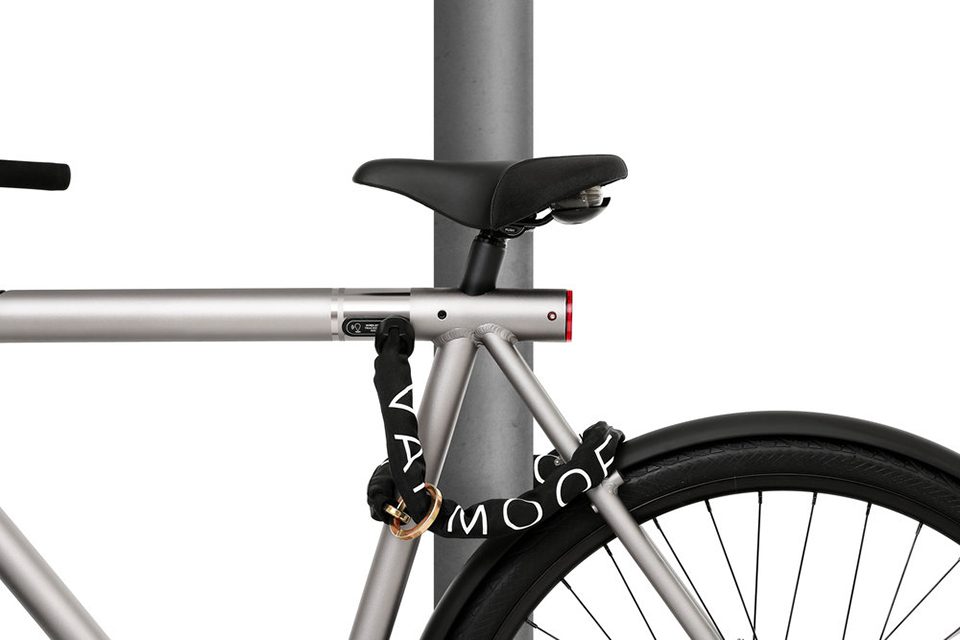
Even the strongest bike locks aren’t totally foolproof, but when locks fail or risky storage options don’t pay off, the makers of this smart bike will send a recovery team after your ride. The ‘SmartBike’ by Amsterdam-based bike specialists VanMoof comes with a lot of cool features, but this anti-theft guarantee is definitely the most valuable of them all, and they’ll even buy you a new one if they can’t find it once it’s stolen.

theft proof smart bike 3

theft proof smart bike 2

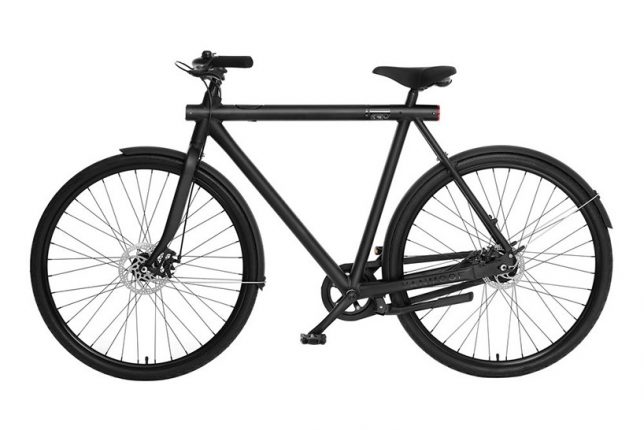
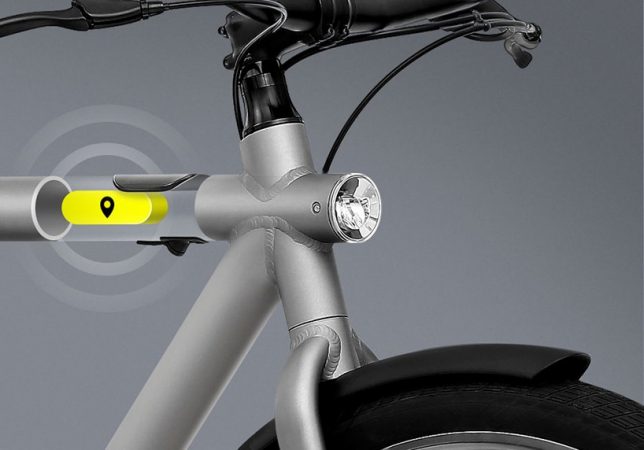
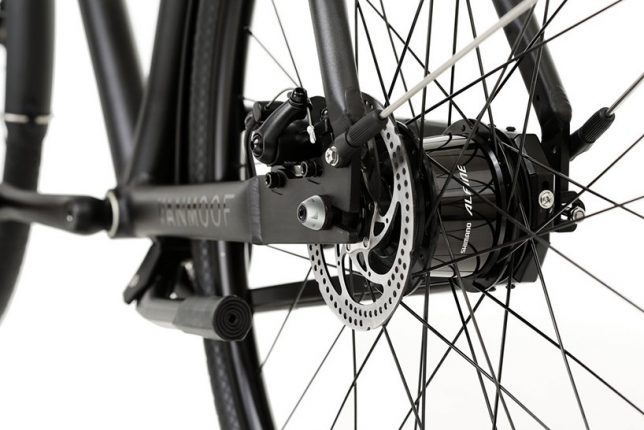
Available in 3 speed in grey or 8 speed in black, the VanMoof SmartBike features GSM anti-theft tracking with ‘Peace of Mind Service’ free of charge for the first two years of ownership. If a thief manages to make it past all the built-in anti-theft parts, like tamper-proof nuts and screws, the GSM cellular info will activate, allowing the recovery team to find it even if it’s inside a building. They promise to get it back within two weeks, with the last mile of tracking powered by a “top-secret” locating technology.

theft proof smart bike 6

theft proof smart bike 7

theft proof smart bike 5

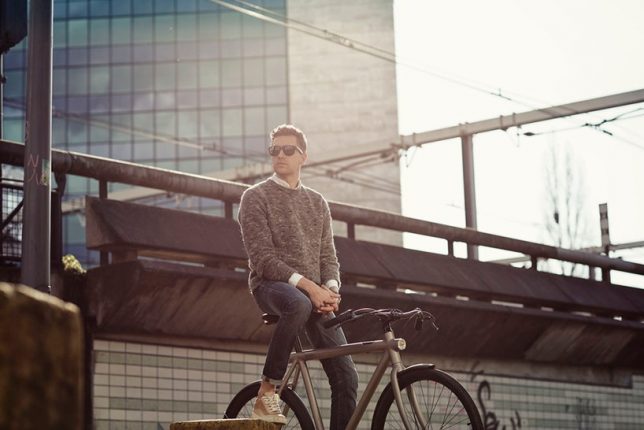
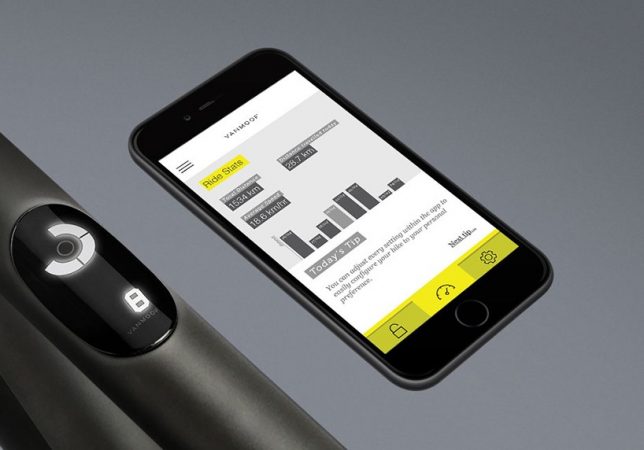
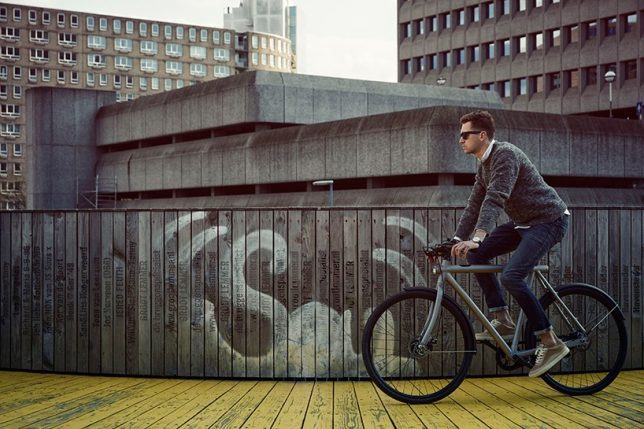
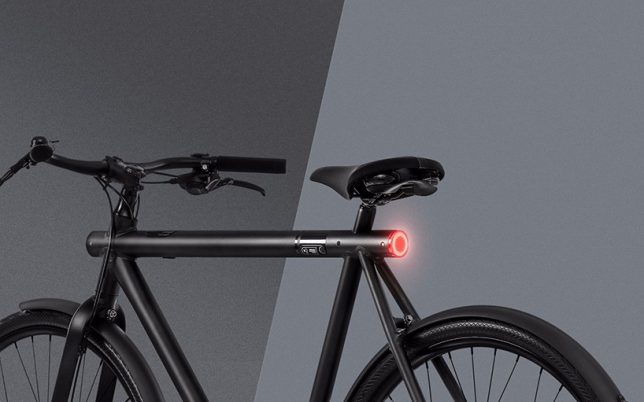
But theft isn’t the only special feature on this bike. Designed to be the ultimate city ride, this one comes with a smartphone app, and can be unlocked with a tap of your finger on your phone or the bike’s dashboard. The software will automatically check via your smartphone’s Bluetooth that it’s really you before it unlocks your bike, so freeing it takes seconds. The app also offers personalized direction and weather for your commute and ride stats, and the bike has head and tail lights that automatically turn on and off. All electric components are pedal-powered, so there’s no charging required.

theft proof smartbike 1

theft proof smart bike 4

The bike is now available for pre-order starting at $ 1098.00, with free shipping.


WebUrbanist

 
Comments Off on Street Smart: Theft-Proof Bike Comes With Recovery Service Guarantee

Posted in Creativity


3 Ways to Guarantee Good Exposures

16 Sep

There is no excuse for coming home from a photo shoot to discover that your images are over or under exposed.

Your camera’s light meter will guide you to choose the right aperture and shutter speed settings to get a good exposure, or it will choose them automatically if you are using the automatic or semi-automatic modes.

The problem is that your camera can be fooled by tricky lighting situations and that’s why your image may not come out exactly the way you want it, despite all the advanced technology in your camera.

Below are 3 techniques you can use to make sure you get a good exposure. Choose the technique that works best for the type of photo shoot you are on and how much time you have while making images.

1. Automatic Exposure Bracketing (AEB)

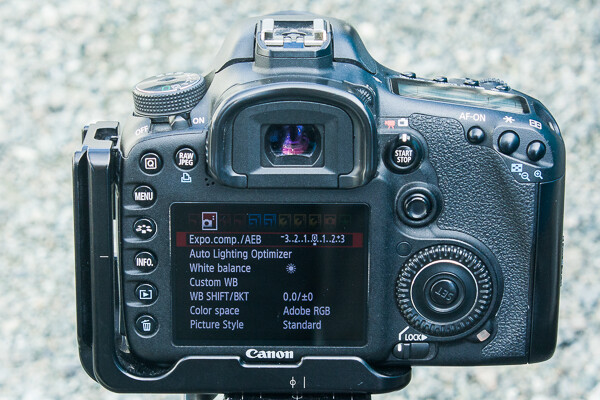
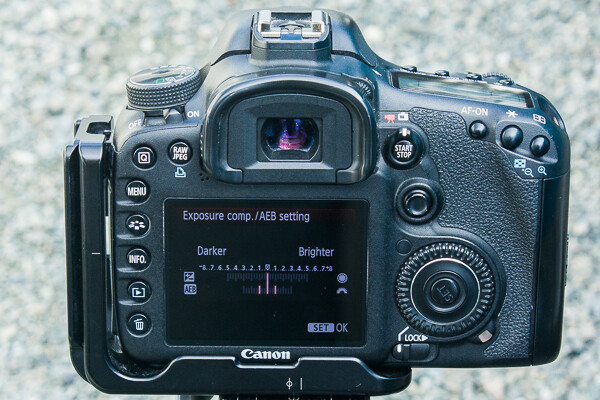
One way to make sure you get at least one image that has a good exposure is to use bracketing, which means that you take one exposure at the setting your camera’s light meter thinks is correct (0 on the light meter) and you take at least two more exposures, one at -1 stop and one at +1 stop.

That might sound like a bit of a hassle, but most cameras have a setting for automatic exposure bracketing which makes it quick and easy. Check your camera manual to see whether your camera has this feature and, if so, how to turn it on.

AEB in Camera Menu

AEB in Camera Menu

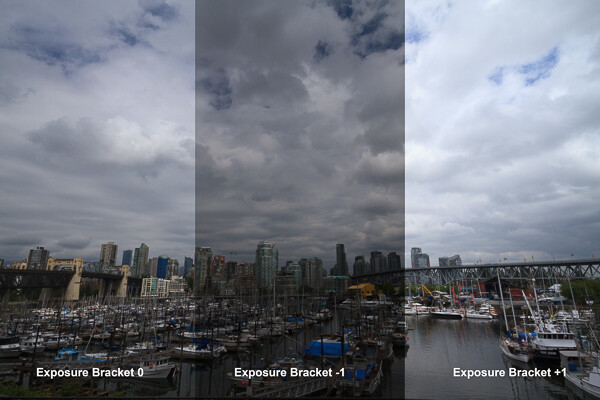
AEB showing +1, 0, -1 brackets

AEB showing +1, 0, -1 brackets

With automatic exposure bracketing on, you simply hold down the shutter until your camera takes 3 exposures and voilà. This is even faster if you set your shutter drive mode to continuous high speed.

AEB will work on Aperture Priority and Shutter Priority exposure modes and on some cameras it will even work in Manual mode.

I usually use AEB on Aperture Priority mode because I like to have control over my depth of field for landscape photography. On this setting the camera will take the photo at three different shutter speeds to give you the three different exposures. It is important to use this setting if you think you might want to combine the exposures in post-processing.

Exposure bracketing example

In this scene, the white sky caused the camera’s light meter to choose a darker exposure than was necessary. I decided that the +1 exposure was the best option.

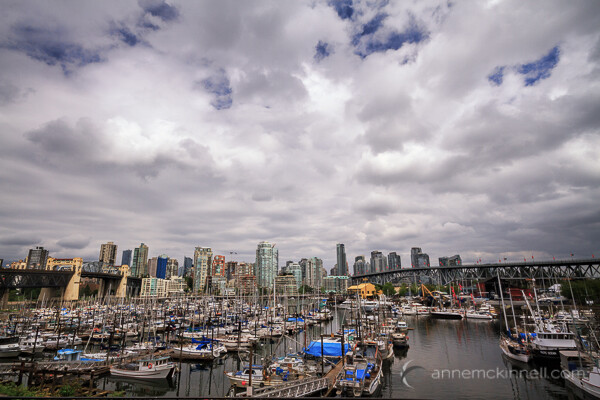
Vancouver, British Columbia, Canada by Anne McKinnell

After processing the +1 exposure, this is the final version of the Vancouver City Skyline image.

If you use AEB on Shutter Priority mode, the camera will take the photo at three different apertures to give you the three different exposures. This is the best option to choose if you need to freeze motion at a fast shutter speed and depth of field is less of a concern.

Using AEB is the best method to use when things are happening quickly and you don’t want to spend any time looking at your LCD (known as “chimping”) after you make an image. When things are happening fast, chimping can cause you to miss a shot.

2. Exposure Compensation

Chimping is not necessarily a bad thing and unless there is a possibility of missing a shot, reviewing your images after you take them is a good practice to double check the exposure, focus and composition.

To use exposure compensation, just take the shot and then evaluate the image using the histogram. It is important to use the histogram for this and not just the picture as it appears on the back of your camera. The LCD is not all that accurate when it comes to exposure. Remember that if you shoot in RAW, what you are seeing on the back of your camera is a compressed version of the image and not an accurate representation of the RAW file. Also, your LCD’s brightness can be adjusted, so if you turn the brightness down when you are photographing at night all your images will appear darker during the day.

Using the histogram is easy. The blacks are on the left, the whites are on the right, all the mid-tones are in between. All you really need to know is that a spike on either edge of the graph is bad.

Under exposed image.

Under exposed image.

Good exposure.

Good exposure.

Over exposed image.

Over exposed image.

If there is a spike on the left edge, it means part of your image is completely black. You may want to use your exposure compensation to adjust the exposure to the right to make it brighter. But remember that having part of your image completely black, especially for a night shot, is okay.

If there is a spike on the right edge, it means part of your image is completely white and contains no data. Never let any substantial part of your image go completely white. Because it contains no data at all, it will always remain a white spot no matter what you try to do in post-processing. It’s better to keep the graph off the right edge. You only need to worry about this if the spike is right on the very edge of the histogram – if it spikes before the edge it is not a problem.

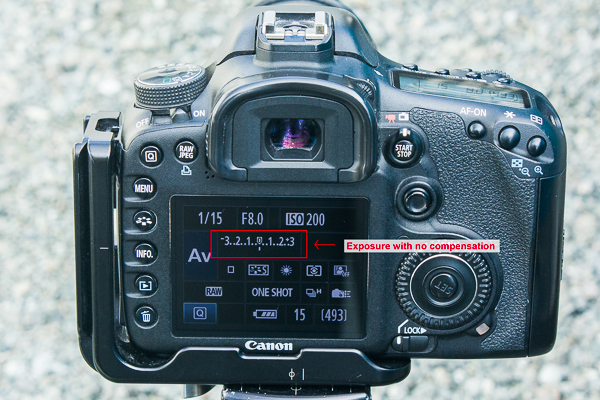
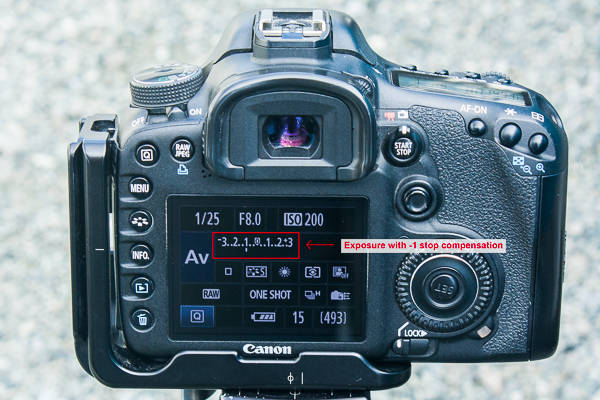
Once you evaluate your image using the histogram, you can use your exposure compensation to make the image darker or lighter without having to worry about changing the aperture, shutter speed, or ISO. If you just want it a little darker, turn the exposure compensation down a little. Or turn it up a little if your image is too dark. You’ll have to check your camera manual again to see how to do this. On my camera, I hold the shutter half way down and move the wheel on the back of my camera to change the exposure compensation.

Exposure with no compensation

Exposure with -1 compensation

This is the quickest method to use when you have time to chimp. While bracketing will ensure one of the three exposures is useable, this method is more precise and deliberate.

3. Exposure Lock

Exposure lock is my favourite method to use when I have lots of time. It actually doesn’t require that much time to do, especially when you get in the habit.

If you have a subject that isn’t moving, such as a landscape scene, and you have time to be purposeful about what you are doing, this is the ultimate method for getting the perfect exposure.

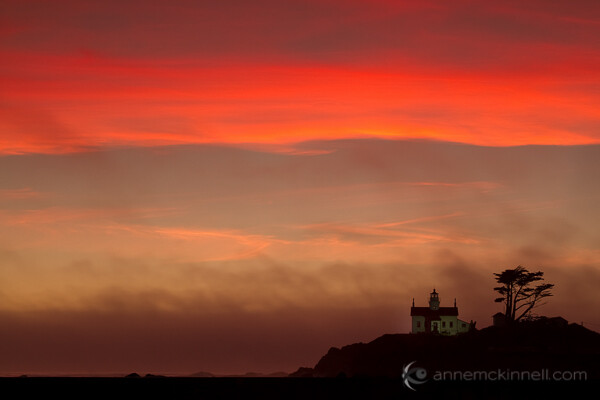
I like to use exposure lock in combination with the “spot metering” exposure mode so that the camera will only take into account the light level at the exact spot in the frame that I tell it to. I decide what part of the image is most important for the exposure. For example, if I am making a silhouette image at twilight, I will point the camera at the sky and use the exposure lock button to exposure for the sky, then I recompose the image, focus, and take the shot.

Battery Point Lighthouse, Crescent City, California, by Anne McKinnell

To make this image of Battery Point Lighthouse in Crescent City, California, I pointed my camera at the bright red band of clouds in the sky, used my exposure lock, and then recomposed the image and pressed the shutter.

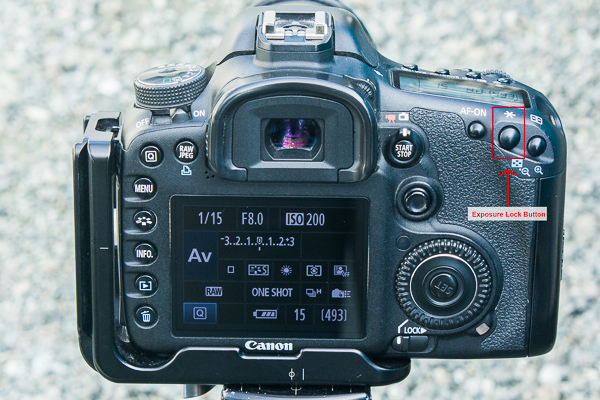
Check your camera manual to see how to use exposure lock. On my camera, I press a button with a * on the back of my camera.

Exposure Lock Button

Depending on the type of subject you are photographing and whether things in your scene are changing quickly or slowly, one of these methods will ensure you always get a good exposure.

Post originally from: Digital Photography Tips.

Check out our more Photography Tips at Photography Tips for Beginners, Portrait Photography Tips and Wedding Photography Tips.

3 Ways to Guarantee Good Exposures


Digital Photography School

 
Comments Off on 3 Ways to Guarantee Good Exposures

Posted in Photography