There is no excuse for coming home from a photo shoot to discover that your images are over or under exposed.
Your camera’s light meter will guide you to choose the right aperture and shutter speed settings to get a good exposure, or it will choose them automatically if you are using the automatic or semi-automatic modes.
The problem is that your camera can be fooled by tricky lighting situations and that’s why your image may not come out exactly the way you want it, despite all the advanced technology in your camera.
Below are 3 techniques you can use to make sure you get a good exposure. Choose the technique that works best for the type of photo shoot you are on and how much time you have while making images.
1. Automatic Exposure Bracketing (AEB)
One way to make sure you get at least one image that has a good exposure is to use bracketing, which means that you take one exposure at the setting your camera’s light meter thinks is correct (0 on the light meter) and you take at least two more exposures, one at -1 stop and one at +1 stop.
That might sound like a bit of a hassle, but most cameras have a setting for automatic exposure bracketing which makes it quick and easy. Check your camera manual to see whether your camera has this feature and, if so, how to turn it on.
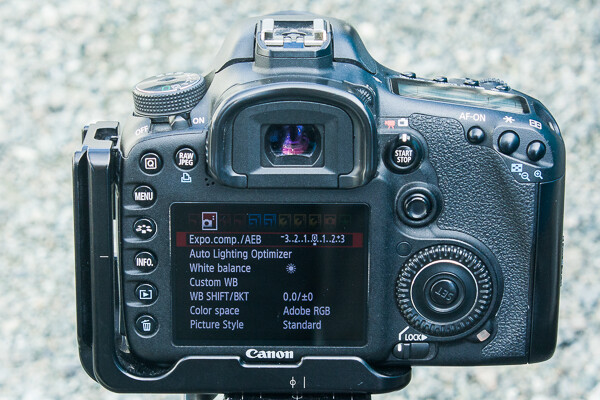
AEB in Camera Menu
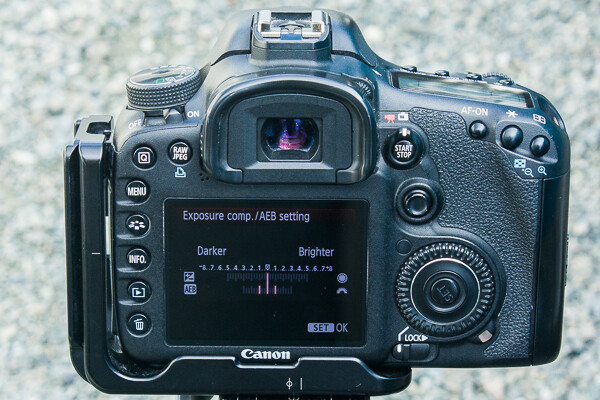
AEB showing +1, 0, -1 brackets
With automatic exposure bracketing on, you simply hold down the shutter until your camera takes 3 exposures and voilà. This is even faster if you set your shutter drive mode to continuous high speed.
AEB will work on Aperture Priority and Shutter Priority exposure modes and on some cameras it will even work in Manual mode.
I usually use AEB on Aperture Priority mode because I like to have control over my depth of field for landscape photography. On this setting the camera will take the photo at three different shutter speeds to give you the three different exposures. It is important to use this setting if you think you might want to combine the exposures in post-processing.
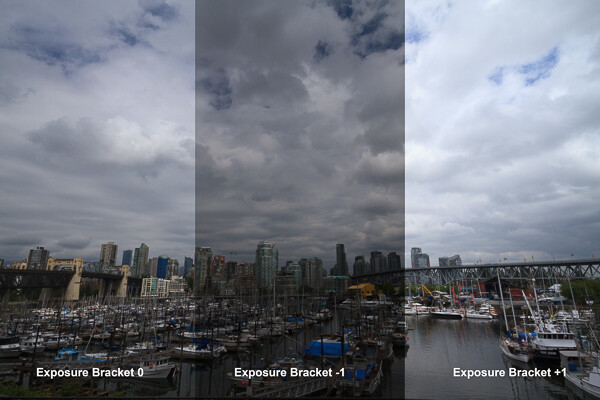
In this scene, the white sky caused the camera’s light meter to choose a darker exposure than was necessary. I decided that the +1 exposure was the best option.
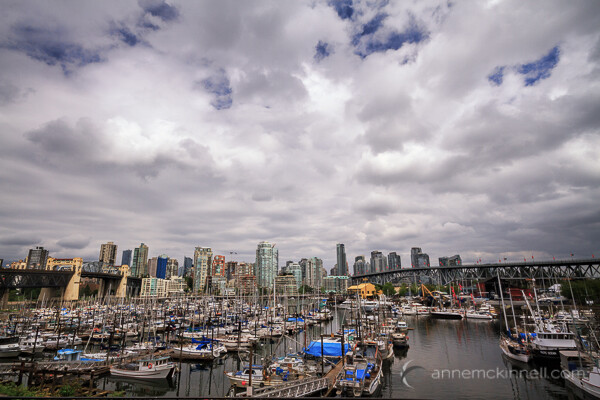
After processing the +1 exposure, this is the final version of the Vancouver City Skyline image.
If you use AEB on Shutter Priority mode, the camera will take the photo at three different apertures to give you the three different exposures. This is the best option to choose if you need to freeze motion at a fast shutter speed and depth of field is less of a concern.
Using AEB is the best method to use when things are happening quickly and you don’t want to spend any time looking at your LCD (known as “chimping”) after you make an image. When things are happening fast, chimping can cause you to miss a shot.
2. Exposure Compensation
Chimping is not necessarily a bad thing and unless there is a possibility of missing a shot, reviewing your images after you take them is a good practice to double check the exposure, focus and composition.
To use exposure compensation, just take the shot and then evaluate the image using the histogram. It is important to use the histogram for this and not just the picture as it appears on the back of your camera. The LCD is not all that accurate when it comes to exposure. Remember that if you shoot in RAW, what you are seeing on the back of your camera is a compressed version of the image and not an accurate representation of the RAW file. Also, your LCD’s brightness can be adjusted, so if you turn the brightness down when you are photographing at night all your images will appear darker during the day.
Using the histogram is easy. The blacks are on the left, the whites are on the right, all the mid-tones are in between. All you really need to know is that a spike on either edge of the graph is bad.

Under exposed image. |

Good exposure. |

Over exposed image. |
If there is a spike on the left edge, it means part of your image is completely black. You may want to use your exposure compensation to adjust the exposure to the right to make it brighter. But remember that having part of your image completely black, especially for a night shot, is okay.
If there is a spike on the right edge, it means part of your image is completely white and contains no data. Never let any substantial part of your image go completely white. Because it contains no data at all, it will always remain a white spot no matter what you try to do in post-processing. It’s better to keep the graph off the right edge. You only need to worry about this if the spike is right on the very edge of the histogram – if it spikes before the edge it is not a problem.
Once you evaluate your image using the histogram, you can use your exposure compensation to make the image darker or lighter without having to worry about changing the aperture, shutter speed, or ISO. If you just want it a little darker, turn the exposure compensation down a little. Or turn it up a little if your image is too dark. You’ll have to check your camera manual again to see how to do this. On my camera, I hold the shutter half way down and move the wheel on the back of my camera to change the exposure compensation.
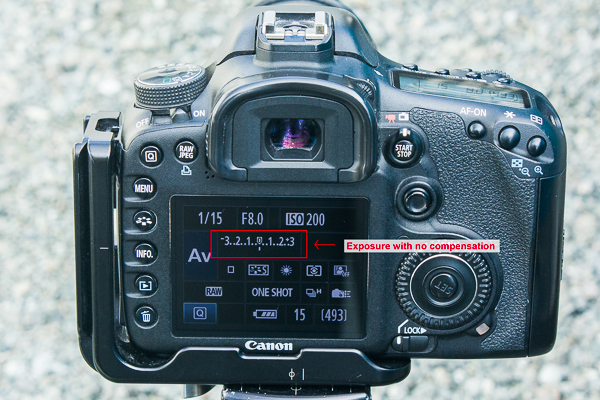
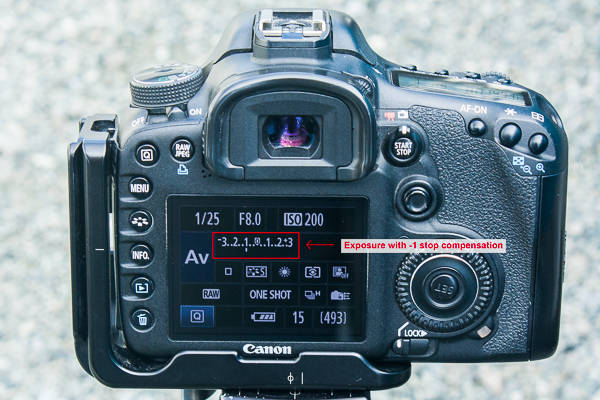
This is the quickest method to use when you have time to chimp. While bracketing will ensure one of the three exposures is useable, this method is more precise and deliberate.
3. Exposure Lock
Exposure lock is my favourite method to use when I have lots of time. It actually doesn’t require that much time to do, especially when you get in the habit.
If you have a subject that isn’t moving, such as a landscape scene, and you have time to be purposeful about what you are doing, this is the ultimate method for getting the perfect exposure.
I like to use exposure lock in combination with the “spot metering” exposure mode so that the camera will only take into account the light level at the exact spot in the frame that I tell it to. I decide what part of the image is most important for the exposure. For example, if I am making a silhouette image at twilight, I will point the camera at the sky and use the exposure lock button to exposure for the sky, then I recompose the image, focus, and take the shot.
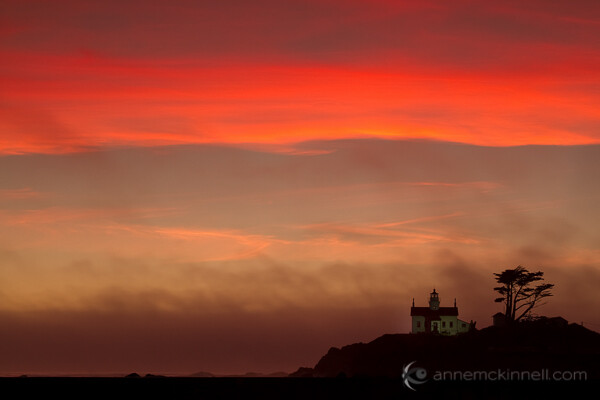
To make this image of Battery Point Lighthouse in Crescent City, California, I pointed my camera at the bright red band of clouds in the sky, used my exposure lock, and then recomposed the image and pressed the shutter.
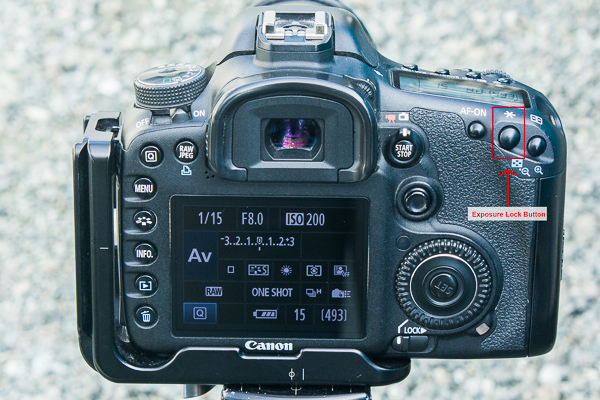
Check your camera manual to see how to use exposure lock. On my camera, I press a button with a * on the back of my camera.
Depending on the type of subject you are photographing and whether things in your scene are changing quickly or slowly, one of these methods will ensure you always get a good exposure.
Post originally from: Digital Photography Tips.
Check out our more Photography Tips at Photography Tips for Beginners, Portrait Photography Tips and Wedding Photography Tips.
3 Ways to Guarantee Good Exposures
You must be logged in to post a comment.