A few weeks ago I shared some key tips on how to get a lot out of Lightroom by using only a handful of sliders and while this is a great place to start eventually you’ll want to get a bit more creative with the software. Today I’m going to show you four different things that you can accomplish by using Lightroom’s Graduated Filter tool.
4 Creative Ways to Use Lightroom’s Graduated Filter
Split White Balance – This technique can be a powerful one when trying to get some interesting colors out of the sky, but retaining the natural colors of the earth. In the photo below I’ve added some pinks and purples to the sky, but was able to retain the natural green color of the grass.
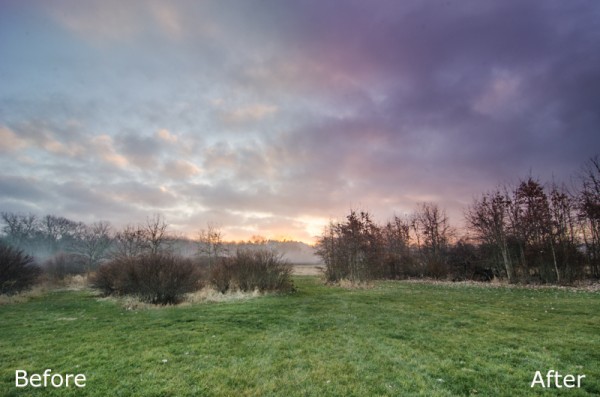
How I Did It – The graduated filter was dropped in from the top and rests just above the horizon line. I then made adjustments to the temperature and tint sliders until I was happy with the colors. Note: if there are objects that fall within your graduated filter’s effected zone you can correct it by using the adjustment brush and adjusting the tint & temp sliders locally for that specific area.
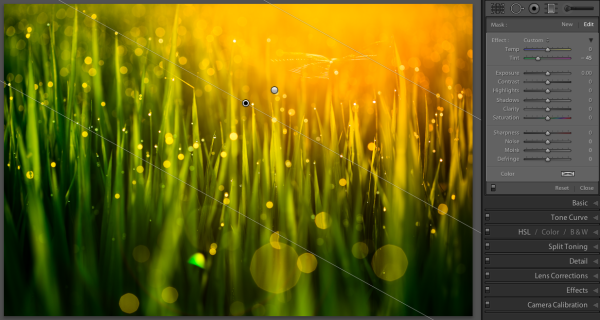
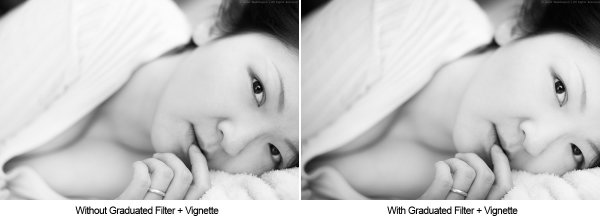
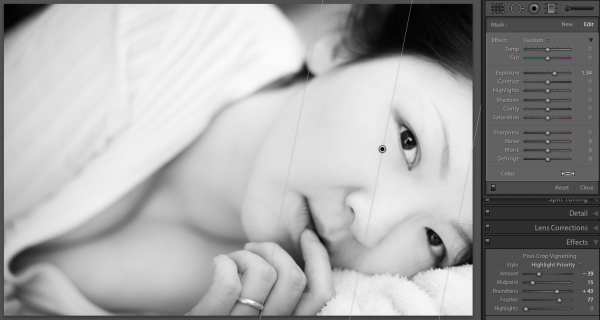
Direct the Light – By applying multiple filters to your photo you can create spot light like effects, leading lines and even your own very customizable vignette effect like seen below.
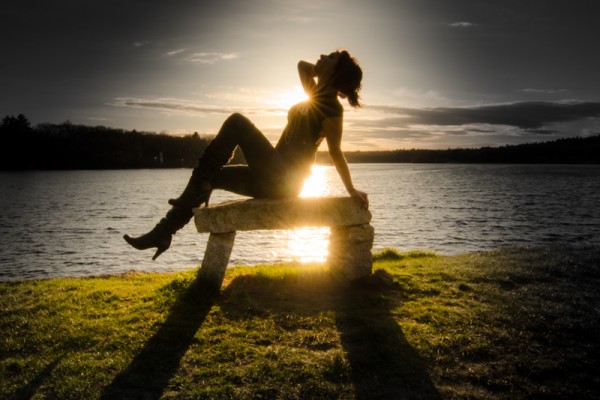
How I Did It – Here I’ve dropped in four different filters which all work together to create the final effect. There are two that are pulled in from the sides of the frame to drop the exposure of the edges. Then I dropped one in from the top and placed it almost at the bottom of the frame I use this one to increase the exposure of the overall photo excluding the very bottom of the frame. However, once this one was applied the top of the frame was over exposed so I then apply one more filter, again dropped in from the top, but placed towards the middle of the frame. This time I drop the exposure to cancel the effect of the previous filter and thus create the vignette effect. Yikes that was a mouthful!
Soften Your Borders – Sometimes you might want to soften the borders of your photo to draw in more attention to the center of the frame.
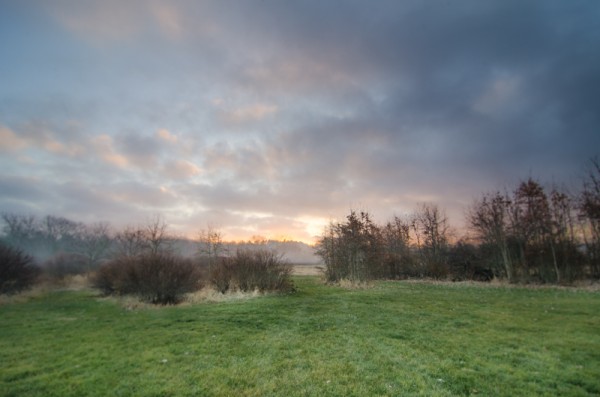
How I Did It – This is a fairly simple process of dropping two filters in one from each side of the photo and then reducing the sharpness and clarity on both of them to -100. This effectively blurs out the sides of the frame and draws your attention to the middle.
Create a B&W to Color Transition – A very cool effect can be the black and white to color transition. It’s not something that’s going to be used on every photograph you produce, but when you do use it it will often get people to look twice.
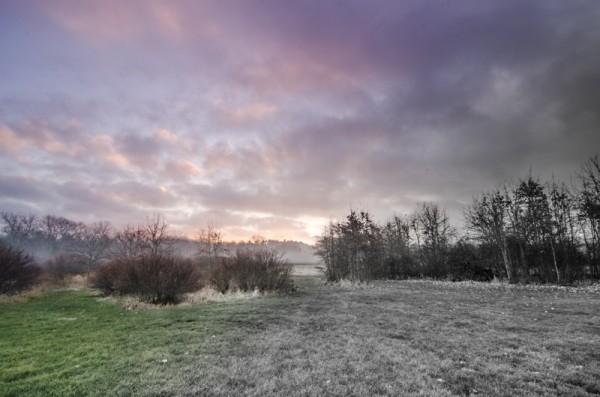
How I Did It – The black and white to color transition is done by using one single graduated filter and dropping the saturation to -100. It’s up to you where you want it placed and how dramatic you’d like the transition to be – a narrow filter makes for a more dramatic transition.
For Those Who Prefer Video
If you’re anything like me it is so much easier to learn this kind of thing when things are in motion and therefore I’ve included a video which walks you through everything I talked about above, plus a few other Lightroom goodies as well. Enjoy!
Post originally from: Digital Photography Tips.
Check out our more Photography Tips at Photography Tips for Beginners, Portrait Photography Tips and Wedding Photography Tips.
4 Fun Tricks to Enhance Your Photos With Lightroom’s Graduated Filter Tool
You must be logged in to post a comment.