RSS
 

Posts Tagged ‘Golden’

Capture Epic Photos Outside the Golden Hour with these Easy Photography Tips

20 Nov

The post Capture Epic Photos Outside the Golden Hour with these Easy Photography Tips appeared first on Digital Photography School. It was authored by Jeremy Flint.

capture-epic-photos-outside-the-golden-hour

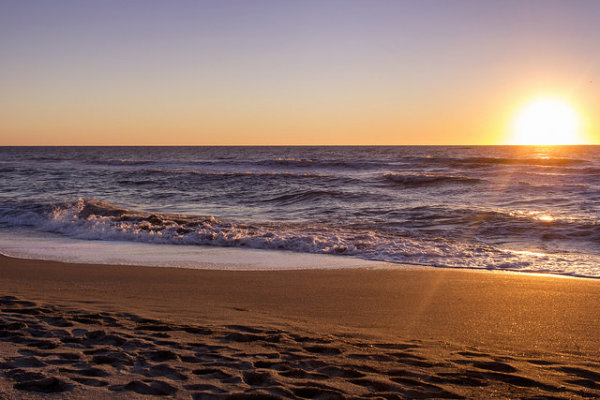
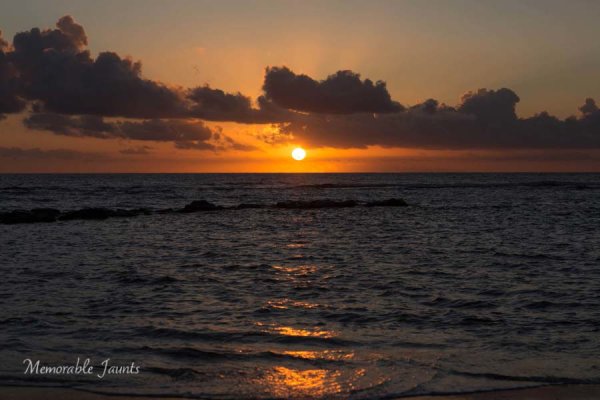
The golden hour is one of the most magical times of the day for photography with wonderful light at sunrise and sunset. Yet, have you ever challenged yourself to photograph around these times? You can still capture amazing photos outside the golden hour and here are some ways you can achieve this:

Shoot during the Blue Hour

capture-epic-photos-outside-the-golden-hour

The blue hour is a fantastic window of opportunity where you can create some stunning images. It refers to the period of twilight when the sun is well below the horizon, and residual, indirect sunlight takes on a predominantly blue shade. The blue hour generally lasts for 20-30 minutes and occurs just after sunset and just before sunrise.

It is important to use a tripod when capturing images in low light. Sharper images will also result from using a tripod by minimizing camera shake when using a slower shutter speed. In terms of the best subjects to photograph during the blue hour, start with cityscapes, roads with street lights, roads with traffic, bridges, fairs, wharves, and marinas.

Include electric lights for dramatic effect and use the extra light to add interest to epic scenes. Most of all, be creative and capture the artificial and natural light together. The warmer tones of illuminated buildings can blend beautifully with the cool blue hues of the sky.

Shoot at night

capture-epic-photos-outside-the-golden-hour

Don’t be in a hurry to put the camera away after the blue hour. There are still more opportunities to take great photos outside the golden hour and blue hour with night photography.

Although the natural light will have faded away, other photographic moments awaken.

Regarding city scenes, the sky will appear darker, and as a result, it can help make other city landmarks and street lights stand out.

Using moonlight can be a brilliant way to capture epic scenes as it paints the landscape or photographing it within a wider frame. Then there is the night sky, which can present wonderfully scenic photos. You can shoot stars, star trails, and even the northern lights.

Combine any of these with the landscape, and they are a recipe for epic images.

Shoot in the midday sun

Outside golden hour 3

Most people tend to avoid photography during the middle of the day, preferring to shoot during the golden hour. Well, challenge yourself to capture photos outside the Golden Hour by shooting at this time of day, and you can be greatly rewarded.

Although the light can indeed be harsh with the midday sun directly overhead, think outside the box. Subjects are well-illuminated, so look for colors that may stand out.

Blue skies can look great with cityscapes. Colorful buildings or flowers can look amazing with a backdrop of a clear blue sky or fluffy white clouds. Also, some cloud cover that reveals patterns of light over a nice landscape scene can look great.

Another option is to shoot the light reflecting indoors. You can head to your local market or capture the interior of a building. Both locations can be great for capturing images at midday.

Shoot when the sun is lower in the sky

Outside golden hour 4

During the winter, daylight is reduced, and we all like to stay in and enjoy the comforts of our home. However, this is a great time to get out and be creative with your camera to capture some awe-inspiring, majestic winter images. At this time, the sun arcs lower in the sky, which is perfect for getting some memorable photos. As this happens throughout the day, you can get some good images at any time.

Watch how the sun stays low and casts long and dramatic shadows and capture this in your images. Use shadows to support your main subject and to give a sense of scale.

Shoot in the morning light

Outside golden hour 5

One of the best times to take photos outside the golden hour is in the morning.

If you shoot after the hour following sunrise when the light is still good, you can get some great images. Whether you find yourself on a trip or in your local area, there is always a morning photography opportunity.

You can photograph landscapes or cityscapes by aiming your camera towards the sun whilst it is still rising. Alternatively, turn around and photograph the gorgeous light painting the land or city behind you.

If you are in a warmer climate, the temperature can be good at this time of day before it can get too hot to be carrying around all your camera equipment. If you like to photograph street scenes and people, head to some of the busier streets as more and more people will be around as the day warms up.

Look for any interesting activity and capture epic scenes of these subjects – they can really be worth the early morning start.

Conclusion

Remember, you can achieve awesome images when shooting at a variety of times outside the golden hour. Choose a time to take your camera out and go and do it!

Do you have a preferred time for taking amazing images besides the golden hour? Share the images you capture with us below.


The post Capture Epic Photos Outside the Golden Hour with these Easy Photography Tips appeared first on Digital Photography School. It was authored by Jeremy Flint.


Digital Photography School

 
Comments Off on Capture Epic Photos Outside the Golden Hour with these Easy Photography Tips

Posted in Photography


Natural Photography Lighting And The Golden Hours

23 Sep

As an avid photographer it always used to irk me that I was so open to the elements and my


Fashion Photography Blog

 
Comments Off on Natural Photography Lighting And The Golden Hours

Posted in Uncategorized


California City: The Half-Built Desert Metropolis of the Golden State

01 Aug

[ By WebUrbanist in Abandoned Places & Architecture. ]

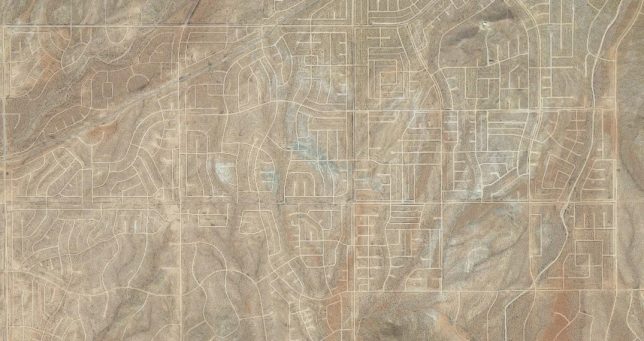
It’s the third-largest city in California by land area but most people (including many in CA) have never even heard of this mostly-empty desert oasis, home to around 15,000 people. It’s not quite a city, but not quite a ghost town either.

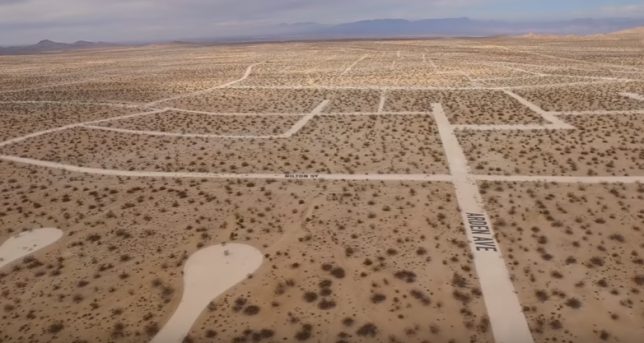
Visiting the area is a bit surreal – roads running through its 200 square miles connect nothing to nothing in the hot Mojave, in some cases following straight lines and in others wrapping to form cul-de-sacs.

Some roads are paved, but most aren’t. In places, nature has started to reclaim the dirty gravel strips with hearty desert plants growing right up through streets.

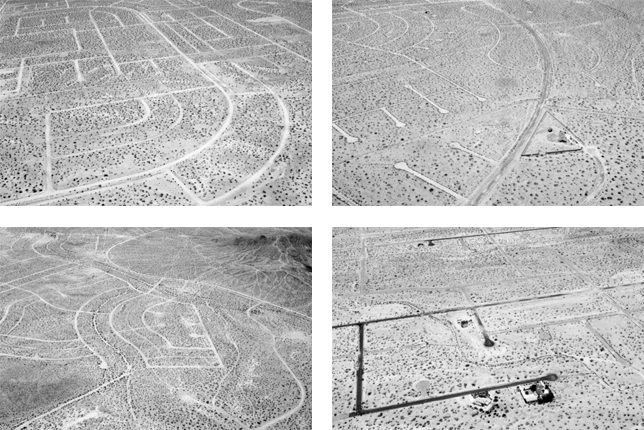
Photographer Noritaka Minami recently took a trip in a helicopter to photograph the strange sprawling semi-ghost town, which are on display at On Freedom, an exhibition at Aperture for another month.

The place was a mid-century vision of a real estate developer named Nathan Mendelshon who purchased over 80,000 acres, imagining California City as a fresh metropolis for a growing state.

Some parcels were resold but never developed — others were bought and remain in use, mainly for people working at a nearby military base or prison.

The few houses that do exist seem almost stranger than the framework of roads around them, neatly fenced in a neighborhood of empty plots.

More from Minami: “This project focuses on California City, a master planned community in the Mojave Desert conceived by sociologist turned real estate developer Nathan K. Mendelsohn in 1958. California City was envisioned as the next major metropolis in California in response to the population and economic growths after World War II. This development was based on the belief that even in a harsh desert landscape, mankind had the freedom and power to produce a built environment that provided all of the essential needs for a prosperous modern life.”

In his series of black-and-white images, “aerial photography is used to document the scale of the vision Mendelsohn proposed in the desert and question whether this ‘wonderland’ could have even been sustainable in this environment. Despite having the foundation for a city in place, there are no indications that this city will ever be realized in the future.” In the end, half-built may be an overstatement — in reality, the place is more like a skeletal outline of a city, punctuated (like a normal rural landscape) by pockets of development and clusters of community.

Share on Facebook


[ By WebUrbanist in Abandoned Places & Architecture. ]

[ WebUrbanist | Archives | Galleries | Privacy | TOS ]


WebUrbanist

 
Comments Off on California City: The Half-Built Desert Metropolis of the Golden State

Posted in Creativity


Out of Gas: Abandoned Station Will Live its Golden Years as a Venue

06 Jun

[ By SA Rogers in Architecture & Offices & Commercial. ]

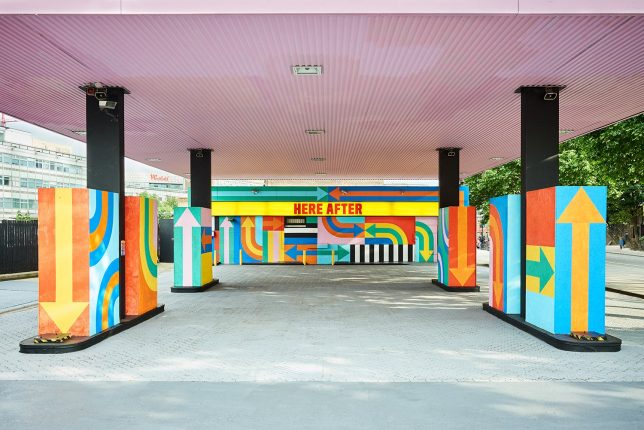
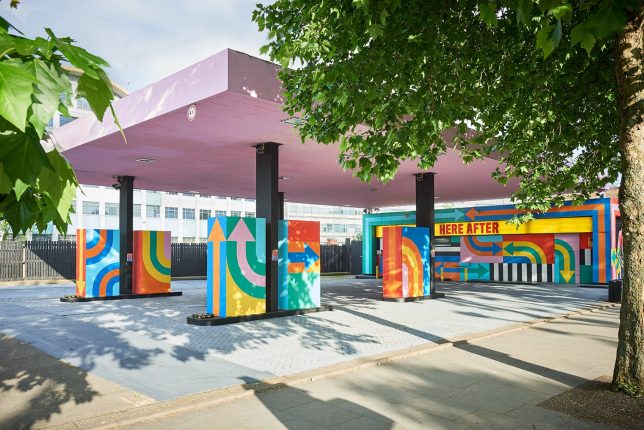
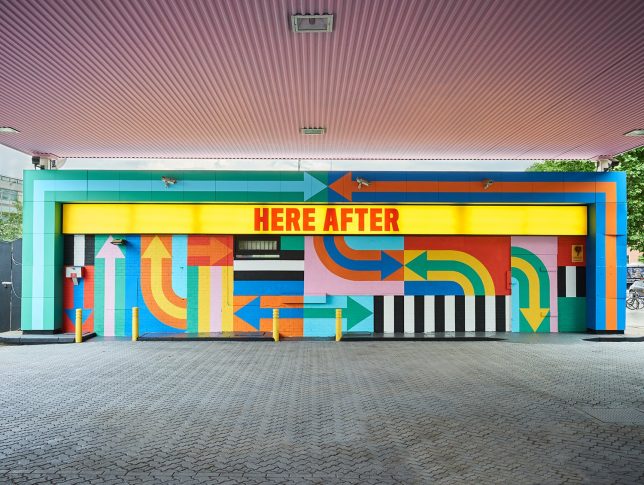
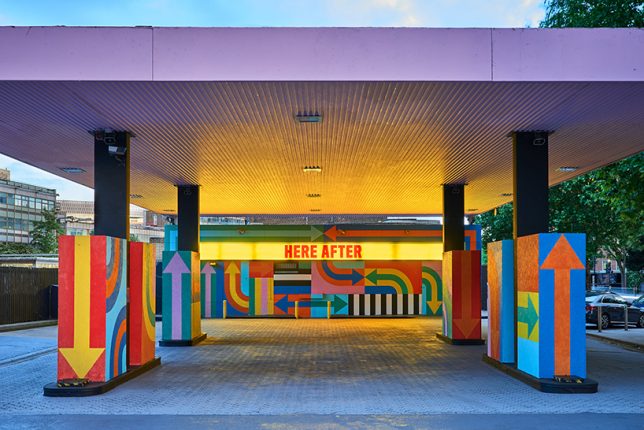
A formerly abandoned gas station in London’s White City district may have outlived its usefulness in its original purpose, but it’s got a new, more relaxing job to do in the ‘hereafter.’ If all those pastel colors didn’t tip you off, the station is in retirement, and it will live out its golden years acting as a colorful venue for pop-up events in the midst of a decade-long urban regeneration effort aiming to create a “thriving, creative neighborhood.”

The station, located on Wood Lane, sits between the BBC’s former headquarters at the Television Centre and White City Place, the former BBC Media Village, both of which will reopen this year after redevelopment. Designer duo Craig & Karl, aka Craig Redman and Karl Maier, took inspiraiton from the bright colors of a television test card for the station’s cheerful new palette and decorated it in their signature graphic style.

“We view this project as the petrol station’s second life, or ‘wonder years,’ which led us to use the words ‘here after’ as a reference to heaven or utopia,” say the designers. “Now that the petrol station has fulfilled its duty, so to speak, it’s free to enjoy itself.”

In a jam-packed, space-challenged city where so few people even own vehicles, this is an especially fitting and fun revitalization of a disused urban space. Doesn’t it make you wish all gas stations were treated as art objects?

Share on Facebook


[ By SA Rogers in Architecture & Offices & Commercial. ]

[ WebUrbanist | Archives | Galleries | Privacy | TOS ]


WebUrbanist

 
Comments Off on Out of Gas: Abandoned Station Will Live its Golden Years as a Venue

Posted in Creativity


How to Get the Most Out of Photographing at Golden Hour

09 Apr

The infamous golden hour is a photographer’s dream. That one key period of time that could make even the most stringent artist swoon with inspiration. The sun will dance across your viewfinder, and an endless array of possibilities will present themselves. Regardless of whether your photographic style is vibrant, monochrome, gentle, or contrasted, the golden hour will grant you the ultimate canvas upon which to paint your vision.

So, what is golden hour exactly?

golden hour

The golden hours include the first hour after sunrise and the last hour of light before sunset. Predicting this short window of time depends upon your geographical location and the current season. What makes this lighting situation so ideal for photography is the sun’s positioning relative to what you are photographing.

Due to the sun beginning its speedy rise or setting in the sky, the light source is now closer in relation to your subject. It is also going through more of the earth’s atmosphere at this low angle. When this occurs, soft diffused light is produced.

Generally speaking, soft light is considered the best canvas for a photographer. It does not create harsh shadows and tends to be very dynamic-range-friendly, as your images will not feature harsh shadows or blown-out highlights. The golden hour casts a warm color temperature as well, which can be enhanced upon or corrected via post-processing. This warm color cast lends itself to being a flattering illumination upon any subject of your choosing.

golden hour portrait

Five key lighting situations at golden hour

Any type of photography, from portraits to landscapes to action, can benefit from the use of the golden hour. There are five key lighting situations you can create during this time:

Front-Lighting

This is when your subject faces the sun directly. During the golden hour, this lighting gives a very warm feel to images. Because the sun is not directly above them, in many cases, your subject will not have to suffer the intensely bright light and need to squint. This lighting situation is very easy to photograph in and will make a lasting impression.

golden hour front-lighting

An example of front-lighting at golden hour.

Back-Lighting

Back-lighting occurs when the sun is behind your subject. During the golden hour, this lighting situation creates a soft, warm, hazy, glowing effect. Be sure to expose for your subject’s proper tones, and enjoy the masterpiece that you create.

Golden hour back lighting.

An example of back-lighting.

Rim Lighting:

Rim lighting is when the sun is positioned in such a way to create a halo around your subject. This halo is especially prevalent when placed against a dark background. The sun doesn’t need to be directly behind your subject to achieve this effect, though, as long as the background is dark. You will have to move around to find the sweet spot to achieve this effect, but a good way to start is by shooting from a lower camera angle.

golden hour - rim lighting

Sun Flare

A sun flare occurs when light hits your lens. Different lenses render different types of flares, so this effect is very fun to try with different types of equipment. To achieve a flare, just move your lens around until you see the light hit it through the viewfinder.

During the golden hour, the sun is at its optimal height for this exact outcome. A simple way to achieve a flare is to move your camera and lens so that your subject is only partially covering the sun. Move around (sometimes you only need to move an inch or two left or right) to find the angle that best creates a sun flare. Another way to achieve a flare is to position your lens and camera so the sun is just out of the frame.

Read more on sun flares: How to Photograph Sun Flares: 14 Tips for Beginners

Golden hour sun flare

An example of a sun flare.

golden hour

A different type of sun flare.

Silhouette

A silhouette is created when your subject is completely black without detail, against a bright background. When the sun is near the end of the golden hour, it becomes fairly easy to achieve a silhouette. Photograph your subject directly against the light, and add some contrast in post-processing.

Golden hour silhouette.

An example of a silhouette at golden hour.

There are several tips to truly take advantage of the golden hour. Here are a few to help you:

1. Observe the sky the day before

The best way to figure out when the golden hour will be at its peak is by observation! Peek out of the window the day before your photo session, and see how the sun moves and how the light changes. This will allow you to get a better idea of what the lighting situation will be like on the day of your shoot.

golden hour

2. Plan your photo session around golden hour

No one wants to feel stressed, anxious or rushed when doing photography, so be sure to plan well ahead of time! It is a good idea to begin setting up for your photo session an hour before the golden hour. That way you have plenty of time to ensure that your subject and equipment are ready for that perfect moment.

Golden hour portrait

Anani Inaru with Trinket photographed at golden hour.

3. Watch out for clouds!

Depending on the level of cloud coverage in the sky, your golden hour can change (or not appear at all!). Clouds can enhance the brilliant sunrise or sunset, or they can block your view.

golden hour

4. Set your White Balance to Cloudy

By changing your White Balance setting, you ensure that the images you produce hold true to the colors you want to appear. This allows you to get the warm look the golden hour is famous for – choose Cloudy or Shade to add even more warmth and golden hues to your images.

golden hour

5. Shoot with a wide aperture

How the light dances during this brilliant hour can make for an incredible bokeh (the aesthetic quality of the out-of-focus parts of a photograph). The dazzling yellows, reds, oranges, and golds make a rather exceptional backdrop.

Golden hour

Golden hour bokeh.

6. Keep photographing, because the light will change every couple of minutes!

The sun moves faster than you may expect, so keep shooting and don’t stop! Every position of the sun will create a brand new image for you to take.

golden hour

7. Try different angles and positions.

The sun flares, colors, and intensity of the light in your image are all affected by how you angle your lens. Experiment and try as many different positions as humanly possible! The best way to get the absolute most out of the golden hour is to take advantage of how easy it is to manipulate this unique lighting situation.

golden hour

8. Underexpose a bit to add more vibrancy

You can always lighten up your subject(s) in post-processing, but it is harder to darken an overexposed image. Underexpose just a bit to bring out the beautiful vibrancy of the sunset or sunrise.

Golden hour

9. Explore the use of HDR

Photograph multiple exposures and then layer them on top of one another in post-processing, and see how many incredible lighting details you can achieve. Read more on HDR: Step by Step How to Use HDR Merge in Lightroom

HDR golden hour

10. Play with post-processing

What colors can you bring out in your image? Use post-processing to really enhance the colors that you capture. You will be surprised at what colors you can see when the sky has a few clouds in it.

Conclusion

The golden hour is full of limitless possibilities, and no two photographs will look the same. Experimentation is key, explore the light. How do you use golden hour for your photography? Share your thoughts and images below.

The post How to Get the Most Out of Photographing at Golden Hour by Anabel DFlux appeared first on Digital Photography School.


Digital Photography School

 
Comments Off on How to Get the Most Out of Photographing at Golden Hour

Posted in Photography


Golden Ratio in Action: Coloring Book & Animations of Geometric Illustrations

01 Mar

[ By WebUrbanist in Art & Drawing & Digital. ]

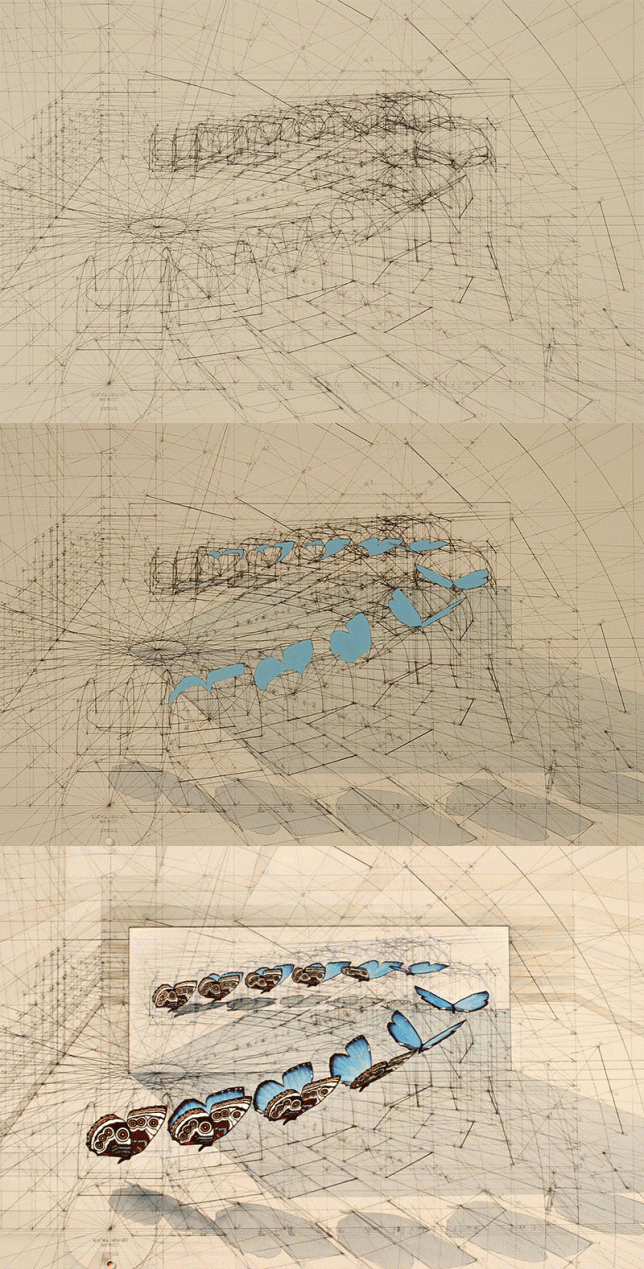
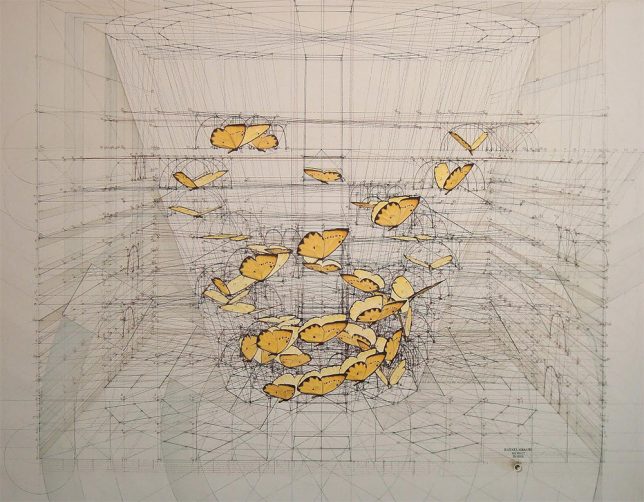
butterflies

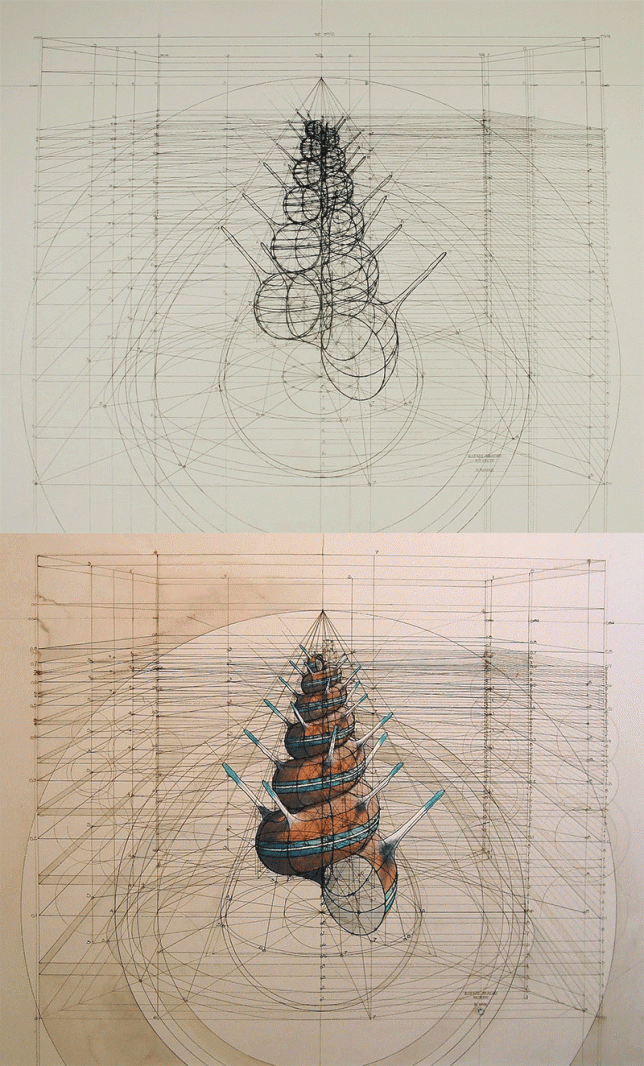
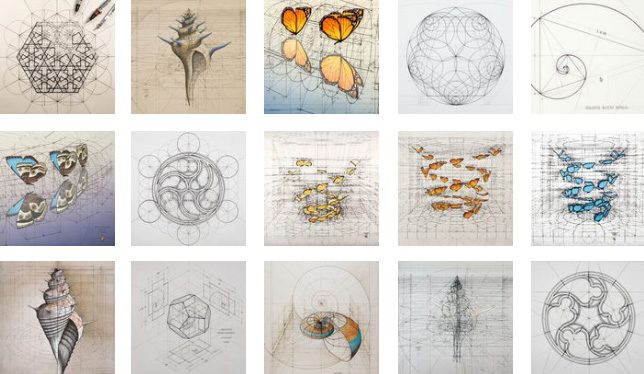
The Golden Ratio has been a source of inspiration (and contention) for thousands of years, lurking behind great works of design. Venezuelan architect and illustrator Rafael Araujo is fascinated with patterns of nature and their applications to built environments, but as his artwork shows, is particularly interested in the Golden Ratio as found in natural settings.

3d drawing

hand drawn

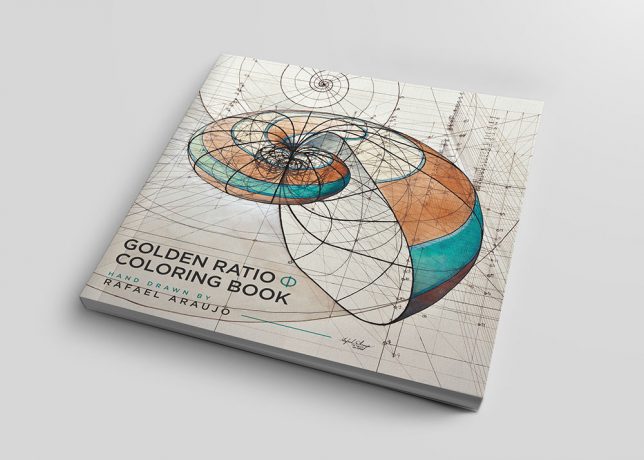
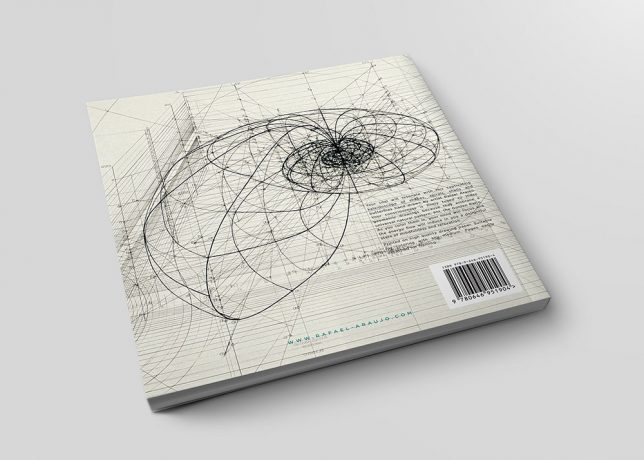
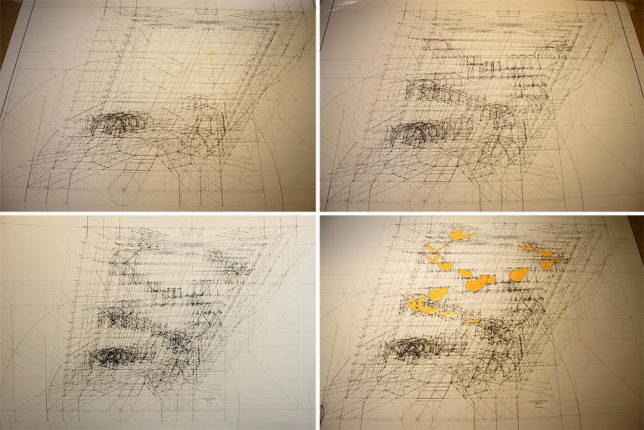
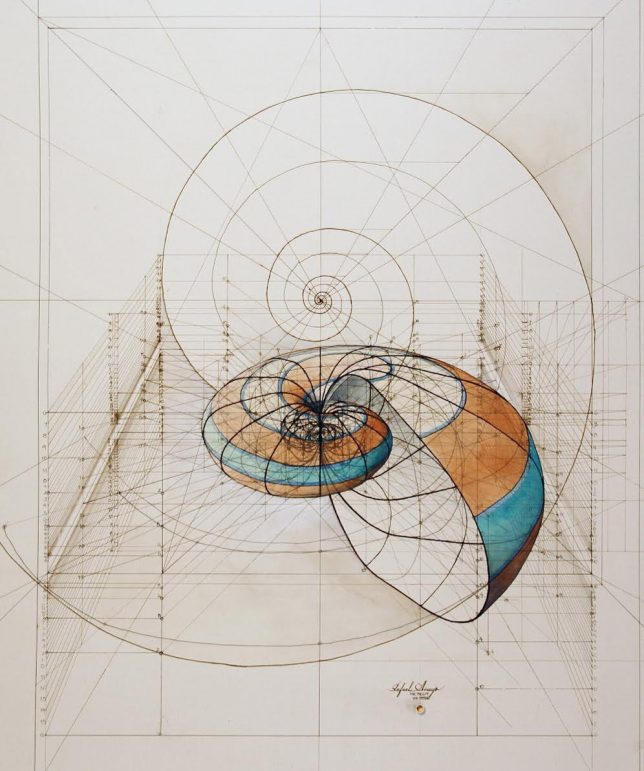
These painstakingly created drawings trace this ratio into reality, animating everything from fluttering bird wings to the formation of seashells. Some of these sophisticated works take days or even weeks to complete — fans can also get in on the action with his recently created coloring book.

coloring book

coloring book interior

coloing book back

This coloring book provides a version of his pieces as frameworks for others to complete. The artist got the idea after fans started asking for prints, seeing it as a way to bring them into the process rather than simply giving them a framed product.

process

art

Using pencils, rulers, compasses and protractors, he spends as much as 100 hours on a given illustration of these mathematical expressions. Leftover lines, like those found faded in architectural drawings, give extra depth to each piece while also highlighting the geometry that goes into it.

3d drawing

His work shows how the geometric formulas of the Golden Ratio can be found in spirals of plants as well as the delicate flights of butterflies, all through hand drawings of each phenomenon. And as fascinating as they are in their finished form, animated images and process videos of the works in progress are especially intriguing.

shell

Part of the challenge in his representations is their three-dimensional nature — showing complex organic curves accurately in 3D is an incredibly difficult feat of science applied to art. At the same time, something would be lost if these creations were simply done using computer programs (h/t Colossal).

Share on Facebook


[ By WebUrbanist in Art & Drawing & Digital. ]

[ WebUrbanist | Archives | Galleries | Privacy | TOS ]


WebUrbanist

 
Comments Off on Golden Ratio in Action: Coloring Book & Animations of Geometric Illustrations

Posted in Creativity


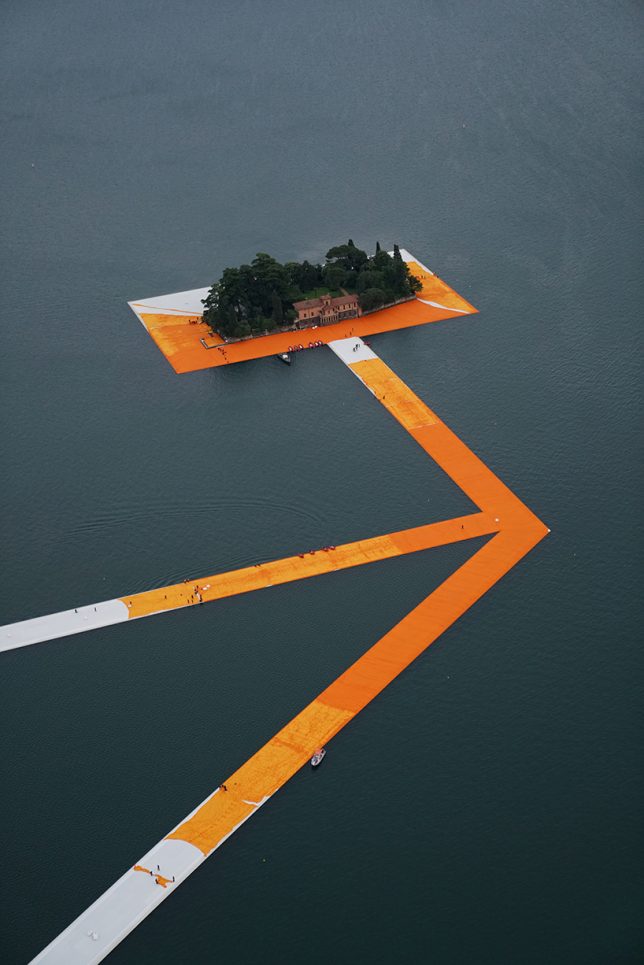
Walk on Water: Christo Unfurls 1 Million Square Feet of Golden Cloth

20 Jun

[ By WebUrbanist in Art & Installation & Sound. ]

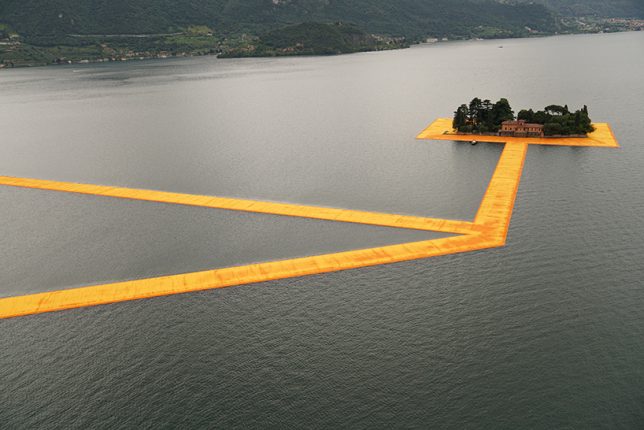
christo island view

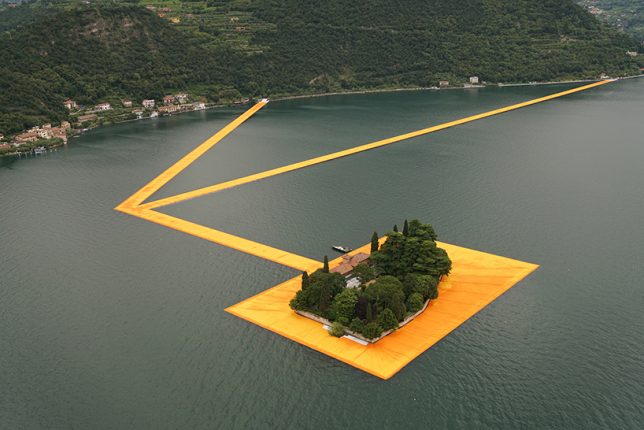
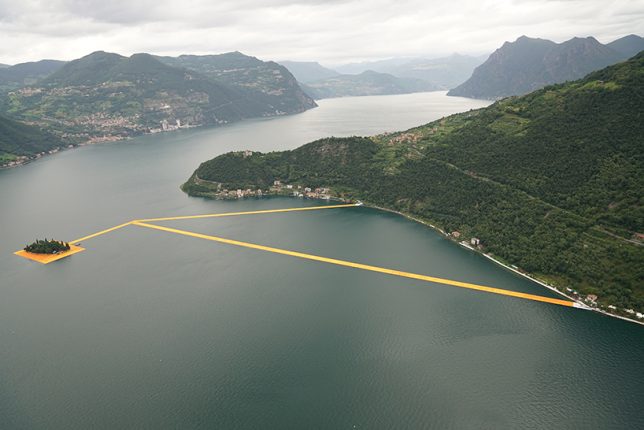
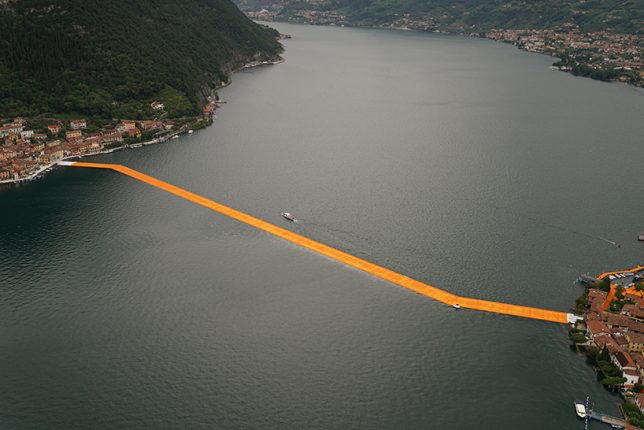
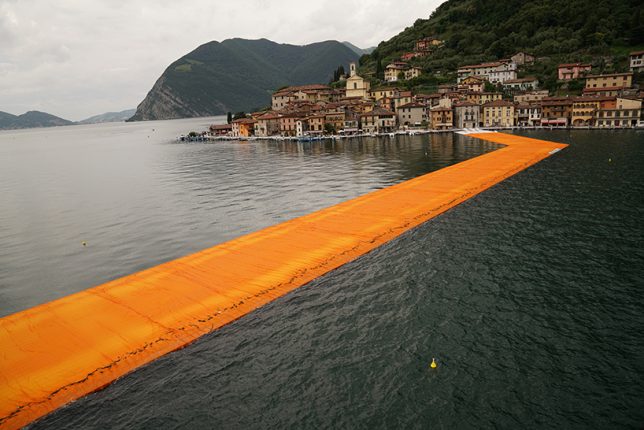
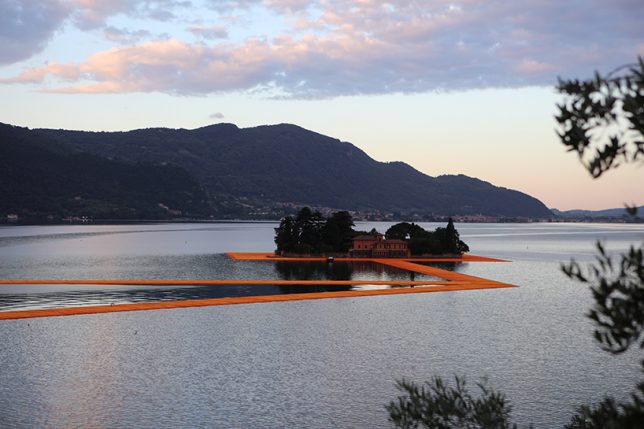
Known for his work on large-scale art projects, including the world’s biggest interior art installation, artist’s latest piece features over 1,000,000 square feet (100,000 square meters) of shimmering yellow fabric, wrapped around floating docks that span for miles up to and across Lake Iseo in Italy.

floating lake art

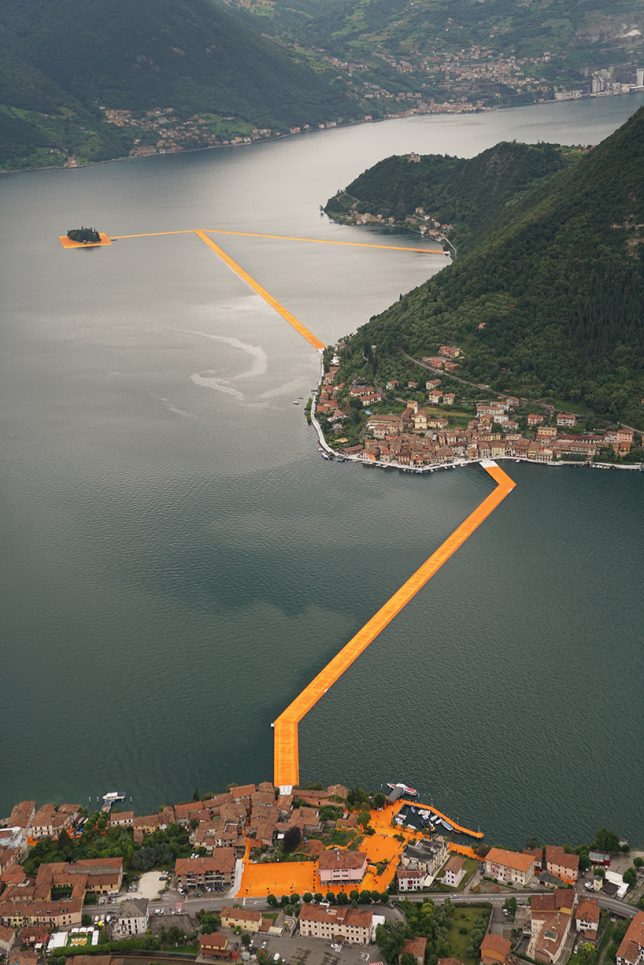
christo aerial view

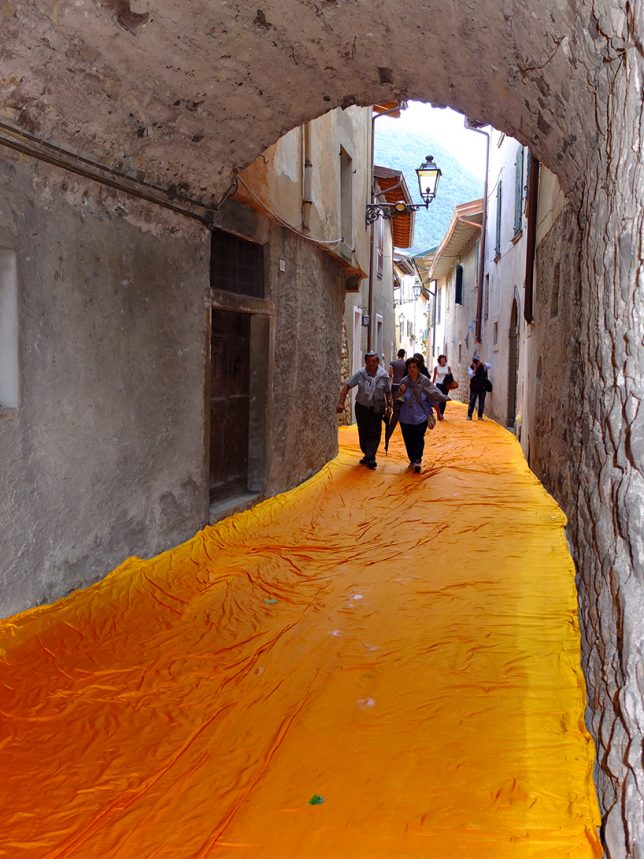
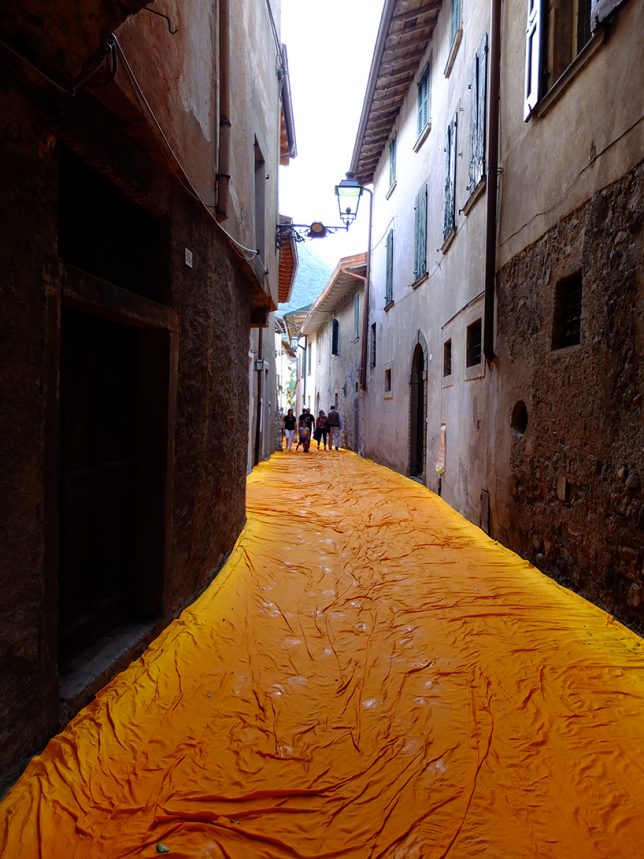
Undulating with the waves, the Floating Piers project lets visitors walk between Sulzano, Monte Isola and to the island of San Paolo; the floating platforms are visible from surrounding mountains as well.

christo golden path fabric

christo streets alleys

Christo conceived of the idea with his Jeanne-Claude as far back as the 1970s, exploring different potential venues for its installation. While Jeanne-Claude passed away in 2009, Christo has carried on the idea, and finally found a place for the temporary work in Northern Italy.

christo unveiling

christo day of

Many works by this long-standing pair of ambitious artists were self-funded, in part through the sales of concept drawings and models in advance.

christo floating path

christo close up

christo lake view

“like all of our projects,” says Christo, “The Floating Piers absolutely free and accessible 24 hours a day, weather permitting. There are no tickets, no openings, no reservations and no owners. The Floating Piers are an extension of the street and belong to everyone.” The project opened this weekend and will run for just 16 days. Images by Wolfgang Volz.

Share on Facebook


[ By WebUrbanist in Art & Installation & Sound. ]

[ WebUrbanist | Archives | Galleries | Privacy | TOS ]


WebUrbanist

 
Comments Off on Walk on Water: Christo Unfurls 1 Million Square Feet of Golden Cloth

Posted in Creativity


5 Tips for Golden Hour Photography

06 Aug

It’s pretty much an accepted fact that the earlier and later parts of the day are best for photography, but if you want the absolute richest, warmest, most beautiful light, the hours directly following sunrise and leading up to sunset – known as the golden hours – are prime time for natural light.

This is when the subtle golden light from the low-hanging sun bathes the world in a warm glow, and shadows become long and dramatic, but not harsh.

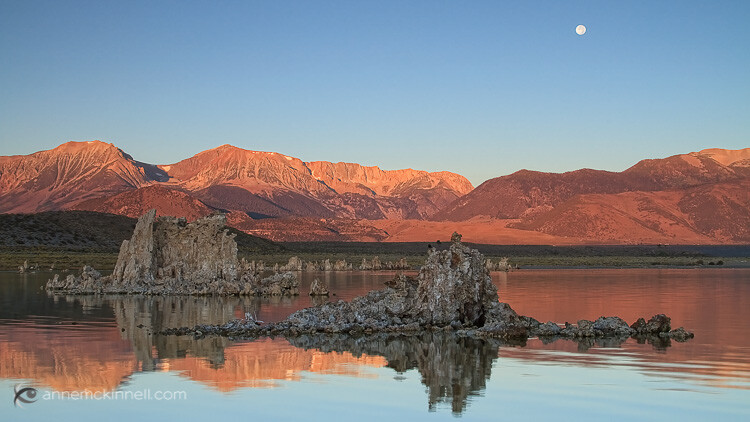
Mono Lake, California, by Anne McKinnell

Those hours can be short-lived, though as once the sun starts to rise or set, it isn’t long before it climbs too high, or disappears altogether. To help you get every second out of each golden hour, consider these tips when you go out shooting.

1. Be There

The first step to making the most of the golden hours is knowing exactly what time that magic light is going to happen. Because the golden light is caused by our view of the sun, the timing will change with the seasons. Exactly what time the sun passes over the horizon depends the time of year and your location.

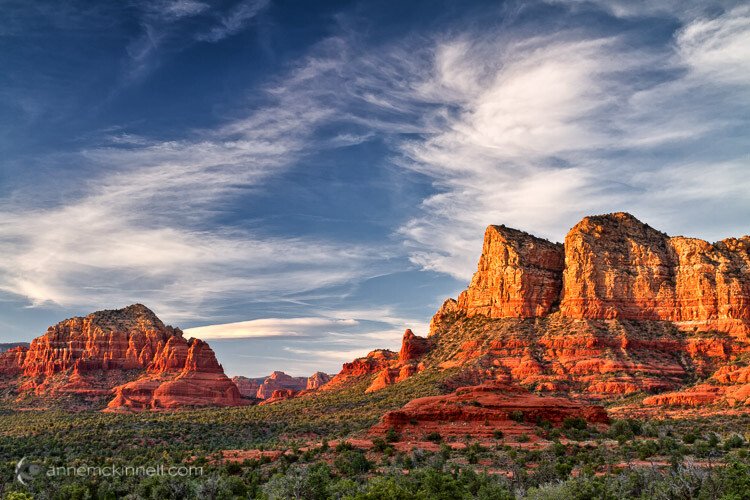
Sedona, Arizona, by Anne McKinnell

The time of sunrise and set is easy to find in your newspaper or online and that is a good place to start to calculate when the golden light will happen. But golden hour may not be anywhere near as long as an hour depending, on the season and your location. For example, near the equator, the sun rises quickly and you may only get golden minutes. On the other hand, in far northern locations the sun may not rise very high in the sky at all and you might get golden light all day.

You also need to watch how the clouds are forming throughout the day, since clouds on the horizon will cut your golden hour short.

2. Prepare Early

The golden hour (or minutes) can pass very quickly, so if you’re not already out shooting when the golden light starts, it’s likely to be over by the time you find your subject, choose a composition, set up your camera, and take the shot. If you know in advance what time you need to be there, you can plan ahead. Go out a couple of hours beforehand so you’ll have time to get to your location, get set up, and be ready to take the photo by the time the horizon starts to glow.

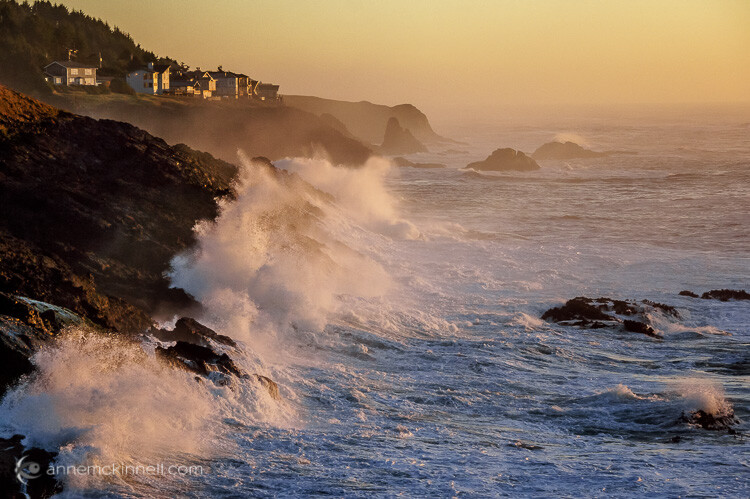
Depoe Bay, Oregon, by Anne McKinnell

By doing this, of course, you have to think into the future a bit. Rather than compose your image based on where the sun is, you must arrange your frame according to where the sun will be. To do this, think about the path the sun takes through the sky. It rises in the east, so you know where you can expect to see it first, and because it sets in the west you know which direction it’s moving. You can even find out the exact position where the sun will set on the horizon using various website and apps. Plan your shots with this information in mind. A compass will come in handy. Compose your photograph where the sun is going to be, then just relax and wait for the moment to present itself.

3. Balance the Exposure

The contrast between light and shadow isn’t as extreme during the golden hours as it is in the middle of the day, but there can still be a huge tonal range between highlights and lowlights (shadows). Especially if you’re trying to capture the sky itself in the picture, its brightness will almost certainly overpower the scene below it.

There are many ways to balance a difference in brightness between two parts of your composition. Bracketing your shots is a good start – use your camera’s exposure compensation feature (+/- button) to take several pictures of a scene with different levels of brightness. There might be a perfect exposure setting that captures both light and shadow areas.

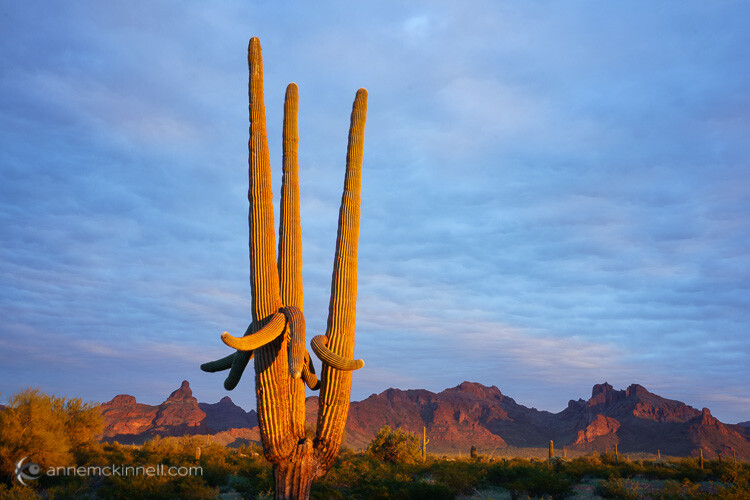
Organ Pipe National Monument, Arizona, by Anne McKinnell

If you shoot in your camera’s uncompressed RAW format you’ll be able to individually adjust your photo’s highlights and lowlights in post-processing, reducing the contrast while preserving as much detail as possible. This way, if one area of your photo is too dark and another is too bright, you can tone down the whiter shades while bringing up the darker shades to create a well-balanced image. This level of control isn’t possible with compressed JPG files, which don’t save the subtle information in those areas.

If the sky is consistently too bright in your photos, consider using a graduated filter that is tinted at one end, but fades out and is transparent on the other. This will reduce the exposure on only half of the image. By putting the tinted half at the top it will darken the appearance of the sky.

Another option is to take your bracketed shots and combine them in post-processing to make a high dynamic range (HDR) image (Merge to HDR in LR or another method).

4. Use Fill-Flash

Rather than take light away from the brighter areas, your other option is to add light to the darker parts instead. You can do this with a continuous light source like a lamp. Moving the light closer to the subject will make it brighter, and pulling the light away will dim it.

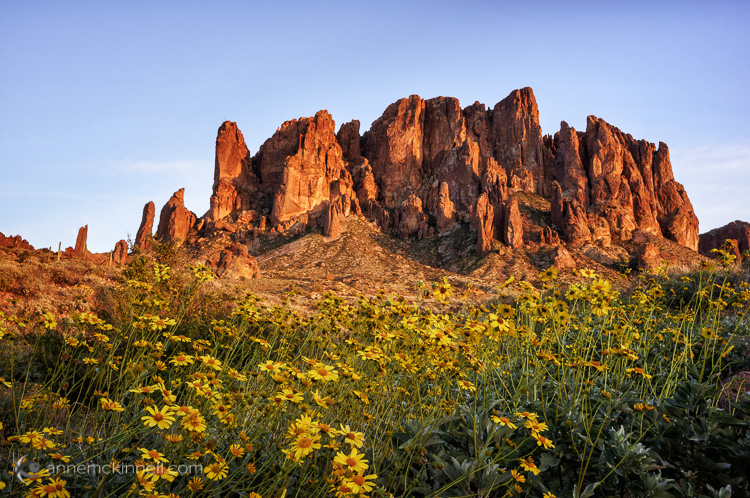
Superstition Mountains by Anne McKinnell

Of course, if you’re outside you probably don’t have a lamp on hand. What you probably do have, though, is your on-camera (or off-camera) flash. Flash doesn’t always have to act as the main light source in a picture – it can enhance an existing light source (such as the sun) by simply adding light into the shadow areas of a photograph.

Flashes also don’t have to be used at full power. Nearly every camera will have a Flash Compensation option. This gives you the ability to turn the brightness of your flash up or down. A dimmer flash will still add light to your scene, but it won’t be strong enough to overtake the primary light source and create new shadows of its own. Using it in this way is known as fill-flash. When your subject is backlit, such as by a fiery sunset, use this method to prevent silhouetting. Bracket your shots using different flash settings to achieve the right balance of brightness between the foreground and background.

5. Set the Colour Temperature

Combining two light sources can cause other complications though – particularly with the white balance. Every light source has a different hue, or colour temperature. Incandescent bulbs have a yellow/orange (warm) cast, while fluorescents are sort of blue/green (cool). Our eyes adjust to those slight shifts on their own, but a camera has to measure the balance of the light so it can alter its colours, and ensure that a white object looks white and not yellow/orange or blue/green. Modern cameras can do this automatically, or you can manually select what kind of light to balance the camera to (daylight, indoor light, candlelight, etc.).

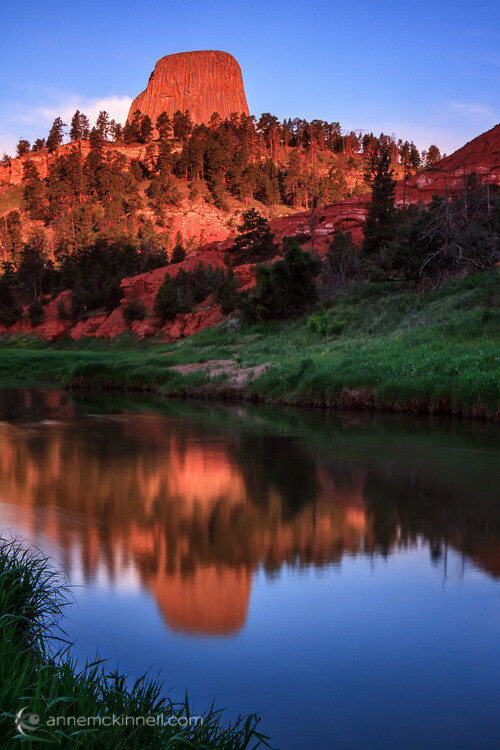
Devils Tower, Wyoming, by Anne McKinnell

The golden hours have a lot of warm coloured light, so if left on auto white balance, the camera will adjust its colours to be a little more blue to compensate. However, if you add in the light of a flash, which is cool in tone, one of two things will happen: the camera will keep the same white balance setting as before, and the flash’s light will appear even more blue, or the camera will re-adjust itself to the white balance of the flash, causing it to look normal but the rest of the picture to appear more orange.

When using two different light sources, it’s important to notice the colour temperature of each. Then, decide which of them you want to appear neutral, and which one should retain its natural colour. Rather than keeping your camera on auto white balance, set it to the type of light you want neutralized. If you shoot in RAW format, this can also be changed in post-processing.

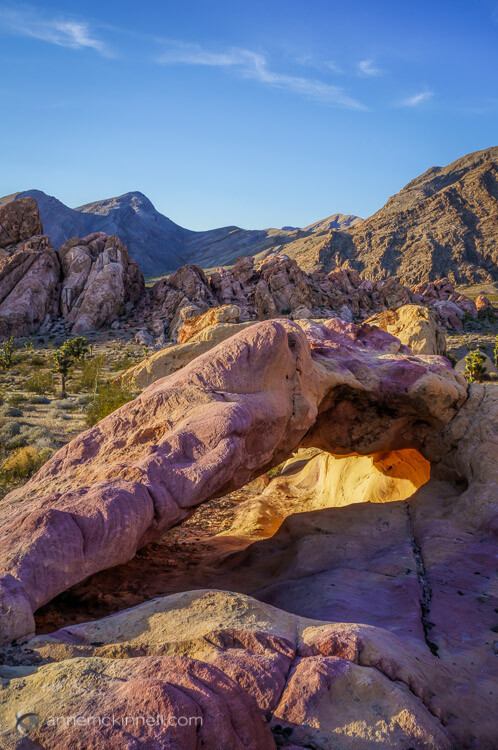
Arch at Whitney Pocket, Nevada, by Anne McKinnell

Remember, golden hour is not sunset or sunrise, but shortly before and after those times when your subject still has direct light falling on it. The magical golden light will transform your photos from ordinary to extraordinary. It’s all about the light!

googletag.cmd.push(function() {
tablet_slots.push( googletag.defineSlot( “/1005424/_dPSv4_tab-all-article-bottom_(300×250)”, [300, 250], “pb-ad-78623” ).addService( googletag.pubads() ) ); } );

googletag.cmd.push(function() {
mobile_slots.push( googletag.defineSlot( “/1005424/_dPSv4_mob-all-article-bottom_(300×250)”, [300, 250], “pb-ad-78158” ).addService( googletag.pubads() ) ); } );

The post 5 Tips for Golden Hour Photography by Anne McKinnell appeared first on Digital Photography School.


Digital Photography School

 
Comments Off on 5 Tips for Golden Hour Photography

Posted in Photography


Tips for Creating Landscape Photos during the Golden Hour

26 Mar

The golden hour. Even if you haven’t been involved in photography for very long, you undoubtedly have heard the term thrown around. As photographers we are in the business of capturing light, and there is no better light to have cast on our subjects, than sun light that is low on the horizon.

The golden hour is defined as periods of time; specifically, the hour after sunrise, and the hour before sunset. The length and time of these occurrences depends on your location on our planet, and time of the year.

siesta_silhouette

Regardless of the type of photography you do, natural light generally falls into two categories; harsh (hard) and soft. Harsh light is what you see when the sun is high in the sky, during the middle of the day (cloudless day).

Because the light is at its most intense during that time, and shining directly down from above, shadows are sharp and well defined. They can also appear in places you don’t want them, such as on a human subject’s face. You can sometimes counter this by using fill flash and reflectors. When you’re shooting landscapes, you see the more unwelcome effects on the sky, with less warmth and higher contrast.

Your subjects are well lit, but generally only from one direction. Images shot during at midday can be rather dull and uninspiring, and it becomes more difficult to capture something spectacular.

goldenhour_article_new4

After the sun lowers in the horizon and sunset approaches however, everything changes. Simply put, taking photos during the golden hour give the images atmosphere. These times give the best light for all kinds of photography, but what advantages do you gain by shooting your landscapes during the golden hour?

Reduced Contrast

Light from the golden hour effectively reduces the contrast in your images. A black and white street shot could benefit from harsher light in the middle of the day, because the higher contrast and sharp shadows better define the subject and the environment. For landscape photos however, the world comes alive when the sun is low, and the light is soft and diffused. Shadows become longer and less defined, and the tonal range changes significantly. Clouds are illuminated differently, and their visual transitions against the sky soften.

Colors

The position of the sun during the day creattes varying temperatures of light, as you can see by the different colors as it crosses the sky. When we discuss temperature in photography, we’re discussing tthat of color, instead of heat. Neutral temperatures are what you see during the middle of the day. The main point to take away from this is that neutral temperatures are fairly uninteresting in regards to their aesthetic effect on your photography.

sunsetcolors

Color ranges become more vibrant and pronounced when the sun is closer to the horizon.

During the golden hour periods, colors tend to bend to the extremes, and give you much more pronounced effects on your images. During the morning golden hour, just after sunrise, the color temperatures are cooler, and give a moody, bluish hue to the shot. In the evening before sunset occurs, the spectrum shifts to warmer colors, providing you with warm oranges and reds.

A photo captured during the golden hour has a wonderful warmth and feel that’s impossible to capture at midday.

Softer Light Through Diffusion

Diffusion can be visualized with the words, scattering and softening. Light that is diffused is soft with less defined edges, and scattered across a greater area than non-diffused light. A good example of that is a diffuser attachment for your DSLR flash unit. The translucency of the diffuser attachment emulates the soft light you get from the sun being in a low position in the sky, and takes away hard shadows.

diffusion

Diffused light is more evenly and softly applied throughout a scene, and a low-hanging sun or sunlight projecting through clouds becomes a great natural diffuser.

Your landscape photos benefit from this by less pronounced shadows from objects in your shot, and in general the light that falls on your subjects within the landscape scatters in a more even, favorable manner. What does this all give you? Again, the one thing you’re ultimately striving for in landscape shots; atmosphere.

Sun Flare Effects

Another advantage of shooting during the golden hours is the opportunity to introduce sun flare effects and backlighting into your images. Because of the sun’s position in the sky (low and near the horizon), you have the ability to better introduce it as a subject, or as a compliment to the subject in your shot.

flare

Sun flares are easier to capture during the golden hours, and produces a much more dramatic effect on the final image.

Flaring occurs when the sun is either at or near the edge of the frame of your photo, and while in some situations it is unwanted (photographers typically use lens hood attachments to minimize these effects), flares can add mood and drama to a landscape shot.

So now that you’re aware of the wonderful effects of photographing during the golden hour, how do you go about shooting our landscape images during these times?

Settings

Your camera settings for shooting during the early mornings or late evenings are going to depend on your exact subject, but in general, since less light is getting to your sensor, a larger aperture is usually required.

You may also need to bump up your ISO setting to compensate for the lower amount of light. This will increase noise, but usually not to a noticeable point, and even then, there are steps in post-processing that can easily remove it.

Again, this all depends on what type of shot you are doing. If you’re looking at a long exposure capture, you would set your camera for a smaller aperture and lower ISO.

goldenhour_article_new3

Use a Tripod

As a landscape photographer you are always encouraged to use a tripod. Since generally you will be shooting in one static location for each set of shots, the tripod will allow you a wider range of apertures to work with. You always want your landscapes crisp!

Prepare

By definition, you have two hours each day to shoot for the best light, so your preparation for those times are even more critical than usual (you’re always prepared for any shoot, right?). If you’re planning on just taking your gear and spending time to set everything up on location, you run the risk of missing the shots you’re looking to get in the first place.

Either prepare before you leave, or allow extra time well before the golden hour to get everything settled. Scout the location ahead of time. Have your settings ready for the appropriate shots, and pack anything extra that you might need, including food, drinks or something warm to cover up with.

Keep Shooting!

While the scope of this article has been the golden hour, don’t forget that the magic doesn’t stop after the sun dips below the horizon. After this point, the blue hour begins, when colors and tones change even more rapidly and dramatically. Keep adjusting your settings, and shoot until there’s no light left to capture. You’ll be surprised at what you have when you finally get those images unloaded on your computer.

White Balance

While white balance is a setting on your camera, because of its overall effect on the atmosphere of your images, it warrants a little extra attention when shooting landscapes during golden hour. My recommendation is to take your camera off of AWB (automatic white balance) because the camera will attempt to neutralize the warmth of the image on this setting. Most DSLR’s have a cloudy or shade setting that will retain that color tone.

If you’re shooting RAW images, this is a step that can be adjusted in post-production.

goldenhour_article_new2Helpful Apps

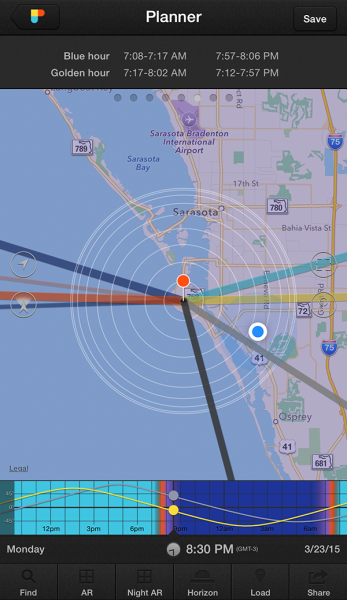
Thankfully, there are several Smartphone apps that can also help your planning process. A search on the Apple app store and Google Play shop will provide no shortage of this kind of apps, although there a few that I’ve used that seem a bit more robust, and worth the price you’ll pay. These apps provide calculators that will let you see when the golden and blue hours occur in any location in the world, and also include calculations for exposure, depth of field, time lapse, and more.

  • PhotoPills – iPhone/iPad, $ 9.99
  • Golden Hour – iPhone/iPad, £1.49
  • The Photographer’s Ephemeris – iPhone/iPad, $ 8.99, Android, $ 4.99

Enjoy the Light!

Shooting at optimal times of the day is one of the easiest things you can do to improve your photography. Nothing else adds character, atmosphere, and dimension to your work so dramatically.

What other golden hour tips do you have to share? How do you apply these guidelines to your own photography? Be sure to join in the conversation below, and keep churning out those golden shots!

googletag.cmd.push(function() {
tablet_slots.push( googletag.defineSlot( “/1005424/_dPSv4_tab-all-article-bottom_(300×250)”, [300, 250], “pb-ad-78623” ).addService( googletag.pubads() ) ); } );

googletag.cmd.push(function() {
mobile_slots.push( googletag.defineSlot( “/1005424/_dPSv4_mob-all-article-bottom_(300×250)”, [300, 250], “pb-ad-78158” ).addService( googletag.pubads() ) ); } );

The post Tips for Creating Landscape Photos during the Golden Hour by Tim Gilbreath appeared first on Digital Photography School.


Digital Photography School

 
Comments Off on Tips for Creating Landscape Photos during the Golden Hour

Posted in Photography


Tips for Using Golden Hour Light for Portraits

24 Mar

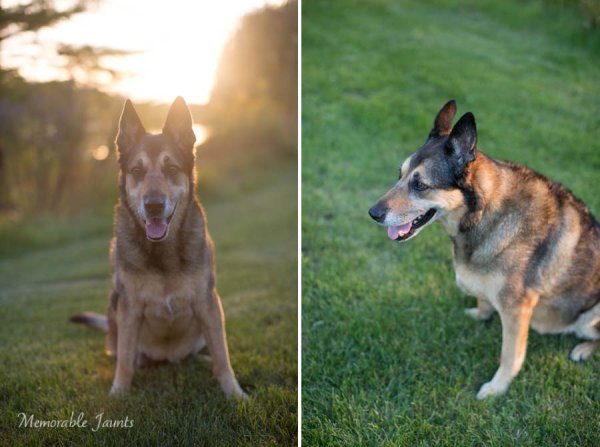
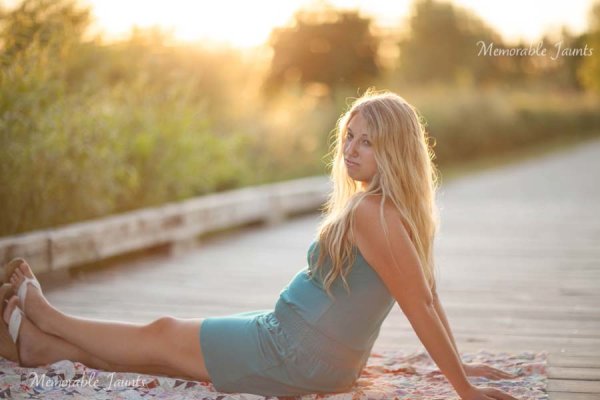
Memorable_Jaunts_Portraits_During_Golden_Hour_DPS_Article-12

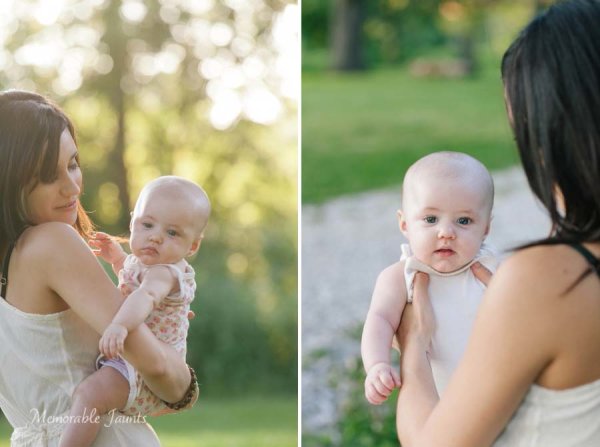
Most photographers will argue vehemently that the golden hour – that pocket of time just after sunrise and just before sunset – produces some of the most gorgeous light ever. Golden light shows up during this time, generally about an hour or so before sunset (after sunrise). However these times are not exact because golden light does depend on where you live. The further away from the equator you are located, the longer golden hour lasts. The closer to the equator you are, the shorter it is. Golden hour is also seasonal.

Memorable_Jaunts_Portraits_During_Golden_Hour_DPS_Article-13

There is a reason why most natural light photographers tend to schedule their portrait sessions around golden hour – to maximize the amount of golden light that they can use and get amazing results for their clients.

Why do you want to use golden light?

There are several reasons why golden light is so sought after.

Golden light is very soft

Memorable_Jaunts_Portraits_During_Golden_Hour_DPS_Article-7

Soft light illuminates the skin tones evenly.

Since the sun is almost setting or just rising during golden hour, the sunlight tends to be much softer than when the sun is high in the sky. During the golden hour, you can have your subjects look towards the sun and not have to squint or shield their eyes. Practice discretion on how long you want them to stare at the sun, and also take care not to point lens and cameras directly into the sun.

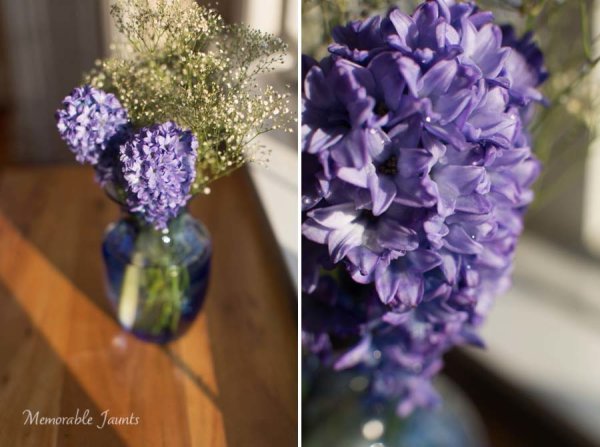
Golden light is warm

Memorable_Jaunts_Portraits_During_Golden_Hour_DPS_Article-10

The warm colors of sunlight are striking against the green grass.

It is easy to think that any form of sunlight is warm – whether the sun is high in the sky, or close to the horizon. But in reality, the warmth varies as the sun moves across the sky. Sun near the horizon has less intensity of direct light since it must travel through more of the atmosphere. You may notice, it is much easier to look at a sunrise and sunset with the naked eye – not that you should because it can damage the retina. As per wikipedia, more blue light is scattered during golden hour, so the sun’s light appears more reddish.

Golden light has dimension

When the sun is high in the sky, particularly around noon, the overhead light is very harsh, creating strong highlights and dark shadows. This type of lighting is not very flattering or desirable especially in portrait photography. Most photographers will use external flash or even a reflector to add additional light to the subject’s face or body, to make the light more even. Because the contrast is lower during golden hour, shadows and highlights are not that extreme. In addition, the sun’s smaller angle to the horizon produces long shadows.

Memorable_Jaunts_Portraits_During_Golden_Hour_DPS_Article-14

How do you use golden light?

Location scouting

Take the time to know the area that you are looking to do photography. There are many website and apps that can provide exact sunrise and sunset times. Some even take it a step further and provide golden hour times – which is specifically for photographers! Even the location matters when searching for golden light. If your photoshoot is in a park that has a lot of tree cover, the light will be further diffused, giving you the option of having a spotlight type effect for your portraits. If you are in a big city, take advantage of the natural block that tall buildings provide when photographing a subject.

Metering

Golden light can be challenging from a metering perspective. Most people leave it in standard (matrix or evaluative) mode and then play around in post-production to try and get the look they want. There is an easier way to eliminate all that time spent in front of the camera. Spot metering is my preferred metering method particularly for backlighting situations. I spot meter off the subject’s face or shadowy part of the image and then recompose and adjust exposure compensation half a stop or more to get the look I want.

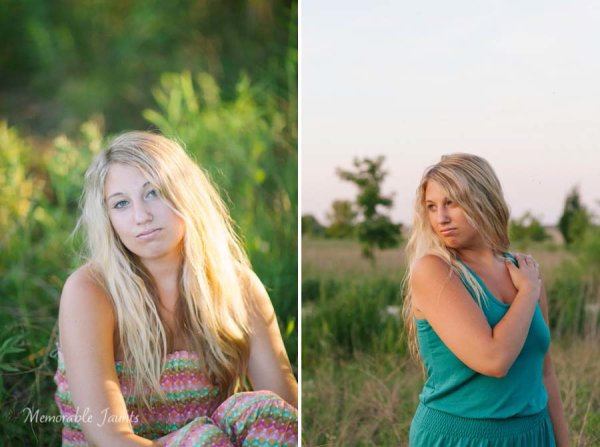
Front lighting

Memorable_Jaunts_Portraits_During_Golden_Hour_DPS_Article-1

Options for front lighting include the sun along the side of the subject as well as subject facing the sun.

Front lighting is when your subjects face the sun directly. Because of the low angle of the sun and the soft light, the sun isn’t as harsh and your subjects will not be squinting as they face the sun. The light is even and warm so make sure that is the look you want – gorgeous, warmly lit, imagery!

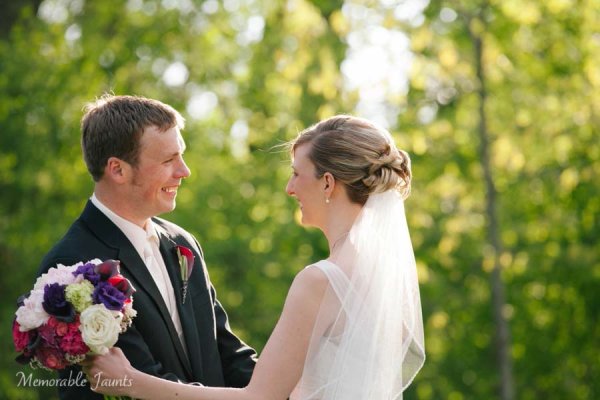
Backlighting

Memorable_Jaunts_Portraits_During_Golden_Hour_DPS_Article-9

Memorable_Jaunts_Portraits_During_Golden_Hour_DPS_Article-6

Backlighting is when you put the subjects between you and the sun. This creates a warm glow and looks really stunning. Make sure you expose for your subject’s skin tones. If you expose for the sun, then you will get a silhouette effect (which might not be the look you are going for, but is equally stunning).

Rim light

Memorable_Jaunts_Portraits_During_Golden_Hour_DPS_Article-3

Rim lighting occurs when you are using the sun to backlight the subject. Here the subject is between you and the sun. If you have a darker background, you can see a faint glow outlining them. That is a rim light and it really helps the subjects pop out in the image, drawing attention to them, adding separation of subject from the background.

No matter what type of golden hour lighting you use, you are bound to get some awesome images. Experiment with various locations and techniques. Also go back to the same location at various times of the year and track how golden hour lighting changes – you will learn to gauge, judge, and use light as a key element in your portrait photography.

googletag.cmd.push(function() {
tablet_slots.push( googletag.defineSlot( “/1005424/_dPSv4_tab-all-article-bottom_(300×250)”, [300, 250], “pb-ad-78623” ).addService( googletag.pubads() ) ); } );

googletag.cmd.push(function() {
mobile_slots.push( googletag.defineSlot( “/1005424/_dPSv4_mob-all-article-bottom_(300×250)”, [300, 250], “pb-ad-78158” ).addService( googletag.pubads() ) ); } );

The post Tips for Using Golden Hour Light for Portraits by Karthika Gupta appeared first on Digital Photography School.


Digital Photography School

 
Comments Off on Tips for Using Golden Hour Light for Portraits

Posted in Photography