RSS
 

Posts Tagged ‘full’

Is it Time to go Full Frame? Weight These Pros and Cons Before You Decide

24 Jan

Has anyone ever said to you, “That’s a nice photo, you must have an expensive camera!”?

According to photography legend Ansel Adams, “The single most important component of a camera is the twelve inches behind it!”  

Your camera is simply a tool, that you use to create your vision of the scene in front of you. A camera can only do what you tell it, so it’s not going to capture that “nice photo” all by itself. But, what if the camera doesn’t perform up to your expectations? Then, it may be time for an upgrade.

 

Captured at ISO 6400 this image shows great tonal range with very acceptable noise levels.

Captured at ISO 6400 on a Nikon D750 full frame, this image shows great tonal range with very acceptable noise levels.

I recently made the jump from a cropped-sensor camera to a full frame body (a Nikon D750, used in all the images below). For the purpose of this article I am not going to get into a technical discussion about the differences between a crop sensor (APS-C), and full frame camera (the main one being is that the full frame has a larger sensor, the size of a frame of 35mm film).

But how do you know if, and when, upgrading to a full frame camera is desirable? What follows are some points to consider if you’re on the fence.

Advantages of full frame

  • Improved low light performance: Because of the larger sensor size, a full frame camera is able to capture more light, which allows it to attain focus in darker environments.
  • Higher ISO performance: The larger sensor of a full frame has larger pixels, which creates less digital noise at higher ISOs. In most cases you will get a one or two stop improvement in high ISO noise, over crop sensor cameras, though many new models of APS-C models have a much improved performance in noise reduction.
  • More control over depth of field: This is a commonly misunderstood benefit of full frame, because the larger sensor does not really affect the depth of field of an image. However, with the larger sensor of a full frame, you can move closer to the subject which causes the depth of field to become smaller. This, in turn, creates a smoother bokeh.
  • Improved dynamic range and color depth:  A full frame sensor can record more tonal range within shadows and highlights. Detail and color are much improved at both ends of the spectrum.

Disadvantages of full frame

Bird in fight was captured here at high ISO to achieve fast shutter speed to capture a very sharp image.

This heron in flight was captured at high ISO to achieve the fast shutter speed needed to get a sharp wildlife image.

  • Expense: Not only is the cost of the full frame DSLR higher than a crop sensor, you will most likely need to make additional investment in compatible lenses.
  • Size and weight: Not only are the sensors larger in a full frame DSLR, the overall size and weight are as well. Also, the lenses have more glass elements, and are also larger and heavier. This may not matter to many photographers, but when carrying gear for long distances it could be a factor to consider.
  • No crop factor: The telephoto reach of a full frame DSLR is lessened by not having a crop sensor. For example: a 200mm lens on full frame doesn’t have the reach of the approximate focal length on a cropped sensor  camera (about 300mm).
  • Slow frame rate in burst mode: Because a full frame DSLR has a larger sensor, there is more information to record to the memory card. Therefore, it will take longer to save images to the card, resulting in fewer frames per second when you are shooting in burst mode.

So, how do you know if you are ready to make the jump to a full frame camera? Ask yourself these questions:

How much will it cost?

As mentioned above, the cost of buying a full frame camera is significantly more expensive than a crop sensor one, plus new lenses will most likely need to be purchased. There isn’t much use in changing to full frame if you are not going use high quantity lenses designed for full frame cameras. If you plan to make the jump to full frame, you may want to begin by upgrading lenses to those compatible with full frame DSLRs.

Choosing a smaller aperture of f/22 gave enough depth of field to keep both the boys and the waterfalls in focus.

Choosing a smaller aperture of f/22 produced enough depth of field to keep both the boys and the waterfalls in focus using a full frame Nikon D750.

What type of photography do you enjoy shooting?

Full frames have advantages and disadvantages for different types of photography.

  • Landscape: Low light performance, more detail and improved ISO performance are all great advantages of full frame for landscape photography. The only possible drawback here is the effectively shallower depth of field, but this can be compensated for by using a smaller f-stop.
  • Portraits: The larger sensor size of a full frame will result in a shallower depth of field. For portraiture this means the backgrounds can feature more blur and make the subjects stand out better.
  • Wildlife: A full frame camera loses the telephoto reach that a crop sensor has. Nevertheless, a lot of wildlife photography is shot in low light situations, where a full frame gives a much improved advantage.
  • Sports: As in wildlife photography, limited reach and low light factors apply to sports photography. Shooting with a full frame, the improved focusing in low light is a helpful benefit for sports. However, the slower frame rates of a full frame can be a drawback in photographing a fast moving sport.

If you are a portrait or landscape shooter, there are many benefits that might convince you to make the switch to full frame.
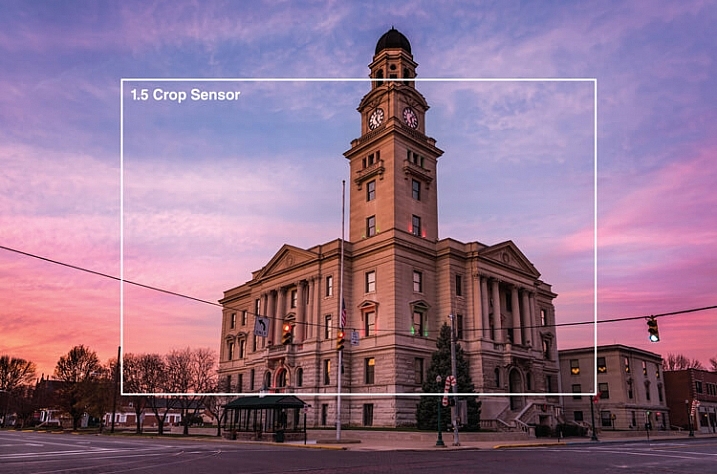
This scene was captured with at 24mm on full frame Nikon D750. The white line shows how much of this image would be captured on a crop sensor from the same location.

This scene was captured at 24mm on a full frame Nikon D750. The white line shows how much of this image would be captured on a crop sensor from the same shooting location.
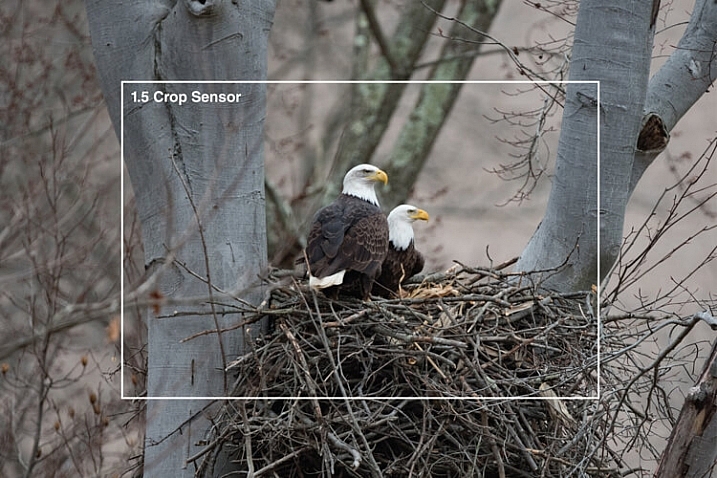
This image was captured at 600mm with a Nikon D750. The white line shows the extra reach that a crop sensor camera would give you. This image was also captured in low light conditions with ISO of 2000 with very acceptable noise level.

This image was captured at 600mm with a full frame. The white line shows the extra reach advantage that a crop sensor camera would provide. Still, capturing this image in low light conditions with an ISO of 2000 results in a desirable noise level.

Is your current camera holding you back?

Every camera has a limited number of shutter releases, so if your camera is nearing the end of its life cycle, it might be time to consider an upgrade. If your older crop sensor DSLR is limiting your results in low light, and you are constantly frustrated by high levels of noise, you might benefit from an upgrade to full frame.

Keep in mind that it’s convenient to blame a camera for taking poor images, but it may not be the camera holding you back. Many times photographers don’t get the results they expect by underutilizing high-end equipment. No matter what type of camera you shoot with, get to know it, and how all of its features work, before moving on to a different one.

shooting here in low light, this shot was able to be captured in low light by increasing the ISO without adding digital noise to the image.

This cityscape was captured with a full frame in low light by increasing the ISO, without adding digital noise.

What is your level of photography experience?

A full frame camera is probably not the best one to use as a beginner. Start shooting with a more entry level DSLR, and work up to a full frame model. If you are looking for a camera to take photos of family and friends, a crop sensor DSLR is a very satisfactory choice. Having a good handle on the exposure triangle (aperture, shutter speed and ISO) and how they work together is a must if you’re going to take advantage of all the benefits of full frame. You must be comfortable with shooting in manual mode. If you earn any part of your income from photography, you may benefit from switching to a full frame camera.

Do you make large prints?

A full frame sensor has a larger pixel size, which will capture more light and detail, which results in sharper images that are conducive to making large prints. If you never make any prints larger than 8×10″, then a full frame DSLR may not be of benefit to you.

Here this sunrise shot has a nice range of tones without any noise in the shadows that you might get with some crop sensor cameras.

Captured with full frame Nikon D750, this sunrise image reveals a nice range of tones, without any of the digital noise in the shadows likely to be present with some crop sensor cameras.

Will purchasing a full frame make you a better photographer?

You may have heard this quote, “Skill in photography is acquired by practice, not by purchase.”

Do you need a full frame camera to capture great images? No, of course not! Most new crop sensor cameras on the market today are engineered to take beautiful images! But if you are an experienced photographer who makes money with your camera, you may gain an advantage by switching to full frame.

The bottom line

If you are thinking of upgrading from a crop sensor camera, be sure to consider the price, lens compatibility, and type of photography you do, before you make the change to full frame. Jumping to full frame can be quite a leap! But if you are ready for that big step, the results can be rewarding.

Are you ready to go full frame? Please leave your comments below.

googletag.cmd.push(function() {
tablet_slots.push( googletag.defineSlot( “/1005424/_dPSv4_tab-all-article-bottom_(300×250)”, [300, 250], “pb-ad-78623” ).addService( googletag.pubads() ) ); } );

googletag.cmd.push(function() {
mobile_slots.push( googletag.defineSlot( “/1005424/_dPSv4_mob-all-article-bottom_(300×250)”, [300, 250], “pb-ad-78158” ).addService( googletag.pubads() ) ); } );

The post Is it Time to go Full Frame? Weight These Pros and Cons Before You Decide by Bruce Wunderlich appeared first on Digital Photography School.


Digital Photography School

 
Comments Off on Is it Time to go Full Frame? Weight These Pros and Cons Before You Decide

Posted in Photography


Full of Hot Air: Clever Urban Monuments Conceal Exhaust Shafts

20 Jan

[ By WebUrbanist in Architecture & Public & Institutional. ]

exhaust building closeup

Fenced off or set back from streets and sidewalks and often raised on platforms as well, civic monuments are oddly ideal candidates for concealing a peculiar secondary function: the ventilation of subterranean spaces, from sewage systems to subway tunnels.

exhaust sewage monument australia

In Sydney, Australia, the Hyde Park Obelisk was built precisely for this purpose back in 1857. Modeled on Cleopatra’s Needle located on the banks of London’s River Thames, the 60-foot-tall tower was designed to allow noxious gases to escape upward from the sewers below. Today, the monument remains in place, but vents the city’s somewhat-less-smelly stormwater system instead.

fountain exhaust cover germany

Meanwhile, in Nuremberg, Germany, a controversial set of statues depicting the trials of married life was commissioned specifically to disguise the subway exhaust port located on the site.

marriage go round

The Ehekarussell (roughly translated: marriage-go-round) is critiqued not because of noxious fumes, but for featuring a sequence of scenes through its statuary: a young happy couple turning older and angrier before one spouse slays the other.

fake townhouse

Another approach that appears in many cities is more architectural, though no less monumental, using anything from small fake shell houses to huge multistory buildings as giant exhaust conduits.

ventilation house

In Burnaby, British Columbia, a boxy little house serves both to vent subway fumes but also acts as a mid-tunnel escape route for emergencies. Many of these structures not only act as exhaust pipes, but also contain bacterium-based odour removal plants so as to spew somewhat less obnoxious gasses.

exhaust hidden secret building

The Callahan Tunnel ventilation building in Boston is a relatively less-camouflaged and more-imposing affair built of bricks with vents where one would ordinarily expect to see windows. Many other American cities have similarly larger exhaust buildings, including New York City, where they vent infrastructure including the Holland Tunnel.

Share on Facebook


[ By WebUrbanist in Architecture & Public & Institutional. ]

[ WebUrbanist | Archives | Galleries | Privacy | TOS ]


WebUrbanist

 
Comments Off on Full of Hot Air: Clever Urban Monuments Conceal Exhaust Shafts

Posted in Creativity


Tips for Using Legacy Lenses and Shooting in Full Manual

19 Jan

Shooting Manually

Full manual. Two words. Ten letters. Yet those words can be some of the most discouraging for new photographers to ingest. There has long been a perceived over complication concerning shooting in Manual Mode. Personally, I always leave my camera set to manual. Granted, I dont shoot many fast-paced sporting events that require speedy autofocus, or many situations where there is constantly fluctuating light. Still, the idea of controlling the aperture, shutter speed, ISO, and focus, all independently of your camera’s computer, unsettles even experienced photographers at times. Happily though, not only is there a swelling community of photographerss who are embracing the somewhat challenging, but highly organic and rewarding, benefits of shooting manually…but also upping the ante by adapting completely analog legacy lenses for use with their cameras.

image

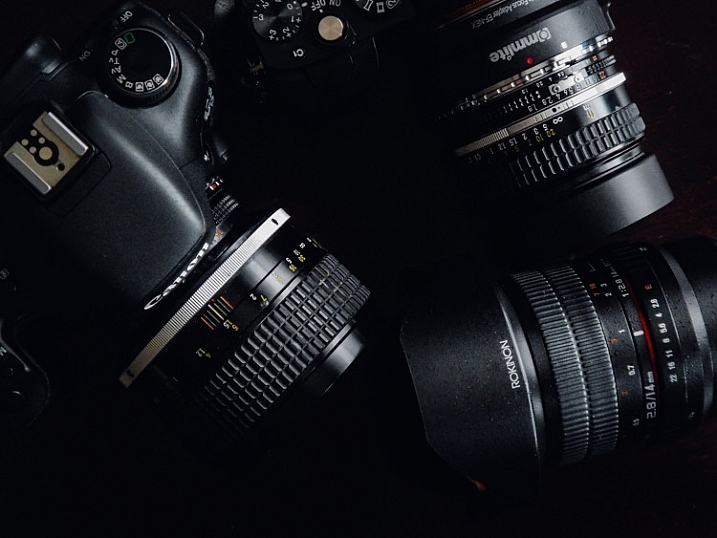
In this article, you will learn how to enjoy what might be considered a devolved methodology of making photographs using legacy lenses, and shooting in full manual mode. Full manual lenses, are generally built to exacting quality standards, but are relatively low-priced, which makes them great for beginners, and those shooting on a budget. Furthermore, adapters are available for virtually all mirrorless and digital SLR camera systems, so that you can start making great photographs using these low-tech lenses. Let’s jump right in.

What are Legacy Lenses?

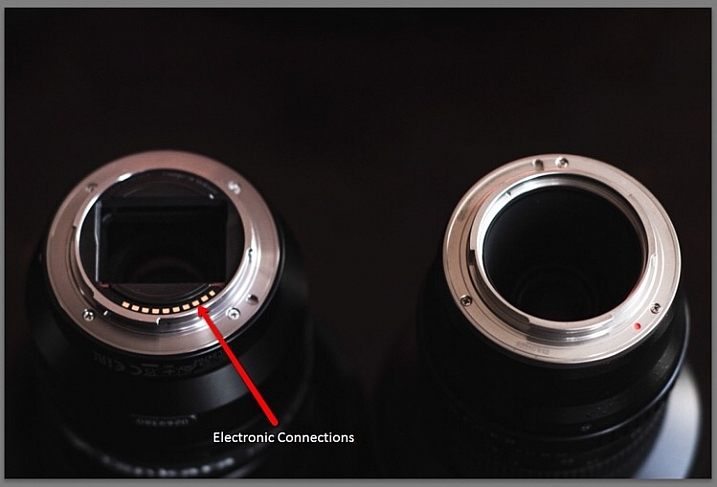
Lenses that were geared for use with older film camera (35mm or medium/large format) systems are called legacy lenses. Glass of this type are non-motor driven, and operate autonomously of your camera. This means that the focus and aperture selection are all accomplished inside of the lens, which is controlled by you. There is no electronic communication between the lens and the camera. You must use the lens’s aperture, and focusing ring, to produce the desired depth of field and focus. Legacy lenses are generally made of metal, making them relatively heavy, but heartily constructed.

Which lenses are fully manual?

Full manual lenses does certainly not include all legacy lenses. Many manufacturers still make completely manual lenses, engineered specifically for the digital camera market. A lens is designated as being fully manual when there is no control being provided by the camera. However, there are quite a few fully manual lenses which have incorporated focus indicator chips into their design. While remaining fully manual, these types of lenses will communicate with your camera when focus has been achieved.

image

Adapting lenses to your camera

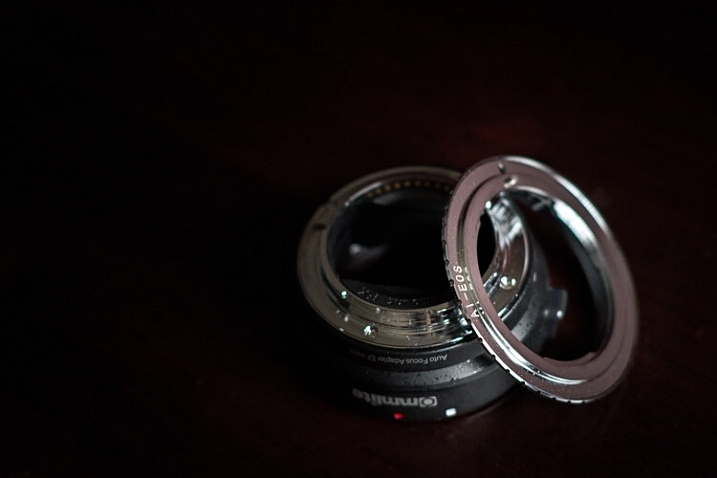
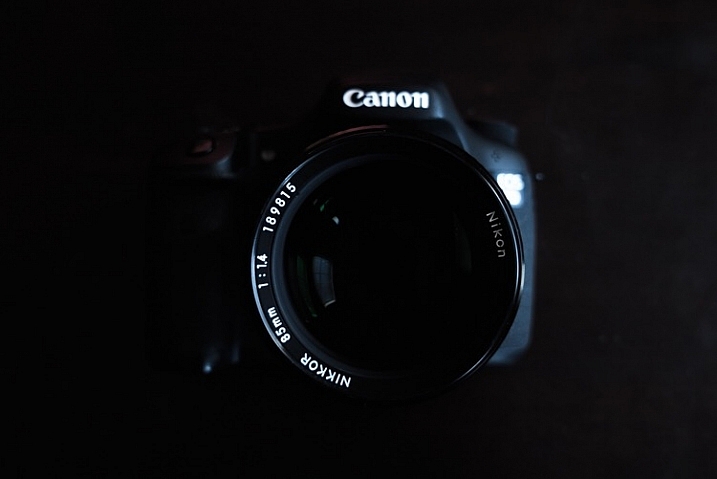
In a previous article on dPS we discussed how easy it really is to use legacy lenses (and other non-native glass) with your digital camera. The same holds true. All that is needed to enable the use of fully manual legacy lenses to be used with your modern digital camera body is a simple adapter.

image

These adapters vary in capability from simple adapter rings, to advanced electronic contraptions, with focus indicator chips of their own. Keep in mind though, there are a few things to consider before adapting any non-native lens to your camera. More on that shortly.

Using your camera in full manual mode with manual lenses

image

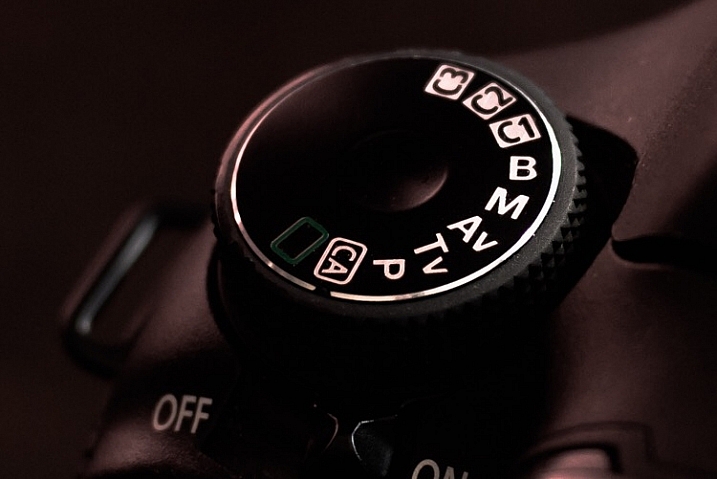
You’ve found an elegant legacy lens and located the appropriate adapter for your particular camera system. You’re excited and ready begin shooting completely manually, so now what? Well, take a breath and exhale a well deserved sigh of relief, because all of that was the hard part. Now all that’s left are a few quick steps. The first of those steps is to switch your camera into Manual Mode. This is almost always done by moving your selector wheel to M for manual mode. This will give you, the courageous photographer, complete control over all aspects of the shot. If you are using a completely manual lens, or a legacy lens, everything except the shutter speed will now be manipulated using the lens. The aperture will be controlled using the aperture selector ring, and so too will be the focusing.

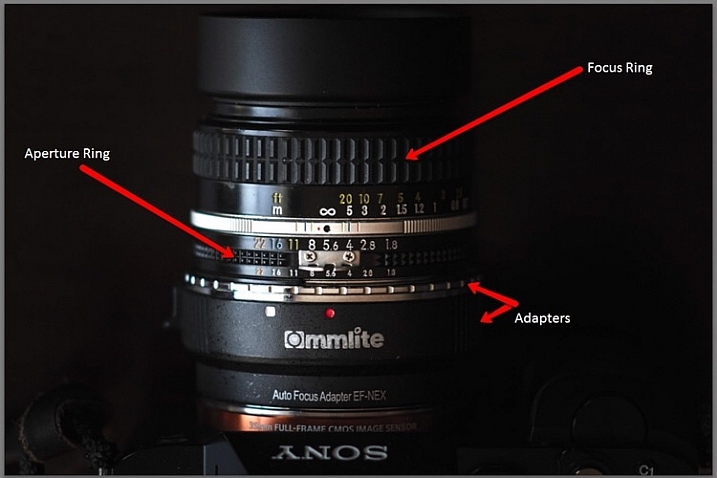
This is a breakdown of the essential features found on an adapted, full manual legacy lens (in this case a Nikkor 50mm f/1.8).

image

Here are a few tips for using your camera in full manual mode, in conjunction with a fully manual or legacy lens:

Focus Peaking Function

Some cameras now incorporate a technology called focus peaking which visually outlines the edges of the most in-focus area of a scene,, before the shutter is ever released. The technology detects the area of the most contrast between pixels, thus determining what region is most in focus. Though not perfect, this a great option to aid with manual focusing.

Focus Magnifier

Not all camera bodies come equipped with the focus peaking feature, but most modern digital cameras are capable of focus magnification. This lets you digitally magnify the scene, and inspect areas for proper focus. I use focus magnification in all of my landscape work. It is a great way to achieve pin point focus on the areas where precision is a necessity. (Note: this is usually available in LiveView mode).

Shoot RAW

Yes, the old shoot RAW lecture again. Even though focus correction can’t be achieved, even in RAW format files, it will however give you much more room to work on contrast and clarity. This will sometimes help to salvage an image that may otherwise be culled.

Things to consider before using legacy lenses

Along with all the benefits of shooting manually with legacy and full manual lenses, there are also some things to remember before, and during shooting times.

Complete Autonomy of the Camera

There is of course no electronic communication between the lens and the camera, unless you have chosen an adapter or lens equipped with focus indicator technology. So there will be no way to use your shutter priority or aperture priority modes.

Physical Considerations

Some lenses will obstruct the mirror function of digital SLRs. This is one of those things that carries a little bit of buyer beware baggage. Make absolutely sure that the lens you are adapting to your camera does not physically occlude the operation of the mirror, this will damage your camera, possibly beyond repair. This becomes less of an issue with mirrorless camera systems.

Crop Factor

The crop factor of any lens is dependant on the size of the image sensor (or film) being used. Always be mindful of the interactions between your lens, and whatever size sensor you are using, be it full frame of APS-C (cropped). Most legacy lenses were intended for use with 35mm film. This will play a major role in your practical focal length, when shopping for lenses of the prime variety.

image

Fully manual and legacy lenses have a firm grasp on today’s digital world. Though viewed as antiquated by some, the essential elements of this type of photography can produce exceptional images. Shooting in Manual Mode gives you ultimate generalship over your work, and allows you to take every aspect of photo making into your own hands. Not only is the use of legacy and manual lenses a cost efficient way to make photographs, but it is also a reflection of a time when the buck stopped with the photographer, not the camera.

Newer isn’t always better. And even though manual shooting might not be the most effective course in some situations, there is no reason why it should be discounted in today’s modern era. Full manual shooting allows you to use lenses of extremely high quality to fully realize your creative vision, in ways you may not have otherwise been able to accommodate. Take your photography back to the future, and go beyond the realm of the automatic.

Do you have a favorite manual setup that you use regularly? Share it in the comments below!

googletag.cmd.push(function() {
tablet_slots.push( googletag.defineSlot( “/1005424/_dPSv4_tab-all-article-bottom_(300×250)”, [300, 250], “pb-ad-78623” ).addService( googletag.pubads() ) ); } );

googletag.cmd.push(function() {
mobile_slots.push( googletag.defineSlot( “/1005424/_dPSv4_mob-all-article-bottom_(300×250)”, [300, 250], “pb-ad-78158” ).addService( googletag.pubads() ) ); } );

The post Tips for Using Legacy Lenses and Shooting in Full Manual by Adam Welch appeared first on Digital Photography School.


Digital Photography School

 
Comments Off on Tips for Using Legacy Lenses and Shooting in Full Manual

Posted in Photography


Kipon to launch reducer to mount medium format lenses on full frame cameras

18 Dec

Chinese lens manufacturer Kipon has announced that next year it will make available a reducing adapter that’s designed to allow medium format lenses to fit on full frame cameras. The adapter will have a magnification factor of 0.7x which it says will both widen the effective focal length of the lens in use and widen its effective aperture. 

The first adapter will be designed to mount Hasselblad lenses on Sony E-mount cameras, but the company says it is working on other mounts for a wider range of both lenses and host cameras. 

The lenses in the adapter channel the light from the exit element to create a tighter covering circle. This means light that would otherwise fall outside the sensor area is directed to land on it to be recorded.

When a 50mm Hasselblad lens is mounted on a current Hasselblad digital body it produces a similar image area to a 35mm lens on a full-frame camera. That calculation though is a factor of the sensor size of the Hasselblad camera, and the same lens would not deliver that apparent angle of view were it mounted on a full frame camera or in front of the 6x6cm film frames Hasselblad lenses were designed to be used with. 

The 0.7x magnification of the Kipon adapter has the effect of canceling out the crop factor, turning that 50mm Hasselblad lens back into a 35mm-equivalent on a full-frame camera.

The adapter will have to be very good quality to make the most of the resolution of Hasselblad lenses, otherwise the exercise will be a bit pointless. It is expected to retail for $ 415 when it becomes available in February.

For more information visit the Kipon website. 

Articles: Digital Photography Review (dpreview.com)

 
Comments Off on Kipon to launch reducer to mount medium format lenses on full frame cameras

Posted in Uncategorized


HandeVision announces five lenses for its Iberit family – full frame lenses for mirrorless cameras

10 Dec

German/Chinese optics brand HandeVision is set to introduce five new lenses next year that are designed for full-frame mirrorless cameras. Each with a maximum aperture of F2.4, the focal lengths the company is planning to release in its Iberit series will be 24mm, 35mm, 50mm, 75mm and 90mm. 

The company says it has concentrated on making the lenses small and lightweight to suit small and light cameras, but has used brass, aluminum and stainless steel in the construction of the barrels and mounts. 

The lenses, which look more than a little like Leica M lenses, are all manual focus and offer aperture rings with markings for F2.4-16. Although they have a 44mm imaging circle that covers a full frame sensor, the lenses will be released with mounts for APS-C cameras, such as the Sony NEX and Fuji X system. These lenses will offer electronic aperture control. The 35mm, 50mm and 75mm lenses have six-blade apertures, while the iris in the 90mm uses 10. There is no specification as yet for the 24mm lens.

The first set of lenses will be made for Leica M, Sony E and Fuji X cameras, though the company doesn’t specify what other mounts will be available eventually. A Micro Four Thirds mount Ibelux 40mm F0.85 lens already exists, but there is no mention of whether MFT mount versions of these new models will be introduced at any point.

January 2016 is given as the launch date for the 35mm, 50mm and 75mm lenses, and the 24mm and 90mm lenses will be available ‘later in the year.’ Prices are a bit vague at the moment, but HandeVision says the lenses will cost between $ 480 and $ 660 depending on the model. 

HandeVision is a brand created through cooperation between German lens manufacturer IB/E Optics and the Chinese company Shanghai Transvision Photographic Equipment Co – the company behind the Kipon brand. 

For more information visit the HandeVision website. 

Focal Length   35mm  50mm  75mm  90mm
 Angle of View  63.4  46.8  32.2  27
 Aperture  2.4-16 2.4-16  2.4-16  2.4-16
 Close Focus (M/NEX,FX)  0.7/0.35m  0.7/0.6m  0.7/0.6m 0.7m 
 Iris Blades  6  6  6  10

 Length 
(M/NEX, FX)

 35/45mm  55/65mm  35/75mm  69/79mm
 Diameter  58mm  58mm  58mm  58mm
 Filter Thread  M49x0.75  M49x0.75  M49x0.75  M49x0.75
 Weight (M/NEX, FX)  NA  250/310g  270/330g  NA
 Elements/Groups  6/6  6/6  5/5  4/4

Articles: Digital Photography Review (dpreview.com)

 
Comments Off on HandeVision announces five lenses for its Iberit family – full frame lenses for mirrorless cameras

Posted in Uncategorized


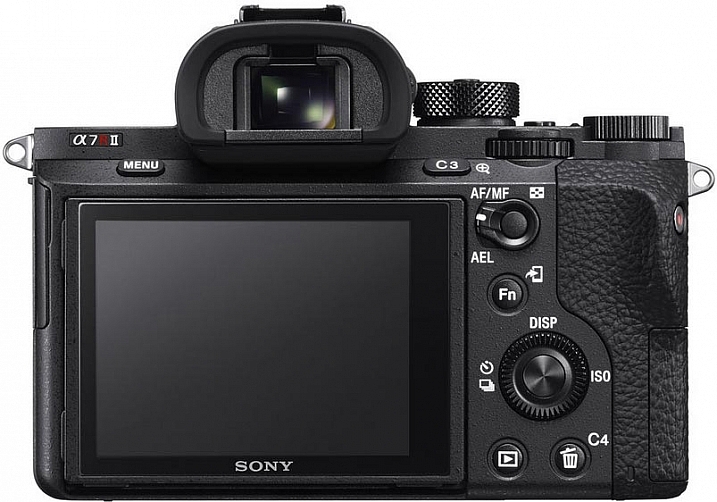
Sony A7RII Mirrorless Full Frame Camera Review

17 Nov

Do you ever get the feeling you’re being played by the camera manufacturers? Sony appears to have no shame in regularly drip feeding its technology to consumers, eager for the next best thing in image quality.

If you don’t mind your hot new camera becoming a dinosaur six months after you buy it, Sony is the camera brand for you. You see, Sony has been very crafty by releasing a wide range of new mirrorless cameras, in such a way that you’ll probably need more than one of them, if you want to avail yourself of their best features.

The Sony A7RII Mirrorless Full Frame Body continues this money grabbing trend. The A7R was like the ultimate prototype, with a lot of usability problems, but it did produce gorgeous images. The next big hitter was the A7S with its amazing lowlight performance, and limited 4K video recording functionality (I say limited, because it cannot do internal 4K recording) .

Enter the Sony A7RII – the next resolution monster from Sony.

Sony A7RII Review

As you may know, I switched from Canon to the Sony A7R system as soon as it was launched, and overall I’m delighted with the results, even if the actual functionality of the camera can be painfully annoying at times.

Sony A7RII Review by Gavin Hardcastle

Image courtesy of Sony

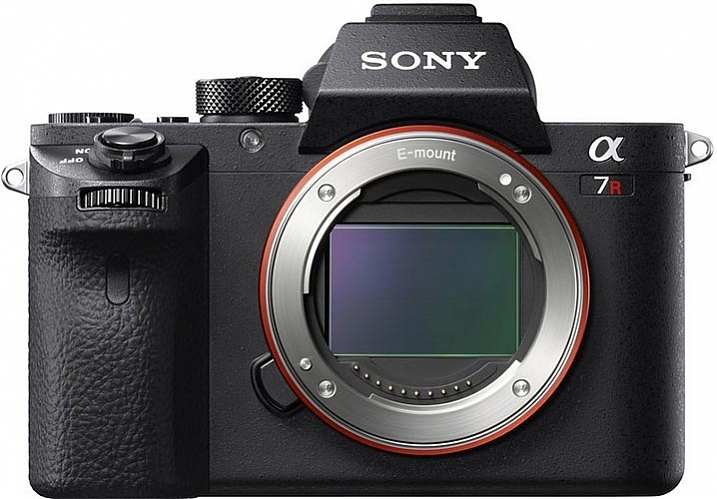
For $ 4000 CDN ($ 3198 USD) the 42 Megapixel Sony A7RII packs a lot of firepower into a very small package, when you look at the specs. If your credit card is quivering in anticipation of buying this camera, there are a few things you might want to consider before throwing down your dollars.

I’m going to approach the question of whether or not you should buy this camera based on the assumption that there are likely three types of buyer for this camera:

  1. Existing Sony A7R users considering the upgrade.
  2. DSLR users considering switching to the Dark Side.
  3. New camera buyers with no current investment in any system.

Sony A7RII Review - Astrophotography, Gavin Hardcastle

#1 – Existing Sony A7R users considering the upgrade

If you already own the Sony A7R, here are four major reasons to shell out the big bucks for the upgrade:

  1. If you shoot a lot of handheld work and want the 5-axis image stabilization.
  2. You want to shoot 4K video (see below for my thoughts on that).
  3. You value the silent shutter for less vibration, and therefore sharper images.
  4. You value the new Eye Detect autofocus.

If none of the features listed above have any great importance to your photography, you’re probably better off keeping your A7R, and spending your upgrade dollars on some of the stunning new Zeiss glass for E-Mount that’s available now, or coming out soon. The Batis and Loxia range of lenses are a force to be reckoned with. Also, realize, that based on Sony’s track record, there will probably be a Sony A7RIII on the shelves before you’ve filled your first memory card.

But what about the extra megapixels?

The difference between 36mp and 42mp is not that big a deal. In realistic terms, all it means is that you’ll be able to makes prints ever so slightly larger with the A7RII, and you’ll have a little bit more resolution to play with when cropping. To give you an idea of how big the difference is take a look at this comparison.

Sony A7RII pixel dimensions vs A7R

What about the Silent Shutter?

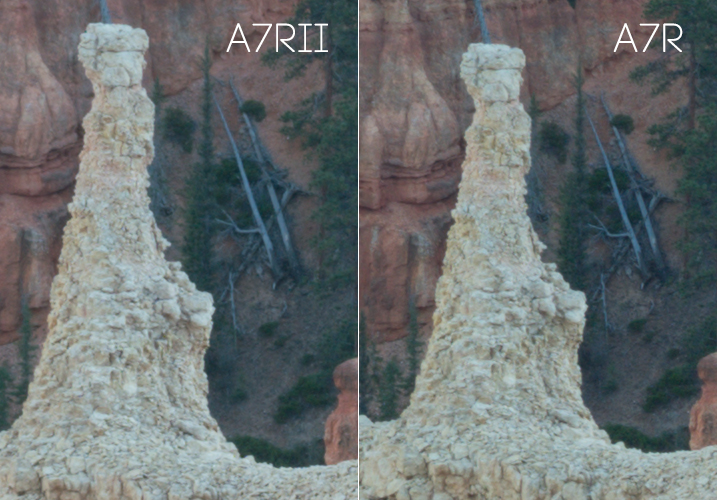
I was very keen to discover how much of a sharpness improvement I could expect from the new silent shutter (and therefore vibration free) on the A7RII.

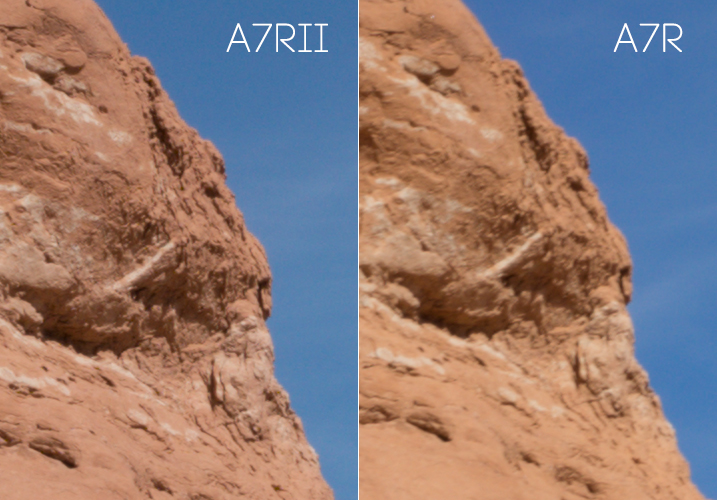
Using the Zeiss Loxia f/2.8 35mm lens, I took the above shots on the A7RII and the A7R, with identical settings and focus point. The only difference was that the A7RII was set to silent shooting mode, and therefore didn’t suffer from the notorious shutter shock vibration of the A7R, which is something of a problem for fast exposures and when using telephoto lenses.

The results were impressive. Zooming in to 100%, I can see a significantly sharper image produced by the A7RII, when shooting in bright daylight with fast shutter speeds.

Sony A7RII Sharpness test

Both shots used the Zeiss Loxia 35mm at f/11 with focus manually set at the same point. No sharpening was added in post- production.

After the above comparison, I thought I’d do the same thing in low-light, with a long exposure, to see if the increase in sharpness was consistent.

With this post sunset shot of Bryce Canyon, the sharpness increase on the A7RII is much less significant. Zoomed in to 100% I can barely see a slightly sharper image produced by the A7RII, but the difference is not as significant in low-light situations with long exposures. Once you add a little sharpening in Adobe Camera RAW there is no visible sharpness difference between the A7R and A7RII image when shooting long exposures in low-light.

Sony A7RII Review - Resolution Comparison

100% magnification. Both shot with Sony FE 55mm lens at f/11. No sharpening was added in post-production.

It has better noise performance right?

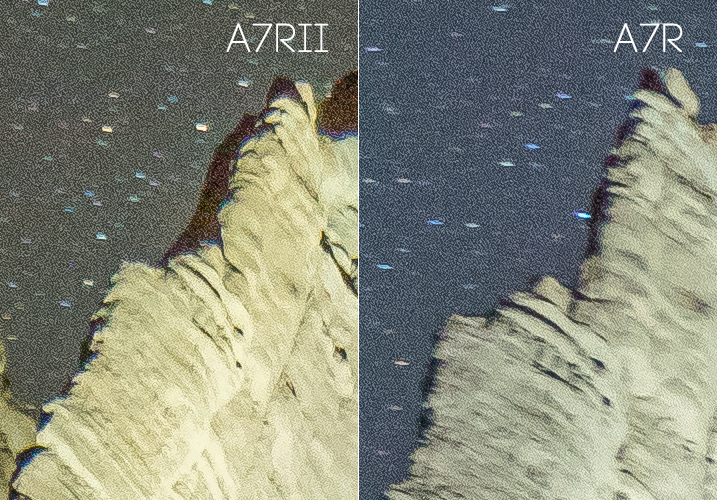
When I heard that the A7RII had much better noise performance than the A7R, I was pretty excited to see how it would fare with astrophotography.

In my tests I could see hardly any improvement over the A7R when pushing the ISO up to 3200 during long exposures for astrophotography. Don’t get me wrong, the A7R was already pretty impressive at astrophotography when paired with good f/2.8 lenses. But, if you’re considering upgrading mainly for the supposed better noise performance, you may be setting yourself up for disappointment.

The Sony A7RII for astrophotography

What about the USB power option?

If I wanted to carry around a brick all day I’d still be shooting with a DSLR.

Granted this is a major improvement on the A7R which wouldn’t allow you to use the camera when connected to a USB power source, but I only ever use this feature when shooting a time-lapse sequence longer than the measly one hour provided by the feeble Sony batteries, which I pop like Tic Tacs.

A better solution would be to provide longer lasting batteries. The A7RII has a bigger body than its previous version, so how about a bigger battery?

What about dynamic range?

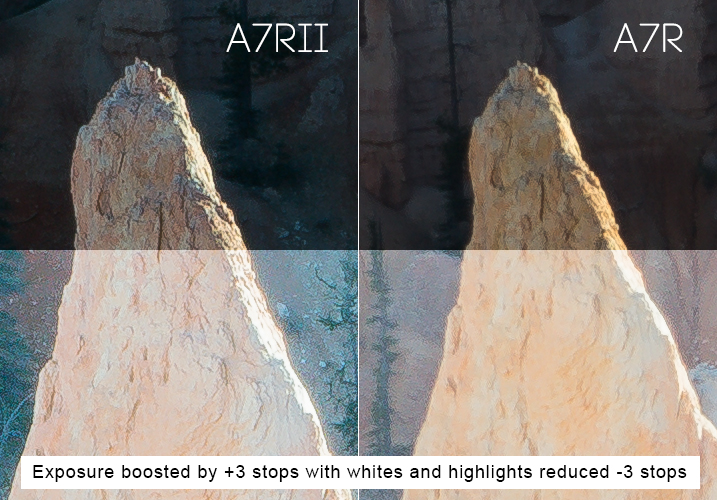
In my tests I couldn’t see any improvement in dynamic range between the A7RII and the A7R in real use cases. By real use cases, I mean the limits by which you can recover shadow detail and highlight detail in your photos. It’s typical to deliberately underexpose your shots, so that you can recover the shadow detail when processing, and you won’t usually have to worry about blown out  highlights.

Sony A7RII Review - Dynamic Range Test

I deliberately underexposed these shots to avoid blown out highlights. I knew I could recover the shadow detail in post-production. Shown in the bottom half of the images, I increased the exposure by a ridiculous three stops in ACR, then reduced the Whites and Highlights sliders by three stops. I can see no noticeable difference in dynamic range between either camera, but the A7RII image is considerably sharper in this fast exposure as previously mentioned because of the silent shutter.

I tried this many times with both the A7RII and the A7R, and my conclusion is that they both performed equally well. I’m sure there will be some scientific test that proves the A7RII has better dynamic range, but when it comes to what you’ll observe with your own eyes, I doubt you’ll see any noticeable difference between both cameras in most situations.

If other users are observing better dynamic range in fast exposures, I wonder if what they’re seeing is actually the increase in sharpness on the A7RII, which simply records more detail than the A7R when shooting in silent shutter mode.

Sony A7RII Review by Gavin Hardcastle with Example Images

The 5-Axis Image Stabilization

This is a very good feature. If you’re using adapted prime lenses with no vibration reduction, you’ll really see the benefit of this feature when shooting handheld in low-light, where otherwise trashed shots can end up being very usable.

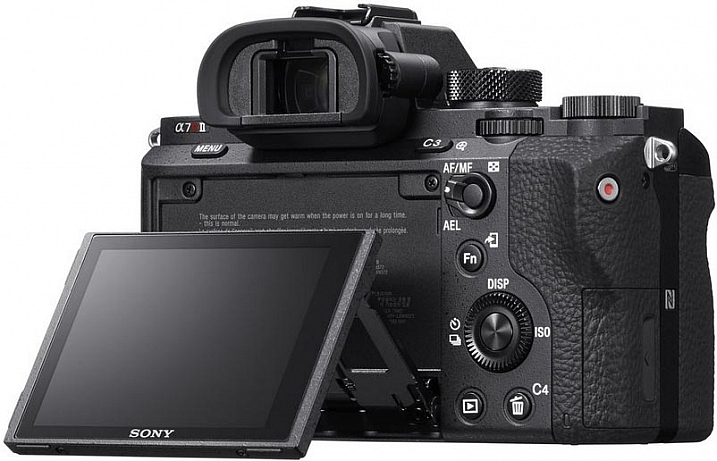
You’ll also be able to capture smoother handheld video with the image stabilization switched on, and with the additional Custom Function button on the camera body you can easily assign IS to that button, to save digging around in the menus to turn it on and off. This is a major improvement over the A7R.

The menu system of Purgatory

The one consistent gripe among all reviewers of the A7 series over the last couple of years has been the atrocious Sony menu system. They should have dealt with this issue long ago, but decided it wasn’t worth bothering on this upgrade.

Sony doesn’t seem to use any sensible kind of logic as to where they place menu items. For example, you’d expect anything to do with Autofocus to be grouped in one menu – but no, it’s scattered all over the place as if deliberately trying to test your patience. Things like this are a real turn-off for professionals who don’t have the time to waste on menu digging.

Get a grip Sony and sort this out! I’ll happily provide a much better layout for FREE if it means I no longer have to suffer the menu of misery.

Much better autofocus

Let’s be honest, the autofocus on the A7R is pretty lame, when compared to high-end DSLR cameras. If you’re seriously considering using the A7RII for portraiture the new Eye Detect autofocus function is a major attraction, and it works very well. If you primarily shoot landscapes this feature alone might not be worth the upgrade.

Sony A7RII Image Examples for Astrophotography by Gavin Hardcastle

It does 4K video right?

Well – kind of. If you want full frame 4K video you’ll probably want to buy the A7SII instead, because the 4K full frame footage that I shot with the A7RII looks more like scaled up 1440p, and comes out looking pretty soft.

You’ll get proper 4k image quality when shooting in the Super 35 mode, but you’re basically shooting in crop sensor mode, so you loose a major part of the frame to get that crisp 4K video quality. The other downside, is that the better looking Super 35 mode suffers from bad rolling shutter.

Once again, this is another example of how Sony eeks out their technology across different camera models, ensuring that you have to buy more than one camera if you want all the coolest features. That being said, Sony is still offering better value than their competitors when it comes to how much bang you’re getting for your buck.

Better color rendering?

It’s been said that the A7RII produces better colors than the A7R, but I’ve yet to see any improvement from the test shots that I made. I’ve always been quite happy with colors produced by my A7R, but try as I might, I can’t see any difference (good or bad) in the colors produced by either camera. My examples above may show a slightly different color tone, but I’m putting that down to the time difference between shots while I got everything set up.

Sony A7RII Review in Peek-a-Boo Canyon by Gavin Hardcastle

Isn’t the EVF mind blowing?

There’s been a lot of hype over the improved image quality on the EVF (Electronic View Finder) of the Sony A7RII, and while it’s definitely better than the A7R, it all amounts to nothing once you’ve punched in and magnified the image so that you can accurately set your focus manually.

Sadly, the magnified image quality of the new EVF still looks like a bag of smashed crabs, and I didn’t find it to be any more usable than the A7R for that specific purpose. I tried viewing in both Normal, and High Quality modes, and my conclusion is that the new EVF doesn’t live up to all the hype. Sorry Sony Fanboys.

Where you really notice the improved resolution of the EVF is during playback, and that can be very useful when you need to check the focus after shooting. This is something I do very often when working with poorly made Samyang lenses that have terrible build quality, but produce amazingly sharp images when focused correctly (especially for astrophotography). So, in that respect it’s great, but don’t for a second think that it’ll be any easier to set perfect focus using the EVF magnification.

Review of the Sony A7RII Digital Camera

Image courtesy of Sony

It’s bigger and heavier than the A7R

The first thing I noticed as soon as I held the A7RII, was how much bigger and heavier it felt. While I liked the slightly larger size of the A7RII, I was none too happy about the added weight.

One of the major attractions of mirrorless camera systems is their small size, and even with the added weight of carrying lots of spare batteries, it’s still a relief not to be lugging around a breeze-block (cinderblock) of a DSLR.

If Sony could keep the same light weight to these cameras, but make them slightly larger and more ergonomically pleasing to the average hand size, I think they’ll win a lot of new business.

#2 – DSLR users considering switching to the Dark Side

If you’re considering jumping ship from another camera system, there are some things you need to consider before buying into the Sony brand. For most hobbyists these issues aren’t that big of a deal but for professionals these might be deal breakers.

  • No second memory card slots
  • Tedious and slow menu system induces violent tantrums
  • Slow response times when changing settings, writing to card, previewing and using apps
  • Battery life gives you a maximum of one hour of shooting
  • Small size is not comfortable for long periods shooting handheld unless you have tiny hands
  • Weather sealing is pathetic on the A7 series, don’t even test it

Adapt your DSLR Glass

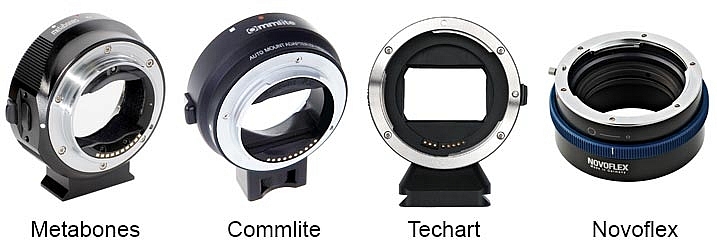
Sony A7RII Lens Adapters

On the plus side, there are now many choices of lens adapter available from different manufacturers, some of which can now handle aut focus. If you own a lot of expensive DSLR glass you’ll most likely be able to adapt it to the Sony E-Mount system. I’ve personally gone down this route but I’ve begun to gradually invest in native Zeiss glass for the Sony because the bulky size of the adapted DSLR lenses makes for a very uncomfortable experience and my camera bag needs to get smaller, not bigger.

Is there really any competition?

It’s pretty slim pickings in the DSLR camp if you need big megapixels. The Canon 5DSR offers more pixels but I’ve yet to see it produce better image quality than the A7RII, especially when it comes to low light shooting and ISO performance. The Nikon D810 is still the king of dynamic range in the DSLR world, but it falls behind the A7RII when it comes to accurate manual focusing using Live View, they don’t even have flip screens!

None of the high end DSLR cameras currently records 4K video.

If you’re outgrowing your current DSLR, or thinking of adding a second camera, that can produce superb images, the Sony A7RII is a logical choice if you can afford the asking price.

3 – New camera buyers with no current investment in any system

Sony A7RII Camera Review by Gavin Hardcastle

Image courtesy of Sony

If you’re not already invested in any camera system and are thinking of splashing out in this camera, I can summarize the entire ethos of the Sony A7 series for you in one sentence.

Image Quality Over Functionality. That’s what it’s all about. The Sony A7 series of cameras cannot compete with high end DSLR cameras in terms of functionality and reliability in high pressure shooting situations. But when it comes to sheer image quality, sharpness and low light performance, Sony crushes the competition with ruthless dominance.

If you’re a landscape photographer there really is no competition in this price bracket. The Sony A7RII will produce spectacularly sharp and detailed images when paired with good quality lenses.

What do you need from your camera?

Your decision as to whether or not you should buy this camera depends entirely on your shooting style and requirements. Want to shoot weddings and sporting events where reliability is paramount? Buy a high end DSLR. Want to shoot stunning landscapes with the utmost clarity? It doesn’t get much better than the A7RII for the current asking price.

But hold on – What about the A7R?

If the $ 3200 USD price tag of the A7RII (body only) puts too much strain on your bank account, I would recommend that you seriously consider saving some money for Zeiss glass and look for a good used A7R. There should be quite a few Sony fanboys out there, selling off their now obsolete Sony A7Rs for peanuts. Snag one of those for a bargain price and you might still have money left over for a Zeiss Loxia 21mm f/2.8, and maybe even the Sony FE 55mm f/1.8 which are both excellent lenses.

The attraction of top glass

The Zeiss Batis 85mm and Sony SEL35F14Z 35mm lenses

Image courtesy of Zeiss

When the Sony A7 range first came out there were hardly any native lenses to choose from. Now there are more and more high quality lenses from Sony and Zeiss that are so good, I can see some photographers buying into the A7 system simply to take advantage of lenses like the Zeiss Batis 85mm and Sony SEL35F14Z Distagon T FE 35mm f/1.4, which are quickly becoming legendary lenses.

The Sony A7RII gets 4.5 stars

Sony A7RII Test Shots and Review

Why not 5 stars? In some ways Sony has listened to its users and fixed, or worked around, many of the issues voiced by A7R users. However the menu system is still atrocious, and the full frame 4K video is something of a let down.

I would have placed more value on improved dynamic range over the extra few megapixels, and there has been zero improvement in battery life even though the A7RII is a larger camera than its predecessor.

Maybe Sony will fix all of these issues in the A7RIII, and based on recent history, that camera should be in the shops before the next Star Wars sequel comes out.

Special Note: All of the test shots created for the review were done before the latest firmware update which now allows the A7RII to shoot 14-bit uncompressed RAW files.

googletag.cmd.push(function() {
tablet_slots.push( googletag.defineSlot( “/1005424/_dPSv4_tab-all-article-bottom_(300×250)”, [300, 250], “pb-ad-78623” ).addService( googletag.pubads() ) ); } );

googletag.cmd.push(function() {
mobile_slots.push( googletag.defineSlot( “/1005424/_dPSv4_mob-all-article-bottom_(300×250)”, [300, 250], “pb-ad-78158” ).addService( googletag.pubads() ) ); } );

The post Sony A7RII Mirrorless Full Frame Camera Review by Gavin Hardcastle appeared first on Digital Photography School.


Digital Photography School

 
Comments Off on Sony A7RII Mirrorless Full Frame Camera Review

Posted in Photography


City Museum: Abandoned Warehouse Full of Caves, Rides & Slides

19 Aug

[ By WebUrbanist in Architecture & Public & Institutional. ]

city museum exterior playground

Somewhere between a huge funhouse, playground and circus, the City Museum of St. Louis may be the most entertaining and interactive urban architectural experiment in the world. And if you are not having a good time, you can always hop on the 10-story slide, a remnant of the structure’s days as a shoe factory (originally designed to send products down the side of the building).

city museum bridge

Eclectic from its stylings to its offerings, this unique place features everything from recycled buses and airplanes to giant multi-story slides and artificial caverns as well as more conventional kid-friendly fun in the form of skate parks and ball pits.

city museum ball pit

city museum indoor cavern

Various other imported, salvaged and upcycled oddities can be found throughout, including a vault and safety deposit boxes from a Chicago bank. And the place is constantly changing, being reconfigured and hacked away at by the Cassilly Crew.

city museum slides

What started inside of a derelict structure in the late 1990s has burst from the walls of the building, featuring an array of exterior ‘exhibits’ as well. Visitors can climb ramps, bridges and tunnels to access a high-hanging plane and other repurposed spaces. Up on the roof sits a small Ferris Wheel while a bus hangs over the edge of the building (and of course: people are welcome to climb inside).

city museum roof bus

city museum ferris wheel

The owners boast that they are “always building,” and Gallery Hip summarizes the strange paradoxes of this ever-changing place: “popular among residents and tourists, the museum bills itself as an ‘eclectic mixture of children’s playground, funhouse, surrealistic pavilion, and architectural marvel.’ Visitors are encouraged to feel, touch, climb on, and play in the various exhibits.” Or, as Colossal describes it: “hundreds of feet of tunnels that traverse from floor to floor, an aquarium, ball pits, a shoe lace factory, a circus arts facility, restaurants, and even a bar… because why not?”

city museum bridge system

city museum tower plane

Faced with this amazing place, one is left to wonder: would such an unusual endeavor be approved of were it being started from scratch today, or would safety-minded citizens suck the fun out before it got started? Like Adventure Playgrounds, also more popular in an era now past, it is hard to imagine this kind of project getting off the ground, but thankfully there is a precedent: it is hard to argue with the success of the City Museum.

Share on Facebook


[ By WebUrbanist in Architecture & Public & Institutional. ]

[ WebUrbanist | Archives | Galleries | Privacy | TOS ]


WebUrbanist

 
Comments Off on City Museum: Abandoned Warehouse Full of Caves, Rides & Slides

Posted in Creativity


Pocket full of tricks: Sony Cyber-shot DSC-RX100 IV review posted

29 Jul

Sony defined a category when it rolled out the enthusiast-focused Cyber-shot DSC-RX100. This shirt pocketable compact’s fourth iteration brings a new 20MP 1″-type stacked CMOS sensor to the table, maintaining an F1.8-2.8, 24-70mm equivalent zoom lens from the preceding model. Our full review analyzes its performance in the field and in our studio. Read more 

Articles: Digital Photography Review (dpreview.com)

 
Comments Off on Pocket full of tricks: Sony Cyber-shot DSC-RX100 IV review posted

Posted in Uncategorized


Inflatable Installations: 18 Fun Projects Full of Hot Air

28 Jul

[ By Steph in Art & Installation & Sound. ]

inflatable filthy luker 1

Inflatables are good for more than just pool toys and camping beds – they also come in the form of giant tentacles springing from open windows, the world’s largest rubber duck and (literally) gigantic piles of crap. Blow-up buildings can have a practical purpose as mobile architecture, but sometimes, oversized inflatables are just for fun, transforming both interior and exterior environments and bringing shock value to art festivals around the world.

Giant Poo, Pig & Stonehenge
inflatable poo

inflatable poo pig

inflatable stonehenge

A group of artists came together in the West Kowloon Cultural District of Hong Kong to install oversized inflatable works, including ‘Complex Pile’ by Paul McCarthy, ‘House of Treasures’ by Cao Fei and ‘Sacrilege’ by Jeremy Deller, for an art festival.

Plastic Bubble Environments Transform Interiors

inflatable balloon environemnts 2

inflatable balloon environments 1

inflatable balloon environments 3

inflatable balloon environments 4

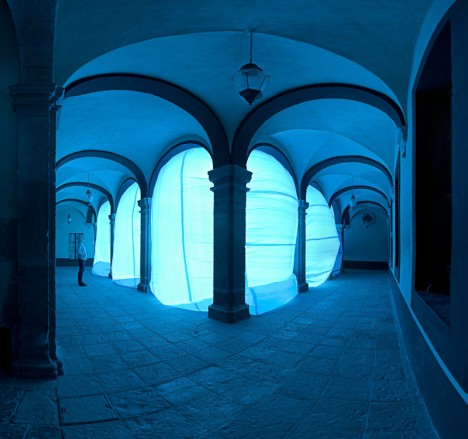
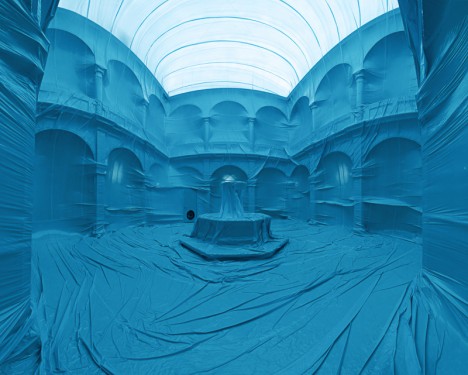
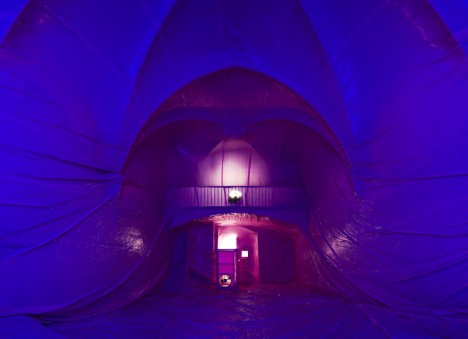
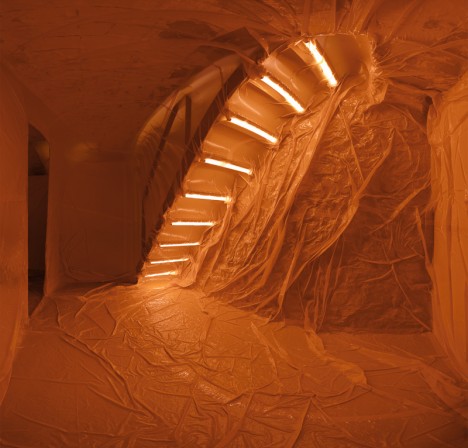
All that’s left of an interior space once these inflatable plastic environments by Penique Productions are put into place is the basic shape and structure of it, all details obscured to create a surreal new environment. The Barcelona-based group inflates massive colorful balloons inside buildings to transform them for special events.

Tentacles, Eyeballs & More by Filthy Luker

inflatable filthy luker 3

inflatable filthy luker 2

French street artist Filthy Luker makes it seem as if gigantic octopi are trying to escape from buildings around the world, and anthropomorphizes trees with inflatable eyeballs.

Inflatable Snow Chalet in Miami Beach

inflatable log cabin

inflatable log cabin 2

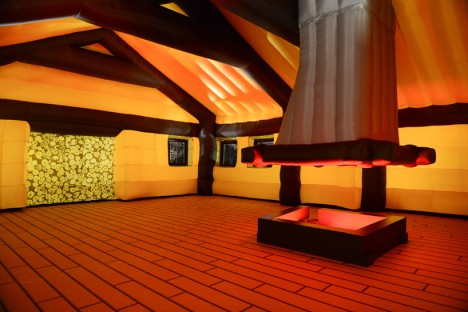
The unlikely sight of a snow-topped ski chalet bobs up and down in the bay beside the now-abandoned Miami Marine Stadium for Art Basel 2013. Entitled ‘Curiosity,’ the giant inflatable structure by Paris-based Galerie Perrotin and French artist duo Kolkoz plays on contrasts. “‘Curiosity’ was the name that was given to the last Mars exploration rover. We have taken this idea of an invader exploring a foreign land and applied it to the snow covered chalet that has set off on a journey and arrived in the middle of a maritime stadium in the hot Florida sun.”

Next Page – Click Below to Read More:
Inflatable Installations 18 Fun Projects Full Of Hot Air

Share on Facebook


[ By Steph in Art & Installation & Sound. ]

[ WebUrbanist | Archives | Galleries | Privacy | TOS ]


WebUrbanist

 
Comments Off on Inflatable Installations: 18 Fun Projects Full of Hot Air

Posted in Creativity


Sigma announces 24-35mm F2 DG HSM Art for full frame camera

19 Jun

Sigma has announced the 24-35mm F2 DG HSM Art, a constant wide-aperture, wide-angle zoom for full frame cameras. Part of the company’s high-end ‘Art’ range, Sigma suggests the lens can play the same role as a 24, 28 and 35mm set of prime lenses. The lens has a minimum focusing distance of 28cm, giving a maximum magnification ratio of 1:4.4. It will be available in Canon, Nikon and Sigma mounts. No details of pricing or availability have yet been given.

Articles: Digital Photography Review (dpreview.com)

 
Comments Off on Sigma announces 24-35mm F2 DG HSM Art for full frame camera

Posted in Uncategorized