RSS
 

Posts Tagged ‘full’

Sony a9 Full Review: Mirrorless Redefined

15 Jun

The Sony Alpha 9 is the company’s first camera aimed at professional wedding, action and sports photographers. It’s a 24MP, full-frame mirrorless camera that can shoot at 20 frames per second with full autofocus. And, just as importantly, with very low viewfinder lag and absolutely no blackout during continuous shooting.

That’s right, a mirrorless camera targeted at wedding, action and sports photographers – a strike at the DSLR’s area of greatest strength. It’s true that Olympus has pushed in this direction with its E-M1 Mark II, but Sony is promising both super-fast readout and full-frame image quality, backed up with an expansion of its Pro Support scheme that will be needed to break into the pro market. This is ambitious stuff.

Of particular note for wedding and event photographers are the a9’s speed and silent shooting, both of which are certain to have a positive impact on capturing just the right moment without any interruption from the clacking of a conventional shutter.

All this capability stems from a stacked CMOS image sensor, which includes processing circuitry nearer the pixels and features built-in memory to deliver all this data to the off-board processors at a rate they can cope with. It’s this structure that enables the camera to shoot at 20 frames per second and do so with an electronic shutter that’s fast enough to minimize the rolling shutter effect. The fast readout also allows 60 AF/AE calculations per second, promising better subject tracking and prediction.

Key specifications

  • 24MP full-frame Stacked CMOS
  • 20 fps continuous shooting with full AF (electronic shutter, 12-bit files)
  • Continuous shooting buffer of up to 241 compressed Raw files (362 JPEG)
  • 10 fps continuous shooting with AF with adapted lenses
  • 5-stop (estimated) 5-axis image stabilization
  • 3.7M-dot OLED viewfinder (1280 x 960 pixels) with up to 120 fps update
  • 1.44M-dot rear touchscreen LCD
  • Oversampled UHD 4K/24p video from full sensor width (1.24x crop for 30p)

The stacked CMOS design not only allows the super-fast readout that powers so much of the camera’s attention-grabbing spec, it also means it has all the benefits of BSI design. This means that the light-sensitive section of each pixel is closer to the surface of the sensor which, in turn, means the sensor is better at collecting light near the corners, where the incident angle will be high. It also generally means improved low light performance, and sharper pixel-level imagery.

Sony’s crammed the a9 with seriously speedy technology and is aiming it at true sports professionals. Out-of-camera JPEG cropped to taste.
Sony 24-70mm F2.8 GM | ISO 2500 | 1/800 sec | F2.8
Photo by Carey Rose

Beyond the technical wonders of the new sensor, there are a large number of significant changes to the a9 relative to Sony’s a7-series that have all been made with demanding professionals in mind; these include updates to menus, controls, image quality, and more. Will all of this be enough to tempt professionals to switch? Let’s dig in and find out.

Review History
23 Apr 2017 Introduction, Shooting Experience, Image Quality Impressions, Autofocus Impressions published
30 May 2017 Studio Scene and Raw Dynamic Range published
14 June 2017 Full review published

Articles: Digital Photography Review (dpreview.com)

 
Comments Off on Sony a9 Full Review: Mirrorless Redefined

Posted in Uncategorized


Rokinon 20mm F1.8 and Cine DS 20mm T1.9 Full Frame Super Wide Angle lenses now available

30 Dec

Rokinon has announced the launch of its new Rokinon Digital Photo 20mm F1.8 and Cine DS 20mm T1.9 Full Frame Super Wide Angle lenses. Both lenses are made from high-strength aluminum alloy and feature a super-wide 94.8-degree view, a non-rotating 77mm filter mount, Rokinon’s Ultra Multi-Coating, and a quiet, smooth focusing control.

These prime lenses, say Rokinon, offer both fast aperture and ‘the full frame perspective of 20mm,’ offering a solution that falls between the maker’s similar 14mm and 24mm models. These 20mm lenses have a 7.9in / 0.20m minimum focusing distance, 13 elements in 12 groups, three extra-low dispersion elements, and a pair of aspherical elements.

In addition to the ‘common’ features shared between the lenses, the Cine DS lens features geared aperture and controls, a de-clicked aperture control ring, and dual right/left side distance and t-stop scales. 

The Digital Photo lens is available for Canon, Nikon AE, Sony E, Micro Four Thirds, Pentax K, and Fuji X mounts (MSRP $ 599), while the Cine DS lens ($ 799 on B&H Photo) is available for Canon, Nikon, Sony E, and Micro Four Thirds mounts.

Articles: Digital Photography Review (dpreview.com)

 
Comments Off on Rokinon 20mm F1.8 and Cine DS 20mm T1.9 Full Frame Super Wide Angle lenses now available

Posted in Uncategorized


Transformers: 2 Beijing Houses Packed Full of Space-Maximizing Tricks

08 Dec

[ By SA Rogers in Architecture & Houses & Residential. ]

blue-architecture-studio-narrow-5

Think you’ve seen it all when it comes to ideas for saving space in small houses and apartments? Beijing’s B.L.U.E. Architecture Studio is here to prove you wrong in the most delightful way, with a series of transforming elements and incredibly clever layouts in two tiny ‘hutong’ alley houses. Working with lots as small as 258 square feet that are squashed between existing buildings, the architects managed to produce functional, comfortable, private residences full of natural daylight and enough space for multi-generational families.

blue-architecture-studio-narrow-1

Both homes butt up against other structures, making it impossible to incorporate windows into the design. B.L.U.E. added skylights to both, utilizing open-plan lofted layouts inside to encourage a bright and cheerful atmosphere. The first home is on a narrow L-shaped lot and features a cool glass-filled rear wall that opens all the way up to the courtyard.

blue-architecture-studio-narrow-2

blue-architecture-studio-narrow-4

blue-architecture-studio-narrow-6

Inside, beds and children’s play areas are lofted above a pale wooden built-in full of sliding elements, fold-down tables, transforming stairs, beds that instantly double in size, retractible walls and a modest-sized table that expands to seat six diners.

blue-architecture-studio-narrow-7

blue-architecture-studio-narrow-3

The second house is even smaller, with a nearly-identical arrangement of skylights and cabinet-packed walls revealing an array of unexpected features when opened. Extra countertops and work surfaces pop out of the wall facing the galley kitchen, and storage space stretches from the floor to the ceiling.

blue-architecture-studio-hutong-2

blue-architecture-studio-hutong-3

Beneath the lofted bedrooms for the owners and their kids, a third bedroom area doubles as an extra dining space. Remove the mattress to reveal a pop-up table and cushioned bench seating that you climb into like a retro conversation pit, or lay it back down and pull down the blinds for privacy. A second table folds down from the adjacent wall in seconds, with storage cubes doubling as stools.

blue-architecture-studio-hutong-1

blue-architecture-studio-hutong-4

From the pictures, it looks like there are even more built-in elements that aren’t demonstrated in GIF form, like a mysterious hatch in the dining room floor. The whole setup is clean, modern and uncluttered enough for a minimalist’s sensibilities despite so many people living in such a small space – an inspiration for all the tricks and hacks we’re going to have to come up with to boost housing density in cities with burgeoning populations.

Share on Facebook


[ By SA Rogers in Architecture & Houses & Residential. ]

[ WebUrbanist | Archives | Galleries | Privacy | TOS ]


WebUrbanist

 
Comments Off on Transformers: 2 Beijing Houses Packed Full of Space-Maximizing Tricks

Posted in Creativity


Fotodiox introduces full automatic Nikon to Sony E adapter

22 Nov

Accessory manufacturer Fotodiox has introduced a new adapter that allows Nikon lenses to operate with a full range of automatic functions when hosted on a modern Sony E-mount camera body. The Fusion Smart AF Adapter accepts Nikon G AF-I and AF-S and provides connections between the lens and a Sony compact system camera body so that the user can enjoy autofocus as well as the ability to automatically stop down the lens and to trigger vibration reduction in lenses that have it. The adapter uses power from the camera to drive the lens, and EXIF data is passed back from the lens to be recorded in the image file created by the camera.

The company says that the adapter works best with Sony’s latest bodies that feature phase detection autofocusing systems, such as the a7R II. The adapter works with bodies that use contrast detection but the AF is a lot slower.

As Nikon uses a physical lever to close the iris of its lenses Fotodiox has used a motor within the adapter to handle that function so lenses that have no aperture ring don’t have to used wide open all the time. This also means that metering works without the user having to manually stop the lens down and that the camera’s semi-automatic exposure modes to operate.

The Fotodiox Fusion Smart Adapter costs $ 370. For more information visit the Fotodiox website.

Press release

Fotodiox Pro Announces Nikon to Sony FUSION Adapter for Full Function Control

Fotodiox Pro, creator and distributor of several lines of specialty solutions for videography, cinematography and photography, has announced their new Nikon to Sony FUSION Lens Adapter. Available now on Fotodioxpro.com, the Nikon to Sony FUSION Adapter allows photographers to mount Nikon lenses onto Sony cameras and maintain electronic communication between the two, delivering decades of legendary Nikon imaging expertise to the hands of full frame or APS-C Sony E-Mount camera users.

“The Nikon to Sony FUSION Adapter is truly the first of its kind, and we couldn’t be more excited to share it with our customers,” said Bohus Blahut, marketing director for Fotodiox Pro. “What makes it such a breakthrough is the presence of FUSION Drive – a built-in motor that physically moves the lens’ internal aperture control lever. Nikon lenses are notorious for maintaining mechanical aperture control while many other functions are electronic, but FUSION Drive, which we built for the very first time for this Nikon to Sony FUSION Adapter, solves that issue.”

By installing the Nikon to Sony FUSION Adapter on a full frame or APS-C Sony E-Mount camera, Nikon AF-I and AF-S lenses gain auto-focus, full aperture control for Auto / Aperture Priority / Program AE modes, EXIF data transmission (on compatible models) and image stabilization (on compatible models). The Nikon to Sony FUSION Adapter is also compatible with fully manual vintage Nikon F lenses as a manual adapter.

Photographers are advised that the FUSION Adapter is designed to work best with newer Sony cameras that have “Phase Detection Auto Focus”, such as Sony a7, a7II, a7rII, a6000, a6300 and a6500 cameras. The Nikon to Sony FUSION Adapter’s performance will be significantly slower with older Sony cameras that rely solely on “Contrast Detection Auto Focus”.

Articles: Digital Photography Review (dpreview.com)

 
Comments Off on Fotodiox introduces full automatic Nikon to Sony E adapter

Posted in Uncategorized


Full frame 48MP sensor with global shutter and 8K video hits market from CMOSIS

13 Nov

The Belgian manufacturer that makes some of the sensors used in Leica’s cameras has announced a new offering that features 48MP and a global shutter. Although the CMV50000 CMOS sensor is described as medium-format in the press release, it is actually nearer to being 35mm-sized and measures 36.43 x 27.62mm (the width of a 35mm ‘full-frame’ sensor but elongated out to 4:3 aspect ratio).

The new sensor is also designed to record 8K video at a rate of 30fps and offers, according to the manufacturer, a dynamic range of 64dB at full resolution and a signal-to-noise ratio of 41.4dB. The sensor can increase the dynamic range of its output by recording alternate row of pixels at different exposures (a process comparable with the DR mode of Fujifilm’s EXR CCD designs).

The global shutter design of the sensor allows all pixels to record at the same time instead of in sequence as is usually the case. This means fast moving objects traveling across the frame can be captured without distortion in cameras when using a fully electronic shutter. While some of the company’s target market is industrial inspection the sensor is also said to be suited to still photography and professional and broadcast video.

At the moment the sensor is only available in black and white, but a color version is on its way for the end of the year. The existing sensor costs €3450 (approx. $ 3800). For more information visit the CMOSIS website.

Press release:

Industry’s first global shutter 48Mpixel CMOS image sensor from CMOSIS supports 8k image resolution at 30 frames/s

CMV50000 features low noise, high frame rate, and high dynamic range; easy-to-design-with sensor excels in automated optical inspection systems, machine vision uses and prosumer video applications

Premstaetten, Austria — CMOSIS a member of the ams AG (SIX: AMS) group, a leading provider of high performance sensors and analog ICs, today launched the CMV50000, an industry first global shutter CMOS image sensor offering high resolution of 48Mpixels, more than twice the resolution of its previous generation CMOSIS global shutter CMOS image sensors.

The CMV50000 is a medium format 48Mpixels sensor with 7920 x 6002 4.6-µm sized pixels using the patented 8-transistor pixel architecture to offer low noise and excellent electronic shutter efficiency. Global shutter operation means, that images of fast-moving objects can be captured without distortion.

Its pixel offers 64dB optical dynamic range at full resolution and up to 68dB in subsampled 4k mode, and the imagers benefits from the implementation of sophisticated new, on-chip noise-reduction circuitry such as black level clamping to enable it to capture high quality images under low-light conditions.

Operating at a fast 30 frames/s with 12 bit pixel depth at full resolution or a binned 4k mode, and at up to 60 frames/s with pixel subsampling to 4k resolution, the sensor is suitable for use in high-speed machine-vision systems, as well as in TV broadcasting and video cameras.

The CMV50000 provides detailed views of a large surface area required in factory automation applications such as automated optical inspection (AOI) systems and systems for the inspection of displays of mobile phones, tablets, laptops and TVs. The combination of high frame rate and high re-solution allows further increase of the already high throughput rates at consumer product assembly plants.

A High Dynamic Range (HDR) mode is supported by an odd/even row dual-exposure operation.

The CMV50000 is expected to replace high pixel-count charge-coupled device (CCD) image sensors used in machine-vision cameras and high-end security cameras. Compared to the older CCD sensor technology, CMOS image sensors are easier to integrate in camera designs, use less power, and can operate at much higher frame rates.

“The introduction of the 48Mpixel CMV50000 gives camera manufacturers the opportunity to enjoy the design and operating advantages of a CMOS image sensor while gaining the ultra-high resolution, which has previously only been available through the use of CCD sensors”, said Wim Wuyts, Marketing Manager for image sensors at ams.

“The CMV50000’s advanced noise-reduction features such as black level clamping combined with its high optical dynamic range, results in high picture quality at full operation speed without the need for complex analog output matching required for multi-tap CCD image sensors and therefore also decreases the camera development time significantly.”

The monochrome version of the CMV50000 is sampling now. The color version will be available for sampling by the end of 2016. Unit pricing is €3,450.

Articles: Digital Photography Review (dpreview.com)

 
Comments Off on Full frame 48MP sensor with global shutter and 8K video hits market from CMOSIS

Posted in Uncategorized


App review: Full Frame is a quick, easy JPEG viewer, EXIF editor

28 Jun

Full Frame is a Mac-based image viewer, photo importer and metadata editor that centers around an incredibly clean and intuitive user interface. Released by California-based Inland Sea and available now in the App Store, its potential to speed up one’s workflow caught our attention.

Of course, there are a lot of different photo viewing, ingesting and sorting programs available on market, many of which are geared toward casual users. Full Frame, on the other hand, is targeting more toward high-end users like photo enthusiasts.

In Use

Having spent some time trying out using Full Frame in my own workflow, it seems its closest competitors are Photo Mechanic, a time-honored program with a cult-like following from photojournalists world-wide, as well as Adobe Bridge.

Unlike Adobe Bridge, which I find frustratingly sluggish and cluttered in design, Full Frame comes across as exceptionally lean in terms of speed (except when working with un-supported Raw files) and design. It has much more in common with Photo Mechanic like quick startup and image load times. Of course the spectrum of its functionality is much more limited than that of Adobe Bridge.

I took Full Frame for a spin while sorting images to post to one of my personal sites. Specifically,  I used it to move and rename selects from one drive, to a folder on another.

Once you have Full Frame fired up, users simply select the source folder and destination (assuming you are copying files) in the upper-left of the screen. The above screenshot represents the entire window when the program is open. There is literally nothing to get in your way of viewing images and deciding which to keep and which to trash.

To select an image to copy, simply click on it and a checkmark appears. Alternatively you can select all by hitting ‘Command A’ and uncheck the ones you don’t want. In the upper-left portion of the window you’ll find a slider to zoom in the grid view as well as options to view metadata and delete files from their source.

With your mouse hovering over an image, a small plus sign will appear in the upper left of the photo. Click on it to expand the view. Once in the single image viewer, users can use the slider at the top to zoom the image in and out, to check for critical focus. Unfortunately, when zooming in and out, there is no display of the percentage you are zoomed to, unlike in Photo Mechanic.

One of the best features of Full Frame is the metadata/EXIF viewer. It offers an incredibly detailed list that goes above and beyond what a lot of other programs show, including Photo Mechanic.

Users can also add EXIF info to any imported files from within the preferences panel. One thing I’ve always really liked about Photo Mechanic is how simple it is to add copyright warnings and contact info to my files. In Full Frame, it is just as painless. From within the preference panel users can also assign rules for renaming files on import, which is very handy. 

In many ways, Full frame comes across as a utilitarian program, built to accomplish several specific tasks related to moving and organizing images. However it also doubles as an outstanding way to show off your work to clients, friends or families. The grid view is frankly gorgeous, and once in the single image view, users can simple use the arrow keys to move from image to image. It also starts up very fast, which is a plus.

Things to consider

While I found a lot to like about Full Frame, there are some things to consider before purchasing it: First and foremost, despite the claims of Raw support, I found numerous files, from varying manufacturers, to be unsupported. For instance, Raw files from the Nikon D750 are unsupported, as are those from the Sony a7 II. However, if you have Raw+JPEG files, load times will slow significantly but you can at least view and import your images.

This is really quite unfortunate. Sure, app updates could bring about Raw support but who has time to wait around? On the other hand you could always covert to DNG first, but if the whole point of this program is to speed your workflow, that also makes little sense. Photo Mechanic on the other hand does not have this problem, it can display a JPEG rendering from any Raw file, and loads quickly regardless.

Another beef I have with Full Frame is that there is only one option for sorting/rating images. In Photo Mechanic and Bridge, there are numerous ways to rate and sort images. For instance, when choosing my selects, I first do an initial sweep and check mark all of the ones I like, I then assign color or star ratings until I’ve got the images sorted down to a manageable amount.  At that point I copy the selects to a separate drive to be imported into Lightroom for processing.

The Takeaway

Full Frame is not a program that can do it all, but the things it can do, it does well. If you need a quick, easy way to view JPEGs or edit/view EXIF info, it might be your cup of tea.

Full Frame is an outstanding option for photographers seeking a powerful EXIF viewer/editor or a quick and easy way to import and rename files. Its spotty Raw support is the main thing holding it back. But at $ 30, Full Frame is a major bargain compared to Photo Mechanic, which will set you back $ 150. It is also a much faster way to quickly view and sort JPEG files than Adobe Bridge.

What we like:

  • Intuitive user interface
  • Very clean, simple design
  • Powerful EXIF viewer and editor
  • JPEGs load very quickly
  • Can be used to import, sort, batch rename files
  • Support for video files

What we don’t:

  • Despite claims of Raw support, many Raw files not supported
  • No percentage shown on zoom slider
  • Not as many options for rating photos as competition

Rating:

Articles: Digital Photography Review (dpreview.com)

 
Comments Off on App review: Full Frame is a quick, easy JPEG viewer, EXIF editor

Posted in Uncategorized


How to Photograph the Full Band of the Milky Way

16 Mar

Get Grant’s three video instructional series Guide to Post-Processing Night Photos – currently available at 59% off through the SnapNDeals for a limited time only.
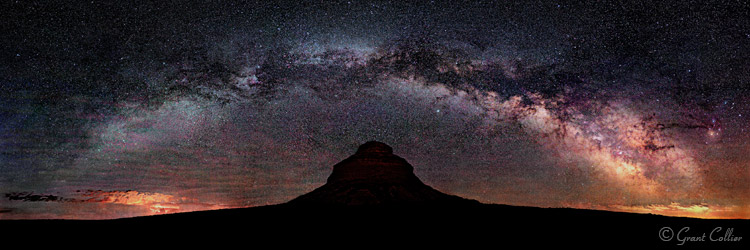
Pawnee Buttes

Our small blue planet is located on a spiral arm, far out from the center of the Milky Way Galaxy. When we look towards the galactic center, we can view one of the most spectacular sites imaginable. Thousands of stars are clustered together, to form a hazy band in the sky, known simply as the Milky Way.

If you enjoy photographing the Milky Way, the winter months can seem especially long. During this time, the Earth is pointing away from the center of the galaxy at night, and you can only see the fainter parts of the Milky Way. It can still be photographed, but the shots won’t likely be as dramatic as they are at other times of the year.

Fortunately, the bright galactic center becomes visible again in the spring. In March, it rises shortly before dawn in the Northern Hemisphere. So you will need to stay up all night or get up very early to photograph it. Every day, it rises a little earlier in the night, and by June it will be rising about the same time that the sun sets.
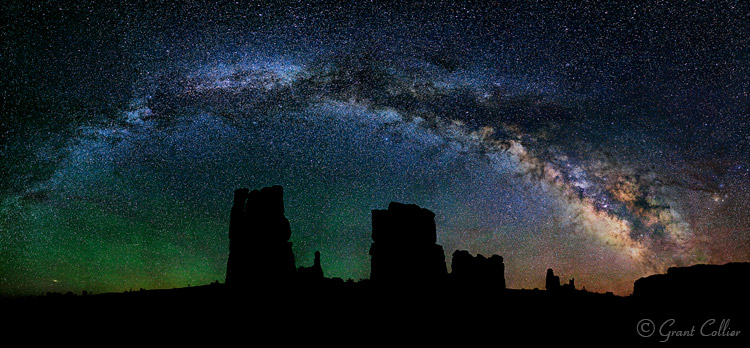
Determination Towers

The great thing about photographing the Milky Way in the spring and early summer months, is that you can capture the full band of the Milky Way arcing across the sky. By August, the Milky Way will appear too high in the sky, in the Northern Hemisphere, to capture the full arc.

If you’re shooting from the Southern Hemisphere, you will have a longer time frame to see the full band of the Milky Way. From about February to June, you can capture it in the southern part of the sky, just after the galactic center rises above the horizon. From about June to September, you can capture it just before it sets in the west.

Since the Milky Way spans such a large portion of the sky, you will need to stitch together multiple images to capture all of it in one photograph. I explain how to do this below.

EQUIPMENT
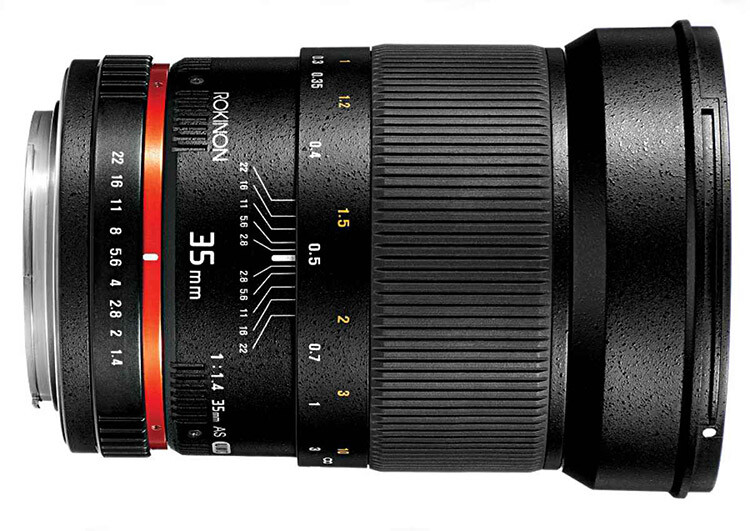
Rokinon35

The Rokinon 35mm f/1.4, all manual lens, works great for this kind of photography.

There is some specialized equipment you can use to capture stitched images of the Milky Way, such as a panoramic tripod head, a leveling base, and even a robotic camera mount. However, the majority of the time you won’t need any special equipment. Anyone with a good tripod and a DSLR can capture the full arc of the Milky Way.

You can use any lens from about 14mm to 50mm to capture your images. If you use a longer lens, like 50mm, you’ll need to take, and stitch, a lot more images together. This can be more time-consuming, but you will also capture much larger image files, with greater detail and less noise.

Ideally, you’ll want to use a lens with a very wide aperture, like f/1.4 or f/2.8. It is also helpful to have a tripod with a bubble level on top of its legs, and a tripod head that has a rotating base.

PLANNING YOUR SHOTS

You can pre-visualize how the Milky Way will appear at any time and location using a program called Stellarium. This program can be downloaded for free, it can also be purchased as an iTunes or Android app, or you can use other apps like PhotoPills or Sky Safari.
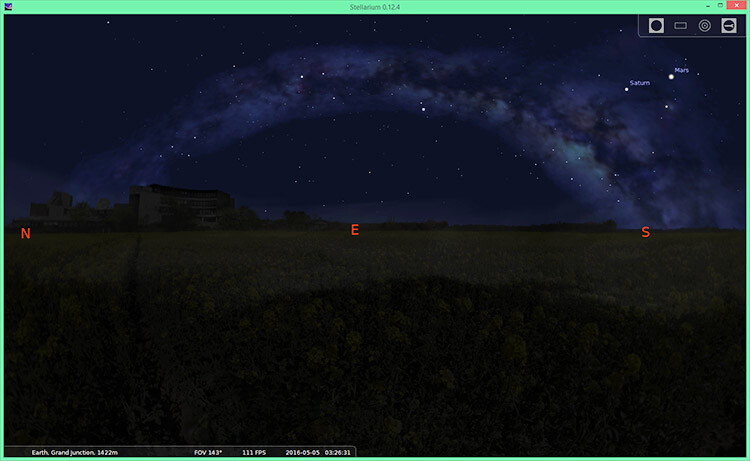
Stellarium

Stellarium

You will usually want to shoot images of the Milky Way under no moon. If the moon is out, it will obscure the stars, and the Milky Way will not look as impressive. One exception to that, is if you want the moon to illuminate the foreground. You can shoot with a waxing crescent moon that is about 20% illuminated. You’ll need the moon to be directly behind you so it obscures the stars as little as possible. The moon will be in a good position for this shortly after it gets dark on July 8-9th, 2016.

You will want to get far away from any city lights when shooting images of the Milky Way. Light pollution can create an unnatural color cast in the image and it can obscure the Milky Way. And, of course, you should check the weather forecast to make sure there will be clear skies.

COMPOSITION

Once you know how the Milky Way will appear, and have determined the best time to shoot it, you need to decide where to take your photograph. Although the full band of the Milky Way can be spectacular on its own, your images will be more compelling if you include an interesting foreground. If you’re in the Northern Hemisphere, you should find a composition facing east, since that is where the shallow arc of the Milky Way will be visible shortly after it rises. If possible, I recommend arriving before it gets dark to set up your shot. It’s much easier to determine the best composition, and focus your camera, when it’s still light out.
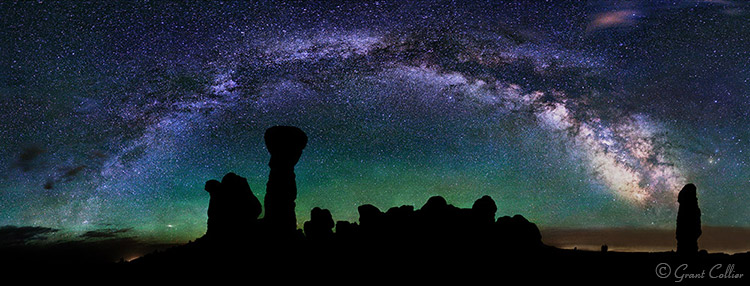
Milky Way Arches National Park

CAMERA SETTINGS

You can use the rule of 500 to calculate the exposure time for your images. Simply take 500, divided by the focal length of your lens, to get the number of seconds to expose the shot. For example, if you’re using a 50mm lens, take 500, divided by 50 = 10 seconds per exposure (this will give you long enough exposures to get good quality images at night without small star trails starting to appear in your shots).

You’ll typically want to use the widest aperture on your lens when shooting stitched images. You’ll also want to use the highest native ISO, that doesn’t cause any highlights to be blown out. As long as you don’t have any close foreground objects in the shot, you can focus at infinity.

You can do this by autofocusing on the moon if it is out, or by focusing on a very distant object before it gets dark. Switch to manual focus afterwards to make sure the focus stays set at infinity. Alternatively, if you have Live View on your camera, you can use it to zoom-in on a star on your LCD screen, then adjust the focus manually until the star appears as a small, sharp point of light.  Don’t rely solely on the infinity marker on your lens, as it isn’t always accurate.

I’ve found that a white balance of about 3800K works well at night with no moon out. However, as long as you’re shooting in RAW (or if you do not have the K setting on your camera), you can set it to Daylight and adjust the white balance later.

Turn off Long Exposure Noise Reduction, as it can take too long, causing the stars to move too much between the exposures, and making it difficult to stitch the images together seamlessly.

Calhan Paint Mines

TAKING THE PHOTOS

You will need to make sure that your camera is straight, using a bubble level or your camera’s built-in levelling feature. Ideally, you’ll also want to make sure your tripod head is mounted on a level surface by using a bubble level on top of your tripod legs, or a levelling head. This will ensure that your camera remains level as you turn it.

Before beginning the stitched image, I recommend taking a test shot. Point your camera towards the brightest part of the scene you will be photographing, and take an image using the camera settings you have chosen. Check the histogram to make sure you are not overexposing the image. If you are, lower the ISO until you are not clipping any of the highlights. You’ll also want to zoom in on your shot, and make sure everything is in sharp focus.

If everything looks okay, you can start taking your stitched image. I always recommend capturing a wider view of the scene than you want in your final image. You’ll have to crop the image afterwards, since the stitched images will never be perfectly rectangular. So it’s always better to capture too much of the scene, than too little.
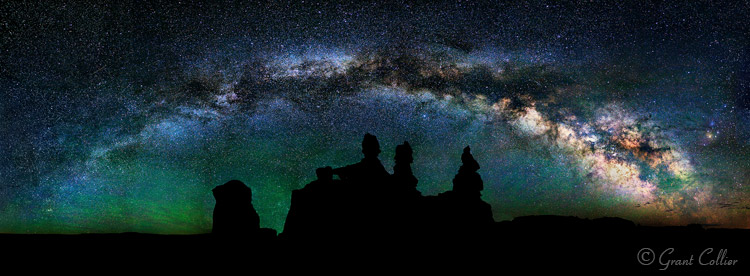
Goblin Valley

Position your camera to take an image of the far, bottom left corner, of the scene you want to capture. After you take the first shot, you’ll need to quickly rotate your camera to the right before taking the second shot. Make sure and leave plenty of overlap (about one third of the scene) between the images to make it easier for the software to stitch the images.

Now, continue taking shots, and rotating the camera to the right, until you’ve captured the entire horizontal field of view that you want. To get the full band of the Milky Way, you’ll typically need to shoot a multi-row panorama. You can rotate the camera up and then shoot a second row of images. Keep doing this until you’ve captured the entire vertical field of view you want.

STITCHING WITH LIGHTROOM
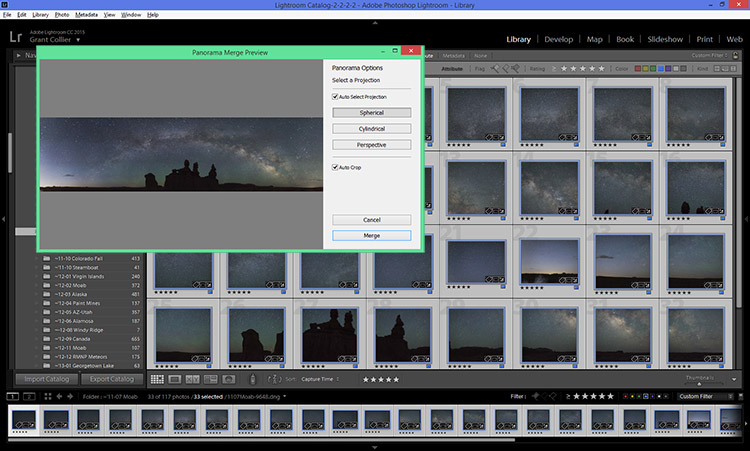
Lightroom Preview

You can stitch images within Lightroom CC. Simply select all of the images you want to stitch, right-click on them, and select Photomerge > Panorama. Lightroom will then attempt to stitch the images. Occasionally, Lightroom will be unable to stitch them together. If this happens, I recommend trying a free program for PCs called Image Composite Editor.

Once the images are stitched, you can process them like any other image. I’ve provided detailed information on post-processing night photos in my instructional videos, which are currently available at 59% off through the SnapNDeals for a limited time only.


googletag.cmd.push(function() {
tablet_slots.push( googletag.defineSlot( “/1005424/_dPSv4_tab-all-article-bottom_(300×250)”, [300, 250], “pb-ad-78623” ).addService( googletag.pubads() ) ); } );

googletag.cmd.push(function() {
mobile_slots.push( googletag.defineSlot( “/1005424/_dPSv4_mob-all-article-bottom_(300×250)”, [300, 250], “pb-ad-78158” ).addService( googletag.pubads() ) ); } );

The post How to Photograph the Full Band of the Milky Way by Grant Collier appeared first on Digital Photography School.


Digital Photography School

 
Comments Off on How to Photograph the Full Band of the Milky Way

Posted in Photography


23 Ellipical Photos that Come Full Circle

11 Mar

Shapes are a something that occur naturally in the world, and we reproduce in man-made objects. Squares, triangles, rectangles, and circles.

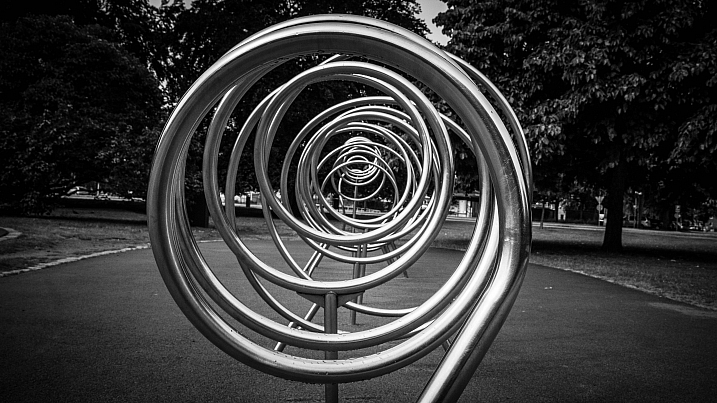
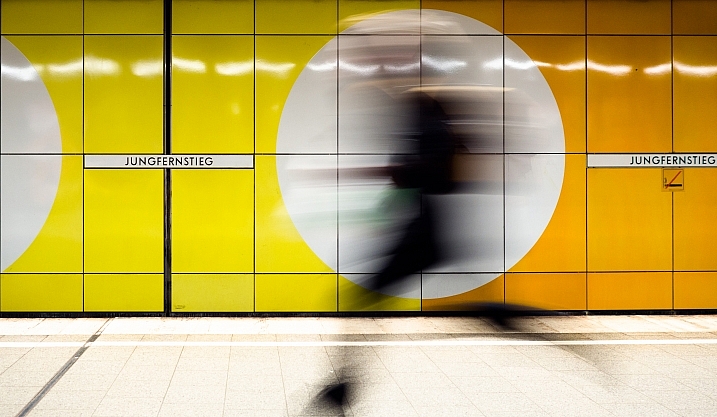
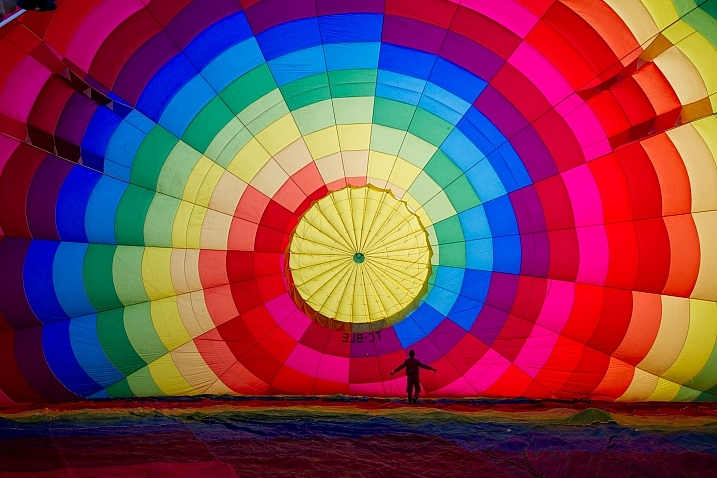
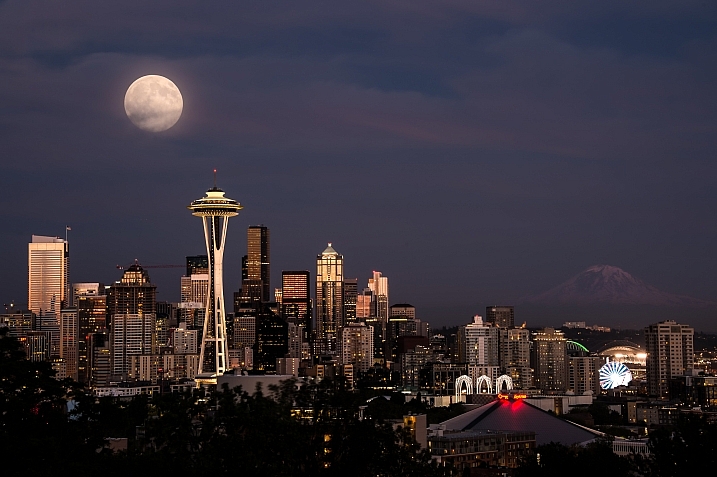
In this image set let’s look at the never ending shape – the circle. Curves lines are feminine in nature, they have no beginning and no end. Here are 23 images showing the circle:

Darlene Hildebrandt

By Darlene Hildebrandt

Stardex

By stardex

Kirsten Pauli

By Kirsten Pauli

Sea Turtle

By sea turtle

Tracy Ducasse

By tracy ducasse

Macaron*macaron(Est Bleu2007)

By macaron*macaron(Est Bleu2007)

Joakim Berndes

By Joakim Berndes

TheGiantVermin

By TheGiantVermin

Tanakawho

By tanakawho

Andrew

By Andrew

Susanne Nilsson

By Susanne Nilsson

Mette1977

By Mette1977

Jeff_golden

By jeff_golden

Daniel Novta

By Daniel Novta

Benh LIEU SONG

By Benh LIEU SONG

Howard Ignatius

By Howard Ignatius

Sam Ili?

By Sam Ili?

Kkmarais

By kkmarais

David Goehring

By David Goehring

Anh Dinh

By Anh Dinh

Renate Dodell

By Renate Dodell

Nicholas Erwin

By Nicholas Erwin

FabQuote.co

By fabQuote.co

googletag.cmd.push(function() {
tablet_slots.push( googletag.defineSlot( “/1005424/_dPSv4_tab-all-article-bottom_(300×250)”, [300, 250], “pb-ad-78623” ).addService( googletag.pubads() ) ); } );

googletag.cmd.push(function() {
mobile_slots.push( googletag.defineSlot( “/1005424/_dPSv4_mob-all-article-bottom_(300×250)”, [300, 250], “pb-ad-78158” ).addService( googletag.pubads() ) ); } );

The post 23 Ellipical Photos that Come Full Circle by Darlene Hildebrandt appeared first on Digital Photography School.


Digital Photography School

 
Comments Off on 23 Ellipical Photos that Come Full Circle

Posted in Photography


CP+ 2016: Sigma MC-11 adapter allows DSLR Sigma lenses full range of AF modes on Sony bodies

02 Mar

While photographing and filming our way through Sigma’s booth this year at CP+ 2016 in Yokohama, one rather understated product may have just stolen the show for a number of Sony shooters, as well as our Technical Editor Rishi Sanyal.

Put simply, the Sigma MC-11 adapter allows the use of Sigma-mount and Canon-mount Sigma lenses, such as the excellent Sigma Art 35mm F1.4, to be adapted to Sony bodies with no autofocus compromises whatsoever. That means Sigma is the first brand of DSLR lenses to support Eye AF and Lock-On AF modes on Sony cameras, as well as smooth phase-detection in video. What’s more, they work really well.

Don’t believe us? We didn’t believe it at first either. Watch the video and see for yourself why this is a huge step forward in realizing truly hybrid camera systems: where you can pair the best lens with the best camera body – for you – without severe compromises.

Pricing and availability of the Sigma MC-11 adapter has yet to be announced.

Articles: Digital Photography Review (dpreview.com)

 
Comments Off on CP+ 2016: Sigma MC-11 adapter allows DSLR Sigma lenses full range of AF modes on Sony bodies

Posted in Uncategorized


Pentax continues full frame DSLR tease with two sample photos

29 Jan

In September 2015, Ricoh published a teaser website for a Pentax full-frame DSLR set to launch in spring 2016. Additional teasers have been released on occasion since the website went live, including a new one today. In this latest post, Ricoh has released a pair of sample photos alongside details about the HD PENTAX-D FA 24-70mm F2.8 ED SDM WR lens and how it functions with the upcoming full-frame camera.

We got a look at an early mockup of the elusive Pentax full-frame DSLR at CP+ in February 2015. The post below is Ricoh’s latest update on the camera; the new sample photos can be viewed on the Pentax teaser website.

D FA 24-70mm F2.8ED SDM WR: for well-depicted, fine-detailed images

The HD PENTAX-D FA 24-70mm F2.8ED SDM WR lens has a 17-element, 12-group optical construction featuring three ED (Extra-low Dispersion) glass elements, one anomalous-dispersion glass element, and three aspherical elements. It delivers high-contrast, high-resolution images with extra-fine details across the image field — from the center to the edges — while effectively compensating for a variety of aberrations.

When mounted on a PENTAX 35mm full-frame digital SLR camera body, this lens can be used as a standard zoom lens, with a zoom ratio of approximately 2.9-times, covering focal-length ranges from ultra-wide angle to standard. It captures unique, eye-catching images with an exaggerated perspective and a wide depth of field, making it ideal not only for sweeping landscapes, but also for confined indoor scenes with limited depth. Its weather-resistant structure prevents the intrusion of water into the interior. When coupled with a weather-resistant PENTAX 35mm full-frame digital SLR camera body, it creates a dependable, durable imaging system that performs superbly even in the rain or mist, or at locations prone to splashing water.

Articles: Digital Photography Review (dpreview.com)

 
Comments Off on Pentax continues full frame DSLR tease with two sample photos

Posted in Uncategorized