RSS
 

Posts Tagged ‘exposures’

How to Understand Reflected Versus Incident Light and Get More Accurate Exposures

14 Sep

Do you ever get under or overexposed photos when you use your camera’s light meter? Do you get frustrated that even in auto-mode you can’t get the correct exposure? That’s because there are two different type of light to deal with when taking a photo.

When you make a photograph the light is your raw material, which is why it’s important to understand how it works. It’s a very broad topic to cover, so for this article, we are just going to focus on the difference between incident and reflective light because that’s the key to getting your exposure right.

Incident versus reflective light


We all know this difference in a very intuitive way; let me give you an everyday example: when there is a sunny day, do you wear white clothes or black ones? Easy! You wear white or at least light colors, but why? If the sun will be the same, why wouldn’t you wear dark colors? Because you know that dark colors absorb light and therefore you’ll feel the heat more than wearing white which will reflect more light and keep you fresher. This is the same principle you need to apply when measuring the light for photography.

The difference explained

Diagram How to Understand Reflected Versus Incident Light and Get More Accurate Exposures

Incident light is that which is illuminating your scene. It falls on the subject before being altered (reflected) by it which is why it’s also a more accurate light reading.

When light hits objects it gets transformed by them and reflected out; this is what we perceive and what the camera captures and reads. This is called reflective light.

Light metering

Let’s see how these two concepts apply to light metering and exposure when you take a photo. In the next examples, I always used the same light for each.

In this first shot, I metered the light once I had framed the image I wanted, so it gave me a reading making an average of the reflective light.

General Reading - How to Understand Reflected Versus Incident Light and Get More Accurate Exposures

The settings were ISO 400, f/5.6, with a shutter speed of 1/80th.

And the resulting photograph looked like this:

General Reading Result - How to Understand Reflected Versus Incident Light and Get More Accurate Exposures

Reflected light from a dark subject

However, like we said when talking about clothes, dark objects absorb light. So if I make the reading by measuring the black part of the photo, the settings that were “correct” before, now appear to be underexposed.

Black Reading - How to Understand Reflected Versus Incident Light and Get More Accurate Exposures

Even if the lighting is always the same, your camera thinks there is less. As a result, your photos will be overexposed.

Black Reading Result - How to Understand Reflected Versus Incident Light and Get More Accurate Exposures

Exposure: ISO 400, f/5.6, shutter speed 1/13th.

Reflected light from a light subject

On the other hand, light objects reflect most of the light, so your camera will receive the message that it needs to reduce the exposure if you meter off something light.

White Reading - How to Understand Reflected Versus Incident Light and Get More Accurate Exposures

And as a result, you will end up with underexposed images.

White Reading Result - How to Understand Reflected Versus Incident Light and Get More Accurate Exposures

Exposure: ISO 400, f/5.6, shutter speed 1/200th.

None of these three readings gave you the correct exposure on your image because none of them were about the incident light. In order to get this accurate reading, you need to use a handheld external light meter, which can be very expensive. Fortunately, there are other ways to get the right exposure without having to spend a fortune.

Black and white… and gray

Back in the 1930s, a photographer called Ansel Adams developed a technique for the optimal exposure of photographs by dividing the degrees from light to dark into 11 zones, therefore it’s called the zone system. Everything in the world has a color and lightness that correspond to a zone. All light meters, including the one integrated into your camera, are designed to give you the middle zone: Gray V that reflects 18% of the light. So, what you need in order to have a correct exposure is to measure the light reflecting off of this tone.

Gray card Reading - How to Understand Reflected Versus Incident Light and Get More Accurate Exposures

You’ll find gray cards on the market which are used to calibrate your exposure and white balance. They are a very practical and economical way to turn the reading of your reflective light into an incident light accuracy.

It is also very easy to use, you just have to put one in front of your subject and frame it with your camera. Once that’s the only thing in your shot, press the shutter button halfway to see the light meter and adjust your exposure accordingly. With those settings, you can have the perfect exposure regardless of the tones in your image.

Grey cardReading Result - How to Understand Reflected Versus Incident Light and Get More Accurate Exposures

Exposure: ISO 400, f/5.6, shutter speed 1/30th.

Real world examples

I know what you’re thinking, that was an unreal example because most of your photos will have much more colors than just black, white and gray V. That’s true, but the principle remains the same. Look at these real life examples:

Bridge Reflective - How to Understand Reflected Versus Incident Light and Get More Accurate Exposures

Reflective reading with an exposure of ISO 400, f/5.6, shutter speed 1/80th.

Compared to the incident reading:

Bridge Incident - How to Understand Reflected Versus Incident Light and Get More Accurate Exposures

Incident reading with an exposure of ISO 400, f/5.6, shutter speed 1/320th.


How to improvise!

What if you don’t want to be carrying around a gray card? Or did the perfect image catch you unprepared? No problem, everything in the visual world has its equivalent in the zone system.

For example, grass or wet cement correspond to the gray V zone so you can always look for elements like that in your photo and you will get a very accurate reading from them.

Take this composition of candle holders. When they are all white the photo is dark, sad and shows all the imperfections of the backdrop because it’s underexposed. However, when I add a gray candle holder and measure the light in it, the exposure is perfect.

Candleholders Reflective

Exposure: ISO 1250, f/11, shutter speed 1/125th.

Candleholders Incident

Exposure: ISO 1600, f/8, shutter speed 1/125th.

Tip: So that you are never caught off guard, you can measure the palm of your hand and figure out how much lighter or darker it is than the gray card, that way you will always have the perfect reading “at hand”.

Things to remember:

  • Get close enough to the gray object so that it’s the only thing you see through the lens, or at least the majority of it, and take that reading to set the exposure values.
  • The gray card or object needs to receive the same light as the rest of the scene. Be careful to not cast a shadow with your body or your camera when getting closer to measure the light.
  • Reflective light depends also on the material and shape of the object so a black car, for example, reflects more light than a black wool sweater.

There you go, understanding the difference between reflective and incident light can transform your photo from snapshots to pro shots!

The post How to Understand Reflected Versus Incident Light and Get More Accurate Exposures by Ana Mireles appeared first on Digital Photography School.


Digital Photography School

 
Comments Off on How to Understand Reflected Versus Incident Light and Get More Accurate Exposures

Posted in Photography


How to Take Unique Double Exposures Without Using Photoshop

20 Feb

For over a hundred years, double exposures have captivated photographers and art enthusiasts alike. Discovered by pure chance, a double exposure is a trick where a single frame of film is exposed twice or more in order to achieve multiple images in a single shot. This results in a photograph that comes out as a combination of the two images that were shot, one superimposed on top of the other.

From the technique’s boom in the 1860s, this inspired accident created an avant-garde trend that could only be described as one of the most creative uses of photography. Today, you don’t need to shoot on film to be able to create wonderful double exposures. Digital cameras are all capable of performing this unique trick!

Double Exposures Made Simple

There are five key steps to creating a basic double exposure on a digital camera. Let’s look at them one at a time.

1. Conceptualize

Although spontaneity and experimentation in photography are excellent (and very important learning processes in becoming a good photographer), more difficult techniques require further planning and forethought. It is far easier to produce a successful and satisfying double exposure when you conceptualize the image(s) beforehand, than fumbling around for hours producing work that may leave you feeling frustrated! To begin your plan, ask yourself a few simple questions:

  • What is my subject?
  • What is my background?
  • What is this image’s purpose?
  • What resources do I have available to me?

After you have answered these, you should have a much better idea of what your finished photograph will look like. As such, bringing your vision to life will now be a breeze!.

Double Exposures Made Simple

2. Multiple exposures settings

For film, you would simply shoot on the same frame multiple times by re-rolling (or not advancing it) the film. Since digital is not a roll, you will have to dig into your camera’s settings (check your user manual if need by) and do a couple of tweaks. Most digital cameras, such as Canons and Nikons, have a multiple exposure setting to allow you to generate these distinctive images.

Often found in the menu, the multiple exposure setting will more than likely host an array of options.

One of the main selections presented is choosing how many images you would like to overlay. Most cameras range from two to ten. For the purpose of this simple tutorial, we will only be using two images. At the bottom of this article, I will mention how to use far more than two photographs for advanced techniques.

Another important option will be Multi-Exposure Control (or blend mode). This tells the camera how you want your images composited together. The options are typically Additive, Average, Dark, and Light.

Blend mode options

Additive means that your images will simply be overlaid one over the other without any special considerations (see below).

Double Exposures Made Simple

Average (which is similar to Additive) means that the camera will automatically adjust the exposure in any overlapping areas to prevent overexposure, based on the number of exposures you combine. Any non-overlapping areas will be rendered with a normal exposure.

Double Exposures Made Simple 8

Bright means that exposure priority will be given to bright objects so that they will retain their exposure even when combined with a dark background.

Double Exposures Made Simple 6

Dark means that exposure priority will be given to dark objects so that they will retain their exposure even when combined with a light background.

Double Exposures Made Simple

The final main setting should revolve around the actual physical camera controls. On Canon and Nikon cameras, you will most likely be presented with two options: Func/Ctrl (which allows you to pick your base image before shooting) and ContShtng (which means that you just photograph images one after the other and they will be composited).

Every camera is different, so remember to please reference your user manual for more detailed information.

3. Photograph the silhouette

A silhouette is the shape that will be filled by your background of choice. The key to this is making sure that your silhouette subject is photographed on a plain background. Don’t worry too much about properly exposing the details on your subject, all of that will be covered up by your background. Focus on making sure that the area around your subject is clear of objects.

Double Exposures Made Simple

The first thought that may pop into your head is using a studio, but that isn’t necessary. You don’t have to be in a studio to photograph your subject on a clean background. You can photograph your subject on a plainly colored wall or better yet, you can go outside and use the beautiful open sky above you.

To photograph your subject in front of the sky, shoot from a slightly lower angle to make sure that no additional clutter ends up disrupting your clear sky. Depending on your geographical position, the easiest time of day to photograph your subject is about an hour before sunset. The right exposure will ensure that no flare ends up in your photograph.

4. Photograph the background

This is the texture or image that will fill the silhouette you just captured. Good options for this image are well exposed trees, landscapes, flowers, mountains, or patterns. Make sure that your background is well lit, as to not lose any details. If the background is over or underexposed, the resulting image may be hard to read.

When picking your background, consider color, complementary shapes, and how these factors all correlate with one another to produce a great double exposure. If your silhouette is a soft, female form, think about using flowers with complimentary delicate shapes. If your silhouette is a rugged form, think about using some strong-featured trees to accent the silhouette’s configuration.

Double Exposures Made Simple

5. Watch the images line up

On some cameras, you need to remember the positioning of the two images. On others, you can use the Live View feature to actually see how the images line up before taking the last photograph. In either case, watch the photographs come together, and look in awe at your masterpiece.

The aforementioned steps are just the foundation for creating a simple version of these painterly images. The double exposure technique can be utilized for a variety of purposes, styles, and effects. Instead of just using two photographs, utilize three or more to create entirely new types of imagery. Here are some advanced techniques to really push the limits of double exposures:

Using double exposures for movement

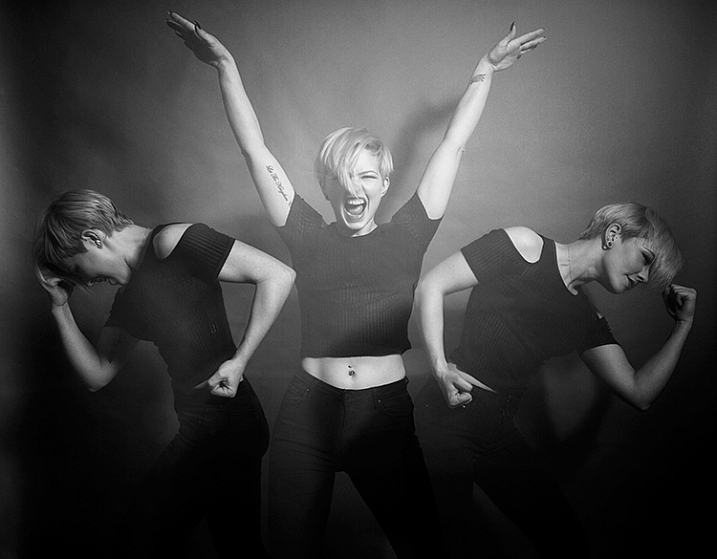
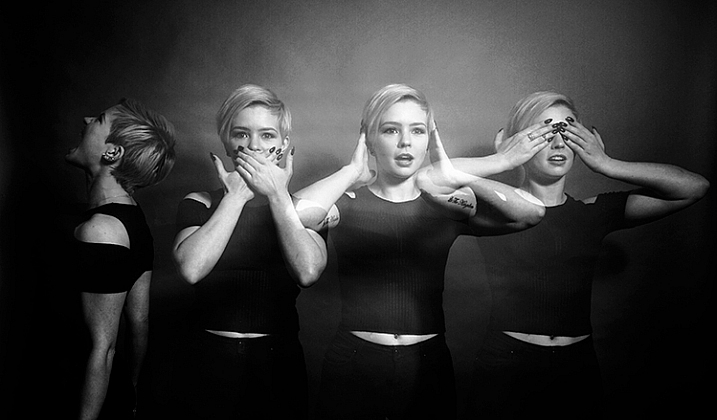
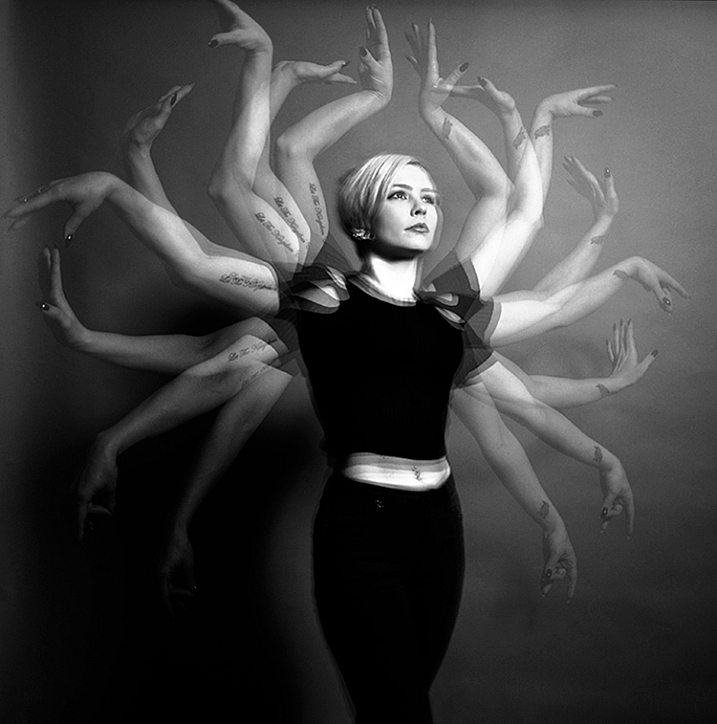
Double exposures are a fantastic way to express artistic movement in an image and have the viewer move their eyes around the frame. Set your number of frames to three or more, and have your subject move differently in each shot. When the images are composited together, you will generate an image that showcases a lot of movement.

Double Exposures Made Simple

Using double exposures for sequences

You can use double exposures to create a step-by-step sequence in a single image. When Continuous Shooting (ContShtng) is selected in the settings, put the camera on a tripod, and fire away at your subject without panning (following the subject with your camera). Make sure that your focus settings are set to AI Servo for Canon or Continuous-Servo AF (AF-C) for Nikon (which means that the camera will lock focus on your subject and hold that focus no matter where the subject moves.

You want to keep the camera as still as possible so that the not-moving parts of your photographs do not have any overlap distortion. Your finished composite will feature every step in the sequence.

Super-imposing without photo editing software

Upon its discovery in the 1800s, a significant use of double exposures was to super-impose without needing to physically combine or paint photographs in the dark room. Today, although we have access to incredible post-processing and retouching programs, editing can be quite time consuming. A good way to combine images without the need of Photoshop is by utilizing this infamous technique.

Instead of silhouetting your subject and picking a background, you will now be placing subjects together. Similar to what was done with sequencing above, put the camera on a tripod to make sure that the frame does not move (as to not have any distortion on still objects.

Using double exposures for sequences

Ghosting

Back when double exposures were first discovered, many photographers of that time loved to create ghostly images. The concept of ghosts were quite prevalent because of the world’s tumultuous history. Photographers and artists alike were captivated with this eerie subject matter, and fascinated with the audience’s response to that kind of image.

To create your own ghostly photograph, set your camera on a tripod. Photograph the background location. Then for the next image, set your shutter speed quite low to create some motion blur. Finally, have someone slowly walk through the frame and take a picture. The composite will feature a ghostly presence.

Now that you’ve finished this guide, go out there and take some phenomenal double exposures. Please share your images and comments below.

googletag.cmd.push(function() {
tablet_slots.push( googletag.defineSlot( “/1005424/_dPSv4_tab-all-article-bottom_(300×250)”, [300, 250], “pb-ad-78623” ).addService( googletag.pubads() ) ); } );

googletag.cmd.push(function() {
mobile_slots.push( googletag.defineSlot( “/1005424/_dPSv4_mob-all-article-bottom_(300×250)”, [300, 250], “pb-ad-78158” ).addService( googletag.pubads() ) ); } );

The post How to Take Unique Double Exposures Without Using Photoshop by Anabel DFlux appeared first on Digital Photography School.


Digital Photography School

 
Comments Off on How to Take Unique Double Exposures Without Using Photoshop

Posted in Photography


How to do Multiple Exposures In-Camera

10 Feb

Combining two or more exposures into a single image is a technique that almost certainly began as an accident (much like photography itself). When using early film cameras, it was all too easy to press the shutter button while forgetting to change the plate – a faux pas that was generally rewarded with an overexposed jumbled mess. When roll films became popular, camera manufacturers thought it prudent to build a mechanical interlock into the film advance mechanism to prevent accidental multiple exposures (unless you used a special override button).
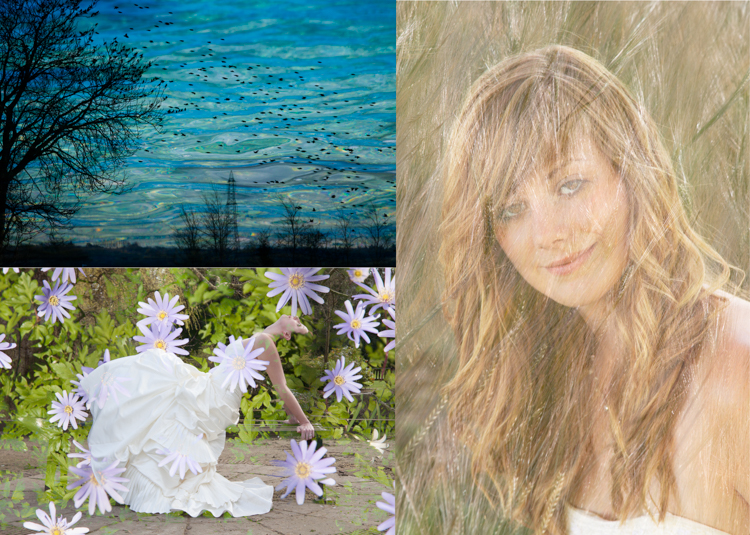
Most digital cameras carried on the tradition of discouraging such mischief by simply not providing the facility at all. As a consequence, a distinctive style of this sometimes serendipitous art began a steady decline – until recently. Today, the thirst for retro styles is gaining popularity and many photographers are once again experimenting with this old technique.

Traditional multiple exposure methods

If you cannot do the electronic equivalent of resetting the shutter without winding the film, how can you achieve this effect? Unless your camera offers you special multiple exposure options, you’re limited to doing everything during one long exposure so that your image can accumulate on the sensor.

One method is to build up your image by firing a flash several times during a long exposure, under low ambient light. This technique is often used by cave photographers as it allows them to create what appears to be a floodlit underground chamber by popping off a number of flashes in different parts of the scene. The disadvantage is that you need a dark environment, but the technique can be effective – particularly when using a flashgun set to produce a rapid burst of flashes in strobe mode to capture fast-moving action.
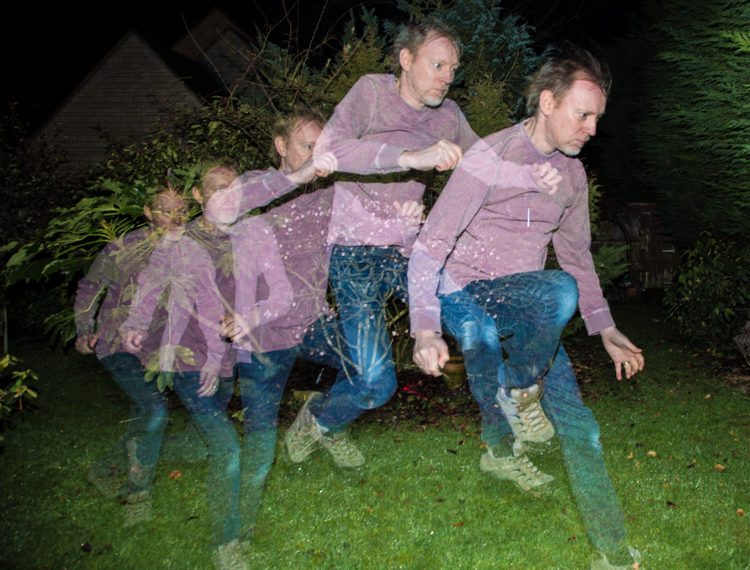
In normal daylight conditions, the only way to achieve a long exposure is to employ a neutral density filter, which will allow you to achieve an exposure time of ten seconds or more. During this time, you can cover and uncover the lens as needed to superimpose a series of still images.

Since both of these methods rely on accumulating more and more light on the sensor from different subjects during a long exposure, it’s easy to produce a result that’s overexposed unless you carefully compensate by underexposing each shot in the sequence. It’s also somewhat tricky to see how your composite image is turning out until the exposure is complete.

New possibilities

Some digital cameras now offer a multiple exposure function, that not only provides a simple means to recreate the traditional effect but also extends the creative possibilities by using more sophisticated blend modes. In addition, the technology is not limited to just high-end DSLRs. Now even smartphone users can enjoy making multiple exposure images using apps such as Multiple Exposures for the iPhone or Photo Blender for Androids.
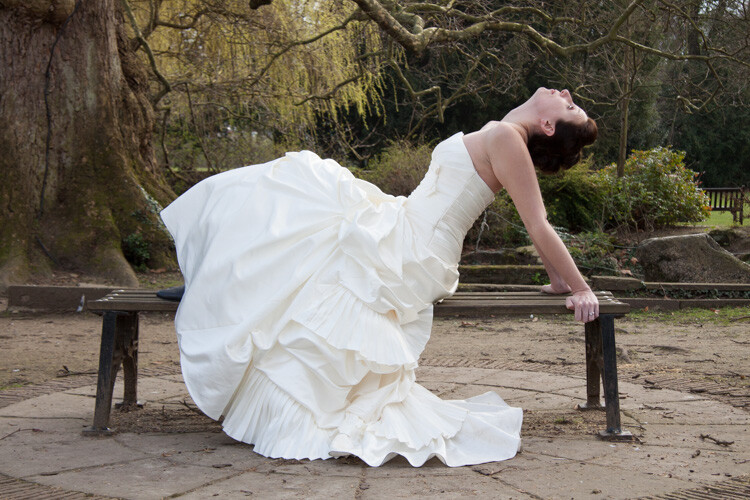
Photo #1
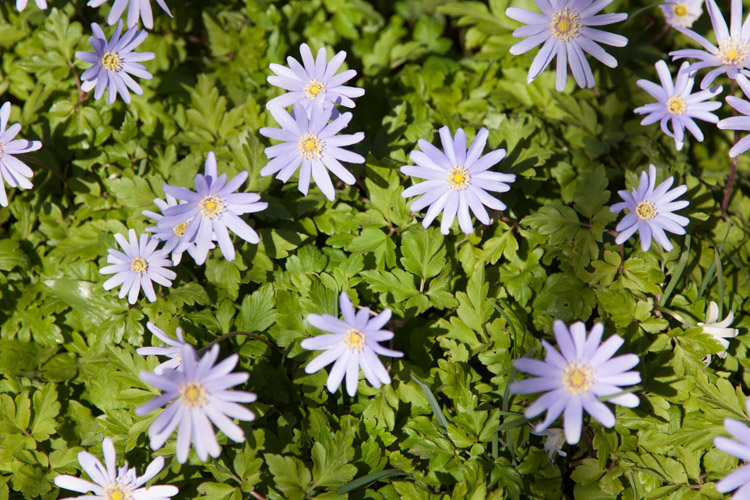
Photo #2

Combined using the Photo Bender app.

If you have a recent camera model, it’s increasingly likely that it will sport some form of multiple exposure feature. Check your camera user manual for details. The specific facilities on offer will vary from one camera model to another, but all those that have this feature will be able to simulate the original technique. So let’s start with a simple double-exposure example using a Canon 5D Mark III.

Double-take

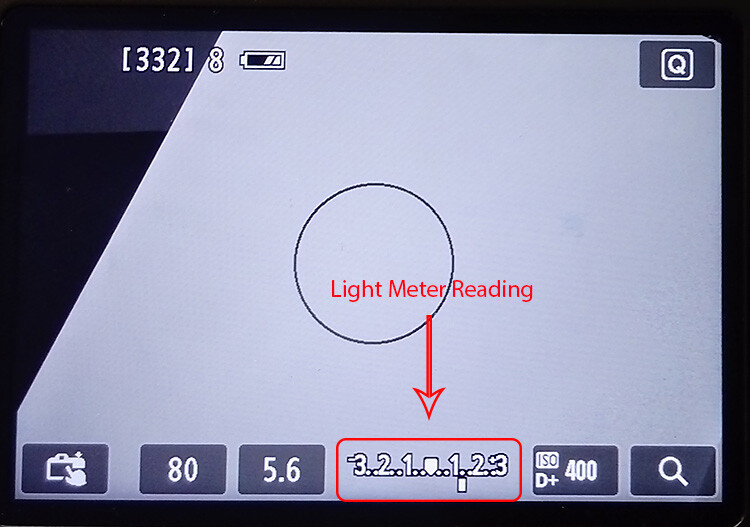
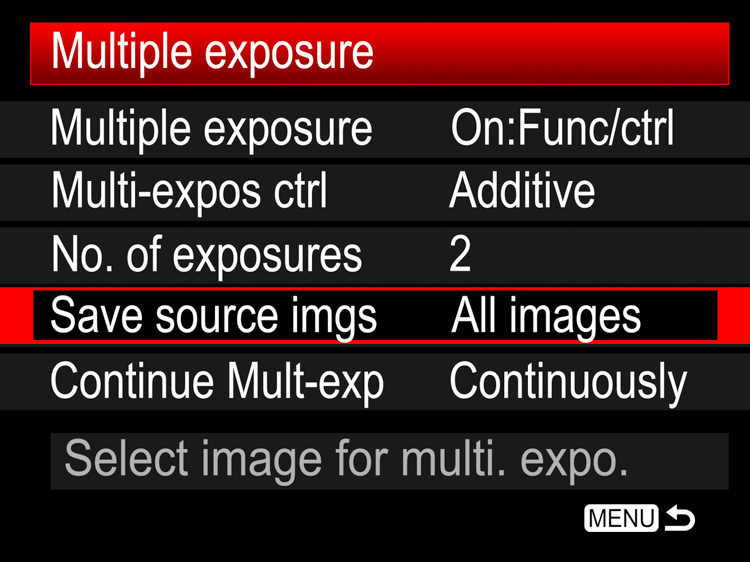
In this technique, both images are exposed normally and then added together. This means that the brightest parts of the final image will be made from the brightest parts of either of the two component images, a fact which can effectively be used to make each image cut out the other. Set the camera’s multiple-exposure setting to take two photos and blend them in the Additive mode, as shown here for the 5D Mk III:
In camera multiple exposures 01

Shooting the images

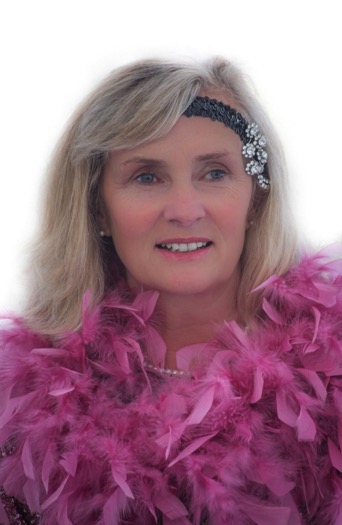
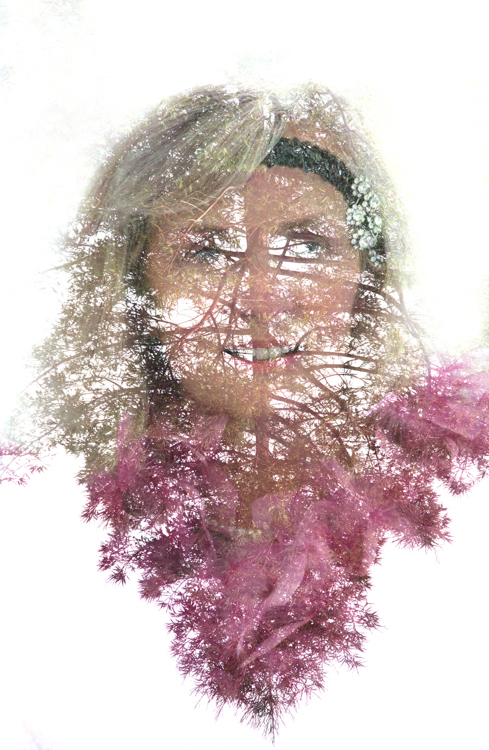
For the best results, you will need two images with light backgrounds. In this example, my subject was photographed indoors against a fairly light background (below left). If your subject is outdoors, it’s often useful to position yourself low down so that your subject is against the sky.

In camera multiple exposures 02 In camera multiple exposures 03

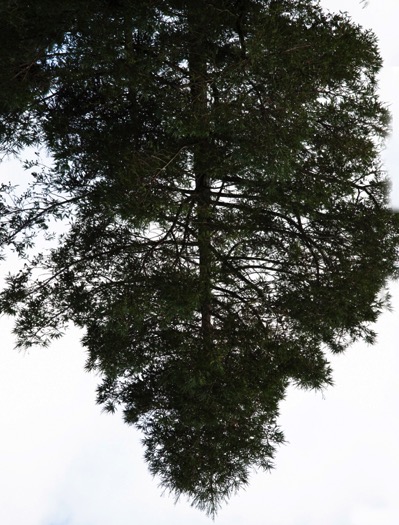
For the second image, look for a high contrast subject that has white areas where you want the first image to be cut-out. In this case, I chose to photograph a tree against the sky (above right), remembering to use the camera in portrait mode but rotating it such that the tree was inverted.

When the images are added in the camera, the light pixels around the subject’s head overwrite the dark pixels from the tree. In the same way, the light pixels from the lower left and right corners of the tree image overwrite the pink feather boa in the first image. Depending on how light the background is in each image, this pixel addition will produce something between a faint high-key effect to a full blown-out white wherever the two subjects don’t overlap.
In camera multiple exposures 04

Camera settings

By default, the multiple exposure setting is disabled. When it is activated on the 5D Mk III, it can be set to either allow you to review and change some settings between exposures or just fire away continuously without slowing down to review images. For this example, I chose the “On:Func/ctrl:” option to allow me time to compose the next shot. One big advantage of selecting that option with Canon cameras is that it enables you to switch to “LiveView where you can see an overlay of your previous shot to help you line up the next one.

Using a previous image

Canon cameras allow you to combine a photo taken the conventional way, with an exposure taken in the multiple exposure mode. To try this, choose the “Select image for multi.expo” option. If you’ve set the total number of exposures to two, you now only have to shoot one extra exposure in multiple exposure mode to complete your composite.

Nikon cameras take this a step further by allowing you to select any two images from the camera’s media card and combine them using a feature Nikon called “Image Overlay”. This is particularly flexible because you can simply keep combining pairs of images and applying exposure adjustments as needed to make your composite raw image.

Auto exposure compensation

If you shoot in this Additive mode and don’t want to exploit the cut-out effect, then you need to reduce the exposure of the individual images according to the number of shots you include in your composite. For example, you should underexpose each shot by one stop if you’re combining two images, or by two stops if you’re combining four images. Alternatively, you can leave the adjustment to the camera. Since you’ve already told the camera how many exposures you wish to combine, it can work out how much exposure compensation to apply in order to create a composite that still retains details in the highlights.

To apply this compensation automatically, simply select “Average” instead of the “Additive” option and set your camera to either aperture or shutter priority mode. If you want to experiment with overlaying textures and making abstract patterns, Average is a good initial blend mode.

Bright and dark

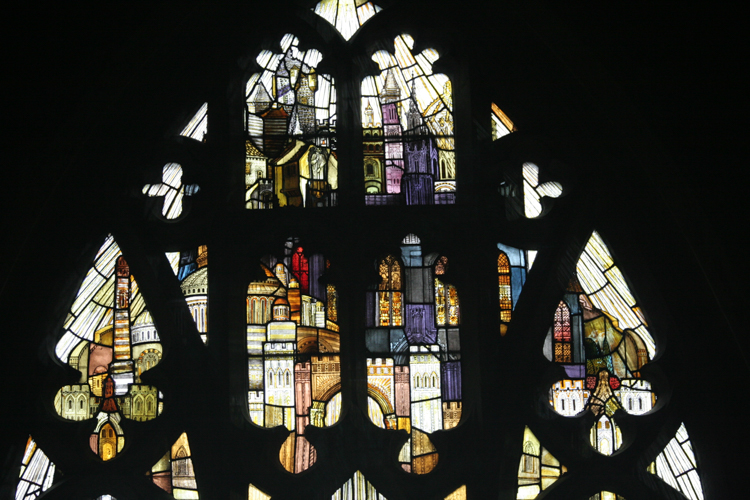
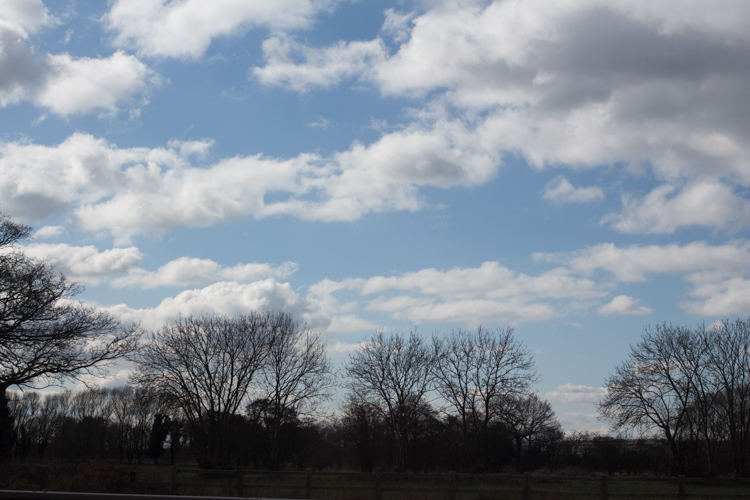
Both the Additive and Average options effectively just accumulate one image on top of another with optional exposure adjustment, so these modes are not that different to conventional film multiple exposures. However, thanks to the increased computing power on some DSLRs, you’re no longer limited to just overlaying images by simply adding their brightness values. Images can also be combined by taking pixels from either one source image or the other, based on which one is brightest (or darkest). To show how this works, consider this combination of window and clouds.
In camera multiple exposures 05

In camera multiple exposures 06

Selecting the Bright mode gives priority to the clouds, which will appear in front of the window at the top of the composite. The dark trees will be excluded in favour of the brighter parts of the window at the bottom of the composite.
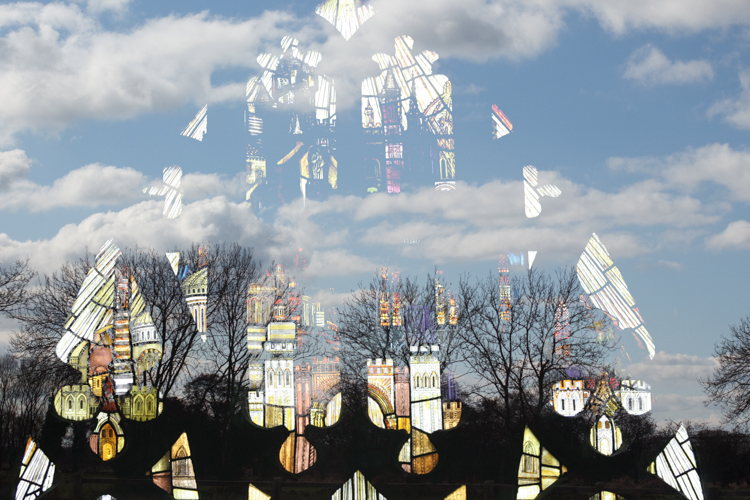
In camera multiple exposures 07

If you select Dark, then the darkest pixels win and the clouds appear behind the window in this rather more subtle version.
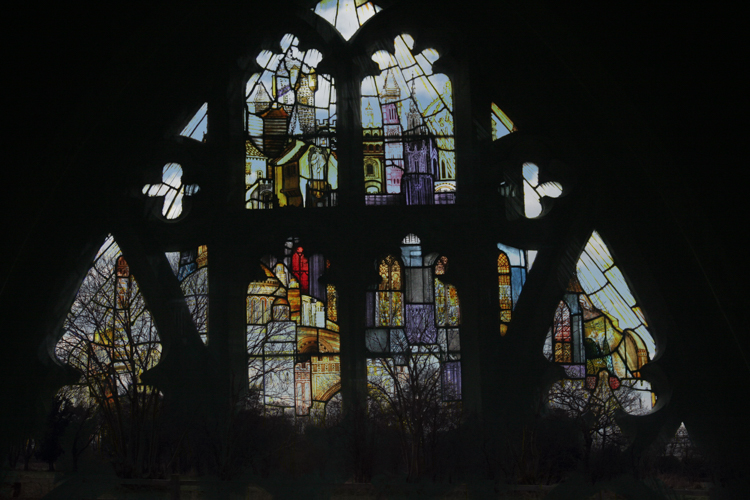
In camera multiple exposures 08

Other creative techniques

Having tried out the various blend modes your camera has to offer, it’s worth considering what changes you might want to introduce between shots. As long as you don’t turn the camera off, you could swap lenses, filters or even countries between shots so that you could combine, for example, a macro image with a landscape. Since cameras invariably allow you to combine a live image with one previously stored on the card, there’s a great deal of scope for creatively combining images. Here are two simple examples you might want to try.

Layering a landscape

Zoom lenses provide a very convenient way to create a layered effect from a simple skyline. In this example, I combined four shots of different parts of the horizon and also adjusted the camera’s white balance for each exposure to simulate a distance haze.
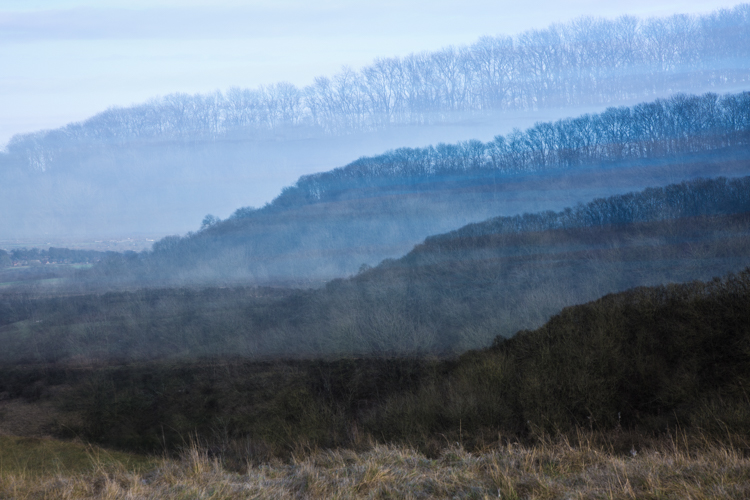
In camera multiple exposures 09

To produce this effect, follow these steps:

1. Set up your camera to take four exposures in Average multiple exposure mode using either aperture or shutter priority.

2. Set the white balance to 2500ºK to produce a strong blue tint and zoom out for a wide-angle shot. Position the horizon in the top quarter of the viewfinder and take the first photo in the sequence.

3. Turn on LiveView and zoom in slightly so that you can see the magnified overlay which will become your next nearest line of hills. Pan the camera to a different part of the horizon to create some topographic variety and tilt the camera up to position the next horizon just below the previous one. Set the white balance to 4000ºK to create a less intense blue bias and take the second photo.

4. Reposition the horizon lower still on the LiveView screen. Zoom in a little more and with the white balance set to 5500ºK, take the third photo.

5. Finally, zoom in fully, pan the camera again for some foreground interest and position the horizon near the bottom of the screen. Increase the white balance to 7000ºK and take the final photo.

Focus effects

Most of the time, we strive to achieve a sharp focus in our pictures, perhaps with some creative background blur. Shooting multiple exposures enables you to combine a pin-sharp image with a soft out-of-focus one of the same subject to smooth out highlight details or make it glow with an unusual soft-focus effect. Here are the steps used to make a highlight-smoothed image:

1. Set the camera on a tripod and set the multiple-exposure blend mode to Dark.

2. Take a sharply focused photograph of the subject. In this case, some roses were set against a dark background to give them more definition in the final image.
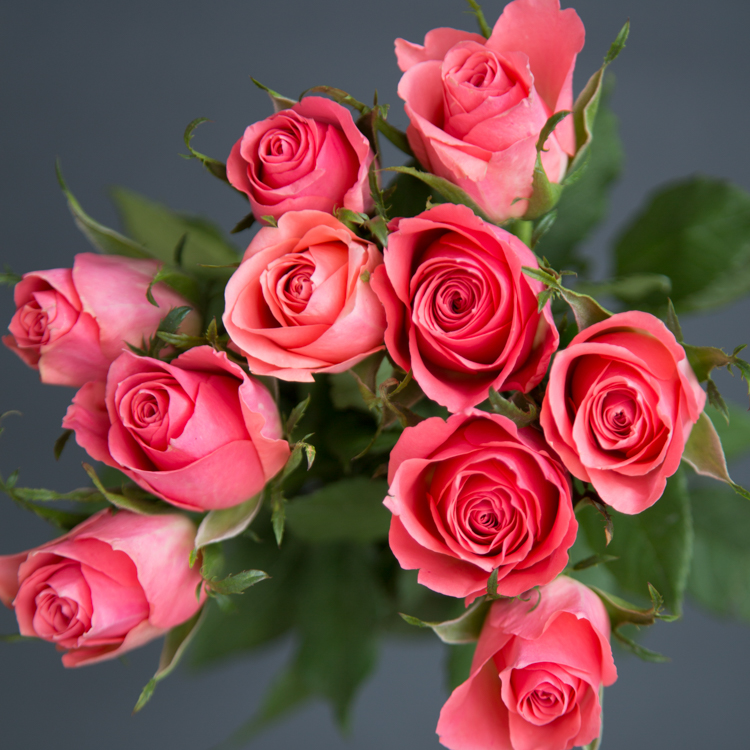
In camera multiple exposures 10

3. Defocus the image (set the lens focus to manual to stop it refocusing on the next shot). In this example, I’ve defocused rather drastically to illustrate the effect.

In camera multiple exposures 11

4. Take the second photo.

Since the highlights are blurred, they become darker. In the Dark blend mode, these darker tones make it to the final image instead of the original highlights. The dark background from the sharper image also takes priority over the fuzzy edges in the defocused image, resulting in a composite image that’s well defined against the dark background but with highlight details smoothed out.
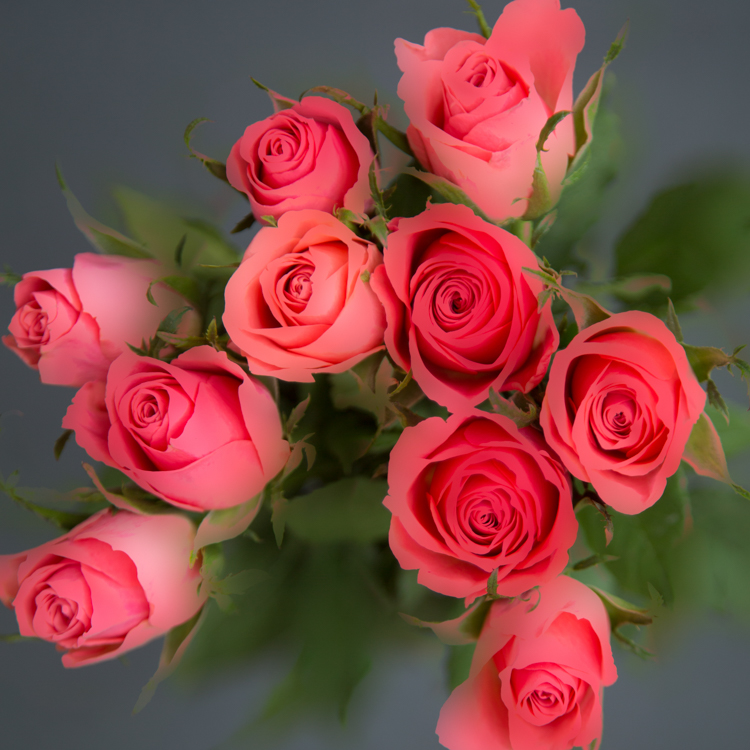
In camera multiple exposures 12

For a more traditional soft-focus effect, it’s necessary to preserve the highlight detail and add the highlight blur around it. You can achieve this effect by simply selecting the Bright blending mode to produce a soft glow, as shown here.
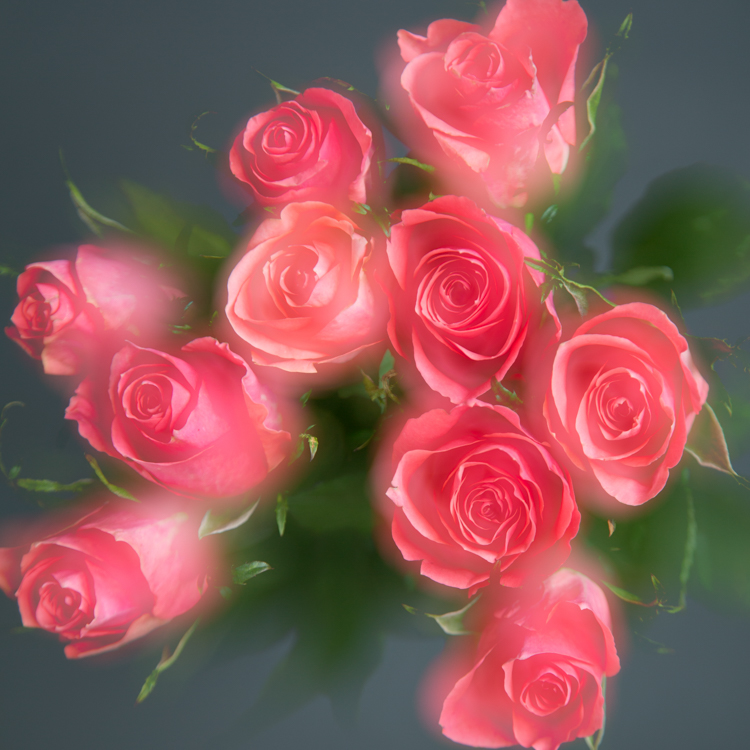
In camera multiple exposures 13

Action shots

In the techniques considered so far, the camera has been set up to review the image after each shot in the sequence and if your camera allows, to store each component image to the media card. This is useful to help line up each new image with the previous one.

But for fast-action shots, this takes too much time to process in-camera. If you want to take a composite photo of someone jumping over a fence, (then apart from arranging for a bull to be located in the same field as the subject) these are the basic steps to follow:

1. Set the multiple exposure mode such that it doesn’t display the image after each shot or write to the card. On the 5D Mk III, this is achieved by setting the Multiple Exposure menu item to “On:ContShtng” for continuous shooting.

2. Set the number of exposures according to the speed of the action you’re anticipating (more exposures for faster action) and set the shutter speed and aperture to values that will be able to capture a sequence of sharp images.

3. Set the camera on a tripod and pre-focus at the distance where the action is to take place. Set the lens focus to manual to ensure the focus doesn’t change during the shoot.

4. Set the drive mode to continuous high speed burst.

5. When the action takes place, press and hold the shutter button to ensure that all the individual exposures are taken.

Blend modes

If you leave the blend mode set to Average, you’ll get a solid background with a number of ghostly overlays corresponding to the various exposures. This is because the exposure of each image in the sequence is automatically reduced to prevent the accumulating image from becoming too bright, but the results can be rather thin and disappointing, like this shot of a Canon camera swinging against a light background.
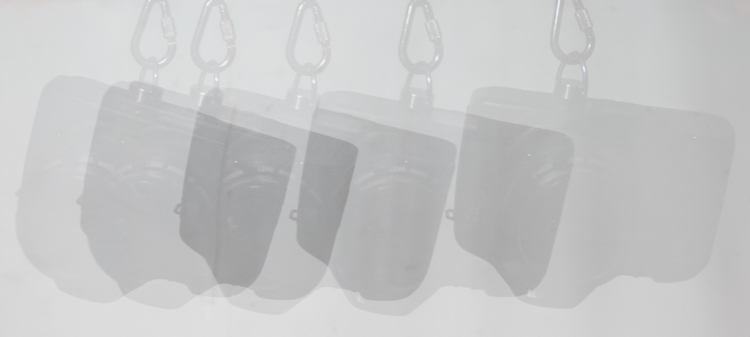
In camera multiple exposures 14

If you set the blend mode to Dark when using a light background, the results will be much more defined like this:
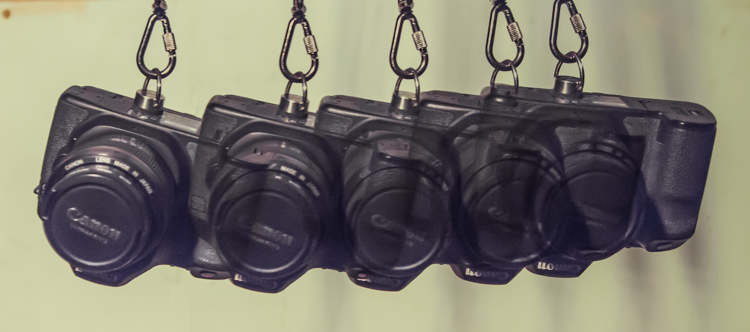
In camera multiple exposures 15

It follows that the converse is also true. When you are shooting a lighter colored object moving against a darker background, the best results are obtained by selecting the Light blend mode:
In camera multiple exposures 16

Slowing down

Not all multiple exposure action shots need to be frantic. This image was made using an EOS 6D in multiple exposure mode set to take nine exposures in the Bright blend mode. One image was taken every two minutes.

In camera multiple exposures 17

Look for future image material

Much more sophisticated multiple exposure techniques can be achieved by using dedicated editing software such as Adobe Photoshop. At the moment, you may only be interested in combining some images in-camera, but bear in mind that you might want to experiment on your computer in the future. Even if you’re not familiar with powerful desktop editing software just yet, it’s always worth getting together the raw material you can process on a rainy day.

The next time you’re out and about with your camera, think about photographing interesting textures, silhouettes, and fast-action sequences, instead of just taking single photos. You’ll soon be on your way to creating some eye-catching multiple exposure photos.

googletag.cmd.push(function() {
tablet_slots.push( googletag.defineSlot( “/1005424/_dPSv4_tab-all-article-bottom_(300×250)”, [300, 250], “pb-ad-78623” ).addService( googletag.pubads() ) ); } );

googletag.cmd.push(function() {
mobile_slots.push( googletag.defineSlot( “/1005424/_dPSv4_mob-all-article-bottom_(300×250)”, [300, 250], “pb-ad-78158” ).addService( googletag.pubads() ) ); } );

The post How to do Multiple Exposures In-Camera by Dave Baxter appeared first on Digital Photography School.


Digital Photography School

 
Comments Off on How to do Multiple Exposures In-Camera

Posted in Photography


How to do Multiple Exposures In-Camera

08 Feb

Combining two or more exposures into a single image is a technique that almost certainly began as an accident (much like photography itself). When using early film cameras, it was all too easy to press the shutter button while forgetting to change the plate – a faux pas that was generally rewarded with an overexposed jumbled mess. When roll films became popular, camera manufacturers thought it prudent to build a mechanical interlock into the film advance mechanism to prevent accidental multiple exposures (unless you used a special override button).

Most digital cameras carried on the tradition of discouraging such mischief by simply not providing the facility at all. As a consequence, a distinctive style of this sometimes serendipitous art began a steady decline – until recently. Today, the thirst for retro styles is gaining popularity and many photographers are once again experimenting with this old technique.

Traditional multiple exposure methods

If you cannot do the electronic equivalent of resetting the shutter without winding the film, how can you achieve this effect? Unless your camera offers you special multiple exposure options, you’re limited to doing everything during one long exposure so that your image can accumulate on the sensor.

One method is to build up your image by firing a flash several times during a long exposure, under low ambient light. This technique is often used by cave photographers as it allows them to create what appears to be a floodlit underground chamber by popping off a number of flashes in different parts of the scene. The disadvantage is that you need a dark environment, but the technique can be effective – particularly when using a flashgun set to produce a rapid burst of flashes in strobe mode to capture fast-moving action.

In normal daylight conditions, the only way to achieve a long exposure is to employ a neutral density filter, which will allow you to achieve an exposure time of ten seconds or more. During this time, you can cover and uncover the lens as needed to superimpose a series of still images.

Since both of these methods rely on accumulating more and more light on the sensor from different subjects during a long exposure, it’s easy to produce a result that’s overexposed unless you carefully compensate by underexposing each shot in the sequence. It’s also somewhat tricky to see how your composite image is turning out until the exposure is complete.

New possibilities

Some digital cameras now offer a multiple exposure function, that not only provides a simple means to recreate the traditional effect but also extends the creative possibilities by using more sophisticated blend modes. In addition, the technology is not limited to just high-end DSLRs. Now even smartphone users can enjoy making multiple exposure images using apps such as Multiple Exposures for the iPhone or Photo Blender for Androids.

Photo #1

Photo #2

Combined using the Photo Bender app.

If you have a recent camera model, it’s increasingly likely that it will sport some form of multiple exposure feature. Check your camera user manual for details. The specific facilities on offer will vary from one camera model to another, but all those that have this feature will be able to simulate the original technique. So let’s start with a simple double-exposure example using a Canon 5D Mark III.

Double-take

In this technique, both images are exposed normally and then added together. This means that the brightest parts of the final image will be made from the brightest parts of either of the two component images, a fact which can effectively be used to make each image cut out the other. Set the camera’s multiple-exposure setting to take two photos and blend them in the Additive mode, as shown here for the 5D Mk III:

In camera multiple exposures 01

Shooting the images

For the best results, you will need two images with light backgrounds. In this example, my subject was photographed indoors against a fairly light background (below left). If your subject is outdoors, it’s often useful to position yourself low down so that your subject is against the sky.

In camera multiple exposures 02 In camera multiple exposures 03

For the second image, look for a high contrast subject that has white areas where you want the first image to be cut-out. In this case, I chose to photograph a tree against the sky (above right), remembering to use the camera in portrait mode but rotating it such that the tree was inverted.

When the images are added in the camera, the light pixels around the subject’s head overwrite the dark pixels from the tree. In the same way, the light pixels from the lower left and right corners of the tree image overwrite the pink feather boa in the first image. Depending on how light the background is in each image, this pixel addition will produce something between a faint high-key effect to a full blown-out white wherever the two subjects don’t overlap.

In camera multiple exposures 04

Camera settings

By default, the multiple exposure setting is disabled. When it is activated on the 5D Mk III, it can be set to either allow you to review and change some settings between exposures or just fire away continuously without slowing down to review images. For this example, I chose the “On:Func/ctrl:” option to allow me time to compose the next shot. One big advantage of selecting that option with Canon cameras is that it enables you to switch to “LiveView where you can see an overlay of your previous shot to help you line up the next one.

Using a previous image

Canon cameras allow you to combine a photo taken the conventional way, with an exposure taken in the multiple exposure mode. To try this, choose the “Select image for multi.expo” option. If you’ve set the total number of exposures to two, you now only have to shoot one extra exposure in multiple exposure mode to complete your composite.

Nikon cameras take this a step further by allowing you to select any two images from the camera’s media card and combine them using a feature Nikon called “Image Overlay”. This is particularly flexible because you can simply keep combining pairs of images and applying exposure adjustments as needed to make your composite raw image.

Auto exposure compensation

If you shoot in this Additive mode and don’t want to exploit the cut-out effect, then you need to reduce the exposure of the individual images according to the number of shots you include in your composite. For example, you should underexpose each shot by one stop if you’re combining two images, or by two stops if you’re combining four images. Alternatively, you can leave the adjustment to the camera. Since you’ve already told the camera how many exposures you wish to combine, it can work out how much exposure compensation to apply in order to create a composite that still retains details in the highlights.

To apply this compensation automatically, simply select “Average” instead of the “Additive” option and set your camera to either aperture or shutter priority mode. If you want to experiment with overlaying textures and making abstract patterns, Average is a good initial blend mode.

Bright and dark

Both the Additive and Average options effectively just accumulate one image on top of another with optional exposure adjustment, so these modes are not that different to conventional film multiple exposures. However, thanks to the increased computing power on some DSLRs, you’re no longer limited to just overlaying images by simply adding their brightness values. Images can also be combined by taking pixels from either one source image or the other, based on which one is brightest (or darkest). To show how this works, consider this combination of window and clouds.

In camera multiple exposures 05

In camera multiple exposures 06

Selecting the Bright mode gives priority to the clouds, which will appear in front of the window at the top of the composite. The dark trees will be excluded in favour of the brighter parts of the window at the bottom of the composite.

In camera multiple exposures 07

If you select Dark, then the darkest pixels win and the clouds appear behind the window in this rather more subtle version.

In camera multiple exposures 08

Other creative techniques

Having tried out the various blend modes your camera has to offer, it’s worth considering what changes you might want to introduce between shots. As long as you don’t turn the camera off, you could swap lenses, filters or even countries between shots so that you could combine, for example, a macro image with a landscape. Since cameras invariably allow you to combine a live image with one previously stored on the card, there’s a great deal of scope for creatively combining images. Here are two simple examples you might want to try.

Layering a landscape

Zoom lenses provide a very convenient way to create a layered effect from a simple skyline. In this example, I combined four shots of different parts of the horizon and also adjusted the camera’s white balance for each exposure to simulate a distance haze.

In camera multiple exposures 09

To produce this effect, follow these steps:

1. Set up your camera to take four exposures in Average multiple exposure mode using either aperture or shutter priority.

2. Set the white balance to 2500ºK to produce a strong blue tint and zoom out for a wide-angle shot. Position the horizon in the top quarter of the viewfinder and take the first photo in the sequence.

3. Turn on LiveView and zoom in slightly so that you can see the magnified overlay which will become your next nearest line of hills. Pan the camera to a different part of the horizon to create some topographic variety and tilt the camera up to position the next horizon just below the previous one. Set the white balance to 4000ºK to create a less intense blue bias and take the second photo.

4. Reposition the horizon lower still on the LiveView screen. Zoom in a little more and with the white balance set to 5500ºK, take the third photo.

5. Finally, zoom in fully, pan the camera again for some foreground interest and position the horizon near the bottom of the screen. Increase the white balance to 7000ºK and take the final photo.

Focus effects

Most of the time, we strive to achieve a sharp focus in our pictures, perhaps with some creative background blur. Shooting multiple exposures enables you to combine a pin-sharp image with a soft out-of-focus one of the same subject to smooth out highlight details or make it glow with an unusual soft-focus effect. Here are the steps used to make a highlight-smoothed image:

1. Set the camera on a tripod and set the multiple-exposure blend mode to Dark.

2. Take a sharply focused photograph of the subject. In this case, some roses were set against a dark background to give them more definition in the final image.

In camera multiple exposures 10

3. Defocus the image (set the lens focus to manual to stop it refocusing on the next shot). In this example, I’ve defocused rather drastically to illustrate the effect.

In camera multiple exposures 11

4. Take the second photo.

Since the highlights are blurred, they become darker. In the Dark blend mode, these darker tones make it to the final image instead of the original highlights. The dark background from the sharper image also takes priority over the fuzzy edges in the defocused image, resulting in a composite image that’s well defined against the dark background but with highlight details smoothed out.

In camera multiple exposures 12

For a more traditional soft-focus effect, it’s necessary to preserve the highlight detail and add the highlight blur around it. You can achieve this effect by simply selecting the Bright blending mode to produce a soft glow, as shown here.

In camera multiple exposures 13

Action shots

In the techniques considered so far, the camera has been set up to review the image after each shot in the sequence and if your camera allows, to store each component image to the media card. This is useful to help line up each new image with the previous one.

But for fast-action shots, this takes too much time to process in-camera. If you want to take a composite photo of someone jumping over a fence, (then apart from arranging for a bull to be located in the same field as the subject) these are the basic steps to follow:

1. Set the multiple exposure mode such that it doesn’t display the image after each shot or write to the card. On the 5D Mk III, this is achieved by setting the Multiple Exposure menu item to “On:ContShtng” for continuous shooting.

2. Set the number of exposures according to the speed of the action you’re anticipating (more exposures for faster action) and set the shutter speed and aperture to values that will be able to capture a sequence of sharp images.

3. Set the camera on a tripod and pre-focus at the distance where the action is to take place. Set the lens focus to manual to ensure the focus doesn’t change during the shoot.

4. Set the drive mode to continuous high speed burst.

5. When the action takes place, press and hold the shutter button to ensure that all the individual exposures are taken.

Blend modes

If you leave the blend mode set to Average, you’ll get a solid background with a number of ghostly overlays corresponding to the various exposures. This is because the exposure of each image in the sequence is automatically reduced to prevent the accumulating image from becoming too bright, but the results can be rather thin and disappointing, like this shot of a Canon camera swinging against a light background.

In camera multiple exposures 14

If you set the blend mode to Dark when using a light background, the results will be much more defined like this:

In camera multiple exposures 15

It follows that the converse is also true. When you are shooting a lighter colored object moving against a darker background, the best results are obtained by selecting the Light blend mode:

In camera multiple exposures 16

Slowing down

Not all multiple exposure action shots need to be frantic. This image was made using an EOS 6D in multiple exposure mode set to take nine exposures in the Bright blend mode. One image was taken every two minutes.

In camera multiple exposures 17

Look for future image material

Much more sophisticated multiple exposure techniques can be achieved by using dedicated editing software such as Adobe Photoshop. At the moment, you may only be interested in combining some images in-camera, but bear in mind that you might want to experiment on your computer in the future. Even if you’re not familiar with powerful desktop editing software just yet, it’s always worth getting together the raw material you can process on a rainy day.

The next time you’re out and about with your camera, think about photographing interesting textures, silhouettes, and fast-action sequences, instead of just taking single photos. You’ll soon be on your way to creating some eye-catching multiple exposure photos.

googletag.cmd.push(function() {
tablet_slots.push( googletag.defineSlot( “/1005424/_dPSv4_tab-all-article-bottom_(300×250)”, [300, 250], “pb-ad-78623” ).addService( googletag.pubads() ) ); } );

googletag.cmd.push(function() {
mobile_slots.push( googletag.defineSlot( “/1005424/_dPSv4_mob-all-article-bottom_(300×250)”, [300, 250], “pb-ad-78158” ).addService( googletag.pubads() ) ); } );

The post How to do Multiple Exposures In-Camera by Dave Baxter appeared first on Digital Photography School.


Digital Photography School

 
Comments Off on How to do Multiple Exposures In-Camera

Posted in Photography


3 Tips for Creating Double Exposures In-Camera Using Flash

20 Oct

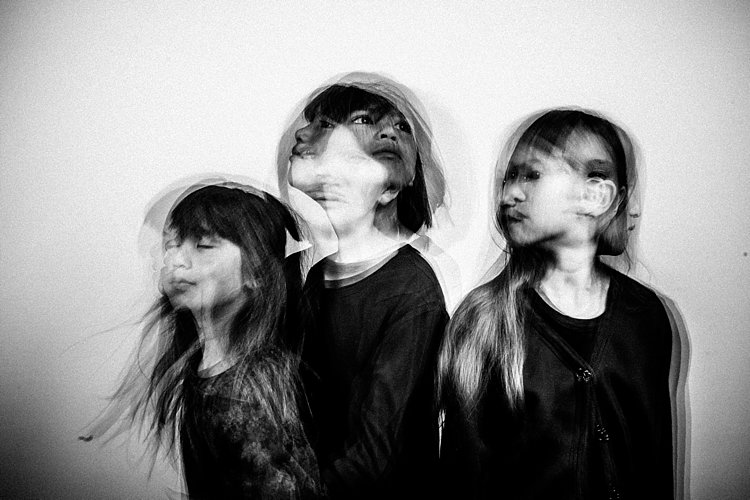
Have you ever wondered how double exposures are done in digital cameras? I have. Back in film days, we knew that to double expose a frame, all you needed to do is rewind it back to the frame you have just exposed, thereby taking two separate shots using one frame of the film. Nowadays with digital SLRs, there is no film to re-expose and no rewind mechanism to go back to a previous photo so you can re-shoot on top of it. However, double exposure and multiple exposures can be done in post-production quite easily. But this little tutorial will focus on how to take double exposure in-camera using a digital camera.

double-exposures-in-camera-tutorial

Equipment needed for double exposures

What you will need:

  • A tripod.
  • Your camera.
  • Remote trigger, receiver or transceiver.
  • Flash guns (speedlights) or strobes (one or two).
  • Some light modifiers (optional) such as umbrellas, softboxes, or octaboxes.
  • A backdrop or wall.

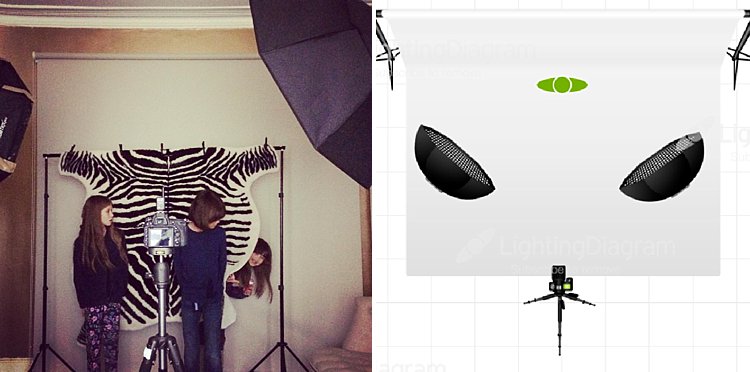
For my experiment below, I used two strobes mounted on stands and modified by gridded octaboxes. I used Paul Buff’s Cybersyncs for the wireless remote transceiver system. I also had three backdrops: one black, one beige and one patterned. See the image below for my studio setup and an iPhone picture of behind the scenes.

double-exposure-tutorial-in-camera

The camera and flash settings

The strobes were kept on a constant setting and I chose the lowest power. My ISO was also on the lowest setting (ISO 100) for most of the shots except for the f/16 ones where I cranked it up a little. The aperture varied between f/8 – f/16, depending on the look I was after and the length of my exposure. Shutter speed also varied between one second to a few seconds, to bulb. In other words, experiment until you get the look right.

How to take the double exposure

This is the trick. While the camera is exposing the image so that the shutter is open, keep triggering the flash. For these shots, I triggered the flash 2-4 times depending on the length of the exposure and how fast I could press the trigger button. The flash freezes the action so the more time the flash fires the more frozen actions you get on your image.

This leads us nicely to the first tip.

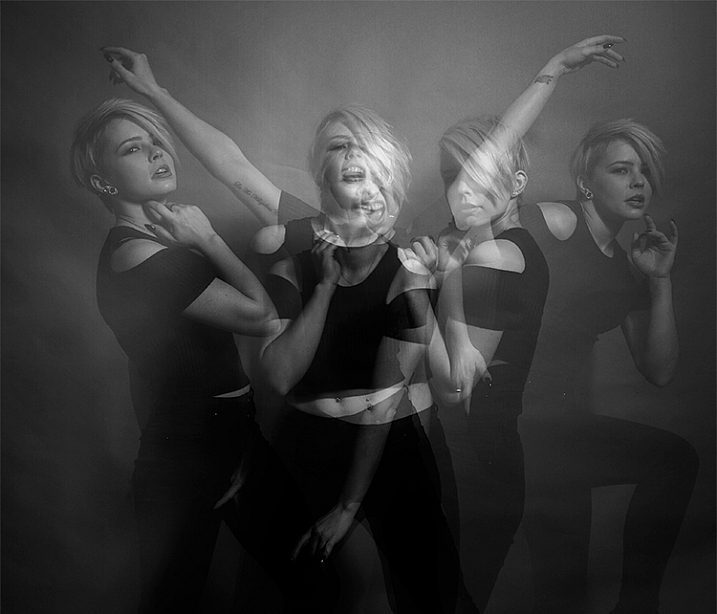
#1 Exaggerated movement is key

double-exposures-in-camera-tutorial

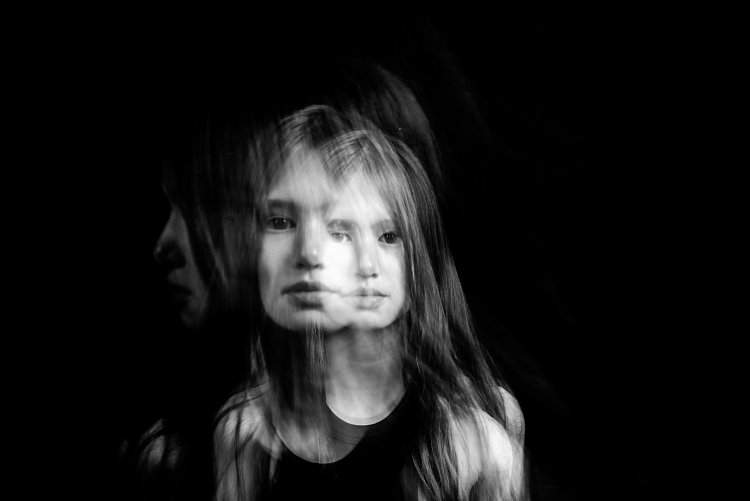
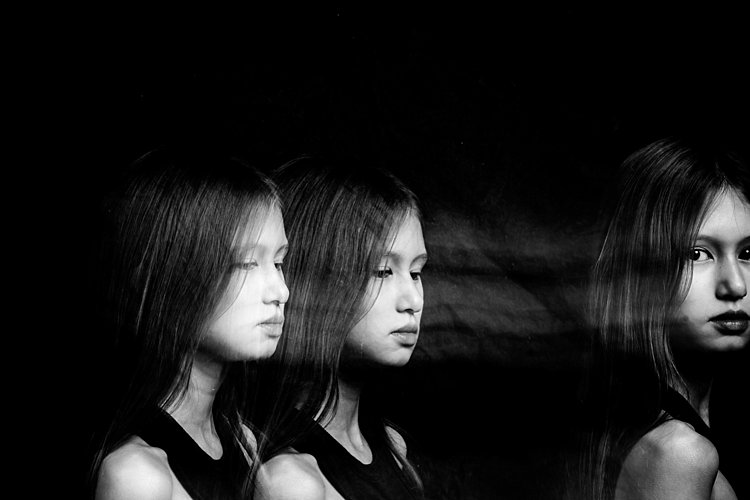
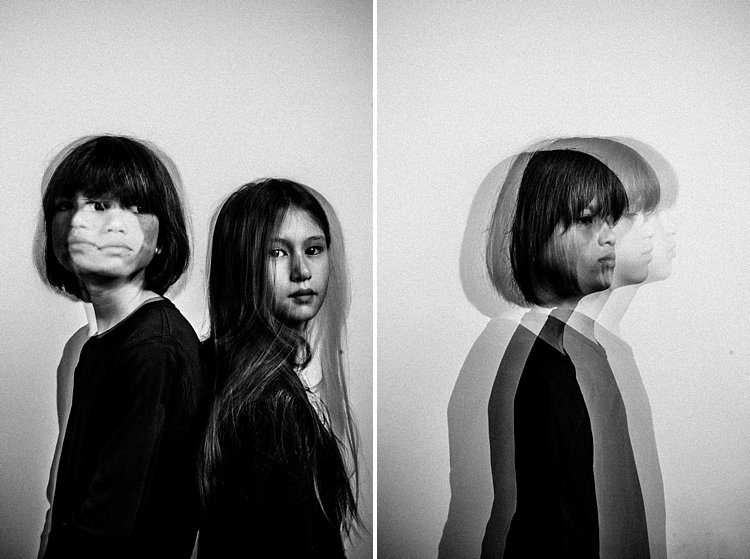
If your subject makes very small and minor movements, the likelihood is the images will sit on top of each other. This may result in one final image that looks like a blurry mess as in the photo above rather than many separate frozen images on a single photo as shown in the photo below. It is better to tell your subject to move distinctly away from the first position so the movements are separate. The camera still captures the trail of movement as a blur. But when you trigger the flash, that particular moment is rendered sharp and still.

double-exposures-in-camera-tutorial

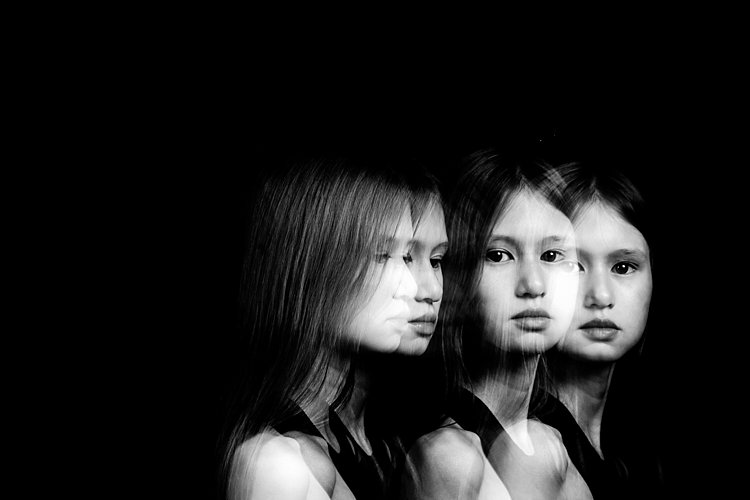
I asked my kids to walk across the frame, counting each step and on a certain count to turn their heads. I would trigger the flash when they moved sideways or turned their heads. At other times I asked one of the children to only join the frame on the third flash so that there is only one of her that registers. I also got them to walk towards me (see photo at top of article). It was at that stage that I changed my aperture to the smallest my lens allowed, in this case, f/16 so that I could still get the head sharp at various depths of field.

double-exposures-in-camera-tutorial

In the photo below, I got my kids to shake their heads as fast and as many times as they could. I wanted the focus here to be the movement rather than their frozen faces. Don’t be afraid to experiment. The beauty of digital is that unlike film, you have an infinite number of frames at your disposal so can afford to make many mistakes until you get what you are looking for.

double-exposures-in-camera-tutorial

#2 A dark background is better

Compare the image above with the light background to the other images with the black background. The difference in the final image is vast. I prefer the dark background where my intention was to freeze several portraits and the lighter background where my focus was on capturing the trail of movements. Overall I shot and preferred more of the images with a dark background as the delineation between actions and the clarity of subjects are easier to see. Contrast between the skin and other lighter parts of the image was also easier to achieve compared to images shot with the beige background. In the photo below, I edited quite aggressively to get the contrast I wanted. I also added grain to simulate a film look.

double-exposures-in-camera-tutorial

#3 Experiment with materials and textures

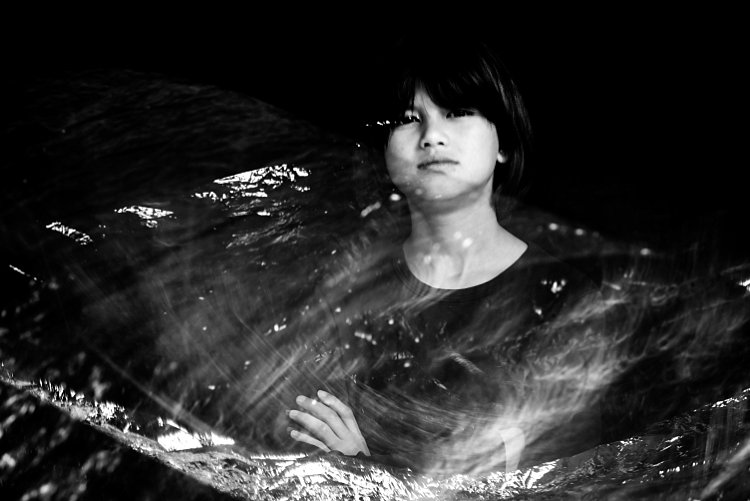
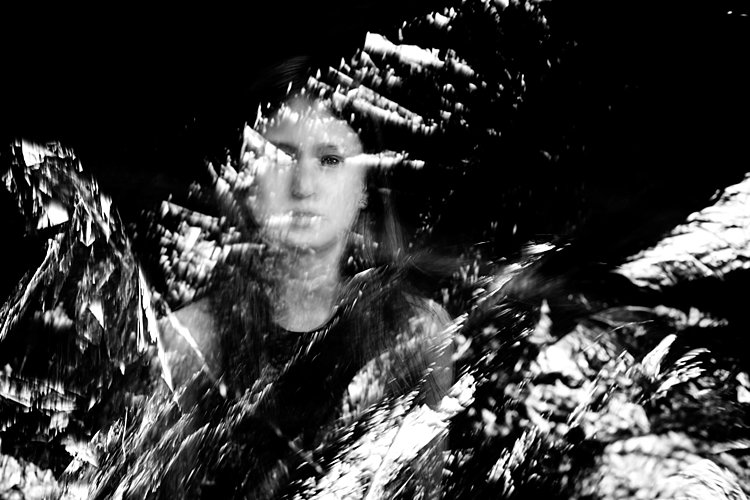
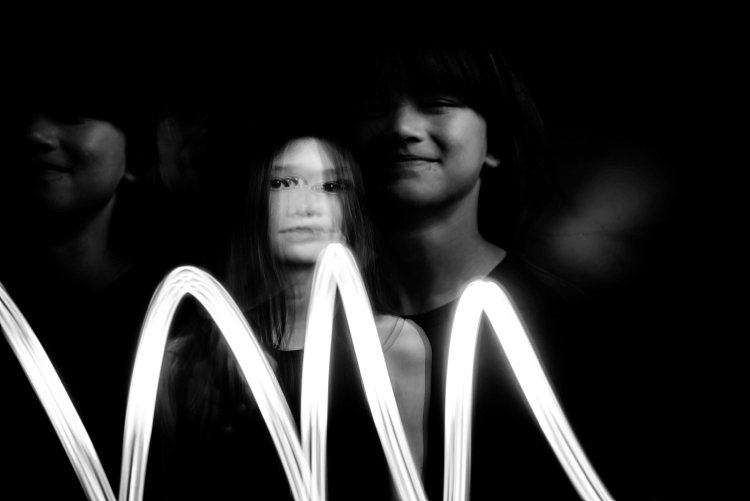
Bring in other materials such as aluminum foil. This one here is an emergency blanket. Two of my kids stood on either side, held and waved the blanket up and down in front of the middle child so the slow shutter captured some of the movement of the foil. The kids also carried  a torch (flash light) and did some light painting. The problem I found with both photos was the blurry look of their faces. Because they did not do big movements with their bodies, hence the frozen photos captured by each flash just got stacked up in roughly the same spot. Other things you can use are glow sticks, flashing lights, moving lights, iPhone and iPad screens – pretty much anything that reflects or emits light.

double-exposures-in-camera-tutorial

double-exposures-in-camera-tutorial

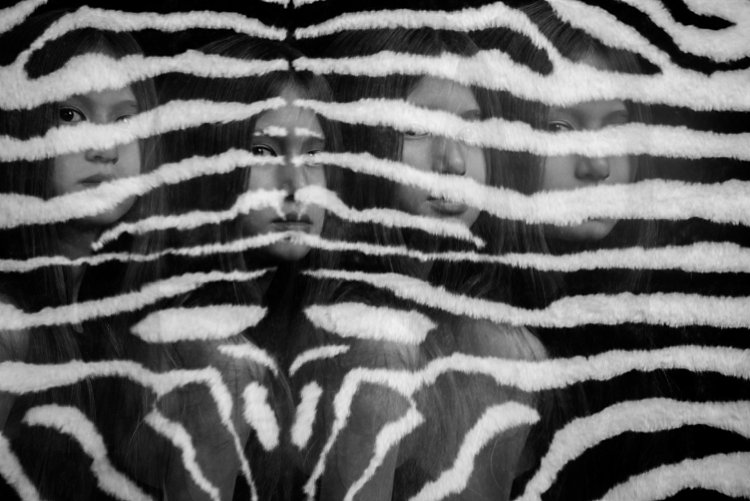
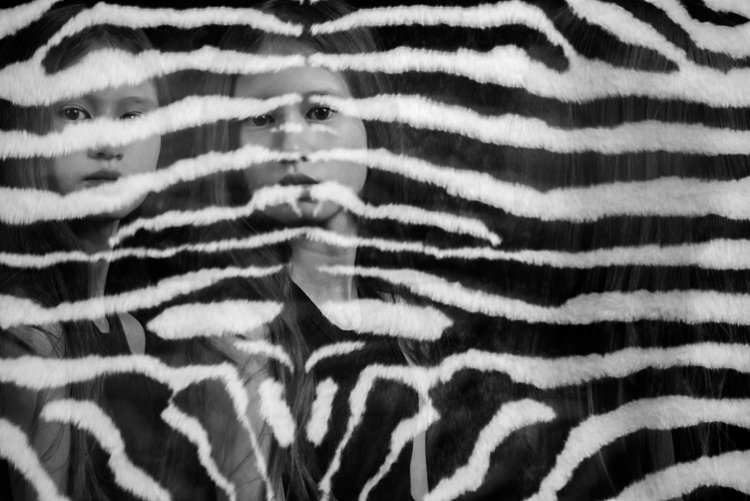
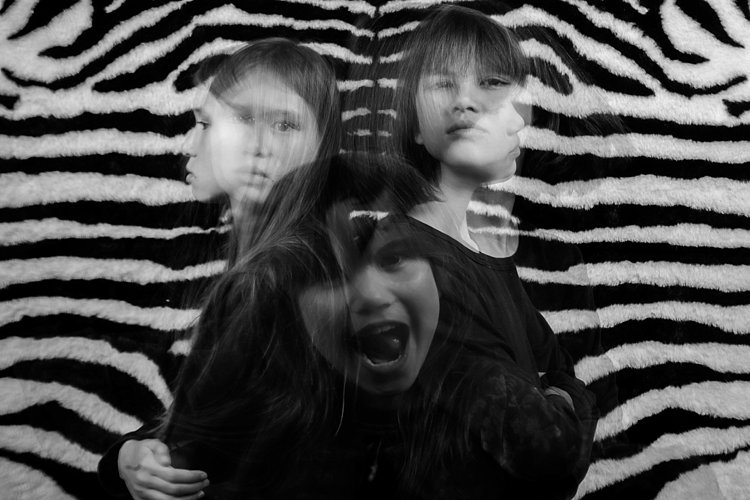
Don’t be afraid to experiment with backgrounds too. In the photos below, I changed the background to a zebra striped black and white rug just because I wanted to see what would happen. I used the same movement techniques as above and the same camera and light settings but the results were very different and unique. The last image below was a happy accident. My third child popped her head up on the third flash, but she came closer to the camera than I had intended so the flash didn’t quite illuminate her face enough. However, I thought this looked really effective as it provided the gray tone of the image as well as a solid form in the middle thereby making the overall image more dynamic and interesting.

double-exposures-in-camera-tutorial

double-exposures-in-camera-tutorial

double-exposures-in-camera-tutorial

I hope you enjoyed this little tutorial on in-camera double exposures using flash. If you have more ideas, do share them here in the comments below!

googletag.cmd.push(function() {
tablet_slots.push( googletag.defineSlot( “/1005424/_dPSv4_tab-all-article-bottom_(300×250)”, [300, 250], “pb-ad-78623” ).addService( googletag.pubads() ) ); } );

googletag.cmd.push(function() {
mobile_slots.push( googletag.defineSlot( “/1005424/_dPSv4_mob-all-article-bottom_(300×250)”, [300, 250], “pb-ad-78158” ).addService( googletag.pubads() ) ); } );

The post 3 Tips for Creating Double Exposures In-Camera Using Flash by Lily Sawyer appeared first on Digital Photography School.


Digital Photography School

 
Comments Off on 3 Tips for Creating Double Exposures In-Camera Using Flash

Posted in Photography


NASA combines exposures on the fly to create high-speed 3D HDR video

09 Aug
Credit: NASA

NASA has successfully tested a camera that uses multiple frames of different exposures to create HDR video. The demo of a rocket test shows that the dynamic range provided is enough to capture plumes of exhaust fire and the surrounding area at the same time. The High Dynamic Range Stereo X, or HiDyRS-X, camera is capable of recording a collection of different exposures using very high frame rates which it then combines to create individual frames of HDR video – in 3D.

The idea is to be able to capture the extremely wide range of brightness values during a rocket test so that the rocket itself and the flames of the plume can be seen and studied simultaneously – not something that traditional capture methods can do.

NASA says that the trial, using the Space Launch System Qualification Motor 2 test, allowed its scientists to study elements and behaviors they had not been able to see before. As with many critical moments in photography things didn’t go completely smoothly for the photography team during the unrepeatable engine test. The camera’s automatic timer failed to start the recording so the team had to intervene manually, and then the vibrations of the rocket itself caused the camera’s power cable to fall out.

The HiDyRS-X camera was developed as a part of a scheme to allow young engineers to come up with concepts and lead projects to create new hardware to help with NASA’s space programs. The project won one of the Early Career Initiative grants in 2015 and was led by structural dynamist Howard Conyers from the Stennis Space Center in Hancock County, Mississippi.

For more information on the camera and the test visit the NASA website.

Articles: Digital Photography Review (dpreview.com)

 
Comments Off on NASA combines exposures on the fly to create high-speed 3D HDR video

Posted in Uncategorized


How to Create In-Camera Double Exposures

22 Mar

It was yet another snowy day in New York, so I headed to the Arboretum to work on macro photography. Tripod slung over one shoulder, with my Olympus mirrorless gear in tow, I approached the door only to be stopped in my tracks. “No tripods” she said, pointing to the sign.

I’ve been here plenty of times with a tripod, but on holidays and weekends the rules change. Since it was President’s Day, the ban was in place. I put the tripod back in the car and decided to use the limitation as opportunity. Instead of close up studies, my plan changed to in-camera double exposures.

This is a feature that I loved with my old film camera (Canon Elan 7). While my switch to digital was a revelation, the lack of double exposure capability was a huge let down. It was only recently that camera manufacturers started including it again. Not only has it been added to most current bodies, but the functionality has been further enhanced. Some may consider it cheating, but I look at the updates as an opportunity to be even more creative.

When you take your first shot, you can see an imprint of it in the viewfinder, while looking for shot number two. This makes it possible to line things up carefully, instead of leaving it to chance. It takes a little time to get used to it, sort of the way the depth of field preview button is a bit odd at first. After some practice however, you start to realize the incredible potential of this feature. Scenes that were once ordinary, become a treasure trove of artistic possibility.

In addition to the standard double exposure mode, the Olympus E-M1 has an overlay feature that lets you choose a RAW file from your SD card as shot number one. You then shoot as many frames as you like, to find the perfect image for shot number two. I found this to provide even greater control over the final image. I’m not sure what other manufacturers offer this feature, so be sure to check your manual. With this setting turned on, I set out to create some interesting images.

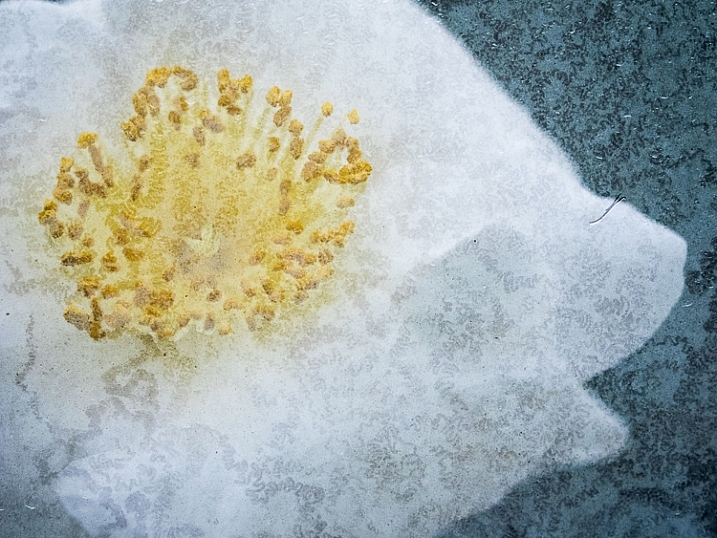
Ultimately I was looking for texture in shot one, as it would be complementary to the subject in shot number two. The possible outcomes are limitless, with every shot being completely unique. Rather than simply shooting a static flower, it’s possible to create a special piece of art. Today, as more people have cameras than ever before, the ability to make a shot has become even more important. This is not something you can do with a phone camera.

You may be wondering why I wouldn’t just do this in post-production by layering two shots in the computer. First, it wouldn’t be nearly as fun – I enjoy working with my camera more than pushing pixels around in Photoshop.

Next, there is something serendipitous about doing it in the field. You work harder, and really tune in to all the possibilities around you. A textured brick becomes more than a wall, but a perfect layer of texture. A crack in the pavement is not merely an imperfection in the floor, but a possible part of an exciting composition. By working deliberately like this, you have no choice but to slow down, and really exercise your vision. You pay attention to the smallest details, focusing on things that most people would walk right past. Isn’t that what creating art is all about?

Will there be shots that don’t work? Absolutely! To create these six images I took 200 photos, over two hours. I don’t regret a single moment of this experience however. Each one is a unique work of art that can never be reproduced. Still, you must be patient, and set aside a good amount of time to do this. If you are rushing through, you’ll miss potentially great opportunities.

With winter upon us (spring coming soon in some areas of the Northern Hemisphere), and outdoor expeditions limited, now is the perfect time to explore this form of photography. You just may create something spectacular. The only way to find out is to give it a try.

Have you tried in-camera double exposures before? Please share your results and questions in the comments below. If your camera has a cool double exposure feature – please tell us about it.

This week on dPS we are featuring articles on special effects. Check out the others that have already been published here:

  • How to Photograph the Full Band of the Milky Way
  • Fire Spinning with Steel Wool – A Special Effects Tutorial
  • Special Effect – How to Create Multiple Flash Exposures in a Single Frame
  • Stacking Light Trails for Night Photography Special Effects
  • 26 Unique Special Effects Photos to Spark Your Creativity
  • Weekly Photography Challenge – Special Effects
  • Tips for Shooting Through Objects to Create a Special Effect
  • How to Add Vintage Frame Overlays Using Alien Skin Exposure X
  • 8 Steps to Great Long Exposure Landscape Photography

googletag.cmd.push(function() {
tablet_slots.push( googletag.defineSlot( “/1005424/_dPSv4_tab-all-article-bottom_(300×250)”, [300, 250], “pb-ad-78623” ).addService( googletag.pubads() ) ); } );

googletag.cmd.push(function() {
mobile_slots.push( googletag.defineSlot( “/1005424/_dPSv4_mob-all-article-bottom_(300×250)”, [300, 250], “pb-ad-78158” ).addService( googletag.pubads() ) ); } );

The post How to Create In-Camera Double Exposures by Chris Corradino appeared first on Digital Photography School.


Digital Photography School

 
Comments Off on How to Create In-Camera Double Exposures

Posted in Photography


Special Effect – How to Create Multiple Flash Exposures in a Single Frame

18 Mar

Many photographic techniques, rightfully, tend to focus on polished images. They vary anywhere on the spectrum from getting sharper images to capturing accurate skin tones. These techniques are important. However, sometimes they’re not very much fun. Sometimes, that’s precisely what you need to have, and exactly what photography should be – fun.

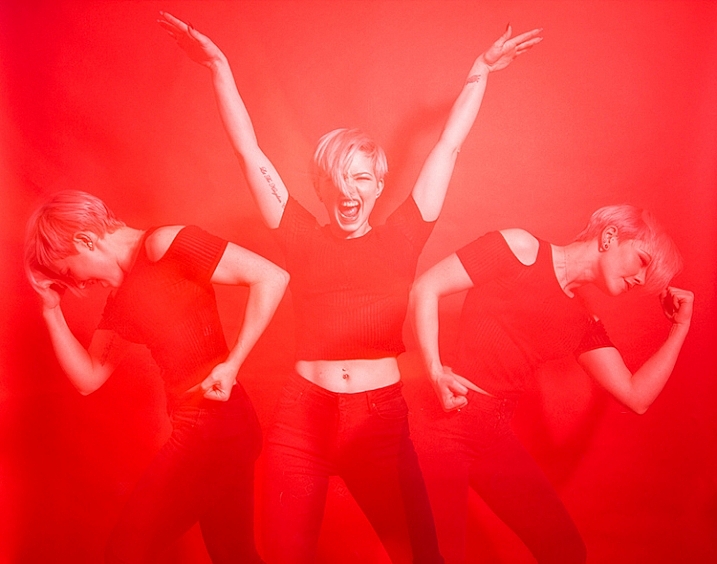
This article will guide you through a fun special effect technique that will allow you to capture multiple exposures in a single frame, using the test button on your strobes or flashguns. Using this method, you will gain a new tool to add movement, and a sense of action in your studio photography.

how-to-multiple-flash-exposures-2793

What you need

  • A dSLR on manual settings (set from 2-10″ or bulb exposure)
  • A very dark room (or nighttime outdoors)
  • A tripod
  • A human subject
  • A strobe or flashgun (speedlight) with a test button (to manually fire the flash)
  • Someone to serve as an extra pair of hands (not required but it helps a lot)

Setting it up

how-to-multiple-flash-exposures-2795

Aperture

Because you’re using flash, the aperture setting is the most important in this technique. As long as your shutter speed is slower than your camera’s flash sync-speed, aperture is what controls how the flash exposure is recorded, and it also dictates what power output to set on your flash. I suggest using an aperture somewhere between f/8 and f/16, to get the best results. A smaller aperture will also help to minimize the effect of any ambient light in your images.

Camera settings

With your camera on a tripod, set the dial to manual mode, the ISO to 100, and your shutter speed to between two and six seconds. To test if your shutter speed is suitable, take a test shot without any flash. As long as the image is completely black at the end of the exposure, it will work for this technique.

This time can be changed and extended later, depending on how many movements you want to capture.

Lighting

To start with, try to keep your lighting simple. A single light source will give you unlimited potential. This technique will work with multiple lights, but it is best to build up to that over time, as you get used to how the technique works.

As for lighting placement, the choice is yours. The lighting will, and should, depend on the final intent of the image you are trying to create. However, if you’re unsure, try starting with your light high above, and in front of, your subject. That will provide a good starting point to make adjustments from there.

Use a light meter, or manually calculate the exposure, to set your flash output, so it matches your chosen aperture.

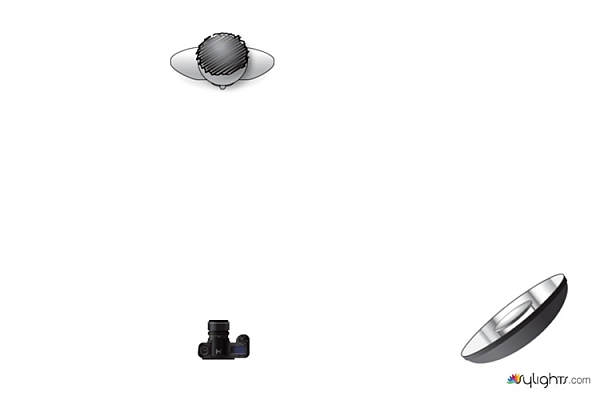
how-to-multiple-flash-exposures-diagram

Simple lighting set-ups, like this one used in these images, can be the most effective.

Direction

With everything set up, you need to explain to your subject how to move. The easiest way to explain this is, “Pose, wait for the flash, pose, wait for the flash, and pose again”.

In more detail – you want to wait for your subject to adopt the first pose, set the focal point, and start the exposure. Press the test button on your strobe to fire the flash. After this first flash, your subject should move to their second position as quickly as possible, where you will press the test button again. Repeat as many times as required.

Keep trying

The hardest part of this technique is that it is incredibly hit and miss. Getting your subject to move into positions that create pleasing compositions, without be able to evaluate while it’s happening, is tricky. It takes time and patience. You will need to shoot a lot of frames, and most of them will be unsuitable. Just keeping making as many attempts as you can, until you think you have something, then take some more.

how-to-multiple-flash-exposures-2781

Tips

Here are a few things to keep in mind that will make your attempts easier.

Start small

Sometimes it’s hard judge how movements will appear in the final image. By trying to squeeze too much in, you might end up with a cluttered mess in your images. Start with two or three movements to gauge where things are and build it up from there.

how-to-multiple-flash-exposures-2787

Trying to include too many movements may result in a cluttered mess like this image.

Remote triggers

If you have a remote trigger for your strobes with a manual button on it, you can hold it in your hand and fire the flash. This is much more preferable than having to move between the camera and your light source during each frame.

Recycle rate

If you want to squeeze more than two or three movements into a six second exposure, try to ensure that your flash isn’t set to full power. By reducing the power output, you’re also decreasing the amount of time it takes your flash to refresh. This will allow you to fire the strobe more times in the short timeframe.

Clarity

There is no one way to process images from this technique, and all of that is up to you. However, if you want crisper, more pronounced outlines of your subject, the clarity slider in Lightroom or Adobe Camera RAW will help a lot.

Neutral backdrops

how-to-multiple-flash-exposures-2793-2

Colored backdrops will overpower images using this technique.

For color images, try and stick to a black or grey background. Because your subject is moving to different positions, the background continues to expose once your subject has moved. If you use a colored background, as I did with these images, that color will dominate your exposures. Of course, this can be used judiciously as a feature of the image should you choose.

Two second timer

If you can’t rope someone into being your assistant for the day, set your camera to use the two second timer, to give you time to move between the camera and the strobe.

Keep going

Once you’ve had a go at this technique with people, feel free to try and think of ways to use it with other subjects. For example you could use it to capture a hammer at different points in its swing, or perhaps a basketball at different parts of its arc. The choices are endless. Be creative with it, have fun, and if you give it a go please share your images below, as well as any questions you may have.

This is the third of a series of articles we will be featuring this week on dPS all about special effects. Check out the others here:

  • How to Photograph the Full Band of the Milky Way
  • Fire Spinning with Steel Wool – A Special Effects Tutorial

googletag.cmd.push(function() {
tablet_slots.push( googletag.defineSlot( “/1005424/_dPSv4_tab-all-article-bottom_(300×250)”, [300, 250], “pb-ad-78623” ).addService( googletag.pubads() ) ); } );

googletag.cmd.push(function() {
mobile_slots.push( googletag.defineSlot( “/1005424/_dPSv4_mob-all-article-bottom_(300×250)”, [300, 250], “pb-ad-78158” ).addService( googletag.pubads() ) ); } );

The post Special Effect – How to Create Multiple Flash Exposures in a Single Frame by John McIntire appeared first on Digital Photography School.


Digital Photography School

 
Comments Off on Special Effect – How to Create Multiple Flash Exposures in a Single Frame

Posted in Photography


How to Use a Gray Card to Get More Accurate Exposures and Color

15 Jan
how-to-use-a-grey-card-1597

High contrast scenes with delicate colors can prove tricky for your camera’s meter and white balance settings.

If you’re familiar with the fundamentals of camera technique, then you know how much of an effect white balance can have on your images. Also, you probably have a basic understanding of how your camera’s meter works, or at least how to react to its output to change your settings appropriately.

Just beyond these basics, there are a few simple techniques that will allow you to fin- tune your white balance, and get more accurate meter readings from your subject. To take advantage of these techniques, you only need to add a single cheap piece of equipment to your camera bag: a gray card.

These humble accessories start at less than $ 10, yet the amount of control they give you over the final image, can be invaluable in tricky situations. For example, they allow you to obtain a good white balance reading from mixed light sources, or get an accurate exposure reading from your camera’s meter in a high contrast scene.

What is a gray card

A grey card is exactly what it says it is. A card that is gray. More specifically, it is middle gray, or 18% gray. This number is important because 18% gray is what your camera’s meter is trying to calculate when it meters to expose for a scene. This means if you put a grey card in front of your subject, and take a meter reading off it, you will get a correct exposure regardless of any tonal contrast in the scene.

Additionally, when used in conjunction with a camera’s custom white balance feature, you can manually set a perfect white balance for everything you photograph. This becomes especially important when you need to faithfully recreate colors in your images, whether that may be for commercial purposes or record shots.

Metering

The more useful of these two techniques is metering. In this case, a gray card is the closest thing you’ll get to a magic bullet that will allow you to get a near perfect exposure, in almost any situation.

Spot metering

To get started, the first thing you’ll want to do is to set your camera to the spot metering mode. While this is not absolutely necessary, the fact that the camera will only be metering from a small section in the centre of the frame will help a lot, especially in circumstances where you cannot fill the entire frame with the gray card. It will also save you a lot of time if you use manual mode.

Metering

With your metering mode changed, all that you have to do now, to take advantage of this technique, is put the gray card in your scene, point the centre of the frame at it, dial in the exposure your meter gives you and then just take the gray card away. Providing that the light doesn’t change, you will now have an accurate exposure for any subsequent shots that you take in this setup.

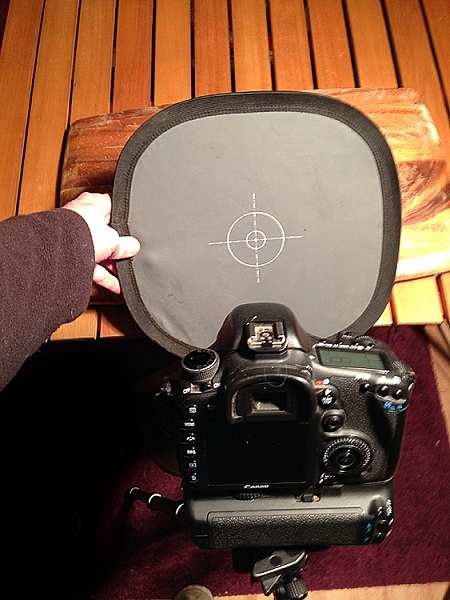
Taking a meter reading with a grey card.

Taking a meter reading with a gray card.

Hints

There are a few things can do that will make this process easier and more accurate.

First, you should make sure that your subject remains in a similar position relative to the light source, from where you took your gray card reading. For example, if you’re taking headshots outdoors and the sun is lighting your subject from the front; that is one exposure reading. If you turn your subject to the side, or completely around, that will affect your exposure and you will need to take another reading.

The second tip is when you’re taking the exposure reading; fill the frame with the grey card as much as possible. This will help to ensure that your meter is only trying to expose for the card, and not anything around the edges.

White balance

Although the basic white balance settings in cameras can be pretty good, they do tend to struggle at times. For example, tungsten bulbs can vary greatly in color temperature, depending on their quality and power output. This may lead to the basic tungsten setting on your camera failing to give you an accurate representation of colors.

There are two ways to use a gray card to set your white balance. The first is to use it to set your camera’s custom white balance. The second method will allow you to use Lightroom to set a white balance for your images after they have been taken. You can also use Adobe Camera Raw (inside Photoshop) if you don’t have Lightroom.

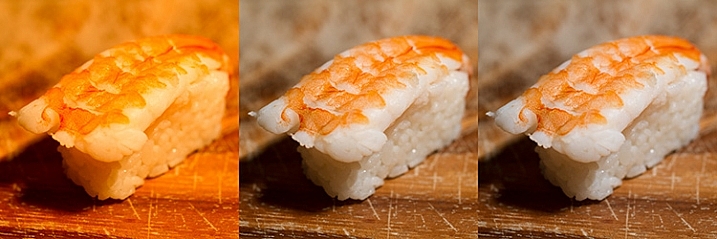
Shifts in White Balance - Left: Daylight Center: Tungsten Right: Custom

Shifts in White Balance – Left: Daylight – Center: Tungsten – Right: Custom

In-camera custom white balance

The technique described here is for Canon users. If you use Nikon, Sony, or any other brand, you will need to consult your manual for instructions on setting a custom white balance.

  • Step 1:  Take a photo of your grey card, ensuring that it fills the frame entirely. Try to make sure that it is flat in the frame and that it is lit evenly, and in the same way as your subject.
  • Step 2: Open the camera’s menu and find the option labeled “Custom White Balance” (or Custom WB). Press the select button and choose the photo of your gray card. Press select again and you have set your custom white balance. Set the camera’s white balance to use the new custom setting and start taking photos.

how-to-use-a-grey-card-canon

If something in your scene changes, such as the lighting, just repeat the steps above and all of your images should have an accurate white balance.

Post-production custom white balance

how-to-use-a-grey-card-1626

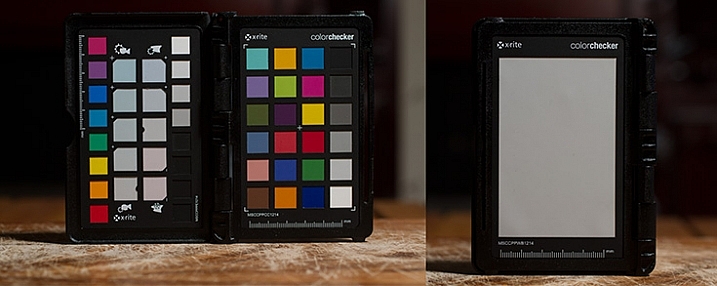
The ColorChecker Passport offers even greater control over white balance, and also has a section for setting a custom white balance in-camera.

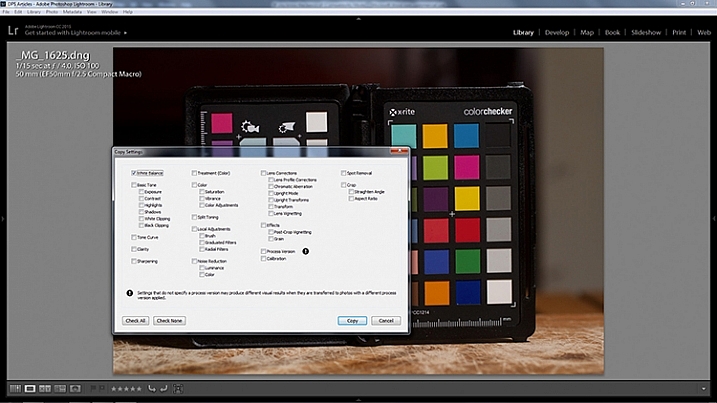
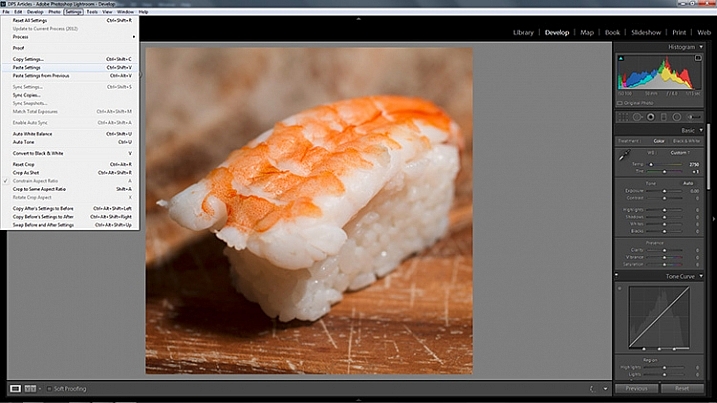
For the post-production option, the only thing you need to do with your camera is to take a photo of your gray card in all of the scenes that you’re photographing. It may help with organization if you start off any sequence of photos with the gray card image. This way, you will always know which image to use to take a white balance setting from.

Once you’re on the computer, and have your images loaded into Lightroom, the steps are quite straightforward:

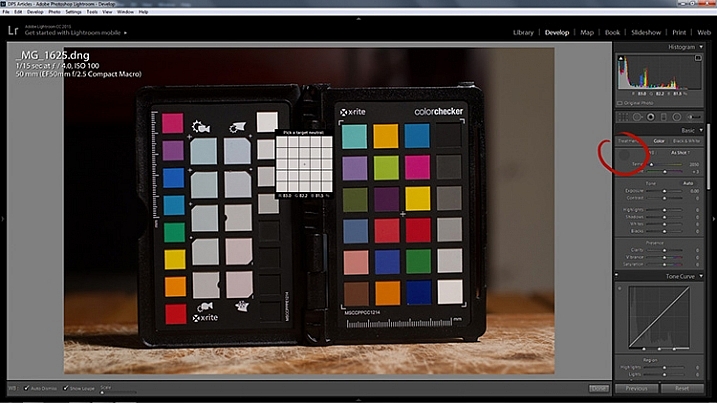
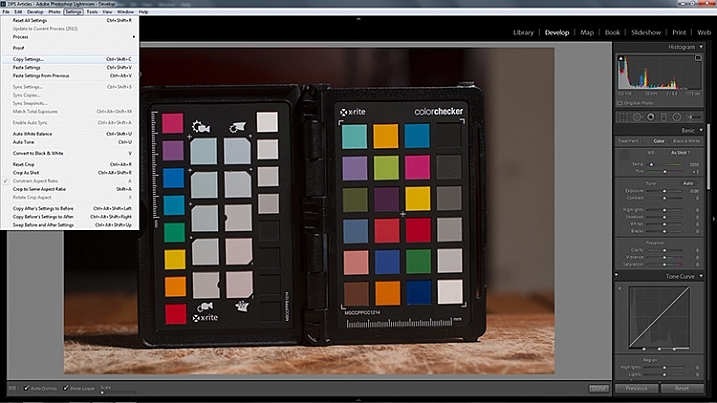
  • Step 1: Select the photo of a gray card that you want to take a white reading, from and enter the develop module.
  • Step 2: Select the eyedropper tool that’s next to the White Balance sliders in the right hand panel, and click anywhere on the image of the grey card. You should now have an accurate white balance setting.

how-to-use-a-grey-card-lightroom-1

  • Step 3: In Lightroom, to copy your settings, press ctrl+shift+c (CMD+C on Mac) and check the White Balance boxes. Leave all of the other boxes unchecked.

how-to-use-a-grey-card-lightroom-2

how-to-use-a-grey-card-lightroom-4

  • Step 4: In Lightroom, select all of the photos you want to correct (using the filmstrip at the bottom) the white balance on and press ctrl+shift+v (Cmd+V on Mac). Now all of photos you took should have a corrected white balance.

how-to-use-a-grey-card-lightroom-3

Summary

All of the techniques outlined here are simple, and not very time consuming, yet the amount of extra control they give you over your camera makes a gray card one of the most cost effective accessories in any camera bag.

Have you used one before? Do you have any other tips to add? Please share that or any questions you have below.

googletag.cmd.push(function() {
tablet_slots.push( googletag.defineSlot( “/1005424/_dPSv4_tab-all-article-bottom_(300×250)”, [300, 250], “pb-ad-78623” ).addService( googletag.pubads() ) ); } );

googletag.cmd.push(function() {
mobile_slots.push( googletag.defineSlot( “/1005424/_dPSv4_mob-all-article-bottom_(300×250)”, [300, 250], “pb-ad-78158” ).addService( googletag.pubads() ) ); } );

The post How to Use a Gray Card to Get More Accurate Exposures and Color by John McIntire appeared first on Digital Photography School.


Digital Photography School

 
Comments Off on How to Use a Gray Card to Get More Accurate Exposures and Color

Posted in Photography


5 Tips for Geting Sharper Images When Doing Long Exposures

29 Apr

Long exposure photography makes it possible to show the passage of time in a still photograph. It does this by blurring moving elements and sharpening the static parts. But there is a downside to long exposures – any camera movement blurs the static elements. Here are four simple ways you can prevent unwanted blurring.

Salt Lake Sunset at Mandurah

1. Use a Good Tripod

For very short exposures there are ways to hold yourself and your camera steady, like: How to Reduce Camera Shake – 6 Techniques. However, when you’re taking an exposure of a few seconds, you need something steadier than your hands to hold your camera. You may set the camera on a table, or a rock but risk dropping the camera or accidental movement that can ruin your shoot.

The most common way is to put it on a sturdy tripod. You have to get at least a decent tripod as El Cheapo tripods are going to give you camera shake too.

Light Trail Central

2. Use a Remote Shutter Release

Even with a tripod the act of snapping the shutter can cause the camera to shake. There are a couple of ways to combat this problem.

One is to set the delay on the camera (2-sec timer) so any movement is done by the time the shutter snaps. The other is to get a remote shutter release.

Remotes can be connected to the camera by a cable or wireless – either one snaps the shutter without shaking the camera. They are also called remote cable releases. This is a small and cheap accessory which can help you get rid of camera shake.

Rockingham Sunset

3. Use Manual Focus

Autofocus is a wonderful thing. Most of the time it does exactly what you want, making it easier to take great photos. But there are times, especially when shooting long exposure, that it can have the opposite effect.

In low light situations autofocus has trouble finding something to focus on. Even when it seems focused it can readjust when the shutter is snapped. Using ND filters can cause the same problem.

Light Trail IFC

Fortunately, there is a simple solution. When shooting in low light you can use manual focus, or use a flashlight for focusing and once the focus is set, turn autofocus off so it won’t change once the light is off.

For ND filters set the focus manually (either before or after mounting the filter) or autofocus first, turn it off and mount the filter. The shot will stay focused, the picture sharp.

Moving Cloud Sunrise at Kings Park

4. Lock the Mirror Up

If you are using a DSLR camera – and you probably are since you are shooting long exposure – it has a mirror that reflects the image from the lens to the viewfinder. It is between the lens and the camera sensor, so it has to move before the shutter snaps.

That small movement causes vibration. When you turn on the mirror lockup it turns the shutter button into a two stage button. The first click lifts the mirror and the shutter doesn’t open until the second click. The time between the two clicks allows the vibration of the moving mirror to stop.

Light Trail Hong Hum

5. Use Your Aperture Sweet Spot

Closing down the aperture can make you shoot longer. However, when your aperture is too small, it will start to have a diffraction effect which lowers the sharpness.

In most lenses, the sweet spot of the lens aperture is between f/5.6 to f/8. In other words, you will get the sharpest images when using this range.

When you step down to f/16 or smaller, you will get images like that seem out of focus. You can learn the physics about diffraction in the below video by Steve Perry:

Conclusion

Taking long exposure photographs is a science and an art. Like any art, taking long exposure pictures with the right balance of sharpness and blur takes both skill and intuition. These five tools will help you use your skills to turn intuition into great photographs.

googletag.cmd.push(function() {
tablet_slots.push( googletag.defineSlot( “/1005424/_dPSv4_tab-all-article-bottom_(300×250)”, [300, 250], “pb-ad-78623” ).addService( googletag.pubads() ) ); } );

googletag.cmd.push(function() {
mobile_slots.push( googletag.defineSlot( “/1005424/_dPSv4_mob-all-article-bottom_(300×250)”, [300, 250], “pb-ad-78158” ).addService( googletag.pubads() ) ); } );

The post 5 Tips for Geting Sharper Images When Doing Long Exposures by Kevin Choi appeared first on Digital Photography School.


Digital Photography School

 
Comments Off on 5 Tips for Geting Sharper Images When Doing Long Exposures

Posted in Photography