RSS
 

Posts Tagged ‘Experiment’

11 Things to Experiment With When Starting Out in Digital Photography

15 Oct

The post 11 Things to Experiment With When Starting Out in Digital Photography appeared first on Digital Photography School. It was authored by Megan Kennedy.

Starting out in digital photography can seem a little daunting. With so many avenues to explore, it can be hard to pinpoint exactly where to begin. Here are 11 things to experiment with when first taking up photography.

experiment when starting out in digital photography wattle flower
Canon 5D Mark II | Canon EF 50mm f/1.8 II with extension tubes | 1/250 sec | f/7.1 | ISO 100

1. Semi-automatic and manual modes

When first getting started in photography, it can be tempting to switch a camera over to Auto mode and forget about making manual adjustments, especially when starting out in digital photography. Why make manual adjustments when the camera can do it all for you, right?

The truth is that shooting with Auto mode sacrifices experience, flexibility, and control. If you can avoid Auto mode, you should.

Now, the prospect of shooting in Manual can prove overwhelming to start with. Fortunately, there are often semi-automatic modes available in-camera to bridge the gap between Manual and Auto.

Shutter Priority allows you to alter shutter speed while the camera automatically adjusts the aperture. Aperture Priority is similar, but it allows you to change the aperture while the camera adjusts the shutter speed instead.

experiment when starting out in digital photography spider's web
Canon 5D Mark II | Canon EF 50mm f/1.8 II with extension tubes | 1/125 sec | f/1.8 | ISO 800

Shutter Priority and Aperture Priority facilitate a creative approach to photography while allowing the camera to manage some of the load in maintaining a decent exposure. This balance of functionality allows you to experiment, which in turn helps you develop a good sense of the right settings for any circumstance.

And after becoming familiar with the dynamics of semi-automatic modes, graduating to Manual is a lot more fluid, when you can finally take full advantage of the camera as a creative tool.

2. ISO

ISO is a little misunderstood; there’s a great video about it here. But in basic terms, ISO is a setting that brightens an image in-camera. As the ISO value is increased, images grow progressively lighter. It’s a function that is useful for photography in darker environments.

However, raising the ISO value also increases noise, which can compromise the quality of a digital image.

Experimenting with ISO will give you a sense of how your images will turn out in low-light situations. By becoming familiar with ISO and its trade-offs, you can learn to anticipate the outcome of a photograph, maintaining as strong image quality as possible in a variety of environments.

3. Metering modes

In-camera metering is how a camera determines the appropriate exposure for a given situation. Metering modes refer to the method the metering system uses to evaluate a scene.

starting out in digital photography metering modes

Different metering modes allow photographers to select the ideal settings for a particular situation. For example, Matrix metering (Nikon)/Evaluative metering (Canon) measures the light intensity at several zones in a scene, then combines the results to find the average settings for the exposure. Spot metering, on the other hand, measures only a very small portion of a scene to determine exposure settings.

While Matrix/Evaluative metering is useful for situations with evenly-distributed tones, Spot metering is ideal for metering in high-contrast scenarios. Experimenting with metering modes exposes a user to effective ways of working in different lighting conditions, leading to greater creative and technical control.
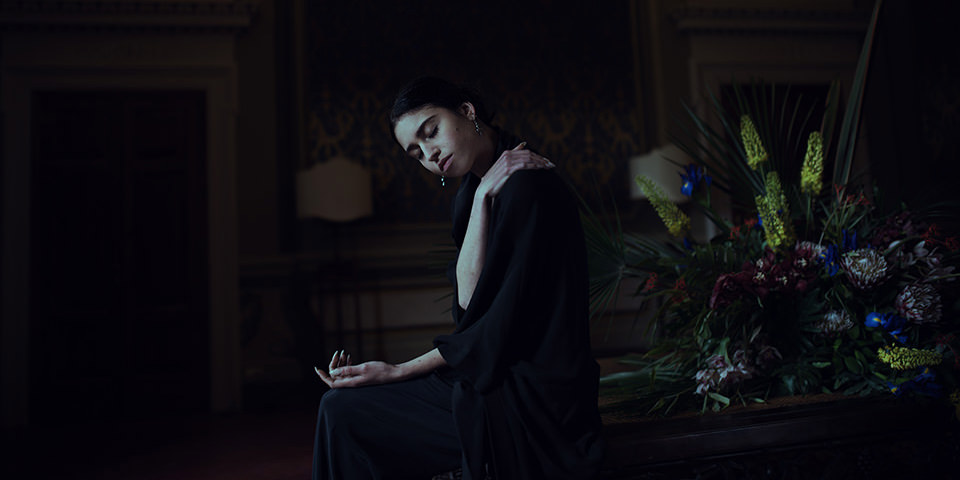
4. White balance

Different lighting conditions can impact the color temperature of the overall photo. For example, fluorescent lights can generate a different color cast than the afternoon sun. To rectify this, many digital cameras offer a function that balances the whites in a scene in order to make images appear more natural.

Experimenting with preset or custom white balance modes can help achieve a more aesthetically pleasing result in-camera. Although white balance can be set to Auto, the camera doesn’t always get it right. Trying out custom or preset white balance functions prepares a photographer for tricky lighting situations down the track.

5. Manual focus

As a beginner photographer, achieving sharp images can be a challenge. Although a camera’s autofocus function is quick and relatively easy to use, shooting with manual focus can sometimes be the difference between successful and unsuccessful images.

Often, manual focus is much more effective than autofocus in low-light and low-contrast conditions, and shooting through objects (like glass or fencing) with autofocus engaged can be a frustrating experience. The autofocus system may even get confused when the user is trying to focus on a fast-moving subject.

starting out in digital photography manual focus
Canon 5D Mark II | Canon EF 50mm f/1.8 II with extension tubes | 1/125 sec | f/4.0 | ISO 800

While autofocus may be convenient in some situations, switching to manual focus can play a vital role in creating quality images. Experimenting with manual focus when starting out in digital photography builds and reinforces technical experience. Using manual focus also fosters a greater awareness of camera capabilities and generates a more diverse range of images.

6. Composition

Throughout the history of visual art, concepts have emerged to aid in the formulation of impactful imagery. Composition refers to the organization of visual elements within an artwork. Whether it’s a painting, a photograph, or a sculpture, all art hinges on composition.

Experimenting with composition allows photographers in the early stages of their practice to arm themselves with helpful knowledge that has been passed down by artists. By experimenting with compositional elements (such as perspective, the rule of thirds, and leading lines), new photographers can quickly start to identify and utilize key visual aspects of a scene.
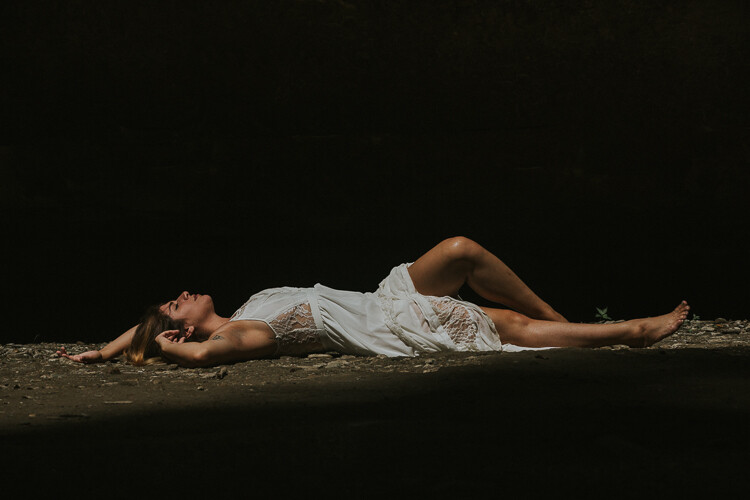
7. Abstraction

Wikipedia defines abstract photography as “a means of depicting a visual image that does not have an immediate association with the object world and that has been created through the use of photographic equipment, processes, or materials.”

Basically, abstract photographers generate subject matter that prioritizes aesthetic experience over conventional discernibility.

starting out in digital photography abstraction
Left: Canon 5D Mark II | Canon EF 24-105mm f/4L IS USM | 1/250 sec | f/8.0 | ISO 100
Right: Canon 5D Mark II | Canon EF 24-105mm f/4L IS USM | 1/250 sec | f/6.3 | ISO 100

Abstraction is a unique facet of photography in that it encourages a more experimental approach to the photo-making process.

By taking advantage of abstraction, those starting out in digital photography are free to experiment beyond the conventional notion of a photograph. This experimentation will inevitably inform other areas of a new photographer’s practice, building experience and developing individual perspective.

8. Subject matter

There is nothing wrong with specializing, but tackling a range of different photographic fields expands your photographic experience. And it can also completely alter the way you approach your preferred subject matter.

For example, landscape photography can reveal opportunities for beautiful outdoor portraits. Abstract photography can impact the way motion is expressed in action shots. Street photography can help you develop an eye for subtle photographic opportunities. Macro photography will help you notice small details.

In short, experience with different photographic subjects can feed into one another in surprising ways. Experimenting with a variety of subjects is a solid means of developing a well-rounded photographic approach.
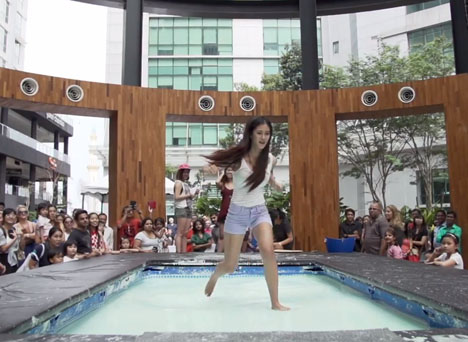
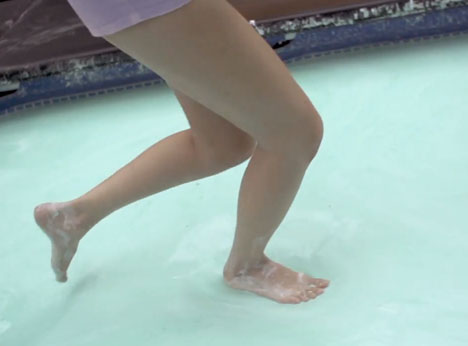
9. Perspective

One of the reasons photography is so effective is because it challenges both the photographer’s and the viewer’s comprehension of the world. However, it can be easy to get into the habit of photographing subjects from the same eye-level viewpoint, especially when starting out.

starting out in digital photography plane
Canon 5D Mark II | Canon EF 24-105mm f/4L IS USM | 1/160 sec | f/9.0 | ISO 100

We all know the saying, “Show, don’t tell.” Moving around with the camera is one of the simplest ways to convey a unique photographic experience. You can shoot from above your subject, below your subject, or off to the side.

And by experimenting with different camera positions, you explore the nature of photography and the world we live in. By photographing from interesting or unusual perspectives, the physicality of the image-making process is emphasized, providing a unique insight into the world through the experience of the photographer.

10. Post-production

Getting it right in-camera is ideal, but sometimes a bit of work in post-production is necessary. Becoming familiar with digital post-production techniques can be very handy, especially because even minor adjustments can create a positive impact. In addition, editing can affect your overall approach to digital image-making by revealing photographic techniques that work well or need improvement.

Photoshop is a great tool for editing images, but there are also free applications such as GIMP to make use of. With practice, you can develop a sense of how to bring the best out of a photograph.

11. Accessories

There are plenty of ways to expand your creative image-making through economical accessories.

For example, extension tubes are a cheap way of getting into macro photography. Filters can significantly alter the outcome of a photograph. And a budget tripod will help you achieve sharp images. Renting or buying second-hand is also a viable option. In some cases, digital photographers can even make use of old lenses designed for film cameras.

Investing in economical accessories allows new photographers to experiment with engaging techniques without breaking the bank.

starting out in digital photography flower
Extension tubes are a cheaper alternative to a macro lens. Canon 5D Mark II | Canon EF 50mm f/1.8 II with extension tubes | 1/2000 sec | f/2.5 | ISO 500

Starting Out in Digital Photography: Conclusion

While there are plenty of considerations to take into account when starting out in digital photography, experimenting with technical settings, creative approaches, and accessories gives you a strong foundation for future photography endeavors.

And this allows for a more comprehensive skillset and well-developed creative instincts.

Now over to you:

Have you tried experimenting with any of these items? What are you going to experiment with first? Leave a comment and let us know!

The post 11 Things to Experiment With When Starting Out in Digital Photography appeared first on Digital Photography School. It was authored by Megan Kennedy.


Digital Photography School

 
Comments Off on 11 Things to Experiment With When Starting Out in Digital Photography

Posted in Photography


Large format macro: a crazy wet plate photography experiment

15 Mar

Austrian wet plate photographer Markus Hofstaetter is back with another crazy large format photography experiment. This time, he decided to find a way to shoot macro photos on a large format wet plate camera. To do this, he actually had to stack two wet plate cameras front to back, bellows fully extended.

Markus documented the whole experiment on his blog, and shares a behind-the-scenes ‘Making Of’ look at the shoot in the video above. His subject was a little snowdrop from his garden, with a simple tin-foil background for some pretty bokeh. But getting any sort of magnification with a large format camera is no easy feat. He needed a lot of distance between his film plane and the little flower.

That’s why he decided to ‘connect’ two large format wet plate cameras together, giving him enough extension to magnify the flower onto an 18x24cm plate.

Here’s a diagram that shows the difference between your standard “full-frame” size, a 10x12cm plate, and an 18x24cm plate (left) and that same diagram overlaid on the final plate:

The next problem he faced was getting enough light. The farther the plate is from the subject, the more light he needs—the plate has an ISO value of about 0.5—and he was pretty far away from his subject. The trick to solving this problem, says Markus, is using fresh chemicals and a LOT of artificial light.

“Freshly mixed chemicals are more sensitive to light,” he tells DPReview. “If I had used older chemicals, I’m not sure if this macro shot would have been possible.” Add to that two flashes of 7,000W of light, and you’ve got JUST enough exposure to make this work.

Mix all of this together and here’s what you get. Scroll to the very end to see the final image:

$ (document).ready(function() { SampleGalleryV2({“containerId”:”embeddedSampleGallery_9257219705″,”galleryId”:”9257219705″,”isEmbeddedWidget”:true,”selectedImageIndex”:0,”isMobile”:false}) });

Definitely check out the whole Making Of video at the top if you want to see how this shot came together. Markus goes into more detail, revealing interesting tidbits about the lens he used, his lighting setup, and lets you tag along for the entire developing process as well.

And if you like his work, don’t forget to visit his website, check out his blog, and give him a follow on Facebook and Instagram. His quirky experiments—several of which we’ve featured on DPReview—might just get your creative juices flowing, too.

Articles: Digital Photography Review (dpreview.com)

 
Comments Off on Large format macro: a crazy wet plate photography experiment

Posted in Uncategorized


Photo Experiment: Shooting macro photos of boiling water

21 Sep

Recently I’ve become interested in photographing boiling water in a glass tea kettle. It may sound boring and uninteresting, but with the right lighting you can get some truly interesting images.

It began when I was boiling my tea water one day in January this year, and I happened to have my camera with a macro lens and a speedlight mounted, laying nearby. I decided to try what would happen if I photographed the boiling water in the glass tea kettle and was very surprised by the results! It looked like melted metal, and the shapes were a lot more intricate and detailed than I would have expected.

When experimenting with this, I have gotten the best results when using a macro lens with a long focal length. I used my trusty Sigma 150mm f2.8 macro. You could probably get interesting photos with a non-macro lens, but you would likely have to do some cropping to take away the edges of the teakettle and the background, as you wouldn’t be able to focus as closely.

I set the aperture to around F6 or F7 for the sharpest results, and I focus fairly close, but not all the way to 1:1 magnification. I make sure that the room is as dark as possible, as this gives the photos a calmer background. I use either a normal speedlight mounted on the top of the camera, or, for more interesting results, I use two speedlights with colored gels, placed at different angles towards the teakettle.

In this case, I used two Godox TT 685s: cheap but incredibly well-built wireless speedlights.

Finally, I turn on the teakettle and let the water start boiling, while I press the shutter as many times as possible. Be prepared to take a lot of photographs, and know that most of them will turn out only okay. When I recorded my video about this, I took thousands of shots, and only deemed around 10-20 to be “good.” But when you get a nice composition of bubbles, with perfect sharpness and that metallic, futuristic look, it is worth the effort!

$ (document).ready(function() { SampleGalleryV2({“containerId”:”embeddedSampleGallery_9440977853″,”galleryId”:”9440977853″,”isEmbeddedWidget”:true,”standalone”:false,”selectedImageIndex”:0,”startInCommentsView”:false,”isMobile”:false}) });

The most interesting photos seem to come at two stages: when the water is boiling the most – when it is total chaos inside that teakettle—and when it has stopped boiling and you only see small, flat bubbles rising from the bottom with some distance between them.

Again, this might seem like a silly, boring idea but photographing boiling water is a fun and interesting experiment to try at home on a rainy day!


Micael Widell is a photography enthusiast based in Stockholm, Sweden. He loves photography, and runs a YouTube channel with tutorials, lens reviews and photography inspiration. You can also find him as @mwroll on Instagram and 500px.

Articles: Digital Photography Review (dpreview.com)

 
Comments Off on Photo Experiment: Shooting macro photos of boiling water

Posted in Uncategorized


How to Experiment with Different Editing Styles to Find Your Own

02 Nov

Photography is an art form and like every art form, it goes through its fair share of evolution. Hence, it is only fair that as photographers (artists of this trade), we too go through an evolution process of defining and redefining our artistic flair. This redefinition can take place in many different ways. It can be technical (going from digital to film or vice-versa) or it can be business (changing genres of what you photograph). Another way you can evolve as a photographer is with your editing style. And it is perfectly okay and acceptable to make one or all of these changes in your personal photographic journey.

memorable-jaunts-experimenting-with-editing-styles-article-for-digital-photography-school-1

For a photographer, his or her images are the art form. Experimenting with the images is creatively satisfying.

There comes a point in one’s career when you really take a hard look at what your journey has been. What you have been through to get here and where you are headed. While you may call this a mid-life crisis of some sort, I call it reassessing your strengths, talents, and goals.

A few years ago, while I was searching for what style of photography appealed to me, I was instantly drawn to bright and airy images with lots of light and emotion. This kind of images really inspire me and make me happy. But of late, I have been drawn to more moody contrasty images that are still full of emotion. I don’t consider this a flaw or a failure of my part but instead, choose to look at it as a natural evolution in my journey as an artist.

memorable-jaunts-experimenting-with-editing-styles-article-for-digital-photography-school-1-4

The same subject shot two different ways. I love them both equally and feel like both represent the message/story I wanted to convey about summer’s favorite produce – blueberries!

If you are at such crossroads, I encourage you to fully explore each of these paths and find a way to integrate it with your existing work. I have found that, if done correctly, your clients (or fans) will also value this evolution process as a sign of internal growth of your talent.

There are a few ways to go about this discovery.

1 – Identify your personal editing style

What style of images are you most drawn to? In other words, when you seek inspiration what sort of images do you gravitate towards? For me, images that are full of emotion and personality really call out my name! That is my first requirement; what story is the photographer trying to communicate.

Then I look for processing – is it dark and moody, or full of light and crisp? I like airy, light images just slightly more than dark and moody ones but they both appeal to me. My personal opinion – I am not inspired by sepia or warmer toned black and white, it’s just my personal preference. If that is what moves and motivates you, you own it and rock that style!

memorable-jaunts-experimenting-with-editing-styles-article-for-digital-photography-school-1-5

A clean, crisp, bright edit brings out the freshness of the florals against the blue backdrop of the chairs.

2 – Research all other styles that inspire you

There are a few common editing styles that seems to surface over time. This is by no means a comprehensive list, just some that I noticed as I browsed through the internet and Pinterest for inspiration.

Matte Finish

Those images that appear as if a slight hazy filter has been placed consistently over the image.

Matt style typically has black which is not sure 100% as it it were printed on matt paper.

Matte style typically has blacks which are not sure 100% as if the image was printed on matte paper. (see original image below)

Original image

Original image

matte-style2

A slight haze like finish that is predominately seen over the florals (especially comparing to the earlier image).

Desaturated Look

Images where all the colors are very muted. This style seems to be quite popular lately, especially images where the greenery (i.e. trees and brushes) are toned down in the saturation of green tones.

memorable-jaunts-experimenting-with-editing-styles-article-for-digital-photography-school-6

A desaturated look where all the colors are muted from the original vibrancy seen in the first image of this series. The reds are toned down, the greens and blues are also muted (reduced in intensity).

HDR

As Per Wikipedia, HDR or High Dynamic Range is the effect to reproduce a greater dynamic range of luminosity than what is typical of standard digital imagery. I have seen this typically with urban night shots but in theory, this effect can be applied to any image.

memorable-jaunts-experimenting-with-editing-styles-article-for-digital-photography-school-7

HDR here almost has the opposite effect of desaturated colors…the greens, reds, and pinks seem to pop in this image.

Monochrome

This quite simply means single color and is most commonly used in black and white images.

memorable-jaunts-experimenting-with-editing-styles-article-for-digital-photography-school-8

3 – Identify artists that do these things well and follow them

There are many artists that excel at one or more of these types of editing styles. Once you have identified the ones you want to experiment with, find those artists and follow their work. You will begin to see a pattern in their shooting and editing style that may provide you with the right amount of motivation to try and achieve a certain look for your own portfolio and images.

4 – Shoot for a particular style and close to your vision

This ties in with the above two points. Once you have identified the type of look you want to achieve, take the time and effort to set up all the parameters needed to achieve it. For example, if I am aiming for a dark and moody look to my image I will look for lighting, textures, and tones that will support that type of imagery. I will not set up the shoot in the brightest part of my house where sunlight fills the room.

memorable-jaunts-experimenting-with-editing-styles-article-for-digital-photography-school-1-2

This food editorial shot was set up in my basement studio on a dark cloudy day to minimize the amount of light hitting the overall scene. Additionally the dark tones of the bread and the wood board compliment the look, feel, and tone of this image.

5 – Invest in LR presets or PS actions or experiment

There are numerous editing aids out there for almost every style of photography. Just google the kind of look you want to achieve and chances are someone has created a template/preset/action for that effect. Some editing aids are free while others cost money. Depending on your personal preference, you can choose to use these aids or not. My primary editing software is Lightroom and sometimes I will use a free preset just to see if I like that style of editing before I go down the path of additional research and experimentation with my own shooting style.

Conclusion

At the end of the day, there are many different ways to look at your creativity and your photography style. There will always be those of us who go through life with the mindset of – Don’t fix what isn’t broken – while others follow the logic of – Change it up, mix it up, rock that boat…fall in the water and you will learn to swim! No matter what camp you belong to, the message I want to leave with you is that do that what makes photography fun, interesting and creatively challenging for you!

googletag.cmd.push(function() {
tablet_slots.push( googletag.defineSlot( “/1005424/_dPSv4_tab-all-article-bottom_(300×250)”, [300, 250], “pb-ad-78623” ).addService( googletag.pubads() ) ); } );

googletag.cmd.push(function() {
mobile_slots.push( googletag.defineSlot( “/1005424/_dPSv4_mob-all-article-bottom_(300×250)”, [300, 250], “pb-ad-78158” ).addService( googletag.pubads() ) ); } );

The post How to Experiment with Different Editing Styles to Find Your Own by Karthika Gupta appeared first on Digital Photography School.


Digital Photography School

 
Comments Off on How to Experiment with Different Editing Styles to Find Your Own

Posted in Photography


Italien, Blumen und ein Experiment

21 May

© Alessio Albi

Über Ostern konnte ich zusammen mit Redakteur Chris tolle Menschen und Fotografen in der Toskana treffen. Zusammen erlebten wir einige Abenteuer und an unserem letzten Tag gab es eine besondere Herausforderung. Die Blumenstylisten und Designer von FluidaDesign stellten ein großes Blumenarrangement zusammen und wollten dieses von jedem Fotografen des Treffens fotografiert haben.
kwerfeldein – Fotografie Magazin | Fotocommunity

 
Comments Off on Italien, Blumen und ein Experiment

Posted in Equipment


Walking on Water: Fun Non-Newtonian Fluid Experiment

11 Jan

[ By Steph in Gadgets & Geekery & Technology. ]

Walking on Water Experiment 1

When you step into a pool of water, you fully expect your foot to fall right down to the bottom, unless you’re under the delusion that you’re the savior of mankind. But if that water has just the right mix of cornstarch in it, you’ll just sort of bounce along the surface. Film company WeAreKix teamed up with Mach by Hong Leon Bank to fill a pool with 8,000 liters of non-Newtonian fluid for an event that makes science fun.

Walking on Water Experiment 2

A slight blue tint to the fluid makes the illusion more complete; it really does look like a pool of cloudy water until you witness the surreal sight of someone trotting along the surface like it’s no big deal. Of course, you have to tread lightly and quickly, or you might actually break through and get sucked into the sticky fluid like the little kid in the video.

Walking on Water Experiment 4

Walking on Water Experiment 3

The event took place in Kuala Lumpur and offered a party-like environment to explore the science of non-Newtownian fluid. Visitors ran, jumped and even rode their bikes across the surface of the pool.

Walking on Water Experiment 6

Walking on Water Experiment 7

Mythbusters carried out a similar experiment, trying out all sorts of possibilities before settling on non-Newtowntian fluid made with 1,000 pounds of cornstarch.

Share on Facebook


[ By Steph in Gadgets & Geekery & Technology. ]

[ WebUrbanist | Archives | Galleries | Privacy | TOS ]


WebUrbanist

 
Comments Off on Walking on Water: Fun Non-Newtonian Fluid Experiment

Posted in Creativity


Energy Ball – After Effects Experiment

24 Jan

An experiment in after effects where I tried to create an energy ball that is motiontracked to the hand palm. Software – After Effects + Boujou (black dots in the hand where used for proper motion tracking..)


experiment for photography 1

18 Nov

photography
Video Rating: 0 / 5

Outdoor photographer Vladimir Donkov shares what he learned during his 2-month trips alone in the wilderness. For more information visit tedxbg.org and http About TEDx, x = independently organized event In the spirit of ideas worth spreading, TEDx is a program of local, self-organized events that bring people together to share a TED-like experience. At a TEDx event, TEDTalks video and live speakers combine to spark deep discussion and connection in a small group. These local, self-organized events are branded TEDx, where x = independently organized TED event. The TED Conference provides general guidance for the TEDx program, but individual TEDx events are self-organized.* (*Subject to certain rules and regulations)
Video Rating: 4 / 5

 
Comments Off on experiment for photography 1

Posted in Photography Videos


3D Analygraph Experiment

04 Aug

After daydreaming for an extended amount of time, I got this idea in my head, about how to rig up two cameras so that I could attenuate the focal depth and coloration of two separate video recordings. This is the result of that daydream.
Video Rating: 5 / 5

 
4 Comments

Posted in 3D Videos


I’ll B Yours 3D Video – 2d to 3d Conversion Experiment Anaglyph

18 Feb

This is an experimental 2d to 3d conversion of I’ll B Yours by The Raw I’s (a music video of mine) from a few years back. The style of the video itself doesn’t really lend itself to this subtle conversion but I thought I’d share it anyway. FREE 3D Glasses,Stereoscopic 3D Birthday Cards, 3D Stock Video and more can be downloaded from enhanced-dimensions.com/wordpress For more info on Enhanced Dimensions: Contact us on 3d@enhanced-dimensions.com +++++++++++++++++++++++++++++++++++ The Stereoscopic 3D Channel on Vimeo vimeo.com/channels/stereoscopic3d The Stereoscopic 3D Channel TESTBED on Vimeo vimeo.com/groups/steroscopic3dchanneltestbed +++++++++++++++++++++++++++++++++++ Built and tested in Adobe After Effects to be viewed with Red Cyan 3D Glasses (Red Blue 3D Glasses). A 3D Stereoscopic Production for Enhanced Dimensions by Andrew Murchie. For details of our FREE 3D Glasses offer please visit our website.

3D stereoscopic anaglyph night time lapse movie showing a complete night at the Very Large Telescope (VLT) Paranal Observatory in Chile. The four 8m telescope and four 1.8m telescope are observing at the same time. Note that the ISS (International Space Station)is corssing the sky during the first seconds of the movie. This movie has to be watched with a red (left)/Cyan (right) pair of glasses for 3D effects. Copyright Stephane Guisard, www.astrosurf.com/sguisard Better version here : www.astrosurf.com/sguisard/Pagim/P41

 
2 Comments

Posted in 3D Videos