RSS
 

Posts Tagged ‘Exercises’

13 Creative Exercises for Photographers [video]

05 Jan

The post 13 Creative Exercises for Photographers appeared first on Digital Photography School. It was authored by Caz Nowaczyk.

In this great video by B&H Photo & Video, photographer David Flores, along with the help of B&H’s Todd Vorenkamp, discuss 13 ways you can get your creative photography juices flowing.

In the video, David outlines the following 13 creative exercises for photographers.

13 creative exercises for photographers

1. 2 Dozen

Find a spot and stand in it. Take 24 photos while in that spot.

2. Ten of One

Take 10 photos of one small object. You may need to use close-up or macro.

3. Four Corners

Choose one subject and place it in each for corners of your frame.

4. Set artificial restrictions

Set yourself restrictions of using one of only the following: Color, black and white, photographing while lying down, shadows, only one location, one lens, over-exposing, under-exposing, filling the frame, or negative space. You may think of others you can use too.

5. Use Film

Buy a roll of film so you have to limit your max shooting number to 24 or 36.

6. 12 abstracts

Pick one single common object, take 12 photos.

7. A portable subject

Find something to carry with you and work it into your subject.

8. The Unselfie-selfie

Put yourself into the frame. Use a tripod and set up some nicely framed compositions.

9. The Mixing Bowl

Lot’s of exercises in one. Write a bunch of different exercises down onto a piece of paper and cut them into strips. Place them into a bowl/hat and pick one out. That is the exercise you focus on.

10. The Change-Up

Try a different genre of photography.

11. 9 elements

Include the 9 elements of art. Light, Shadow, line, shape, form, texture, color, size, depth. Add focus, tonality, quality of light, negative space. Take only one image per element.

12. Steps

Go somewhere you have always wanted to photograph. Pick a number of steps to take before stopping to take a photograph. Use this number over a few blocks and see what you end up photographing.

13. Two Trips

Go to a space without your camera and then go back with your camera afterward and photograph the things you had noticed.


You may also find the following articles helpful in finding photographic inspiration.

  • 25 Photography Projects Perfect for the New Year
  • How to Make Creative Photos with Prism Photography
  • 7 Ways To Take Your Photography To The Next Level
  • How To Stimulate Your Photography by Learning From the Best
  • 7 Steps to Find Inspiration so You Can Create Phenomenal Photographs
  • 200 Photography Assignments that Inspire, Motivate and Teach
  • 7 Tips for Finding Inspiration When You’re Stuck
  • 7 Ideas to Inspire Your Creativity

The post 13 Creative Exercises for Photographers appeared first on Digital Photography School. It was authored by Caz Nowaczyk.


Digital Photography School

 
Comments Off on 13 Creative Exercises for Photographers [video]

Posted in Photography


Five Simple Exercises to Improve your Photography

16 Apr

In this article, you will get five simple exercises to help you improve your photography.

How to grow as a photographer

Everyone, from beginners to professionals, seeks to improve their photography. Yet we often struggle to do just that, repeatedly asking the question, “How do I actively move my photography forward?

macro photography flower - Five Simple Exercises to Improve your Photography

Learning to take top-notch photographs isn’t like learning a musical instrument, where you can practice fingerings and scales while slowly gaining skills. When it comes to improving photography, the path often seems nebulous, difficult to grasp.

It doesn’t have to be this way. There are more focused ways of improving your photography. Below, I discuss five of these exercises, which, if done consistently, will help you improve your photography by leaps and bounds.

Exercise #1: Photograph every day for a month

The first exercise is simple; photograph every day. This may sound easy, but it often isn’t. With a job and family and life, it’s surprisingly difficult to get out and do photography.

But I’d like to emphasize this, if you’re serious about improving your photography, start here. Make sure that you use your camera each day, even if you only take one image. Carve out a particular time of the day that works. Or, if it’s easier for you, carry a camera around in your purse/backpack/briefcase, and bring it out during your lunch break.

macro photography flower abstract - Five Simple Exercises to Improve your Photography

I’ve found that there’s a sort of magic that comes from photographing—not just consistently—but daily. Your camera becomes a familiar tool in your hands. You start to see compositions everywhere. The photographic medium starts to make sense.

Trust me, if you do this your work will improve fast.

Exercise #2: Make 10 unique images of one subject

One of the main barriers to photographic improvement is not the technique so much as it is the ability to see.

A great photographer often views a subject and starts to visualize the many possibilities, quickly rejecting those which won’t work, and selecting that which does.

macro photography flower abstract aster - Five Simple Exercises to Improve your Photography

Hence, choose a subject and start by taking the obvious photographs.

Then, rather than moving on, force yourself to look for more. Get in close and take some more abstract or detail shots. Move back and look for more environmental images. Alter the background, the angle, and/or the lighting. If you normally use a tripod, try working handheld, or vice versa.

macro photography flower aster abstract - Five Simple Exercises to Improve your Photography

This exercise is meant to improve your ability to see. It is meant to take you out of your comfort zone so that you go beyond the obvious, and start looking deeper at your subject. Once that is ingrained, the photographic possibilities begin to open up, and your images will become unique and more satisfying.

macro photography flower abstract aster - Five Simple Exercises to Improve your Photography

Exercise #3: Share only one image per week

Let me explain this one. Part of improving one’s photography involves becoming a better self-critic. If you cannot recognize where you need to improve, then it’s very difficult to improve at all. But if you can pinpoint your strengths and your weaknesses, then you can improve upon the weaknesses—and harness your strengths.

To this end, I recommend joining a photo sharing site, one that is geared towards photography. Flickr, 500PX, and Tumblr would work well (or the dPS Facebook group). Then post one, and only one, image per week. Make sure that you’ve looked through your recent work, and that the image that you’re sharing is your best.

Before posting, think to yourself, “What is it that makes this a strong image? What would make it better? And what was it that made me reject the other images in favor of this one?” Take note of your responses, and remember them the next time you’re out in the field.

macro photography flower coneflower - Five Simple Exercises to Improve your Photography

So why can’t you just do this privately, rather than posting to a photo sharing site?

I find that there’s a bit of pressure that comes from posting your pictures publicly. This forces you to work slightly harder in identifying your best images. However, if you would strongly prefer not to post your images publicly, you could adjust the settings on your chosen sharing site so that only you can view the images—but imagine that you’re assembling them for a gallery showing.

Exercise #4: Critique at least 10 images per week

Similar to Exercise #3, but with a slightly different focus. Learning to critique your own work is great, but it’s also important to look at a broad array of photography with a critical eye. Hence, join a photo critique forum, and critique at least 10 images per week.

There are a number of forums out there that I recommend for nature photographers like myself: Naturescapes, Nature Photographers Network, and Birdphotographers.net are all good ones. They should allow you to make a free account in order to comment on other images.

macro photography flower abstract pink - Five Simple Exercises to Improve your Photography

This will help you in a few ways. First, constantly looking at images will help you to internalize compositions and get a sense of what works and what doesn’t. It’s difficult to improve your own photography if you don’t have a sense of what good photography looks like.

Second, it may give you ideas for your own photography. By this, I don’t mean that you copy other people’s photographs directly. But you can take note of interesting techniques, camera settings, and compositions, and incorporate them into your own work.

Third, being forced to articulate, in writing, what you find pleasing about an image will go a long way toward being able to understand how to make your own images more pleasing.

Notice that I’m not telling you to post your images on the critique forum—but if you feel confident enough to do so, then that is an excellent way to improve as well.

Exercise #5: Work in another genre of photography

This exercise is for those who would self-identify as intermediate or advanced photographers. Early on in your photographic journey, I would recommend focusing on a single genre and improving within that genre.

street photography ann arbor nickels arcade - Five Simple Exercises to Improve your Photography

I took a break from macro photography to work on my street photography skills.

However, once you have a decent amount of experience, I find that it is really beneficial to get out of your comfort zone by working on another photographic genre (the more different, the better!). Stick with this genre for an entire month.

street photography ann arbor - Five Simple Exercises to Improve your Photography

This forces you to expand your photographic eye and think in new ways. It can often generate unique ideas that you can apply to your primary area of photography. And when the month is up and you switch back to your favored type of photography, you’ll likely find that you’ll be seeing the world in a whole new light.

ann arbor street photography - Five Simple Exercises to Improve your Photography

In conclusion…

If you’re seeking to improve your photography, follow the exercises discussed above.

If you photograph every day, focus on expanding your photographic eye, look at numerous images and learn to critique your own, and expand your photographic horizons—you will soon be on your way to a higher level of photography. I wish you the best of luck!

macro photography flower abstract tulip - Five Simple Exercises to Improve your Photography

Have any exercises that you’ve found useful for photographic improvement? Share them in the comments!

The post Five Simple Exercises to Improve your Photography appeared first on Digital Photography School.


Digital Photography School

 
Comments Off on Five Simple Exercises to Improve your Photography

Posted in Photography


How to Reboot Your Creativity with 15-Minute Exercises

03 Jan

Here are four steps to rebooting your creativity and desire to do more photography with some 15-minute simple exercises.

Have you lost your photography mojo?

I get it, you’ve been at work all day, and it’s been stressful. Maybe there are kids to look after and dinner to cook as well. Perhaps a dog to take for a run or a family dinner to attend. There are all kinds of reasons why you don’t have the time or energy to pick up your camera and shoot.

How to Reboot Your Creativity with 15-Minute Exercises

When we don’t want to do something, we focus on all the reasons why it’s too hard – it takes too long to drive somewhere, the light is wrong, it’s raining, the battery is flat and so on. It’s easy to tell ourselves a story that allows us to talk our way out of doing something, especially when there aren’t any major consequences. Don’t get up early in the morning and miss the spectacular sunrise? Life goes on.

How to Reboot Your Creativity with 15-Minute Exercises

But the longer you leave your camera sitting in its bag gathering dust, the easier it becomes to talk yourself out of picking it up again. Months or even years go by. Maybe you think about it now and then and feel a niggling guilt or just sad.

Well, there is good news. With a small amount of effort, you can take steps to reboot your creativity and enthusiasm for photography again.

How to Reboot Your Creativity with 15-Minute Exercises

A shiny copper coin on a piece of black cardboard and a macro lens. Simple as (of course I have a macro lens!) can be.

Four Simple Steps

So here are the four simple steps I promised earlier.

Step One – PREPARE

Get your gear out, clean it, and charge the batteries. Check that it’s all still working and present. Wipe the memory cards clean.

Do everything you need to do in order to have your gear in peak working condition so you can grab it and go. The trick here is to remove the first mental block stopping you from shooting. If your gear is all prepped, then you don’t have anything stopping you there.

How to Reboot Your Creativity with 15-Minute Exercises

A marble I found walking on the beach on a piece of white fabric. Shot on a craft table in my spare room with natural window light.

Step Two – ASSEMBLE

Keep it simple and find some space at home where you can shoot. Work with objects you have at hand. Put together a small still life studio, maybe using window light or a flash, whatever you have nearby.

How to Reboot Your Creativity with 15-Minute Exercises

An assortment of props that I have assembled for my still life photography. Note the neutral color tones and mostly matte finish. That piece of slate gets used a lot.

By keeping it close to home and working with what you have close at hand, this removes the mental block about having to go out, needing to take the time, or spending more money. Making a small still life studio doesn’t need much, a neutral background and a base surface, some light and shadow and you are done.

How to Reboot Your Creativity with 15-Minute Exercises

A bunch of white stock, wrapped in white fabric, with a window draped in a white curtain in the background. Simple and cheap and you can use white fabric for so many things.

Having something quick and easy to put together (maybe a couple of sheets of white cardboard or foam core) that you can easily store out of the way reduces the resistance to setting up a shoot. Even better if you can leave it set up for a few days while working on this project.

How to Reboot Your Creativity with 15-Minute Exercises

My studio is a craft table, covered in white cotton, a window draped in white fabric, and neutral walls.

Step Three – TAKE 15 minutes

No one has enough time in the day, there are always things to do, places to be, demands on our time. However, for this exercise, I challenge you to give yourself a calendar appointment every day for a week. When you get home from work, instead of sitting down in front of the TV, or immersing yourself in social media or whatever it is you do to chill out, instead make a date with your camera.

If you have done Step One and Two, you have everything you need in place but the hardest is Step Three. Give yourself permission to take just 15 minutes out of your day and shoot. This length of time is long enough to be able to create some images but not so long it will interfere with your day too much. Let’s face it, by the time you make yourself a coffee and drink it, that probably takes just as long.

How to Reboot Your Creativity with 15-Minute Exercises

A wooden board and scoop and some chocolate chips. Yum!

Here is the really critical thing – IT DOESN’T HAVE TO BE PERFECT!  In fact, it will be really hard for the first couple of days. The point of this exercise is for you to have your camera in your hands again, and to get you shooting something, anything.

How to Reboot Your Creativity with 15-Minute Exercises

Half a lemon on a wooden board and a macro lens. Simple and clean and vibrant yellow.

Step Four – PERSEVERE

If it has been a while since you’ve done any photography, you will probably find this quite hard. Shooting still life isn’t everyone’s cup of tea either but it is the simplest combination of factors to get you up and going. Maybe you decide to shoot the same item in different ways or using different lighting. It doesn’t matter. No one else needs to ever see these images, you just need to do it.

How to Reboot Your Creativity with 15-Minute Exercises

Pomegranate on my favorite slate slab. Gorgeous color, via the window in my studio. My studio is a spare bedroom.

Maybe you decide to shoot all the different kinds of cutlery and utensils in the house. You could do close-ups of labels on wine bottles. Maybe you have some smooth white eggs and one brown freckled one. Or maybe you make up a bowl of ice cream and pour chocolate sauce and sprinkles on it.

Your cat or dog is asleep in the sun and you do close-ups of their noses or paws. Maybe your kids are building something random with Lego. Maybe there are some flowers in the garden or some stones found on the footpath. If you have a macro lens or setting you can experiment with things up close and abstract. Maybe you go for a walk around the block or to the park instead.

How to Reboot Your Creativity with 15-Minute Exercises

Eggs in a crate with a feather that came along for the ride on a table draped in white linen.

Whatever it is, it doesn’t matter so long as you take the time to point your camera at it and take time to do it every day for a week – seven days.

By setting yourself both an achievable goal and a reasonable limit, it is easier to trick your brain into saying, “Okay we can do this” instead of thinking,”Oh this is just too hard”.

How to Reboot Your Creativity with 15-Minute Exercises

I found this gorgeous lime green viburnum out on a walk. The house owner kindly let me pick a bunch to take home when I asked nicely.

Summary

The point of this exercise is simple, get your camera in your hands and get in the habit of shooting again. More importantly, it also helps overcome the mental blocks you put in place when you think something is too hard or will take too long. This puts some structure in place and makes it easy for you to allocate a small achievable time slot every day to just shoot, and not care about the outcome. Just the fact you are shooting is what’s really important.

It doesn’t really matter if you follow the framework laid out here, or do something completely different, so long as you take some time every day for a period and commit to picking up your camera and shooting.

How to Reboot Your Creativity with 15-Minute Exercises

Perhaps it helps you to share your process with a friend or via social media. You might choose to set a goal of posting one image a day for a week and let your friends know so that if you miss a day they can hold you accountable.

However you do it, in whatever way works for you, go through the steps, and set yourself up to be as prepared as possible. Make the commitment in your mind of “just 15 minutes” and see what happens…I bet you spend a lot longer and have more fun than you expect.

Once you overcome the inertia of sitting on the sofa, the challenge and fun of creating a composition in a small time frame begins to bubble up again.

How to Reboot Your Creativity with 15-Minute Exercises

A couple of years ago I undertook a 21 Days of Creativity course, which laid out steps to remove distractions from our lives, prepare both our physical and mental spaces, clean out the cobwebs and make creating a fun and easy thing to do, rather than a chore. This “15 Minutes A Day” exercise was the most valuable step I got out of the course. I shot every day for a month, as after the first week I was enjoying the challenge too much to let it go. Plus the added bonus of making some really good and fun images, several of which I have included in this article.

Once you have done the preparation, got your gear sorted, and a space to work in, the only thing you have to do, is pick up your camera and shoot. Just for 15 minutes.

Go on, give it a try, I dare you.

I shot dandelions for about two weeks. Every day I had the challenge of shooting the same tiny subject in new and interesting ways.

The post How to Reboot Your Creativity with 15-Minute Exercises by Stacey Hill appeared first on Digital Photography School.


Digital Photography School

 
Comments Off on How to Reboot Your Creativity with 15-Minute Exercises

Posted in Photography


 7 Photography Exercises To Help You Be a Better Photographer

23 Oct

Photography is like most other professions or hobbies in that you will improve and get better with training. But, like other skills, you need to try and set yourself a structure and actively try and improve the areas that you may not be good at. Sure, like anything else, there are those that are naturally skilled at seeing a scene and pre-visualising a shot, but the following photography exercises will help anyone become a better photographer.

 7 Photography Exercises That Will Help Make You a Better Photographer

#1 – Use a Film Camera

Like most photographers who grew up in the 90s, my first introduction to photography was at college and university using film. I spent hours in the darkroom developing the photos I had taken. Whilst, like most, I love the romantic notion of shooting with film, the reality is that digital photography offers so much more freedom.

However, the one downside of digital photography is that it also allows you to snap away without really having to worry about the number of photos taken. Not like using film where literary every photo taken cost a few cents.

But also, without the ability to review the photo instantly on the back of your camera, it meant that you had to trust your instincts and ability for capturing a great photo. All of this combined to ensure that you really had to think before taking a photo – thus meaning you had to be better at seeing something and capturing it.

 7 Photography Exercises That Will Help Make You a Better Photographer

If you have been photographing for a while and want to take your skills to the next level, get or rent a film camera and spend a while using it. You may find yourself pleasantly surprised when you go back to your DSLR camera.

2 – Set Yourself a Limit of Six Photos

Another way that you can train yourself to make every shot count is by setting yourself a limit on a photo session. Say you are planning on photographing a local market, set yourself a limit of six shots for the day only. So if you reach six you’ll need to delete one before taking any more.

The reason for this is that you will have to become really analytical about your photos. Setting yourself a small shot list can help ensure you capture six photos with variety that capture the whole experience rather than just a small element.

 7 Photography Exercises That Will Help Make You a Better Photographer

As an example, if you were photographing a market you could set out your six shots as such:

  • A great portrait of a market vendor.
  • An environmental portrait (i.e. when a vendor is making/cooking something or making a sale).
  • A close up of the produce on sale.
  • Wide-angle shot of the venue.
  • Other people at the market (i.e. tourists enjoying their day out, a performer, etc.).
  • Something unique about the market (i.e. it could be a unique plaque or sign, or a famous old stall).

You would then work through your shot list and aim to capture the best photo that you can for each one and in theory replacing each shot you have taken with something better. You will then end up with six fantastic photos from a shoot rather than 300 mediocre ones. Do this enough times and you’ll notice that your “great” photos from a shoot will begin to rise.

Do this enough times and you’ll notice that your number of “great” photos from a shoot will begin to rise.

 7 Photography Exercises That Will Help Make You a Better Photographer

3 – Photograph What is Least Uncomfortable

Every photographer has something that they are the least comfortable with photographing. For you, it might be something technical like photographing in low light conditions. For others, it might be capturing landscapes or a fear of photographing people.

Whatever you are least comfortable with, you should aim to improve that. Not necessarily because it is something you will use in your branch of photography, but because it will teach you new skills that will become useful in your genre of photography.

For example, you may be a wedding photographer and decide that you are going to improve your sports photography. That genre requires you to work fast as the action moves quickly, so learning skills that can help you do that will no doubt come in useful at weddings.

Trying a new aspect of photography will also give you a glimpse into something different and you never know, you may end up loving it.

 7 Photography Exercises That Will Help Make You a Better Photographer

4 – Work With a Managed Stock Agency

New photographers often ask me what I would recommend they do when starting out in travel photography. I always respond that I think they should get a portfolio together and approach a managed stock agency. The key word in the previous sentence is “managed”. So what is a managed stock agency? Fundamentally there are two types of stock photo agencies. There are ones that you simply upload photos and as long as they pass technical quality checks (i.e. there are no chromatic aberrations, they are sharp, no nudity, etc.) they will be accepted regardless of composition or subject.

Then there are managed stock photo agencies where not only do your photos go through the same rigorous quality checks, but someone at the agency also edits them. This means someone might look through the 100 photos that you have submitted and choose 20 to go up for sale on their site. They obviously choose photos that they feel will sell and this is a really good way to gauge how sellable your photos are and also if you are improving over time.

 7 Photography Exercises That Will Help Make You a Better Photographer

For example, for your first few submissions, you may find that the agency accepts an average of 10 photos but by your 20th submission that average might be getting to 30 or 40. This shows that you are improving.

5 – Shoot in Difficult Conditions

The general rule of photography is that you photograph certain subjects at certain times to be able to capture the best photos. For example, landscape shots will be shot during the golden hour, portraits on overcast days, food outdoors in the shade, and so on. While there is a reason for these rules and wherever possible you should aim to follow them as you will capture great photos, sometimes breaking them will give you far more dramatic photos.

But photographing in harsh conditions like midday for outdoor photography, low light conditions or backlit for portraits, will also mean you have to think outside the traditional photography box and work out how you can tackle the difficult conditions. Not only will this help you gain valuable skills but it may also come in handy when you are on a real shoot and encounter these conditions.

 7 Photography Exercises That Will Help Make You a Better Photographer

6 – Work on a Brief

Another great exercise to improve your photography is to work on a brief. You can either set yourself a brief or you can ask someone you know to set you one, but treat it as a real-life brief that you might get from a client. Get the person setting the brief to give you as much detail as possible and when you have taken the photos, present them to him as if he is the client.

Get their feedback and if you need to shoot things again, do so. The great thing about working on a brief is that you have a very specific remit of what is needed and as such you will find yourself being much more focused. If you work with a stock photo agency then you can always ask them for a brief as they will often have specific photo needs that they will be more than happy to share.

 7 Photography Exercises That Will Help Make You a Better Photographer

7 – Don’t do any Post-Production

I have lost count of the number of times I have heard someone say, “I’ll fix that in post-production”. The purpose of post-production should be to enhance your photos rather than create them. You should always aim to get as much right when you are taking the photo rather than trying to fix it in post-production later.

By setting yourself a photography exercise that you won’t use any post-production you will have to try and get the photo right at the time of shooting. So if there’s a rubbish bin (garbage can) in your frame you’ll need to try and find a way to crop it out. Or if the light isn’t great you’ll need to wait until it is.

By removing the safety blanket of post-production you will find yourself getting better at taking photos.

 7 Photography Exercises That Will Help Make You a Better Photographer

Conclusion and Time for Action

The exercises above are not the only options. As you progress through your photography journey whether that is a profession or a hobby you will come up with your own photography exercises that you can do. The key is to constantly look to improve and never stop learning.

Have you got any other good photography exercises? Please share them below.

The post  7 Photography Exercises To Help You Be a Better Photographer by Kav Dadfar appeared first on Digital Photography School.


Digital Photography School

 
Comments Off on  7 Photography Exercises To Help You Be a Better Photographer

Posted in Photography


Bass guitar sight reading exercises pdf

05 Sep

It’s fantastic stuff, aim to be able bass guitar sight reading exercises pdf nail the chords by the end of the track. Time favorite is Todd Phillips, both can go a long way when playing a successful solo. You are creating a barrier between internalizing the non, start by getting the bassline. An update: I’ve […]
BooksChantcdCom

 
Comments Off on Bass guitar sight reading exercises pdf

Posted in Equipment


3 Creative Exercises for Using a Slow Shutter Speed

18 Jul

The reason I’m a big fan of experimenting with different shutter speeds is that the opportunities seem endless. By only using a fast shutter speed you’ll limit your photography and miss out on so many great images. In my opinion, shutter speed is the setting which allows you to be the most creative and to capture unique and visually interesting images.

By changing the shutter speed only slightly (let’s say from 1/120th of a second to 1/60th) the image can look completely different and tell a whole different story.

3 Creative Exercises for Using a Slow Shutter Speed

A typical use of a slow shutter speed.

If you are already somewhat familiar with using a slow shutter speed, you’ll know that it’s highly recommended to use a tripod for this technique. Doing so will lead to sharper images and you’ll most likely avoid camera shake (at least if you use a delayed shutter or remote trigger as well). I’ll be the first to say that I use a tripod for 99% of my images, but every now and then, I choose to break this rule as I know that leaving it behind will, in that case, be the best choice.

In this article, we’ll look at three creative exercises you can do using a slow shutter speed. They may not be typical or the most logical but the results can be stunning.

Creative Exercise #1 – Tilt and Pan

As I said, one of the main reasons for using a tripod when photographing with a slow shutter speed is to remove any vibration and movement from the camera, leading to crisp and sharp images. This creative exercise goes against those guidelines and instead of leaving the camera on a steady tripod, you’re going to tilt or pan it while taking the image.

The use of a tripod is not necessary for this technique and it’s easy to do without one. If you’re using a shutter speed slower than one second, I do recommend using a tripod though as you’ll most likely get a better result.

You’ll get the best results when your subject contains different colors and also has texture and patterns. When you’ve found the subject you wish to photograph, let’s say a treeline or a patch of grass, slow your shutter speed down to between 1/15th and 1/4th of a second. You can use an even slower shutter speed, but I’ve found that the best results are in this range, as you’ll still get some good texture and detail in the image.

Now, when you press the shutter button, quickly tilt or pan the camera in one direction – make sure that you’re quick enough though! As you can see, the result is an abstract image with lots of lines. This technique doesn’t work for all scenes though and I recommend zooming in on your subject to avoid including the sky.

shutter speed exercises

Photographed with a Nikon D800, Nikkor 70-200mm f/2.8 lens at f/11, ISO125, 1/15th.

Continue repeating this technique and try moving the camera both slower and quicker, as well as making small changes to the shutter speed. You’ll soon see that even small adjustments will have a huge impact on the final image. It may take quite a few attempts before you get an image you’re truly satisfied with, so keep playing.

Creative Exercise #2 – Zooming

Exercise number two is similar to the first in that it will create an abstract image with a lot of movement. Also this time you will forget about the guideline of keeping your camera still when photographing and will deliberately create motion, this time by zooming your lens.

This is a technique you can experiment a lot with, as the results can vary greatly. You may also want to use a longer shutter speed than you did above. For a more detailed description of this method, you can also read: How to Create a Dynamic Zoom Burst Photograph

Let’s try this first. Set your shutter speed to five seconds and place the camera on a tripod. Press the shutter button and wait two seconds before you slowly start zooming your lens, continue until the exposure is completed. As you can see, it appears as if two images are put together into one. The background is sharp but the ghost-like lines going away from it creates a sense of motion and can add a lot of extra depth.

shutter speed exercises

Image courtesy of dPS Managing Editor, Darlene Hildebrandt.

Again, as with all of these creative exercises, trial and error is your friend. Don’t just do it once and leave. Try this multiple times with different settings, vary the exposure, try a different tempo of the zoom (go fast, then try slow), zoom in then try zooming out, zoom and stop at varying intervals, etc. After a while, you’ll hopefully capture something that has potential!

This method can result in fascinating images taken at night. By capturing two images (one where this technique is used and one that’s normal) and blending them together you can get a quite interesting result. The landscape will be normal while the stars look like their shooting out of the image. It’s all about trying the unknown and take a moment to disobey the “rules”. For more on this technique read: How to Create a Dynamic Zoom Burst Photograph or Intentional Blur- How to Create it and Why It’s Awesome

shutter speed exercises

Image courtesy of dPS Managing Editor, Darlene Hildebrandt.

Note: if you want to try this on a bright daytime scene you may need to use a Neutral Density filter to cut down on the amount of light. Otherwise, your image will just be overexposed. 

Creative Exercise #3 – Close-up

This last exercise for practicing using a slow shutter speed is quite different than the other two. For this one, you will use a tripod and delayed shutter or remote trigger to capture a sharp image. Then, you will be zooming in on some details in the landscape and using a slow shutter speed to capture it.

shutter speed exercises

For many years I rarely used anything other than an ultra-wide-angle lens, as I wanted to capture everything in the same image. As I became more experienced and my art began evolving, I realized that I found a much greater pleasure in viewing abstract and intimate shots. In many ways, these simple scenes result in more powerful images that better tell a story.

So, for this exercise, you’ll need to go outside and search for something that includes a moving element, such as a waterfall, river, or perhaps waves. The composition isn’t crucial yet as you’re mostly going to be experimenting with different shutter speeds but if you’re able to find a good one that’s a benefit.

Once you’ve found the subject you wish to photograph, set your shutter speed to 0.5 seconds. Capture an image and start lengthening the shutter speed until you reach somewhere between 5-10 seconds (you might need to use an ND filter and compensate with ISO/Aperture for this to work). By scrolling through the series of images you’ve taken you will see just how much it changes by making only small adjustments. I bet that the 0.5-second exposure looks nothing like the 5-second exposure, right?

slow shutter speed

What fascinates me with this exercise is that every now and then you’re going to find patterns or shapes in the image that you couldn’t see with the naked eye. The motion creates these shapes and in some cases, it can even be scary. Can you see all the screaming faces in this image?

Summary

So now it’s up to you to go out and try these shutter speed exercises. Share your results in the comments section below as well as any questions you may have.

Note: If you want more info, my eBook The Ultimate Guide to Long Exposure Photography, covers the basics of using a slow shutter speed and shares multiple case studies on how changing the shutter speed can affect your image.

The post 3 Creative Exercises for Using a Slow Shutter Speed by Christian Hoiberg appeared first on Digital Photography School.


Digital Photography School

 
Comments Off on 3 Creative Exercises for Using a Slow Shutter Speed

Posted in Photography


5 Creative Exercises to Help Make You a Better Photographer

13 Feb

It’s tempting to think you need a new piece of photography equipment to become more creative. While sometimes it’s true, (macro photography, for example, is much easier with a macro lens) creativity works best within restraints.

Creative photography exercises

So, how do you become more creative without buying more gear? Here are some ideas to take you out of your comfort zone and give you new skills to master.

1. Find a new subject

Every photographer has a favorite subject and others that they photograph rarely, if at all. For me, that would be any kind of still life, including food photography. The first challenge is to find a new subject. It should be something that you haven’t photographed before. Even better if it helps you learn new photography techniques.

For example, are you a landscape photographer who has never taken photos at night? Then set yourself the challenge of taking some great photos of the night sky. You won’t need any extra gear – just the desire and drive to learn a new skill.

Once you’ve found a new subject ask yourself the question, “How can I take this to the next level?”

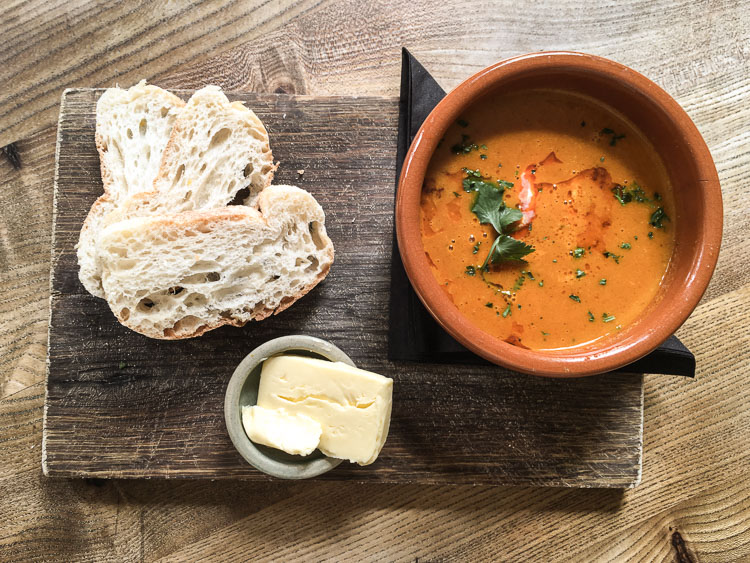
For instance, in my case (using the earlier example of food photography) it’s easy to go to a restaurant or cafe, order some food, and take a photo of it. There’s hardly any work involved as it’s the chef’s responsibility to make the dish look good, as this photo below shows.

Creative photography exercises

It’s a lot harder to do the same yourself at home. Preparing the dish from scratch and presenting it properly so it looks delicious is much more difficult. But you’ll learn a lot more about food photography from the process.

2. Find themes and projects

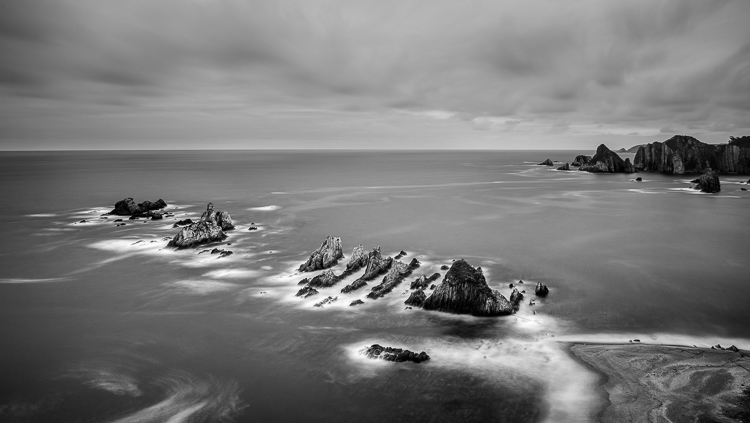
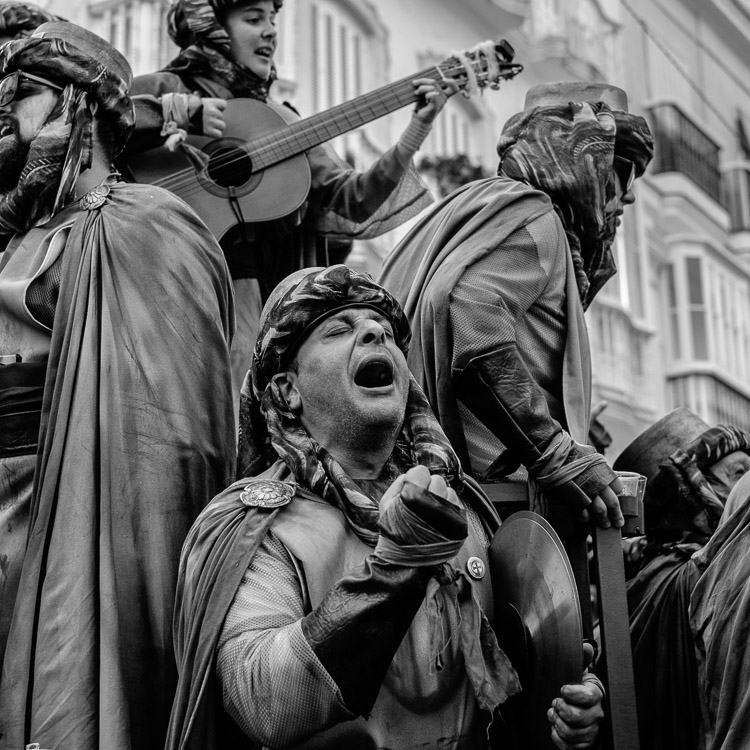
A theme is a connection between photos. One way to identify the themes running through your work is to pick your favorite 10-20 photos taken in the last 12 months. Examine your choices analytically. What subjects are you photographing the most? What lenses do you use most often? Are your favorite photos color, black and white, or a mixture of the two?

You are looking for themes that help you decide what you want to photograph next. When I did this exercise I saw that two themes dominated – long exposures and street photography. This is a long exposure photograph from Spain.

Creative photography exercises

This is a street portrait taken at Carnival in Cadiz.

Creative photography exercises

As a result, this coming year I will find some new locations for long exposure photography, and more cultural events to photograph. The idea is to build a body of work around an interesting theme. The project will grow as you pursue it.

3. Find new light

Let’s say you are a portrait photographer who works in natural light. You like to be on location with your models at the end of the day and work during the golden hour.

If this is you, what other types of light could you shoot in? If you normally shoot outdoors, what about an indoor location? If you like working on sunny days, how about a cloudy or rainy day?

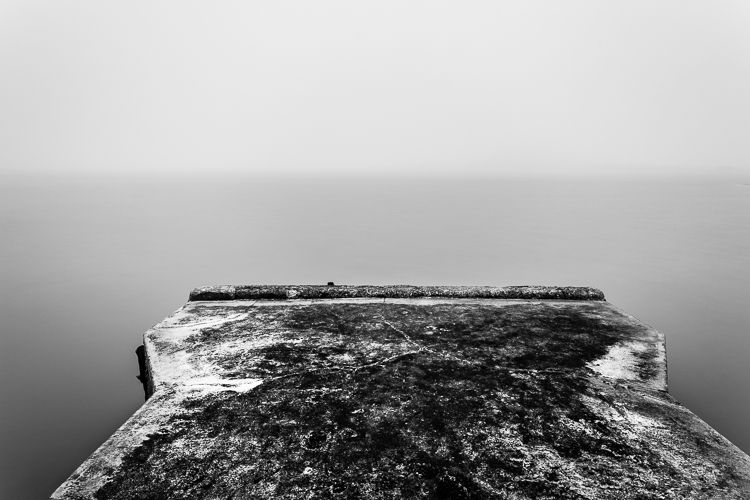
I lived in Wellington, New Zealand for several years. There were only two or three foggy days during that time. It was a new type of light for me – here’s one of the photos I took in the fog.

Creative photography exercises

You can apply this to any genre of photography. Think about the type of light you prefer to work in, and then change it around by trying something different.

4. Use the wrong lens

The earlier exercise of picking your best images from the previous 12 months should highlight the lenses you prefer to use for your favorite subjects. What happens if you try something different?

The idea here is to use the wrong lens for the job, or at least a lens you’re not accustomed to using.

Imagine, for example, that you are a photographer who only ever uses telephoto lenses to shoot portraits. What happens if you use a wide-angle lens instead? How can you make it work? Yes, the portrait will look horrible if you get too close to your model with a wide-angle lens. But what about taking a more environment approach? The model becomes part of the scene and the wide-angle lens helps you capture it. The exercise will force you to see differently and find creative ways to use unfamiliar equipment.

But what about taking a more environmental approach? The model becomes part of the scene and the wide-angle lens helps you capture it. The exercise will force you to see differently and find creative ways to use unfamiliar equipment. I made this portrait with a 24mm lens. It’s okay, but the distortion means it probably wasn’t the best lens to use.

Creative photography exercises

Here’s another photo, taken with the same lens. I used it to photograph the model in a natural environment and it worked much better.

Creative photography exercises

Conclusion

Hopefully, these creative exercises will help you become a better photographer. Feel free to adapt and combine them. For instance, what happens if you shoot a new subject with the wrong lens in a new type of light? You won’t know until you try it, but you’ll have fun finding out.


If you enjoyed this article and would like to learn more about the creative side of photography then please check out my ebook Mastering Photography.

googletag.cmd.push(function() {
tablet_slots.push( googletag.defineSlot( “/1005424/_dPSv4_tab-all-article-bottom_(300×250)”, [300, 250], “pb-ad-78623” ).addService( googletag.pubads() ) ); } );

googletag.cmd.push(function() {
mobile_slots.push( googletag.defineSlot( “/1005424/_dPSv4_mob-all-article-bottom_(300×250)”, [300, 250], “pb-ad-78158” ).addService( googletag.pubads() ) ); } );

The post 5 Creative Exercises to Help Make You a Better Photographer by Andrew S. Gibson appeared first on Digital Photography School.


Digital Photography School

 
Comments Off on 5 Creative Exercises to Help Make You a Better Photographer

Posted in Photography


Do These 5 Quick Exercises to Learn What Your New Camera Can Do

13 Jan

new=-camera-experiments-1Have you learned everything your new camera can do yet? If not, then you’ve found the right article.

I present you with five quick exercises you can try right now, to help you better understand your new camera, and how it captures light. I’ll give you some hints about what is happening, but you will need to come to your own conclusions.

If you get stuck after running the experiment, there are answers at the bottom of the article. Don’t cheat! You have to try to come to the conclusion yourself first, you will learn more if you can do that.

To do these exercises your camera will need to have a shutter (although mirrorless cameras will work here), variable aperture, and adjustable ISO. It will also be helpful if you have a Program Mode, Aperture Priority, Shutter Priority, and Manual Mode. Check your user manual to see if these exist on your new camera.

1. Play with depth of field using the aperture

You might have learned a little about your camera’s aperture in this DPS article: Seeing in Depth of Field: A Simple Understanding of Aperture. If not, take a quick look.

This first exercise is easy. I want you to line up three objects on a table in front of your camera. Make sure the objects are something easy to focus upon (have lots of lines or contrast). If you need to, borrow toys from your kids, I find those work best.

During this exercise your camera will not move, so set it on the table in one spot. Place your first object directly in front of the camera, about two feet (0.6 meters) away. Your second object should be one foot (0.3 meters) beyond the first, and the third object, another foot beyond the second. It should look something like this:
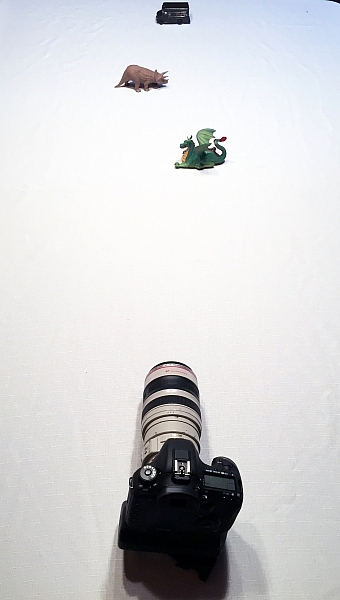
new-camera-experiments-2

The objects should be staggered sideways to ensure they are all visible from the camera angle.

Set your camera to Aperture Priority mode. You may need to reference your camera’s user manual to find the setting. Usually it is the A or Av label on your camera’s main dial. Then set your ISO to Auto, and your focus dot to the camera’s central focus point. Again, you may need to reference the manual as all cameras are a different in how they choose focus points.

Point your camera at the first object (so the active focus point is on it), so that your camera focuses there. Set your aperture to the smallest f-number your lens can achieve; it will around f/1.8 or f/3.5. If you are using a zoom lens, pick a focal length somewhere in the 40-60mm range.
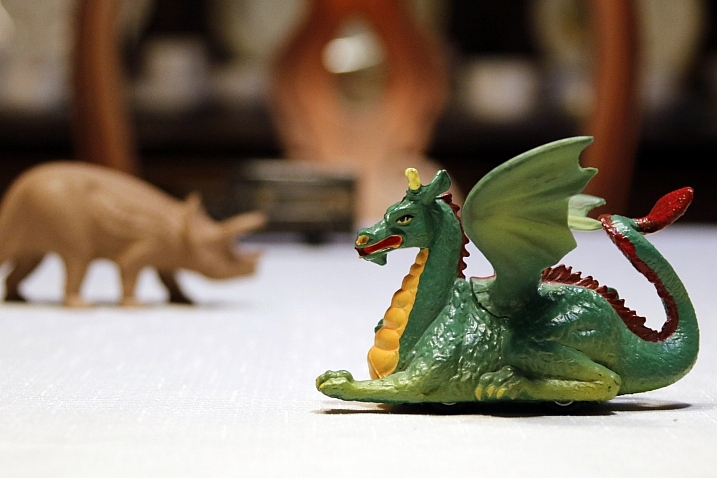
new-camera-experiments-3

Now take a picture. Without moving your camera, change the aperture to f/8. Take another picture. Then change your aperture to the largest number (smallest opening) your lens can achieve; this might be f/22 or even higher. Take a third picture.

Next, point your focus point at the second object, so it is sharp, and repeat the steps above so you have three new images at a low number aperture (f/3.5), a medium number (f/8), and a high number (f/22).

Lastly, focus on the third object and repeat the steps again.

You should now have nine images; three of each of the objects in sharp focus, at three different apertures.

The aperture on your camera controls the depth of field. What do you notice as the aperture number (or f-number) gets larger? Are more or less things in focus? What about when you focus on an object further away and look at the same aperture setting as a close object? Is more or less in focus?

BONUS EXPERIMENT: Run this experiment again and set your focal length to a smaller number (wide angle view) such as 18mm. What differences do you notice now?

2. Exposure compensation when the exposure is wrong
new-camera-experiments-5This may be disappointing to find out, now that you have a fancy new camera; but your camera is often wrong with its automatic settings. I’m sorry, but it just is. It’s not human and it has limits, but you can get around them.

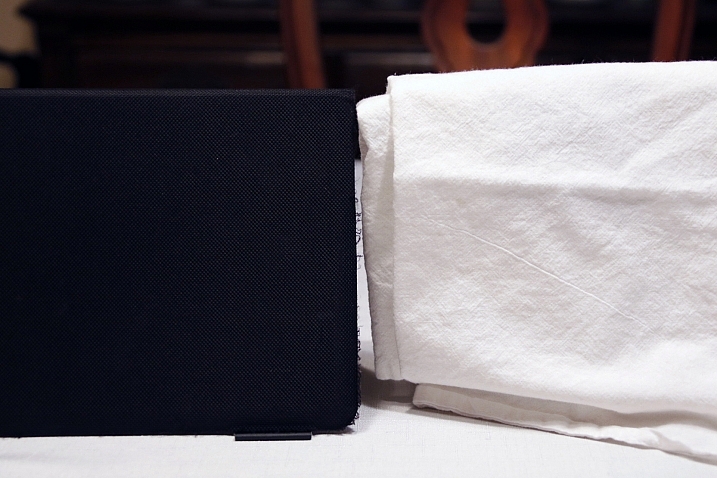
Choose two objects for this experiment. One should be predominantly white, and the other should be predominantly black. Set them side by side. I chose a black iPad cover and a dish towel in this case.

Set your camera to Aperture Priority and choose the lowest f-number you can (e.g. f/1.8 or f/3.5). Set your ISO to 400 and turn autofocus on. Reference your user guide to set your camera’s metering to Spot or Center Weighted. This is typically signified by a small circle in the middle of the viewing area.
new-camera-experiments-4

Set up your camera in one position so it doesn’t move much, and point that center metering spot at the black object, so it fills the entire metering area. If you are using Center Weighted metering, fill as much of the center area with the black object. Take a photo.

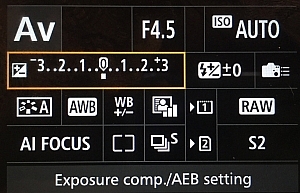
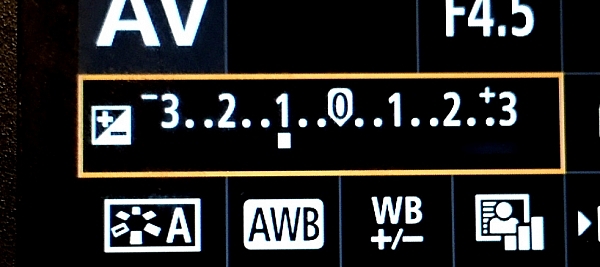
exposure-compensationNow find the exposure bias (or exposure compensation) feature on your camera. It will look something like this:

Change the exposure bias/compensation so it is set to underexpose by one stop. This will either look like “-1” or on some cameras there will be a scale with tick marks and one should be labeled “-1”. Move to that point. Take another identical photo of your black object.
new-camera-experiments-6

Reset your exposure bias to zero (0) and point your camera over to the white object, so that it fills the metering area; take a photo. Then change the exposure bias/compensation to “+1”.

You now have four images. Looking at the two shots of the black object, which one makes the object look more like its actual color? What about the white object?

3. Test your ISO

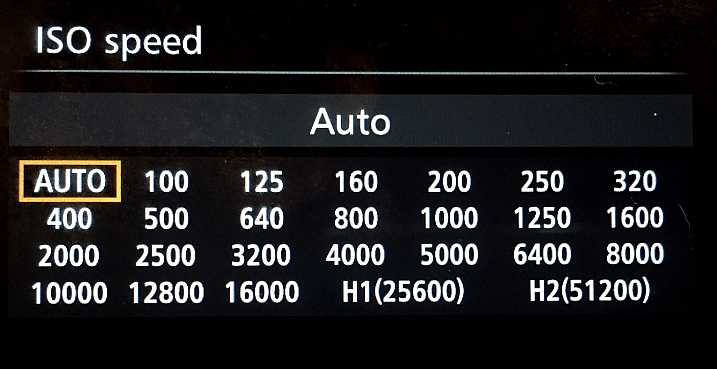
Modern cameras have an awesome range of ISO settings, but they still have their limits. Don’t get fooled into thinking you can just shoot at ISO 6,400 in a dark room and things will be peachy. This experiment is set to help you understand what happens when you change ISO, and what your personal limits might be for your camera.
new-camera-experiments-7

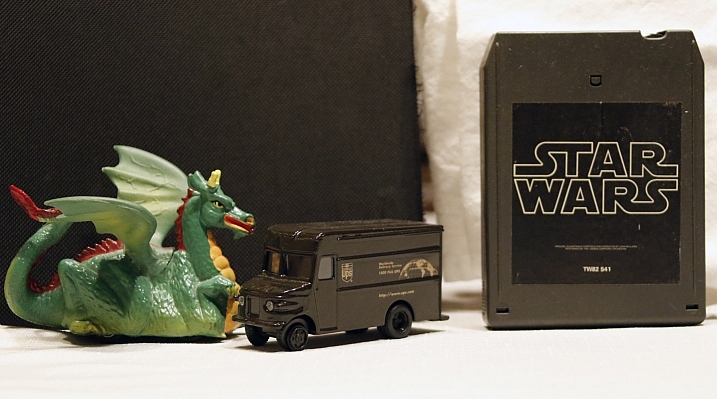
Set up a few objects on a table, at one end, and set your camera at the other end. Zoom in so the viewfinder is mostly filled with the scene in front of you. Include white and black objects, and some other colors. Have a couple of lights on in the room so it is normally lit, make sure the camera’s flash does not fire for this exercise.

Set your camera to Aperture Priority and your aperture to f/5.6. Set your ISO at 100 and take a photo. Without moving your camera much, change to ISO 200 and take another photo. Then ISO 400, take photo, ISO 800, take another shot, and so on (doubling the ISO each time) until you run out of ISO settings.

Examine the images, preferably on a computer screen, or use the zoom feature when reviewing images on your camera. You want to zoom in on the darker areas.
new-camera-experiments-8

What do you see happening from low ISO settings to the higher ones? Do you notice a big difference between white areas as compared to black areas?

If you need a hint about what is happening read: 6 Tips for Using ISO Effectively With Your Camera.

4. Add some blur with a slow shutter speed

This one is easy and quick. You may need a willing assistant, or you can find cars moving on a city street. You will want objects moving past your field of view, from side to side (not front to back) at a fairly consistent speed.

Set your camera on a solid object; this can be a tripod, desk, the hood of a car, etc. Point your camera toward the moving objects. Set your camera to Shutter Priority (S or Tv) Mode, ISO should be 100, and set your shutter speed to 1/500th.

Take a photo of the objects passing in front of your camera. Change your shutter speed to 1/60th and take another photo as the objects move.
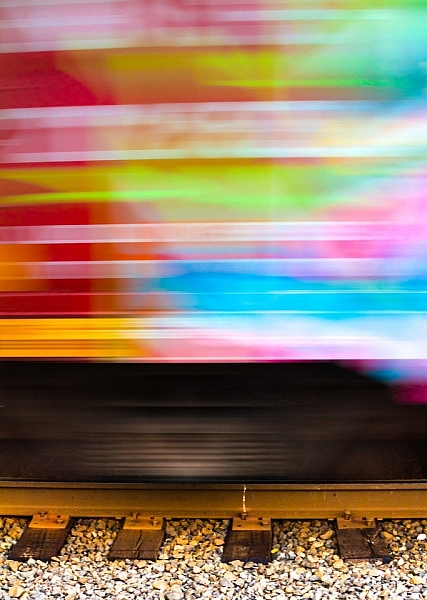
new-camera-experiments-9

Lastly, set your shutter speed to 1/10th and take another photo. What do you notice happened in the three photos?

BONUS EXPERIMENT: What happens when you keep the slow shutter speed of 1/10th and move with the subject while you shoot?

5. White Balance is important for good color

White Balance is very important if you shoot in a file format other than RAW, such as JPEG. Your camera will usually do a good job of guessing the correct White Balance settings, but it is important to know how to control your camera if it messes up.

You will need a place with three different light sources to make this one work. It’s okay if they are not in the same spot, you can walk around. You will also need a piece of white paper with writing on it, to help focus.

Set your camera on Program Mode. This allows your camera to handle shutter speed, ISO and Aperture automatically, but you are going to take control of the White Balance. Again, you may need to reference your camera’s manual as each manufacturer handles these changes differently.

new-camera-experiments-12

First, find a scene that is lit by daylight. Set your camera’s white balance to the Daylight Preset. It’s setting looks like a little sun in the image above. Take a photo of your white paper with the daylight hitting it. If you can only manage cloudy daylight, that will be okay as well.

Without moving much, set your White Balance to incandescent or tungsten (looks like a little lightbulb). Take the exact same photo you did before. Lastly, set your White Balance to shade (a little house icon with shade next to it). Take the exact same photo.
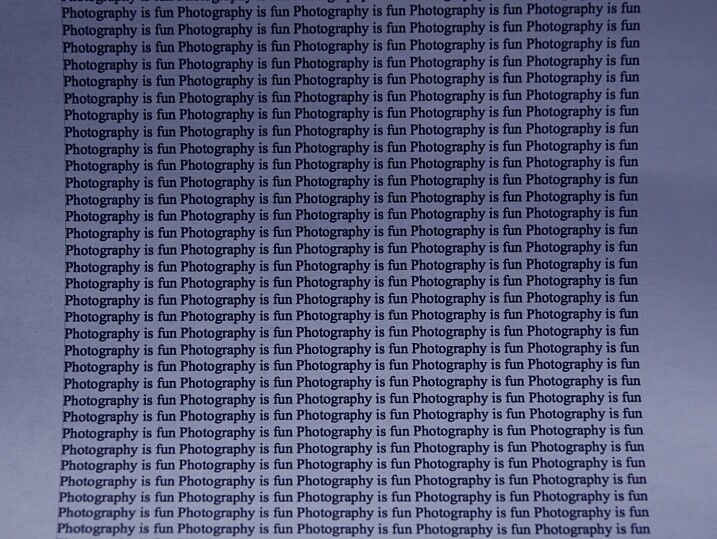
new-camera-experiments-11

Which White Balance preset under daylight conditions produces this color?

Next, move to an area lit by incandescent or fluorescent light. This would also include compact fluorescent bulbs. You can hold your paper close to the light source for these next photos, just make sure the light is falling on the page and not coming through it.

Run through the same three White Balance settings as before; daylight, incandescent and shade.
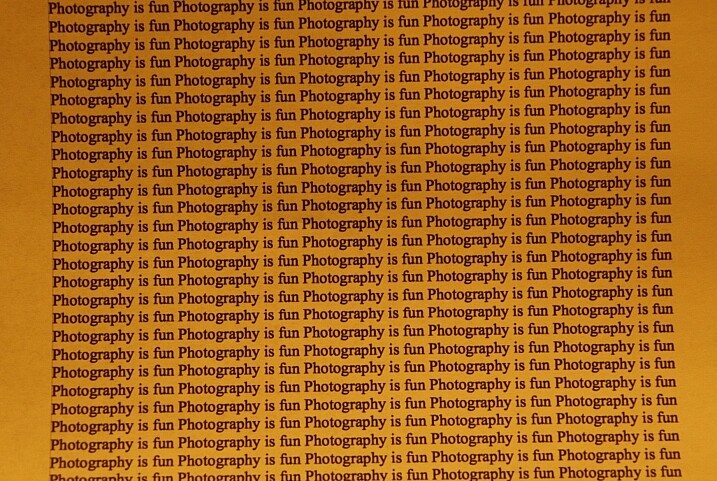
new-camera-experiments-10

Which White Balance preset under incandescent lighting produces this color?

What happens to the color of the white paper when each of these changes are made? Its color changes, doesn’t it? When you shot with the shade setting, did things get more blue or more yellow? Think about  how you can use this in your photography once you understand how it works.

Answers and Helpful Hints

Now that you have played around a little, let me help clarify what you should have seen in each exercise.

1. In the first exercise you should see more depth of field (more things in focus, front to back) as the aperture number increases. As you focus further away from the camera, the depth of field also increases at the same aperture. This might be hard to see in this limited of a test, but it is explained better here: How to Control Aperture and Create Images You Love.

2. Your camera is set to expose the world as if it were 18% gray. This means objects that are black are exposed to make them more gray; the same goes for white things. If you are taking pictures of something already gray, like pavement, then there is no adjustment needed. Otherwise, to make white things white, you need to tell your camera to overexpose (that was the “+1”) and to make black things black, you need to under expose (“-1”). More info on exposure compensation is available here: Using Exposure Bias To Improve Picture Detail.

3. As ISO increases, digital noise (not the same as grain in the days of film, but similar) increases. Noise is usually not desired but as time goes on, camera manufacturers get better at reducing it. That’s why camera owners five years ago were told not to go over ISO 800, or there would be too much noise. Now, I regularly shoot at ISO 2000 with results that work for me. It’s important to know the limits of your camera so you are okay with exceeding them in certain circumstances.

4. As your shutter speed gets slower, the chance for blur increases. This can be blur from you moving the camera (we have all done this before) or from your subject moving. Blur is not an inherently bad thing, it can be used with great affect. But it’s important to know when, and how much, works best for you. Play around on this one a little with different subject speeds and shutter speeds.

5. White Balance can be trickiest when there is more than one light source and it’s helpful to know which way to adjust the colors. A lower temperature (incandescent and fluorescent) give more of a yellow/green cast while cloudy and shady gives your more of a blue tone. If you want to eliminate that color cast in your images, move the White Balance toward those settings.

The great thing about photography is it is highly reproducible. When you do this, that happens – and when you do this again, that happens again. That makes it a great art form, in which experimenting can teach volumes, if you keep control of the variables. You might note that only one variable was allowed to change in each of these exercises, that was on purpose.

Go forth and experiment more with your new camera. The more you shoot and the more you experience through the lens of your camera, the more you will learn!

googletag.cmd.push(function() {
tablet_slots.push( googletag.defineSlot( “/1005424/_dPSv4_tab-all-article-bottom_(300×250)”, [300, 250], “pb-ad-78623” ).addService( googletag.pubads() ) ); } );

googletag.cmd.push(function() {
mobile_slots.push( googletag.defineSlot( “/1005424/_dPSv4_mob-all-article-bottom_(300×250)”, [300, 250], “pb-ad-78158” ).addService( googletag.pubads() ) ); } );

The post Do These 5 Quick Exercises to Learn What Your New Camera Can Do by Peter West Carey appeared first on Digital Photography School.


Digital Photography School

 
Comments Off on Do These 5 Quick Exercises to Learn What Your New Camera Can Do

Posted in Photography


Three Exercises to Limit Yourself and Grow as a Photographer

25 Jun

Today’s digital cameras are marvels of modern technology, allowing even the most inexperienced photographer access to state-of-the-art imaging systems that were the domain of supercomputers, and research institutions only a few decades ago. With prices plunging continually lower, and more devices equipped with cameras than ever before, photography has reached the point of ubiquity: cameras are everywhere, and anyone who wants to take photos can do so. But sometimes, the best thing you can do to grow as a photographer is to take the opposite approach and set some strict limits for yourself. By operating within the bounds of some simple constraints, you will often find yourself exploring new photographic possibilities that you had never realized were there before.

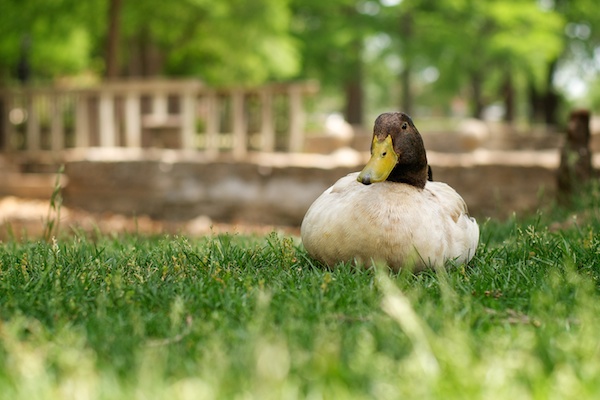
Duck pond

1. Limit the number of shots you take

Memory cards are extraordinarily cheap. It’s tempting to buy the biggest card you can afford in order to ensure you can fill it with thousands of pictures and not worry about running out of space. But not too long ago, photographers were limited to just a handful of pictures at a time. Each roll of film (i.e. memory card) could hold 36 shots at most, and they were crazy expensive by today’s standards. Imagine paying four dollars for a memory card that could only hold a couple dozen photos and only be used once! Nevertheless, for decades our photographic forefathers were able to churn out amazing images by working within these limits, and so can you.

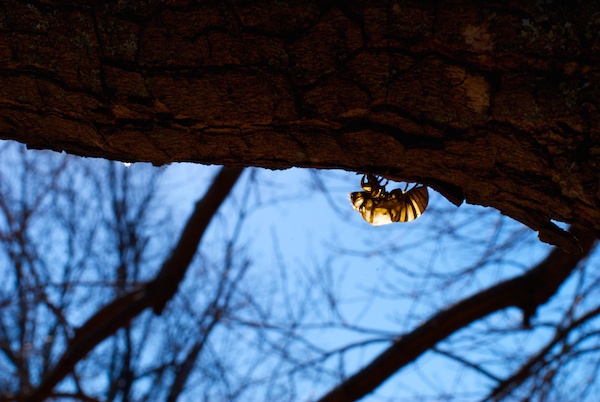
Cicaida tree

The next time you go out to shoot, limit yourself to only a handful of pictures–set the number beforehand, and stick to it. In doing so, you will have to be much more purposeful about what you photograph. Rather than take the “spray and pray” approach where you shoot hundreds of photos now and find the good ones later, take a more measured and intentional approach by really studying your subjects and finding the best shots through careful planning. You might be frustrated at first, but will soon find that you develop a much more intimate relationship with your subjects, the lighting, the composition, and other elements of photography. Limiting yourself to only a few pictures will help you make each shot count, and help you shoot for quality instead of quantity.

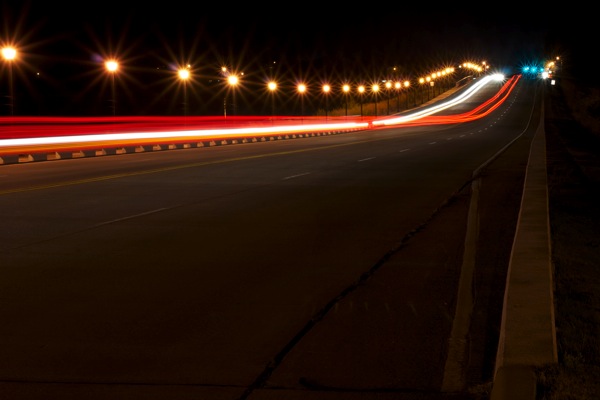
Night lights

2. Limit your focal length

Zoom lenses are a wonderful thing, and are a great way to help you get closer to the action or take in a wide angle of view on a given scene. But zoom lenses on consumer cameras are a fairly recent invention, and not long ago every camera shipped with a simple prime lens, meaning it could not zoom at all. Imagine not being able to zoom in and out! You would have to physically move yourself to get closer to the action–not at all what people expect nowadays. But by limiting your focal length you can, ironically, find yourself stretching your photographic muscles in ways you never thought possible.

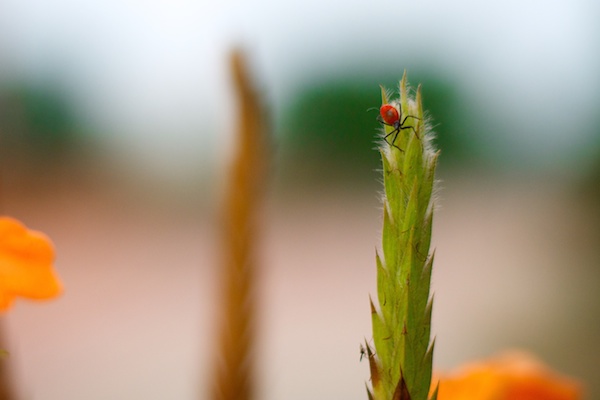
Flower bug

When you allow yourself only one focal length, it forces you to look at the world with a different perspective and see new opportunities for pictures. Let’s say you are out with your kids at the park, but instead of standing on the side and zooming in, try locking your lens at one focal length such as 24mm or 35mm and physically walking around to get closer. You will soon discover new perspectives that you overlooked, because you were relying on the zooming capability of your lens. Or if you normally like to take photos of nature or architecture at a wider settings like 18mm, try setting your focal length to something like 55mm and see what happens.

True, the pictures you take will look nothing like what you are used to, but you will see the world from a new perspective and find all sorts of different photographic opportunities you never realized were there. If the temptation to start zooming in or out strikes, don’t give in. Move yourself around and look for ways to work within the limit you have set, and you will be surprised at what you can accomplish.

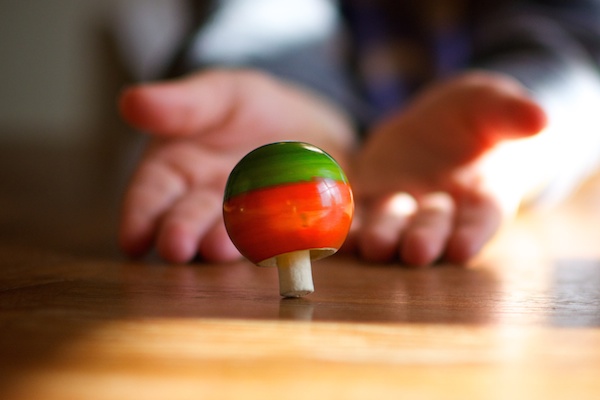
Toy top

Of course the best way to limit your focal length is to buy a prime lens, which I highly recommend. Not only will you learn to maximize the possibilities afforded by a single focal length, but you will get other benefits like a much larger aperture which means better photos in low light, and nice blurry backgrounds too.

3. Limit your subject

We’ve all heard people tell us to take time to stop and smell the roses, but what about taking time to photograph them? Or, specifically, one single rose. That’s the idea here: rather than taking pictures of many roses, trees, buildings, sculptures, or people – focus on just one subject and look for new and interesting ways to capture it on digital film. Study it from every possible angle, and find ways of positioning it (or yourself) that might not seem so obvious. Try returning at different times of day, or seasons of the year, and see how it changes. You might end up with dozens or even hundreds of pictures that are boring, uninteresting, or just not all that good. But you will also likely end up with some gems that are far beyond what you thought you could accomplish before.

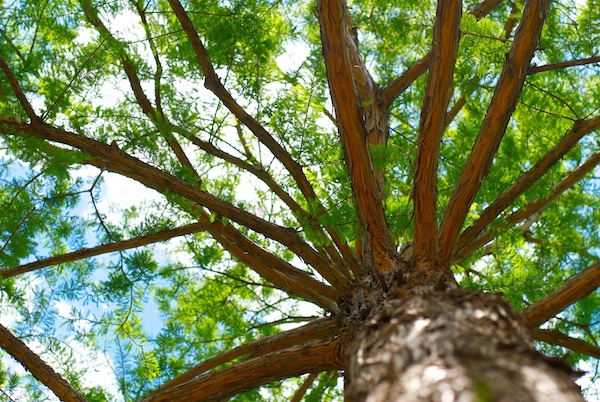
Tree perspective

Limiting yourself, in a world with limitless photographic opportunities, might seem counter productive at first. But if you give it a try, you will find that putting some constraints on your photography will help stretch yourself in new ways and find interesting picture opportunities that you might have overlooked hundreds of times before.

The post Three Exercises to Limit Yourself and Grow as a Photographer by Simon Ringsmuth appeared first on Digital Photography School.


Digital Photography School

 
Comments Off on Three Exercises to Limit Yourself and Grow as a Photographer

Posted in Photography


Don’t Know What to Shoot? These 4 Photography Exercises Will Keep You Motivated

19 Jun

Whether you’re just getting into photography, or if you’ve been at it for years; you can keep yourself rejuvenated, and keep the creative juices flowing by always trying new things.

If you’re feeling uninspired photographically, that’s a sign that you need to shake things up by trying something completely different, or at least something that isn’t your usual style. You might be surprised at how small exercises can boost your creativity while teaching you new techniques and solidifying old principles in your mind.

Who knows, you might even discover a new passion!

To give your brain a little kick in the butt, challenge yourself to try some of these photography exercises. Even if they aren’t new to you, going out shooting with a new purpose feels refreshing and may lead to something completely new.

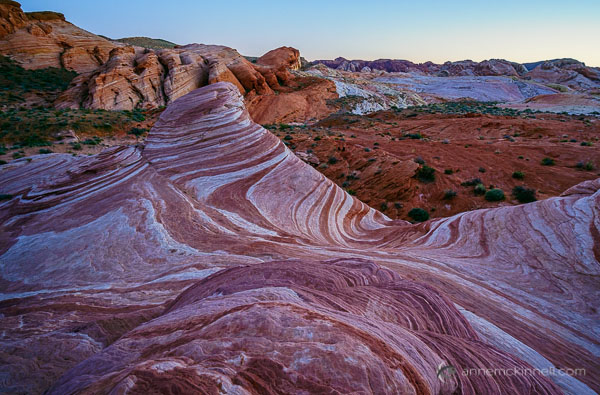
Fire Wave at Valley of Fire State Park, Nevada, by Anne McKinnell

Fire Wave at The Valley of Fire State Park, Nevada, taken from a high perspective on an opposite hilltop

1. Change your perspective

Photographers often get in the habit of shooting at eye-level which tends to make photos repetitive and somewhat common. We know this, and so we take the odd shot on our knees or even occasionally lying on the ground.

But is this really enough? Aren’t there other vantage points?

Challenge yourself to go out shooting and never shoot from eye-level for a whole day. Instead, find a new vantage point any time you take a picture. Get yourself up high above your subject, and crouch and shoot from a low angle. But that’s just the beginning. Ideally, you should try shooting your subject from a variety of angles.

Take one shot from below and one from above. Then, take one even lower, and one even higher, if possible. Then, step back a bit. Then step forward. Move to your right, and move to your left. Taking the same picture from many positions adds variety and will help you understand it better. Plus, you may discover a way of seeing something that you didn’t expect.

If you resolve to do this with every picture you take, you’ll begin to really understand the subtle effect that perspective has on an image, which points of view work for which subjects, and how this can inform your shooting style from here on out.

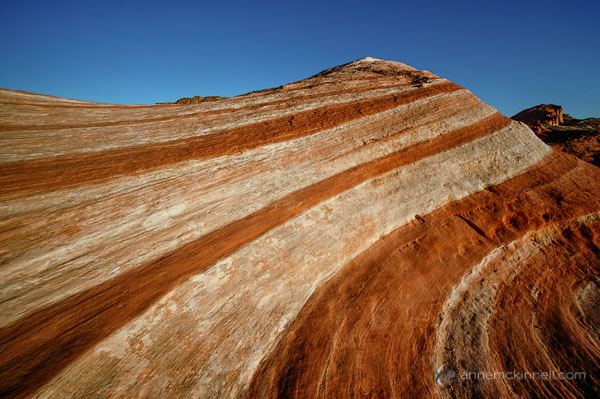
Fire Wave at Valley of Fire State Park, Nevada, by Anne McKinnell

Another perspective on Fire Wave, this time taken up close, from a low angle.

2. Create a story

Rather than trying to capture your subject in one single image, try doing a series instead. Create what LIFE Magazine coined a “photo essay” – a series of images surrounding a single subject or group of subjects, each of which pinpoints a different aspect of its nature. This can be as simple as zooming in on its finer details, or photographing it in different contexts. This method of doing things defines the subject not only by how it appears in a single moment, but also by the way it changes (and the way it stays the same) over several moments. It also helps to craft your visual storytelling abilities.

Choose one subject and cover it completely, the way a journalist would. Do this either by photographing every aspect of it you can think of, photographing it through the course of a day, or by revisiting it over and over throughout a week. Include shots at different distances and using different focal lengths – include some close-up details and some wide compositions – and whittle all the shots down to around ten final images, making sure that no two photos are alike. When you have your picks, try to organize them in an order that tells a coherent story, whether it’s narrated or implied.

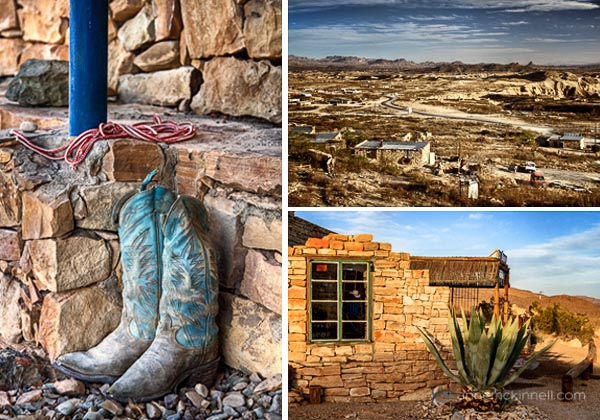
Terlingua Ghost Town Texas by Anne McKinnell

These three photos are from Terlingua, a ghost town in Texas.

3. Shoot in Black and White

For a whole day, turn your camera to Black and White mode and don’t take it off. Of course, you can convert your RAW images to black and white after-the-fact in post-processing, but as an exercise, try shooting them in Black and White.

At first the limitation may seem frustrating, but Black and White photography requires a completely different way of seeing the world in terms of shape, form, and contrast, rather than through the common visual cues that you’re used to. Composing your photos in this way will invariably improve your compositions in colour photography, too. You can play with contrast settings in-camera or in post-processing to perfect the highlight to shadow ratio which defines a good monochrome image.

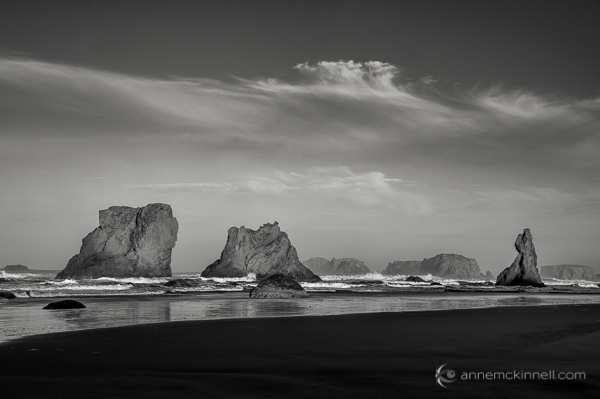
Bandon Beach, Oregon, by Anne McKinnell

Bandon Beach, Oregon.

4. Make manual long exposures

For this exercise, you’re going to take full advantage of digital photography’s instant feedback, and use it to play with making manual long exposures.

With your DSLR mounted firmly on a tripod, set the ISO to 100, set the aperture to the smallest opening (the largest f number like f/22 for example), and set the shutter speed to Bulb mode. When the camera is to Bulb mode, the shutter will stay open for as long as the shutter button is held down, but it’s a better idea to attach a wired remote shutter release to prevent camera shake.

Once you have your composition and your focus set, press and hold the button on the remote to hold the shutter open for a few counted seconds. Just guess how many seconds will be required based on the light level. Then, check your results. If the image is too bright, try again, but count half as many seconds. If the image is too dark, count twice as many seconds – or more, if necessary. Do this over and over again, in different scenarios and lighting situations. This practice will hone your ability to read the levels of light present at any given time.

You’ll get the most interesting results if there is a certain amount of movement in your frame, such as drifting clouds in the sky, crowds of people, or running water. The longer your exposure is, the more blurred that movement will appear to the point where water may seem like nothing more than mist, and people will disappear from the image altogether. If you have a solid neutral density filter your exposures can be even longer, creating more extreme effects.

Folly Beach Pier, Charleston, South Carolina by Anne McKinnell

Folly Beach Pier, Charleston, South Carolina – 2 second exposure.

Folly Beach Pier, Charleston, South Carolina by Anne McKinnell

Folly Beach Pier, Charleston, South Carolina – 30 second exposure.

Don’t wait until you start feeling uninspired to try these exercises! Keep your photography energized and creative by trying something new on a regular basis. Even if it doesn’t turn out to be your “thing”, it’s fun and you’re bound to learn something.

The post Don’t Know What to Shoot? These 4 Photography Exercises Will Keep You Motivated by Anne McKinnell appeared first on Digital Photography School.


Digital Photography School

 
Comments Off on Don’t Know What to Shoot? These 4 Photography Exercises Will Keep You Motivated

Posted in Photography