RSS
 

Posts Tagged ‘Event’

Motorola shows off ‘DSLR’ and 360° camera Moto Mods at Ghana event

06 Jul

Motorola has big plans for Moto Mods—the company’s snap-on accessories for the modular Moto Z smartphone. The company recently showcased some new Moto Mods at an event in Ghana, and according to TechDroider they included a 360-degree camera mod and a ‘DSLR’ mod with interchangeable lens support.

Popular leakster Evan Blass also recently tweeted a photo showing the alleged 360 camera Moto Mod unveiled in Ghana:

Assuming the 360 camera mod leak shows the actual product, the Moto Mod will feature a dual-lens camera module attached to the top of the Moto Mod, which itself attaches to the back of the Moto Z smartphone. The ‘DSLR’ mod is a bit more of a mystery, appearing in one very rough photo from TechDroider as a Moto Mod with a mount for attaching removable lenses.

No further information about either mod—including specs, pricing or availability—are known at this time, but we’ll keep you updated. Chances are good the products won’t stay exclusive to the little country of Ghana.

Articles: Digital Photography Review (dpreview.com)

 
Comments Off on Motorola shows off ‘DSLR’ and 360° camera Moto Mods at Ghana event

Posted in Uncategorized


Tips for Getting Started Doing Event Photography

17 Oct

Have you ever wanted to be a fly on the wall? To see the behind-the-scenes of amazing events and activities? To meet influential or interesting people? If so, candid event photography may be the thing for you!

While wedding photography is technically event photography, that is not our focus here. There’s just something different about wedding photography. It’s more pressure, higher stakes, more intensity. In this article we are going to focus more on other types of events – social, corporate, family, religious, and others, that can broaden your experience (and line your pocketbook!).

Getting Started

event photography tips 1

Unless you are an event planner or have an “in” already, sometimes it can be a little hard to break into event photography. You are probably going to have to volunteer for a few events to get started.

Are you or any of your immediate family members part of an organization or club? This can be absolutely anything – PTA for your child/grandchild’s school, a community fraternal organization, a slow-pitch softball team, your place of worship. Do they have any big events that they feature regularly or annually? Ask if they would like some free event photography. The good thing about doing free photography is that it lets you practice and hone your skills without feeling like you’re wasting someone’s money if your photos aren’t perfect.

Communication is Key

Before the event, work with the event coordinator in advance. A phone call, or thorough email, is usually sufficient, but you may also want to meet in person. You’ll want to ask some key questions, if they don’t have the information readily available such as:

  • “Is there an itinerary for the program? Can I receive a copy in advance?” If you’re anything like me, you’re a planner. You want to know in advance exactly what is going to happen, and ideally, where. That way, you can make sure that you’re lined up to catch the keynote speaker or the moment when an honoree receives their award. This isn’t just a matter of convenience for you, it helps you make sure that you are able to provide the shots that will help the group remember their event (or, if appropriate, to market it for the future!).

event photography tips 2

Who to photograph

  • “Who are the key people I should photograph?” Unless you’re a seasoned veteran of the event you’re photographing, you might not know who the big players are. I recently photographed a big charity gala for the biggest hospital in the area . Some of the attendees were CEOs of companies, coaches of Big 12 sports teams, mayors, and councilpersons. By receiving the names of the key attendees in advance, you can do a Google Image search for them (yeah, I know it sounds super-creepy) so that you can recognize them on-site.
  • “Who or what should I avoid photographing, if anything?” Nobody really wants to get into a situation where the person being photographed becomes belligerent or aggressive. You also don’t want to photograph a moment that is supremely personal if that is not desired. There are many events where you don’t need to ask this question, but keep it on the list for more personal events (such as family or religious ones). Don’t be paparazzi!

event photography tips 3

event photography tips 4

What to photograph

  • “How many/what kind of pictures would you ideally like?” I try to provide as many photos as possible to my clients because everyone’s tastes vary so widely. However, this can be really overwhelming for some people who are under time constraints, or who really only want photos of a certain portion of the event. Figure out their ideal amount and try to stick to it.
  • “Is it okay if I use any of these photos in my business advertisements or on my web page in the future?” It can essentially be free advertising if you can use these photos to demonstrate your abilities.
  • “When are you setting up for the event? May I stop by early for some test photographs?” Unless you want to take every flash, diffuser, and lens you own, you want to get a feel for the venue in advance. It’s ideal if you can get some test shots using the same lighting (whether it’s natural or artificial) and see how they come out. This will not only help you decide what gear to bring, but it also saves you time on the day of the event. Having to readjust your camera settings to accommodate the environment, get your ISO correct, decide on a lens, etc., all take time. This will make you look more professional and prepared.

Work the Crowd – Tastefully

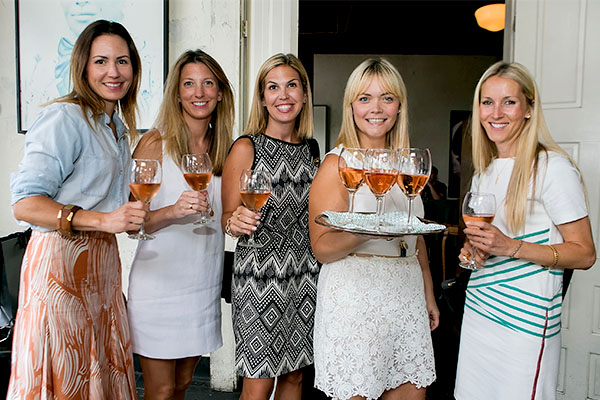
This next bit may not be appropriate for more solemn and serious occasions. For most, however, your foot is officially in the door. Be friendly and professional, make appropriate jokes or comments to appear personable and fun. Keep the attention off of you, but interact kindly with everyone you meet.

Having a camera in your hand instantly makes people more prone to smile around you, so use that goodwill to make them laugh. This will also allow you to get natural, fun shots that will please both the client and the subject of the photo. This will often lead to people either asking for your business card or asking the event organizer for your information. Make sure to keep a stack of business cards on hand, and give a few to the event organizer if they are comfortable with that.

event photography tips 5

After the event, don’t hesitate to ask the organizer if you can use them a a reference, or if they might be wiling to write you a review. You’re doing them a service, potentially for free. It’s not uncommon or inappropriate to ask for an honest review of your services.

Details, Details, Details

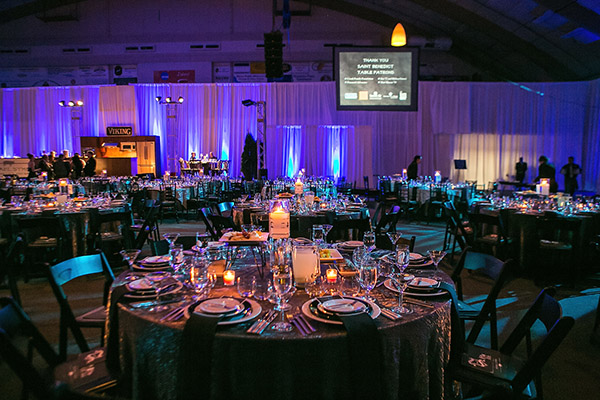
Whether you’re photographing a political dinner, a church bazaar, a birthday party, or an awards event, someone put a great deal of thought and time into making that event unique and special. Someone spent hours thinking aboutcenterpiecess and the dessert table, about the table layout, registration table, the serving stations and other details. In many instances, the people who planned the event are also in charge of hiring the photographers now and in the future, so it doesn’t hurt to get on their good side!

To do so, get good quality shots of the small things that went into the event to make it special. Programs, food, signage, the little things. These shots are good for remembering all of the wonderful details that were so special to them on that day, and they can also make good marketing (for a company, religious entity, charity organization, or similar) in the future. Getting them these shots gives them lots of options – this makes you more helpful and versatile, as they’re getting more bang for their buck. This ultimately makes you more marketable!

event photography tips 6

event photography tips 7

event photography tips 8

While You’re At It…

For some events, they want to get the feel of the event from the attendee’s eyes. These can be tricky to do, you may have to photograph tactfully over someone’s shoulder, or through an open door. These types of photos, however, can be used to promote events in the future, especially if they do not actually feature the faces of anyone. It’s always important to get shots of the attendees for the event, but you can also get some of these shots that are not related to a specific date and time. This gives the organization (if applicable) options if the attendees do not want their faces being used as advertisements.

event photography tips 9

event photography tips 10

Make It Artsy… But Not TOO Artsy

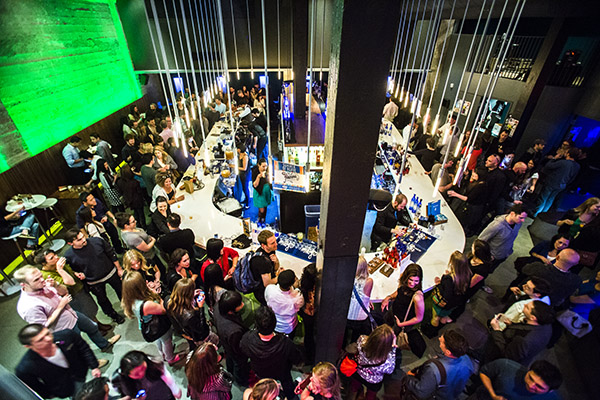
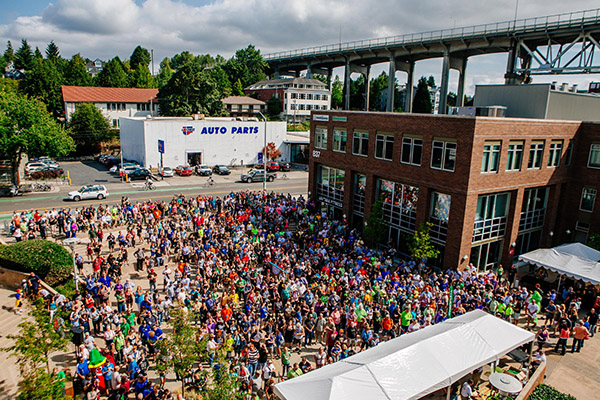
One of the biggest mistakes that I see in some candid event photography is that there is little artistic focus or composition to the photos. Yes, there will be times you’re ultimately just getting crowd shots, and those ARE important. In those instances, make sure you’re using the appropriate aperture and focal length to get everyone in focus who needs to be.

Try and catch an interesting moment, or a moment when the crowd is focused on something , when someone is the center of the crowd’s attention. This composes your photo more and draws the viewer’s eye. For shots of smaller groups, couples, or solo shots, use a wider aperture and an appropriate focal length to get more artistic portraits. Attendees like to see more personal, beautiful photos of themselves. People are predisposed to stopping and smiling for the camera, so you will end up with some staged shots. But also get images of people in mid-conversation, or engaging in activities.

Pic 11

You can also use a wider aperture to up your artistic factor. Is there a beautiful centrepiece that is blocking your shot of a crowd on the other side of the room? Focus on it with an f/2.8 or f/4 aperture so that your crowd in the background is slightly blurred. This will make for some interesting variety in your shots.

Pic 12

Not Too Flashy

Just imagine that you are in the crowd at a movie night sponsored by the PTA. The lights have been dimmed, your eyes adjusted for the screen, and then someone’s camera flash pops right in your eyes. This exact same situation can occur at almost any event. A flash can distract from the event and disrupt not only the audience, but a potential performer or speaker. While it is usually absolutely appropriate to use a flash for group and/or staged photos to get proper lighting, it is often ideal to simply adjust your camera settings to make the available lighting work for candid photos.

The photos below were taken at a PTA movie night just like the one I described. It was in the cafeteria of a local elementary school, with no artificial lighting other than the projector screen, and some natural light coming in through a skylight. I adjusted my ISO to 800 to accommodate for the limited light, and opened my aperture to f/2.8. Even at that, I had a shutter speed around 1/25 or 1/15 pretty consistently. If I needed to capture action (which was very limited in this sort of event), I bumped my ISO up to 1600 to accommodate it. These adjustments allowed the families to watch the film without disruption as I photographed.

Pic 13

Pic 14

Picking the Best Shots

The first time I photographed an event was at my church, and I realized during editing how much people yawn and pick their noses when they think nobody’s looking!

For a multiple-hour event, you will likely get an abundance of photos. On your first pass through, obviously weed out any photos that are fuzzy or have poor technical skills. Since these photos will represent your abilities, you want to make sure to highlight the best of them.

I always take a second and third pass through, however. Hopefully the event organizer gave you a rough idea of how many photos he or she wanted. So go through and remove any photos that are boring, or that paints the subjects in a bad light (such as picking their nose). If you still have a surplus, narrow it down on the next pass through to weed out ones with weak composition, or ones that don’t tell the story of the event well. I will then edit the remaining photos (rather than editing hundreds that I will just throw away), and export them. I usually give them another look at that time to make sure there isn’t anything I missed in my editing software.

Pic 15

I personally use Lightroom for editing event photography. Unless it is a statement photograph or a photo to be used for advertisement, I try to do very spare editing. These photos are not likely to be hung on someone’s wall in a large size, so you usually do not need to worry about editing out stray hairs or specks of lint. Basic adjustments for exposure and contrast, white balance, and occasionally a conversion to black and white are often sufficient.

Pic 16

Ready to Roll

You’re now ready to deliver your photos to your client. Be sure to provide your contact information and business cards for the future. If they indicated that you could share the photos on your website or business pages, make sure to feature them to show your amazing prowess as an event photographer.

Do you do events? If you have any other tips please share them in the comments below.

googletag.cmd.push(function() {
tablet_slots.push( googletag.defineSlot( “/1005424/_dPSv4_tab-all-article-bottom_(300×250)”, [300, 250], “pb-ad-78623” ).addService( googletag.pubads() ) ); } );

googletag.cmd.push(function() {
mobile_slots.push( googletag.defineSlot( “/1005424/_dPSv4_mob-all-article-bottom_(300×250)”, [300, 250], “pb-ad-78158” ).addService( googletag.pubads() ) ); } );

The post Tips for Getting Started Doing Event Photography by Angie DeWaard appeared first on Digital Photography School.


Digital Photography School

 
Comments Off on Tips for Getting Started Doing Event Photography

Posted in Photography


Review: Simple Booth Event Edition photo booth app

20 Aug

Simple Booth Event Edition iOS App
$ 60/£45 | www.simplebooth.com 

Photo booths are a pretty popular item to have at your event these days. Weddings, parties, fundraisers – you’ll find a photo booth at many of them. From a simple camera on a tripod with a remote to fancier automated systems that take multiple images and print instantly, people seem to love being able to control their own image making. Could it be the result of selfie-obsession on steroids? Or is it nostalgia for the chemical-photography based photo booths of our past? Either way, people are fascinated by them. Because of this, having the ability to set up your own booth could make you the star of your office holiday party, PTA fundraiser, or child’s birthday.

Into that popularity steps Simple Booth. Simple Booth is an iOS app designed to place all of the software you need to take, layout, share and print photo booth images into the hardware of your iOS device. There are four versions of the app with varying capabilities (one for the iPhone and three for the iPad): iPhone, Event Edition, Pro Edition 2, and Enterprise. Simple Booth Event Edition is the version I focus on in this article. It is the best choice for a photo enthusiast who wants to set up a photo booth. The iPhone version is pretty limited and while the Pro and Enterprise versions offer a number of additional options, they are probably overkill for anyone who isn’t running a photo booth business.

What does Simple Booth do?

When you start the Simple Booth app, you are presented with a setup screen with a number of options for how the app will work and your images to be laid out. You can choose 2/3/4 image photostrips for the classic booth style. For a more modern look, there are also a number of other multi image options in square or rectangular layouts. You have are options for setting background color, auto cropping, custom logos, and even Instagram-style film effects. You can also give your users the ability to crop, change the layout, and apply effects once the photos are taken. Though, to be honest, this doesn’t lend itself to the quick in-and-out pace of photo booths and I would suggest leaving that option off. I tend to feel the same way about the “retake” option, it encourages picky people to monopolize the booth trying to get the perfect photos.

For output, you can set up a printer (more on that option below), send to various social media services, email, or sync to dropbox. You can also tell the app to save each individual image taken to the camera roll as well as saving the photostrips. Honestly, the print option is the winner here. The social media options require people to mess around logging into their accounts, thus taking up time in the booth when others are waiting, and the email has to use the iOS mail app. Now, if you have an extra iPad handy, you can use Simple Booth’s free companion app Live Booth Lite to create an “out of the booth” interface for people to use for emailing, sharing, and even printing. In order to connect with any of the social or output options, you will need to have access to an active wifi network. One odd thing for a photo app in this day and age is that there is no Instagram sharing option. The Simple Booth crew explains that this is because Instagram doesn’t offer an API that would enable uploading. You can choose to use either the front or rear camera on the iPad but there is no option to use an external camera. In all honesty, the front-facing camera is the one you are going to want to use. Using the rear camera has advantages as far as resolution and image quality, but it means that someone has to stand there operating the booth because users will not be able to touch the screen to do so themselves. And if you are having someone standing there, you might as well have them take the photos with a real camera. Part of the allure of a photo booth is that it can operate unattended. 

Once you have decided on your initial settings, you put the app into booth mode, and it’s ready to go. Users cannot get back to the settings page and muck things up. Okay, well that isn’t completely true, if they think to double tap the home button and shut down the app, then restart it, they could get to the settings. But that is why you will probably want to use Guided Access to limit the iPad to just running Simple Booth.

From the user POV, the app is really quite simple. Clear “tap to start booth” and “look here” messages instruct them on what to do. A visible countdown timer and beeps mark the pace between the images being taken. Once complete, the photostrip appears on screen with the various edit/print/sharing options. If anything can be described as foolproof in the digital age, at least as user interface for the end user, Simple Booth is pretty darn foolproof.

What equipment will you need? 

At the very least, you will need an iPad. The newer iPads with improved cameras will have better resolution and low light performance. But just about any recent vintage iPad will work. A tripod and mount capable of holding your iPad will make interacting with the app much easier for your subjects and safer for your iPad. You’ll need a neutral backdrop of some sort, though a plain wall could be used as well. And you will probably want some lights. Unless you are outdoors in open shade on a bright day, you will likely find ambient light to be too dim for the iPad’s camera. This is one area where having the ability to use a DSLR would be an improvement, both for the improved low light performance and ability to connect to strobes. But as is, you can solve the problem with something as simple as a couple clip on fluorescent work lights.

Using a printer…

While the social media sharing features are handy in this day and age, having a printer on site is really the way to go with a photo booth. You increase the smile and fun quotient 1000% when someone is able to walk away from the booth with an image in their hand. While an inkjet printer will work, as any event photographer can tell you, a dye-sublimation printer is the way to go in this situation. The speed and toughness that dye-sub prints can offer over inkjets is significant in an event environment. 

When looking at dye-sublimation printers, you have options on either end of the market, and not much in between. Both offer excellent prints, but at vastly different prices. At the one end is the Canon Selphy series of printers. At around $ 100, the compact Selphy 1200 won’t break the bank. With wifi connectivity and AirPrint, connecting to iOS devices is easy. Print speed is a somewhat slow 47 seconds and it can only hold 18 sheets at a time. Finally, print prices are a fairly inexpensive $ 0.28 cents per 4×6.

At the other end of the market is the $ 1000 DNP DS620A. Designed for the high volume, high speed needs of event photography printing, the DS620A prints a 4×6 in as little as 8.3 seconds and can print up to 400 images without needing the paper roll replaced. The dye transfer is all done internally and the image only pops out once it is completely done. This makes it perfect for an unmanned both, you can set the DS620A up and leave it running all night. Print prices for a 4×6 work out to $ 0.14 a piece.

Inkjet or dye-sublimation connecting Simple Booth to a printer needs to be done in one of two ways. If you have an AirPrint compatible printer, like the Canon Selphy 1200, the app can connect directly to the printer as long as both are on the same Wi-Fi network. If you have a printer that isn’t AirPrint compatible, such as the DNP DS620A, you’ll need to connect it to a computer and run an app to make it available via AirPrint. I used Printopia, a dead simple $ 20 utility app that works perfectly for sharing a printer with your iOS devices. 

How does it work in the real world?

While I was working on this review, my son received an invitation to a classmate’s birthday party. So, I offered to bring along a Simple Booth setup and printer (in this case, a DS620A) for the kids to play with. Partially, I was just helping a dad-buddy put on a party. But I also wanted a chance to see how Simple Booth worked in real life with people who had never played with it before. Would 6-8 year olds be interested in something as retro as a photo booth? Would they have trouble operating it? Would the printer jam or run out of paper? 

Since this was a sunny summertime party, I had been planning to just set up a backdrop and tripod in some open shade and let the kids have at it. But my friend is a carpenter and decided at the last minute that he wanted to knock together a real “booth”. A few trips to the hardware store later and we had a low rent copy of an old school photo booth. It was nothing fancy, but the ipad was mounted and the printer delivered the print through a slot into the grubby over-sugared hands of the party goers. 

Did it work? It couldn’t have worked better. Being an old-man tech-nerd, I insisted on showing the first group how to do it. But with much eye-rolling, they made it clear that I might as well have been teaching them to drink a glass of water. They had no problem understanding how to make it work. The DNP DS620A printer was outstanding for this sort of use. Having a print in their hands in less than 10 seconds was pretty exciting for the kids and knowing that I could go hundreds of prints without having to reload the printer was pretty relaxing for me. The kids piled in and out of the printer in group after group. They giggled, laughed and loved it completely and all went home with handfuls of photo strips.

What’s the bottom line?

Simple Booth is a pretty amazingly full featured solution to creating a photo booth out of gear that many photographers already own. It is simple enough for children or technophobes to use, but offers enough options to allow customization of layout and operation.

At $ 59.99, it is likely more expensive than most any other iOS app that you own. That said, when you consider what you are getting and what it would cost you to figure out a way to do it without Simple Booth, it starts to look like a bargain. Perhaps more importantly, the proof is in the pudding. Even our hastily knocked together photo booth was a huge hit with the kids at the party – plenty of smiles and laughs and threats of tantrums if I didn’t print out duplicates for the kids in the group shots.

Tired of bringing meatloaf to your local block party every year? Bring Simple Booth and a printer instead and watch yourself turn into the neighborhood hero. 

What we liked:

  • Easy to set up
  • Customizable layouts
  • Pretty fool-proof in operation
  • Saves individual images as well as the “photo booth strips”
  • Print, email, social media integration

What we didn’t like:

  • iPad rear camera offers limited resolution and quality, using higher resolution front camera eliminates the viewing screen
  • No options for flash lighting, must use constant lights
  • While inexpensive for a photo booth, somewhat expensive for an app

Rating

Articles: Digital Photography Review (dpreview.com)

 
Comments Off on Review: Simple Booth Event Edition photo booth app

Posted in Uncategorized


Today Only: 54% OFF Phil Steele’s Event Photography Course

19 Dec

It is day 5 in our 12 Deals of Christmas and today we’ve got a great deal that is perfect for anyone who gets asked to photograph events (birthday parties, concerts, school plays, reunions, weddings etc).

It’s 54% off Phil Steele’s Event Photography Course.

NewImage

We are all Event Photographers

While not all of us see ourselves as ‘event photographers’ most of us are. As Phil says:

“Let’s face it, we are ALL event photographers. Even if you have no desire to shoot professional events for money, if you are the person in your family with a decent camera, then you get called on to shoot the kid’s birthday party, your friend’s concert, the school play, or the family reunion.”

With 25 videos and over 5 hours of training this course teaches you the techniques used by professionals to get great photos—every time—even in the most difficult conditions.

See full details of what Phil covers in his training here.

For the next 24 hours you can pick this practical course for just $ 67 USD – that’s 54% off the normal price of $ 147.

Lastly – as with all our products during this 12 days of deals this one comes with a money back guarantee. If you buy it and are unsatisfied in any way Phil will gladly refund the purchase price with no questions asked.

Become a Great Event Photographer

We are all event photographers – this course will help you to become a great one!

Get full details of Phil Steele’s Event Photography Course.

googletag.cmd.push(function() {
tablet_slots.push( googletag.defineSlot( “/1005424/_dPSv4_tab-all-article-bottom_(300×250)”, [300, 250], “pb-ad-78623” ).addService( googletag.pubads() ) ); } );

googletag.cmd.push(function() {
mobile_slots.push( googletag.defineSlot( “/1005424/_dPSv4_mob-all-article-bottom_(300×250)”, [300, 250], “pb-ad-78158” ).addService( googletag.pubads() ) ); } );

The post Today Only: 54% OFF Phil Steele’s Event Photography Course by Darren Rowse appeared first on Digital Photography School.


Digital Photography School

 
Comments Off on Today Only: 54% OFF Phil Steele’s Event Photography Course

Posted in Photography


Amazon releases more details of ‘Prime Day’ event on July 15th

11 Jul

To mark 20 years since it opened its (virtual) doors, Amazon is planning a ‘Prime Day’ next week, on July 15th. Billed as a ‘global shopping event’, Prime Day will feature more deals than Black Friday for Prime members, including more than 60 deals from top camera brands. Click through for more details

Articles: Digital Photography Review (dpreview.com)

 
Comments Off on Amazon releases more details of ‘Prime Day’ event on July 15th

Posted in Uncategorized


Lightroom Walk Through – Event Photography Workflow with Phil Steele

12 Apr

Phil Steele is a well-known and respected photography educator. In this video tutorial he walks you through exactly how he works through the post-processing of an event he has just shot.

Learn tips on importing, rating, culling, organizing in Collections, exporting, and delivering the photos as Phil goes through his entire event photography workflow step by step.

If you enjoyed that and want more you can check out Phil’s courses here:

  • How to Shoot Headshots and Portraits on a Budget with Small Flashes
  • Photoshop Basics for Photographers
  • Lightroom Made Easy
  • Event Photography course

googletag.cmd.push(function() {
tablet_slots.push( googletag.defineSlot( “/1005424/_dPSv4_tab-all-article-bottom_(300×250)”, [300, 250], “pb-ad-78623” ).addService( googletag.pubads() ) ); } );

googletag.cmd.push(function() {
mobile_slots.push( googletag.defineSlot( “/1005424/_dPSv4_mob-all-article-bottom_(300×250)”, [300, 250], “pb-ad-78158” ).addService( googletag.pubads() ) ); } );

The post Lightroom Walk Through – Event Photography Workflow with Phil Steele by Darlene Hildebrandt appeared first on Digital Photography School.


Digital Photography School

 
Comments Off on Lightroom Walk Through – Event Photography Workflow with Phil Steele

Posted in Photography


Europe’s Landscape Photography Event of the Year – Streamed Live

13 Nov


Image By Joe Cornish

onLandscape magazine’s landscape photography conference takes place amongst some of Britain’s most dramatic countryside in the English Lake District on 22nd and 23rd November 2014.

Billed as Europe’s biggest landscape photography event of the year it brings together some of the continent’s best known and loved photographers and the entire weekend is to be beamed out live via satellite and streamed around the world by StreamScape.

Luminous-Landscape is happy to announce that our readers can stream the video from the conference or download segments all for a special price. (see below)

Speakers

The Swedish photographer Hans Strand tops the bill talking about the opportunity and inspiration Iceland has given him in his photography. Rafael Rojas the Spanish photographer, now living in Switzerland, who runs whytake.net, a massively popular photographic website, will be looking at which ingredients are needed to produce fine art landscape photographs.

While Britain’s best loved landscape photographer Joe Cornish pushes photographers to think at a higher level about their photographs, discusses some lesser known works and provides some thought provoking concepts for landscape photographers to take on-board.

Other speakers include the critically acclaimed Jem Southam whose work has been displayed in the Victoria & Albert Museum, Alan Hinks OBE, the only British photographer to climb all 14 of the world’s mountains over 8,000 meters.

The list goes on with David Ward, Paul Gallagher, David Clapp and Paul Wakefield all offering inspiration and insight any landscape photographer would love to hear.

Streamed Live

The streamed event will give internet viewers the opportunity to question the speakers in special internet only “Green Room” interviews after each of their presentations. Particular need to viewers who are in different time zones has also been taken into account with special DVR functions allowing viewers to tune in at any time and rewind to the start of the day.

For those who are unable to watch over weekend all the videos will be available to watch on-line or download for at least 1 year after the event.

The cost of the streaming weekend pass with the Luminous-Landscape discount code is £12.95 – just over US$ 20 and offers amazing value. Tickets to actually attend the event are still available at £225 (US$ 375). 

The Luminous-Landscape discount code is LL35 and active till the end of the conference.

To book your weekend pass and for more information visit streamscape.uk


The Luminous Landscape – What’s New

 
Comments Off on Europe’s Landscape Photography Event of the Year – Streamed Live

Posted in News


5 Tips for More Successful Event Photography Using a Shot List

26 Oct

Company parties. Special galas. Nonprofit fundraisers. When someone asks you to shoot one of these events, you aren’t exactly leaping for joy, right?

Event Photo 04

Corporate event photography can get a bad reputation among creatives, mostly because it sounds like an unglamorous style of photography. While it is true that many aspects of corporate event photos can be very rote, these events actually a huge advantage that can lead to even more creative expression. Here’s why: There is almost always a set structure and schedule to corporate events that rarely deviates, meaning it is incredibly easy to build a shot list to get your essential shots out of the way very quickly. That means you have more time on your hands at the event to get creative with the way you choose to take these shots. Whether you’re a budding event photographer, or taking on an event as a favor, use these tips to build an effective event photography shot list that will make your clients happy and maybe even lead to other photography opportunities with them down the road!

Fact: Most corporate clients will not know what kind of photos they need.

At least in my experience working with west coast corporate clients, most of them can’t give me a clear answer when I ask how many photos they need, what they need shots of, etc. While this may seem frustrating at first, bear in mind that this vagueness from your client gives you the perfect opportunity to shine by filling in the blanks for them, because in general, most corporate clients want the same types of event photos.

So what kinds of photos do corporate clients want?

To answer this question, put yourself in the shoes of the branding or marketing coordinator who put the event together. Often, their whole purpose to having you there to is capture images that show that they did their jobs right by properly setting up the space and making sure the people they invited showed up and had a good time. They want shots that capture:

1. Setup shots of empty rooms, trade show booths, promotional items, signage, etc.

Event Photo 02

Be sure to arrive early to capture any event setup shots. It was someone’s job to put everything together, so he or she will definitely want images that show off all of the hard work that went into it. Generally, setup shots should be taken before guests arrive so that everything is still intact.

2. Candid and posed shots of VIPs or executives that are deemed important by the company.

Event Photo 01

This can be extremely tricky because often times, you won’t have any idea who the company CEO or big wigs are, even if the event coordinator hands you a sheet with all of their names on it. The best way to handle this is to ask the coordinator ahead of time if there is someone from the company who can accompany you and point out their VIPs and executives on site. Don’t be afraid to ask for help so that you can get your job done right.

3. Closeups and wide angle shots of any speakers.

Event Photo 03

As much as possible, get shots of speakers that include branding and signage somewhere in the photo. Also bear in mind that you will not always have a designated spot to shoot from, so bring a telephoto lens and prepare to possibly shoot from farther away. If you’re shooting from up close, make your shots quick so that you don’t block the view of guests.

4. Guests looking engaged and interested at the event.

Barneys New York And The Parkinson's Project Host A Luncheon In Support Of The Parkinson's Project At The Kingfish Cafe

Try not to capture photos of people (especially VIPs and executives) making unflattering expressions or gestures. It can take some patience, but make sure you get images that indicate everyone was having a good time. If you captured any goofy expressions or moments, you might be able to submit them, but be sure to flag them as optional outtakes.

5. Shots that indicate the event was well attended, such as full room shots with lots of people.

Event Photo 07

While it might still be valuable to include full room shots where only half of the seats are filled, you’ll want to pull out your zoom lens and focus in on larger clumps of people to provide shots that indicate the event was well attended.

The photos that corporate clients DON’T want

While event photography can in many ways feel like photojournalism, this is not the time to take too many images that are overly honest. Bear in mind that many times the photos are intended to be used for marketing purposes, so the last thing your clients want to see are ugly, unfavorable photos. Even though events might be poorly attended and the attendees might not be the most interesting people, it’s your job to make the event look and seem as fun as possible, even if you have to act like a hype person or stage photos to do so.

While there are many lessons and creative inspiration that can be obtained by winging it and thinking quick on the spot, professionals know there is generally more value to preparing ahead of time. One way to effectively do this is to think out every aspect of the shoot beforehand and great a comprehensive shot list. This will help you picture the finished shoot even before you step foot on set, greatly reducing any last minute issues that might arise, and giving you more freedom to take your necessary shots with creativity.

Do you photograph events? Do you have any other tips you’d like to share? You could also read 5 Tips for Special Event Photography here on dPS for more tips on covering events.

The post 5 Tips for More Successful Event Photography Using a Shot List by Suzi Pratt appeared first on Digital Photography School.


Digital Photography School

 
Comments Off on 5 Tips for More Successful Event Photography Using a Shot List

Posted in Photography


Event Photography: How To Take Electric Photos of Rock Bands

13 Aug

Do you remember the photographs that inspired you to want to take photography more seriously? If so, you must have a better memory than me. 😉 I don’t remember the specific photographs that made me want to keep me camera with me at all times. Maybe it was Henri-Cartier Bresson’s street photography, or maybe it was Andreas Gursky’s Rhine which Continue Reading

The post Event Photography: How To Take Electric Photos of Rock Bands appeared first on Photodoto.


Photodoto

 
Comments Off on Event Photography: How To Take Electric Photos of Rock Bands

Posted in Photography


CreativeLive to host free one-day event with Art Wolfe

18 Jul

On July 18th from 9AM PT to 4PM, CreativeLive will host a free, one-day event with nature photographer Art Wolfe. The class will be streamed live on CreativeLive’s website, and viewers will be able to submit questions through Twitter, Facebook and CreativeLive’s chat. Once it’s aired, the class will be archived and available for download for $ 49. Learn more

Articles: Digital Photography Review (dpreview.com)

 
Comments Off on CreativeLive to host free one-day event with Art Wolfe

Posted in Uncategorized