RSS
 

Posts Tagged ‘Effective’

4 Ways of Creating Effective Catchlights in Portraiture

31 Jul

The post 4 Ways of Creating Effective Catchlights in Portraiture appeared first on Digital Photography School. It was authored by John McIntire.

Catchlights in portraiture example
Canon 5D Mark III | Canon EF 50mm f/2.5 Macro | 50mm | 1/80 sec | f/5.6 | ISO 100

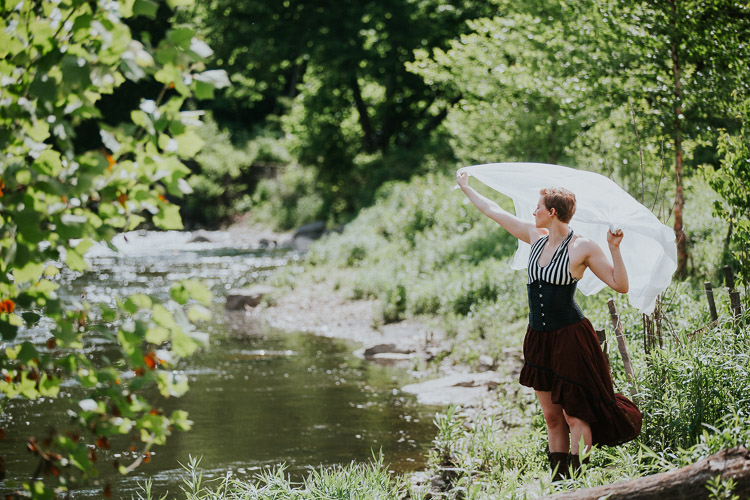
It is arguable that the most important part of a portrait is your subject’s eyes. While there is a case or two in which this might not be true, for the most part, the eyes are the focal point of portraits. This is because, when we interact with people on a one-to-one basis, it’s the eyes that we use to interact with one another.

As a photographer, it’s vital that you are able to present your subject’s eyes as the focal point in your images. One key way to do this is through the deliberate use and manipulation of catchlights. Catchlights in portraiture are the reflection(s) of your light source(s) that appear in the eyes. 

This article will discuss why catchlights are important, how to make use of them, and how to manipulate them to your benefit. It will also discuss several ways to help you to include catchlights in your portraiture.

What are catchlights?

catchlights in portraiture types of catchlights
Catchlights are the reflection of the light source in your subject’s eyes.

As mentioned above, catchlights are the reflections of your light source as they appear in your subject’s eyes. It doesn’t matter if you are using natural light or flash; if there is light going directly into your subject’s eyes, there will be a catchlight.

In terms of photography, this is important because the presence of a catchlight in portraiture means that the detail in your subject’s eye will be revealed in the final images. If there is no detail in the eyes, it will be that much more difficult for your viewers to engage with the subject. You’ve probably heard of the term dead-eyes before. That’s what this is referring to. 

Ensuring you have a catchlight

catchlights in portraiture
Making sure that your catchlights are a prominent feature in your subject’s eyes can help you to create more evocative portraits. Canon 5D Mark III | Canon EF 50mm f/2.5 Macro | 50mm | 1/125 sec | f/5 | ISO 100

If your goal is to create a catchlight in your portraits, the easiest way to do it is to ensure that your key light is pointed directly into your subject’s eyes. Because your key light will be the brightest light source in your frame, this will help to ensure that the catchlight is as bright as possible, making sure that it stands out. 

If you are using natural light, or studio lighting with a modeling light, you will be able to see the catchlights in your subject’s eyes before you take the picture. All you have to do to ensure a catchlight is direct your subject’s pose until you can see the catchlight. If you are using a light source without a modeling light, you will have to be more careful. Take a test shot and review it on the back of your camera to see what’s going on, then guide your subject from there. 

Placement

catchlights in portraiture
Ensuring that the main catchlight is at the top of your subject’s eye is a great starting point. This is a natural place for the catchlight to sit and leaves most of the eye unobscured. Canon 5D Mark III | Canon EF 50mm f/2.5 Macro | 50mm | 1/60 sec | f/5.0 | ISO 100

To help ensure more natural results, it can help for you to light your subject from above. This has a few effects. The first of these is that it places the catchlight at the top of your subject’s eye, just as it would be if they were outdoors and being lit by the sun. Also, having the catchlight at the top of the eye helps to have more of the eye visible in the frame. 

If you are using more than one catchlight, the position of the other ones doesn’t matter too much, but putting the main catchlight at the top of the eye is still a good idea. 

Big vs small

catchlights in portraiture size of catchlight
The size of your catchlight is going to depend on your chosen light source and how far away that light source is from your subject.

The size of the catchlights in your subject’s eye is entirely dependent on the light sources you are using. If you are shooting in the middle of a clear day, the light source will be the naked sun, and it will appear as a small pinprick of a catchlight in your subject’s eye.

If you are shooting on an overcast day, the entire sky becomes your light source. It is not uncommon for the catchlight to appear massive, as a reflection of everything that appears above the horizon. And if you are in a studio using a large octabox close to your subject, your catchlight will be enormous and take up a large portion of the eye. 

How big you want your catchlights is entirely up to you. Personally, I prefer them to be somewhere in the middle. Too small and they barely show up in anything wider than a close-up portrait. Too big and they take up far too much of the eye, dominating one of the most important parts of your image. 

On occasion, you might hear people saying that catchlights should only ever be small. This is not a rule. Use whatever size catchlight you want.

Bright vs dim

catchlights in portraiture
Large light sources close to your subject will result in dimmer catchlights. Smaller light sources will result in brighter catchlights. It doesn’t matter which you choose, but it can help to be aware of it.

Another aspect of catchlights in portraiture that is dictated by the size of the light source is how bright the catchlights appear. Catchlights made by smaller light sources (such as the sun or small studio modifiers) will appear brighter than those made by large light sources (such as an overcast sky or large studio modifiers). 

Again, how you use this is entirely up to you. In a close-up portrait where the eyes take up a large portion of the frame, the brightness of the catchlights won’t matter as much. However, in a three-quarter length or full-length shot where the eyes are a much smaller part of the image, you may need catchlights to be brighter so that they stand out more. 

Of course, you always have the option of brightening up your catchlights with a bit of dodging and burning afterward, but making the choice at the time of capture can help to save you a lot of time behind the computer. 

Doing more with catchlights in portraiture

Beyond the basics of simply placing a catchlight in your subject’s eye, looking out for new and intriguing ways to use catchlights in portraiture can be a fun and rewarding pursuit. There are a lot of different things you can do to try and make your catchlights more exciting and visually interesting. This section will outline a few of these. 

1) Add more lights

catchlights in portraiture
Adding more lights (that show in your subject’s eyes) is one simple way of changing up the catchlights in your portraits. Canon 5D Mark III | Canon EF 16-35mm f/4L IS USM | 35mm | 1/125 sec | f/5.6 | ISO 100

Simply adding an extra light or two is possibly the easiest way to make your catchlights a little more interesting. Any secondary lighting that you use that is in your subject’s line of sight will usually appear as a second catchlight in their eye. 

catchlights in portraiture
Here the two fill lights show up as two additional catchlights.

The thing to look out for here is that you don’t go overboard. Having your subject’s entire eye consumed by multiple large catchlights will probably look more disconcerting to your viewer than clever. By all means, experiment, but don’t be afraid to dial it back a notch if you go too far.

2) Use a reflector

catchlights in portraiture
The humble white reflector is a great way to add a subtle second catchlight that lifts the brightness of your subject’s eyes. Canon 5D Mark III | Canon EF 16-35mm f/4L IS USM | 35mm | 1/125 sec | f/14 | ISO 100

Adding a simple white reflector as fill can help to lift your subject’s eyes with a catchlight of its own. This will usually result in a subtler effect, but it can lead to much brighter and more vivid eyes in your images. 

catchlights in portraiture
Here you can see just how much the reflector is doing.

3) Try different lighting patterns

catchlights in portraiture
Some lighting patterns like clamshell lighting make for really interesting catchlights. Canon 5D Mark III | Canon EF 50mm f/2.5 Macro | 50mm | 1/100 sec | f/9 | ISO 100

Using lighting patterns that require multiple light sources can provide interesting catchlights as well. Cross lighting and clamshell lighting are two patterns in particular that can create interesting effects. Both of these patterns only require two lights as well.

catchlights in portraiture clamshell lighting catchlight example
Here you can see the effect that clamshell lighting has on the subject’s eyes.

4) Use novelty light sources

catchlights in portraiture
Ring lights and other novelty light sources produce unique catchlights that can be used for visual interest. Canon 5D Mark III | Canon EF 50mm f/2.5 Macro | 50mm | 1/60 sec | f/8 | ISO 1000

There are fair few interesting lighting options on the market that provide unique catchlights. The most prominent of these is the ring light. Ring lights provide on-axis lighting for your subject as you put your camera through the aperture of the ring. The catchlight appears as a ring in your subject’s eyes.

These lights, and other lights like them, are fun to use and can help you achieve interesting lighting in your portraits. 

catchlights in portraiture
Here, you can see the distinct ring shape of the catchlight made by a continuous ring light.

One caveat for these novelty light sources: While a lot of people really love the effect they produce, a lot of people really hate it, and are very vocal about how much they hate it. Depending on the purpose and the audience of your images, novelty light sources may not be the right choice. 

The end

Taking control of your catchlights can be a great way to help you get the most out of your portrait photography. Hopefully, you see how easy and impactful this can be. It’s also a lot of fun.

Chasing catchlights in portraiture can lead you to a lot of interesting scenarios and lighting setups that you may not find, or come up with, by other means. 

The post 4 Ways of Creating Effective Catchlights in Portraiture appeared first on Digital Photography School. It was authored by John McIntire.


Digital Photography School

 
Comments Off on 4 Ways of Creating Effective Catchlights in Portraiture

Posted in Photography


7 Effective Post-Processing Steps For Beginners

23 Oct

Effective post-processing can be challenging to learn.

If you take photos in RAW format, you need to post process your photos to get them looking good.

Here are seven steps I take in Lightroom and Photoshop with most of the photos I take.

Typically, the photos I take are documentary-style, and I don’t change them with much post-processing. I have developed a workflow to enhance and tweak my photos with the aim of rendering a result similar to how I saw the picture in reality.

Technicalities and alternative variations are kept to a minimum in this article to avoid causing confusion and discouragement. This article is written for beginners starting on their post-processing journey.

7 Effective Post-Processing Steps For Beginners

The original unaltered RAW file.

Intention When Post-Processing RAW files

Post-processing software has become very complex and powerful. It is possible to manipulate photos, so they become entirely different from the original. There are dozens of tools and multitudes of ways of achieving the same or similar results.

My intention most for most photographs I post process is to make them look as natural as possible. I believe this is an excellent place to start, even when you want to go on and create more surreal looking images.

Tone range in a photo is one of my primary concerns. Your eyes can usually see a broader range of tone than your camera can record. How to post-process a RAW file to appear as close as possible to what you saw, in reality, is what I want to share with you.

Seven Post Processing Steps

  • Step 1: Process The RAW File
  • Step 2: Open in Photoshop (PS) and Create Two Layer Copies
  • Step 3: Balance the tone range
  • Step 4: Remove Distractions
  • Step 5: Dodge and Burn to Refine
  • Step 6: Crop (if you need to)
  • Step 7: Save a TIFF and a JPG

Step 1: Process The RAW File

7 Effective Post-Processing Steps For Beginners

The RAW file with no adjustments.

Choose the photo you want to work with and open it in the ‘Develop Module’ in Lightroom. Take a look at the shadow areas, mid tones, and highlights. Choose what you consider to be an essential part of your photo and pay attention to that when making your adjustments.

For this article, I am using a landscape photo of the view I see from my home. Within it, there are no real extremes or any outstanding main subject. The photo has a pleasing range of tone and color, and I want to see detail in each area – the sky, mountains, and the rice. As an unprocessed RAW file, it looks flat and dull.

Make use of the sliders in the ‘Basic’ panel on the right to begin making adjustments. For my image, I move the ‘Blacks’ slider to the left, darkening the black areas and take the ‘Contrast’ slider to the right up increase the contrast a little. Then move the ‘Shadows’ slider to the right a fraction to bring back detail in the dark areas that I may have lost while moving the previous two sliders. Lastly, I push the ‘Clarity’ slider to the right a bit.

It’s good practice to avoid moving any slider to its extremity because the image quality deteriorates. It’s better to use a combination of the various sliders to achieve the look you want and keep the quality.

The ‘Color Temp’ slider has also been moved towards the blue as the photo is a little too yellow.

I’ve made a Preset in Lightroom with these adjustments, using it on most of my photos, and then tweaking the sliders if need be.

7 Effective Post-Processing Steps For Beginners

The RAW file with adjustments.

Step 2: Open in Photoshop and Create Two Layer Copies

About 90% of the photos I post-process go through this step. I have an Action set up in Photoshop that is applied first-up on any photo I process. Make two layer copies and set the Blend Mode of the top layer photo to ‘Screen’ and the middle layer blend mode to ‘Soft Light’.

Creating two additional layers of your photos allows you to add extra punch to them. This extra punch happens by manipulating the top ‘Screen’ layer.

7 Effective Post-Processing Steps For Beginners

Opening Photoshop with two new layers created of the photo and Blend Modes changed.

Step 3: Balance the Screen Layer

Adjust the ‘Opacity’ of the layer until the darkest area you want to retain detail in is looking good. In my photo, it is the forest on the mountain that’s in shadow. I adjusted my screen layer to 40%.

7 Effective Post-Processing Steps For Beginners

Manipulate the opacity of the top Screen layer.

You can turn off the top to layers to see the changes you have made. The bottom layer is still as you imported it.

Now select the ‘Eraser’ tool and give it an Opacity setting of around 30%. Begin to gently erase the areas of your photo you want to darken. The sky is the area I worked on the most because I wanted to bring out more detail in the clouds.

7 Effective Post-Processing Steps For Beginners

Use the Eraser tool to darken some areas that are too bright.

Having the Opacity set at 30% allows you to be more precise in the way you manipulate your photo. I use a pen and tablet which is pressure sensitive and gives me more control than a mouse.

7 Effective Post-Processing Steps For Beginners

Turn off the lower two layers and temporarily make the Screen layer 100% opacity to see what you are doing more easily.

Turn off the other layers and temporarily bring the ‘Screen’ layer opacity back to 100%. Doing so makes it easier to see the changes you are making. Turn the layers back on and set the ‘Screen’ layer to the opacity level you chose.

Once you are happy, flatten the image.

Step 4: Remove Distractions

7 Effective Post-Processing Steps For Beginners

Use the Patch tool and clone tool to remove distractions.

Use the clone tool or the ‘Patch’ tool to remove distractions from your photo. There’s not too much distracting in my photo, but even taking out the few bright elements enhances the photo. I have used the ‘Patch’ tool to fill in the small section of road that was visible, the electricity poles, a person and a water tower in the distance.

7 Effective Post-Processing Steps For Beginners

Cleaned image with distractions removed using the ‘Patch’ tool.

Step 5: Dodge and Burn to Refine

Zoom your photo to fill your monitor and take a good look at it. Are there still areas which are too dark or too bright? If so, use the ‘Dodge’ and ‘Burn’ tools to fix them. You also may need to use the ‘Burn’ tool on areas you used the ‘Patch’ tool to help them blend in better.

In my photo, I have set the ‘Burn’ tool to an Exposure value of 11% and chosen to work on the ‘Mid-tone’ Range. I have darkened the clouds more and also some of the rice. The clouds now look more natural. The rice in the foreground is a little darker and helps draw your eye into the photo. I have used the ‘Dodge’ tool also on 11% Exposure, to lighten the palm tree.

7 effective post-processing Steps For Beginners

‘Dodge’ and ‘Burn’ to refine the tone range.

Step 6: Crop If You Need To

Take a look at your photo and consider whether cropping it somehow would make it a stronger image. Try it and see if you are not sure. Make a copy to crop and compare with your original. Alternatively, crop it and then use Ctrl+z (cmd+z on Mac) to see the comparison.

Step 7: Save a TIFF File and a JPG File

Saving two files gives you one of full quality and one you can use on the internet. I have a lot of different Photoshop ‘Actions’ set up to resize and save my photos depending on their usage.

7 effective post-processing Steps For Beginners

The photo with post-processing complete.

Not Every Image is Created Equal

Apply these steps with a good dose of flexibility and creativity. Experiment with them to discover alternative ways you can make your photos look.

Based on these, I have alternative steps I apply to some photos to achieve a certain look. As you work your way through these steps, remember the scene you photographed to keep your photos looking as natural as possible.

If you have any other helpful tips, please put them in the comments below.

The post 7 Effective Post-Processing Steps For Beginners appeared first on Digital Photography School.


Digital Photography School

 
Comments Off on 7 Effective Post-Processing Steps For Beginners

Posted in Photography


Tips on how to Verify That Pest Regulate Services Are Effective to the People

04 Apr

To get rid of these kinds of pests, utilization of pesticides and pesticides may be of excellent assistance once the pests are fewer in selection. The moment the infestation becomes uncontrollable,termite control pensacola fl one particular really should understand that there may be a necessity for expert services that will assistance persons to eliminate these annoying pests. Using the services of a pest regulate services may be beneficial in quite a few strategies namely –

• Provisions in the very best products – The industry experts involved along with the pest handle services vendors equip them selves with the best devices, pesticides and pesticides that allow them to eradicate the existence on the pests not to enable it infest the premises once more.

• Protected and safe ecosystem – When 1 decides to remove pests all by them selves, there are actually possibilities of a person harming the surroundings by spilling the insecticide or spraying it in locations which could contaminate drinking water, food stuff, and so forth. The kids and pets in the household might also occur in touch with this sort of sprays or liquids. When performed with the professionals, you can sit back assured that there is no harm brought on on the ecosystem as these experts consider all attainable care to curb such dangerous challenges.

• Usage of Eco-friendly items – Most corporations offering pest management solutions equip on their own with eco-friendly items that bring about a safer atmosphere where by there’s no type of pollution created. The sprays applied are ozone welcoming and thus only influence the qualified pest and almost nothing else.

• Turning out to be educated with regards to the numerous safeguards – The specialists from the pest manage services providers without a doubt present their ideal services and strive to eradicate the pests from the individual premise. In addition they educate the citizens about the methods to avert these types of pests from infesting yet again. The citizens are recommended to help keep their environment cleanse and litter free in which there’ll be no probabilities of even further pest breeding.

• Lowered Infection – Pests unfold an infection inside a way that turns fatal occasionally. They handle many health conditions for instance malaria, dengue, plague, leptospirosis, salmonella, asthma, and many others. Eradication of these types of infection resulting in pests with the enable of pest handle solutions will help a single to steer a healthier lifestyle where by you’ll find lesser conditions of folks falling sick. It can be beneficial don’t just for the residents but in addition for your persons residing around them.

Benefiting within the services which the pest management companies provide, people may very well be able to steer a much healthier and a peaceful lifestyle with no existence of those pests.

The post Tips on how to Verify That Pest Regulate Services Are Effective to the People appeared first on Photonovice.

Photonovice

 
Comments Off on Tips on how to Verify That Pest Regulate Services Are Effective to the People

Posted in Equipment


18 Stunning Images of Effective Backlighting

30 May

The direction of light is so important in photography. Backlighting is one that can be tricky to handle exposure wise, but make sure a stunning image if you can nail it. Let’s have a look at these 18 images that use backlight effectively.

By Bill Gracey

By Julian Schüngel

By Sascha Wenninger

By Toby

By Vincent Brassinne

By tai-nui

By Linh Nguyen

By Jason Walley

By Anne Worner

By M. Accarino

By Steve Corey

By philografy

By Eric Huybrechts

By Sean Molin

By denise carrasco

By Theophilos Papadopoulos

By Diana Robinson

By Sergiu Bacioiu

The post 18 Stunning Images of Effective Backlighting by Darlene Hildebrandt appeared first on Digital Photography School.


Digital Photography School

 
Comments Off on 18 Stunning Images of Effective Backlighting

Posted in Photography


Tips for Fast and Effective Studio Product Photography

23 Sep

This is the second part of a series that will explore a studio setup aimed at product photography. You can see the first here: Equipment Tips for Quick and Efficient Studio Product Photography.

Although this is built primarily for product photography you can use it for a few other genres. In this second part I will be going hands on with an actual shoot. I will show you how to set up a shoot based on the equipment from part one and go over some tips that I have gathered over the years of using it. If you haven’t read part one yet, head over there and give it a quick look so that you are up to speed with how we are about to implement that system.

PICTURE 1

Getting set up

Now that you are caught up let’s dive in. For almost every shoot I start by turning on my table lights. Those include the lights behind and beneath my table to allow the surface to glow from within (see photo above).

I have one of my Spiderlite TD6 heads above the table aimed straight down. This really helps fill in the top of the product and knock down the shadows caused by the table that underlights the product. My second TD6 light is the one that moves around my set. This is my main light as it is set brighter than the others and it is responsible for the main direction of light.

Settings for my lights will differ slightly from what you will need but this is a good starting point. The overhead TD6 is set for 30% power. The two Flashpoint lights under the table are set to 50% power. I have two small fluorescent softboxes behind the table at full power. My main TD6 is usually at 66% power (two switches turned on).

PICTURE 2 PICTURE 3

These are the settings I run on my lights, and they work for almost all of my clients that need photos shot for their Amazon, Ebay, Etsy stores or their online company catalog. You need to realize that all bulbs are not created equal and that if you are mixing different daylight balanced fluorescents that colors can come out altered in your shots.

Set the color balance

To counter this problem, invest in the Xrite color checker. Make a custom profile for your camera using your lights and this will ensure that colors are accurate. To find more information on incorporating the Xrite into your workflow check out this article by Andrew Gibson: How to Use the X-Rite ColorChecker Passport to Obtain Perfect Color.

PICTURE 4

Set the exposure

As for my camera, I have one of my custom buttons pre-programmed and ready to go, I simply switch to C2 and I am shooting in seconds. My C2 settings are fixed for Manual Mode at f/16 and 1/6th of a second, highlight detection on, and a square crop. This will get me very close with my studio setup. If I need a little more blowout on my white table I slow my shutter speed, or alternatively if any clipped whites creep into my product I can increase the shutter speed.

PICTURE 5

I also find that manual focus is much faster in this situation. Focus hunt happens a lot during shoots and it eats time quickly when you are shooting 20+ products with 4+ angles per part. With a quick flick of a button on the back of my camera, I can enter Live View mode, zoom in, and get the exact focus that I would like. I shoot with highlight detection on so that when the image comes up for review anything that is clipped will flash black.

PICTURE 7

From there I am able to determine if I obtained a proper exposure. The histogram doesn’t help very much here as it is always going to be spiked to the right because I am purposely blowing out the background. I have also set my camera to crop the image to a square as this tends to be the only format my customers want for this style of photography.

Make a raised platform

A big tip that I can share with you is to use a raised platform. The reason you need a raised platform is because when an object gets placed directly on the table surface it tends to add a glaring highlight to the bottom of the product. The tabletop and the highlight are so close in terms of power it becomes difficult to blow out your table and keep the highlight on the bottom of your product from clipping. I have a super easy solution to get around this dilemma. What I did was take two boxes, stack them on top of each other, and then wrapped both in regular old white printer paper.

PICTURE 8

PICTURE 9

If you leave them unwrapped then you will have black strips reflecting in your product. The next thing I did was get a sheet of clear acrylic from Lowes. It is a quarter inch thick, and is 18×24″. It cost me around $ 20. I place this acrylic on top of the wrapped boxes which raises the shooting surface by seven inches.

PICTURE 10

What this does is allow the table to blow out, but because of light falloff it prohibits the product from being overly lit on the bottom and clipping the highlight. While I was at it I wrapped two smaller boxes of different sizes in white paper as well. I use these quite often to bounce light back into the shadows.

PICTURE 11

Ready to place the subject

Now that we have gone over power settings for the lights, the configuration of my camera, and some tips on knocking down blown highlights by raising the surface, let’s set up an actual shoot. We will ease into it and start with something that doesn’t give you a whole lot to think about. Let’s do a regular coffee mug.

I placed the mug directly in the middle of the acrylic. The overhead light is directly over the mug aimed down. The other TD6 is at 90 degrees, hitting the mug from camera right.

PICTURE 12

Picture-13b

The resulting image is 95% ready to go online almost straight out of the camera. There are a few things you might want to obsess over, like adding more white reflection and narrowing the dark gap. But honestly, it’s ready to go as is. I did say this was an easy subject so let’s move onto something a bit harder, shall we?

Let’s try a harder subject

The next thing we will attempt is something that gives plenty of photographers fits; a white subject on a white background. Well, because we have a blown out table top and we are controlling the amount of light that the tabletop is introducing to our subject, it actually isn’t difficult to get great results.

Let’s start with the same lighting. Light from directly above, and one more light at 90 degrees to camera right. Straight out of camera we can see we did a pretty good job.

Picture-14b

There is no major clipping going on the subject yet the background is completely white. There is not a lot of shape and dimension to the item, however. So let’s move the right light so that instead of 90 degrees it is 45 degrees. Now the light will hit the product on the front of this USB hub. Bingo.

Picture-15

We now have highlights on the leading edges which helps give it shape and dimension. It’s very close, but we can still do a little better. Let’s add one of those white wrapped boxes we made earlier to the shadow side and bounce some of our key light back into the product.

PICTURE 16

Picture-17b

Now what we get is just a subtle fill in the shadow and that just about does it for this product. Yes, we could obsess further over some other details and finesse it some more, but remember this is a speed table. We are trying to get products on and off the table quickly. This image would pass for all of my clients.

Shooting reflective surfaces

For our final demonstration let’s do a reflective surface. Leaving the lights exactly the same as the previous shot (again because this is about speed) I will remove the white box that is acting as a fill and shoot this RCA adapter.

PICTURE-18b

Again right out of camera it is pretty good. You can see some red reflecting on the shadow side in the lower left which is coming from a red bag out of frame, and there is a really dark strip running down the left/center side. Let’s clean those two things up and try again. I will remove the red bag from out of the frame and put the smaller white box fairly close to the adapter.

PICTURE 19

picture-20b

With just those two changes it has made a large difference in the shot. Let’s try and clean this up a tad more. The reason there is a black line is because it is reflecting the much darker room behind the camera. Using the angle of incidence I will use my large white box just below my lens and throw light back into the subject.

PICTURE 21

picture-22b

There we go! A perfectly acceptable image for an online catalog. The RCA adapter is cleanly lit, no harsh black lines, a fully white background and it is already squared because of our camera settings. This image is ready to go.

Read more info about shooting reflective surfaces here.

Summary

The reason I built this system is for speed. If you are trying to knock out 100 products a day, with this system you could absolutely do it. I know because I have done it.

Of course, there is the third and final part of the process and that is editing using your favorite software.

I use Lightroom, and it will really going up your product photography game. You need it to catalog all of your client’s images, keep track of the part numbers, export to their specification and clean up shoot errors using very little time.

Please share your questions and comments in the space below.

googletag.cmd.push(function() {
tablet_slots.push( googletag.defineSlot( “/1005424/_dPSv4_tab-all-article-bottom_(300×250)”, [300, 250], “pb-ad-78623” ).addService( googletag.pubads() ) ); } );

googletag.cmd.push(function() {
mobile_slots.push( googletag.defineSlot( “/1005424/_dPSv4_mob-all-article-bottom_(300×250)”, [300, 250], “pb-ad-78158” ).addService( googletag.pubads() ) ); } );

The post Tips for Fast and Effective Studio Product Photography by Jacob Macias appeared first on Digital Photography School.


Digital Photography School

 
Comments Off on Tips for Fast and Effective Studio Product Photography

Posted in Photography


How to Create an Effective Workflow and Image Organization

28 Aug

Lets face it, we all love to take pictures, basically to get out there and photograph what makes us happy and gets our creative juices flowing. Many of us, myself included, hate sitting in front of the computer, sorting and sifting through images from a session, wedding, or just personal work. From busy professionals to active hobbyists, having a good solid workflow and method of organizing images is crucial. I am a wedding, lifestyle and travel photographer. So my workflow is slightly different based on the type of session I am photographing, but for the most part I follow the same series of steps. Here are some tips on how to create an effective workflow that can work for your style of photography.

Memorable Jaunts DPS Article Editing and Workflow -4-2

Camera gear

My camera of choice is a Canon 5D MKIII with a Canon 5D MKII as a backup camera. I have to admit, 90 percent of my sessions are shot using the MKIII. I very rarely use the MKII, but when I am photographing a wedding, the MKII is fully loaded and ready to go, in case I need it. I start of each session (wedding or lifestyle) with a fully charged battery and a Transcend 32GB CF card. I own four 32GB CF cards, three 16GB CF cards and two 8GB CF cards.

For weddings that are over 10 hours long, I carry all my cards with me. Each camera will start with formatted 32GB CF card. When I am traveling for work or pleasure domestically, I carry my MKIII but when I am traveling internationally I typically carry both MKIII and MKII. The night before any photoshoot (either wedding, travel, or lifestyle), I charge all my batteries (I have five batteries between my two cameras and luckily they are the same configuration) and format all my CF cards. My bag is packed and ready to go in my office.

Fits a Canon 5D Mark II with 28mm lens.

During the shoot

Depending on the photoshoot timeline, I will swap out my cards during a logical break in the shoot. For example – the bridal portraits, first look, etc., will be on one or more CF cards. I will swap out the used card before the ceremony (even if it is only partially used), so I can photograph the ceremony on a fresh card. I learned this the hard way early on, when I lost an entire session on a card that failed. Luckily it was not a wedding, but a personal shoot that I was able to recreate. Since then I don’t take any chances with failed CF cards, especially for important events like weddings. Used CF cards from a photoshoot are placed in a separate pouch, from fresh CF cards which are placed in another pouch in my camera bag.

After the shoot (local)

When I am back home from a wedding or a lifestyle shoot, the first thing I do is pack away my gear. I separate my camera bodies from my lenses, and pack them away separately. All batteries are removed, including those from my flash. I have heard horror stories where batteries, especially AAAs, have leaked into the flash socket, so I don’t want to have to deal with that mess!

I download the images from my CF cards onto an external hard drive, that acts as a storage for my RAW images. Once the RAW images are transferred to my external hard drive, I then format the cards in camera (not via the computer). I use Seagate external hard drives to store my images. I also download my images into the Photos app on my iMac computer. The Photos library resides on another Seagate external hard drive.

Memorable Jaunts DPS Article Editing and Workflow -2

My external hard drives from Seagate are used to store RAW files from my cards and my Photos library. The RAW files are not deleted but the Photos library are deleted at the end of every year.

I use iPhoto (now Photos) and quickly sort through the images that I like. Those images are exported as Originals to a folder on my iMac (I name my folders based on the date of the shoot. For example: YYYYMMDD_ClientName_TypeoftheShoot. These selected images are then imported into Lightroom, my preferred editing software.

My Lightroom catalog also resides on a WD My Passport Ultra, external hard drive. I understand you may have some concerns over running a LR Catalog on an external HD, because of potential LR speed issues. So far, I have not experienced any issues with LR in terms of speed by having the catalog on an external HD. But if you are concerned about speed then your LR catalog can be put on your computer’s hard drive, and keep a backup on the external HD.

This is more portable than a Seagate and I carry it on extended trips, especially international travel. Once the images are imported into Lightroom (I retain the same name of the folder in Lightroom as well), I delete the folder containing the RAW images from my iMac hard drive. If you are keeping track, my RAW images are stored on two separate external hard drives – one that is a dump of the card and the other in a Photos catalog.

After the shoot (on the road)

When I am traveling for work or pleasure, I carry two WD My Passport Ultra external hard drives. One holds the RAW files from my CF cards, the other holds my Lightroom catalog. My original LR catalog is also backed up on one of my Seagate external hard drives. Once I copy the Raw files over, I follow the similar process as when I’m at home.

When I get home, the raw files from the CF cards used during the trip are copied over to the Seagate that houses all my RAW images, and deleted from the WD Ultra so that it is ready for my next trip. I carry my Lightroom catalog only for extended travel trips, when I know I will be editing images and posting them on social media and/or my blog. For short weekend getaways, I either carry just the WD Ultra just for the raw files or nothing at all, based on the duration of the trip.

Memorable Jaunts DPS Article Editing and Workflow -3

My portable hard drives are used to save my RAW files when I am traveling, as well as my Lightroom catalog when I am traveling for an extended period of time.

Editing and delivery workflow

80% of my editing is done in Lightroom. I use Photoshop sparingly if I have to make any advanced editing like head swapping, and or removing large objects from images. I have invested in the Adobe Creative Cloud for LR and Photoshop. It’s the bundle package deal for $ 10 per month for photographers (get both for only $ 7.99 as a dPS reader). I am able to use both on both my iMac, which is my primary editing device, as well as my MacBook Pro, which is my travel companion.

After editing is complete, I export my client images onto the same WD Ultra external hard drive as my Lightroom catalog. The client folders are also arranged by date of the session. This time my naming standard is as follows: Memorable Jaunts_ClientName_YYYYMMDD – all images will have the same naming convention as the folder, along with an image sequence number. The images are also uploaded to my portfolio site, in a gallery which is password protected. I share the password with my clients, for viewing their images and ordering any prints. I use Zenfolio to host my client galleries. I have been with them since I launched my business in 2010, and have had a very good experience with them (and no, I did not get paid to say this about them, my views are my own).

Memorable Jaunts DPS Article Editing and Workflow 01

My naming convention for my Lightroom Catalog – the folders are ordered by Year and then by date for each of my sessions

When I am traveling, I follow the same process, and edited images are saved in the same WD Ultra external hard drive. Should I need to touch-up or re-edit an image when I am back home, I simply connect the same external hard drive to my iMAC, launch the LR catalog, and I am good to go.

Client galleries are live online for two weeks, and then they are deleted. At the end of every year, I delete old client processed images from my external hard drive. I retain client session raw files for three years before I delete them from my Seagate external drives (both the original CF card download as well as the Photos catalog) to make room for new sessions. My personal images (images of my family and personal travel) follow the same process as my client sessions. Except these images are never deleted, they are too precious to me and live on forever on my external hard drives!

Client galleries are live online at Zenfolio for two weeks, and are then deleted from that site. At the end of every year, I delete client processed images from my external hard drive. I retain client session RAW files for three years before I delete them from my Seagate external drives, to make room for new sessions. This is something that I communicate with all my clients when when they receive the link for their online gallery. If any of my clients request additional time to store and/or purchase their images, that is something I will most certainly accommodate 

My wedding photography packages all include edited images on a personalized flash drive. Whereas my family portraiture clients have the option of purchasing digital images, if they want them for future use. If you don’t want to delete client images in the event that a client may come back to you after a few years (for example in case of death in the family, etc.), you can invest in a large external storage unit like Synology system for backing up, or use Amazon s3 in a cloud environment. 

Memorable Jaunts DPS Article Editing and Workflow -4

The naming convention for my processed files

Summary

As you can see, my workflow and image organization is not too complicated. I tried a few different variations, both in terms of file naming conventions, as well as file storage options, but I find working off external hard drives is fast, easy, and safe. It does require investment in external hard drives, but I typically pick some up when they are on sale.

I encourage you to use this, or some variation of this workflow, and tweak it to make it your own. Having a workflow will help you be better organized, spend less time in front of the computer, and more time out there doing what you love the most – shooting.

googletag.cmd.push(function() {
tablet_slots.push( googletag.defineSlot( “/1005424/_dPSv4_tab-all-article-bottom_(300×250)”, [300, 250], “pb-ad-78623” ).addService( googletag.pubads() ) ); } );

googletag.cmd.push(function() {
mobile_slots.push( googletag.defineSlot( “/1005424/_dPSv4_mob-all-article-bottom_(300×250)”, [300, 250], “pb-ad-78158” ).addService( googletag.pubads() ) ); } );

The post How to Create an Effective Workflow and Image Organization by Karthika Gupta appeared first on Digital Photography School.


Digital Photography School

 
Comments Off on How to Create an Effective Workflow and Image Organization

Posted in Photography


Using Framing for More Effective Compositions

12 Nov

From my experience, it’s true – photographers tend to see the world in a different way. If not from the beginning, eventually, and maybe subconsciously, your eye is trained to notice details differently. Perhaps it’s the way light falls off of, or wraps around an object, or when pleasing geometrical compositions fall into place. In extreme cases, you may even start to catch glimpses of your camera’s viewfinder layout when you blink (you might want to seek help for this).

Framing of a hidden Chinese garden.

Some opportunities to use framing in photographs are less subtle than others. Of all the images I shot in this Chinese garden, this one stood out, as it not only shows the hidden nature of the garden, but makes a perfect frame.

Often, an important step in the “Seeing like a Photographer” evolution is to begin recognizing, and implementing, framing elements into your images.

Although in photo lingo we talk about framing often, it is one of the strongest tools you have at your disposal to create strong compositions. Let’s be clear that when we talk about framing your photo, we may be referring to the actual border of the image itself – but in this article we are discussing other objects used to intentionally create some sort of border around the subject of the image.

However, clever framing is just one part of an equation that fits into an overarching photographic formula. In certain circumstances, the frame itself may be so ridiculously amazing and awe inspiring that it carries the image all by itself. In practice, you are likely to use framing in order to draw attention to, and strengthen, the subject of the photo.

Framing a photo of a pier

Framing can help highlight your subject, directing the viewer’s gaze where you want it.

Framing can be used to various degrees; while some framing elements may be subtle in one image, they can be quite obvious in others. This can be a product of your personal creativity or style, or simply a result of making do with what you have, as there aren’t always framing options for every photo you shoot.

Using framing to boost your photo’s appeal is generally a good tactic, and is a great approach to creating original images of over-photographed scenes or landmarks.

Framed shot of the space needle

A keen eye for framing can yield original images of well-photographed landmarks like the Space Needle in Seattle.

As a photographer you will become familiar with the feeling of walking up to a familiar scene, turning on your camera and raising the viewfinder to your eye, only to not push the shutter button. You’ve realized that you’ve seen the picture you were about take a million times, and you want your own unique shot.

For example, as I wander around a new city seeing the sights, I am always looking for environmental elements that I can use to add a sense of place, or implement as an element of a frame. Once you make a conscious effort to use framing techniques in your photography, you start to see all sorts architectural and natural elements that you can use.

Architectural element used for framing an image

After developing an eye for framing your subject, many opportunities will reveal themselves.

What can you use to frame your image? Some of the more common elements include foliage such as trees, branches, and leaves. Windows and mirrors in houses and cars are other popular framing options.

Framing a food photo with the chef's body

Framing elements come in many shapes and sizes – creative perspectives can pay off.

I like to look for interesting architectural features, or even use people as framing borders. Sometimes you may not necessarily even have a subject in mind for an image but see a good framing opportunity, so you then look for a compelling subject or wait for a person to pass through the scene inside the frame.

You can also use lighting as a powerful framing tool. As we are always working with various lighting in photography, what is included or excluded from the lighter areas of the image can help isolate the subject.

Although it’s best practice to develop an eye for framing while out shooting, other options may often present themselves while editing your photos. Cropping can be very useful for honing in on, or aligning, the framed area of the photo just right. Other tools such as the Graduated Filter or Radial Filter in Lightroom, can be used to lighter or darken specific areas of your image, to boost the intensity of your framing.

Have you made good use of framing techniques? Share your successes and images with everyone in the comments below.

This is the first in a week of articles about composition. Look for another tomorrow and over the next few days! 

googletag.cmd.push(function() {
tablet_slots.push( googletag.defineSlot( “/1005424/_dPSv4_tab-all-article-bottom_(300×250)”, [300, 250], “pb-ad-78623” ).addService( googletag.pubads() ) ); } );

googletag.cmd.push(function() {
mobile_slots.push( googletag.defineSlot( “/1005424/_dPSv4_mob-all-article-bottom_(300×250)”, [300, 250], “pb-ad-78158” ).addService( googletag.pubads() ) ); } );

The post Using Framing for More Effective Compositions by Jeremie Schatz appeared first on Digital Photography School.


Digital Photography School

 
Comments Off on Using Framing for More Effective Compositions

Posted in Photography


5 Effective Methods of Creative Composition

13 Oct

It seems everyone has a camera these days, so you may be wondering, “How can I separate myself from the pack?” The answer does not involve a better camera, or a more expensive lens. In fact, the most important part of your equipment actually can’t be purchased in a store. It’s your own unique vision, and perspective on the world, that makes all the difference. The following five elements of creative composition are starting points to help you better express your point of view.

1) Leading Lines

While using leading lines in composition sounds simple, it’s actually one of the harder styles to pre-visualize. The idea is to find a line that will lead the viewer’s eye through the frame, and direct them to the subject. Train tracks are an obvious example, but it’s dangerous to shoot there, and therefore not recommended. There’s no shortage of safe alternatives however. The key is learning to see these opportunities, and apply them accordingly. How do you do this? Slowing down is certainly a good place to start. If you’re chasing the light at sunset, chances are your composition will be rushed and sloppy. If you take the time to really scout a location, it’s possible to craft an image that far exceeds a routine snapshot.

2) Shutter Speed

2_waterfall_slow-shutter

Yes, even your camera settings can be used as a compositional element. In this instance, a fast shutter speed would have frozen the water, leaving it rather listless. By slowing the exposure down to several seconds, the circular motion of the stream becomes evident, and works to anchor the scene. This is a different way of thinking about composition. It’s not only about where you put your focus point, but how you apply your settings to create the scene.

3) Depth of Field and Selective Focus

The aperture you choose can also play a major role in your composition. At f/1.8 for example, you have such a shallow depth of field that only a small portion of the picture is in focus. From a strategic angle, this can be quite an effective way to bring attention to your subject. While the face of the monument is sharp, both the foreground and background are completely out of focus. Seeing like this in advance, takes practice and imagination. When you look at an object, try to visualize how the camera can render it at various settings.

4) Going the Extra Mile

Lazy Composition

When traveling, it’s easy to get swept up in the excitement of a location. Often, you have to balance shooting time with making time to eat, sleep, and well, be human. Still, you want to get the shot that will be good enough for your portfolio. This doesn’t necessarily mean you need to sleep in the field, with the camera as your pillow. Sometimes, the difference between an average shot and a great one is a little extra effort. I’ve seen this time and again in my own work, and therefore wanted to stress it here.

In the first shot (above), I got off the ship, turned around and made a quick mindless record shot. The light was pretty but the overall image is uninspiring at best. Taking my own advice, I asked the waiting cab to let it idle for a minute, and walked down the pier a few hundred feet. From this new perspective, an entire different view presented itself with the sun kissing the ship’s bow. To emphasize the shape and color I purposely underexposed the scene (to make a silhouette). The small aperture of f/16 turned the sun into a starburst. These two shots are vastly different but were taken merely 100 feet apart, separated by five minutes.

Second ship shot

5) Framing

There are of course times when you scout and plan well, but the light is just not flattering when you arrive. You can go home empty handed, or work with what’s been presented, to make something special. Framing is one of the most effective ways to eliminate bad light. By essentially hiding it behind foliage you can emphasize your subject in a clever way. For the viewer, this provides a sense of three dimensionality, almost like they’re peering through a window. A small aperture works best for this technique, as it will keep everything sharp from near to far.

So try to incorporate some of these creative composition techniques into your images as you shoot. Work intentionally and think about your image before you press the button. Share any additional tips you have in the comments below.

googletag.cmd.push(function() {
tablet_slots.push( googletag.defineSlot( “/1005424/_dPSv4_tab-all-article-bottom_(300×250)”, [300, 250], “pb-ad-78623” ).addService( googletag.pubads() ) ); } );

googletag.cmd.push(function() {
mobile_slots.push( googletag.defineSlot( “/1005424/_dPSv4_mob-all-article-bottom_(300×250)”, [300, 250], “pb-ad-78158” ).addService( googletag.pubads() ) ); } );

The post 5 Effective Methods of Creative Composition by Chris Corradino appeared first on Digital Photography School.


Digital Photography School

 
Comments Off on 5 Effective Methods of Creative Composition

Posted in Photography


13 Effective Interior Photography Tips for Dummies

29 Sep

How often have you seen great properties being completely ruined by awful photography? That’s right – terrible interior and exterior photos are a norm, especially when made by average camera users who know next to nothing about composition, lighting or specifications. But the truth is that taking nice rental property photos is within your reach, even if you’re new to Continue Reading

The post 13 Effective Interior Photography Tips for Dummies appeared first on Photodoto.


Photodoto

 
Comments Off on 13 Effective Interior Photography Tips for Dummies

Posted in Photography


Simple Yet Effective Marketing Efforts to Get New Clients (and Tools)

20 Jul

After you have set up your business, made a business plan, created an attractive portfolio, and did a lot of other things, the most challenging part is still: “how to get clients”. What do you need to do to get the right people to see your website? How do you make them want to buy your services and products? These Continue Reading

The post Simple Yet Effective Marketing Efforts to Get New Clients (and Tools) appeared first on Photodoto.


Photodoto

 
Comments Off on Simple Yet Effective Marketing Efforts to Get New Clients (and Tools)

Posted in Photography