RSS
 

Posts Tagged ‘During’

Cameraman injures OSU football player during pregame warm-up

29 Nov
Photo by Paula R. Lively. CC-BY-2.0

Ohio State quarterback J.T. Barrett allegedly suffered an injury after being hit in the knee by a cameraman during pregame warm-ups. Barrett went on to play during the first-half of the game, but left during the second-half due to the knee injury.

The claim that an unidentified cameraman was responsible was initially made by OSU coach Urban Meyer during the post-game press conference. “A guy with a camera hit [Barrett] in the knee…” explained a visibly angry Meyer, going on to call for an “all-out” investigation into who was responsible, though ESPN later reported that OSU Athletic Director Gene Smith said such a probe wouldn’t happen.

“We’re not doing a full-blown investigation to find the photographer,” Smith said. “We’re looking at what things led up to that.”

Details about how the incident happened are unclear, and despite there being a stadium full of cameras, no footage of the actual ‘collision’ has been released. TMZ has obtained some footage of the immediate aftermath from a fan who pulled out his smartphone to record what was happening, which shows Barrett limping off and gives you an idea of just how crowded the sidelines were during warm-up:

Despite Meyer’s anger at the specific cameraman, the incident will probably have a broader impact rather than individual punishment. Smith stresses that the focus will be on making changes so that something like this doesn’t ever happen again.

According to ESPN, Smith said:

The conference office is gathering data. That’s the extent of it. The outcome of it will ultimately be improved operations. There’s no attempt to try and find a person. The attempt is to find out what happened, what corrective measures we need to put in place.

So it sounds like the individual cameraman is off the hook… unless of course this ‘collision’ translates into strict new rules and limited access for sports photographers. Then he’ll have have some very upset colleagues to answer to.

Articles: Digital Photography Review (dpreview.com)

 
Comments Off on Cameraman injures OSU football player during pregame warm-up

Posted in Uncategorized


5 Street Photography Project Ideas During the Fall

15 Nov

Street Photography is seen as a snapshot competition where only a single picture matters the most. This can be fun and teaches you a lot about photography and yourself. You need to put everything in that single shot that tells a story and looks good at the same time. Yet all your pictures might be disconnected over time and it Continue Reading

The post 5 Street Photography Project Ideas During the Fall appeared first on Photodoto.


Photodoto

 
Comments Off on 5 Street Photography Project Ideas During the Fall

Posted in Photography


4 Tips for Low Light Photography During the Winter

26 Oct

With fall here and winter fast approaching as well, the sun sets earlier in the day and most of us will be confined to shooting indoors. Whether you are shooting during the day or in the evening after the sunset, adapting and embracing shooting in low light will be beneficial to help you continue working on your photography skills and other personal photo projects.

If you are like me and work all day and come home in the evening to pick up your camera, you may be further limited to shooting right around sunset or utilizing artificial light sources only.

Low light indoors winter 10

There was a time not long ago when I used to hate photographing my kids in low light. I was nervous about increasing the ISO and adding noise in my images or worried about reducing the shutter speed and causing camera shake. But slowly over time, I started to get used to working with various light sources around me creatively and utilizing them in my images.

If you are new to shooting in low light, here are some simple tips that could be helpful without the fear of shooting indoors in low light or using artificial light.

1. Shoot wide open and/or use a slow shutter speed

Although this may not be the best solution all the time with multiple people in the image indoors; but shooting wide open (as much as your camera allows) helps you get more light in the image. Making sure your focal points are aligned on the subject where they need to be, this could help you with that low light shooting you are struggling with.

Low light indoors winter 1

Low light indoors winter 2

Another option would be to consider using a slow shutter speed. A shutter speed of 1/200th or slower to 1/100th doesn’t always produce camera shake when handheld and lets more light in as well. There’s always the option of using a tripod, however, keep in mind that this may not be feasible when photographing kids in action.

Low light indoors winter 3

2. Crank up that ISO and embrace noise

Having a camera with low light capabilities sounds great. However, if you are on a budget and need to work with what you have, consider cranking up your ISO as high as you can after adjusting your shutter speed and aperture.

Consider embracing the noise or grain produced and using it in your images creatively. Converting an image to black and white during post-processing also helps hide any yellow light indoors you may have from artificial sources after hours.

Low light indoors winter 4

Low light indoors winter 5

Low light indoors winter 6

Low light indoors winter 7

Consider using alternate artificial light sources such as an iPad light, refrigerator light, desk lamp, etc., for extra creativity.

Low light indoors winter 8

Low light indoors winter 9

3. Find pockets of light

Open up windows, blinds, and curtains. Pockets of light and shadows add to the drama and create depth.

Once you get home from work in the evening, look around to find any little pockets of light that you can use. This may be right around the golden hour (one hour prior to sunset) and you will find some amazing light peeking through the windows if you time it just right. Utilizing this light will produce some amazing shadows and you can create some moody images as well.

Low light indoors winter 11

Low light indoors winter 12

Low light indoors winter 13

4. Dust off your flash and practice using it

When all else fails and I need to turn my lights on after hours, I rely on my Yongnuo flash unit and simply bounce it off the nearby walls. A lot of times I hear from other photographers (who limit themselves from shooting indoors during evening hours) that using flash is really complicated. I set my flash unit on ETTL and power it accordingly to get more or less light in the image based on how many artificial light sources I have turned on in the room.

Low light indoors winter 14

Low light indoors winter 15

Conclusion

In conclusion, all of the tips above are not always an either/or situation. Most of them can be used together such as combining a slow shutter speed along with increasing the ISO while shooting in a pocket of light with the blinds open when you really have those corner rooms with less light!

While doing the above and balancing your exposure creatively, you can create moody images with some drama. In summary, shooting in low light or the use of artificial light doesn’t have to be that intimidating. Give it a trying show us what you come up with in the comments below.

The post 4 Tips for Low Light Photography During the Winter by Jyotsna Bhamidipati appeared first on Digital Photography School.


Digital Photography School

 
Comments Off on 4 Tips for Low Light Photography During the Winter

Posted in Photography


Microsoft’s HoloLens may give surgeons virtual help during spinal surgeries

06 May

Scopis, a maker of navigation tools for surgeons, has introduced a new platform that utilizes Microsoft’s HoloLens mixed-reality headset. The benefits are pretty obvious – useful information can be projected in onto a patient, hands-free, and virtual monitors can be displayed within view for quick reference. Take a look at a simulated demo in the video above.

Articles: Digital Photography Review (dpreview.com)

 
Comments Off on Microsoft’s HoloLens may give surgeons virtual help during spinal surgeries

Posted in Uncategorized


9 Tips that Make Couples Happy During a Portrait Session

22 Jan

Whenever a camera appears, you can bet your caboose that there are emotions swirling for 99% of the human population. From fear and disdain, to reverting to the classic Chandler Bing smile, people tend to exaggerate or warp their behaviour in front of the camera in endlessly inventive ways. But unless you’re going for a Sears portrait look, your job as a photographer is to not only deliver an end-product that thrills your clients, it’s to make the shoot an awesome experience as well.

Here are nine of my favorite, tried-and-true strategies for helping clients forget about the camera, and have a good old time on their shoot.

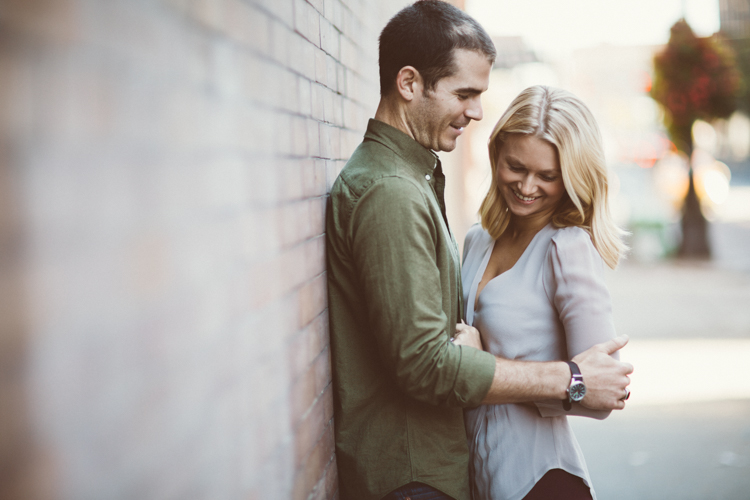
DpsCouplesimage1

1 – Model the behaviour you want

A shoot can be fraught with stress, so for the love of Annie Leibowitz, don’t add to it. When people arrive at a shoot, they are almost invariably nervous, and will be looking to you for all their cues. Take the lead in creating the atmosphere you’re hoping for, and your clients will follow suit almost subconsciously. You have a huge opportunity to model the relaxed, joyful, behaviour you want to capture, simply by setting the tone and mood of the shoot from the get-go!

This is so simple, but laugh. Crack jokes, if that’s your thing. Show them you’re willing to get weird, and it’ll liberate them to fall into a relaxed zone that brings out great images. It’s not about putting on a performance, but about being so yourself and comfortable in your own skin, that your clients can’t help but do the same.

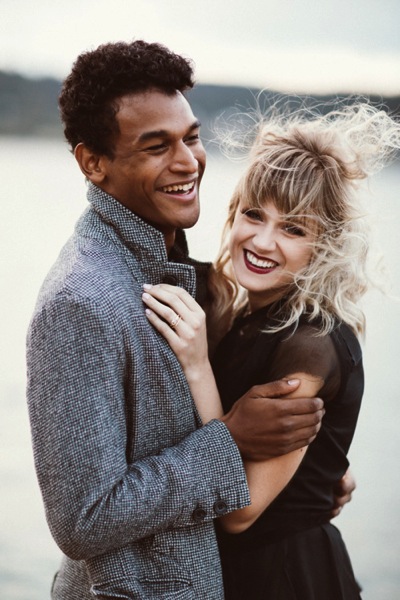
DpsCouplesimage2

2 – Learn to read people

On that note, hone in your ability to read your clients so they really feel seen as individuals, and not two-dimensional subjects, and adapt to their specific personality. In many ways you have to be a chameleon, ready to provide to whatever the client might need from you to make them comfortable. We usually talk a lot throughout our shoots, and have found that most people react well to constant positive feedback, but not everyone wants a running commentary. There’s a fun balancing act to figure out what your client will respond to, and this is a good life skill as well.

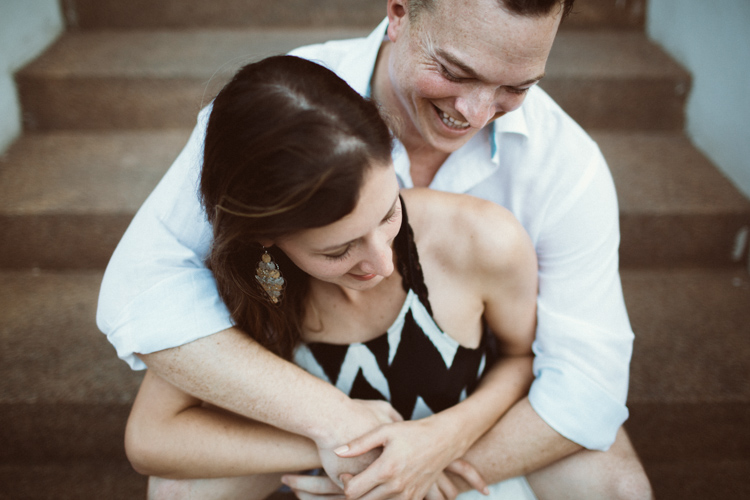
DpsCouplesimage3

3 – Find an in

Whether it’s talking baseball, vintage cars, or Japanese flower arranging, finding some common ground can put even the stiffest of the stiff more at ease. They’ll loosen up, see you as a teammate, and get more invested in following whatever direction you have for them. We’ve established trust with clients by talking with them about everything from beers in Thailand, to Tom Brady’s throwing motion. Chat it out, listen for non-sequiturs and when you find an in, go for it.

4 – Treat your camera like a commonplace object

By treating your camera like it ain’t no thang, with no more emotion connected to it than a chair or a mailbox, you can help couples forget that it’s there (well, almost). When starting a shoot, spend as much time as possible chatting, and relaxing with the couple before you ever lift the camera. Hold it in your hand as if it’s no more consequential than a cup of coffee. This action may seem subtle, but your clients are looking to you for their behavioural cues, and treating the camera like something to not think twice about, will allow them to consider it equally as casually.

DpsCouplesimage4

5 – Have the subject help you design the shoot

Giving your clients plenty of say in the terms of how the shoot goes, is a huge key to making them relaxed. Doing extra legwork ahead of time, like guiding them with their outfits and locations, allows them to show up already feeling invested and in control over much of their experience. The old relationship advice that “communication is key” could not be more apt. Spending time before the shoot helping people feel like their voice is being heard, is central to great images.

DpsCouplesimage5

6 – Tell a better story

We’ve all been that novice photographer who, in a desperate attempt to capture a mirthful photo of unrehearsed laughter, says something panicked like “okay, now make each other laugh”. That’s not funny, y’all! You gotta be more creative than that. If you’re photographing a couple, ask one of them to tell the other about their most embarrassing childhood moment, using only interpretive dance. Tell them to reenact their first meeting, using emotive eye contact, instead of words. Get detailed and ridiculous in these requests, because then you’ll be able to fully leap into #7.

DpsCouplesimage6

7 – Shoot between the lines

You likely won’t keep the image of the poor guy interpretive dancing, but you’ll probably keep the one of the couple cracking up together in between moves. Here’s the real secret to natural looking photos – the in-between photos ARE the photos. The unposed, unrehearsed, laughing at fart jokes, or because your photographer told you they were “just going to test the light” but really you’re capturing them enjoying life together. Those are the images that end up being keepers. Keep that camera at the ready and shoot between the lines to get the good stuff.

DpsCouplesimage7

8 – Keep those hands moving

Every once in a while, we’ll leave the open-ended coaching behind and give a people a very specific pose to try. And no matter what the pose is, no matter how natural it felt when they first tried it, it’s going to get clunky-looking if you make them hold it for long enough. There are a few reasons why someone might need to keep a general pose for a bit — if you’re grabbing different angles, shooting with unique lenses, etc. — but our big piece of advice for them is to always keep their hands moving. With the free-reign to move their hands in whatever way feels natural to them, they’ll avoid the stiff prom-pose look, while still keeping the general idea of the pose you gave them. It sounds silly, but this one seriously works.

9 – Get your own photo taken – often

If you are amongst the hordes of photographers and humans who hate having their own photo taken, this piece of advice goes double for you. You MUST MUST MUST put yourself in your clients’ shoes! Be uncomfortable! Learn what strange tics you have. Know how to comfortably have your photo taken, so you know firsthand how to coach your clients. Standing in their shoes is our number one piece of advice, because as you teach yourself to be in photos comfortably, it’ll become ever-easier to coach your clients to do the same. Get thee in front of a lens. You’ll be a better photographer for it.

So while you may not be able to alleviate someone’s multiple decade love/hate relationship with having their photo taken, focusing on making each client’s shoot experience stellar is the first step on the road to the beautiful, natural, photos you and your client are aiming for. Because if you aren’t having fun, why bother?

googletag.cmd.push(function() {
tablet_slots.push( googletag.defineSlot( “/1005424/_dPSv4_tab-all-article-bottom_(300×250)”, [300, 250], “pb-ad-78623” ).addService( googletag.pubads() ) ); } );

googletag.cmd.push(function() {
mobile_slots.push( googletag.defineSlot( “/1005424/_dPSv4_mob-all-article-bottom_(300×250)”, [300, 250], “pb-ad-78158” ).addService( googletag.pubads() ) ); } );

The post 9 Tips that Make Couples Happy During a Portrait Session by Tim Sullivan appeared first on Digital Photography School.


Digital Photography School

 
Comments Off on 9 Tips that Make Couples Happy During a Portrait Session

Posted in Photography


Nikon D5200 and D7100 firmware updates removes noise during video capture, fixes bugs

17 Sep

Nikon has released firmware updates for both the D5200 and D7100 cameras,. Bth new versions of the firmware reduce horizontal line noise in videos recorded at 1280×720/60p and 1280×720/50p. In addition, firmware v. 1.03 fixes select bugs affecting both models. Read more

Articles: Digital Photography Review (dpreview.com)

 
Comments Off on Nikon D5200 and D7100 firmware updates removes noise during video capture, fixes bugs

Posted in Uncategorized


Finding the Best Quality of Light During the Day

27 Mar

Light is the main ingredient in any photograph. Without light, you cannot make an image. Photography is all about drawing or painting with light. One book I read on the subject said that light IS the subject in photography, in many ways, this is true. Light is a difficult phenomenon to quantify. Most of the time, we don’t really think about light in our day to day lives.

Shoot for the light...

Shoot for the light…

As a photographer however, light is your currency. Without it, you cannot create an image. If you were in a lightproof room, with no light entering the room at all, it would be nearly impossible to make a photograph. However, if you were to light one candle in that lightproof room, suddenly you could make many images. Light is the key to every photograph ever made.

As a result of light being so ethereal, the photography world has tried to make sense of it. Photographers speak about the attributes of light, namely: quality, direction, color and intensity. In this article, I want to look at the first of those definitions, known as quality of light.

What is quality of light?

Light quality is determined by the source of the light. Small light sources that are far from the subject, will create harsh lighting conditions, while a large light source will create soft lighting conditions. Another way to think of it is to look at the shadows what are created by your light source. If the shadows are clear and defined, then your light source is small relative to your subject, and the light is harsh and high contrast. If the shadows are blurry or nondescript, then the light source is large compared to your subject, and the light is soft and low contrast.

A small light source could be something like the popup flash on your camera. This is a small, sharp source of light that will blast bright light into your scene. It creates hard shadows and will create a high contrast scene. A large light source could be the light on an overcast day. The sun’s light is scattered, or diffused, by the cloud cover so the light becomes larger, soft, and less defined.

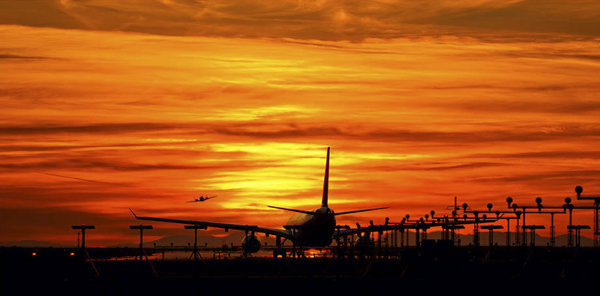
Warm sunset colours over the Vancouver runway

Warm sunset colours over the Vancouver runway

Time of day is key

You will be shooting either in daylight or nighttime conditions and often in the soft light between day and night. Each situation comes with its own challenges. If you are serious about taking your photography to the next level, you need to be shooting more often during the golden hour of the day. The golden hour occurs from about half an hour before, until about an hour after sunrise in the morning, and then an hour before sunset, to about 20 to 30 minutes after the sun has gone down in the evening. If you are going to shoot in this soft light, you will need a tripod, the rewards will be well worth the effort. It is not always possible to shoot at these times of day, so below are some guidelines about shooting throughout the day. Another good time to photograph is during the blue Hour which is the hour after the sun has set (more on this later).

1. Shooting in the middle of the day

Many of us were taught to shoot under bright sunlight, in the middle of the day, with the sun behind us. Sure, that can work, but you won’t get dramatic results every time, in many cases, your images will look very average. This is because light is harsh at this time of day.

Generally, when the sun is high in the sky, it is a small light source compared to the subject. This means that your subject will have very bright highlights and very dark shadows. This is high contrast scene. Also, the shadows will be very well defined and the light will be very directional. In other words, you will be able to see clearly where the sun is because the shadows will be very well outlined.

If you are photographing a wedding at midday in the summer (this is often the case) and the bride is in the full sunlight, you will have have some harsh shadows under her eyes to deal with. That’s not to say that you should never photograph in the midday sun, you can, but you need to know how to deal with the contrast situation. That might mean you need to use a reflector to put some of the light back into the bride’s face, or use some fill flash to lighten the shadows under her eyes. Remember, the brighter and smaller the light source, the harsher the quality of light.

Panoramic image taken at midday in full sun. The image works because the image is properly exposed for the bright sun.

Panoramic image taken at midday in full sun. The image works because the image is properly exposed for the bright sun.

2. Shooting during the golden hours

Shooting in the early morning, before the sun has risen, or shooting at sunset as the sun goes down, gives you a great opportunity to capture images, in dramatic light. Many of the scenes that people love to see in photography, are very often low light or golden hour ones. The reasons why these times are so good to shoot at area:

  • The light is golden in colour and changes colour from yellow, to orange to magenta.
  • The light is soft, i.e. no major contrast such as hard shadows and very bright highlights.
  • Colors are more exaggerated, the color of the light is far more emphasized, much more oranges, reds and magentas are visible in the scene.

It is for these reasons that photographers choose to shoot in the early morning or early evening, these times produce the most dramatic images.

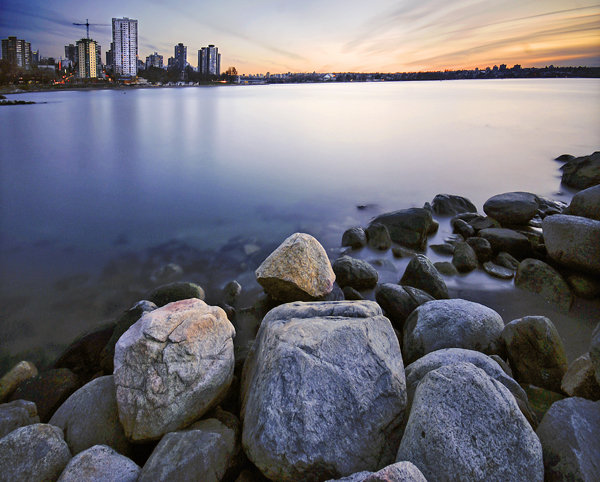
Golden hour shot of the city with a warm glow in the sky.

Golden hour shot of the city with a warm glow in the sky.

3. Shooting during the blue hour

Blue hour conditions don’t always occur, but when they do, the results are spectacular. For the best possible blue hour conditions, you will want a sunset with very little, to no clouds in the sky. Summertime is normally good for this, but any time of year can work. If there is 80% cloud cover, you will probably not see the blue light in the sky, so a clear sky is important to make this work. Blue Hour is the time after the sun has dropped below the horizon and the sky goes a radiant blue for a while. The blue lasts anywhere from 40 minutes to an hour, and that’s the time you want to be photographing.

To make sure you get it right, be in position and set up 20 minutes before sunset. That way, when the light starts getting good, you are able to hit the shutter release and make some great images. Cityscapes work really well for blue hour images. The reason is that the sky will go blue, but the city will be reflecting the yellowy, orange light of the sunset. This means that you will have the sun setting behind you.

The beauty of blue hour images is that that the blue and yellow colours work well together, they are complementary colours on the visual colour wheel, so the scene is visually appealing. If you are not sure about when blue hour will be, you can visit this site and simply enter your city name and it will tell you what time it will be occurring in your city, on a given evening and morning. There is even an iPhone app you can download to work this out in the field, pretty amazing!

Blue Hour panoramic, the blues and the yellows work well in this image

Blue hour panoramic, the blues and the yellows work well in this image

What do I need to use to get the best images

A tripod is always a good idea. You will be able to make sure that your camera is perfectly still as you make longer and longer exposures. As the light starts fading, your exposures may be a few seconds long, this is impossible to handhold without getting blurred images. Use the best quality lenses you have and a cable release or remote shutter release to avoid any camera shake. You will want to set your camera up in manual mode and have your aperture settings at f/8 or f/11. Set your shutter time accordingly, make sure your ISO setting is at 100 and you are ready to go. When the light show starts happening, click away and enjoy the results!

googletag.cmd.push(function() {
tablet_slots.push( googletag.defineSlot( “/1005424/_dPSv4_tab-all-article-bottom_(300×250)”, [300, 250], “pb-ad-78623” ).addService( googletag.pubads() ) ); } );

googletag.cmd.push(function() {
mobile_slots.push( googletag.defineSlot( “/1005424/_dPSv4_mob-all-article-bottom_(300×250)”, [300, 250], “pb-ad-78158” ).addService( googletag.pubads() ) ); } );

The post Finding the Best Quality of Light During the Day by Barry J Brady appeared first on Digital Photography School.


Digital Photography School

 
Comments Off on Finding the Best Quality of Light During the Day

Posted in Photography


Tips for Creating Landscape Photos during the Golden Hour

26 Mar

The golden hour. Even if you haven’t been involved in photography for very long, you undoubtedly have heard the term thrown around. As photographers we are in the business of capturing light, and there is no better light to have cast on our subjects, than sun light that is low on the horizon.

The golden hour is defined as periods of time; specifically, the hour after sunrise, and the hour before sunset. The length and time of these occurrences depends on your location on our planet, and time of the year.
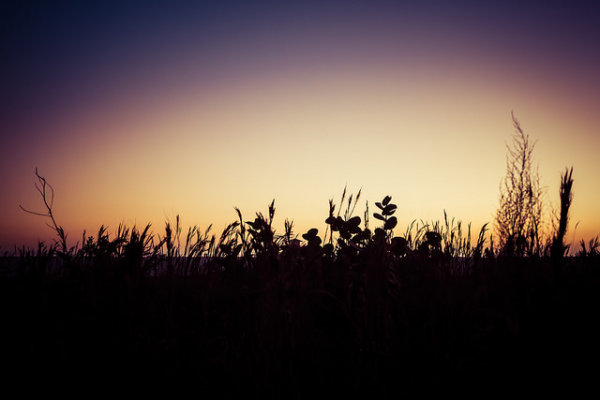
siesta_silhouette

Regardless of the type of photography you do, natural light generally falls into two categories; harsh (hard) and soft. Harsh light is what you see when the sun is high in the sky, during the middle of the day (cloudless day).

Because the light is at its most intense during that time, and shining directly down from above, shadows are sharp and well defined. They can also appear in places you don’t want them, such as on a human subject’s face. You can sometimes counter this by using fill flash and reflectors. When you’re shooting landscapes, you see the more unwelcome effects on the sky, with less warmth and higher contrast.

Your subjects are well lit, but generally only from one direction. Images shot during at midday can be rather dull and uninspiring, and it becomes more difficult to capture something spectacular.
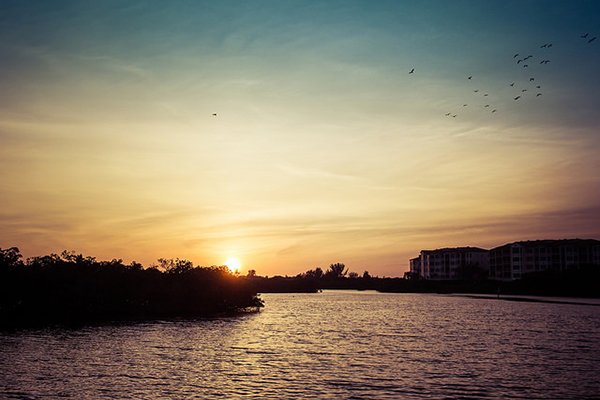
goldenhour_article_new4

After the sun lowers in the horizon and sunset approaches however, everything changes. Simply put, taking photos during the golden hour give the images atmosphere. These times give the best light for all kinds of photography, but what advantages do you gain by shooting your landscapes during the golden hour?

Reduced Contrast

Light from the golden hour effectively reduces the contrast in your images. A black and white street shot could benefit from harsher light in the middle of the day, because the higher contrast and sharp shadows better define the subject and the environment. For landscape photos however, the world comes alive when the sun is low, and the light is soft and diffused. Shadows become longer and less defined, and the tonal range changes significantly. Clouds are illuminated differently, and their visual transitions against the sky soften.

Colors

The position of the sun during the day creattes varying temperatures of light, as you can see by the different colors as it crosses the sky. When we discuss temperature in photography, we’re discussing tthat of color, instead of heat. Neutral temperatures are what you see during the middle of the day. The main point to take away from this is that neutral temperatures are fairly uninteresting in regards to their aesthetic effect on your photography.
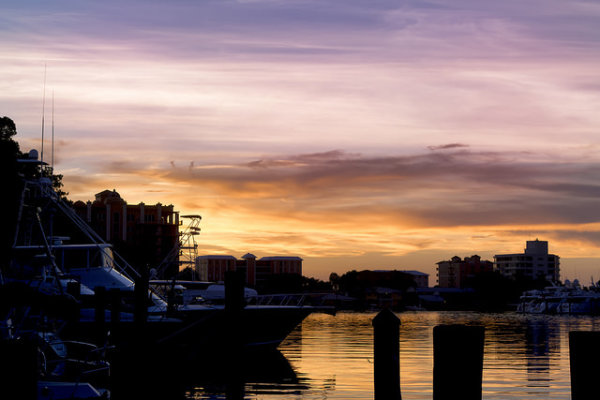
sunsetcolors

Color ranges become more vibrant and pronounced when the sun is closer to the horizon.

During the golden hour periods, colors tend to bend to the extremes, and give you much more pronounced effects on your images. During the morning golden hour, just after sunrise, the color temperatures are cooler, and give a moody, bluish hue to the shot. In the evening before sunset occurs, the spectrum shifts to warmer colors, providing you with warm oranges and reds.

A photo captured during the golden hour has a wonderful warmth and feel that’s impossible to capture at midday.

Softer Light Through Diffusion

Diffusion can be visualized with the words, scattering and softening. Light that is diffused is soft with less defined edges, and scattered across a greater area than non-diffused light. A good example of that is a diffuser attachment for your DSLR flash unit. The translucency of the diffuser attachment emulates the soft light you get from the sun being in a low position in the sky, and takes away hard shadows.
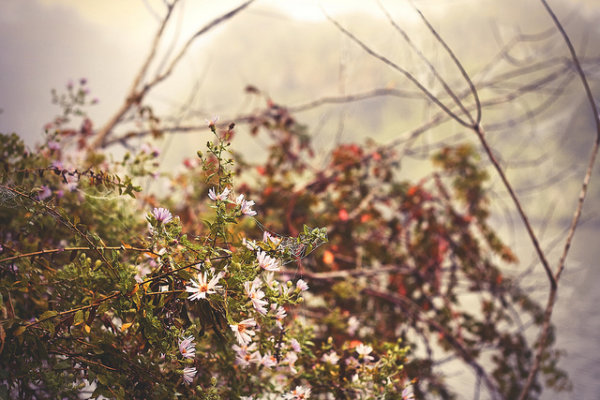
diffusion

Diffused light is more evenly and softly applied throughout a scene, and a low-hanging sun or sunlight projecting through clouds becomes a great natural diffuser.

Your landscape photos benefit from this by less pronounced shadows from objects in your shot, and in general the light that falls on your subjects within the landscape scatters in a more even, favorable manner. What does this all give you? Again, the one thing you’re ultimately striving for in landscape shots; atmosphere.

Sun Flare Effects

Another advantage of shooting during the golden hours is the opportunity to introduce sun flare effects and backlighting into your images. Because of the sun’s position in the sky (low and near the horizon), you have the ability to better introduce it as a subject, or as a compliment to the subject in your shot.
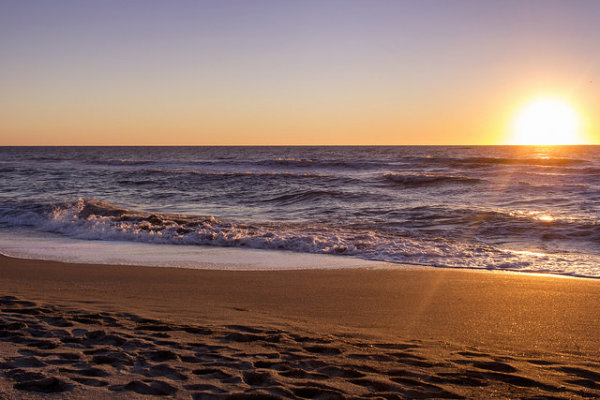
flare

Sun flares are easier to capture during the golden hours, and produces a much more dramatic effect on the final image.

Flaring occurs when the sun is either at or near the edge of the frame of your photo, and while in some situations it is unwanted (photographers typically use lens hood attachments to minimize these effects), flares can add mood and drama to a landscape shot.

So now that you’re aware of the wonderful effects of photographing during the golden hour, how do you go about shooting our landscape images during these times?

Settings

Your camera settings for shooting during the early mornings or late evenings are going to depend on your exact subject, but in general, since less light is getting to your sensor, a larger aperture is usually required.

You may also need to bump up your ISO setting to compensate for the lower amount of light. This will increase noise, but usually not to a noticeable point, and even then, there are steps in post-processing that can easily remove it.

Again, this all depends on what type of shot you are doing. If you’re looking at a long exposure capture, you would set your camera for a smaller aperture and lower ISO.
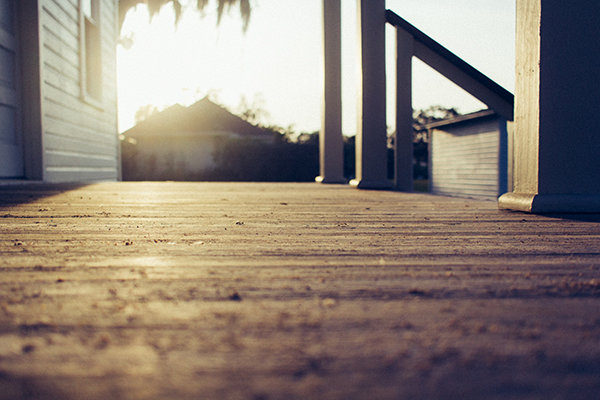
goldenhour_article_new3

Use a Tripod

As a landscape photographer you are always encouraged to use a tripod. Since generally you will be shooting in one static location for each set of shots, the tripod will allow you a wider range of apertures to work with. You always want your landscapes crisp!

Prepare

By definition, you have two hours each day to shoot for the best light, so your preparation for those times are even more critical than usual (you’re always prepared for any shoot, right?). If you’re planning on just taking your gear and spending time to set everything up on location, you run the risk of missing the shots you’re looking to get in the first place.

Either prepare before you leave, or allow extra time well before the golden hour to get everything settled. Scout the location ahead of time. Have your settings ready for the appropriate shots, and pack anything extra that you might need, including food, drinks or something warm to cover up with.

Keep Shooting!

While the scope of this article has been the golden hour, don’t forget that the magic doesn’t stop after the sun dips below the horizon. After this point, the blue hour begins, when colors and tones change even more rapidly and dramatically. Keep adjusting your settings, and shoot until there’s no light left to capture. You’ll be surprised at what you have when you finally get those images unloaded on your computer.

White Balance

While white balance is a setting on your camera, because of its overall effect on the atmosphere of your images, it warrants a little extra attention when shooting landscapes during golden hour. My recommendation is to take your camera off of AWB (automatic white balance) because the camera will attempt to neutralize the warmth of the image on this setting. Most DSLR’s have a cloudy or shade setting that will retain that color tone.

If you’re shooting RAW images, this is a step that can be adjusted in post-production.
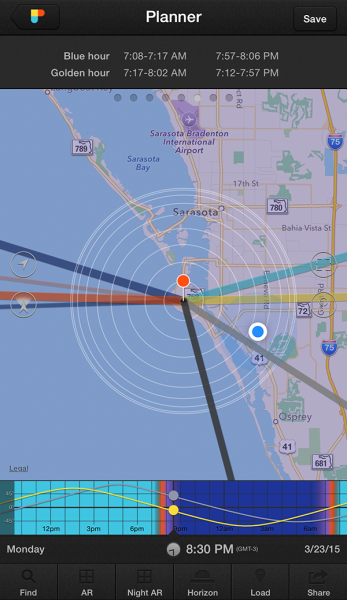
goldenhour_article_new2Helpful Apps

Thankfully, there are several Smartphone apps that can also help your planning process. A search on the Apple app store and Google Play shop will provide no shortage of this kind of apps, although there a few that I’ve used that seem a bit more robust, and worth the price you’ll pay. These apps provide calculators that will let you see when the golden and blue hours occur in any location in the world, and also include calculations for exposure, depth of field, time lapse, and more.

  • PhotoPills – iPhone/iPad, $ 9.99
  • Golden Hour – iPhone/iPad, £1.49
  • The Photographer’s Ephemeris – iPhone/iPad, $ 8.99, Android, $ 4.99

Enjoy the Light!

Shooting at optimal times of the day is one of the easiest things you can do to improve your photography. Nothing else adds character, atmosphere, and dimension to your work so dramatically.

What other golden hour tips do you have to share? How do you apply these guidelines to your own photography? Be sure to join in the conversation below, and keep churning out those golden shots!

googletag.cmd.push(function() {
tablet_slots.push( googletag.defineSlot( “/1005424/_dPSv4_tab-all-article-bottom_(300×250)”, [300, 250], “pb-ad-78623” ).addService( googletag.pubads() ) ); } );

googletag.cmd.push(function() {
mobile_slots.push( googletag.defineSlot( “/1005424/_dPSv4_mob-all-article-bottom_(300×250)”, [300, 250], “pb-ad-78158” ).addService( googletag.pubads() ) ); } );

The post Tips for Creating Landscape Photos during the Golden Hour by Tim Gilbreath appeared first on Digital Photography School.


Digital Photography School

 
Comments Off on Tips for Creating Landscape Photos during the Golden Hour

Posted in Photography


Sweeten Your Photos by Shooting During the Blue Hour

09 May
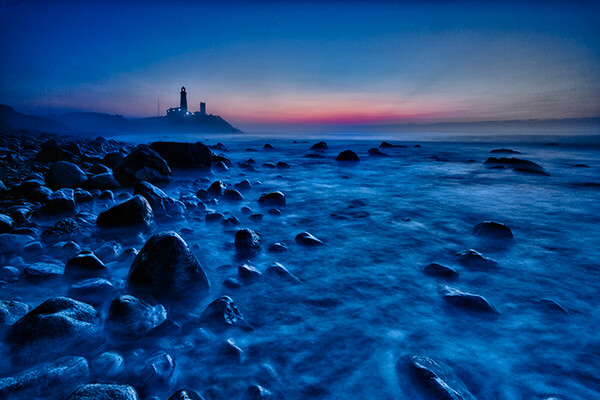
Montauk Point, NY. EOS 5D Mark II with EF 17-40 f/4L. 15 seconds at f/11, ISO 800.

Montauk Point, NY. EOS 5D Mark II with EF 17-40 f/4L. 15 seconds at f/11, ISO 800.

There is a period of time each day, just before sunrise and just after sunset, when the sun is below the horizon, when the light is known as “sweet light.” This period of time is known as “The Blue Hour.” This is a period of time each morning and evening when there is neither full daylight, nor full darkness. The light is almost ethereal, with a soft blue glow bathing the scene. The Blue Hour happens in tandem with the Golden Hour, making the beginning and end of the day exceptional for photography, providing two very different types of light within a single time span.

Equipment and settings

The Blue Hour is a prime time for landscape photography. Subjects that have their own lighting, such as city buildings or lighthouses, tend to look especially good, as the yellow glow of their lights cuts through the blue.  A tripod will be necessary to capture these scenes, unless you’re willing to raise your ISO to the point you can hand hold your exposures.  Setting a proper white balance is one of the keys to Blue Hour photography.  When set to AWB (auto white balance), the camera will try to correct for the blue tone the light has, which can result in flattening your image. If you shoot RAW, you can correct for this in pos- processing, to get just the right white balance for your taste. If you’re a JPEG shooter, you may want to try setting a custom white balance, or you can use your camera’s Live View setting to preview what different white balance settings will do to the scene.

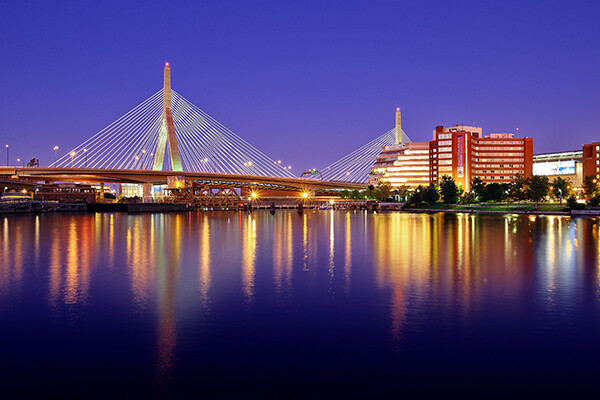
Boston's Zakim Bridge. EOS-1D Mark III with EF 24-105 f/4L IS. 30 seconds, f/11, ISO 100.

Boston’s Zakim Bridge. EOS-1D Mark III with EF 24-105 f/4L IS. 30 seconds, f/11, ISO 100.

I prefer the time during the Blue Hour when the sun is close enough to the horizon that there is a soft orange glow along the horizon. This adds an extra quality to the image, especially when you consider that orange is blue’s complementary color.  You may want to bracket your exposures, as this will vary the intensity of any light in the image, be it the orange glow remaining from the sun, or artificial lighting on buildings.  Blending exposures for HDR images may not be necessary, but it will be possible if you use a tripod and decide to try some HDR.

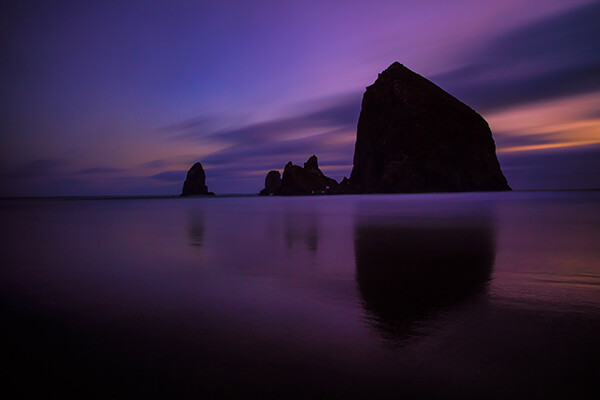
Cannon Beach, Oregon. EOS 5D Mark III with EF 24-70 f/2.8L II. !20 seconds, f/11, ISO 640.

Cannon Beach, Oregon. EOS 5D Mark III with EF 24-70 f/2.8L II. !20 seconds, f/11, ISO 640.

The window of opportunity for Blue Hour shooting is small, and probably much shorter than during the Golden Hour. You’ll want to be at your spot ready to go well in advance of the Blue Hour. To plan your time, you can visit The Blue Hour Site to find out when the Blue Hour starts and ends at your location.  If you don’t have access to the internet, a good rule of thumb is that the Blue Hour starts about 15 minutes after sunset, and ends around an hour after sunset.  For sunrise, it will start roughly an hour before sunrise and end 15 minutes before sunrise.  When I plan to shoot landscapes, be it at sunrise or sunset, I always plan to shoot both the Golden Hour and the Blue Hour.  I tend to get a lot of variety due to the change in light, and it makes the time spent that much more worthwhile.

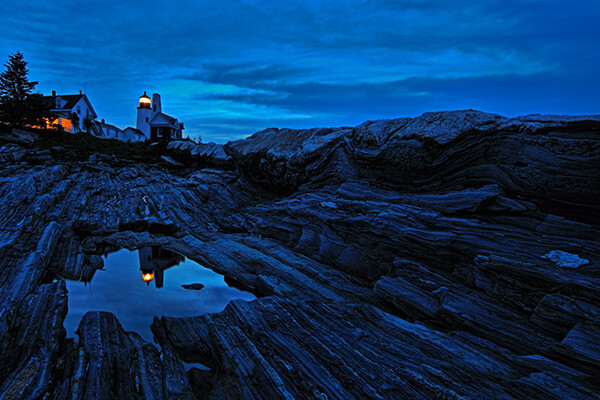
Pemaquid Point, Maine. EOS 5D Mark II with TS-E 17mm f/4L. 8 seconds, f/11, ISO 400.

Pemaquid Point, Maine. EOS 5D Mark II with TS-E 17mm f/4L. 8 seconds, f/11, ISO 400.

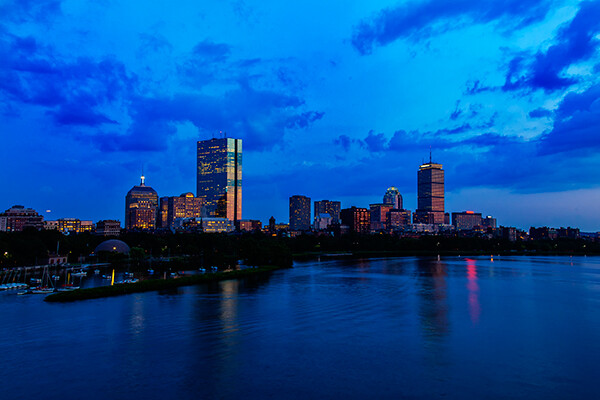
Boston Skyline. EOS 5D Mark II with EF 24-105 f/4L IS. 1 second, f/11, ISO 100.

Boston Skyline. EOS 5D Mark II with EF 24-105 f/4L IS. 1 second, f/11, ISO 100.

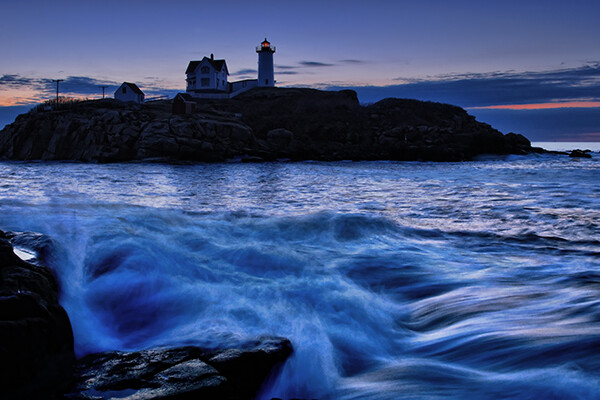
Cape Neddick, Maine. EOS-1D Mark III with EF 17-40 f/4L. 0.4 seconds, f/8, ISO 400.

Cape Neddick, Maine. EOS-1D Mark III with EF 17-40 f/4L. 0.4 seconds, f/8, ISO 400.

_MG_0306

Please share your Blue Hour photos and comments below.

The post Sweeten Your Photos by Shooting During the Blue Hour by Rick Berk appeared first on Digital Photography School.


Digital Photography School

 
Comments Off on Sweeten Your Photos by Shooting During the Blue Hour

Posted in Photography


Sydney Opera House during Luminous

24 Dec

Projectors bathed SOH with Brian Eno’s images each night for the duration of the Vivid/Luminous festival. If you didn’t get to see it or just want to take a look again, please do. Nikon D90 w/ 17-55 2.8