 Extra photos for bloggers: 1, 2, 3  |
|||
Have you ever had a dream where you looked around the room and everyone looked exactly like you?
Wait, was that a dream?
Either way, you can turn your camera into the ultimate cloning device and make like a million clones of yourself!
With our guide, you can learn how to make carbon copies of yourself (the best photo subject around).
Lay on the couch while vacuuming, or build a human pyramid out of 10 versions of yourself.
You can make images where you (appear to) do it all. You’ve always wanted a stunt double, right?
Go Ahead, Duplicate Yourself
p.s. Learn the elements of lighting and sweet power-moves you didn’t know your phone had in our Phoneography 101 course. All the cool kids are doin’ it. Sign up!
Why it’s cool:
 We thought about actually cloning ourselves, which would be awesome in so many ways.
But then we thought digital clones might be better, and a lot less complicated in the long run.
Duplicating yourself is easier than you think.
And you can fool everyone into thinking you have a twin, or a triplet.
Ingredients:

- A model (yourself or a friend)
- Camera
- Tripod
- Computer
- Editing Software
- Props (optional)
STEP 1: Find Your Scene:
 First, find the scene you want to photograph.
Set your camera up and compose your image.
Think about where you will place your carbon copies and what each figure will be doing.
It is best to use your camera on a tripod, so that your background stays exactly the same throughout this process.
If you don’t have a tripod, place your camera somewhere stable, like on top of a bookshelf or stool.
Make an exposure to check your composition.
Step 2: Meter Your Scene:
 Place your model in the scene.
Make another exposure to check the light falling on the person.
You can use the light meter in your camera, or if you want to be more specific, use a hand held light meter.
Did you know there’s a light meter app for the iPhone and Android?
For our first shot, we metered the light for the furthest distance from our lens to make sure it wouldn’t be too dark.
Step 3: Make Your First Image:
 With your camera on a tripod, get ready to take your first photo.
Focus on the area where your model will be.
For focusing self portraits, place something in the scene that can be easily moved. You could prop up a pillow or set a stool where you are going to be.
If you are using yourself as a model, set your camera to self-timer mode.
Once you’ve got your camera set, make sure your model is in place.
Make an exposure.
Step 4: Make your Second Image:
 The important thing here is to make sure your model is the only thing that moves in the scene.
Move your model to the another part of the scene.
Make sure to focus on your model in the new part of the image.
If your camera has a live view mode, you can use the zoom button on the back of the camera to make sure your focus is precise.
Make your second exposure.
Step 5: Repeat:
 Place your model in a third part of the scene.
Check your focus and make an exposure.
Repeat this as many times as you’d like to have multiple individuals throughout your scene.
Step 6: Import Images:
 Once you have made your exposures, it’s time to put them on the computer.
Open the photos you want to combine in Photoshop or another photo editing software.
Hold off on cropping or editing just yet.
It’s best to work with images straight out of the camera before making any color, brightness, or white balance adjustments.
For this tutorial, we’ll be using Photoshop CS6. Other editing programs, such as Gimp, will have similar methods, but the commands and tool placement may be slightly different.
Step 7: Copy and Paste:
 Starting with the second image from your series, select the entire image.
Use the copy function to copy the image (Command + C on macs, Control + C on PC’s).
Paste that image as a new layer onto the first image from your series.
You can use keyboard shortcuts (command or control + V), or go up to “Edit” in the menu, and select “Paste in Place.”
“Paste in place” ensures that the images will be lined up on your canvas.
Step 8: Make a Layer Mask:
 Now, looking at your image, the photo you just pasted is Layer 1. Your first image is the “Background”.
By adding layers stacked right on top of each other, you will be able to erase parts of the Layer 1 to reveal the background image underneath.
This is how you will appear to be in multiple places at the same time.
Because you left your camera on a tripod, the background of each image should line up perfectly.
Erasing part of the layer will reveal what is different between the photos (i.e. yourself within another part of the frame.)
To make things easier in the long run, create a layer mask for Layer 1 by clicking the layer mask icon at the very bottom of the layers palette. It looks like a square with a circle in it.
By making a layer mask, you’ll be able to erase from your layer and paint parts back in with the Paintbrush tool if you mess up.
If you don’t use a layer mask and you accidentally erase something important, you won’t be able to paint parts back in.
Here’s a little more info on layer masks if you’ve never used them before.
Step 9: Erase:
 Set your eraser to a pretty decent size to start with.
Erase all of Layer 1, except your model.
You will see your background image and first figure start to appear
Use a large brush for the background, and zoom in close and use a smaller brush to get the details and edges.
Step 10: Brush Tool:
 When using a layer mask, it’s okay to make a mistake.
If you happen to erase too much, like we did here with the model’s hand, it’s not a big deal.
Use the brush tool to paint that part of the layer back in.
By working back and forth with the eraser and the brush tool, you can remove what you want from the image with precision.
Step 11: Repeat:
 Repeat steps 7-10 for your third image.
Select it, copy it, and paste in place.
Don’t forget to make a layer mask for this new layer as well.
Erase the extra info from your layer, revealing the figures underneath.
Step 12: Save your Layers:
 It’s always important to save your work as you go along.
Saving your image as a PSD (photoshop file) or a TIFF will allow you to save the layers and layer masks.
This way, you can come back and edit them at any point.
Step 13: Share:
 Once you’re satisfied with your photo, save your final version as a jpg.
When you go to File, select “Save As”, then select JPG. Doing this automatically flattens the image into one layer, and compresses the file size a bit.
JPG is more friendly with websites and social media sites, and will make emailing your creation easier.
Take it further

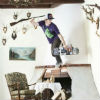
- Make elaborate scenes, like the one above, with the live-view zoom to focus method.
- Create composite photos on your phone! Photoshop Touch lets you work with layers.
- Use this layering technique to create levitating photos.
Related posts:
- Learn How To Mat. Matting Gives Photos Teh Snappiness! There’s no question about it, a mat and frame make…
- The Fastest Way to Learn Keyboard Shortcuts for Photoshop, Aperture, FCP, and more This Photojojo made possible by… ~Have a cool photo product…
- Double Exposures: A DIY Project That Brings Friends Together With Photos! Extra photos for bloggers: 1, 2, 3 We love hanging…


You must be logged in to post a comment.