RSS
 

Posts Tagged ‘Custom’

How to Create Custom Brushes in Photoshop

08 Sep

The Brush Tool in Photoshop is one of the most versatile and it can be used for many applications. It already comes with many useful brushes preloaded into the program and you can find even more online. But sometimes you just need to be more creative and have full control. Don’t you think?

Not to worry, another great thing about Photoshop is that you can create your own custom brushes. Let me show you how.

What is a Brush?

First things first, what exactly is a brush? It’s a tool used to draw strokes. You can find it in the toolbox or you can activate it by using its hotkey: B.

This tool is very flexible because you can adjust its shape, size, opacity and lots of other specs from the Presets panel. That multiplies the options far beyond the first array of choices that you see on the first menu.

Create custom Brushes Photoshop Tutorial Tool Options Presets

None the less, there are times that you need something you just can’t find pre-installed. For example, you can turn your signature or your logo into a brush, it doesn’t get more personal than that right? In just a few steps you can achieve this.

Make a Signature Brush

Open the image that contains your signature or logo, this can come from a scanned paper, for example, or the JPG version of a logo designed in a different program. Now that you have that opened, activate the Marquee tool to select the image. Just click and drag the selection around it and make sure you’re not grabbing anything else from the image.

How to Create a Custom Brushes in Photoshop

Then go to Menu > Edit > Define Brush Preset and a new window will pop up where you can name your brush. Type any name you want, preferably something that will help you identify it later, and click OK.

How to Create a Custom Brushes in Photoshop

Note: In the Brush Name window you’ll see a thumbnail with the preview of your brush, you’ll notice that the color (if it had any) is lost, that’s because brushes are grayscale, so it won’t register the colors of the original. You can, of course, apply any color when you use it though.

Now you have your new signature brush. Whenever you want to use it, just select the brush tool then open the drop-down menu from the options bar. You can also pick it from the Brush Presets panel which you can reach from the Window menu in case it’s not already opened.

How to Create a Custom Brushes in Photoshop

Using the Custom Brush

You may be wondering why you need to turn it into a brush instead of just placing it as an image. This is because it gives you access to all the settings and controls of the brush tool. Just open the Brush panel and you’ll be able to change from color to size to spacing – anything you need for you to create patterns, watermarks and more!

How to Create a Custom Brushes in Photoshop

How to Create a Custom Brushes in Photoshop

That’s just how easy you can turn any image into a custom brush. But how about creating one from scratch?

Create a New Custom Brush

First, open a white canvas and draw the shape you want to turn into a brush. To do this you can use any of the Shape tools or even other Brushes. For example, I’ll make a simple sparkle. For that, I just need four lines using the Line tool and a round brush with very soft edges in the center so that it has a glow effect.

How to Create a Custom Brushes in Photoshop

Remember that color is not registered so it doesn’t matter which colors are you using to draw your shape. Just know that anything in white won’t be part of the brush as it will translate as transparent. Now to turn it into a brush just follow the steps that you did before. Menu> Edit > Define Brush Preset. Click name it.

How to Create a Custom Brushes in Photoshop

Now your custom brush is done, grab it from the menu like any other brush. It’s very easy to create but its use can be as elaborate as you need since it has a lot of possibilities. Let me give you some tips to make the most of it.

Tips and Tricks

You can quickly access some of your brush’s most used properties like size, hardness and opacity from the Options Bar or get a lot more control if you open the brush panel. Regardless of whether you created the brush or it came with Photoshop, you can adjust its presets in the brush panel.

A quick overview of the presets I find more useful:

Brush tip: Apart from the size and hardness that you can also find in the Options Bar, here you can also adjust the roundness and angle of the brush.

How to Create a Custom Brushes in Photoshop

Scattering: this is as straightforward as the name suggests. With this option, you can place the brush more randomly, thus, scattering it.

How to Create a Custom Brushes in Photoshop

You can also change the blending mode of the brush in the drop-down menu. This changes the way the brush stroke interacts with the object directly below, which could be an image or a previous brush stroke. However, I prefer to leave it as Normal and put the new brush strokes on their own layer and then alter the layer’s blending mode, that way I can always come back and change it later if need be.

Opacity and Flow: Both of these refer to the amount of paint that you are applying. However, with opacity, it won’t add more paint if you pass over the same area many times unless you release the click and start again. While flow will keep adding paint regardless.

Over to You

I hope you found the tutorial useful and give your creativity a go with some custom brushes of your own!

The post How to Create Custom Brushes in Photoshop appeared first on Digital Photography School.


Digital Photography School

 
Comments Off on How to Create Custom Brushes in Photoshop

Posted in Photography


How to Make Custom Camera Raw Profiles for Lightroom & Photoshop

29 Apr

Adobe just released a huge update to Camera RAW for Lightroom and Photoshop, which includes the ability to make creative custom camera RAW profiles!

Above is a video tutorial showing you how you can make your own creative RAW profiles for Lightroom and Photoshop, and below I’ve also detailed the process with photos so you can follow along and get started making your own RAW profiles.

Here’s a closer look at the process detailed in the video.

Getting started

To start, you need to open a RAW file into the Camera RAW Plugin for Photoshop. To do this, copy a RAW file to your desktop, and then either right-click the file and choose to open with Photoshop, or while in Photoshop, use the File > Open menu option to locate and open the RAW file (or just double-click it inside Bridge).

Custom camera raw profiles 001

Custom camera raw profiles 002

Ideally you’ll want to choose an image that’s appropriate for the type of look you’re going to create for your profile. For example, if you plan to make a profile for your landscape images, use a RAW file of a landscape for this process.

Make your desired adjustments

Regardless of the image you choose, once you have the image open into Camera RAW you need to create the look you want for your profile.

Custom camera raw profiles 003

You do this using any/all the tools and sliders available in Camera RAW. In the example in the video, I made some adjustments to Split Toning and the point Curve.

Custom camera raw profiles 004

Custom camera raw profiles 005

So my image now looks like this:

Custom camera raw profiles 006

Create your profile

Your look will, of course, be different. But regardless of that, once you’ve created the look you want for your profile, go to the “Presets” tab of Camera RAW.

Custom camera raw profiles 007

At the bottom of the Presets tab is a little icon for creating a new preset.

Custom camera raw profiles 008

To create a new profile, hold down either the Option key (MAC users) or the ALT key (WINDOWS users) while clicking the new preset icon.T his will open the New Profile dialog box.

Custom camera raw profiles 009

You’ll want to name your new profile, just type into the first box at the top.

By default, any sliders/adjustments you’ve made in Camera RAW will be checked in the list below (notice in the example that Split Toning and Point Curve are pre-checked to be included in the profile.)

If for some reason you don’t want an adjustment included in your profile, you can just uncheck that adjustment.

After naming your profile and making any changes to included adjustments, click the “OK” button to save your profile.

How to find and use your new profile

Custom camera raw profiles 010

Back in Camera RAW in Photoshop, you can now navigate to the Basic panel and click the “Browse” icon (circled in red above) to expand the profile browser.

Custom camera raw profiles 011

At the bottom of the browser, you’ll find your new user profile!

The new profile will also be available in Lightroom. However, if you had Lightroom open while you made the new profile, you’ll need to close and relaunch it to reload the profiles.

Once Lightroom is open, go into the Develop Module, expand the Basic panel (if it’s not already expanded), and click the same browse icon that you saw in Photoshop.

Custom camera raw profiles 012

That will expand the profile browser which will look nearly identical to the one in Camera RAW for Photoshop. Then just click to select your new profile when you want to use it on an image.

In either Lightroom or Photoshop, just click that browse icon again to close the profile browser after you’ve made your profile selection.

And that’s it. You’ve now made your very own RAW profile!

Take it a step further

Now, you can stop here, and use this process to create as many profiles as you need to streamline and speed up your editing workflow. But there’s more you can do when creating your custom profiles, and this has to do with LUTs.

If you already don’t know about them, LUT is an acronym for Look Up Table, and it’s a way of manipulating the colors in your image. What LUTs do is remap the colors of your image according to the instructions in the LUT.

For example, you might have a LUT that remaps all instances of the color blue into the color red. When that LUT is applied to your image, anywhere the color blue appears, it will now be red. That’s a very simplified explanation of LUTs, but it gives you the general idea of what they do.

If you don’t care about LUTs and you don’t plan to use them, you don’t need to go any further. But if you do use LUTs and want to include them in your profile, here’s how to do it.

Using LUTs

First, you need a LUT. You can either include a LUT you get from somewhere online or create your own. I can’t go into detail on creating LUTs here, as that’s an entire topic on its own, and there are too many methods for creating LUTs to cover. If you’d like to see one example of how to create a LUT, I’ve included an example in the video above.

Regardless of where you get your LUT, it should be a “.CUBE” file

With your LUT file ready and saved somewhere you can find it, open a RAW file into Camera RAW as detailed above.

With your image open in Camera RAW, the very first thing you need to do is change the RAW profile. The default new is Adobe Color, so you need to change that to Adobe Standard (the previous default profile before this latest update).

Custom camera raw profiles 013

The reason you have to do this is that you need a profile that doesn’t already have a LUT so that you don’t have two different LUTs in a profile conflicting with each other. Prior to this update to Camera RAW, profiles didn’t include LUTs, so using Adobe Standard makes sure there is only one LUT in the profile you are about to create.

With Adobe Standard selected, you can now make any other Camera RAW adjustments you want to include in your profile, just as you did above. After making those adjustments, go to the presets panel and open the New Profile dialog by holding Alt/Option and clicking the “New Preset” icon at the bottom of the window (as detailed above).

With the dialog open, name your preset, and then down near the bottom, click the “Load Cube File” option. With the option highlighted, click it again to open the file browser.

Custom camera raw profiles 014

Find your “.CUBE” file and load it. Once it’s loaded in, you’ll notice some options in that section are now available to edit. The most important options are the Min, Amount, and Max options.

Custom camera raw profiles 015

These options correspond to the Amount slider you get with a creative/user created profile applied to an image.

Custom camera raw profiles 016

This amount slider is ONLY available for creative/user-generated profiles, and this slider changes how intensely the profile is applied to your image.

The slider always defaults to 100. This is the baseline whenever you apply a creative profile. To adjust the intensity of the profile on the image, you can decrease the slider down to a minimum of 0, or increase it to a maximum of 200.

Moving the slider up increases how intensely the profile is applied to your image, and decreasing it, in turn, decreases how intensely the profile is applied.

Now, back to the Min, Amount, and Max settings. These three values correspond to the values of the amount slider.

  • The Min value corresponds to the Amount Slider value of 0.
  • The Amount value corresponds to the Amount Slider value of 100.
  • The Max value corresponds to the Amount Slider value of 200.

What this means is that you can set the intensity levels of the Amount Slider for applying the LUT to your RAW file by adjusting the Min, Amount, and Max values.

Here’s an example. Let’s say I have a LUT, that when applied to an image with no adjustments, makes the image look like this:

Custom camera raw profiles 017

When creating the profile using this LUT, if I leave the Min, Amount, and Max values at their defaults (0, 100, 200), then when I click to apply that profile, by default, my image will look very similar to what you see above.

Custom camera raw profiles 018

If however, I want to change the intensity of the LUT so that when the profile is applied that it looks like this by default:

Custom camera raw profiles 019

I would change the “Amount” value in the “New Profile” dialog to 30. (I’ll explain how I arrived at the value of 30 in a moment.)

When changing the “Amount” value, you’ll also want to consider changing the “Max” value. If you leave the “Max” value at 200, the Amount slider will still work for the profile, and when set to 200, the look will be twice as intense as when the LUT is applied with no changes to intensity (as detailed above).

Custom camera raw profiles 020

If you change the “Max” value to 100, then when the slider is at 200, it will look similar to having the LUT was applied with no changes to intensity.

I know this is a little confusing. What’s important to understand is that by adjusting the Min, Amount, and Max values, you’re setting the default for how the LUT is applied to the image with the profile, and the range of how the LUT will be applied to the image with the Amount Slider.

Now, I came up with the value of 30 by experimenting when creating the profile and the LUT that I used to include in that profile (the process is detailed in the video).

Unfortunately, the process in the video won’t be very helpful unless you create a LUT using the exact same process.

Instead, what I recommend to determine the value you’ll want to use, is to first just create the profile with the LUT and leave the Min, Amount, and Max values alone.

Then, apply that profile to one of your images. If by default the look is too intense, use the Amount slider to reduce the intensity until it looks the way you’d like it to look by default.

Once you’ve found a slider value you’re happy with, make note of that number. For instance, if you reduce the Amount slider to 25, write that down.

Then, go through the process of creating the profile again. This time, when you include the LUT, set the Amount value to 25, and the Max value to 100.

Now, with this new profile applied, by default, it’ll look like you want it without having to make adjustments to the Amount Slider. (This will, of course, vary from image to image, and you’ll likely make some Amount adjustments, but this will give you the baseline you want to start with.)

With this done you can then delete the profile and continue on using your now optimized profile with embedded LUT!

Conclusion

That’s how you create your own custom Camera RAW profiles, and how to include LUTs in them! If you have any questions let me know in the comments below.

The post How to Make Custom Camera Raw Profiles for Lightroom & Photoshop appeared first on Digital Photography School.


Digital Photography School

 
Comments Off on How to Make Custom Camera Raw Profiles for Lightroom & Photoshop

Posted in Photography


How to Use Adobe’s DNG Profile Editor to Make Custom Camera Profiles

04 Mar

Have you ever heard of Adobe’s DNG Profile Editor? No? It’s okay if you haven’t because up until about a month ago I had no idea it even existed. It’s a little bit of an Adobe secret.

Despite being a relatively unknown piece of software the DNG Profile Editor (no easy way to abbreviate) is somewhat of a necessity when it comes to editing infrared images. Not only that, it is extremely useful if you like being a complete photography nerd and you enjoy creating your own unique flavor of processing.

Think of the DNG Profile Editor as a way to make presets that are something more just your run of the mill develop preset. Enough of introducing it, this is the DNG Profile Editor in all its glory:

How to Use Adobe's DNG Profile Editor to Make Custom Camera Profiles

Just kidding, it’s not very impressive but it serves to facilitate a very useful function. What function do you ask? It allows you to create your own custom camera profiles for use inside Lightroom’s Adobe Camera Raw.

Camera profiles are the silent weapon of post-processing but they don’t get a lot of press. I won’t go too far into explaining the usefulness of camera profiles here, but there is an excellent article by Andrew Gibson here on dPS if you want to learn more about camera calibration and profiles in Lightroom.

For the purposes of this article, I will focus on how you can make your very own custom camera profiles using Adobe’s little secret, the DNG Profile Editor. Oh, and did I mention the software is available absolutely FREE from Adobe? If you want to follow along with me then click one of the links below to download the latest build of the DNG Profile Editor from Adobe.

  • DNG Profile Editor for Windows
  • DNG Profile Editor for Mac

Adobe DNG Profile Editor Geography

Finding your way around the DNG Profile Editor is alarmingly straightforward because the majority of the controls are nestled on the right-hand side of the window.How to Use Adobe's DNG Profile Editor to Make Custom Camera Profiles

This is where you will make your custom camera profiles. As you’ll notice there are a number of tabs at the top. I’ll briefly explain what each one of them does.

Color tables

The color table is just the color wheel and it is laid out for you to pick colors from your image (more on this later) to adjust their hue and saturation as well as lightness. You can also control the temperature of the color table in degrees Kelvin just as you would in Lightroom.

How to Use Adobe's DNG Profile Editor to Make Custom Camera Profiles

This is all birthed from the embedded profiles (or downloaded) from the camera used to make the image being used as a reference. Base your custom camera profile on existing profiles of your particular camera by using the “Base Profile” drop-down.

Tone Curve

This is the familiar face in the DNG Profile Editor. The Tone Curve is a long-standing staple in not only Lightroom but many other post-processing software offerings. Here, it operates exactly the same as it does elsewhere by allowing you to adjust luminance values.

How to Use Adobe's DNG Profile Editor to Make Custom Camera Profiles

Color Matrices

Through 99% of your work, you will likely use the Color Matrices tab of the DNG Profile Editor more than any other section. This is a boiled down version of the color table and is extremely useful for adjusting the global white balance of your image as well as RGB hue and saturation.

How to Use Adobe's DNG Profile Editor to Make Custom Camera Profiles

As I mentioned earlier, if you are a practitioner of infrared photography the Color Matrices tab will become your best friend.

Options

In the Options section, you can name your custom camera profile and add the copyright information.

How to Use Adobe's DNG Profile Editor to Make Custom Camera Profiles

The Options tab is incredibly simple but don’t let that fool you. It is perhaps the most important part of the DNG Profile Editor as far as the way you will eventually be able to locate and apply your custom camera profiles.

Chart

In a program that is already geared towards more advanced manipulation of RAW files, the Chart tab is the Jedi level of the DNG Profile Editor. It is used for making color profiles based on the use of a color chart to fine-tune accurate color renditions based on different natural and artificial lighting scenarios.

How to Use Adobe's DNG Profile Editor to Make Custom Camera Profiles

I seldom find myself in portrait, product, or other situations when light-based color rendition is needed. However, if you are a studio or location shooter who uses speedlights or constant artificial lighting the Color Chart option is a valuable tool.

How to make a Custom Profile

Next, let’s walk through the making of a custom camera profile using the DNG Profile Editor.

Make a DNG file

You’re going to need a DNG (digital negative) RAW file to base your profile adjustments upon. The great thing is that Lightroom offers a super simple way to convert any RAW image file to a DNG.

How to Use Adobe's DNG Profile Editor to Make Custom Camera Profiles

To get started, right-click on a RAW file in Lightroom. Select Export > Export to DNG (under the Lightroom Presets section). I usually just send my DNG base files to the desktop for quick access but feel free to place yours anywhere you choose.

Next, open the DNG Profile Editor program and select File > Open DNG Image from the drop-down menu.

How to Use Adobe's DNG Profile Editor to Make Custom Camera Profiles

Locate the DNG file you just exported from Lightroom and it will open automatically in the editor.

How to Use Adobe's DNG Profile Editor to Make Custom Camera Profiles

Using the DNG Profile Editor

From here, the world is your oyster as far as creating your custom camera profile. You can adjust the color tones and hues of colors within the photo based on your needs. The possibilities are virtually limitless so I will show a few examples to demonstrate the effects.

In the Color Tables section, I select three separate colors within the leaves in the image and they now appear both on the color wheel and in the color picker table at the right. You can choose as many colors as you like. I’ve based my profile on the Faithful profile from my Canon 5D MK3.

How to Use Adobe's DNG Profile Editor to Make Custom Camera Profiles

You can select each color from the table and adjust their individual hues, saturation, and lightness. Toggle the on/off of your edits using the black boxes and completely remove the selection with the minus (-) sign. Here is the photo after some fairly drastic hue and saturation adjustments from the color table.

How to Use Adobe's DNG Profile Editor to Make Custom Camera Profiles

Moving on to the Tone Curve, you can adjust the image just as you would anywhere else by changing the curve. For our example, I’ll add contrast by implementing a classic S-curve.

How to Use Adobe's DNG Profile Editor to Make Custom Camera Profiles

In the color matrices section, you can further manipulate the colors and white balance of the RAW file. I’ve made some radical changes here just for the sake of example (plus it’s fun).

How to Use Adobe's DNG Profile Editor to Make Custom Camera Profiles

Keep in mind that when using the DNG Profile Editor you are free to use as many or as few of the tools it offers, either together or singularly.

Saving Your Custom Profile

From here it’s just a matter of naming and saving the custom profile you just made. Switch over to the Options tab.How to Use Adobe's DNG Profile Editor to Make Custom Camera Profiles

Enter a name for your custom profile so you can easily identify it later in Lightroom. Also, it is here where you can add in copyright information and other options.

Unless you’ve chosen to use a custom color chart, it’s time to export and actually put your freshly made camera profile to use. Exporting the profile is incredibly easy. Click File > Export (your camera name) Profile.

How to Use Adobe's DNG Profile Editor to Make Custom Camera Profiles

Yes, Adobe calls these profiles recipes, which is fitting in an odd kind of way.

How to Use Adobe's DNG Profile Editor to Make Custom Camera Profiles

Make sure the export was successful and then click OK (see below).

How to Use Adobe's DNG Profile Editor to Make Custom Camera Profiles

And you’re done! (Unless you’d like to also save your recipe for editing later in which case just select Save As in addition to the export.)

There’s no locating the new profile or trying to remember where you placed it on your computer. The DNG Profile Editor does everything for you and will park it exactly where it needs to be for use in Lightroom. Speaking of which, let’s use the new profile in Lightroom. Here’s how.

Applying Your Custom Profile

If you had Lightroom open while you made your new profile, be sure to restart it for the changes to take effect. Next, scroll down to the Camera Calibration Panel of the Develop module. Click on the Profile drop-down.

*Unless you’d like to also save your recipe for editing later in which case just select ‘Save As’ in addition to the export.

Boom. There is your newly minted camera profile. Remember, these profiles are camera exclusive. For example, the profile I just made will only work with a Canon 5D MK3. It won’t work an image from my Sony A7R, for example.

Some Final Thoughts on Adobe’s DNG Profile Editor

Is the DNG Profile Editor a piece of software that is intended for everyone? Well, not exactly. That isn’t to say that even non-professional shooters can make great use of its tools.

It allows you to customize exactly how Adobe handles its RAW files and enables you to save new camera profiles to fit different situations. If you regularly employ artificial lighting on location or in the studio you will love the DNG Profile Editor. Oh, and remember, as I mentioned before these profiles can also be used in Adobe Camera Raw (inside Photoshop).

*Unless you’d like to also save your recipe for editing later in which case just select ‘Save As’ in addition to the export.

Just select your custom profiles from the Camera Calibration section of ACR and continue as usual.

Thanks for sticking with me all the way to the end. I hope you at least give the DNG Profile Editor a test drive. After all, it’s free and could potentially open up new creative possibilities for your work.

The post How to Use Adobe’s DNG Profile Editor to Make Custom Camera Profiles by Adam Welch appeared first on Digital Photography School.


Digital Photography School

 
Comments Off on How to Use Adobe’s DNG Profile Editor to Make Custom Camera Profiles

Posted in Photography


VSCO adds ‘Recipes’ feature that lets you create 10 custom presets

09 Nov

VSCO has launched a new feature for VSCO X subscribers called Recipes. With Recipes, subscribers are able to save their favorite edits, making it possible to apply them as a batch to future images. Up to 10 Recipes can be saved at a time via a new menu item that you tap after the image edits are chosen for the first time.

Non VSCO X subscribers will be able to save only one recipe, so if you want to get into the preset making game, you’ll need to pony up for the VSCO X membership ($ 20/year).

The company explains how to use the new Recipes feature in the video below:

Articles: Digital Photography Review (dpreview.com)

 
Comments Off on VSCO adds ‘Recipes’ feature that lets you create 10 custom presets

Posted in Uncategorized


Photographer captures Miami Beach air show with Nikon 800mm and custom rig

07 Jun
Jim Winters with his TRIAXEZ rig. Photo by Pete Boden

The AF-S Nikkor 800mm F5.6 VR is an absolute beast of a lens. Shooting handheld with it for more than a few seconds is pretty much unbearable unless you’re a champion bodybuilder. Wanting it utilize it for aviation photography, Jim Winters built a rig to accommodate the lens and a camera body that he can use for hours.

His ‘triple axis’ TRIAXEZ rig includes a counterweight and 12V battery. The battery provides additional counterweight to balance the rig – an earlier evolution used lead pellets as counterweights – and also provides charge to the camera for long shooting sessions. Winters says he can even use it to charge his phone. The whole thing is easily transported to and from shooting locations thanks to a pair of wheels.

It’s a pretty clever piece of engineering, and the proof is in the images below, shot at the National Salute to America’s Heroes in Miami Beach over Memorial weekend.

Photo by Jim Winters

It looks like the rig is working well for Winters, but he’s envisioning ways to improve it. ‘Due to the weight of the rig assembled with lens and counterweight, I was experimenting with a single shoulder mounted rig. You would look through a POV set of glasses so that you don’t have to look through the camera body, nullifying the need for a counterweight.’ That’s a pretty enticing solution, but in the meantime, we think he’s done an excellent job of adapting his equipment to his needs.

See all of his photos from the Miami Beach show at his Team Nikon Miami website.

Articles: Digital Photography Review (dpreview.com)

 
Comments Off on Photographer captures Miami Beach air show with Nikon 800mm and custom rig

Posted in Uncategorized


Digital Knitting Machine: Kniterate is a 3D Printer for Custom Apparel

23 Apr

[ By WebUrbanist in Gaming & Computing & Technology. ]

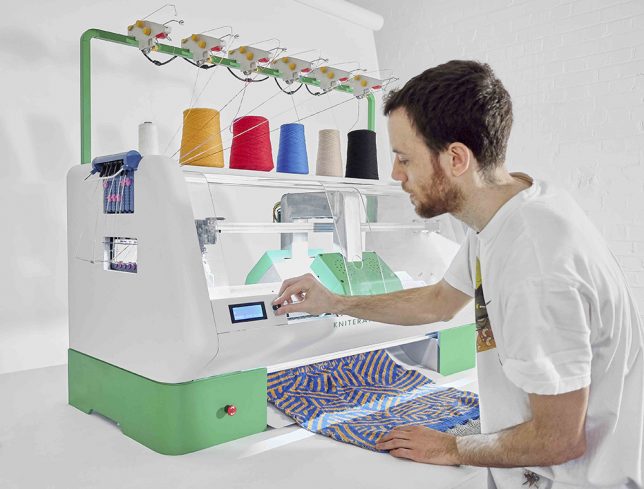
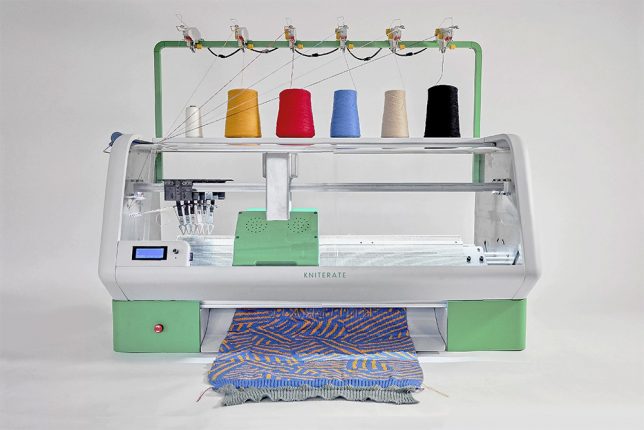
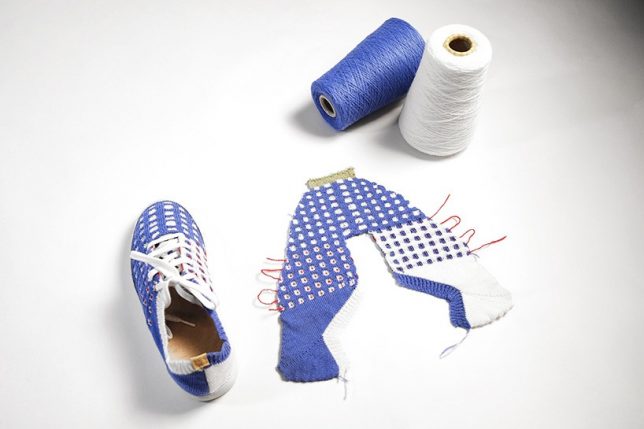
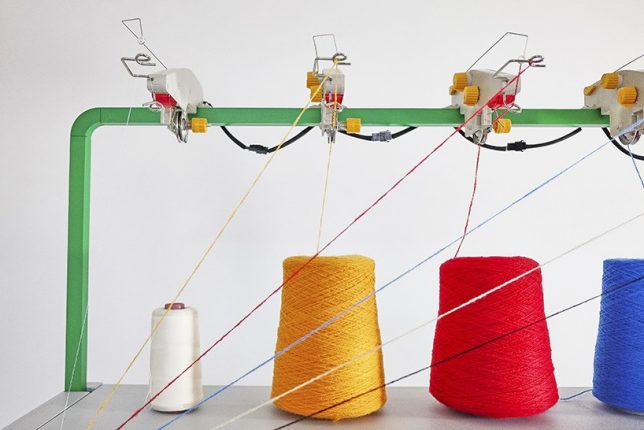
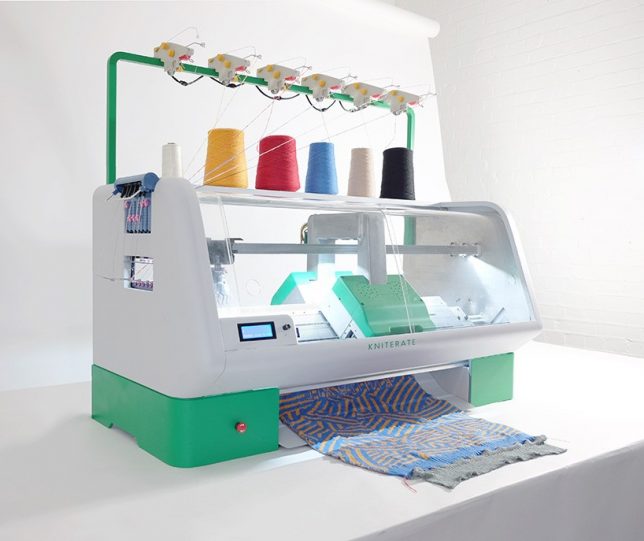
Borrowing logic from the 3D printing industry, Kniterate lets users turn ideas and designs from digital files to one-off wearable garments in hours. Able to “print” shirts, scarves, sweaters, dresses and more, the machine is aimed at enabling customized creations as well as rapid prototyping.

Compact, portable and affordable, the gadget itself links into computer and mobile apps – creatives can build out ideas in Photoshop, build them in Kniterate’s device-specific application, then send them to straight to production with the touch of a button.

The application comes with a number of preset patterns that can be used but the intuitive interface is also designed to allow for easy from-scratch creations, even by people with limited digital design experience. Even in cases there the final product will be made via other methods or materials, this machine allows for iterative design experiments to test size, fit and styles.

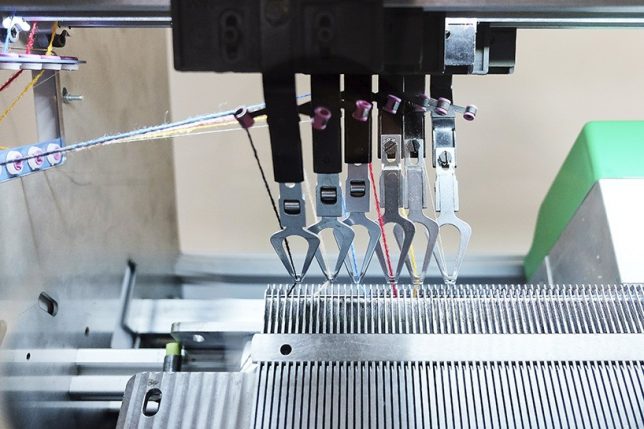
The system is also designed to reduce waste from off-cut materials, printing with the exact amount of material needed to make a particular piece. The device can carry up to six yarns at a time to span an array of colors and materials – it is also made to be compatible with off-the-shelf yarns, making it more flexible and affordable than printers (often designed to make money from material sales rather than the machines themselves).

Share on Facebook


[ By WebUrbanist in Gaming & Computing & Technology. ]

[ WebUrbanist | Archives | Galleries | Privacy | TOS ]


WebUrbanist

 
Comments Off on Digital Knitting Machine: Kniterate is a 3D Printer for Custom Apparel

Posted in Creativity


Custom Essay Writing Service, Buy Argumentative Essay

14 Apr

our essay writing team will work on it relent lessly to ensure that its quality
www.surveymonkey.com/r/CMYZQZV

 
Comments Off on Custom Essay Writing Service, Buy Argumentative Essay

Posted in Equipment


Ultra large and custom film sizes now on order from Ilford Photo

06 Apr

UK black and white film manufacturer Harman Technology has announced that its annual large format and custom film ordering scheme is open from now until May 26th. The scheme allows users of cameras that take unusual film formats to order certain Ilford emulsions within a set window so the company can set aside factory time to bulk-produce formats it wouldn’t otherwise be able to make financially viable.

As was the case last year Ilford FP4 Plus, HP5 Plus and Delta 100 emulsions will be available to order in sheet sizes from 2.25 x 3.25in to 20 x 24in. Rolls are also on offer for 127 film and formats 9cm wide, as well as 50 foot rolls of 20in film. Not all emulsions can be ordered in all formats but most of the more popular formats are covered. 120 backing paper can be ordered in 100ft lengths.

Harman says there are minimum order quantities that need to be reached before manufacturing can go ahead, but in the case of the sheet films usually a single order of a box of 25 sheets is enough. Roll films though need between 2 and 15 orders to make them practical to cut.

The company lists retailers across the world with which orders can be placed and the sizes/emulsions on offer. Prices will need to be checked with those retailers. Shipping to distributors will begin in August 2017. For more information see the Ilford Photo website.

Press release

ILFORD PHOTO ULF, CUSTOM & SPECIALIST FILM MANUFACTURE 2017

Buoyed by ongoing global resurgence in photographic film use, HARMAN technology Limited is delighted to be offering film photographers the opportunity to place orders for a range of specialist film products and formats for the 12th consecutive year.

To enable this film photography revival, it is vital that a wide range of film formats are available including film for ultra large format and collectable cameras.

By consolidating orders HARMAN technology can supply products that would not normally be viable to manufacture.

“This program enables us to further support film photographers who use and value our conventional products” said Giles Branthwaite, Director of Sales and Marketing at Harman technology. “Through running the ULF program each year, we are able to satisfy the strong demand for specialist film formats. Whilst manufacture is not easy, we have been rewarded by high demand ensuring we will continue to address and care for this market.”

Films available for this year are ILFORD FP4 PLUS, HP5 PLUS, and DELTA 100 PROFESSIONAL. Not all films are available in all formats.

For a full list of the 2017 items and participating dealers visit:
http://www.ilfordphoto.com/ulf

The options available reflect what has been asked for over the past 12 years. HARMAN technology is happy to consider any other size suggestions but do not guarantee to make them available.

For sheet sizes an order for just one single box can be made, but for roll sizes this is not possible due to potentially excessive waste. Please see the minimums and multiples required next to the appropriate roll size.

Note:
Orders must be placed with the listed ULF reseller partners no later than Friday 26th May.

The UK factory will start to ship orders to Distributors during August and end users should check with the local ULF reseller for expected arrival dates.

Articles: Digital Photography Review (dpreview.com)

 
Comments Off on Ultra large and custom film sizes now on order from Ilford Photo

Posted in Uncategorized


How to Make Custom Bokeh Shapes

28 Feb

How to Make Custom Bokeh Shapes

The theory

Bokeh (pronounced b??k?) is a Japanese term that translates to blur in English. Bokeh is used by photographers to describe the quality of the unfocused or blurry parts of a photograph. Every photograph has a depth of field – the area of a photograph that is in focus.

For example, in the image below, the upper half of foreground is sharp and in focus, meaning that it is inside the depth of field. The background, however, is blurry or outside of the depth of field. The reason the leaves in the upper foreground are focused is because I physically positioned myself close to them with my camera set to a wide aperture – resulting in a shallow depth field and an unfocused background. It’s this subsequent softness and shape in the background that is described as Bokeh.

How to Make Custom Bokeh Shapes

Looking at the image again, you’ll notice that the points of light in the unfocused areas of the photograph are circular in shape. That’s because my lens renders them to appear that way. However, you can change this shape to create your own patterns by making simple filters and attaching them to your lens.

googletag.cmd.push(function() {
ruleset_slots.push( googletag.defineSlot( “/1005424/_dPSv5topic-rhs(300×250)”, [300, 250], “pb-ad-0” ).addService( googletag.pubads() ) ); } );

What you need to make custom bokeh

How to Make Custom Bokeh Shapes

  • Camera
  • A large aperture lens (I used a Canon 50mm f/1.8, but the larger the aperture the better the effect)
  • Lens cap for the above lens
  • A sheet of black poster board
  • Scissors
  • Craft knife
  • Pen
  • Compass (optional)

Making the filterHow to Make Custom Bokeh Shapes

To begin, place the lens cap on the sheet of black poster board and carefully trace around the outside of the cap with a pen. Alternatively, you can measure the diameter of your lens, set a compass to the measurements and trace an outline with the compass instead. Mark out an extra little tab coming off of the outline to help remove the filter later.

Cut around the outline of the lens cap and tab so that you have a circle that fits snugly in front of your lens. Usually, the filter diameter is about 0.5 mm smaller than the lens cap size, so you may have to trim the edges of the circle a little more for a tight fit.

In the very center of the circle, draw the outline of the shape or design you want to use. Keep in mind that to work properly, the shape can’t too be too big or small. Making the shape too small blocks so much light that most of your photos will be underexposed and turn out black. Too large a shape and you won’t be able to see the effect in your photos at all. It’s a little fiddly, but keep the shape to at least 5mm and at most 20mm. As an example, I cut shapes that were about 15-20 mm on the longest side for my f/1.8 lens. It may take some experimentation to get perfect.

googletag.cmd.push(function() {
ruleset_slots.push( googletag.defineSlot( “/1005424/_dPSv5topic-rhs(300×250)”, [300, 250], “pb-ad-1” ).addService( googletag.pubads() ) ); } );

How to Make Custom Bokeh Shapes

Keep the design simple

The simpler the design, the easier it is to cut with the craft knife, which will make for a more defined bokeh shape. I recommend shapes like 5-pointed-stars, triangles, hearts, crosses, or even question marks. Cut the outline of the shape out with the craft knife, tidying up any messy corners carefully or they will show up in your photographs.

How to Make Custom Bokeh Shapes

Take your filter and press it into the front of your lens so it sits snugly in the ridges.

Using your custom bokeh filter

Set your camera to Aperture Priority or Manual mode. For maximum effect, you want to set the f-stop to be as wide as possible. On my lens, the lowest aperture available is f/1.8 but depending on the lens you use, you might be able to go wider still (f/1.4 or f/1.2). Because the filter blocks a lot of light, you will need to make longer exposures and/or use a higher ISO, so having a tripod will prove handy.

googletag.cmd.push(function() {
ruleset_slots.push( googletag.defineSlot( “/1005424/_dPSv5topic-rhs(300×250)”, [300, 250], “pb-ad-2” ).addService( googletag.pubads() ) ); } );

Remember that only unfocused points of light in the photograph will be affected by the filter. If you want a dramatic effect, try going out at night with your camera set to manual focus and see the results at different focal lengths. The most dramatic effect will be seen at the closest focus distance (when you’re close to the subject and the background is far away). Have fun with reflective objects, fairy lights, reflections, and even glitter to create some eye-catching bokeh patterns. My favorite shape is the heart, can you tell?

How to Make Custom Bokeh Shapes

How to Make Custom Bokeh Shapes

The outline of a tree is marked out at night by the pretty fairy lights draped on its branches. I couldn’t resist the opportunity to test one of my heart-shaped bokeh filters.

How to Make Custom Bokeh Shapes

How to Make Custom Bokeh Shapes

How to Make Custom Bokeh Shapes

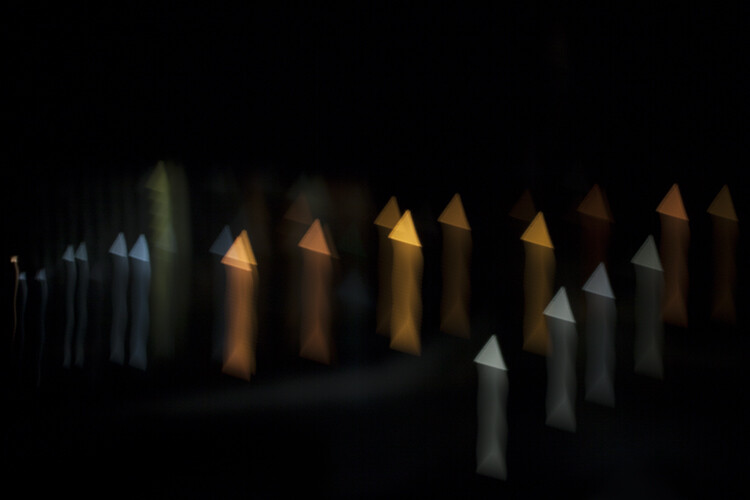
Moving the camera around during exposure with a custom bokeh filter can produce some interesting results

How to Make Custom Bokeh Shapes

googletag.cmd.push(function() {
ruleset_slots.push( googletag.defineSlot( “/1005424/_dPSv5topic-rhs(300×250)”, [300, 250], “pb-ad-3” ).addService( googletag.pubads() ) ); } );

How to Make Custom Bokeh Shapes

Light filtered through an oak tree transforms into an intriguing array of diamonds.

How to Make Custom Bokeh Shapes

This bokeh filter transforms car lights into a sprinkle of stars

The post How to Make Custom Bokeh Shapes by Megan Kennedy appeared first on Digital Photography School.


Digital Photography School

 
Comments Off on How to Make Custom Bokeh Shapes

Posted in Photography


Mount a Canon 5D Mark III to a custom drone and capture the beauty of nature

04 Nov

Polish photographer Miron Bogacki mounted a Canon EOS 5D Mark III to a custom-built octocopter and flew the drone over Northern Poland in the Valley of Drw?ca. We hope that you enjoy the gorgeous video footage he captured as much as we did! To see more of Miron’s work check out his website.

Articles: Digital Photography Review (dpreview.com)

 
Comments Off on Mount a Canon 5D Mark III to a custom drone and capture the beauty of nature

Posted in Uncategorized