RSS
 

Posts Tagged ‘Choose’

Different Tripods for Different Subjects – Which to Choose?

14 Mar

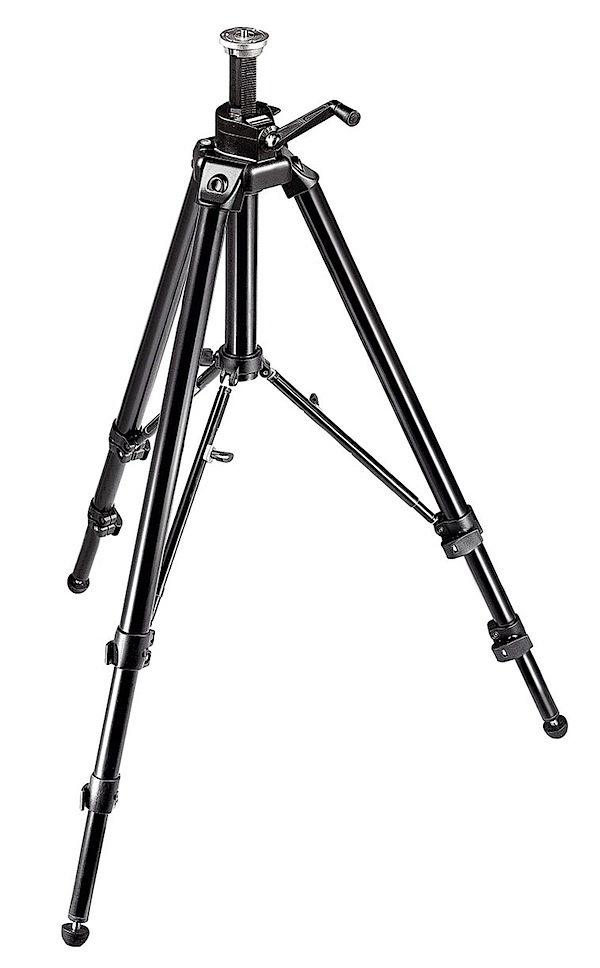
manfrotto-tripod.jpg

Tripods are always a fun topic of conversation but you might not think so because of their simplicity. In more circumstances than others, the tripod that you use really doesn’t make a big difference. The reason is because your tripod is designed to hold your camera and that’s it. But at the same time, different tripods include certain features that are beneficial for special situations.

In this article I will identify six different situations in which different tripod features come in extremely handy and can improve your photographs. These situations will go beyond the basic tripod usage of mounting the camera, adjusting height and angle. Let’s dive in, shall we?

Tripods for long exposure photography

When it comes to photographing long exposures a sturdy tripod is key. However, the most common tripods purchased these days are made of carbon fiber. The reason is due to the strength and light-weight properties of the material. Those two factors make carbon fiber desirable for any type of photography. However, with long exposures you need the tripod to stay still, and having a light tripod is not always the best.
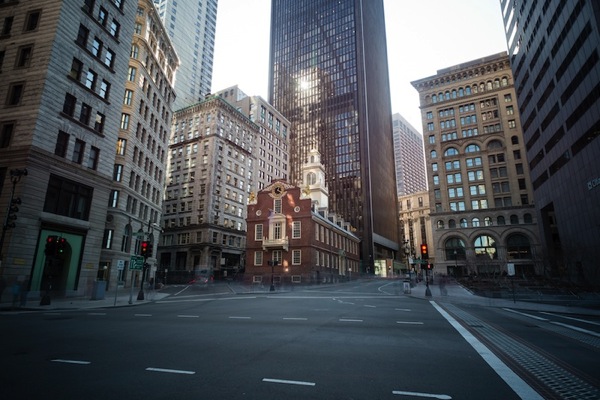
Tripod long exposure photography

Having a tripod that includes a hook under the head or at the bottom of the center column, allows you to hang a weight or bag, helping to steady the tripod even more. Higher quality tripods also include vibration dampening technology which can help reduce shake. Lastly, a tripod that has the ability to attach spikes to the bottom of the feet can be very useful when photographing in dirt, sand or in the ocean.
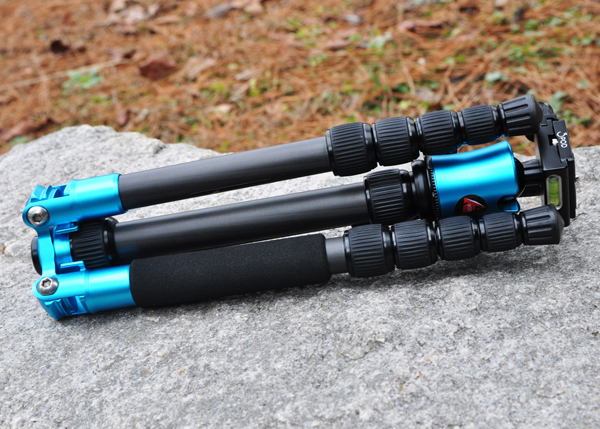
The P5CRH folds up to approximately 12 inches.

The P5CRH – folding tripod

Tripods for panoramic photography

The weight of your tripod does not matter so much with panoramic photography, unless of course you are photographing long exposure panos. There are two tripod components that can really help improve panoramic photographs. The first feature is a leveling plate or base. With it, you can have your tripod in any angle and level the camera separately from the rest of the tripod. That will ensure the smoothest transition between frames. The other feature is a nodal slide, which will help bring the lens closer to the pivoting point of the tripod instead of the camera body. Having the lens nodal point in the correct spot will ensure minimal distortion between frames.

For advanced panoramic photographers, a gimbal head might be the ideal choice for a mounting system.
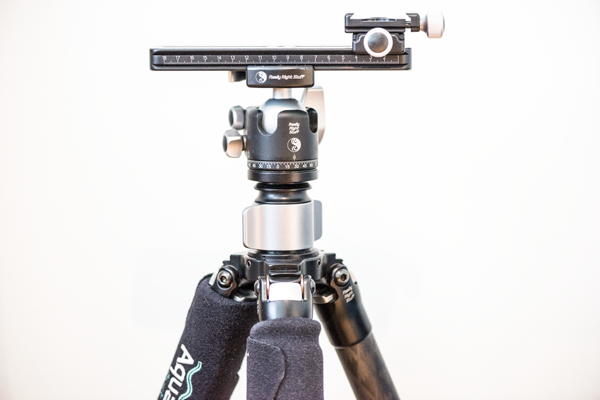
Tripod panorama

Tripods for headshot photography

Headshot photography is very different than other portrait photography. That might sound strange, but it’s true. With your typical portrait photographs you are likely moving around too much to use a tripod. However, with headshot photography the client is typically standing or sitting in one spot and moving only slightly. You, the photographer, are not moving so much.

At the same time, you are moving enough that you need fluid movements with your tripod, and the ability to let go without the camera changing positions on you. So when it comes to photography headshots be sure to use a ball head on your tripod rather than any other. It will make the process so much better for you. I highly recommend viewing one of Peter Hurley’s headshot videos and how he uses his tripod with a Hasselblad, which is a fairly heavy camera.

Tripods for product photography

Product photography is studio photography where the subject doesn’t move. When you are in the studio photographing product stills your camera is typically in one spot the entire time, with only minor adjustments. Quite often you will be tethered to a laptop, and there are plenty of tripod accessories to attach a camera and laptop at the same time. But oddly enough many product photographers utilize camera stands rather than tripods. They’re the same principal as a tripod except their extremely heavy, and have fine tuning adjustments for height, angle and length of reach. They are also on wheels for portability around the studio. Due to the heavy-duty structure of camera stands, attaching a laptop is very easy and safe.
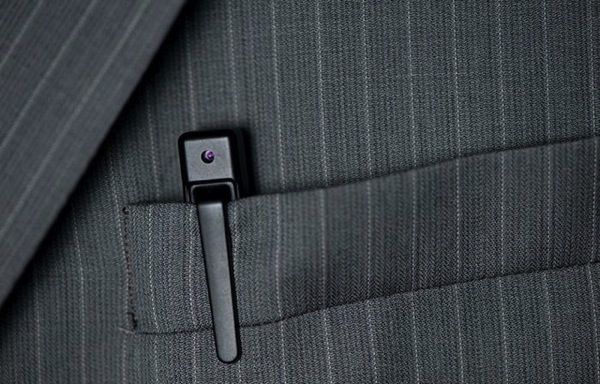
Tripod product photography

Camera stands are expensive though, typically over $ 1,000, so they are not for everyone. If you’re not willing to dish out that much money in one shot, then my recommendation is a heavier steel tripod. Because you’re not moving them great distances, they are perfect for staying in one place. The weight of these heavy-duty tripods means they can hold heavier cameras, and if you want to attach a laptop mount as well you can feel comfortable it will hold both products safely. Also, for product photography a ball head is not the best choice. Instead, a positioning head like the Induro PHQ-3 would be ideal.

Tripods for wildlife photography

Paul Burwell talked about tripods for wildlife photography previously, so definitely give it a read. Typically a sturdy carbon fiber tripod will do perfectly fine for this type of photography. Gimbal heads can be a wildlife photographer’s best friend in addition to LensCoats (yes, the camo covers). If you cannot afford a Gimbal head, stick with a ball head so you can stay sturdy and adjust your view in smooth motions.

For some wildlife photographers, safari clamps (like the ones from Really Right Stuff) can be extremely useful, especially if you are taking a tour through Africa and have to shoot from a truck.

Tripods for photowalks and travel photography

I combined these two into one, because they’re extremely similar. Even if you are not traveling far for a photowalk, the principal is the same. Basically with any type of travel or photowalk you want to carry a tripod that is light and convenient. I personally have a Really Right Stuff tripod that’s made of carbon fiber. It’s extremely tall, but also light. In fact, it is as light as my compact 3 Legged Thing tripod.

So although the 3LT tripod is perfect for fitting into small places, like a camera bag, the Really Right Stuff doesn’t add weight, is much sturdier and extends much higher.
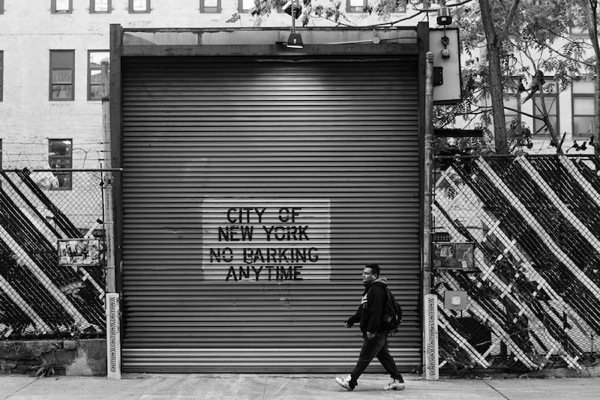
Tripod street photography

In Conclusion

In this article I shared six reasons why the tripod you use matters, and the differences between them. Although there are specific things to look for in a tripod depending on what you are photographing, it also doesn’t matter.

As long as you know your gear, understand how to use it to the best of its ability and your ability, then you’re fine. Use what you are comfortable with because having a tripod for many situations is better than not having a tripod.

Before wrapping up this article I want to share some other useful articles here on dPS. Be sure to read How to Buy a Tripod, How to use Your Tripod and Steady On.

If you have any additional comments to add please do so on the comments.

The post Different Tripods for Different Subjects – Which to Choose? by Scott Wyden Kivowitz appeared first on Digital Photography School.

Digital Photography School

 
Comments Off on Different Tripods for Different Subjects – Which to Choose?

Posted in Photography


Back Up Your Photos Four Ways!(Or Choose One And Go With It)

13 Feb

If your phone takes a plunge into a puddle, you’re going to wish you’d backed up your irreplaceable photos…

The video from the time you met Oprah. Photos from the top of Mt. Everest. A timelapse of your first place win at the donut eating contest.

Don’t wait until you wish you would have backed up your photos.

We’ve compiled our four favorite backup solutions, their pros, their cons and their how-to’s. Turns out it’s easy and it doesn’t have to be expensive.

Do not wait until your computer is actually on fire. That is entirely too late.

Find A Way That Suits You, Back Up Your Photos Today

(…)
Read the rest of Back Up Your Photos Four Ways!
(Or Choose One And Go With It) (589 words)


© laurel for Photojojo, 2014. |
Permalink |
No comment |
Add to
(Or Choose One And Go With It)”>del.icio.us

Post tags:


Photojojo

 
Comments Off on Back Up Your Photos Four Ways!(Or Choose One And Go With It)

Posted in Equipment


How to Choose the Perfect Portrait Lens

30 Jan

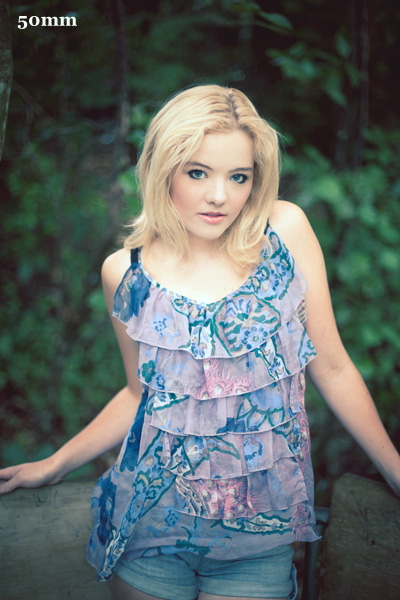
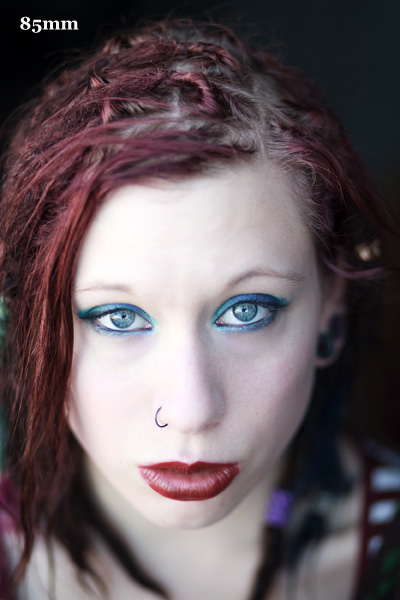
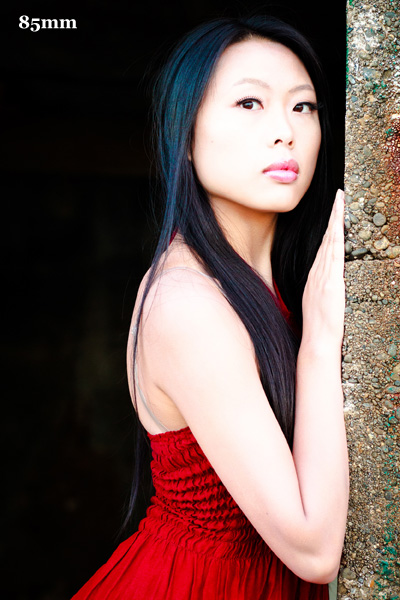
Portrait taken with 85mm lens

A question we often get asked at Digital Photography School is which lenses are best for portraits. It’s a tricky question because the answer is subjective. It depends on your budget, personal style of photography and the make of camera. It is further complicated by the relationship between sensor size and focal length.

Let’s start by exploring some of the things you need to think about when choosing the perfect portrait lens.

1. What about the lenses you already own?

It may be that you already own a lens that you haven’t thought of using to take portraits, but could actually do the job quite well. Do you have a 50mm prime? Or maybe a 100mm macro lens? A 70-300mm zoom? All of these are capable of being great portrait lenses.

Even if your only lens is a kit lens, you may still be surprised by how well it performs (within its limitations). You can read more about that in my article Why Your Kit Lens is Better Than You Think.

Getting to Know Your Lenses will also help.

2. Do you need a zoom lens or a prime?

Prime lenses are great for portrait photography. One advantage is that they have a wider maximum aperture than a zoom lens covering the same focal length. This is useful for creating images with shallow depth-of-field (a common technique in portraits). It is also handy in low light, as it lets you take photos with faster shutter speeds or lower ISO than you could with a zoom with a smaller maximum aperture.

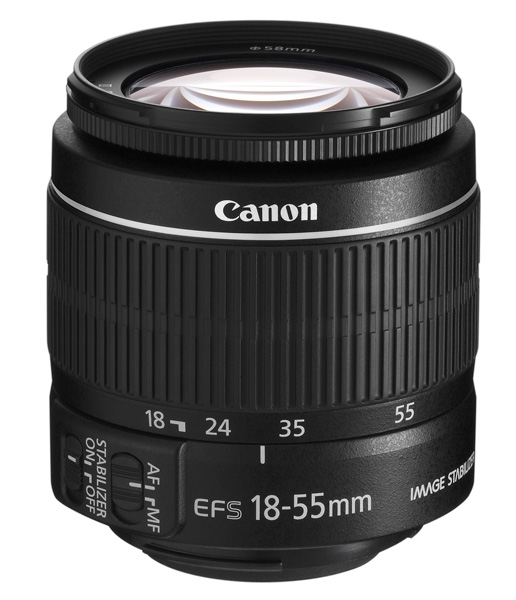
Canon EF-S 18-55mm lens

Another benefit is image quality. Prime lenses tend to have less elements than zooms, and the result is that image quality is better, and they produce sharper images with more contrast and less lens flare. If you’re on a budget (see next point) then an inexpensive prime will give you better results than an inexpensive zoom.

3. What’s your budget?

This is an important consideration because, as with most things, good quality lenses cost more. The best example of this is Canon’s 50mm lens range. There are four models, ranging from around $ 110 to $ 1600 in price. That’s a big difference, and your budget determines which model makes it to your shopping list.

More expensive lenses usually produce sharper images with less flare. The construction quality is better, they may be weatherproofed and have better or quieter autofocus mechanisms. The difference in image quality is usually greater between expensive and cheap zoom lenses than it is between expensive and inexpensive prime lenses.

The other trade-off (besides cost) for better quality built lenses, is extra weight. Top of the line lenses are usually made of metal and are heavier than the less expensive plastic lenses.

Bear in mind that good camera lenses should last decades, and sometimes spending more up front is beneficial in the long run. In the words of Sir Henry Royce (of Rolls-Royce):

The quality is remembered long after the price is forgotten”.

4. What focal lengths do you require?

The answer to this question depends on the size of your camera’s sensor (our article Crop Factor Explained tells you why). Rather than discuss specific focal lengths it’s easier to split lenses up into four categories. Once you’ve figured out what category of lens you’re interested in, and whether you would prefer a prime lens or a zoom, you can investigate which models are available for your camera.

Wide-angle lenses

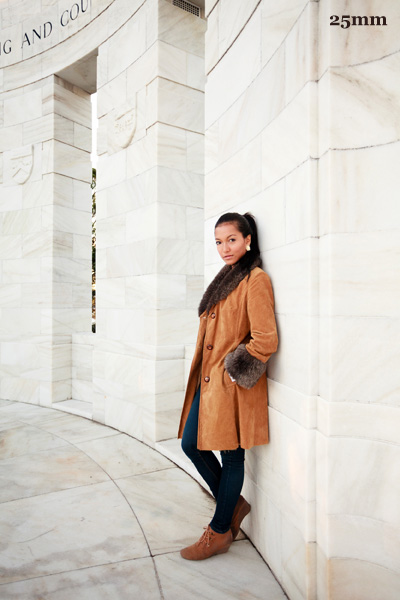
Wide-angle lenses are good for environmental portraits – those where you keep your distance a little from the subject and include their surroundings. They are generally not as good for close-up portraits as they distort your subject. Here are some examples:

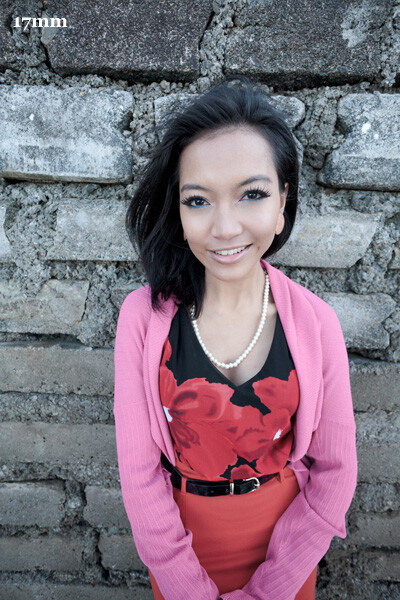
Portrait taken with 25mm lens Portrait taken with 17mm lens

Normal lenses

A normal lens is one with a focal length equivalent to around 50mm on a full-frame camera (that’s around 35mm on an APS-C camera, or 25mm on a Micro four-thirds camera). You may have read that these lenses give a similar perspective to that of the human eye. It’s a debatable point, but there’s no doubt they are interesting for portraits, occupying the middle ground between wide-angle and short telephoto lenses. They can be used for close-up portraits, although not completely without distortion (see image left, below)

Portrait taken with 50mm lens

A “normal” 50mm lens portrait

Portrait taken with 85mm lens

A short telephoto 85mm lens

Short telephoto lenses

These lenses are often called portrait lenses because they are an ideal focal length for taking flattering photos of people. You can move in close and take images without distortion, or step back and include the entire figure without moving so far away that it becomes difficult to communicate with your model. If your short telephoto is a prime lens, you get the additional benefit of wide apertures. Best of all these lenses, especially primes, tend to be reasonably priced.

My favourite lens for portraits is an 85mm prime lens (you can read more about it in my article How a Humble 85mm Lens Became My Favourite). (see image right, above)

If you have an APS-C camera then a 50mm prime lens is effectively a short telephoto. Yes, I’ve written about 50mm lenses too – let me point you towards Nifty Fifties – Why I Love 50mm Prime Lenses and Why a 50mm Lens is your new best friend.

Telephoto lenses

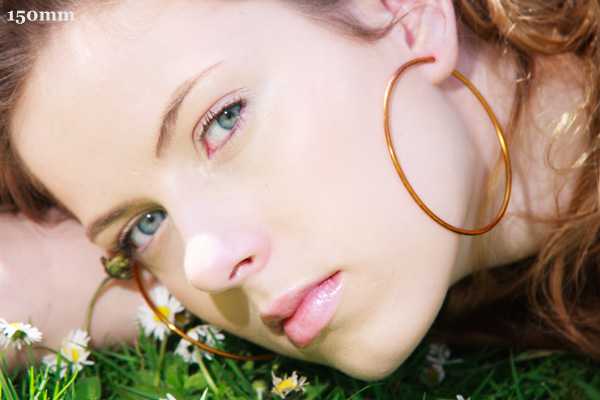
Telephoto lenses are often used by professional fashion and portrait photographers for the compressed perspective and their ability to isolate the model from the background. The downside of telephoto lenses is that they tend to be more expensive than shorter focal lengths, especially if you’d like one with a wide maximum aperture. They are definitely heavier as well. Having said that, there are plenty of relatively inexpensive lenses, especially zooms, in the 100mm-200mm range.

Portrait taken with 150mm lens

Selecting a focal length

If you’re unsure which focal lengths appeal to you, try this exercise. Go onto Flickr or 500px and do a search for portraits. Mark any you like as favourites. When you have marked at least twenty, go and have a look at them together. Examine them carefully and think about why you liked each one. Are there any common themes? Which focal lengths are used the most? Are the photographers using wide apertures for shallow depth-of-field? Are they predominantly black and white or colour? Is the photographer using natural light or flash? Are they predominantly close-ups or environmental portraits? The answers to these questions may help you decide which lenses to shortlist. Read more: 5 Easy Steps to Choose the Perfect Prime Lens for You

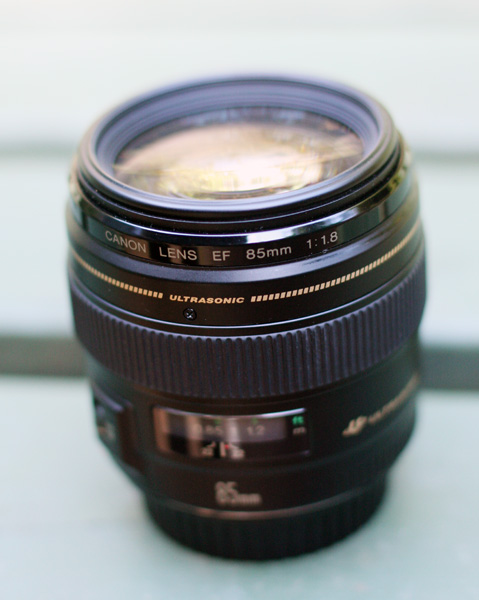
Canon EF 85mm f1.8 lens

My thoughts

I’m going to be specific and tell you exactly which lenses I use. My favourite lens for portraits is my Canon EF 85mm f/1.8 prime lens. I use it for approximately 80% of the portraits I take. I also use my Canon EF 40mm f2.8 pancake lens (it’s a moderate wide-angle) on my full-frame camera and, occasionally, a Canon EF 50mm f1.4 or EF 17-40mm f/4L zoom. The next lens on my list is a 24mm prime, and when I buy one I’ll no longer use the 17-40mm zoom for portraits. I favour primes over zooms because of image quality and the wider maximum apertures.

Your thoughts

Now it’s time to share your personal experiences. Which lenses have you purchased for taking portraits, and how did they work out?


Understanding Lenses

Understanding Lenses: Part II ebook coverI’ve written two ebooks for Canon EOS users about camera lenses. Click on the links to learn more about each one:

  • Understanding Lenses: Part I – A Guide to Canon Wide-angle and Kit Lenses
  • Understanding Lenses: Part II – A Guide to Canon Normal and Telephoto Lenses

The post How to Choose the Perfect Portrait Lens by Andrew S. Gibson appeared first on Digital Photography School.

Digital Photography School

 
Comments Off on How to Choose the Perfect Portrait Lens

Posted in Photography


5 Easy Steps to Choose the Perfect Prime Lens for You

10 Jan

“But how will I zoom in and out?”,  I blinked my eyes in disbelief.

“You’ve got feet, don’t you?”

85mm-canon-lens

My first encounter with the concept of fixed or prime camera lenses was when they were explained to me (a baby photographer) when I met with a local wedding photographer whose work I was (and still am) crushing on. I was so surprised to hear that there were lenses that (gulp) didn’t zoom. ‘What’s the point of that?’ I wondered. Why pay more for less?

Clearly, I had lots of catching up to do!

There are many merits to utilizing prime lenses in your photography. One is that you may find you can achieve mind blowing sharpness and quality with a lens that isn’t 10 lenses in one. I like to say that the 50mm prime lens doesn’t have to try to be anything other than 50mm. It only needs to focus on (pun intended) being the best 50mm it can be. Of course, there are many fantastically sharp and capable zoom lenses out there, but you will find that you’re not only paying for quality, but versatility. Prime lenses aren’t very versatile, but what they lack in versatility, they can make up for in quality which may leave you asking, “what zoom?”

How to choose

So with so many to choose from, how do you choose the perfect prime lens for you? You can be like me and buy-to-try a whopping 14 lenses in 5 years, to the tune of $ 10,250, (true story) or you can try these great 5 steps:

  1. Choose one of your existing zoom lenses
  2. Set it on a focal length and leave it there
  3. Shoot for a week or so only on that setting. Experience what it’s like to use your feet instead of your zoom. Photograph your typical subjects, ones you photograph the majority of the time, and see how that focal length feels.
  4. Repeat the exercise at different focal lengths.
  5. Assess your experience shooting at different lengths. The setting at which you felt most comfortable will be a great indication of where to start when purchasing the perfect prime lens for you.

50mm-canon-lens

Bonus tip!

If you use multiple lenses (or even just a few), there’s a super cool way to use Lightroom to see all the images taken with a particular lens. First, make sure you’re in the library module. On the left (under the smaller preview image) click ‘all photos’. Then on the top bar, click ‘metadata’. You’ll then see many sorting options depending on what photos you want to see. In the middle is the box which shows every lens you’ve used for all the images in your catalog (if you don’t see that use the pull down menu to select “lens”. How cool is that?! Then you can sort by focal length and see which one(s) you use most often.

50mm-canon-lens

My Final Choice

As I mentioned before, I’ve experimented with many different zoom and prime lenses. As for primes, I’ve owned the following Canon lenses: 50mm f/1.8, 50mm f/1.4, 50mm f/1.2, 85mm f/1.8, and 24mm f/2.8. After all that, the only one that remains in my collection is the 50mm f/1.2. I personally love quite tight portrait shots so although I think the quality was fantastic, the 24mm was too wide. The 85mm had phenominal sharpness and quality, but I sold it to help pay for the 50mm. I find the 50mm great on my full frame camera for wideish family shots but also tight-enough portraits. The f/1.2 means it’s my best lens for ultra low light and the sharpness is a little mind blowing. For me, it’s the perfect prime lens.

Now, there are many lenses from which to choose and that’s where you fine people come in! If you’re a prime lens aficionado or even just a fan of a particular lens, get involved below and tell us what prime lenses you have experience with, and which are your favourites!

The post 5 Easy Steps to Choose the Perfect Prime Lens for You by Elizabeth Halford appeared first on Digital Photography School.

Digital Photography School

 
Comments Off on 5 Easy Steps to Choose the Perfect Prime Lens for You

Posted in Photography


How to Choose Your Next EOS Camera: Part Two

21 Apr

01.jpg

This article is written by Andrew S. Gibson, the author of Understanding EOS, on sale now at Snap N Deals for a limited time.

Note: This article is about Canon’s semi-professional and professional EOS cameras. You can read about its entry level models in my previous article.

Semi-professional cameras

This group of EOS cameras is aimed at semi-professional photographers and serious hobbyists. Don’t let that put you off if your budget stretches to one of these models and you’re looking to buy your first EOS camera. There is nothing intrinsically more complicated about these models. In some ways they are even simpler to use as most of them don’t have the automatic exposure modes (portrait, landscape etc) that come on entry-level models.

The main differences between these cameras and entry level models are:

Size and weight. These cameras are bigger and heavier than entry-level models. Most of them have bodies constructed from magnesium alloy frames and are built to last.

Quick control dial. Entry-level models use a set of four cross keys to dial in exposure compensation and make other adjustments. Semi-professional (and professional) EOS cameras use the Quick Control dial instead. This makes it easy to dial in exposure compensation while looking through the viewfinder and simplifies the photo taking process.

Autofocus. Two of these models (the EOS 7D and 5D Mark III) have a much more advanced autofocus system than the entry level cameras and are suitable for shooting moving subjects such as sports and wildlife.

Full-frame. Both the EOS 6D and 5D Mark III have full-frame sensors. Cameras with full-frame sensors cost more but give better image quality and improved high ISO performance over cameras with APS-C sensors.

Names. These cameras have the same name no matter where they are sold.

02.jpg

EOS 60D

September 2010

Key specs:

  • 18 megapixel APS-C sensor
  • 9 point AF with 9 cross-type sensors
  • 63 zone evaluative metering
  • Live View and movie mode
  • DIGIC 4 processor
  • Uses SD cards
  • Three inch vari-angle LCD display
  • Built-in flash with wireless flash control

The EOS 60D is bit of an oddity in that it has a smaller and lighter body than the previous models in the xxD range like the EOS 40D and 50D. In terms of size, weight and features the EOS 60D occupies the middle ground between the EOS 700D and 7D. However, the 700D, being much newer, has a few advanced features that the 60D doesn’t have such as a touchscreen menu system and hybrid AF for improved autofocus performance in Live View and movie mode.

The EOS 60D is a fine camera to learn photography with but the age of the model does suggest that Canon may replace it with an EOS 70D sometime this year. Whether the 70D will retain the body size of the 60D or return to the larger sizes of its predecessors remains to be seen. However, in the meantime the EOS 60D represents great value for money.

While lagging slightly behind the EOS 700D in terms of specification, it has a much more professional feel in the hand, and the Quick control dial is a great asset. If you’re trying to decide between the 700D and the 60D, it’s a good idea to try both out in a camera store. That’s the best way to appreciate the difference between the two.

03.jpg

EOS 60Da

April 2012

Key specs:

  • 18 megapixel APS-C sensor
  • 9 point AF with 9 cross-type sensors
  • 63 zone evaluative metering
  • Live View and movie mode
  • DIGIC 4 processor
  • Uses SD cards
  • Three inch vari-angle LCD display
  • Built-in flash with wireless flash control

The EOS 60Da is a modified version of the EOS 60D designed specifically for astrophotography. It contains a powerful infra-red filter that increases hydrogen-alpha light sensitivity by 300%. This means that it can capture light wavelengths emitted by deep space gases normally blocked by the low-pass filters in regular digital SLRs. This camera is a specialised tool for photographing stars and nebulae in space, and not intended for ‘regular’ photography.

04.jpg

EOS 7D

October 2009

Key specs:

  • 18 megapixel APS-C sensor
  • 19 point AF with 19 cross-type sensors
  • 63 zone evaluative metering
  • Live View and movie mode
  • Dual DIGIC 4 processors
  • Uses CF cards
  • Three inch fixed LCD display
  • Built-in flash with wireless flash control

The oldest model in the current EOS lineup, the EOS 7D marked a turning point in EOS camera design when it was released in 2009. It was the first APS-C camera to feature an advanced autofocus system capable of accurately focusing on and tracking moving subjects. It has 19 cross-type autofocus points (entry level models have 9 point AF arrays) plus other innovative features such as the electronic level and built-in Speedlite transmotter that have since been included in other EOS cameras. Despite its ‘age’ it’s still a very capable camera and the least expensive EOS camera to feature advanced autofocus.

The big question is will Canon release a 7D Mark II in 2013 and if so how much will it cost and how good will the autofocus be? In the meantime, the EOS 7D is another camera that represents excellent value for money. It is ideal for photographers who photograph sports, wildlife or any other moving subject and need an AF system capable of keeping up.

05.jpg

EOS 6D

November 2012

Key specs:

  • 20.2 megapixel full-frame sensor
  • 11 point AF with 1 cross-type sensor
  • 63 zone evaluative metering
  • Live View and movie mode
  • DIGIC 5+ processor
  • Uses SD cards
  • Three inch fixed LCD display
  • No built-in flash
  • Built in Wi-Fi and GPS connectivity

The EOS 6D is less expensive, smaller and lighter than Canon’s other two full-frame EOS cameras, the EOS 5D Mark III and 1D-X.

Unique features include an 11 point autofocus system that Canon claims is the best in low light of any EOS camera and built-in Wi-Fi and GPS transmitters (it is sold in some countries without the latter two features where forbidden to do so by laws regarding radio transmission).

The Wi-Fi lets you tether the camera wirelessly to a computer and will be appreciated by anybody who works in a studio or has bought a dedicated Wi-Fi transmitter separately (expensive!) and struggled to get it to work. The GPS transmitter, if enabled, records your location in the photo’s metadata and will be a useful feature for some.

The EOS 6D, like Canon’s other full-frame cameras, doesn’t have a built-in flash or Speedlite transmitter for controlling Speedlite flash units remotely.

06.jpg

EOS 5D Mark III

March 2012

Key specs:

  • 22.3 megapixel full-frame sensor
  • 61 point AF with 41 cross-type sensors
  • 63 zone evaluative metering
  • Live View and movie mode
  • DIGIC 5+ processor
  • Uses CF and SD cards (dual card slots)
  • Three inch fixed LCD display
  • No built-in flash

This is the latest model in the venerable 5D range and is used by many professional photographers. While the most expensive of the models reviewed so far, it also has the best autofocus system (61 point array), high ISO performance, dual CF and SD card slots and a 22.3 megapixel sensor. If you can afford it you won’t be disappointed by any aspect of this camera. It is a tool that will serve you faithfully for many years to come.

Professional cameras

Canon’s top of the line EOS 1 series cameras are aimed at professional photographers. They are big, heavy and expensive, built to withstand just about anything the working pro can throw at them. There is just one current model:

07.jpg

EOS 1D-X

April 2012

Key specs:

  • 18.1 megapixel full-frame sensor
  • 61 point AF with 41 cross-type sensors
  • 252 zone evaluative metering
  • Live View and movie mode
  • Dual DIGIC 5+ processor plus a DIGIC 4 processor dedicated to AF processing
  • Uses CF and SD cards (dual card slots)
  • Three inch fixed LCD display
  • No built-in flash

The best camera in the EOS range by far. I’ve used one and the look, feel and quality just blows the other cameras away completely. Which, considering the price, is exactly what you’d expect.

The EOS 1D-X has an 18.1 megapixel full-frame sensor, 61 point autofocus, 12 frames per second continuous shooting speed, two DIGIC 5+ processors, a weatherproofed body and a maximum ISO of 204,800. It has a built-in portrait grip and a large battery that outlasts every other Canon battery.

If you’re in the market for this camera bear in mind the extra size and weight may be a disadvantage. Take the EOS 5D Mark III into consideration when making your buying decision. The money saved on the body could be used towards some good quality glass.

Final thoughts

Recent advances in digital camera technology mean that there has never been a better time to buy a new camera body, regardless of which brand you use. The recent expansion of Canon’s line-up with the launch of the EOS 100D and 700D means that Canon users have a greater choice of camera bodies than ever before, which can only be a good thing for the consumer.

Understanding EOS

It’s wise to remember that whichever camera you have, it’s only a tool. Photographers create photos, cameras just take them. An understanding of the principles of light and composition are just as important as which model you own.

08.jpg

This is the principle behind my ebook Understanding EOS, which I wrote to help people learn to use their EOS cameras. It’s available now at Snap N Deals for a special price for a limited period. Whichever EOS camera you own, it’s the essential accessory to help you get the most out of your camera. Grab it today (at 30% off) at SnapNDeals.

Post originally from: Digital Photography Tips.

Check out our more Photography Tips at Photography Tips for Beginners, Portrait Photography Tips and Wedding Photography Tips.

How to Choose Your Next EOS Camera: Part Two


Digital Photography School

 
Comments Off on How to Choose Your Next EOS Camera: Part Two

Posted in Photography


How to Choose Your Next EOS Camera: Part One

14 Apr

01.jpg

This article is written by Andrew S. Gibson, the author of Understanding EOS, on sale now at Snap N Deals for a limited time.

In these articles I’m going to take a look at the current range of Canon EOS cameras, giving an overview of each model and the reasons that you may consider buying one.

You may be wondering why I’m writing about Canon EOS cameras – after all there are other brands such as Nikon, Sony, Pentax and Olympus to choose from. The answer is that I’m a Canon EOS user, and I write about EOS cameras for a living. If you want to know anything about other brands, I’m definitely the wrong person to ask.

Maybe other DPS authors will jump in and write similar guides about the brands they’re familiar with (hint, hint). I think it would make a fantastic series.

A note about prices: DPS has an international readership, so I haven’t included prices as they vary so much. The cameras are listed roughly in order of ascending price to give you an idea of where each model fits in the EOS range.

Entry level EOS cameras

Let’s start with ‘entry level’ EOS cameras. Canon calls these enthusiast cameras. They are designed for hobbyists rather than professional photographers. If you are buying a digital SLR for the very first time, or you’re on a tight budget, you will probably buy one of these models.

An idiosyncrasy of entry level EOS cameras is that Canon gives the same model different names depending on which territory they are sold in. Hence the same camera is a 700D in Europe, a Kiss X7i in Japan (where it is marketed to the female demographic) and a Digital Rebel T5i in North America.

Canon currently has five enthusiast models:

02.jpg

EOS 100D/Rebel SL1/Kiss X7

March 2013

Key specs:

  • 18 megapixel APS-C sensor
  • 9 point AF with 1 cross-type sensor
  • 63 zone evaluative metering
  • Live View and movie mode
  • DIGIC 5 processor
  • Uses SD cards
  • 3 inch fixed touch screen LCD display
  • Built-in flash with no wireless flash control

According to Canon the EOS 100D is the world’s smallest and lightest digital SLR. It’s aimed at photographers who are moving up from compact cameras or smart phones and don’t want to buy a larger camera.

It is ideal for photographers who want a light body to carry around all day, or who need to keep the weight down when travelling overseas. It may also appeal if you like the idea of being able to carry it around in your bag or handbag.

The small body of the EOS 100D will be more inconspicuous when you are travelling than other EOS cameras. This may suit some people, including street photographers.

The spec is similar to the EOS 700D, although it doesn’t have as many features. The main selling point of this model is the size. If size doesn’t matter, then consider a more advanced model – you’ll get more bang for your buck.

03.jpg

EOS 1100D/Rebel T3/Kiss X50

March 2011

Key specs:

  • 12.3 megapixel APS-C sensor
  • 9 point AF with 1 cross-type sensor
  • 63 zone evaluative metering
  • Live View and movie mode
  • DIGIC 4 processor
  • Uses SD cards
  • 2.7 inch fixed LCD display
  • Built-in flash with no wireless flash control

This is Canon’s least expensive SLR, ideal for anybody on a tight budget. However, it also has the lowest spec and lacks some of the features found on the other models in this list, such as the three inch vari-angle LCD screen and built-in master unit for controlling external Speedlites.

It also has the lowest megapixel count. To be honest, if you buy it you’re probably going to outgrow it fairly soon. It’s also possible that Canon may update this model soon as it’s two years old.

Don’t let that put you off though if you’re on a tight budget – this is a very capable camera for learning on and is by far the cheapest model in this list. Might also make a good gift for a relative or friend who has expressed an interest in photography. Budget allowing, you’ll be better off with a more advanced model.

04.jpg

EOS 600D/Rebel T3i/Kiss X5

March 2011

Key specs:

  • 18 megapixel APS-C sensor
  • 9 point AF with 1 cross-type sensor
  • 63 zone evaluative metering
  • Live View and movie mode
  • DIGIC 4 processor
  • Uses SD cards
  • 3 inch vari-angle LCD display
  • Built-in flash with wireless flash control

The EOS 600D is a step up from the EOS 100D and 1100D models. It has a larger body and a high resolution vari-angle LCD screen that you can use with movie mode or for taking photos at awkward angles (ie with the camera at ground level).

Another benefit of the vari-angle screen is that you can turn it around so the screen faces the back of the camera, protecting the LCD surface during travel.

The built-in flash doubles as a wireless master for external Speedlite flash units, so if you want to use (or learn to use) external flash then this is a good camera to buy instead of the EOS 100D or 1100D.

You may be interested in this camera if you are upgrading from an 1100D, or an older model such as the EOS 400D camera. It’s not as advanced as the EOS 700D, but much less expensive.

05.jpg

EOS 700D/Rebel T5i/Kiss X7i

March 2013

Key specs:

  • 18 megapixel APS-C sensor
  • 9 point AF with 9 cross-type sensors
  • 63 zone evaluative metering
  • Live View and movie mode
  • DIGIC 5 processor
  • Uses SD cards
  • 3 inch vari-angle touch screen LCD display
  • Built-in flash with wireless flash control

The EOS 700D was announced in March and replaces the EOS 650D (which you may still be able to buy until stock runs out). The EOS 600D remains available as a lower cost alternative to the 700D.

The key differences between this camera and the 600D is that the 700D has a more advanced processing chip, a greater ISO range and hybrid AF that gives better autofocus performance in Live View and movie mode.

You may be interested in this camera if you are upgrading from an 1100D, or an older model such as the EOS 400D camera. It’s an ideal model if you want an advanced EOS camera but don’t like the extra size and weight or need the more advanced features of models like the EOS 6D, 7D or 5D Mark III. It is also cheaper than those cameras.

06.jpg

EOS M

July 2012

Key specs:

  • 18 megapixel APS-C sensor
  • 31 point hybrid AF
  • 63 zone evaluative metering
  • Live View and movie mode
  • DIGIC 5 processor
  • Uses SD cards
  • Three inch fixed LCD display
  • Comes supplied with 90EX Speedlite flash unit in most countries when purchased in kit form

The EOS M is Canon’s first compact system camera and marks the company’s entry into the mirrorless camera market. It’s essentially a scaled down EOS 650D without a pentaprism or viewfinder.

Another important difference is that the EOS M has its own lens mount (the EF-M mount). At the moment there is a choice of two EF-M lenses, plus an adapter that lets you mount the EF-S and EF lenses that other EOS cameras use.

The appeal of this camera is the small size and beauty of the design. Coupled with the EF-M 22mm pancake lens it makes a very portable setup that will create high quality images, something that could be ideal for travel or street photography.

However, reviews about the camera’s autofocus performance aren’t encouraging. The lack of a viewfinder means you have to take photos by composing them on the LCD screen, something regular digital SLR users could find hard to get used to.

If size isn’t important, then go for an SLR camera instead. The optical viewfinder and phase detection autofocus make them a much more versatile tool.

Conclusion

That concludes the round up of entry level EOS cameras. I will take a look at the current range of semi-professional and pro cameras in the next article.

Understanding EOS

It’s wise to remember that whichever camera you have, it’s only a tool. Photographers create photos, cameras just take them. An understanding of the principles of light and composition are just as important as which model you own.

07.jpg

This is the principle behind my ebook Understanding EOS, which I wrote to help people learn to use their EOS cameras. It’s available now at Snap N Deals for a special price for a limited period. Whichever EOS camera you own, it’s the essential accessory to help you get the most out of your camera.

Post originally from: Digital Photography Tips.

Check out our more Photography Tips at Photography Tips for Beginners, Portrait Photography Tips and Wedding Photography Tips.

How to Choose Your Next EOS Camera: Part One


Digital Photography School

 
Comments Off on How to Choose Your Next EOS Camera: Part One

Posted in Photography


5 Tips on How to Choose the Right Lens

19 Feb

Lens lust is a terrible thing. It didn’t quite make the list of the 7 Deadly Sins, but can still be an agonizing process that will have your significant other wondering if Zeiss Prime is the codename for an escort service. Choosing the right lenses is also a lonely decision. I get questions almost daily from people wondering which lens Continue Reading

The post 5 Tips on How to Choose the Right Lens appeared first on Photodoto.


Photodoto

 
Comments Off on 5 Tips on How to Choose the Right Lens

Posted in Photography


How to choose the correct camera belt for the Modular Rotation Component System

25 Dec

In this video, Think Tank Photo identifies three different camera belts, the Pro Speed Belt, the Thin Skin Belt, and the Steroid Speed Belt and what each is designed and used for. Each belt is designed to be used with every Modular Rotation Component and can also be added to some of the Think Tank Photo backpacks.
Video Rating: 5 / 5

 
Comments Off on How to choose the correct camera belt for the Modular Rotation Component System

Posted in Nikon Videos


How to Choose the Right Tripod – Photography Lessons by Berger Bros Camera

24 Dec

www.Berger-Bros.com – Tripods provide great stability for your camera which will help prevent taking blurry photos. In addition, they give you the opportunity to get yourself into your photos. Yvonne Berger, an instructor with Berger Bros Camera in Amityville and Syosset Long Island, New York explains how to choose the right tripod. So, how to you choose the right tripod? The easiest answer is to choose the tripod that you will actually use. There are many different factors that go into buying a tripod and you really can’t buy a tripod just by looking at a picture. You should go into your camera store and physically hold the tripod so you can see and feel how it works. Things to Look For When Buying a Tripod: 1. What is it made of? 2. What are you using your tripod for? 3. What type of camera are you putting on the tripod? There are two different types of tripod legs to choose from: 1. A clip leg 2. A twist leg There are two types of tripod heads: 1. Ball Head 2. Hand Tilt Head Some tripods have what is known as a quick release plate which will enable you to quickly remove your camera from the tripod if the photography need arises. Carrying your tripod can sometimes be a pain. That’s why you need to have a bad for your tripod. The thing to remember is that you always want you tripod there when you need it. So, make sure carrying your tripod is not a problem that will keep you from using it. Tripods available at Berger Bros… Giottos Gitzo GorillaPod Manfrotto/Bogen Call


Why I choose to play Halo over other Multiplayer Games

10 Nov

Why I choose to play Halo over other Multiplayer Games – TU Slayer DMR’s (Gameplay/Commentary) TU Slayer DMR’s on Uncaged Topic: Why I choose to play Halo over other Multiplayer Shooters Why do you choose to play Halo over other Multiplayer FPS’s out there? Be sure to let me know below in the comments! Follow me on Twitter www.twitter.com
Video Rating: 4 / 5

 
Comments Off on Why I choose to play Halo over other Multiplayer Games

Posted in Nikon Videos