RSS
 

Posts Tagged ‘Choose’

How to Choose the Right Camera Mode to Get the Shot You Want

02 Dec

When starting out in photography, one of the scariest and most confusing things for a beginner is deciding which camera mode to use. While the automatic modes provide a bit of a safety net for those just starting out, there will come a time when you either want to or have to, take greater control of your camera to get the results you desire. But how do you know what camera mode to use?
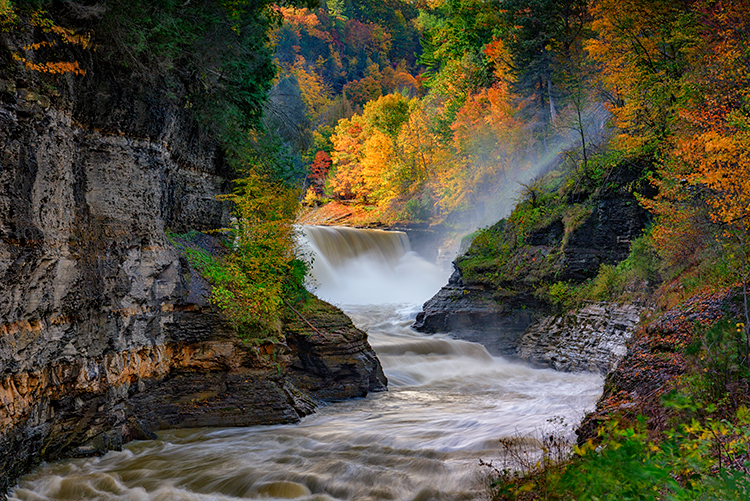
Aperture Priority Mode

Aperture Priority mode is a perfect choice for a scene like this where you know you’ll want deep depth of field to keep the entire scene in focus.

First off, I won’t discuss any of the automatic modes here. A full discussion of what those do can be found here: Camera Modes Explained for Newbies. What I’d like to do here is discuss specific situations and the appropriate mode for each. Before we dive into that, I’ll explain the basics before we move forward.

Aperture

The aperture is the opening of the lens, which determines exactly how much light enters the camera and strikes the imaging sensor. The aperture also affects the field of focus from foreground to background, otherwise known as depth of field. A shallow depth of field is one that has a sharp focus on the subject, while objects in front of or behind the subject are out of focus. Deep depth of field is when the entire image is in sharp focus from foreground to background. And of course, you can have a depth of field that is somewhere in between those two.

Aperture is shown as a number on your lens, usually as a ratio. For instance, lenses with a maximum (widest) aperture of f/1.8 will have a very shallow depth of field. That same lens set to f/16 will have a deeper depth of field. An easy way to remember this is smaller numbers give you less and higher numbers give you greater depth of field.
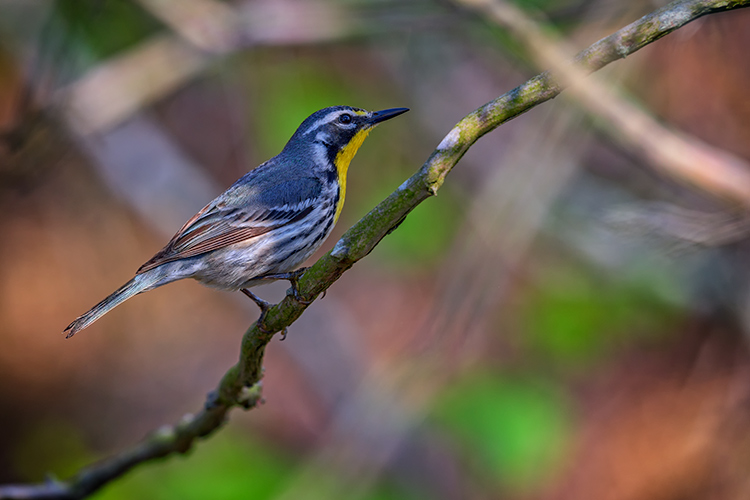
Aperture Priority

When you know you want the background blurred, setting a wide aperture to create a shallow depth of field is key. Aperture Priority mode can be used in cases like this (keep reading to learn more on that a bit later).

Shutter Speed

Shutter speed determines the amount of time light strikes the sensor when it enters the camera. The faster the shutter speed, the less light strikes the sensor. In addition, shutter speed is directly responsible for how movement is rendered in an image. Shutter speeds are referred to in fractions of a second, such as 1/125th, 1/60th, or 1/1000th. Faster shutter speeds, such as 1/500th, freeze motion, while slower shutter speeds, such as ½, 1 second, or even 30 seconds,  will show motion as more of a blur. The longer the shutter speed, the more blur motion will create.

ISO

Your camera’s ISO determines how sensitive it is to light. Lower numbers such as ISO 100 or 200 mean your camera is less sensitive to light and are used in bright situations, such as in direct sunlight. When there is less light, such as in shade, or indoors, you might use a higher ISO such as 800, 1600, or 3200 to make your camera more sensitive to light. ISO plays an important part in the various situations I will discuss going forward, so always keep in mind that you can change this setting, and don’t be afraid to raise your ISO if needed.

Camera Modes

Before going any further, I want to clarify that there are multiple ways to get a specific desired result with your camera, using any of these modes. Once you understand the relationship between shutter speed, aperture, and ISO, you’ll be able to do whatever you like in any of these modes.

But which mode is best for which situation? You’ll have to visualize your image to decide.

Program Mode

"<yoastmark

Program Mode resides on the advanced side of the camera mode dial, usually denoted by a P. In this mode, the camera will set the aperture, ISO, and shutter speed for you. So when should you use Program Mode?

Program Mode is good when you’re not looking for any effect in particular. Your camera, when set to Program Mode, will attempt to give you a proper exposure that can be handheld, meaning you won’t be required to use a tripod to steady your camera. This is a good mode for when you’re just casually photographing and just want to be sure your exposures are right.

It is a lot like Automatic Mode in that regard, except that you have the ability to override, or shift, the exposure the camera sets, as well as many other settings such as white balance and picture style. In addition, while in Auto mode, the camera will pop your flash up when it thinks it needs more light. But in Program Mode the flash will not pop up unless you tell it to.

Aperture Priority

On some cameras, this mode is simply denoted by an A on the mode dial, while on Canon cameras it is denoted as Av, meaning Aperture Value. In any case, in this mode, you set the aperture and ISO you want and the camera will set the appropriate shutter speed for you. So when should you use Aperture Priority mode?
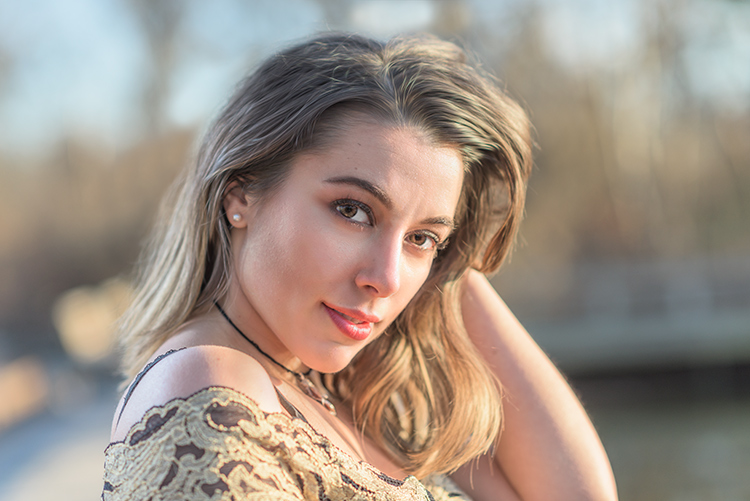
Aperture Priority

When you want a shallower depth of field, such as in a portrait, using Aperture Priority and setting a wide aperture is an excellent choice.

To determine the answer, visualize your finished image in your mind’s eye. What do you want it to look like? Generally speaking, if you’ve decided that the most important factor in your image is a specific depth of field, you’ll want to use Aperture Priority Mode so that you can force your camera to give you the depth of field that you want. For instance, if you’re making a portrait, you probably want your subject in sharp focus, but you may also want the background to be a little blurred, to keep your viewer’s focus on the subject. An out of focus background can create a setting without distractions for the viewer. So you might decide you want to use a fairly wide aperture such as f/4, to create enough depth of field to keep your subject sharp, but let the background blur nicely.

But watch your shutter speed too

It’s important to note, however, that you also need to keep an eye on the shutter speed setting. While the camera will set this for you, unlike in Program Mode, the camera is not going to try and give you a fast enough shutter speed to handhold. If there isn’t enough light, this will result in a slower shutter speed that may not be fast enough to freeze any subject movement. This could result in a slight blur due to unsteady hands or slight movement by your subject. If the shutter speed chosen by the camera (based on the aperture you’ve set) isn’t fast enough to freeze motion in this situation, you’ll need to raise your ISO. Raising your ISO will effectively increase the shutter speed given for the aperture you’ve set.
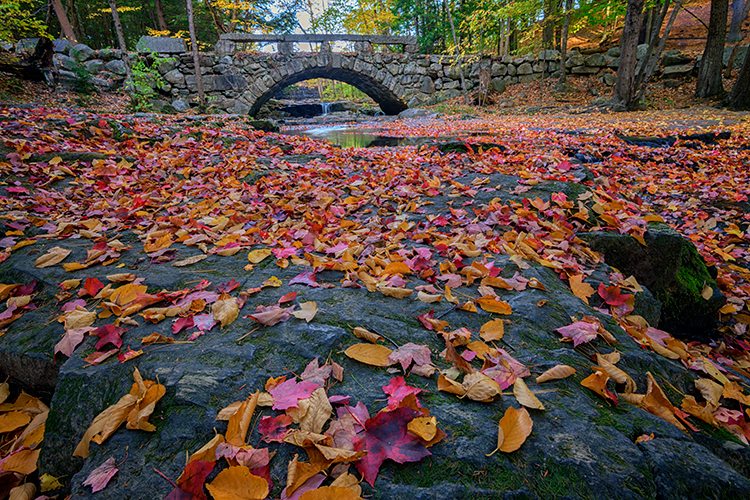
Aperture Priority Landscape

Aperture Priority is a great choice when photographing a landscape where you want a deep depth of field, and the shutter speed doesn’t need to be set at anything specific to capture motion a certain way.

For landscape photography

Another situation for Aperture Priority would be a landscape photo, where you may want greater depth of field to keep the entire scene in focus. In this situation, your primary goal is to get lots of depth of field to keep the entire scene in focus, so you’d set an aperture of f/11 or even f/16 to capture a greater amount of the scene sharply. In this situation, if you’re using a tripod, the shutter speed may not be as big of a factor for you.

But if you’re handholding the camera,  you will want to pay attention to the shutter speed the camera sets to ensure it’s fast enough to avoid camera shake. In addition, if there is moving water or clouds, or the wind is blowing the trees or grass, you’ll want to ensure that the shutter speed the camera sets is appropriately stopping that movement to your liking. If not, you’ll want to adjust your ISO so the camera sets a more appropriate shutter speed.

Shutter Priority
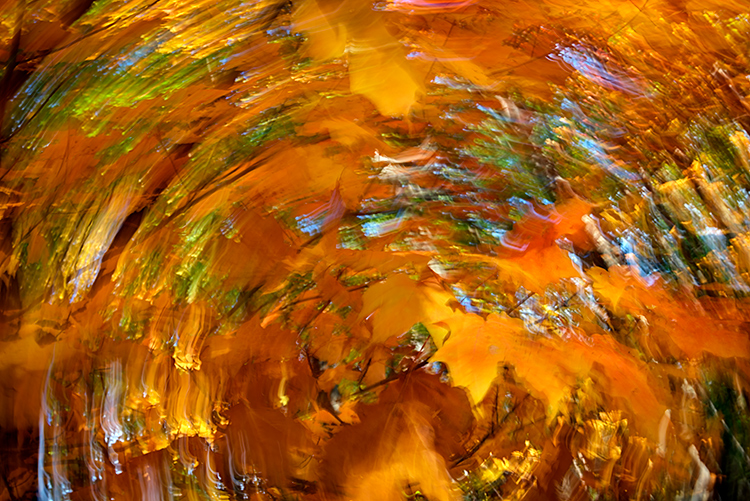
Panning using Shutter Priority

When you know you need a specific shutter speed, such as this image where a panning technique was used, Shutter Priority is often the best choice.

Shutter Priority is usually denoted using an S on most cameras, while Canon uses Tv, representing Time Value to denote Shutter Priority mode. Shutter Priority Mode is just the opposite of Aperture Priority. In this mode, you set the shutter speed you want, as well as the ISO, and let the camera choose the appropriate aperture.  This mode is an excellent choice when you’ve decided that rendering motion in a certain way is the key component of your image.

Shooting sports

For example, suppose you are photographing a sporting event. Most likely, you’ll want to freeze the action of the athletes on the field. To do so, you need a fast shutter speed, such as 1/500th or even 1/1000th. In shutter priority, you’ll need to again keep an eye on your ISO to ensure that the camera is giving you a proper exposure. Usually, the exposure indicator in your viewfinder will flash to show that at the current settings, proper exposure cannot be achieved. In this case, raise the ISO to achieve the correct exposure for the shutter speed you want.
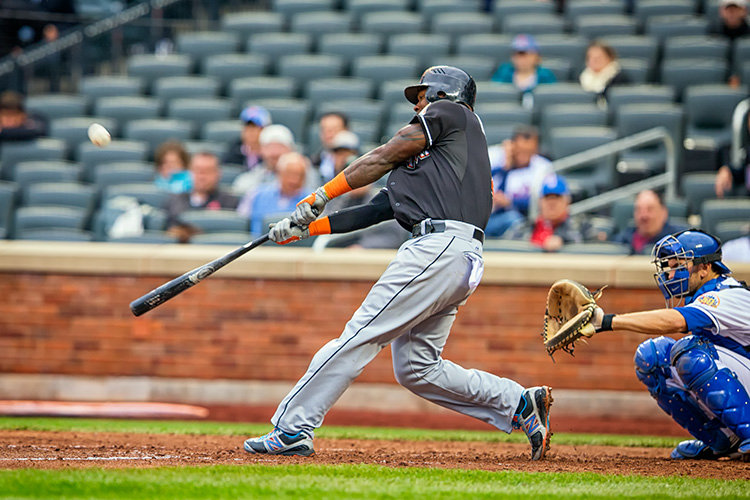
Shutter Priority for Fast Action

You might want to use Shutter Priority Mode when you know you need a fast shutter speed to stop action, such as when photographing sports.

As another example, let’s say you want a slower shutter speed to create a panning effect. Again you would set the correct shutter speed to create the effect, and let the camera adjust the aperture. Any time the primary concern is the appearance of motion in an image, Shutter Priority is a good choice for shooting or camera mode.
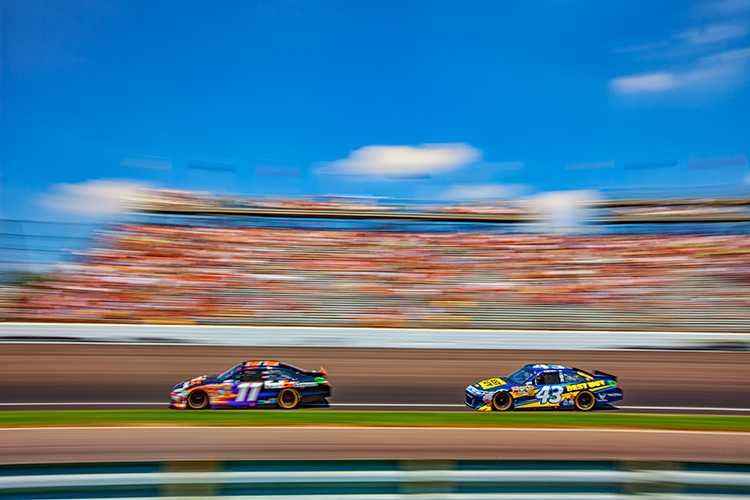
Panning in Shutter Priority mode

Another example of using a slow shutter speed to create a panning effect in Shutter Priority Mode.

Manual Mode

Once you’re comfortable with changing settings and you really want to take control of your camera, Manual mode is the way to do that. You will set all of your settings according to how you want your final image to look. There is one caveat, however. Your settings will also be dependent on the available light in the scene. So if you want a fast shutter speed, and deep depth of field, you’ll probably need to raise your ISO a bit. Or compromise on one of the other settings as well.

Watch the meter

Just keep an eye on your camera’s meter and it will help you find the right combination of shutter speed, ISO, and aperture. The other modes do a nice job of taking some of the load off your brain by allowing you to choose one setting to have priority, but sometimes you just need to take full control.
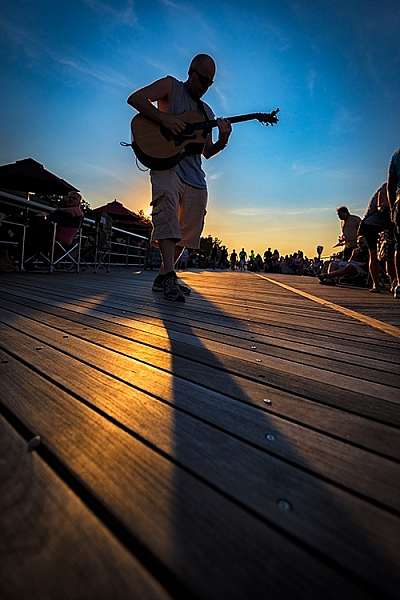
Silhouette in Manual Mode

Manual Mode is the best choice when you want to create an effect that the camera’s normal exposure modes just don’t normally do, such as this silhouette.

Exposures long than 30 seconds

One instance where you’ll need to do this is when creating an exposure longer than 30 seconds. Today’s cameras don’t have shutter speeds for longer than that, so you would need to calculate in your head how long to keep the shutter open, and then use the Bulb setting to do so. Any time the camera can’t properly calculate exposure is a good time to use Manual Mode.
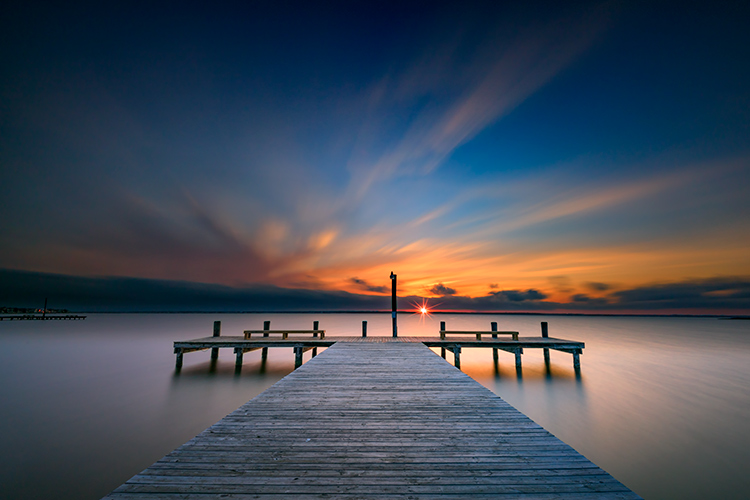
manual-mode-long-exposure

When creating images using a long exposure, such as this one with an exposure time of two minutes, Manual Mode is the best (or possibly only) choice.

Another time to use Manual Mode is when the lighting in a scene is especially challenging, such as when there are a lot of dark shadows. Your camera will try to expose for the deep shadows, causing the highlights to overexpose. Using a manual setting to override the camera’s choices will work well in achieving a satisfactory exposure.

Summary

As I mentioned, there are many ways to capture an image and arrive at similar settings. But each time I’m out photographing, I go through the following checklist in my head:

  1. Do I want deep or shallow depth of field?
  2. Do I want to stop action or is some motion blur okay?
  3. Which of the above two choices is more important for this image?
  4. Is one of the priority modes suitable for the available light of the scene?

The answer to those four questions should lead you to the correct mode for the shot you want.

Shutter Priority for fast action

Shutter Priority can be used when photographing sports to set a fast shutter speed to stop action.

googletag.cmd.push(function() {
tablet_slots.push( googletag.defineSlot( “/1005424/_dPSv4_tab-all-article-bottom_(300×250)”, [300, 250], “pb-ad-78623” ).addService( googletag.pubads() ) ); } );

googletag.cmd.push(function() {
mobile_slots.push( googletag.defineSlot( “/1005424/_dPSv4_mob-all-article-bottom_(300×250)”, [300, 250], “pb-ad-78158” ).addService( googletag.pubads() ) ); } );

The post How to Choose the Right Camera Mode to Get the Shot You Want by Rick Berk appeared first on Digital Photography School.
Digital Photography School

 
Comments Off on How to Choose the Right Camera Mode to Get the Shot You Want

Posted in Photography


How to Choose Your Camera Angle to Take Better Portraits

18 Sep

Taking portraits involves so many variables that it can feel overwhelming for a new photographer. What lenses do you use—zoom, prime, or a mix of both? Do you shoot full-frame or cropped sensor? Will you shoot indoors or outdoors. Even the subject matter can be tricky, with some portrait photographers working exclusively with families, others who only shoot high school seniors or newborn babies, and still more who do a mix of everything.

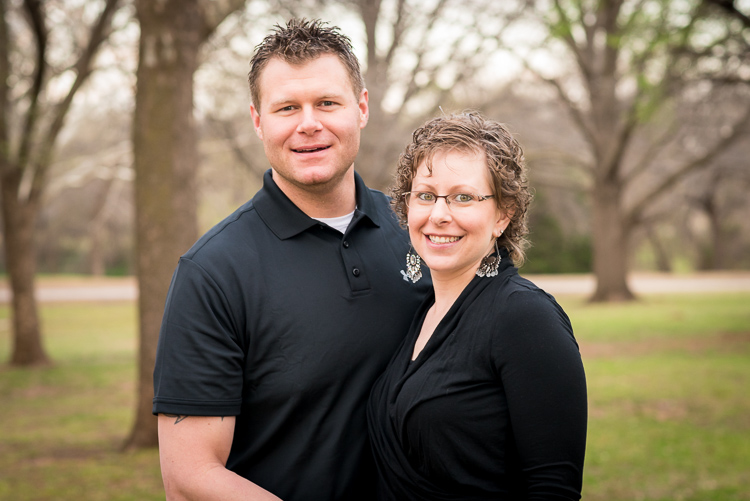
all-about-angle-husband-wife-outdoors

Nikon D750, 85mm, f/4, ISO 900, 1/250 second

While you are pondering all these variables it can be easy to lose sight of the forest for the trees and forget about a few key basics such as posing and lighting, and no matter what style of portraits you choose to pursue there is one thing that always comes into play which may not seem obvious: the camera angle from which you shoot. This can make all the difference between happy clients and complaining customers. Understanding how you can use camera angles and points of view can greatly enhance any portrait session.

Point of view – up high or down low

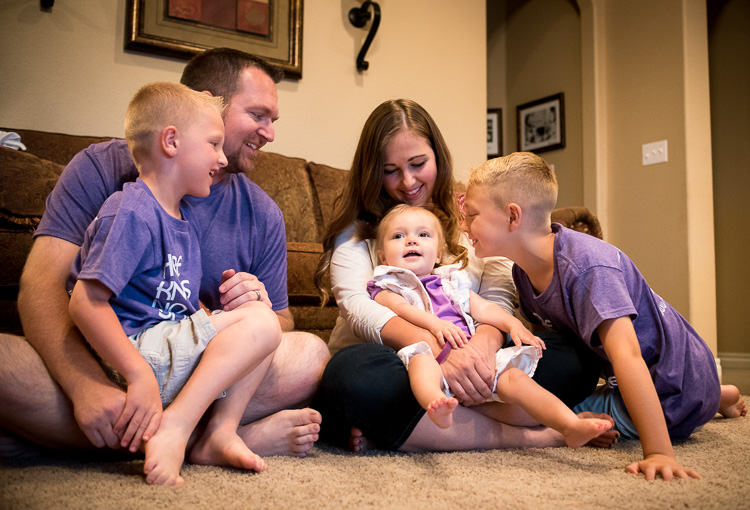
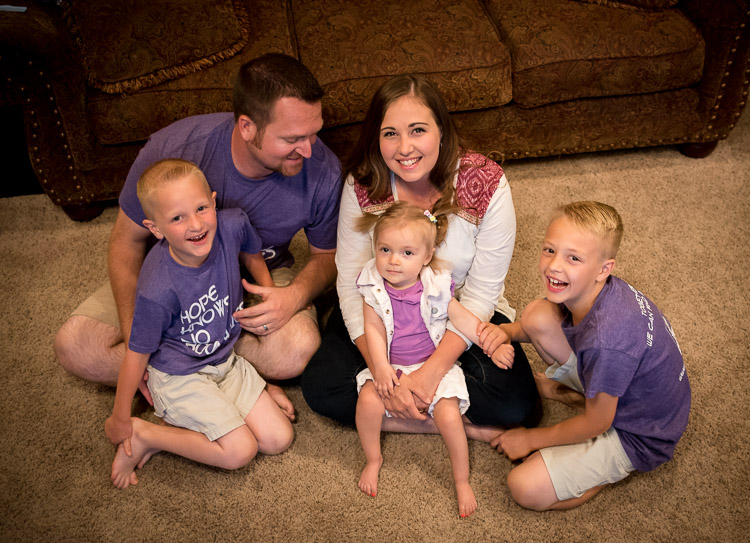
Understanding how your camera angle, or point of view, can affect your shots will go a long way towards improving not just your portraits, but your photography in general. How you position yourself in relation to your subjects can have a dramatic effect on the resulting pictures. As an illustration of how this works, here are two pictures of a family from a recent home-based session I did. Both show a very similar scene, and yet the different angles from which I shot them results in two vastly different images.

all-about-angle-family-indoors-low

Nikon D750, 35mm, f/4, ISO 5600, 1/90 second

As I shot the image above I was very low to the ground. Crouching down on my hands and knees, I got very close physically to the family while the mother and father watched the boys play with their sister. It feels like the viewer is part of the scene, right there with them as they all share a fun moment together. This is entirely due to the low angle from which the picture was shot. Now take a look at virtually the exact same scene but shot from high above.

all-about-angle-family-indoors-high

Nikon D750, 35mm, f/4, ISO 3600, 1/90 second

To get this picture I grabbed a dining room chair and stood on it to get a shot from a much higher angle. The result is a picture that feels quite different from the first one. It doesn’t seem like you are a part of the scene, but an outside observer looking at the family as they gather together.

While I like both images, each one creates a very different emotional response on the part of the viewer. Even though both were shot with the same camera and lens, at the same location, with the same subjects, the result is two pictures that are vastly different from one another all because of the angle from which they were taken.

Even subtle changes make a difference

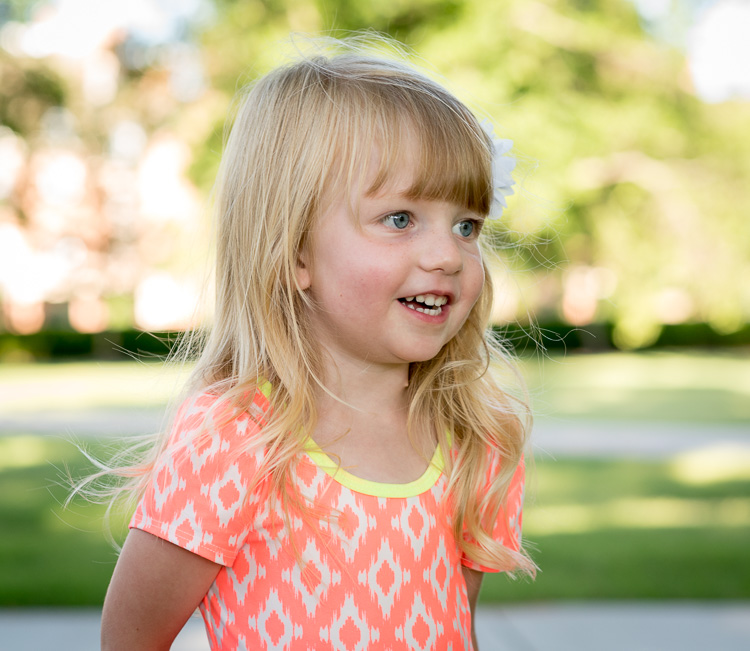
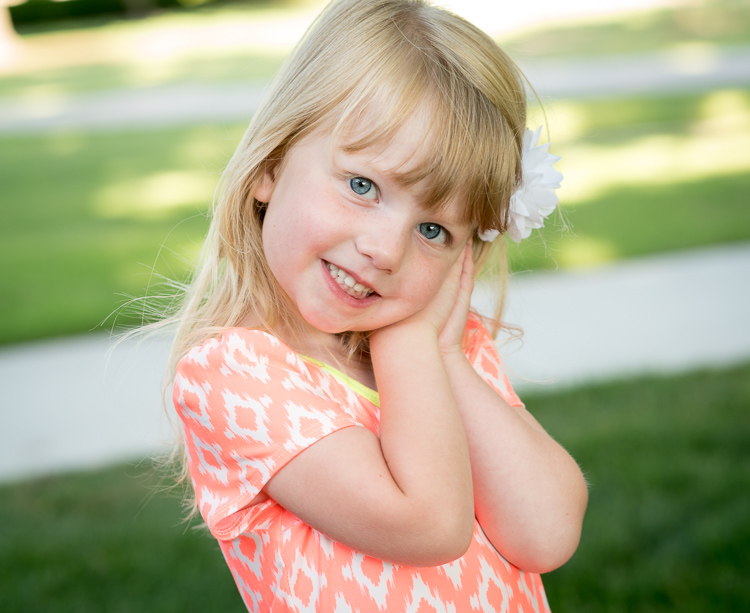
You can see a similar, but more subtle, effect in this pair of portraits I took of a young girl near her birthday.

Shot with a Nikon D750 and 85mm lens.

Nikon D750, 85mm, f/4, ISO 800, 1/500 second

The angle here isn’t as low as the first one of the family, but it’s low enough to be on the girl’s eye level. To get this I had to kneel down and stand a few meters back as her mother talked with her from my right-hand side. It gives a similar sense of intimacy as the first picture of the family and feels as though the viewer is near the girl and part of the scene.

This changes a bit when the girl is shot from an adult’s eye level looking down (below).

all-about-angle-child-playing-high

Nikon D750, 85mm, f/4, ISO 560, 1/250 second

While the effect here is not as dramatic as the example with the family, you will still note a similar result in terms of emotion and tone. Instead of getting down on eye level I shot this while standing up about the same distance away. It doesn’t feel like you, the viewer, are a part of the scene and instead it seems like you are merely an observer. Notice how the sidewalks in the background cut across the frame at odd angles whereas in the first one the sidewalks neatly cross in horizontal lines, adding a subtle touch without being too obvious or gaudy.

Once again I don’t think either picture is necessarily better or worse, but both are quite different as a result of the camera angle.

Kids – break the rules

This is, incidentally, one of the most common issues I see with people who are taking casual snapshots of their kids, whether with a fancy DSLR or just their mobile phone. Taking a few seconds to crouch down and get on eye level with the children can make all the difference in the world between an intimate moment frozen in time, and a boring snapshot.

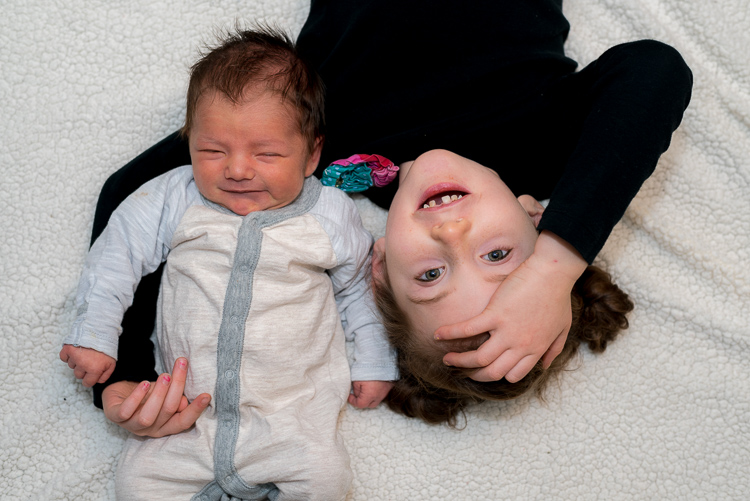
However, I don’t want to give the mistaken impression that shooting from a high angle is necessarily a bad thing. It can be a very good thing indeed, and quite effective when used intentionally, such as this image of a girl with her two-week-old baby brother (below).

Shot with a Nikon D750 and 50mm lens.

Nikon D750, 50mm, f/4, ISO 400, 1/125 second

This picture was a bit tricky, but the results were well worth it. I was doing this on location in the family’s home so I didn’t have a lot to work with, but I wanted to get something a bit unique. I put the two kids on a blanket on the floor, got a chair to stand on, and positioned myself directly above them while bouncing my flash off the ceiling.

It resulted in an image that feels more fun and playful as if the viewer is peeking in on a fun moment between the two siblings. The equipment here was nothing all that special (I could have just as easily used my old D7100 and 35mm lens to get the same shot) but paying attention to the angle made for a picture that stood out quite a bit from the rest of the image I shot that day.

Other camera angles to consider

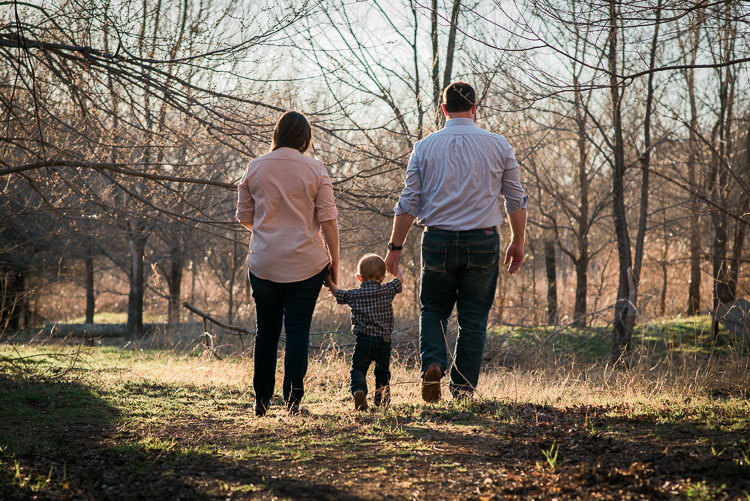
Sometimes finding the right angle involves something as simple as choosing where to put yourself in relation to your subject, not necessarily whether to shoot from high above or down low. You can see this in the example below. After an hour of taking a variety of traditional portrait-style

After an hour of taking a variety of traditional portrait-style shots, I stood back while the family walked back to their car and took some pictures with the sunset casting a warm glow through the trees above.

Shot with a Nikon D750 and 85mm lens.

Nikon D750, 85mm, f/4, ISO 180, 1/400 second

There are some elements that I could do without, such as the tree branches coming from the left-hand side. But overall the picture feels warm, cozy, and conveys a sense of comfortable intimacy as if I have captured the family in a quiet and sincere moment. It puts you, the viewer, as an outside observer to the scene and almost feels like you are watching from afar as the family shares a special time together.

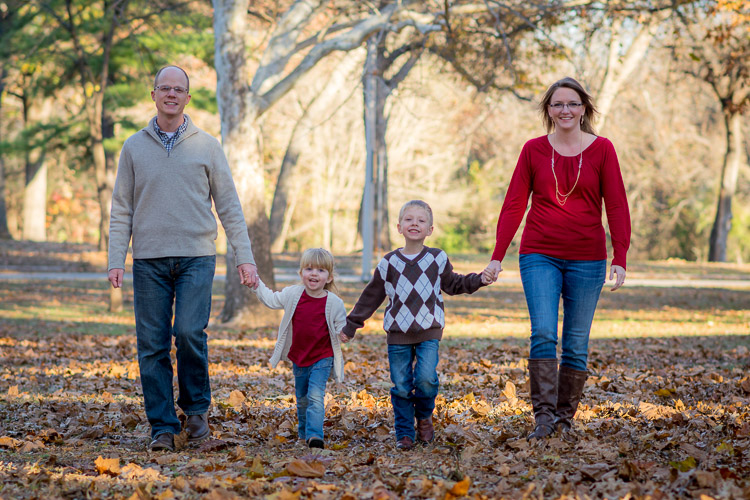
This is in stark contrast to the next picture, which despite being at a different location is composed in almost exactly the same manner except for one variable: the angle.

Shot with a Nikon D7100 and 85mm lens.

Nikon D7100, 85mm, f/2.8, 1/250 second, ISO 100

This picture feels like it’s full of energy, excitement, and enthusiasm as the family holds hands and walks towards me. I like both pictures quite well, but changing the angle resulted in two images that are vastly different from one another.

Summary

Hopefully, these examples give you an idea of how your camera angle and point of view can dramatically affect the types of portraits you take. If you are looking to try something new and kick your photography up a notch without spending any money on more gear, try doing something as simple as changing your angle and see what happens.

In fact, this now makes me wonder about your favorite tips and tricks for shooting portraits at different angles. Leave your thoughts in the comments below, and feel free to share pictures as well!

googletag.cmd.push(function() {
tablet_slots.push( googletag.defineSlot( “/1005424/_dPSv4_tab-all-article-bottom_(300×250)”, [300, 250], “pb-ad-78623” ).addService( googletag.pubads() ) ); } );

googletag.cmd.push(function() {
mobile_slots.push( googletag.defineSlot( “/1005424/_dPSv4_mob-all-article-bottom_(300×250)”, [300, 250], “pb-ad-78158” ).addService( googletag.pubads() ) ); } );

The post How to Choose Your Camera Angle to Take Better Portraits by Simon Ringsmuth appeared first on Digital Photography School.

Digital Photography School

 
Comments Off on How to Choose Your Camera Angle to Take Better Portraits

Posted in Photography


How to Choose the Right Digital Camera for a Specific Type of Photography

19 Apr

Are you overwhelmed with the many digital camera options available in the market? This article will help you determine the right camera for your specific photography need. Whether it’s portrait, landscape, travel, sports and adventure, or aerial photography that you want to get into, you can’t just settle for the most popular. So before you go checking out what the Continue Reading

The post How to Choose the Right Digital Camera for a Specific Type of Photography appeared first on Photodoto.


Photodoto

 
Comments Off on How to Choose the Right Digital Camera for a Specific Type of Photography

Posted in Photography


How to Choose the Best Lens for Travel and Street Photography

23 Feb

If you were to ask me what the best lens for street and travel photography is, the first thing I would advise you to do, is to think about what you need from the lens. In my case, the following criteria are important to me –  your list, of course, may differ.

  • The lens should be small, lightweight, and unobtrusive.
  • The optical quality must be excellent.
  • Autofocus performance needs to be very good.
  • As I sometimes shoot in low light, a wide aperture is a must.

Best lens for street and travel photography

These criteria should point to several lenses that may be suitable for you. Perhaps you own these lenses already – in which case the next step is to take them out into the street, and take some photos with them. This is important, because you may find that in practice, the lens you prefer to use is different from the one you thought might be best.

For example, you may think that a zoom lens will come in useful because of the convenience of being able to quickly adjust focal length. But in reality, find that you prefer a prime lens with a wider aperture for shooting in low light, or using selective focus.

On the other hand, you may be approaching this exercise with the intent of choosing a lens to buy. It’s difficult to test a lens if you don’t already own it, although you may be able to borrow or rent it. If you can’t do that, the next best thing to do is to go online and do some research. Read some reviews of the lens. Look for articles written by photographers whose photos you like, who also use the lens you’re considering. Go onto Flickr and see if there is a group dedicated to the lens. Explore some good quality forums, ask the members if anybody owns the lens, and what they think of it.

My favorite lens

By now you are probably wondering what is my favorite lens for street and photography. The answer is – the Fujinon 35mm f/1.4 lens. To be honest, this has come as a surprise to me. When I first bought into the Fujifilm camera system, I thought that I would either prefer a short telephoto lens (such as the 56mm f/1.2) or a moderate wide-angle (like the 18mm f/2 pancake lens) for street and travel photography.

But in practice, I’ve found that I prefer the 35mm. It has received a lot of praise since it was released with the X-Pro-1 several years ago, and is a standard prime lens (for APS-C cameras). The angle-of-view is very similar to that of a 50mm lens on a full-frame camera, or a 25mm lens on a Micro four-thirds camera.

So, why has this lens worked so well for me? The short answer is that it is extremely versatile. I prefer to take the simple approach to street photography, and that means reducing the number of choices that I have to make. Using a prime means I don’t have to think about focal length, yet the versatility of this lens means I can use it a number of different ways.

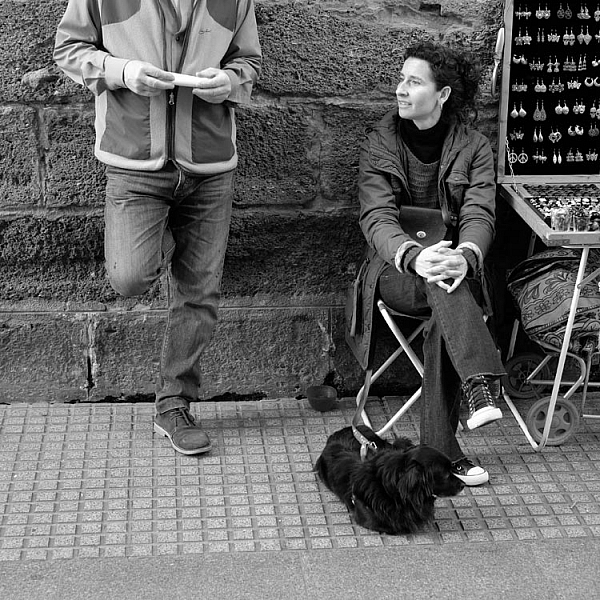
For example, when photographing people I can keep my distance and frame the person in the context of their environment.

Best lens for street and travel photography

Or I can get closer and concentrate more on the person.

Best lens for street and travel photography

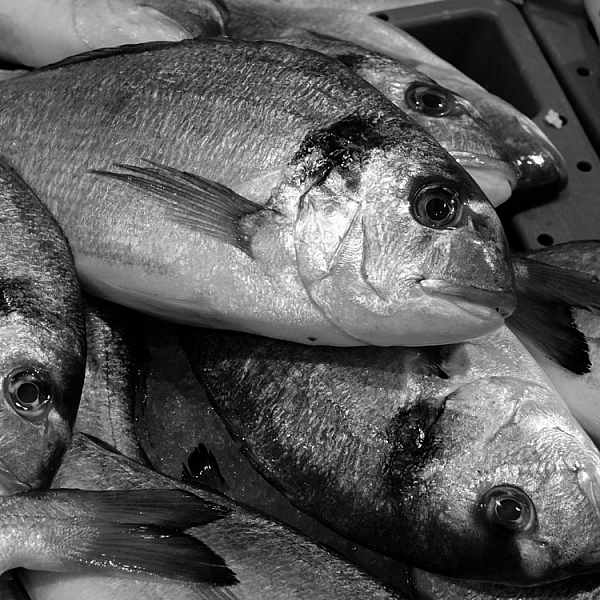
I can also get close to the subject for a tight detail shot, like this one.

Best lens for street and travel photography

Standard lenses for street photography

Working distance is a term used in macro and close-up photography to describe how far the lens is from the subject. You can apply this concept to street, and travel photography too. If you are using a telephoto lens, you will be farther away from the subject. That’s great for not being noticed, but it can also lead to a kind of detached feeling in the image. The viewer can tell you weren’t close to the action, and there may be a sense of lack of involvement in the scene.

A wide-angle lens forces you to get in closer to fill the frame. The closer you get to somebody on the street, the more likely they are to notice you, and react to the camera in some way. This is not necessarily a bad thing (Bruce Gilden has taken this confrontational style to an extreme) and using a wide-angle lens definitely shows involvement in the life of the street. It’s also an approach you can take if you like to go up to people, and ask permission to take their photo first.

The standard lens falls in-between these two extremes. It lets you get close enough to be involved in the scene, but not so close that people are overly bothered by what you are doing. It helps you blend in to what is a very common thing these days – people taking photos on the street (although most often with camera phones, not actual cameras).

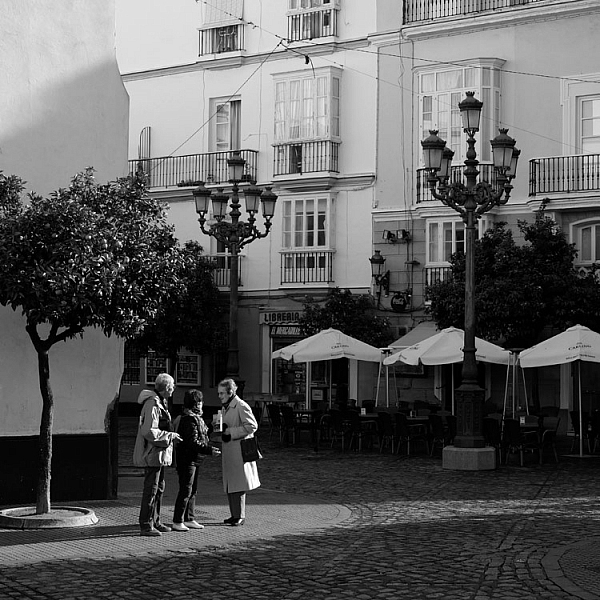
Best lens for street and travel photography

By the way, all the photos in this article were taken in the Spanish city of Cadiz, and I wanted to show the people in context, with the historical buildings in the background, in at least some of the photos. The 35mm lens worked very well for this.

So, for me, the 35mm lens is a clear favorite for travel and street photography. But, what about you? What lenses do you prefer to use? Please let me know in the comments, I’d like to hear your thoughts.


Mastering Lenses photography ebookMastering Lenses

My new ebook Mastering Lenses: A Photographer’s Guide to Creating Beautiful Photos With Any Lens shows you how to get the best from the lenses you own already. A comprehensive guide to exploring the creative potential potential of wide-angle, normal and telephoto lenses, it’s also the ultimate buying guide for readers thinking about purchasing a new lens for their camera. Please click the link to learn more or buy.

googletag.cmd.push(function() {
tablet_slots.push( googletag.defineSlot( “/1005424/_dPSv4_tab-all-article-bottom_(300×250)”, [300, 250], “pb-ad-78623” ).addService( googletag.pubads() ) ); } );

googletag.cmd.push(function() {
mobile_slots.push( googletag.defineSlot( “/1005424/_dPSv4_mob-all-article-bottom_(300×250)”, [300, 250], “pb-ad-78158” ).addService( googletag.pubads() ) ); } );

The post How to Choose the Best Lens for Travel and Street Photography by Andrew S. Gibson appeared first on Digital Photography School.

Digital Photography School

 
Comments Off on How to Choose the Best Lens for Travel and Street Photography

Posted in Photography


How to Choose the Best Black and White Photo Printer

23 Feb

In the digital age, color accompanies most of the images we come across during our daily lives. So when it’s intentionally missing, as is the case with artistic black and white photography, people take notice. Monochrome photography is popular in the fine arts for a variety of reasons, many of which come down to how it emphasizes different aesthetic components Continue Reading

The post How to Choose the Best Black and White Photo Printer appeared first on Photodoto.


Photodoto

 
Comments Off on How to Choose the Best Black and White Photo Printer

Posted in Photography


How to Choose a Black and White Plug-In

02 Sep
Best black and white plug-ins

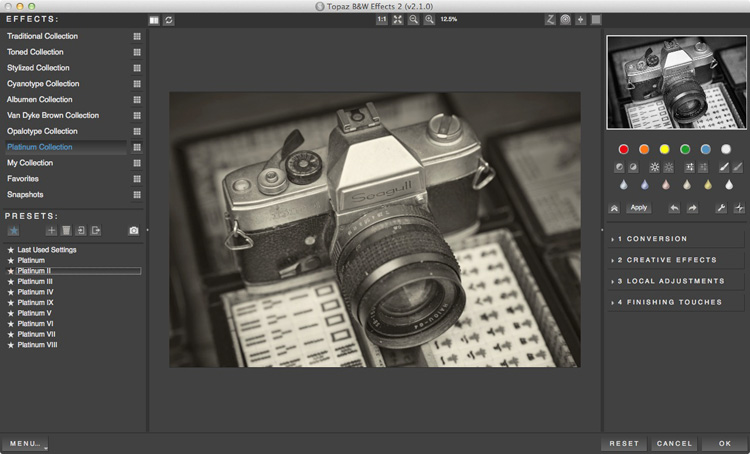
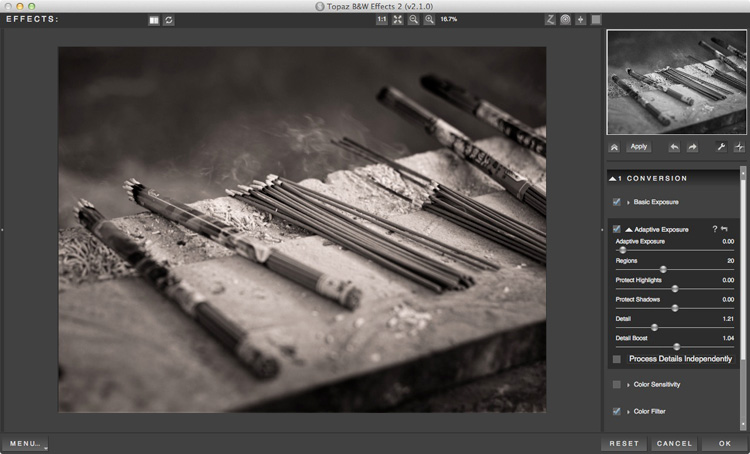
Photo converted to black and white in Topaz B&W Effects 2.

While Lightroom and Photoshop are sophisticated, advanced Raw converters and image editing programs, there are still many things that they don’t do as well as third party applications. One of these is converting photos to black and white. But, there are so many plug-ins available that it can be difficult to know which one to buy. This guide will help you decide.

Why buy plug-ins?

A common theme with black and white plug-ins is that they contain many more ways to emphasize texture than Lightroom and Photoshop. This is important with black and white, as texture is an important part of the composition. In Lightroom and ACR (Adobe Camera Raw) you can use the Clarity slider to emphasize texture, but it’s a blunt instrument compared to the options available in these plug-ins.

Another feature of most of these plug-ins is that they come with an extensive set of presets that you can use as a starting point for your black and white conversion. Just browsing through the presets and seeing what you can do to your photos will inspire you.

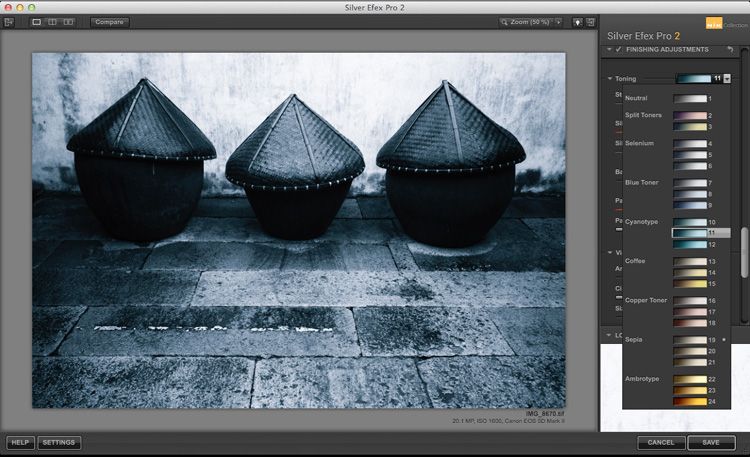
Some presets imitate old printing processes such as cyanotypes and wet plate photography. Others emulate black and white films, some of which are no longer available.

Silver Efex Pro 2

Best black and white plug-ins

Split toning in Silver Efex Pro 2.

Silver Efex Pro 2 is made by Nik software and regarded by many photographers as the ultimate black and white conversion plug-in. You can buy Silver Efex Pro 2 along with the other applications in the Nik Software range in a bundle for $ 149. While you can’t buy Silver Efex Pro 2 as a stand-alone application, it also means that you get the rest of Nik software range included with it.

Who is Silver Efex Pro 2 for?

Silver Efex Pro 2 is for the professional, or advanced hobbyist photographer, who wants to take black and white processing to the ultimate level. If you are serious about black and white photography, you will love this plug-in.

Reasons for buying Silver Efex Pro 2:

  • It has more options than Lightroom or Photoshop. There are more ways of adjusting tonal values, toning images, and adding borders. The Structure, Fine Structure, Dynamic Brightness and Soft Contrast sliders in Silver Efex Pro 2 provide a lot of ways to enhance texture, an important element of many black and white images.
  • It has a good workflow. The History in Silver Efex Pro 2 makes it easy to see where you’ve been and where you are going with your black and white conversion.
  • It comes with a number of good presets that help you obtain good black and white conversions right away.
  • It mimics black and white film grain. If you are interested in creating images that look like they were taken with film, Silver Efex Pro 2 lets you imitate the grain structure of 18 commonly used black and white films.
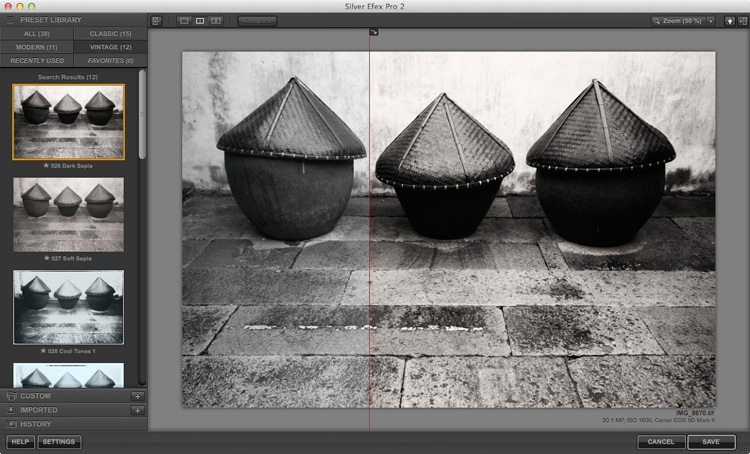
  • It has the standard Before and After view. It also has a Split View that I rather like. You can move the red dividing line to see more of one version or the other (see below). You can also zoom-in to view the differences in fine detail.

Best black and white plug-ins

Exposure

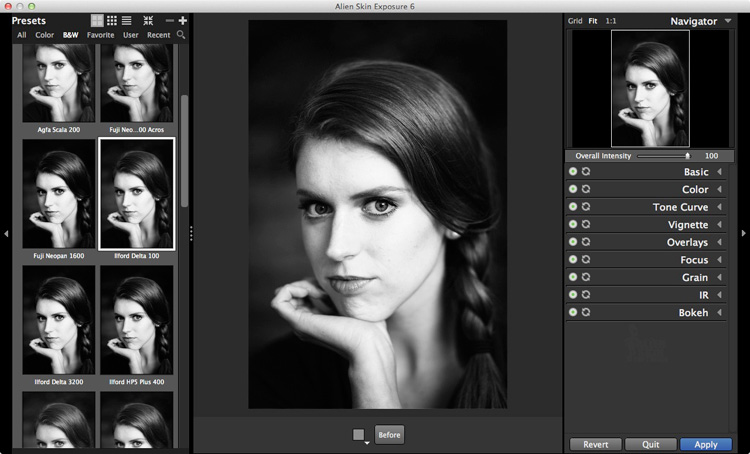
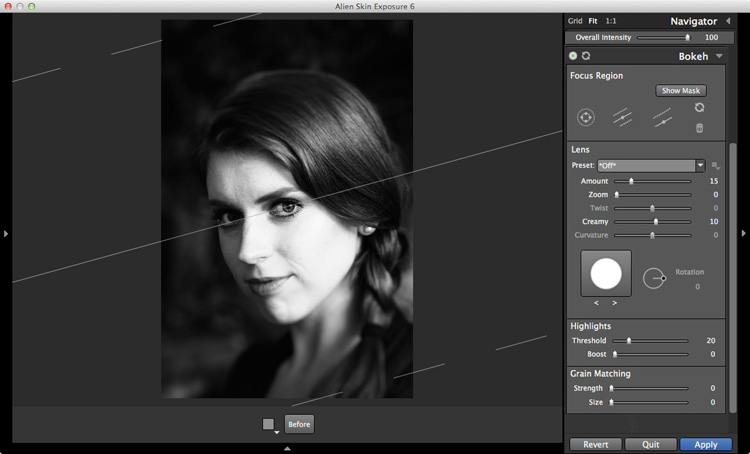
Exposure by Alien Skin Software is a plug-in designed to give your digital photos an analog look. It comes with hundreds of black and white and colour presets that imitate the look of film and antique processes. Alien Skin Software are not merely imitating though – a lot of research has gone into replicating the grain structures of all the film types featured in their software. Where the film wasn’t available, they used photo archives.

Best black and white plug-ins

Just like Silver Efex Pro 2, the presets are a starting point, and tools are provided to make adjustments, including an Intensity slider that lets you fade the effects created by the plug-in. You can create and save your own presets for future use.

Who is Exposure for?

Exposure is for photographers who want to mix the look of analog photography, with the speed and convenience of digital. If you yearn to make your photos look like they were shot with film rather than a digital camera, then this is a good plug-in to use.

Exposure is used by a lot of photographers to create effects that you can’t create in Lightroom, or would take a long time in Photoshop. While it seems mainly pitched at portrait, fashion and wedding photographers, you can apply the filters to virtually any type of photo. It’s a lot of fun to use.

Reasons for buying Exposure:

  • It lets you emulate the look of black and white film. There are over 20 film presets (plus variations) that let you apply an analog look to your digital photos.
  • Exposure is for colour as well as black and white. While this isn’t a concern if you are only interested in the plug-in for black and white conversions, there are some beautiful colour presets and film emulations to use.
  • It lets you add creative borders, light leak effects and scratches to your photos.
  • Exposure lets you add sophisticated lens blur effects to your images, emulating the look created by using specialist lenses such as tilt-shifts and Lensbaby optics (see bel0w).
  • It has an easy to use batch processing tool that makes processing multiple images very quick and easy.

Best black and white plug-ins

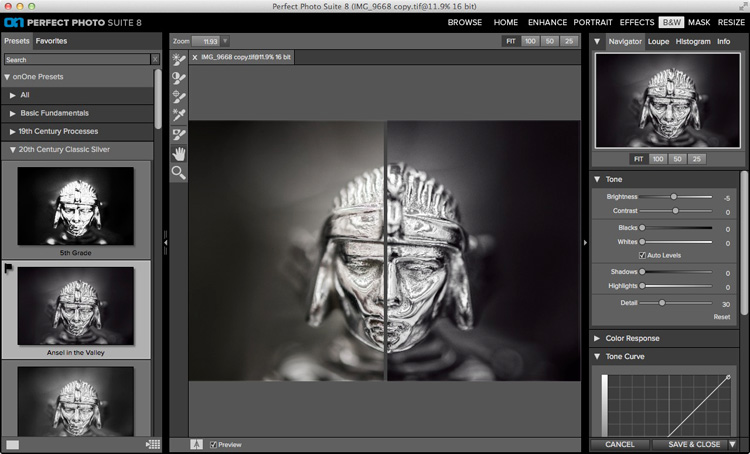
Perfect Black & White

Perfect Black & White comes as part of OnOne Software’s Perfect Photo Suite. There are six modules within the suite, giving you the use of the additional ones if you buy it.

Another benefit of Perfect Photo Suite is that it comes with built-in layers. When you convert a photo to black and white it is placed on a layer with an Opacity slider that lets you merge it with the original colour image. While this feature is of limited use for black and white conversions, it may come in handy with the other programs included in the suite.

Best black and white plug-ins

Who is Perfect Black & White for?

This software is ideal for the photographer who wants to experiment with black and white photography and take advantage of the other programs that come with the suite. You will only appreciate the power and potential of this software by using it and experimenting with all the tools.

Reasons for buying Perfect Black & White:

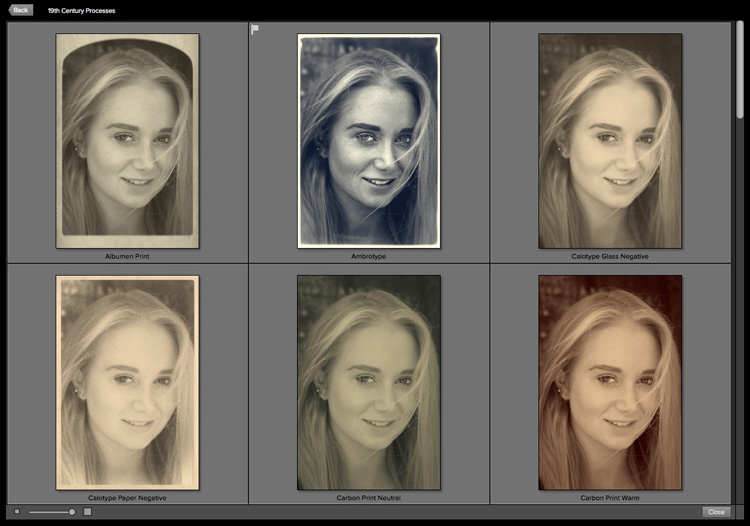
  • It has presets that emulate old photographic processes such as 19th century processes such as the Albumen Print and Ambrotype (see below).
  • There is a good selection of creative borders that you can add to your images.
  • The Sharpening options in it are more advanced than those in Lightroom and Photoshop. There are three types of sharpening to choose from: High Pass, Progressive and Unsharp Mask. High Pass is the most aggressive, while the others let you apply Sharpening in a more subtle fashion.
  • It works in conjunction with the other modules in Perfect Photo Suite. For example, you can use Perfect Portrait to retouch portraits before (or after) converting them to black and white. Or Perfect Resize to enlarge your photo files to a suitable size for making large prints. Or add textures to your photos using layers.
Best black and white plug-ins

Some of the antique process presets available in Perfect Black & White.

B&W Effects 2

B&W Effects 2 is a Lightroom plug-in made by Topaz Labs. The main strength of this plug-in is its strong collection of presets, many of which imitate old processes. There are over 200 to choose from, and many of them have an interesting look which you don’t get from the presets in the other plug-ins mentioned here.

Best black and white plug-ins

Who is B&W Effects 2 for?

B&W Effects 2 is for photographers who want to take advantage of its extensive preset range as a basis for creative black and white conversions. The Snapshots feature gives you a history function that most of the other plug-ins lack, albeit one that you have to activate yourself by taking Snapshots at important points in the processing stage. B&W Effects 2 is also good at increasing detail in mid-tone areas and bringing out texture, an important part of a good black and white conversion.

Reasons for buying B&W Effects 2:

  • Lots of presets for emulating old printing processes. Have you ever wanted to try out cyanotype, albumen, van dyke brown, opalotype or platinum printing? The cost and impracticality associated with these processes puts them out of reach of all but dedicated enthusiasts. But B&W Effects 2 has all these and more.
  • It uses Adaptive Exposure technology to add mid-tone contrast in a way that can’t be replicated in Lightroom or Photoshop. It works by analyzing the image, breaking it into regions and applying the adjustment to each region individually. The best way to appreciate what this tool can do is to try it out for yourself.
  • The Detail and Detail Boost sliders bring out details and texture, completing the work done by the Adaptive Exposure sliders. You’ll be amazed by how much detail and texture you can bring out with these sliders.

Best black and white plug-ins

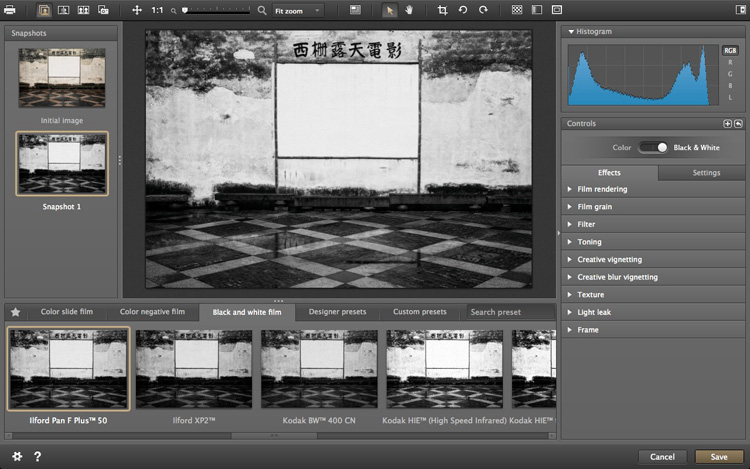
DxO FilmPack

All the plug-ins we’ve looked at so far include some sort of film simulation, but DxO have taken it a step further with their FilmPack plug-in. According to their website, DxO FilmPack lets you, “Perfectly reproduce the quality, style, colours, and grain of the most famous analog films.”

Like Exposure, DxO FilmPack works in both colour and black and white.

Best black and white plug-ins

Who is DxO FilmPack for?

DxO FilmPack is for photographers who want to process their digital images so that they look as if they were taken on film. But it goes further than that, and offers a variety of creative effects that you will find useful in creating emotive monochrome images.

Reasons for buying DxO FilmPack:

  • Lots of film emulation presets, based on an analysis of the films themselves.
  • Features shared by most of the plug-ins listed here – the ability to add borders and textures, toning, light leaks effects and creative blur.

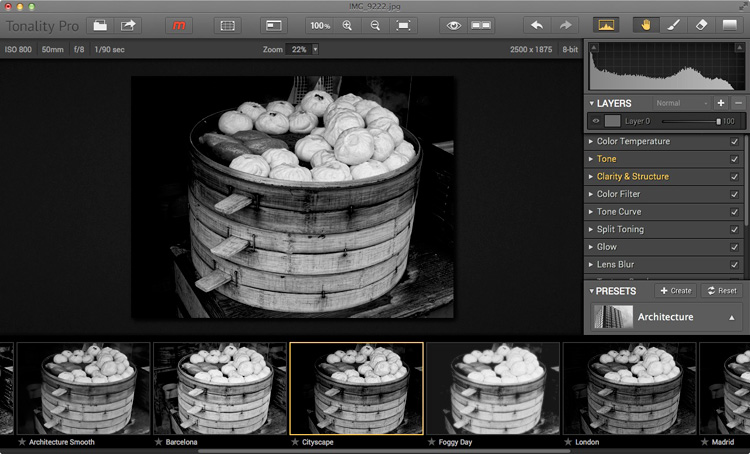
Tonality Pro

MacPhun is a company that makes plug-ins for Apple Mac computers (sorry Windows users!). Tonality Pro is a relatively recent addition to its stable of software and even though it will only be of interest to some of our readers I’ve included it here because it is a very good piece of software.

MacPhun’s aim with Tonality Pro was to create the best black and white plug-in available. I’ll leave it up to others to decided whether they have achieved that, but there’s no doubt it’s a powerful application with lots of useful tools for converting your photos to monochrome.

best-black-white-plugins-10

Reasons for buying Tonality Pro:

  • Tonality Pro has over 150 presets. There is also an Opacity slider that lets you control the strength of the preset, so you can make the effect as strong or subtle as you wish.
  • Tonality Pro has layers. None of the other presets mentioned here do, except for Perfect Black & White (and then not within the plug-in itself). Layers mean that you can apply an effect to your photo, then use brush mode to create a mask so the effect is applied selectively. Layers add a level of creative potential that allows you to use the plug-in’s tools with nearly unlimited freedom.
  • The clarity and structure tools help you emphasize texture and bring out detail in a way which simply isn’t possible in Lightroom or Photoshop.

Your turn

For me, one of the best things about plug-ins is that they give you a chance to play. They open up new ways of processing that you may not have considered before. Above all they are fun, give you chance to get creative, and find new ways of expressing yourself.

So, here’s a challenge. Download the trial version of one of these plug-ins. Then have a play with some of your favourite images and see what you can do with them. Does the new software give you some creative options that you had never considered before? Let us know how you get on in the comments.


Mastering Lightroom: Book Three – Black & White

Masterlng Lightroom: Book Three – Black & White by Andrew S GibsonMy ebook Mastering Lightroom: Book Three – Black & White goes into the topic of black and white in depth. It explains everything you need to know to make dramatic and beautiful monochrome conversions in Lightroom, including how to use the most popular black and white plug-ins. Click the link to visit my website and learn more.

googletag.cmd.push(function() {
tablet_slots.push( googletag.defineSlot( “/1005424/_dPSv4_tab-all-article-bottom_(300×250)”, [300, 250], “pb-ad-78623” ).addService( googletag.pubads() ) ); } );

googletag.cmd.push(function() {
mobile_slots.push( googletag.defineSlot( “/1005424/_dPSv4_mob-all-article-bottom_(300×250)”, [300, 250], “pb-ad-78158” ).addService( googletag.pubads() ) ); } );

The post How to Choose a Black and White Plug-In by Andrew S. Gibson appeared first on Digital Photography School.

Digital Photography School

 
Comments Off on How to Choose a Black and White Plug-In

Posted in Photography


8 Factors to Look at Before You Choose a New DSLR or Mirrorless Camera

29 Jul

Not too long ago, the path to choosing your gear was very clear. If you wanted to take professional quality images, the DSLR reigned supreme. Yet, the landscape of available camera gear is constantly evolving, and today there are more options than ever before. Instead of just one or two dominant companies, you now have outstanding systems from no less than seven manufacturers. Mirrorless cameras have matured from a niche product to a complete solution, while DSLRs have been further refined. This may sound daunting at first, but with a bit of research, it’s possible to find a model that meets your specific needs. Here are the main points to review when considering whether you get a DSLR or mirrorless camera next.

1) Availability of Lenses

Buying a high megapixel camera body won’t spare you from the the negative effects of a poor lens. In fact, more resolution can bring greater attention to the lens’s optical flaws. For example, if you pair a full frame sensor with a kit lens you’ll have soft corners and mushy detail. Alternatively, high quality lenses can maximize every pixel of your camera’s sensor providing tack sharp focus from corner to corner. There may be some who will argue this theory and point to studio tests and technical charts. Yet in practice, a camera with a smaller sensor and less megapixels paired with a stellar lens can provide more clarity than a high resolution full frame coupled with an average lens. For this reason, the selection of available lenses is the first consideration when deciding on a camera.

Sharpness is not the only part of this decision, but also the speed in which the lens achieves focus. A constant aperture is also a nice convenience for low light shooting as opposed to slower variable aperture lenses that span from f/3.5 to f/5.6. Finally, if you envision a super shallow depth of field in your images, f/5.6 will not be as desirable as f/2.8. Map out your kit with each manufacturer using your dream scenario. For example, can you build a system with f/2.8 lenses that span from ultra wide to super telephoto? How much would this cost for each manufacturer, and what would it weigh? While it’s true that DSLR users once enjoyed a significant advantage in lens availability, that gap is quickly closing. Most mirrorless systems now offer a complete line of professional quality glass that is of equivalent quality to a DSLR counterpart.

2) Image Quality

Ultimately, the image quality from a camera is only as good as the person controlling it. The best photographers in the world can capture stunning imagery, with the most basic cameras. Simply put, they know how to maximize the potential of any situation, and work around the limitations to get the shot.

Ideally, you want to find a camera that doesn’t get in the way of your creative process. If you’re fumbling with confusing menus and buttons, chances are you will miss a number of fleeting opportunities. Still, photography is also a game of confidence, and you want to feel as if the photo you are capturing will have all of the detail you need it to. I have good news for you! Nearly every DSLR and mirrorless camera today has more than enough resolution for professional work. Whether you are shooting for large prints, billboards, magazine spreads, stock submissions or your own personal satisfaction, today’s modern cameras are up to the task. This is a game changer, as a DSLR is no longer a prerequisite for professional work.

3) Sensor Size

At the same effective focal range and aperture, the actual depth of field each format provides will appear different based on sensor size. For example, a full frame camera at f/2.8 dramatically throws a background out of focus. This is ideal for reducing distractions and bringing attention to the subject. To achieve the same look with an APS-C sensor you would need to open the aperture to f/1.8. With micro 4/3, you’d need f/1.4. Clearly, this makes shallow depth of field easier to achieve with a full frame. Having said that, micro 4/3 users can create similar results with fast lenses like the Voigtlander 42.5mm f/0.95.

While larger sensors enjoy a slight advantage for shallow depth of field, the opposite happens with great depth of field. This means f/5.6 on a micro 4/3 camera provides the equivalent depth of field to f/8 on APS-C and f/11 on a full frame model. This provides the micro 4/3 user with 1-2 extra stops of light while still creating sharp focus from near to far. As a result, the ISO doesn’t need to be as high, providing better image quality. For the same exposure and equivalent depth of field, here is an example of how the sensor size would affect the settings.

  • Micro 4/3: 1/125, f/5.6, ISO 200
  • APS-C: 1/125, f/8, ISO 400
  • Full Frame: 1/125, f/11, ISO 800

This is summed up nicely by Cambridge in Colour who noted, “Larger sensors (and correspondingly higher pixel counts) undoubtedly produce more detail if you can afford to sacrifice depth of field. On the other hand, if you wish to maintain the same depth of field, larger sensor sizes do not necessarily have a resolution advantage.”

4) Features and Functionality

The technology you’ll find, in even the most entry level mirrorless camera, can make a DSLR feel like stepping back in time. This is not solely due to the weight, but the glaring absence of useful features that make simple tasks more convenient. No longer do you need to stand beneath a shaded tree to check your images on the LCD. The quality of EVF in today’s mirrorless cameras is astonishing. It’s similar to using live view, but the image appears in the viewfinder where the display is not affected by harsh sunlight. Without removing your eye from the viewfinder you can check critical focus and exposure while viewing the histogram, highlight alert, and exposure settings.

With in-viewfinder image magnification and focus peaking, manual focus has never been easier or more accurate. Tapping the shutter lightly will activate the shooting mode so you’re always ready to capture the action. This can certainly reduce time spent chimping, and helps one remain focused on the subject in front of them. Depending on the model, you may enjoy other features like double exposures, silent electronic shutter, keystone correction, live time, time-lapse, touch screen autofocus that covers most of the frame, and built-in wifi. It’s these little things that ultimately make the shooting experience more enjoyable.

For those who are struggling with depth of field, the EVF on mirrorless cameras offers a huge advantage. As you look through the viewfinder and adjust your aperture, you will see a real-time look at how the depth of field will alter your image. This makes it so convenient to establish your settings for any given shot. In fairness, some DSLRs have a DOF preview button, but its functionality is far from ideal. Using that method the screen gets very dark, and you have to really look hard to determine what will truly be sharp. The EVF simplifies all of this as what you see is what you get.

5) Size and Weight

A DSLR is a commitment. You make a decision to take pictures, pack your gear, and head out. This has proven to be an effective formula for a very long time. Yet, I’ve spoken with countless photographers who leave their DSLR home to avoid carrying extra weight. Some even purchase expensive telephoto zoom lenses only to complain they’re too much of a hassle to bring along. If you do the math, DSLRs are about twice as heavy as mirrorless cameras and approximately 40% bulkier. When you’re traveling to distant places, or hiking deep into the woods, every ounce matters. I’ve been on small international airplanes with a strict 25 pound luggage limit, which included personal items.

Advances in technology can allow us to go places that were previously inaccessible. No longer do you need to leave important things behind. That’s one of the reasons carbon fibre tripods have become the preferred choice for many. Since they are much lighter than aluminum models, you can go further. Couple this with a lighter camera system, and it’s possible to reach remote locations faster, giving you the competitive edge.

6) Familiarity

15 years ago, on countless pages of photography magazines, experts debated the topic of film versus digital. What followed was undoubtedly one of the biggest revolutions in the history of photography. Despite some of the early limitations, digital imaging forged ahead, ultimately winning over many of the initial naysayers. While this current shift in camera gear may not be quite as dramatic, there are many who are still resistant to change. Yet, as George Bernard Shaw said, “Progress is impossible without change, and those who cannot change their minds cannot change anything.” If you’ve never tried a modern mirrorless system, you are short changing yourself. Visit a local camera store and have a look, or better yet, rent one for a weekend photo adventure. It may take a real world test to experience the benefits that don’t translate well on paper.

7) Durability and Battery Life

DSLRs take the crown when it comes to battery life. Where one DSLR battery can go a full day with 1000 plus shots, a mirrorless camera will require approximately three batteries. The obvious workaround is to carry several spares, but it’s worth noting as it is one definitive area that requires improvement. The issue is largely due to the heavy power demand from the EVF. As a result, it’s a concern for all mirrorless manufacturers with no one brand having a distinct advantage.

If you’re looking for a camera that’s weather sealed and built like a tank, both types of cameras have models to check out. Still, in order to enjoy a fully weatherproof system, the lenses need to have the same level of durability. With a DSLR this build-type is often reserved for the professional models. These are typically more expensive and heavier than non-sealed lenses. Alternatively, Sony, Fuji and Olympus all have rugged systems that boast features like splash, dust, and freeze resistant. If you find yourself in extreme situations often, this may be the better option for you.

8) Cost Savings

Do you rely on image stabilization as part of your photography routine? With a DSLR, this convenience comes at a significant cost. Lenses with this feature are often priced hundreds of dollars more than a non-stabilized model. Perhaps a more cost effective method would be a camera with built-in 5-axis stabilization. This will work on any lens you mount, making it possible to capture sharp hand held images at 1/15th of a second or slower. If you’re skeptical, as I certainly was, there are a myriad of tests that prove its accuracy.

This is an important development that changes the way you works in low light scenarios. For example, if you’re photographing a dark interior where tripods are not allowed, a typical setting would be around 1/125, f/4, ISO 6400. That same shot with 5-axis IS could be captured at 1/15, f/4, ISO 800. Noise won’t be nearly as prevalent at the lower ISO, and you’ll still have a tack-sharp image. This cutting edge feature gives photographers yet another tool to solve common everyday problems.

Conclusion

There have never been as many viable options as we have right now. It is indeed a great time to be in the market for a new camera. The system you decide on will certainly have a big impact on your work, so do thorough research and choose wisely. Remember, the ideal selection should not be based on what everyone else is doing, but what will allow you to realize your unique vision. This can only be decided by you, not a salesperson, or forum chatter. Above all, your next camera should be one that inspires you to pick it up and use it more often.

As for my gear, I don’t leave the house without my Olympus OMD EM1. Sometimes I also carry an EM10 as a backup body. I recently sold a Canon 40D, retired the old 10D, and am still determining the fate of my Canon 6D.

googletag.cmd.push(function() {
tablet_slots.push( googletag.defineSlot( “/1005424/_dPSv4_tab-all-article-bottom_(300×250)”, [300, 250], “pb-ad-78623” ).addService( googletag.pubads() ) ); } );

googletag.cmd.push(function() {
mobile_slots.push( googletag.defineSlot( “/1005424/_dPSv4_mob-all-article-bottom_(300×250)”, [300, 250], “pb-ad-78158” ).addService( googletag.pubads() ) ); } );

The post 8 Factors to Look at Before You Choose a New DSLR or Mirrorless Camera by Chris Corradino appeared first on Digital Photography School.

Digital Photography School

 
Comments Off on 8 Factors to Look at Before You Choose a New DSLR or Mirrorless Camera

Posted in Photography


How to Choose Which Version of Lightroom to Buy

27 Jan

Lightroom creative cloud

Buying Lightroom used to be simple. All you had to do was buy the full version of the program, and upgrade (if you wished) every time a new version came out. But ever since Adobe announced the Creative Cloud subscription service, photographers have been faced with two choices. You can still go for the standalone version, or you can buy Lightroom as part of a Creative Cloud monthly membership. But how do you know which is the best option for you? Read on to find out.

Creative Cloud is announced

Adobe’s initial announcement of the Creative Cloud licensing concept was somewhat controversial as the price for a subscription to Photoshop ran at $ 20 a month (all prices in this article are in US dollars). For photographers who had already purchased the full version of Photoshop this represented a significant price increase. Not only was subscribing more expensive in the long run, compared to upgrading Photoshop regularly, but the license to use the software expired once monthly payments stopped.

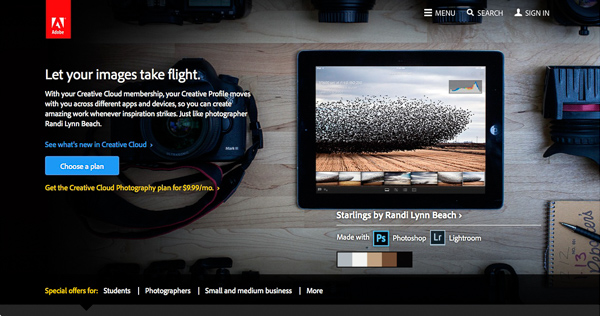
There’s little doubt this was a raw deal, but Adobe listened and introduced a new package for photographers – a subscription to both Lightroom and Photoshop CC for $ 9.99 a month (or $ 119.88 per year).

Lightroom creative cloud

Read about this on forums and photography websites and you will still come across a lot of negativity towards the Creative Cloud subscription model, especially from Photoshop users upset at the loss of a perpetual licence. But today, I aim to cut through this negativity and take an objective look at the differences between the two options.

Two types of Lightroom users

To start, we have to acknowledge that there are two types of Lightroom users.

The first uses Lightroom in conjunction with Photoshop and wants access to both programs. For this user, the Creative Cloud option is the only choice if you want the latest version of Photoshop CC. Alternatively, if you own a version of Photoshop CS and are not bothered about upgrading to Photoshop CC, you can buy the standalone version of Lightroom and use them together.

The second type of user carries out the bulk of their image processing in Lightroom. For tasks Lightroom can’t handle, they may use an older version of Photoshop, a less powerful program like Photoshop Elements, or a plug-in such as the Nik Collection or Perfect Photo Suite 9. These users may be wondering whether to continue using the standalone version of the software or to subscribe.

Financial considerations

If you are on a budget, and don’t need Photoshop CC, then it is definitely less expensive to buy the standalone version of Lightroom. At the moment a new version of Lightroom comes out approximately every 18 months. At $ 9.99 a month, the subscription service would cost you $ 179.82 over that period. If you are new to Lightroom, the full version (priced at $ 149 from the Adobe website) saves you money, and if you already own Lightroom, then the upgrade (priced at $ 79) is even less, saving you a little over $ 100 over the same time period.

As a standalone version user you get free upgrades until a full new version comes out. So, if you upgraded to Lightroom 5.0 when it first came out, you can upgrade to the latest version (5.7) for free, taking advantage of new features introduced since then. But when Lightroom 6 comes out, you will need to pay the upgrade fee to use it. Upgrading isn’t compulsory, and you can continue to use your earlier version of Lightroom as long as you want.

Adobe have stressed their commitment to continuing the standalone version of Lightroom for the foreseeable future.

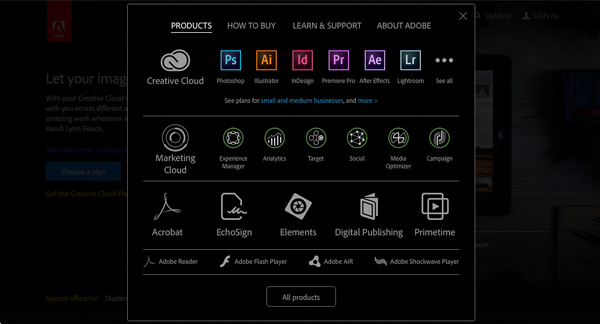
Note: The standalone version of Lightroom is a little hard to find on Adobe’s website. You can get there by going to Adobe’s home page and clicking the Menu option at the top. Click the All Products button at the bottom, scroll down to Lightroom and click Buy. Or you can also find it here on Amazon. 

Lightroom creative cloud

What the Creative Cloud subscription gives you

The Creative Cloud subscription is more expensive, so what do you get for that extra money? The two headline features are Photoshop CC, a powerful image editing program that you are likely familiar with, plus access to Lightroom Mobile, a mobile version of Lightroom that works with iPads and iPhones (but not currently with devices using the Android or Windows operating systems).

There are several additional features that may interest some people, such as 2GB of online storage space, access to Lightroom Web and the ability to use Photoshop CC and Lightroom on multiple machines (although not at the same time).

What happens when the Creative Cloud license ends?

If you stop paying your subscription fee you no longer have the right to use the full versions of Photoshop CC and Lightroom. Photoshop will stop working completely (or at least until you renew the subscription).

But Lightroom is different. Bear in mind that with Lightroom your Raw files are untouched. The edits you make are stored in the Catalog. If you lose access to the Catalog, you lose access to all the edits you have made to your images, including all post-processing.

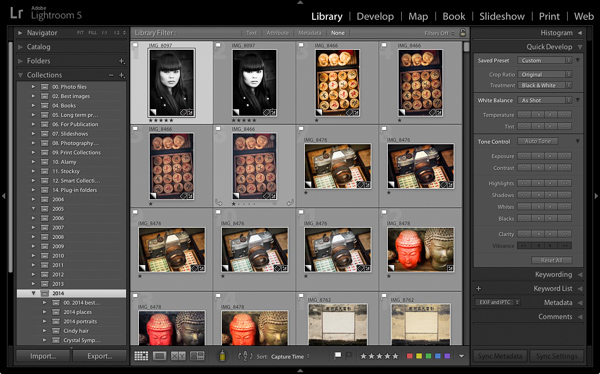
Adobe doesn’t want that to happen, so it gives you partial access to Lightroom even if you cancel your Creative Cloud subscription. You have full access to the Library, Book, Print, Slideshow and Web modules. The Develop module is severely restricted (you can’t make any adjustments using the right-hand panels) and there is no access to the Map module.

Lightroom creative cloud

Your Catalog remains intact, including any Collections you’re created and any changes to metadata, including ratings and keywords. So does your post-processing, and the ability to make basic edits to photo files using the Quick Develop panel. You can also export your photos any time you want.

You need to have Lightroom Version 5.5 or later installed for this to work.

Conclusion

Hopefully you are now clearer about how the two ways of buying Lightroom differ, and which is best for you. If you want to use the most up to date version of Photoshop CC, or Lightroom Mobile, then the Creative Cloud subscription service is the choice for you.

However, if you don’t require the latest version of Photoshop CC, or Lightroom Mobile, then buying the standalone version is the least expensive way to go.

What do you think? Have Adobe got it right with the price and services offered for the Creative Cloud Photography plan? Do you use the Creative Cloud version of Lightroom or the standalone version? Please let us know in the comments.


Mastering Lightroom: Book Five – The Other Modules ebook coverMastering Lightroom: Book Five – The Other Modules

My new ebook Mastering Lightroom: Book Five – The Other Modules shows you how to use Lightroom’s powerful features to create fun and interesting projects using the Map, Book, Slide show, Print and Web modules. Whether it’s geotagging, putting together a photo book, printing your best photos or creating web galleries all the information (and inspiration) you require is right here.

googletag.cmd.push(function() {
tablet_slots.push( googletag.defineSlot( “/1005424/_dPSv4_tab-all-article-bottom_(300×250)”, [300, 250], “pb-ad-78623” ).addService( googletag.pubads() ) ); } );

googletag.cmd.push(function() {
mobile_slots.push( googletag.defineSlot( “/1005424/_dPSv4_mob-all-article-bottom_(300×250)”, [300, 250], “pb-ad-78158” ).addService( googletag.pubads() ) ); } );

The post How to Choose Which Version of Lightroom to Buy by Andrew S. Gibson appeared first on Digital Photography School.

Digital Photography School

 
Comments Off on How to Choose Which Version of Lightroom to Buy

Posted in Photography


Mobile Triggers Compared to Help You Choose the Right One

25 Sep

When it comes to mobile triggers or cable releases photographers often have multiple responses:

  • I got the knock-off brand and it doesn’t work when I need it
  • I got the basic button kind and have to count the time on my own
  • The intervalometer is way too expensive
  • I could save money and build a DIY release but that’s too much effort
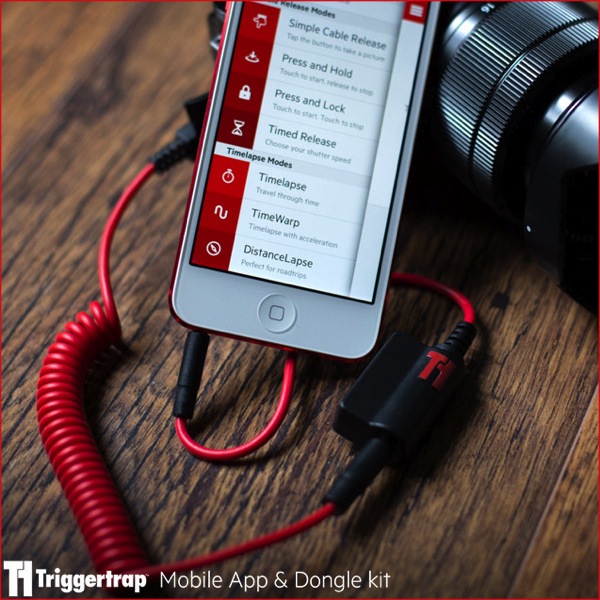
Triggertrap

Image from Triggertrap site

Image from the Triggertrap website.

I hear comments like that on almost a daily basis. In my previous article on long exposure photography accessories I mentioned Triggertrap and Trigger Happy. In this article I’m going to discuss both of those (with a bonus tip at the end) and also discuss some other options that are available to you.

This article is not a review of the products but rather just an overview of what each offers. It is worth noting that I do own each of the products and will share my personal recommendation at the end of the article. So if you don’t care so much about the comparison then please skip down to the bonus tip and my recommendation.

However, if you’re considering a mobile trigger for your camera, but haven’t purchased one yet, then please continue reading.

Triggertrap

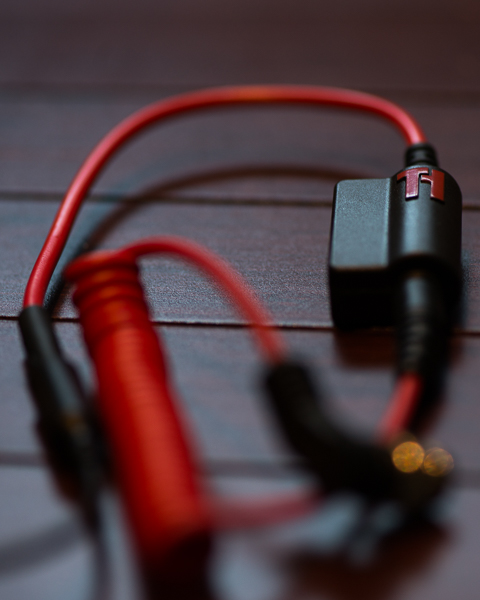
Triggertrap started as a Kickstarter project, and really set the bar high for its standards and features. The Triggertrap software is open source and can be found on Github. The quality of the physical cables is top notch, very durable, and they’re also attractive.

The mobile kits are available for Nikon, Canon, Fuji, Sony, Olympus, Samsung, Panasonic, Pentax, Sigma, Leica, Lytro, Hasselblad, Contax, Konica Minolta and Kodak.

A mobile kit is available for nearly every camera you could possibly want. It connects to the headphone jack of your phone and then the cable release part of your camera. The mobile kits start at $ 37.46 USD.

Triggertrap 1

The mobile app (iOS and Android) has a variety of trigger options that can go way beyond just pushing the button. Here is a list of all the trigger options:

  • Sound sensor
  • Vibration sensor
  • Motion sensor
  • Facial recognition
  • Time-lapse
  • TimeWarp
  • DistanceLapse
  • Bramping
  • Star Trail
  • Long Exposure HDR
  • Long Exposure HDR time-lapse
  • Press and Hold
  • Timed Exposures
  • Simple Cable Release
  • Wifi Trigger
  • Triggertrap also includes a neutral density filter calculator, which is convenient. Although I prefer Slower Shutter, it is convenient having a calculator in the same place as the trigger. The app also includes local sunrise and sunset times which is very convenient.

It is worth noting two more things about Triggertrap. First, all the features of the apps are not available on both iOS and Android. Second, that is likely to change quick because Triggertrap is always working on improvements and new features.

The apps are free so while you are paying for the mobile kits, you are not paying for the software side.

Trigger Happy

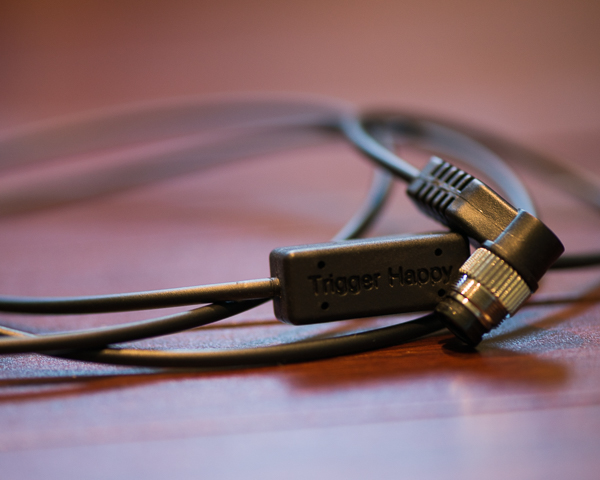
Trigger Happy also began as a Kickstarter project and was successfully funded. It works the same way at Triggertrap, using the headphone jack of your mobile device.

NOTE: Since writing this article, TriggerHappy has closed for business, but some of the products are still available. They decided to open their software up to the world and made it Open Source available on GitHub.  They are also recommending people to check out Triggertrap.

Triggerhappy

The kits are available for Canon, Nikon, Pentax, Olympus, Sony only and retail at $ 29-49 USD. The apps are limited to the most basic features including the following trigger options:

  • Simple camera trigger
  • Bulb
  • Time-lapse mode / Intervalometer
  • HDR mode
  • Bramping

This system was the first I owned, via the Kickstarter project; it’s changed since then but even the original still works very well. The apps are also free, so while you are paying for the kit you are not paying for the software side.

SmartShutter

SmartShutter is from a company called Zesty Accessories in Japan, and is different than the other mobile releases as it uses Bluetooth to trigger instead of a wired release. Cool, right? The product sells for between $ 39.99 and $ 64.99 direct or through Amazon.

It works very well, but the app is extremely limited. I do have some issues with the design of the Nikon version, but instead of re-stating it here you can see to my full review and video of the product here.

Zesty

I mentioned that the product uses Bluetooth, but you should know that it relies on your camera’s battery for power. That means if you’re using a camera like the Sony A7, which has poor battery life, then this device will drain your camera battery faster. But if you have a camera like the Nikon D810 your battery life will continue performing well.

The devices are available for Nikon, Canon, Sony, Olympus, Pentax, Konica Minolta, Contax, Fuji, Sigma, Hasselblad and Samsung.

The free app allows for a quick trigger of the camera or a timed exposure. But the timed exposure allows for intervals, a delayed start, and even the number of photos to capture. In addition, the app has the ability to geotag your photographs using your phone’s GPS as well. The app is only available for iOS and is also free.

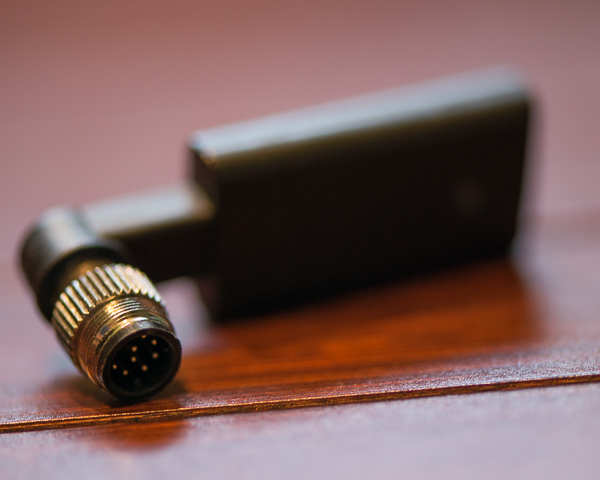
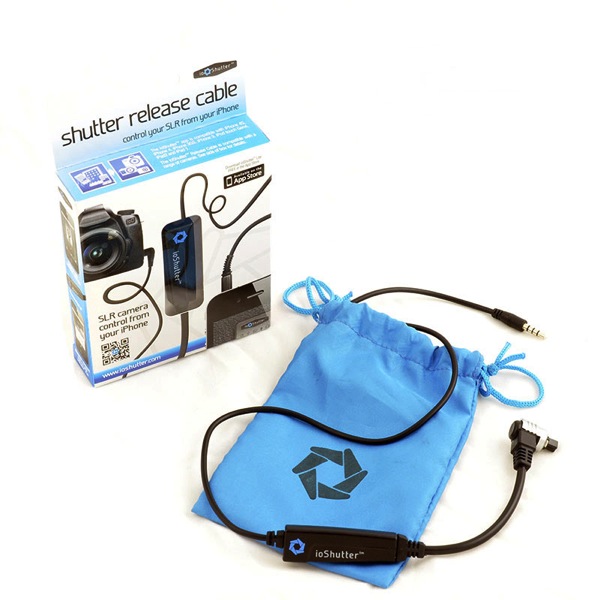
ioShutterPro

ioShutter is made by enlighten photo, the people who created Orbis and other amazing products for photographers. ioShutter is also the priciest of each of the triggers coming in at $ 69.99 for the cable kit. They do have a limited number available right now at 50% off due to what seems to be damaged packaging.

It comes in a nice package and includes a pouch to hold the cable when not in use. The design is actually very similar to the Triggertrap where there is a module with a cable that connects the module to the camera. That way if one part breaks only half of the cable needs to be replaced.

IoShutter

Photo from enlighten photo website

ioShutter is available for Canon, Nikon, Fuji, Pentax, Samsung and Hasselblad. But the mobile app(s) are only available for iOS at the time I’m writing this. Yes, I used plural because the ioShutter app comes in two versions: Lite which is free and Pro, which is an additional $ 5.99.

ioShutter Lite gives you the standard shutter release function you’d expect to find in a cable release. However the Pro version comes with other trigger options:

  • Timed exposure
  • Time-lapse
  • ClapToSnap
  • ShakeToTake

You can also stack features like creating a time-lapse with timed exposures.

Bonus Time

There are two quick things I want to mention before moving on to my recommended product.

The first is for Lifeproof case users. Your case comes with a headphone adapter. I leave mine connected to my earbuds all the time. So I picked up a second adapter, which connects, to my mobile kits.

The second tip is if you already own one of the cables mentioned above, but you want to try another app. I started with Trigger Happy but do not use their app anymore because I now use my favorite of them all, Triggertrap. Before I got my hands on a Triggertrap mobile kit I was using my Trigger Happy cable with the Triggertrap app. So it’s worth knowing that your cable kits should work fine with other apps. I also tested the Trigger Happy cable with ioShutter so I know it works there as well.

Suggested Product

My favorite mobile trigger is Triggertrap for two reasons. For one the app is amazing and contains so many useful features that shouldn’t and can’t be ignored. The team at Triggertrap is also looking for more ways to innovate in the industry, and they’re working on amazing things. For the price of the mobile kits, and the quality of the product itself, on top of the incredible mobile apps, the product is truly a winner.

So there you go – a simple comparison of your options, some tips and my recommendation. Feel free to comment with questions and comments as I’m sure you have your own preferences.

The post Mobile Triggers Compared to Help You Choose the Right One by Scott Wyden Kivowitz appeared first on Digital Photography School.

Digital Photography School

 
Comments Off on Mobile Triggers Compared to Help You Choose the Right One

Posted in Photography


How to Choose a Great Portrait Photography Location

14 Jul

There’s an expression in the photography world called ‘ESP’ which stands for ‘Expressions sell photographs’. It’s true, a lovely expression is the single most important thing in any portrait photo (unless it’s a silhouette).

However, portrait photography isn’t as simple as teasing out a beaming smile, or haughty laugh from your subject. If your captivating expression is complemented by delicious light and an intriguing environment then you have all the ingredients for a cracking image.

Whenever I photograph portraits these are some of the things I’m looking for when I scrutinize the location.

How to choose a great portrait location

Meaningful location

Is it a meaningful location?

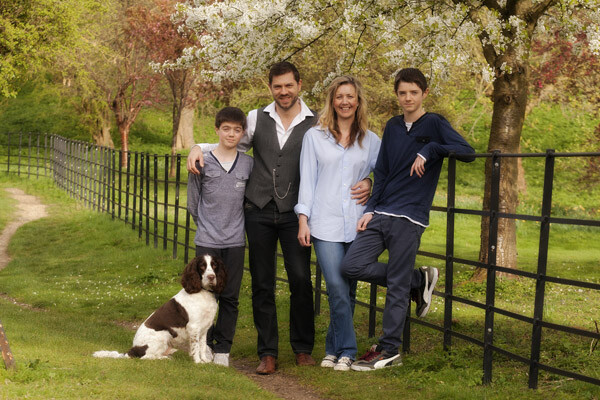
The first thing to do is ask yourself if the location adds to the story you’re trying to tell. For example, when I’m hired to create family portraits I always ask the family if there’s anywhere they like to go, a location to which they have a strong emotional connection. Sometimes they’re proud of their home or garden and we do the session there. Other times it will be in a wood where they walk their dog, or where they go picnicking on lazy summer days. This is far more meaningful to them than some sanitized image on a white background.

Your goal is to either choose a location that helps tell the story of the people in the portrait, or that gives the photo more emotional meaning to the people you’re photographing.

Areas of open shade

Open shade

Every time a bride tells me they’re praying for a gloriously sunny wedding day I don’t have the heart to tell them I’m praying for some lightly diffused cloud cover with intermittent dashes of sunlight upon my express request.

Glaring sunshine causes harsh shadows, particularly in the most important part of the portrait – the eyes.

Open shade is ideal because it doesn’t have harsh sunlight falling directly on the subject, but because the shade is ‘open’ it means there’s still enough light to give the eyes some sparkle. A tree is a perfect example of open shade, so is window light. The subject is in shade but they’re not completely closed off as they would be in the centre of a room, or in a forest. Open shade offers you some nice, soft directional light that creates enough shadow on the face to create depth, but without being harsh.

Lead in lines

Lead in lines

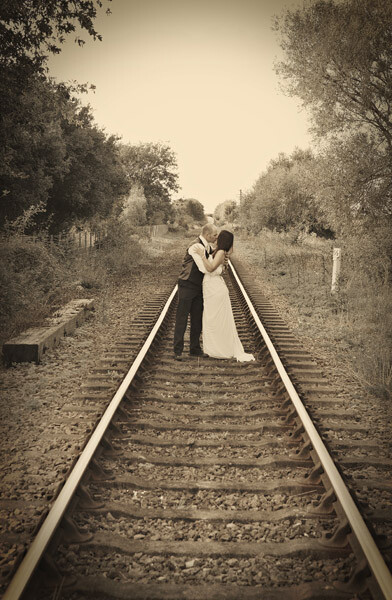
Lead in lines are just as helpful to portrait photography as they are to landscapes. They create depth to a photograph, lead you towards your subject and give the image a three-dimensional feel.

You can use fences, paths, a long twisting tree branch, the lines in a cornfield – anything that draws the viewer’s eye towards your model.

Lead in lines 2

Twinkly leaves

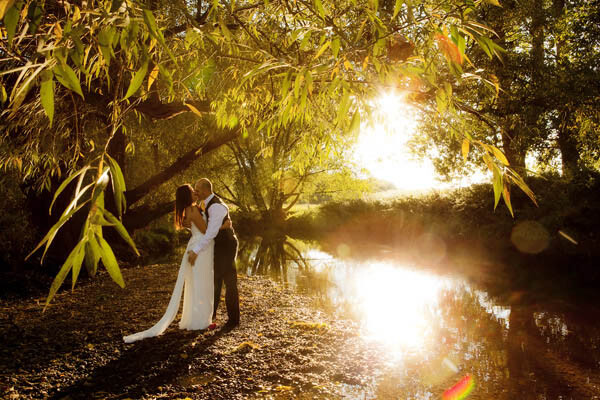
If you position your subject so there are back-lit leaves behind them then you’ll get a beautiful mosaic of green twinkles behind your subject if you use a low f-number on your camera (like f/4 for example).

With backlit subjects like this it’s often wise to use the spot metering mode to help your camera expose correctly for the face and avoid having a silhouette. Using a reflector to bounce some extra light into their face will help even more.

Twinkly leaves

Tantalizing textures

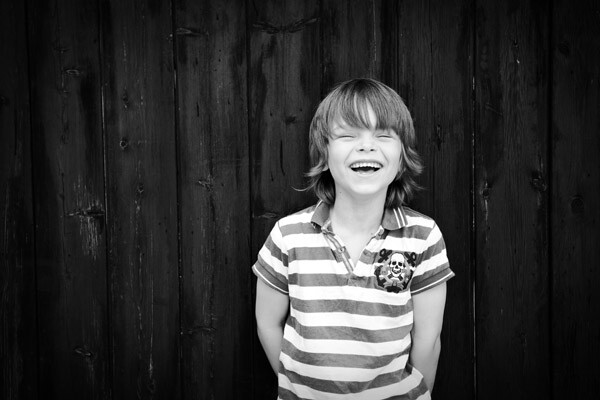
A barn door may not sound like a very exciting background, but rough textures can help the smoothness of your model’s skin pop out of the photograph. I also like rustic walls, and the repeating parallel lines of reeds.

Tantalising textures

Geometric shapes

Our brains like order. We like the pieces of the puzzle to fit together, which is probably why we get so frustrated when putting together flat-pack furniture! This is why our brains like the elements of a photograph to fit together like a completed jigsaw. I look for triangles, circles, rectangles and squares; and compose the image in a way that helps them fit together in harmony. This is also why we like clean, uncluttered hotel rooms that subtly use defined shapes, like the folded triangle of a bed sheet, or the repeating rectangles of a stack of towels.

When you start looking for shapes you’ll see them everywhere. Geometric shapes are often the basis for modern art and when you deconstruct many great photos into line drawings they’ll often look like that.

Geometric shapes

Foreground, mid-ground and background

To give your images depth and a three-dimensional feel you need the viewer’s eye to find interest in the front, middle and background of the photo. Diffused blades of grass could be the foreground, a smiling toddler can be the mid-ground and sunlight sparkling through a tree could be the background.

Foreground midground background

Avenues of trees

I love the effect you get when photographing people in an avenue of trees, using a long lens, because it ticks nearly all the boxes in one go. The leaves provide the necessary shade while the path provides a lead in line and creates depth in the photo. The long lens helps produce a fabulous tunnel vision effect that draws you in and helps to frame the photo, along with the trees themselves.

Long avenue of trees

The next time you decide to photograph someone use these tips and place your subject in the best position to ensure great light and cracking composition. If you have any questions then I’ll be happy to answer them below.

The post How to Choose a Great Portrait Photography Location by Dan Waters appeared first on Digital Photography School.

Digital Photography School

 
Comments Off on How to Choose a Great Portrait Photography Location

Posted in Photography