
I photographed Luke Deslandes with a homemade modifier and a lighting kit that can be created for less than $ 200
One of my favourite TV series from the 90s was MacGyver, an action-adventure series about a US government secret agent with a fabulous mullet, who improvised and built complicated devices from household objects such as rubber bands, paper clips, pens and a Swiss Army knife.
The show was so incredibly popular that the term MacGyver made its way into the dictionary:
MacGyver (v): To make or repair (an object) in an improvised or inventive way, making use of whatever items are at hand:
- He MacGyvered a makeshift jack with a log.
- He has a shock of short red hair and a pair of rectangular-framed glasses, MacGyvered with duct tape.
The other week I was caught short on a night shoot because I’d misplaced my small softbox modifier, and needed to come up with a way to soften and control the from my speedlight to create portrait lighting.
I searched my entire kit and car, found nothing useful, then I asked myself, “What would Macgyver do?”. I rummaged through my bag and found a chocolate donut (Nutella filled, so good!) in a white paper bag, and a hair elastic which would be perfect substitutes for the softbox I’d forgotten to bring to the shoot.
The really cool thing about lighting is that the basic principles will work with any kind of light, regardless of budget, or the type of modifier used. So whether you’re working with a $ 150 lighting kit (similar to the one I used for these images) a $ 1,500 hit, or $ 15,000 one, the light will still react in the same way.
One of the best lessons I learned from working with film and television crews is that ordinary household objects can be used to shape and train light. I’ve seen soft light created using sheets of Perspex, calico, and even shower curtains. A light modifier is basically designed to do two things:
- It controls the shape of the flash
- It controls the quality of light coming from the flash

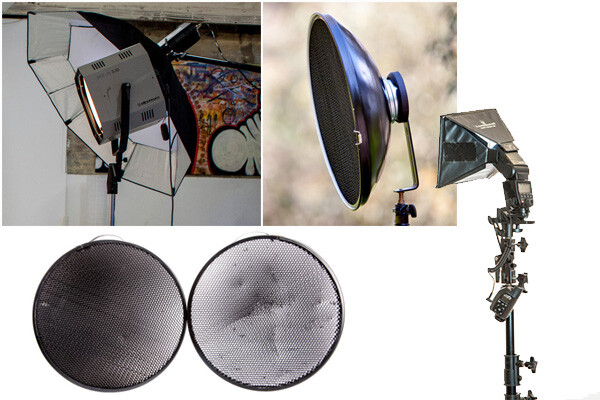
Some modifiers, like umbrellas, will spread the light over a large area and soften the quality of the light. Other modifiers like grid spots contain the light to a very small area and create a hard quality of light (click image above to read more).
The main differences between the high-end options, and MacGyvered lighting are: light quality, consistency, and build. A light modifier that has been cobbled together using found objects is not going to look pretty, and you may attract some odd looks from passers by. On a positive note, I believe a MacGyvered light modifier is a perfect way to get your head around how lighting works, and to vary your lighting styles without having to empty your bank account.
This is how I created my mini softbox using a paper bag, an elastic band, and a chocolate donut.
The Gear

Booms are an awesome way to add light above your model, as they allow the freedom to work without stands getting in the way of your shot. Using a boom is also the best way to position the light exactly where you want it.
I’ve created this lightweight location boom by using a mini-boom arm on an umbrella bracket, attached to a light stand. Always remember to use a weight on the light stand, to avoid it tipping over in high winds. You can buy a sandbag, or MacGyver your own using two-litre drink bottles filled with water in a canvas bag.
A cheaper alternative to the boom is to use a light pole, and to ask a friend to hold it for you. If you are new to working with off-camera flash, I suggest you read one of my previous blog posts: A Beginner’s Guide to Working With Flash Off-Camera.It will walk you through the step-by-step technique of shooting with off-camera flash .
- A Yongnuo YN-560II speedlight – under $ 80
- Yongnuo RF-603N flash triggers $ 30
- CowboyStudio umbrella mount bracket with swivel tilt bracket $ 16
- LumoPro LP605 compact 7 foot stand with ground spikes $ 45
- Sandbag $ 7
- LumoPro mini-boom/reflector arm $ 40
- Tripod
- Nutella donut in a white paper bag – you can use plain donut but they are not as good! <$ 1
- One Hair elastic <$ 1
- Canon 5DMK111 (use your own camera)
- Canon 24-105mm L series (use the lenses you have already)
The Way

Carefully remove the donut from the bag, being careful not to get any Nutella smeared on the bag. Divide the donut into two equal portions. Offer one half to your model and eat the other half. If you can’t find Nutella donuts in your neck of the woods, you can substitute with any other pastry served in a white paper bag.
If you prefer a cleaner style of shooting, just ask for an extra bag when you buy your donut. You can also skip this part altogether, but it’s not as much fun, and just find a white paper bag similar to the one I’m using (see below). They vary in size and thickness so look for bags that are free of any advertising.

Place the bag over the flash and secure using the hair elastic. Electrical tape will also work, but it tends to leave a sticky residue on the flash.

Position the light directly above, and slightly to one side, your model’s head. This lighting style is called loop lighting. I think it’s a flattering style because it leaves the face in partial shadow, and creates the illusion that the face is slimmer.
It’s called loop lighting because of the loop-shaped shadow the nose casts on the side of the model’s face. How prominent the shadow is, depends on how much fill light is used. I use this style of lighting for 80% of my studio and location shoots, as I believe it is one of the most natural-looking lighting techniques.

Adding Fill Light
Using one light from overhead looks great, and adds definition to the model’s bone structure. As I prefer a softer lighting style, I’ve also added a white reflector to my shot.
I placed the reflector on Luke’s (my model) lap because I was shooting very tight headshots. If I were shooting a ¾ or full-length portrait, I would position the reflector on the ground, just out of the shot. The reflector fills in the shadows caused by the flash overhead. You can modify the amount of fill light by how close you place the reflector in relation to your light source. The closer the reflector is to the light, the more evenly lit your portrait will look. If you prefer more contrast or mood to your lighting, move the reflector further away from the light or don’t use one at all.
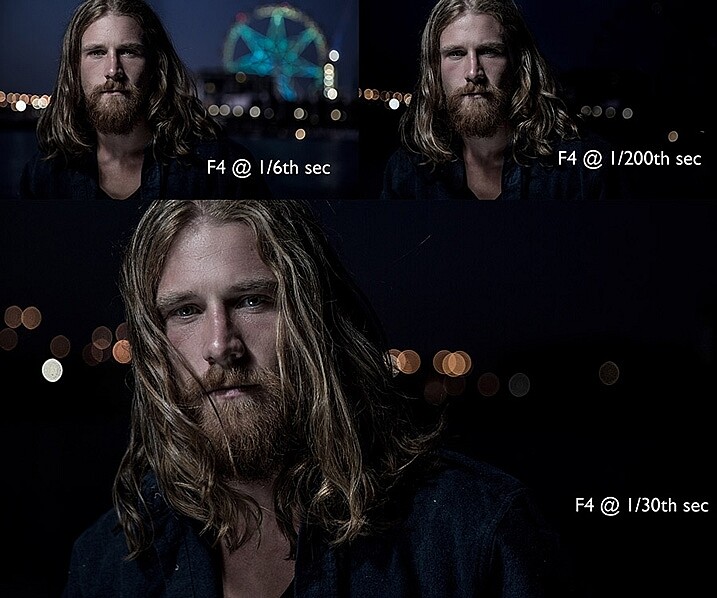
Changing the shutter speed controls how much ambient light there is in the image. To create a brighter background, I selected a shutter speed of 1/6th second. Shooting at 1/200th of a second removes most of the ambient light and creates a moodier image. I wanted to create the goldilocks effect, not too heavy, and not too light, but just right.
The Final Image

Here are a few more awesome Macgyver lighting hacks that my podcast listeners have shared with me.
Ping pong balls and empty toilet rolls

This gorgeous image by Brett Ferguson was created with a light modifier Macgyvered together with a ping pong ball and empty toilet rolls.

Hey Gina Milicia, here is a Macgyver light modifier for you. I needed a spot light source to light the model in a convincing way. It was really important to have a soft glow, and realistic shadows, to emulate what the moon would look like. I used a ping pong ball at the end of two empty toilet rolls and then rigged some cardboard to hold the flash. The flash head fits in nicely, and the centre of the toilet rolls are white, allowing it light up to the ball. This image (edited) was shot at 47mm on a 24-70mm f2.8L II lens on a Canon 5D3 at 1/80th, f/3.5 and ISO 500.
You can see a larger version of the finished image at www.brettferguson.com.au.
The Pringles gridspot

Photographer Glen Dube has Macgyvered this brilliant grid spot using a Pringles container and straws.
This is basically just a Pringles can, with the bottom cut out and replaced by straws, hot glued in place. But I found coloured straws tainted the light, luckily my wife found some paper straws that have a nice bright white inside. The end of the can you get the chips out slides right over all the flashes I have, except this really old Vivitar that has the zoom function on the outside. Pringles has been helpful in providing a variety of lengths of cans for us.
The length (and diameter) of the straws determines the size of the spot and there are even online calculators. I found the flashes zoom function has little effect but the calculators are accurate for determining the spot sizes. The paper straws let you have a sharper fall off (as the plastic straws are translucent and spill light outside the circle). I used 60mm straws, which at 1 meter (3′) gives me a 180MM (7.1″) diameter spot that gets wider the farther away the light is from the subject.
Pop-up flash modifier

Photographer Andrej Valko created this really simple portable pop-up flash modifier using cardboard.
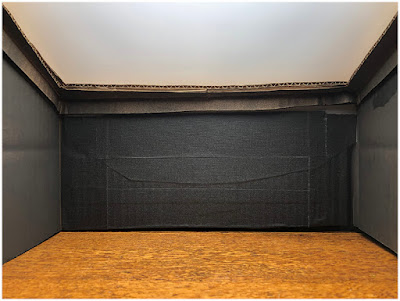
I saw this idea a couple of years ago – a bounce card for the on-camera flash. I thought: how hard can it be to make one. So I did – I printed black on one side of heavy photo-paper so it didn’t look conspicuous from the front. It was white on the other side to bounce light. I taped it with clear tape so it reflected light more efficiently (it also made it a bit more durable), and I cut it to suit my camera.

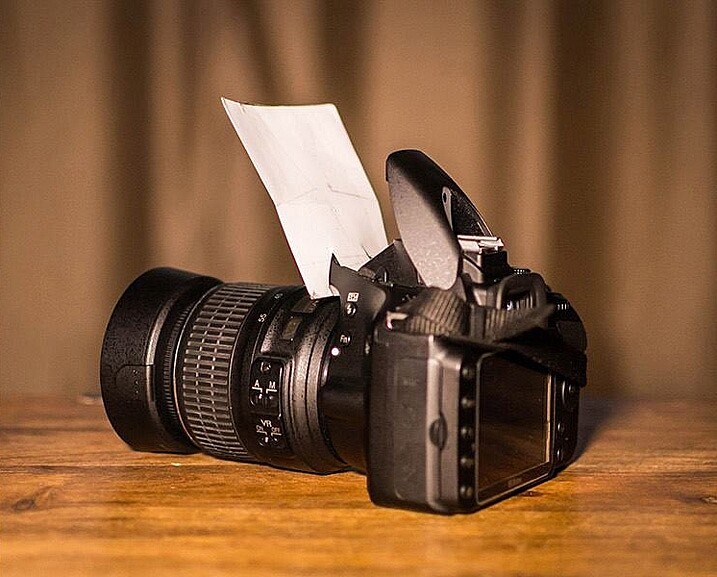
It was easy to mount (it just slid in), easy to carry (in a back pocket just like a business card) and it bounced light off the walls and ceiling, as well as off my face! And I, the crazy photographer, shot a wedding reception with just the bounce card! (I didn’t have a single flash unit at the time.) I still cannot believe I actually used this to shoot a wedding.
The drawer liner modifier

Photographer Mike Hickman created this modifier using a translucent drawer liner.
My “ugly” modifier created from translucent drawer liner which I have used almost exclusively during events, including weddings. The idea came from here.
Cost is about $ 10 for a full liner made by Contact, and attached with Velcro strips for about an additional $ 6. Makes three or four, depending on size. Also, folds up to stick in your pocket when changing locations and I have two in my camera bag at all times. Can’t do that with too many other modifiers!
There are so many awesome ways to MacGyver light modifiers. Do you have one you are particularly proud of? I’d love to see it. Please share your ideas in the comments below.
 If you want to learn more about using flash for creating portraits, pick up Gina’s brand new dPS ebook: Fast Flash for Portrait Perfection. Now on sale for an introductory price for a limited time only.
googletag.cmd.push(function() {
tablet_slots.push( googletag.defineSlot( “/1005424/_dPSv4_tab-all-article-bottom_(300×250)”, [300, 250], “pb-ad-78623” ).addService( googletag.pubads() ) ); } );
googletag.cmd.push(function() {
mobile_slots.push( googletag.defineSlot( “/1005424/_dPSv4_mob-all-article-bottom_(300×250)”, [300, 250], “pb-ad-78158” ).addService( googletag.pubads() ) ); } );
The post How to Create Awesome Portrait Lighting with a Paper Bag an Elastic Band and a Chocolate Donut by Gina Milicia appeared first on Digital Photography School.

Digital Photography School


You must be logged in to post a comment.