RSS
 

Posts Tagged ‘Capturing’

3 Tips for Capturing Connections in Family Portraits

08 Apr

Capturing Conenctions in Family Portraits Article for DPS by Memorable Jaunts 01


We’ve all heard the dreaded words, “Okay everyone, look at the camera and at the count of three say Cheese!”. I have been guilty of using this technique too in my early days of as a family portrait photographer. I remember coming home from client photo shoots and kicking myself for not being original, botching up my client’s experience, and getting really mediocre images that lacked any emotion or connection.

Over the course of time, my style of photography evolved and I started investing more time and effort in making my clients feel comfortable before, during, and after their photoshoot. The results were images that were fun, fresh and full of emotions. Exactly the kind of images that I want in my portfolio. My clients love the experience and I often hear words like, “Oh that was so much fun!” or ‘Thank you for making it so easy”, and “I loved how you made us feel at ease”. I realized that if, as a photographer, I was having a good time interacting with and photographing my clients, they were having a great time too.

Capturing Conenctions in Family Portraits Article for DPS by Memorable Jaunts 02


At the end of the day, my job as a photographer is not only to take great, meaningful and beautiful pictures for my clients but also to make sure they have a great time and it is a pleasant experience. To that end, there are some things to keep in mind to capture connections among your clients

#1 – Family dynamics

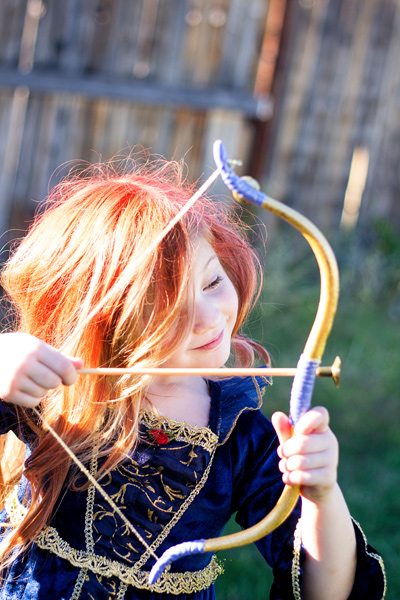
It is very important to understand family dynamics prior to the photoshoot. This goes beyond the typical questions about the names and ages of the kids. Try and understand likes and dislikes of the people involved. If there are young children involved, take the time to understand personalities of the kids as individuals, and with their siblings. Is the family casual and easy going, or do they like formal, traditional posed pictures? Just because they like a particular style of imagery does not mean you have to stick to that. But certainly incorporate what they want first, then feel free to experiment.

Capturing Conenctions in Family Portraits Article for DPS by Memorable Jaunts 03

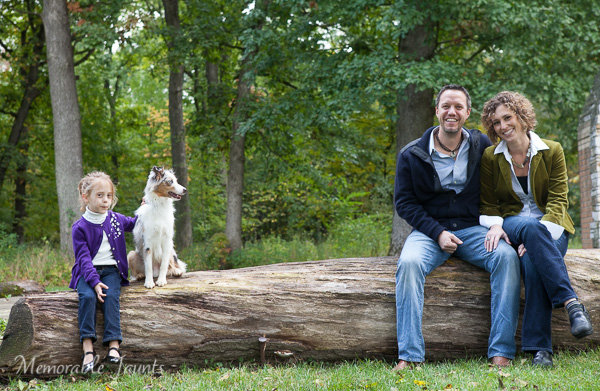
This family made it very clear that their new puppy was their second baby! – Rather than excluding the dog, I made sure to include him in almost all their images.

Capturing Conenctions in Family Portraits Article for DPS by Memorable Jaunts 04

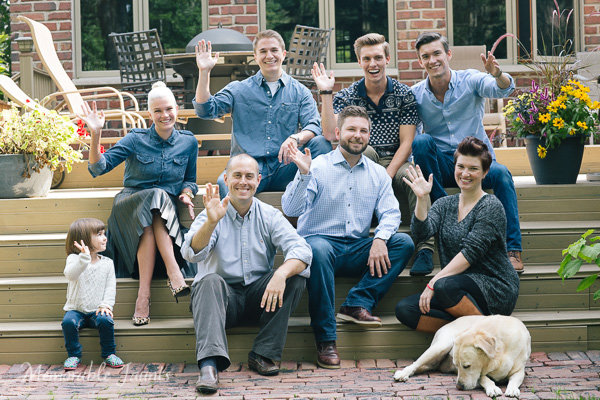
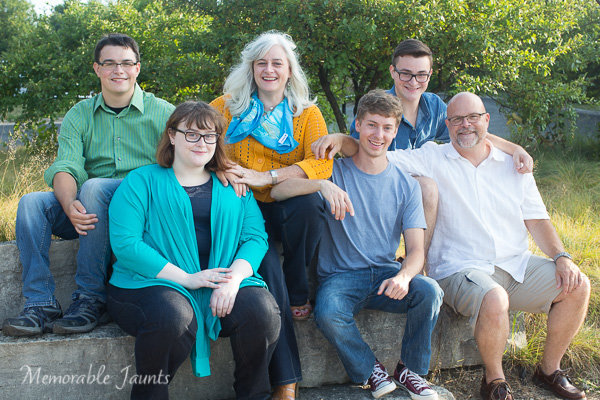
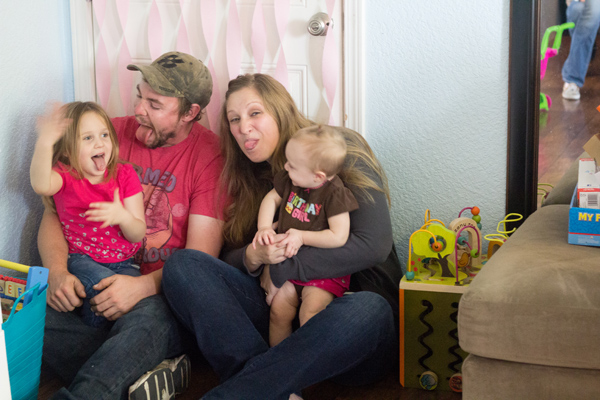
Large family groups don’t have to be intimidating. Just engage with them and give them something to do.


#2 – Structure the shoot

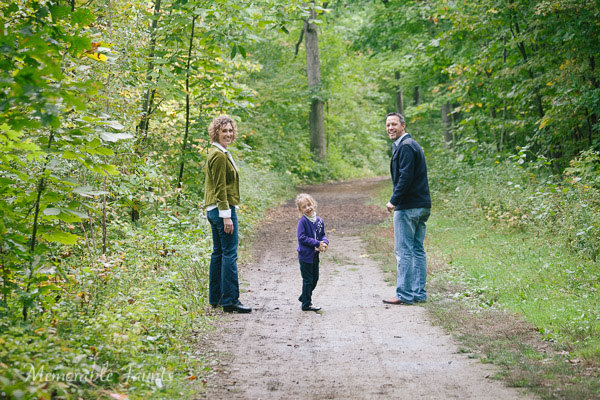
Trust me, this is key and will ensure you maintain your sanity during the photoshoot. Have a plan of action. I make it a point to spend the first five minutes of every session educating my clients on what they can expect. The first few minutes is warmup time – testing the light, figuring out the right lens, etc. I let my clients know exactly what’s happening, and many times, I get a lot of beautiful images during this time. Clients are much more relaxed if they think these first few minutes don’t really count.

Then we incorporate an activity like walking along a path, climbing a tree, playing in the park, and I photograph around that activity. Finally we just sit down to enjoy each other’s company. This not only let’s the clients know exactly how we are going to spend our time but also helps keep me in check. Because let’s face it, for most of us, once we start clicking that shutter, it is so easy to loose track of time!

Capturing Conenctions in Family Portraits Article for DPS by Memorable Jaunts 05

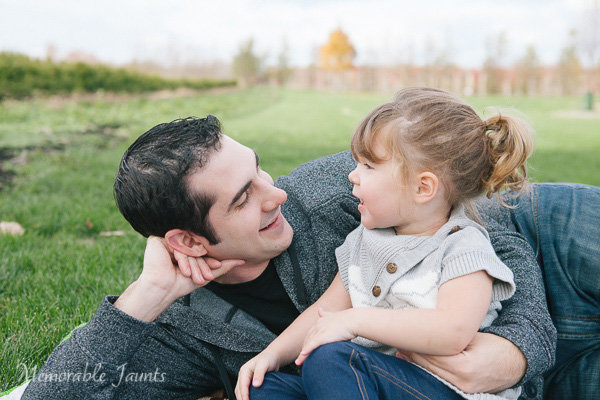
A simple conversation that was set up resulted in some magical daddy-daughter moments.

Capturing Conenctions in Family Portraits Article for DPS by Memorable Jaunts 06

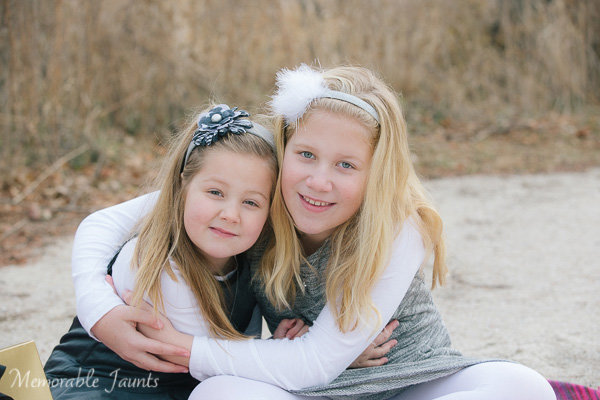
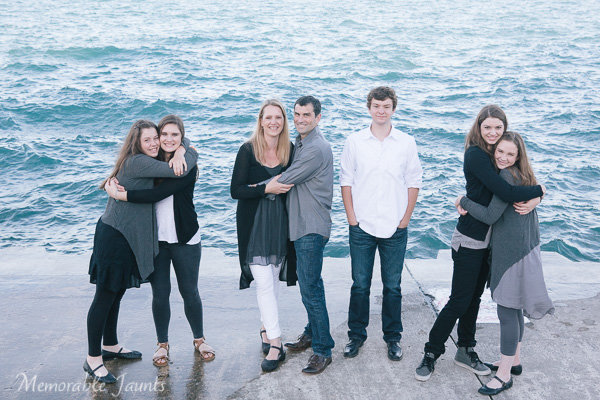
Sometimes just use hands to communicate connection among family members.


#3 – Make it fun

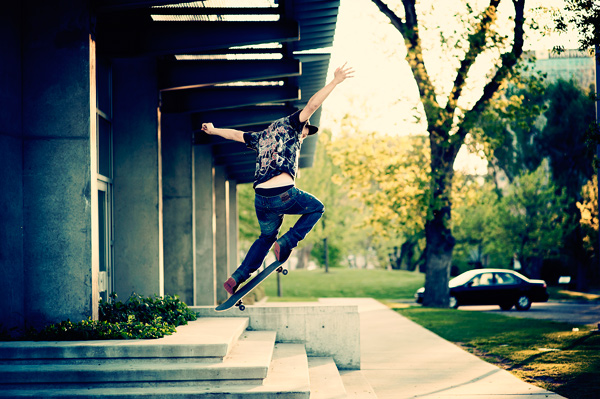
This is a critical part of capturing connections among family members during the photoshoot. For family portraits with little kids, try techniques like tickle-fest, blowing bubbles, rocking out those dance moves and other such methods to get the kids in the spirit of having fun. If kids are a little older, try cracking jokes. Bring some basic props if required and let the kids play. Photograph around the activity and capture candid moments of family interactions. If all else fails, it is okay to setup the shot and work the family into the pose. Make sure to keep clicking so that you can get some candids through out the whole process.

Capturing Conenctions in Family Portraits Article for DPS by Memorable Jaunts 07

Capturing Conenctions in Family Portraits Article for DPS by Memorable Jaunts 08

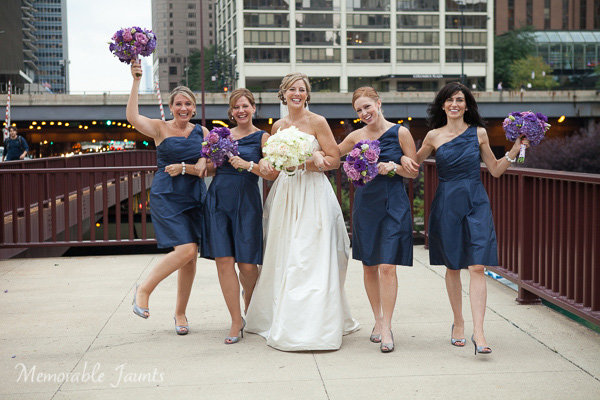
Bride + Bridesmaids + a catwalk pose = really fun images!


Remember that families that play together, stay together. Your job as a photographer is to capture these family dynamics in a fun and pleasing way. If your clients have a great time during the shoot, it is more than likely that they will love your images because they will remember the experience in a positive light.

googletag.cmd.push(function() {
tablet_slots.push( googletag.defineSlot( “/1005424/_dPSv4_tab-all-article-bottom_(300×250)”, [300, 250], “pb-ad-78623” ).addService( googletag.pubads() ) ); } );

googletag.cmd.push(function() {
mobile_slots.push( googletag.defineSlot( “/1005424/_dPSv4_mob-all-article-bottom_(300×250)”, [300, 250], “pb-ad-78158” ).addService( googletag.pubads() ) ); } );

The post 3 Tips for Capturing Connections in Family Portraits by Karthika Gupta appeared first on Digital Photography School.


Digital Photography School

 
Comments Off on 3 Tips for Capturing Connections in Family Portraits

Posted in Photography


The Importance of Capturing Gesture and Emotion in Street Photography

31 Mar
Sometimes an expression can cut you like a knife.

Sometimes an expression can cut you like a knife.

One of the most fascinating things about street photography is that it can be so hard to pinpoint the reasons why one photograph works and another does not.

A good street photograph can be sharp or it can be blurry; it can be in contrasty light or in soft and even light; it can be an energetic scene with layers of people or it can be a quiet shot with nobody in it. It gets further complicated when you start to think about the ideas, moods, and feelings that your images suggest.

Despite this lack of certainty, I believe there are two things that will always improve a candid photograph, and that is a gesture in a subject’s body or an emotion captured on a subject’s face. Both of these elements have the power to be the defining reason that a photograph is great. They can be the basis for an entire image.

When I refer to emotion, I am talking about the look in a person’s face, in their eyes, in their mouth, in their eyebrows, or even in their nose. When I refer to gesture, I am talking about a movement, a stance, an elegance, or any position of a subject’s body that is suggestive in some way.

This image would not have worked without the elegant and suggestive stance in the legs.

This image would not have worked without the elegant and suggestive stance in the legs.

It can be misunderstood that doing street photography well is solely about photographing people that seem to pop out at you in some obvious someway. Maybe this is through a unique fashion or an interesting facial feature. The result is that you see images of people deemed interesting for some reason that don’t seem to be actually doing or thinking anything – they are expressionless and neutral in stride.

Instead of photographing with only the intention of capturing interesting people, try to take this idea further and locate interesting emotions and gestures in all different types of people. I don’t believe that you can differentiate who is more worthy of a photograph based solely on someone’s facial features or clothing. Your most ‘uninteresting’ person aesthetically can give you the best photograph of your life with a single powerful expression. So many compelling moments lie within these expressions and gestures.

So the next time you’re out photographing, pay attention to what you think a person is feeling and work from there out.

NY is filled with nervous people. This image tells the story of the city more than any image of a skyscraper can.

New York is made up of nervous people. To me this image tells the story of the city more than any image of a skyscraper can.

For more street photography tips try these articles:

  • There is No Bad Light for Street Photography
  • 7 Tips for a More Anonymous Approach to Street Photography
  • How to Create Amazing Urban Landscape and Street Photography Images
  • Practical Tips To Build Your Street Photography Confidence

googletag.cmd.push(function() {
tablet_slots.push( googletag.defineSlot( “/1005424/_dPSv4_tab-all-article-bottom_(300×250)”, [300, 250], “pb-ad-78623” ).addService( googletag.pubads() ) ); } );

googletag.cmd.push(function() {
mobile_slots.push( googletag.defineSlot( “/1005424/_dPSv4_mob-all-article-bottom_(300×250)”, [300, 250], “pb-ad-78158” ).addService( googletag.pubads() ) ); } );

The post The Importance of Capturing Gesture and Emotion in Street Photography by James Maher appeared first on Digital Photography School.


Digital Photography School

 
Comments Off on The Importance of Capturing Gesture and Emotion in Street Photography

Posted in Photography


Spring Photography Tips: Capturing the Full Bloom

16 Mar

Spring is a great season to capture different images. Here are some spring photography tips to help you capture the flowers, birds and animals for this colorful season. Spring is all about color, new life and lots of daylight. For a photographer there is nothing better than having a whole new world of landscape come alive to be captured through Continue Reading

The post Spring Photography Tips: Capturing the Full Bloom appeared first on Photodoto.


Photodoto

 
Comments Off on Spring Photography Tips: Capturing the Full Bloom

Posted in Photography


Video: Capturing nature with the Canon EOS 7D Mark II

11 Nov

When we review high-end DSLRs, one of the most common requests we receive is to get them into the hands of professional photographers that work in the kinds of environments for which they were designed. That’s why when we received the Canon EOS 7D Mark II we joined up with Adam Jones, a professional wildlife and nature photographer, to see what he makes of the new camera. Click through to watch our video

Articles: Digital Photography Review (dpreview.com)

 
Comments Off on Video: Capturing nature with the Canon EOS 7D Mark II

Posted in Uncategorized


Finding the Balance: Capturing Memories Versus Making Memories

27 Oct

CM3

I am more than a little obsessed with capturing and preserving memories for my family. We have a photo wall that’s regularly updated. We print photo books, both from Instagram and of photos from my “real” camera. My girls know that twice a year, we go out to a field nearby our house, and I do a mini photo session with them. I’m the type of person who easily had 5,000 photos in the first year after my daughter was born, and that’s just what I decided to keep. So whenever I see a mom taking photos of her kids at the park, or a dad taking pictures at his son’s soccer game, I want to run over and give them a high five. I want to tell them that I think they are awesome, and that capturing those memories for their family is something priceless. They’re images that will be pulled out during graduation parties, played on wedding slideshows, and – God forbid – treasured after the loss of a loved one. It’s important work, and it is work that I feel absolutely passionate about.

But there’s a catch. If you’re anything like me, it can be easy to become so focused on capturing memories for our family and of our kids that we can sometimes tend to forget to be part of making memories WITH our family. It can be hard to find a balance, so here are a few tips that I have picked up along the way that can help you find that sweet spot of capturing those important moments, while also being present for them as well.

1. Do a dry run

CM

Halloween is coming up later this month, and my oldest daughter Lizzy wants to be Merida (from Pixar’s Brave). I absolutely want a non-phone photo of her all dressed-up in her costume. This is non-negotiable. But, I know that on the day of Halloween Lizzy will be excited (and probably a little hopped up on sugar), and trying to have a little photo session with her on that day would probably be fighting a losing battle. So, we did a dry run. We do this every year, and it works out so well for us because I can take a few photos of her to stick in the scrapbook in a no-pressure environment, and then on Halloween night, I can leave the camera at home and just be present with my family. We all get a good outcome, and in my book that’s a win. Does it really matter that the photo was taken the weekend before the event? Not to me in this instance, because the memory that I’m actually interested in capturing was the fact that at age four-and-a-half, Lizzy thought that Merida was the coolest of all the princesses, and that she wants to be strong, independent, and brave just like Merida is.

This tip is SO easy, but it has made such a big difference for our family, and it isn’t just for Halloween – this same idea would work for any occasion in which you want a photo of your kids either in a special outfit or with a particular person, opposed to during an event. For example, doing a dry run would be a good fit for capturing your daughter in her ballet outfit, taking a photo of your kids with Mom for Mother’s Day, or even to catch your kiddos in their Christmas pajamas.  As a bonus, doing a dry run lets us know if there are any costume or clothing  issues (dress is too itchy, shoes too tight, needing six cans of red hairspray instead of one) that need to be addressed before the big day as well.

2. Make good use of your camera’s creative modes

CM5

I have several friends who are currently learning how to shoot in manual. One of them was told by her mentor that the creative modes on her camera are cheating and that she should quit using them cold turkey and shoot in full manual, all the time, if she wants to be a real photographer. When she told me all this, I audibly groaned.

Here’s the deal – learning to shoot in manual is awesome and worthwhile. But as far as I’m concerned, if trying to shoot in full manual means that you spend all of your daughter’s soccer game (or birthday party) behind the camera trying to figure out appropriate settings rather than participating in the event itself, that’s a bummer. In my opinion, you would have been better off to stick your camera in Program mode or any other creative mode that you are very familiar with, take a few photos you love, and then be able to set the camera down and enjoy the rest of the time with your family. I’m not saying that you shouldn’t play around with settings or experiment at all, I’m simply saying that at special events like birthdays, weddings (in which you are not the official hired photographer), anniversaries, once-in-a-lifetime vacations, and graduations are the types of events where it is just as important to be a part of making the memories with your family as it is to be capturing those memories. If using one of your camera’s creative modes can help you in that way, go for it!

3. Don’t feel the need to photograph everything

CM2

Such an easy thing to say, and such a difficult thing to put into practice! The reality is that I don’t need to photograph all three times my daughter will go to the pumpkin patch this month between school field trips, family, and friends. The reality is that I don’t need to photograph every time my kids go out to the backyard to play. Sometimes, pulling out the camera while they play is an awesome time for me to practice and play around, but it can also really frustrate my kids if I do it too often (EVEN if I’m not asking them to, “Look here and say cheese!”).

So, for my sanity and theirs, whenever my gut instinct is to grab my camera, I try to stop and ask myself when the last time I photographed this particular event or activity was. If it has been less than a month, that’s a good cue for me to pause and consider whether or not I really need to bring the camera along that day. I really encourage all you moms and dads out there to choose a similar pause point for your family – maybe it’s weekly, maybe it’s monthly, but however frequent it is, it gives you and your kids some built in grace.

4. Get IN the picture sometimes

This is the only photo with me in it from my daughter's first birthday. It's a little blurry, but it went in the album nonetheless, and it's one of my daughter's favorite photos from the day.

This is the only photo with me in it from my daughter’s first birthday. It’s a little blurry, but it went in the album nonetheless, and it’s one of my daughter’s favorite photos from the day.

If you’re the photographer of the family, chances are that there are a lot fewer photos of you in the family album than there are of anyone else. I think this is something that we ALL struggle with. Or maybe you’ve even tried to pass the camera off to someone else and have been disappointed by the blurry, too light, too dark, weirdly cropped results. I get it, and I’ve been there.

One thing that I’ve noticed is that if I’m quickly handing the camera off to a friend or family member that isn’t familiar with photography, I get the best result if I pass the camera off in AV mode, with the aperture set at least at the number of people that will be in the photo, and the center focal point selected. So, if there will be four people in the photo, make sure the aperture is set to at least f/4 when you hand it over. I usually have my 50mm lens on my camera, so if I hand the camera over in Program mode, there’s a chance that it will elect to shoot at f/1.8 or f/2.2, which would probably not yield the best results for a photo of four or five people. If you’re shooting with a kit lens that isn’t capable of shooting that wide open, it may be just as beneficial to pass off the camera in Program mode. This is just one simple thing that will help yield better results when passing the camera to someone else, but trust me when I say that when it comes to family photos, the important thing is that you’re there, not that you’re well composed and perfectly in focus.

Do you struggle with the balance between capturing memories and making them? Do you have any other tips you’d like to share?

The post Finding the Balance: Capturing Memories Versus Making Memories by Meredith Clark appeared first on Digital Photography School.


Digital Photography School

 
Comments Off on Finding the Balance: Capturing Memories Versus Making Memories

Posted in Photography


Capturing Unenthusiastic Teens: Forget the Perfect Pose and Get Photos You Truly Love

03 Sep

guitar

I wrote an article recently sharing some tips for Capturing Busy Little Ones, and had a request for a similar article for photographing teens. Since I love photographing teens (who doesn’t??), I’m thrilled to share some tips. These aren’t tips for photographing the aspiring model teens. Those teens are usually pretty easy to photograph, they will pose for you until the cows come home, and love every minute of it. No, I’m going to let you in on some ideas for photographing those teens that aren’t so enthusiastic about being there.

Sometimes they’re super shy, and they just feel uncomfortable with the attention on them. Sometimes they are self-conscious, and think that they aren’t photogenic, so they feel awkward. Sometimes mom made them get pictures taken, and they’d rather be shoveling manure than sitting there with you and a camera. Whatever their hang-up is, these tips will help you capture them in the truest way possible, and get through it with your sanity intact. You might even get through it with a new teenage friend!

read

Get to Know Them

Here’s a newsflash: teenagers are people too. They have real feelings and ideas, and sometimes very strong opinions about what they like, and what they don’t like (if you have a teenager of your own, you didn’t need me to tell you that). Spend some time feeling them out, and finding what makes them tick. Watch for cues to let you know what they are going to be down with, and what they might roll their eyes at.

For example, you might notice that they avoid eye contact, and act very uncomfortable when you talk to them a lot. In that case, you may want to do more photos where they are looking at something in their hands, or looking away from you, and ask for eye contact only briefly. Maybe you might notice that the photo shoot was all mom’s idea, and the teen is not at all happy about it. You could diffuse the situation by addressing it directly. “Hey, it’s a bummer to get pictures taken, huh? Moms are so annoying sometimes.”  Ask them questions about their life. Pay attention to more than just the words they say; their body language will give you cues about their personality too.

fence

Don’t Force a Smile

Some kids just don’t like to smile, or they might be angry that they are getting their picture taken in the first place. Repeated requests to “smile” will only make things worse, and at best, get you a fake cheesy smile. Your goal during your session with an unenthusiastic teen, is to gain their trust. Let them know that you are on the same team, and that you aren’t there to torture them. Assure them, through your actions, that you aren’t going to try to make them into something they’re not. The easiest way to do this, if you haven’t picked up on enough cues, is just to ask them.

I might say, “Sometimes people really love jumping pictures. Is that something you would do, or is totally not your style?” They’ll usually let you know exactly how they feel about it, in words or expression, and you can quickly move on if it’s not their thing. Sometimes those that resist the smile the most may actually give you a real, genuine, smile towards the end of the session when you’re best buddies, and they trust you.

skateboard

Photograph Their Passion

Before your session together, encourage your teen subjects to bring things that are important to them. It’s fun for both of you to capture those “action” shots of things that they truly love to do. This also gives you opportunity to give them genuine praise, and puts them at ease. Help them think outside the box. If they are a writer, maybe they’d want to bring a few favorite journals to “write” in, as you photograph them. If they love to run, capture some action running shots, and then a few with them holding their track shoes, or a race medal.

Giving them something to do really helps the shy ones. If they play a musical instrument, you could take some photos of them holding it, but don’t forget those action shots too. Ask them to play something for you, or show you some tricks on their skateboard. If they’re hesitant to actually perform, remind them that the camera won’t capture mistakes, and you’re an expert at making people look really good. That might be enough to loosen them up, and let their passion show.

grass

Do the Unexpected

Most teens will expect you to ask them to smile and look at the camera. They’ll expect you to ask them to “sit there”, “stand here”, “look at me”. Sometimes just shaking things up a little will help them loosen up. You could ask them to lie down in the grass, or climb on a big rock. Maybe a silly expression, or twirling in a field, will shake it up a bit. DO be careful that you watch for cues from your subject before you ask them to do crazy things. Remember to ask them first, like I mentioned before. Some teens will do whatever you tell them to, but they will become increasingly uncomfortable if they aren’t feeling like themselves. Also, sometimes it helps to explain to them WHY you are asking them to do an unexpected thing. You could say, “The sky does amazing things with your beautiful blue eyes when you look up into it. Would you be okay lying down in the grass so we could give that photo a try?”

eyelashes

Capture Something Different

Teens like to be unique. They like to have photos that their peers think are “cool”. You might be tempted to just snap the basic head shots when you have a teenager that isn’t super easy to photograph, just to get it over with. Instead of going into safe mode, use this opportunity to capture something unique. There are lots of details that you can capture without them needing to look at you and smile. Eyelashes sweeping the cheek, hands clasped at the knees while sitting down, profile looking at a distance, details of a guitar with their face blurred in the distance, a close-up of their favorite quote in a book as they read it; those details can tell more of the story of who they are, and sometimes give them a moment to relax. If I’m not taking a photo with their face in it, I’ll tell them that they don’t even have to worry about their expression right then, because it won’t be in the picture. Sometimes they breathe a visible sigh of relief when I tell them that.

truck

Be Yourself

Teens know when you’re being fake. Don’t change your personality to try to be more like them, or to attempt to be “cool”. They’ll trust you more if your compliments are genuine. Look at them when you compliment them, don’t give a routine “you look great” while fiddling with your camera. If you’re a jokester, throw those zingers out. If you are quiet and thoughtful, let that thoughtfulness shine through. You won’t connect with every single person, but you will show your reluctant teen that you are sincere, and that means a lot to them.  Don’t treat them like little kids. They need to know that you recognize them as the almost-adults that they are. If you show them respect, they will usually show you respect right back.

Whether you are photographing a teen who loves to pose and smile, or a teen who is less than enthusiastic about the whole thing, you are lucky. What a privilege to photograph a person at a time of experiencing such beauty, daily transformation, and figuring out the world! Now, go have some fun with your camera and a great teenager. I’d love to see your teen photos in the comments if you’d like to share!

violin

The post Capturing Unenthusiastic Teens: Forget the Perfect Pose and Get Photos You Truly Love by Melinda Smith appeared first on Digital Photography School.


Digital Photography School

 
Comments Off on Capturing Unenthusiastic Teens: Forget the Perfect Pose and Get Photos You Truly Love

Posted in Photography


Capturing Better Portraits Between Poses

13 Aug

1-Mike_Bataki

If you do portraiture of any kind you are probably used to people giving one look when the camera is away from them and another when it is on them. This is the unfortunate game of the portrait photographer.

For my own work, I find that many of the most poignant portraits of people are the ones in between the actual ‘portraits’ taken during a session. These are the moments when your subject is at ease, in their element, thinking about something, and when they have the most interesting expressions.

So how do you capture these and take better portraits?

Paul Kostabi
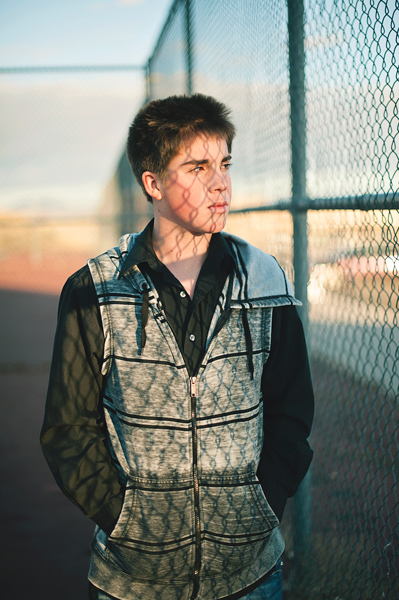
There is an important reason for taking your time to do a portrait session. It gives your subject time to get comfortable with you and the way you work. You can go through multiple backgrounds and ideas, and it is common for subjects to get over the initial portrait trepidation as the time goes on. That deer in headlights look will often (but not always) go away as they get used to how you work and what you want from them. This is the reason that you do not want to start off right away with your best idea because that will often be at their most uncomfortable moment.  Wait until they seem comfortable and in the right mindset.

Give them direction, especially at first. When people do a portrait session they want to be told what to do, even if you want them to just be natural. Talk to them about what you’re doing and what you want from them. Do you want them to give you an emotion? How are their hands and arms? How is their posture?  Where should they stand? I personally prefer to engage the subject and get them standing and interacting in a natural way, but often I will pose people at the beginning just so they feel confident that I know what I’m doing. Then over time I will start trying to get them to pose in ways that feel the most natural for them, as they get more comfortable with what they are doing.

The main key to this is that you want to get them interacting with you. Some types of shots are better posed of course, but you want them in some sort of moment. When they feel something, or think about something interesting, that feeling will shine through in the photograph.

Talk about the person’s life. Get to know them. Ask them questions and get them thinking introspectively. Tell them this is part of the process so they don’t feel uncomfortable or unsure of what to do when they are talking. This is one of the reasons that I sometimes like to interview people as part of portrait sessions. Then, within the interview, right after they have finished talking about something interesting or emotional, I will stop them and ask them to stay just like that and I will take their photo.

Portraits

Sometimes you even have to fake people out. Tell them that you are just taking a few shots to test the light and to relax for a moment. Some of my best images have been taken that way.

There are ebbs and flows in a portrait session. Sometimes it makes you feel like a boxer, bobbing and weaving with what they give you. Other times you will feel like a psychiatrist, trying to bring something out of them. If someone starts to look more and more uncomfortable, don’t keep photographing them hoping they’ll start to get better. Break them out of it by asking them to move to another location or take a break. Keep them on their toes and engaged.

All subjects are different and will react differently to you, but the key is always that you must find ways to get through to them . Then to have the wherewithal to be able to catch the moment once they finally give it to you, because often the best moments are quick and fleeting.

The post Capturing Better Portraits Between Poses by James Maher appeared first on Digital Photography School.


Digital Photography School

 
Comments Off on Capturing Better Portraits Between Poses

Posted in Photography


Capturing Busy Little Ones: Forget the Perfect Pose and Get Photos You Truly Love

29 Jul

PHOTO 1

If you have ever tried to get a three year old to sit still for longer than a nanosecond you know what a challenge it can be to get that “perfect” photo. Well, I’m going to be real here, who wants that perfect photo anyway? Okay, I know you may, but maybe I can convince you to let that go. My favorite photos are always the true ones; the ones that make you smile when you look at them, or maybe even cry a tear or two. Sure, it’s nice to get that beautiful portrait, but which photo is going to help you truly remember the fiery three year old who gave you model-in-the-making poses one minute, and wiped her muddy hands on her white shirt the next?

The first thing you have to do, if you want this experience to be fun for both you and the little one, is to let go of expectations. If you have a certain Pinterest pose in mind, and are determined not to be happy until you’ve forced your little tot into it, you’re both going to be miserable. Sure, use those ideas as a starting point, but then go with what is happening in the moment. You’ll be surprised where your wee subject might take you, and you might like the results much better than what you had in mind in the first place.

PHOTO 2 PHOTO 3

Make sure your cute little one knows that you are on the same team. Most kids have no problem being obstinate, just for fun. If she senses that you really want something from her, she may quickly decide that she wants the exact opposite. I try to take the child by the hand often, even if it’s the first time we’ve met (they usually love this) and let them feel that they are part of where we are going, and what we are doing. If she decides that she wants to put on the pretty dress shoes next, then that’s what we capture next.

PHOTO 4

Bring something for her to do. I prefer not to use props generally, but a few well-chosen, meaningful props can work wonders. This keeps her attention, plus you have the added benefit of capturing those hobbies that she is into at the moment. Let her share her passion with you. Instead of trying to pose her just so, and telling her how to hold the fishing pole, and where to look – ask her to show you “how she fishes with daddy”. Let her be the expert, and you just have your camera ready. Favorite dress-up clothes can bring out the model in lots of kids. Chairs or boxes to climb on, sit on, stand on, and peek through, can be great fun.

PHOTO 5

Try not to give too much direction or commands. Kids start to tune you out pretty quickly if all they hear are orders barked at them: “Sit here, look there, smile, smile, smile!!!”. When I can tell that my little subject is about done, I’ll just let her totally do her thing, and have my camera ready for when the moment is right. If she wants to take her shoes off and splash in the water, throwing rocks, I see a perfect opportunity to capture her in her element. This is where you might get the most genuine joy shining through.

PHOTO 6

When your mini-model is done – you are done. Quit before the meltdown, before she decides that this is the worst form of torture an adult ever created. If you didn’t get everything you hoped to get, don’t sweat it. Sometimes when I look through the photos later, I find gems that I didn’t even remember capturing. You may be pleasantly surprised by how many great images you were able to get, even with truly “busy” little tots. You’re not going to get much worth keeping if you try to force more photos. When little ones are done, they are DONE. Try to keep your photo sessions short, even if you have an agreeable little model. I usually spend less than half an hour shooting if they are under five years old.

PHOTO 7

So, next time you are lucky enough to have an adorable, energetic, little one in front of your camera, remember to relax, breathe, and have some fun. You’ll find that those real photos will be your favorites in the end, and you won’t even miss that perfectly posed portrait with every hair in place.

PHOTO 8

For more tips on photographing kids check out these:

  • Photography Hunting: Play the Waiting Game Photographing Kids
  • Cut the Cheese: 5 Tips for Photographing Kids
  • CLICK! How to Take Gorgeous Photos of Your Kids – a dPS ebook
  • How to Photograph Shy Children

The post Capturing Busy Little Ones: Forget the Perfect Pose and Get Photos You Truly Love by Melinda Smith appeared first on Digital Photography School.


Digital Photography School

 
Comments Off on Capturing Busy Little Ones: Forget the Perfect Pose and Get Photos You Truly Love

Posted in Photography


The Secret to Capturing the Best Image Quality with Your Digital Camera

16 Jul

Many modern digital cameras boast incredible ISO speeds. Where ISO 400 or 800 was the top speed in the film era, usually accompanied by grain the size of golf balls, today’s digital cameras can give you top ISOs of 6400, 12,800, 25,600 or even higher. Camera makers boast of these high speeds and use this information to increase camera sales.

Photodune 2896107 digital camera xs

Inexperienced photographers will be tempted to jack up the ISO on their new cameras, and keep it there. However, just because the feature is there doesn’t mean you should use it all the time. In fact, the best practice is to keep your camera set at its lowest ISO setting by default so you will capture the best possible image.

With experience you will learn that higher ISO settings are more appropriate when shooting sports, street photography, photojournalism, and low-light situations where you need to stop action. Low ISO images will be cleaner (no digital noise), have a wider dynamic range (more shadow and highlight details), and produce better color depth (smoother color transitions). This is a better choice for travel, landscape and portrait photography, where good detail and accurate skin tone are important.

Let’s geek out

There are two ways you can understand the effect of low versus high ISO on digital images: by reading lab test results, and by looking at sample images. DxOMark Labs is a great resource for sensor tests. It’s an independent lab that tests most current digital camera sensors and publishes the results on their web site. For sample images, you can make your own. Continue reading to learn more.

Digital noise

Run any number of digital cameras through a battery of image quality tests and you’ll see a clear pattern emerge. At the lowest ISO setting, the signal to noise ratio, expressed in decibels (dB), is highest. That’s good, it indicates the lowest digital noise. As you increase ISO, the dB level decreases. The lower the dB level, the higher the digital noise, which degrades the image.

By lmvphoto

Example: If a Canon EOS 70D has a 41dB result at ISO 100, 30dB at ISO 1600 and around 17dB at its top ISO of 25,600, the image with the higher dB will have less noise than an image with a 17dB measurement.

Note: keep in mind that most images when viewed at the recommended distance will appear clean as low down as 30dB.

Dynamic range

Similarly, the dynamic range of a digital camera is widest at its lowest ISO. Depending on the camera, that range can be anywhere from 9 stops to around 14. Typically, with DSLRs, it is around 11-12 stops. In carefully exposed high-contrast scenes, both highlights and shadows will have more detail at low ISOs than at high speeds. In test result charts, dynamic range starts to decrease in more of a curve than a straight line; typically the first few ISO settings are acceptable, but once you pass ISO 800 or 1600 (depending on the camera) the range becomes more limited.

Dynamic range is acceptable at 10 stops or higher. Below that number shadows and/or highlights will become blocked up, especially in contrasty scenes.

Tip: RAW image capture is best for dynamic range. You can use the shadow and highlight sliders in your RAW image editor to reveal even more details in both the shadows and highlights, effectively stretching your camera’s dynamic range. The better your image’s dynamic range is, the more information you can reveal this way.

Tone and color

You may have noticed that some images that show the sky or other areas that should have smooth, subtle transitions, instead show subtle strips of color as the shading changes. This is called banding, and that’s what happens when the tonal range is limited. This is usually an artifact from compressing an image too much when preparing it for web use, but it happens in a more subtle form in photos that come straight out of the camera and, as above, this phenomenon is more apparent in high ISO images, but is imperceptible in low ISO photos.

A camera’s ability to capture subtle changes in tone and color (both expressed in bits) is best at its lowest ISO, and decreases steadily throughout the ISO range. Most DSLRs have a 21-24-bit maximum for color sensitivity, and it can degrade to half of that. Tonal range usually peaks at around 8-10 bit.

Testing your camera in the real world

Enough of the geeky stuff, let’s look at some pictures to see how this plays out in the real world. While the images here were shot with a Canon 7D, you can run your own tests:

  • With the camera on Program mode, take a sequence of photos
  • Start with your lowest ISO and work your way up to the highest
  • Mount the camera on a tripod to avoid shake, which is an unwanted additional variable, and turn off the anti-shake feature (Image Stabilization IS on Canon or VR on Nikon)
  • Shoot both landscapes and people pictures so you can see the effects ISO has on each
  • Make prints at your largest print size and see if you notice the distance at a typical viewing distance

Here are two image comparisons at a range of ISO settings.

Portraits show the difference

The effect of changing ISO is most obvious when you photograph people. In this example, the model was photographed on a sunny day while holding a reflector, against a low-key (darker) background. As the ISO setting is raised, the effect on her skin becomes obvious. Camera: Canon 7D with Canon 85mm f/1.8 lens.

ISO100 portrait full 600

ISO 100

ISO100 portrait detail 600

ISO 100

At ISO 100 (above), skin tone is accurate, with good contrast. In the 100% detail shot, there’s good, natural falloff of light, showing a wide range of tonality and good detail in the darker areas. You can especially see this in the eyes.

ISO800 portrait full 600

ISO 800

ISO800 portrait detail 600

ISO 800

At ISO 800 there is a subtle increase in contrast, an indicator that dynamic range has decreased slightly. Noise has not yet become apparent in the detail photo.

ISO1600 portrait full 600

ISO 1600

ISO1600 portrait detail 600

ISO 1600

By ISO 1600 there is a little more contrast, but again, it is a subtle change. However, you can see the noise in the blow-up, and the smooth gradation from light to shadow is starting to become a bit rougher, indicating that the tone has degraded.

ISO3200 portrait full 600

ISO 3200

ISO3200 portrait detail 600

ISO 3200

ISO 3200, at screen resolution it may still be hard to see the change when you compare this image to the one shot at ISO 100, but by ISO 3200 there is a pronounced decrease in highlight and shadow detail, and rougher color and light transitions.

ISO6400 portrait full 600

ISO 6400

ISO6400 portrait detail 600

ISO 6400

By ISO 6400, the Canon 7D’s highest resolution setting, even at screen resolution a difference is visible. If you look in the details of the shirt and hair, you can see that shadows are more blocked up. A quick glance at the 100% detail is all you need to see the graininess and reduced range of color and tone.

Bonus pointer: The advantage of shooting RAW

ISO100 portrait optimized 600b

Optimized

You can increase an image’s dynamic range by using your RAW image editor’s shadow and highlights sliders, which reveals more information in the highlights, and especially in the shadows. Compare this version of the ISO image with the ones above and notice how much more detail is visible in the shadows, thanks to tweaks done in the RAW image editor.

Landscape subtleties

A scenic lookout in western New Jersey, shot in the middle of the day, at ISO 100, 800, and 3200 with a Canon 7D and Canon 24-70mm f/2.8L II USM zoom lens. While the dynamic range, tone and color only show minor differences here, the level of noise deteriorates at the faster speeds. After looking at these examples, you may wonder why anyone in their right mind would want to shoot above ISO 100 on a bright, sunny day. All samples are straight out of the camera.

ISO100 landscape sooc 600

ISO 100

At ISO 100, this is the full scene.

ISO100 landscape detail 600

ISO 100

In this detail of a 100% blow-up of the ISO 100 image, there is no apparent digital noise, as expected.

ISO800 landscape sooc 600

ISO 800

ISO800 landscape detail 600

ISO 800

At ISO 800, digital noise has started to become apparent in this 100% blow-up detail.

ISO3200 landscape sooc 600

ISO 3200

ISO3200 landscape detail 600

ISO 3200

By ISO 3200, digital noise is obvious, and the overall image quality has deteriorated. The graininess covers up the loss of color quality and tonality somewhat.

ISO100 landscape raw 600

While the samples above are unadulterated JPEGs, what happens if you try to coax more detail out of a shot in RAW? You get more detail in the shadows and highlights. Compare this shot to the original and you’ll see more detail in the sky (highlights) and in the bark and branches of the tree (shadows) on the right.

Bottom line

The bottom line? There may be times when you must pump up your ISO settings, and it’s nice to know that you have that option. But when you are shooting in daylight under normal shooting conditions, you will bring back higher quality images when you shoot at, or near, your camera’s lowest ISO settings.

The post The Secret to Capturing the Best Image Quality with Your Digital Camera by Mason Resnick appeared first on Digital Photography School.


Digital Photography School

 
Comments Off on The Secret to Capturing the Best Image Quality with Your Digital Camera

Posted in Photography


SmugMug Films: Capturing what you can’t control

01 Apr

Screen_Shot_2014-03-31_at_11.15.37_AM.png

The latest video from SmugMug Films’ ongoing behind-the-lens series is a look at water photographer Sarah Lee. She uses the unpredictability of nature and creates art that captures the interplay of people, water and light. SmugMug’s videos aim to show people who follow their passions in photography. They plan to release a new clip every two weeks. See video

News: Digital Photography Review (dpreview.com)

 
Comments Off on SmugMug Films: Capturing what you can’t control

Posted in Uncategorized