RSS
 

Posts Tagged ‘Built’

Video: Cinema5D shares more exclusive BTS video of the Fujifilm GFX 100 being built, launched

22 Jun

Earlier this month, we shared with you the first part of Cinema5D’s two-part documentary that shares a behind-the-scenes look at how Fujifilm is bringing its medium-format GFX 100 mirrorless camera to life. Now, Cinema5D has dropped part two, which further dives into the intricacies of creating, testing and launching the world’s first 100-megapixel mirrorless camera.

The 12-minute video shares exclusive footage of how Fujifilm meticulously pieces together GFX 100 units inside its Taiwa, Japan factory, which was opened in September 2018 and designed specifically for the creation of Fujifilm GFX and X-series cameras and lenses. The video also shares a collection of footage captured with a pre-production model of the GFX 100 and takes a behind-the-scenes look at what it took to get the official launch presentation in order.

If you haven’t seen part one, be sure to go watch it first. If you’ve experienced part one, press play on this video and take in the experience.

Articles: Digital Photography Review (dpreview.com)

 
Comments Off on Video: Cinema5D shares more exclusive BTS video of the Fujifilm GFX 100 being built, launched

Posted in Uncategorized


Lens Rentals calls the Z7 the ‘best built mirrorless full-frame camera we’ve taken apart’

31 Oct

In case you were wondering what’s packed inside the Nikon Z7 and how well constructed it is, Lens Rentals has kindly cracked one open so you don’t have to, as promised in its EOS R teardown.

The camera equipment rental and repair business, famous for its camera teardowns, has documented the process of taking the Z7 apart, showing pictures of the weather sealing, electronic design, internal structure, and component layout of Nikon’s flagship full-frame mirrorless camera.

Roger Cicala, the man behind the teardown and founder of Lens Rentals, praises the extensive weathersealing protection from ingress of dust and moisture in the camera’s construction, and says the joints in the body are overlapped, screwed together and then covered by adhesive and rubber. He’s also impressed with the neatness of the electronics and the way the boards are packed into the body without leaving much space between them, especially with the in-body image stabilization.

“[The IBIS] noticeably more compact, has less travel than the Sony system, and seems more robust,” says Cicala. “From our focus on repair, we see this as a good thing – early Sony IBIS systems would sometimes move enough to jam and/or break. (To be clear, that’s not an issue with newer Sony cameras. I point this out just to show that the manufacturers have been watching each other.)”

Cicala’s only concerns seem to be that the diopter adjustment knob might not stand being pulled out and pushed in multiple times in rental models, and that the tripod screw isn’t as deep as some, so runs the slight risk of a long thread busting through it.

In conclusion Cicala says “I’m impressed by the very solid construction of the chassis and IBIS unit. I’m impressed with the neat, modern engineering of the electrical connections […] I’m not here to tell you which camera is best to use or has the best performance. I’m just here to say this is a damn well-built camera, the best built mirrorless full-frame camera we’ve taken apart.”

Go to the full teardown on Lens Rental’s website to see more photos and a more thorough take with all his comments. And remember, don’t try this at home!

Articles: Digital Photography Review (dpreview.com)

 
Comments Off on Lens Rentals calls the Z7 the ‘best built mirrorless full-frame camera we’ve taken apart’

Posted in Uncategorized


A photographer has designed and built the first E-Mount film camera

26 Apr

Photographer Alexander Gee has created something pretty cool: the first (to our knowledge) Sony E-Mount 35mm film camera. It’s called LEX, and when it’s finally finished, Gee intends to make the camera’s design files open source so that anybody with a little bit of interest, soldering skill, and access to a 3D printer can built their own from scratch.

The LEX is the result of more than a year of design work, 3D printing, and trial & error, which Gee actually documented on the LEX Optical website. Development began around the shutter mechanism from a Sony a7, and continued from there until he had achieved a working prototype that has been improved upon and tidied up to create the version you see below:

$ (document).ready(function() { SampleGalleryV2({“containerId”:”embeddedSampleGallery_3532342693″,”galleryId”:”3532342693″,”isEmbeddedWidget”:true,”selectedImageIndex”:0,”isMobile”:false}) });

The current prototype isn’t quite as pretty as the mockups, but it’s not far off either. And more importantly: it works. There are already sample photos posted on the LEX Optical website and more (we assume) to come as development continues. The website doesn’t offer any specific timetable, but Gee does say that he might crowdfund “a small batch of devices before opening the design files up.”

To see sample images, keep an eye on the project’s status, or jump onboard if and when Gee crowdfunds that batch of pre-built LEX cameras mentioned above, head over to the LEX Optical website or follow the project on Facebook and Instagram.

Articles: Digital Photography Review (dpreview.com)

 
Comments Off on A photographer has designed and built the first E-Mount film camera

Posted in Uncategorized


The new JPEG XS image format was built for streaming 4K and VR content

18 Apr

There’s a new video compression standard on the block. It’s called JPEG XS, and while it’s made by the same team behind the ubiquitous JPEG image format, it serves a much different purpose.

JPEG XS was announced earlier this week by the Joint Photographic Experts Group (JPEG), headed by École Polytechnique Fédérale De Lausanne (EPFL) professor Touradj Ebrahimi. The mission of this new format isn’t to replace the standard JPEG image standard, but to supplement it by being a low-energy standard for streaming video content via Wi-Fi and 5G cellular networks.

According to JPEG, the mission of JPEG XS is to, “stream the files instead of storing them in smartphones or other devices with limited memory.” JPEG specifically mentions the benefits of JPEG XS for video captured and streamed by “drones and self-driving cars—technologies where long latency represents a danger for humans.”

Photo by Samuel Schwendener

What’s interesting is that JPEG isn’t trying to shrink the file size with JPEG XS. In fact, quite the opposite. Whereas the JPEG standard has a compression ratio of about 10:1, JPEG XS comes out to a 6:1 ratio.

“For the first time in the history of image coding, we are compressing less in order to better preserve quality, and we are making the process faster while using less energy,” said Professor Ebrahimi in the EPFL announcement post. “We want to be smarter in how we do things. The idea is to use less resources and use them more wisely. This is a real paradigm shift.”

JPEG XS is open source, as well as HDR-compatible, making it a prime candidate for content creators around the world. Already, the European Space Agency (ESA) has expressed interest in the standard. JPEG XS would serve as a perfect format for sending high-quality images and video from space probes down to Earth while not using up any unnecessary energy.

According to Ebrahimi, JPEG XS will first be put to use in “professional applications like movie editing, space imagery and professional-grade cameras.” Consumer electronics will like VR, AR, wireless connections between media devices, and self-driving cars will follow. The only remaining hurdle in the path of JPEG XS is the final approval from the International Organization for Standardization (ISO). Once it gets approved, it should be rolling into products and services shortly.

Articles: Digital Photography Review (dpreview.com)

 
Comments Off on The new JPEG XS image format was built for streaming 4K and VR content

Posted in Uncategorized


MindShift’s new ‘Exposure’ messenger bags are built to handle Mother Nature’s worst

12 Apr

MindShift Gear, the sister company of ThinkTank Photo, has released its all new Exposure messenger bag lineup. Like its backpacks, the MindShift Exposure lineup is made with outdoor photographers in mind, complete with water-repellent material and a rugged bottom.

The Exposure shoulder bags come in two versions: the Exposure 13 and the Exposure 15. As the names suggest, the Exposure 13 can fit a 13-inch laptop, as well as one ungripped DSLR with a 24–70mm F2.8 attached and 2–3 extra lenses depending on your setup. Moving up, the Exposure 15 can fit a 15-inch laptop, as well as one ungripped DSLR with a 70–200mm F2.8 lens attached and 2–5 extra lenses depending on the glass you’re packing. Both bags can also hold up to a 10-inch tablet inside a zippered pocket.

As for looks, the bags are available in two color schemes: Black and Solar Flare, the latter of which is essentially gunmetal grey with orange accents.

Here’s a closer look:

$ (document).ready(function() { SampleGalleryV2({“containerId”:”embeddedSampleGallery_1110310960″,”galleryId”:”1110310960″,”isEmbeddedWidget”:true,”selectedImageIndex”:0,”isMobile”:false}) });

Looks and capacity aren’t the Exposure lineup’s selling point though; these bags were purpose built to handle inclement weather.

The Exposure 13 and 15 were constructed out of durable water-repellant (DWR) fabric and lined with a polyurethane coating, with integrated waterproof sailcloth panels for increased protection from the elements. And for those times when you need to set the bag down, MindShift has constructed the bottom of the bag with Tarpaulin, a strong waterproof fabric that shouldn’t have a problem keeping your gear dry. Finally, if the weather gets even more demanding, there’s also an included rain cover.

The Exposure 13 and 15 messenger bags are available now for $ 160 and $ 170, respectively. To learn more, visit the MindShift Gear website.

Press Release

MindShift Gear’s “Exposure” Shoulder Bags Offer the Ultimate in Durability and Weather Protection for Outdoor Photographers

SANTA ROSA, CALIF – There is no such thing as bad weather, only bad gear. MindShift Gear’s new Exposure shoulder bags are storm-resistant carrying solutions for the active photographer in virtually any outdoor environment. Built with high performance waterproof sailcloth panels, strategically placed storm flaps, water-repellent DWR fabric, and a sturdy Tarpaulin bottom; the Exposure protects camera gear from the elements and withstands the rigors of adventure photography. And, with its cross-body stabilizer strap, the Exposure moves with you while you’re active or is removable for more causal environments. A waterproof rain cover is included when it’s time to put the camera away and hunker down.

Exposure shoulder bags come in two models, the Exposure 13 and the Exposure 15, and in two colors, Black and Solar Flare. The Exposure 13 fits a 13” laptop; the Exposure 15 fits 15” laptops. A 10” tablet fits in zippered pocket.

?“We believe it is time for outdoor photographers to have the optimal level of weather protection and durability in a shoulder bag,” said Doug Murdoch, MindShift Gear’s CEO and lead designer. “The X-Pac™ technology we employed is a four-layer laminated waterproof sailcloth material. It is abrasion resistant and the C6DWR coating meets current environmental concerns and regulations. Many of the large outdoor companies are using this level of DWR coating now.”

ADDITIONAL FEATURES AND BENEFITS

• YKK® AquaGuard® weather-resistant zippered front pocket sized for today’s large phones

• Weather Wings on flap for additional weather protection

• Anodized aluminum hardware is lightweight and resists corrosion

• Tripod attachment straps included

• Comfortably padded neoprene shoulder strap with easy adjustment

• Luggage handle pass-through

• Customizable divider layout for stacking short lenses

• Internal pockets hold batteries, card wallets, and other accessories

• Ultra-Stretch mesh water-bottle pocket fits most 1 liter water bottles and secures with an elastic cord-lock

• Deluxe organizer located in wide zippered pocket

• Gusseted pockets allow for large objects

• Compatible with the MindShift Filter Nest, Filter Hive, and Switch Case (sold separately)

• Compatible with the Peak Design Capture Clip and the SpiderLight Camera Holster

• Seam-sealed rain cover included

MATERIALS

Exterior: For superior water-resistance, all exterior fabric has a durable water-repellant (DWR) coating, plus the underside of the fabric has a polyurethane coating. It also has YKK® AquaGuard® (weather resistant) zippers, high-performance Sailcloth, 420D velocity nylon, 600D polyester, heavy-duty nylon tarpaulin, UltraMesh pockets, anodized aluminum hardware, nylon webbing, 3-ply bonded nylon thread.

Interior: PE board reinforced removable closed-cell foam dividers, 200D liner, PU backed nylex liner, 2x PU coated nylon 190T seam-sealed taffeta rain cover, 3-ply bonded nylon thread.

SPECIFICATIONS

Exposure 13

Exterior Dimensions: 16.1” W x 10.6” H x 6.5” D (41 x 27 x 16.5 cm)

Interior Camera Compartment: 13.8” W x 9.1” H x 4.9” D (35 x 23 x 12.5 cm)

Laptop Pocket: 13.3” W x 9.6” H x 1” D (34 x 24.5 x 2.5 cm)

Tablet Pocket: 11.8” W x 4.7” H x 0.8” D (30 x 12 x 2 cm)

Phone Pocket: 4.7” W x 6.7” H (12 x 17 cm)

Weight: 2.6 lbs. (1.2 kg) – With all accessories included

Exposure 15

Exterior Dimensions: 17.3” W x 12.2” H x 7.1” D (44 x 31 x 18 cm)

Interior Camera Compartment: 15.7” W x 10.4” H x 5.1” D (40 x 26.5 x 13 cm)

Laptop Pocket: 15.4” W x 11” H x 1.2” D (39 x 28 x 3 cm)

Tablet Pocket: 13.4” W x 9.4” H x 0.8” D (34 x 24 x 2 cm)

Phone Pocket: 5.5” W x 6.7” H (14 x 17 cm)

Weight: 3.0 lbs. (1.4 kg) – With all accessories included

Articles: Digital Photography Review (dpreview.com)

 
Comments Off on MindShift’s new ‘Exposure’ messenger bags are built to handle Mother Nature’s worst

Posted in Uncategorized


How I built a large-format (8×10) video camera

07 Feb

Large format, for me, has always been the dream. Not for its ridiculously high resolutions—the 12 megapixels of my Sony a7S are more than plenty for me—but for its unique depth rendering. There is an enchanting quality to the depth of field produced by a huge chunk of vintage 8×10 glass that is near impossible to replicate on a smaller format, mostly thanks to the ridiculous equivalent aperture that would be required.

My longing for large format without the expense and and hassle of chemicals led me to build a pretty unique camera rig with very promising results.

The camera works by projecting an image from a large format lens (an Industar-37) onto a large matte white screen. The projected image is then captured with an off-axis camera (a Sony a7S) and wide-angle lens (an Irix 15mm F2.4). The 15mm is shifted upwards (using a Kipon shift adapter), which allows it to record a centered image of the screen with none of the perspective distortions that would come from simply pointing the camera up, and still be well out of the way of the light path.

I am not really sure if it should be called a ‘large format camera’ or a ‘large format adapter’—is format determined by the size of the imaging plane, or that of the sensor? Usually those are one and the same but not with a rig like this—but either way it records real large format images and just from my first results, I think they look fantastic.

$ (document).ready(function() { SampleGalleryV2({“containerId”:”embeddedSampleGallery_7879104719″,”galleryId”:”7879104719″,”isEmbeddedWidget”:true,”selectedImageIndex”:0,”isMobile”:false}) });

Beyond just digitizing large format photography, the rig opens up the really exciting possibility of large format video. It is absolutely incredible to see the large format image come to life, and it is something the world hasn’t really seen before. Dynamic range and resolution are only limited by the camera you put inside, and I am just using a consumer camera. I can’t wait to see how the rig performs with cinema gear.

The main downside of of the the design is sensitivity. The process of re-imaging loses about 6 stops of light, so an ISO 100 shot outside the camera becomes an ISO 6400 one in the rig. Thankfully, many modern cameras have excess sensitivity for bright environments so the camera works great in well-lit scenes, although it definitely struggles without proper lighting like the indoor scenes in the video above.

Large format ‘reimaging’ rigs have been made before (quite successfully by Gonzalo Ezcurra), but with one key difference: they project onto ground glass and record the image from behind, instead of reflecting the image off a diffuse surface. This method works, but ground glass is never a truly perfect diffusing filter, so there will always be a hotspot at the center of the image and some grain pattern introduced as well. The hotspot can be reduced—really, just enlarged so it looks more like a vignette and less like a spotlight—by moving the camera further back with a longer lens, but then the already huge setup just gets longer and less practical.

My version has the advantage of a folded optical path: since the image is bounced off a screen instead of going through a ground glass, the rig is about half the size of these other experimental reprojection cameras. It is still rather unwieldy, but this size difference is enough to allow shoulder mounting and really improve usability to the point being a genuinely useful tool instead of just a novelty.

I am currently working on an updated v2 version with a host of improvements, but I have really just skimmed the surface of the new possibilities with a camera like this.


Zev Hoover is an 18 year old photographer/videographer based in Natick, MA. His work has been widely featured, ranging from the Boston Globe to a BBC mini-documentary, and he has received awards including the Flickr 20-under-20 Award and 500px ‘innovation’ contest winner. You can find more of his work on his website: zev.tv

Articles: Digital Photography Review (dpreview.com)

 
Comments Off on How I built a large-format (8×10) video camera

Posted in Uncategorized


How one photographer built the ‘ultimate’ PC for Adobe Lightroom

26 Jan
The finished product, a computer designed to be as fast as possible in Adobe Lightroom.

When professional designer and hobbyist photographer Paul Stamatiou got back from his last trip to New Zealand and set about culling and editing his photos from the trip, he quickly realized that his 2-year-old 5K iMac was just not keeping up with Adobe Lightroom Classic CC and the high-megapixel Raw files he was importing. In fact, he spent over a year of spare time editing the 848GB worth of 42-megapixel RAW photos and 4K videos to create the resulting nine photosets.

And so Paul decided it was time to build his own computer. Specifically, his goal was to:

Build a fast, yet quiet and understated desktop PC with a healthy overclock aimed at improving my photo workflow while giving me the ability to upgrade parts of it later on.

Fortunately for all of us, he chronicled the entire journey to this goal in a massive, 32,000-word blog post filled with footnotes and links to all the parts and incredibly detailed descriptions of exactly why he picked the parts he did, how he put them together, and how he optimized it all once it was set up.

This is, I’m comfortable saying, the most comprehensive custom photo-editing computer build breakdown I have ever seen. If you’re at all considering building your own editing PC, bookmark it. If not, we spoke to Paul yesterday and have penned a bit of a TL;DR summary below.

For the Mac lovers out there, note that Paul did consider building a dual-boot Hackintosh, but ultimately decided the annoyances wouldn’t be worth the time. His experience in the past—”randomly have bluetooth stop working and have days where the machine just won’t boot,” he told me over email—just wasn’t worth risking. It was time to build a PC.

This beautiful piece of technology is what he came up with:

$ (document).ready(function() { SampleGalleryV2({“containerId”:”embeddedSampleGallery_4984509525″,”galleryId”:”4984509525″,”isEmbeddedWidget”:true,”selectedImageIndex”:0,”isMobile”:false}) });

What’s impressive about this computer isn’t its sheer power. The parts he used (full list here) won’t make it the most beastly desktop PC you’ve heard of this week… or maybe even today. What makes it impressive is how Paul designed the PC so that it would run Lightroom’s Develop module and his personal workflow as efficiently as possible.

As Paul explains in his post:

As you know, there are a few main levers that affect the majority of a computer’s performance: storage, RAM, GPU and CPU. To be more precise: storage throughput, RAM size, RAM speed as well as the number of CPU cores and clock speed. In the case of Lightroom, CPU plays the most important role in overall application performance and to a much lesser extent GPU.

[…]

For my needs Lightroom loves the highest clock speed it can get, as opposed to a ton of lower clocked cores.

So rather than spend money on a chip with a crazy number of cores, all of which would be running at a lower clock speed, he picked a 6-core Intel i7 8700K, then had it ‘delidded’ and set it up to be water-cooled so he could overclock it safely to 5.2GHz on all cores.

We spoke to Paul about the build yesterday, and he was kind enough to offer this little summary for those of you who aren’t keen on reading all 32,000 words of the full article:

I was most concerned with performance in the Develop module of Lightroom as opposed to other actions that are more efficient with multiple cores and are not GPU accelerated. For me that meant that instead of opting for a machine with a ton of cores at a lower clock, I’d do better for Develop module tasks with fewer cores that were clocked higher, much higher.

With this build I wasn’t particularly concerned about cost and decided to make a full-blown project out of it (along with a high-end graphics card I could use to try out some 4K gaming and Oculus Rift as a side benefit—I’m a designer by day and lots of my friends have begun designing for VR so I was curious to learn more about it). I definitely recognize the build is overkill in many aspects, including having the CPU delidded and running an aggressive overclock.

While the build definitely sped up the Develop actions I was used to—it’s important to note that much of the future improvement will need to come from Adobe optimizing their software even more. […] Until Classic CC gets some performance optimization updates, I think my next step will be integrating something like Photo Mechanic into my culling workflow to do some of that outside of Lightroom so I end up importing, generating previews and managing fewer shots inside Lightroom itself.

And that last bit, really, is the disappointing epilogue to what is a really fun computer build: even with a great system built specifically to run Lightroom well, any major performance improvements will have to come from the Adobe side of the equation. Not that it doesn’t make us want to build something similar…

The final build cost Paul $ 5,931, including all of the peripherals and accessories—$ 1,500 27-inch Dell UltraSharp 4K display, Logitec mouse, Apple Magic keyboard, Bose bluetooth speaker, and Vesa monitor mounting arm.

For a full parts list, or if you want to dive deep into how this computer was built and optimized, check out Paul’s massive article at this link. But don’t be surprised if you find yourself sourcing parts for your own custom-built photo editing PC once you’re done.


All photos by Paul Stamatiou and used with permission.

Articles: Digital Photography Review (dpreview.com)

 
Comments Off on How one photographer built the ‘ultimate’ PC for Adobe Lightroom

Posted in Uncategorized


DIY: How I built my own super macro rig for less than $250

14 Sep

Last year I bought a macro lens for the summer—just a normal one with 1x magnification—and I immediately found myself in a beautiful and mesmerizing world of minuscule flowers and bugs. I found that in macro photography, you don’t have to travel to beautiful places to take beautiful photos—you can just walk around in your backyard, and discover a whole new world. Also, you don’t have to wake up at 4 AM to catch the golden hour…

This year, however, I decided I wanted to take things to the next level. I wanted a super macro lens with 2x or more in magnification, so that I could take closeup portraits of ants and bees. I started Googling around for the right lenses and soon discovered that there are only a couple of them out there. The best known is the Canon MP-E 65, but it costs north of $ 1,000. There is also a 2x macro lens from Venus Optics, but it’s still $ 400 for the lens alone… and then you need to add some kind of flash setup.

I thought this was way too much money to just try super macro photography, so I decided to look around for cheaper solutions.

That was when I discovered this excellent article on a Swedish site. It describes how you can build your own super macro rig with cheap parts off Amazon or eBay. This build works with any Canon EF compatible camera, meaning most Canon cameras and also mirrorless cameras with adapters. After some browsing, I was able to find all the parts on Amazon and I ordered them.

The rig is based around the Canon 40mm f2.8 STM lens. This lens is excellent for this purpose as it is very cheap, small, light, sharp and has beautiful bokeh (possibly more beautiful than the Canon MP-E 65). For this particular setup, the lens is mounted reversed to get more magnification using a Meike reverse adapter. The adapter, in turn, has a cable that allows you to keep control over aperture despite having the lens reversed.

You will need a 52-58 mm step-up ring to fit the Canon 40mm with the Meike reverse adapter. Then, if you put an extension tube before the Meike adapter, you have a super macro lens! Just add more extension tubes for more magnification.

I have found that 36mm of extension tube is my sweet spot—it gives me 2.3x magnification, meaning that the subject will be 2.3x bigger on the sensor than it is in real life. So a bug that is 10mm tall will cover all 24mm of a full frame sensor.

The rest of the parts are the flash and parts needed to mount it in a way that puts it as close to the subject as possible. You should also try to make some kind of diffuser, as shown in the video.

All essential parts:

  • Canon EF 40mm f/2.8 STM Pancake Lens (around $ 50 used)
  • Meike reverse adapter (around $ 55)
  • Meike MK-300 Flash (around $ 33)
  • Vello CB-600 Straight Flash Bracket (around $ 10)
  • Articulating arm, 7” (around $ 14)
  • Fotga Extension tubes for Canon EF (around $ 40)
  • Vello TTL-Off-Camera Flash Cord for Canon EOS 0.5 m (around $ 20)
  • Goja 52-58MM Step-Up Adapter Ring (around $ 8)

In total (if you buy the Canon lens used): $ 230 USD

See the video up top for detailed instructions, and scroll down to see some sample photos. The parts can be put together in a few minutes, as shown in the video.

$ (document).ready(function() { SampleGalleryV2({“containerId”:”embeddedSampleGallery_2626695394″,”galleryId”:”2626695394″,”isEmbeddedWidget”:true,”standalone”:false,”selectedImageIndex”:0,”startInCommentsView”:false,”isMobile”:false}) });

Lastly, a small tip for shooting super macro insect shots with this rig: use a slow shutter speed, such as 1/40s. That way you will get a lot of color and light in your photo, making it more interesting and beautiful. Don’t worry about sharpness, the flash is a lot faster than 1/40, and it will make sure to freeze your subject in most situations.


Micael Widell is a photography enthusiast based in Stockholm, Sweden. He loves macro and nature photography, and runs a YouTube channel around these subjects. You can also find him on Instagram and 500px.

Articles: Digital Photography Review (dpreview.com)

 
Comments Off on DIY: How I built my own super macro rig for less than $250

Posted in Uncategorized


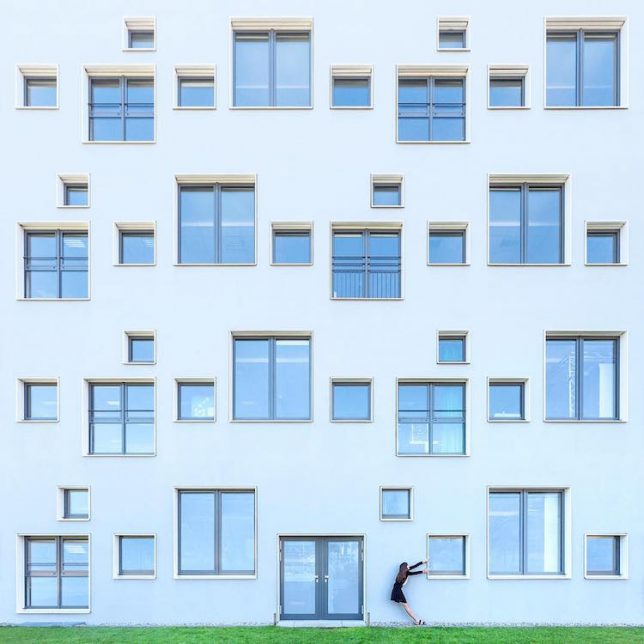
Buildings as Backdrops: Playful Photography Humanizes Built Environments

16 Jul

[ By WebUrbanist in Art & Photography & Video. ]

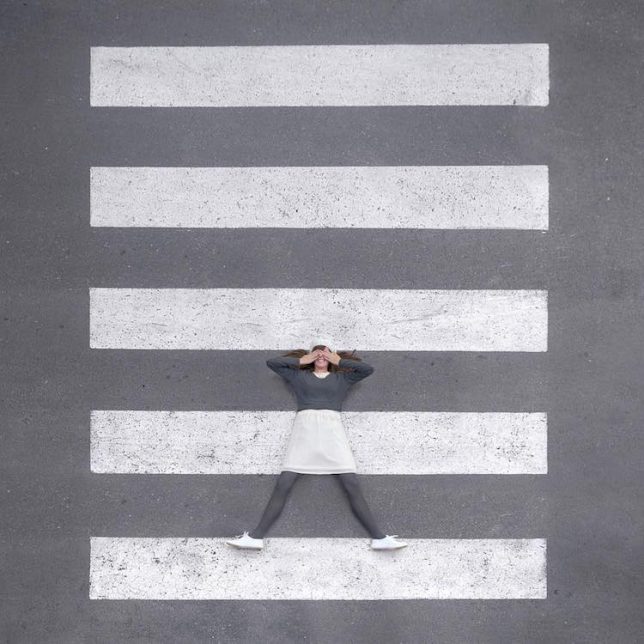
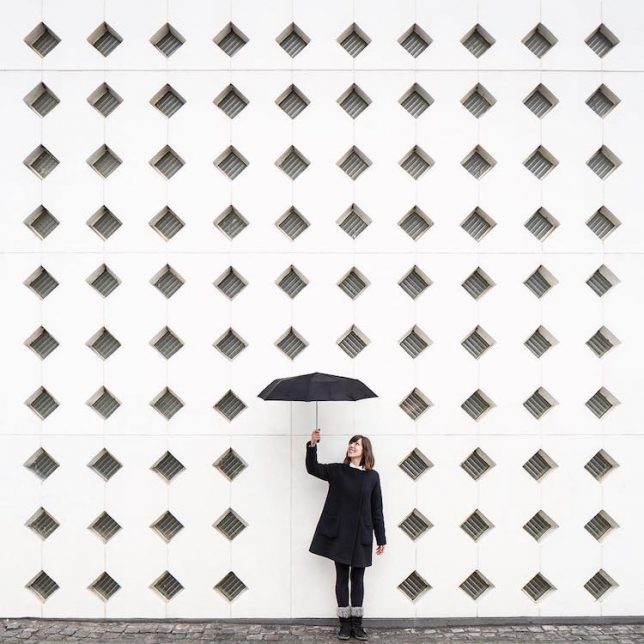
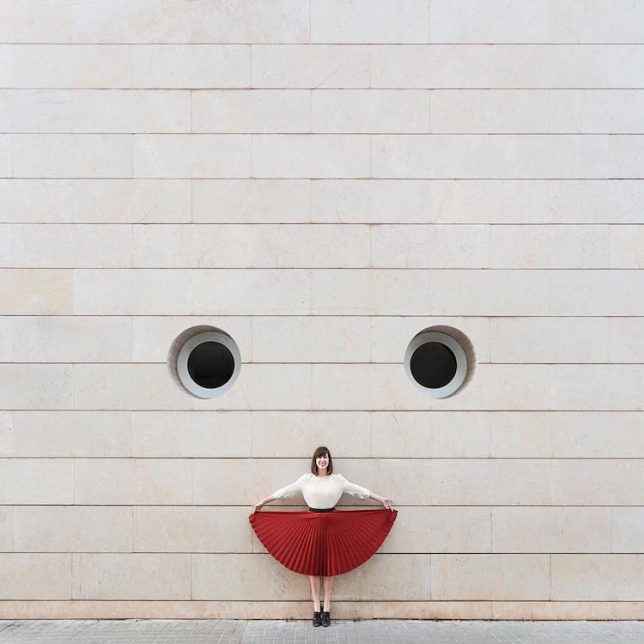
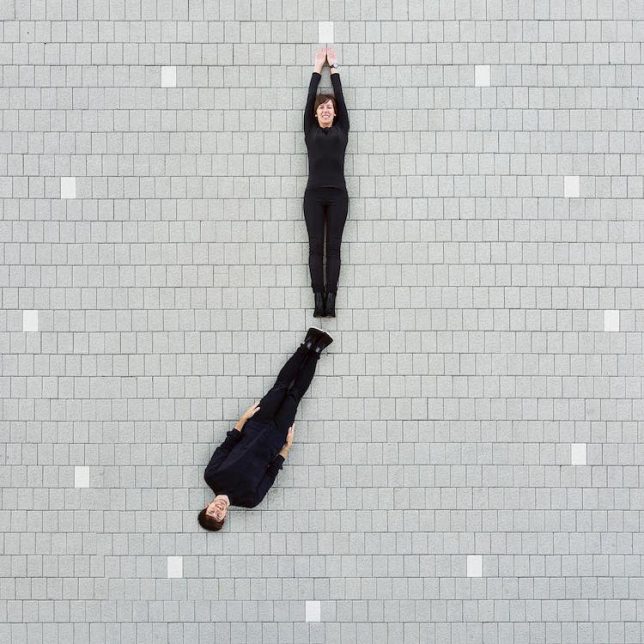
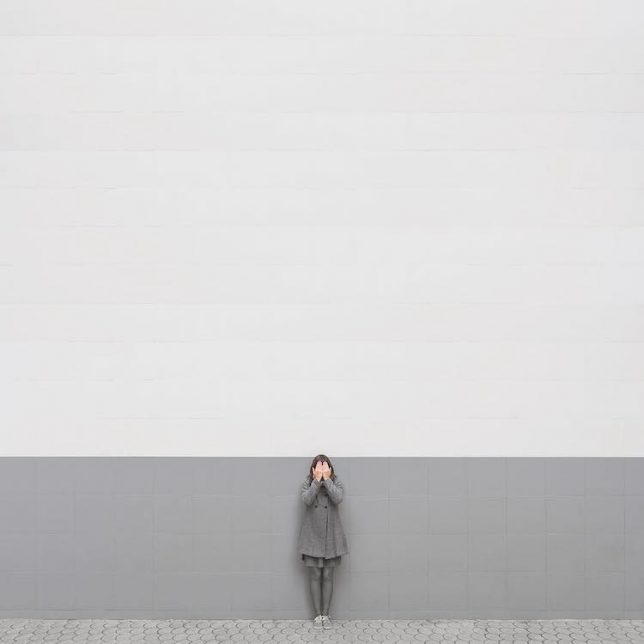
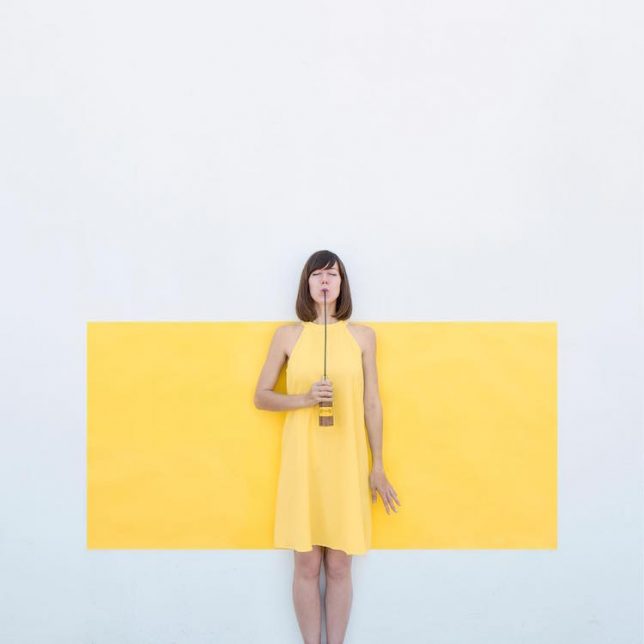
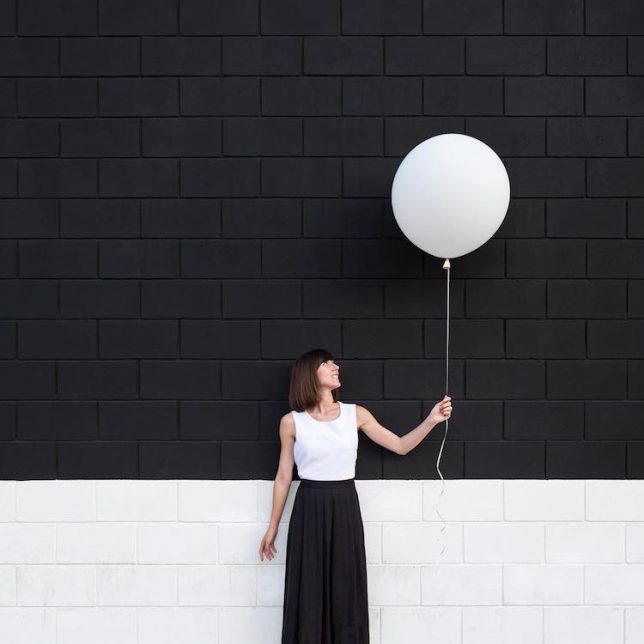
People often play a small part in architectural photography and renderings – not so in this series of travel photographs, which would lovely but otherwise unremarkable without clever human inclusions.

Anna Devis and Daniel Rueda are a design-minded couple, one an illustrator and the other an architect. And they have taken their creative sensibilities on the road, filling in the implicit gaps in built environments across Europe.

The settings represent a range of architectural styles, often bold yet minimalist except for that added element of interactivity, sometimes using props or costumes to turn facades into theatrical sets.

In Denmark, Spain, Italy and other countries they visit, Devis and Rueda take that old idea of a person seeming to ‘tip’ the Leaning Tower of Pisa to new heights. Pixelated surface suddenly become other things, like clocks or canvasses, apparently manipulated by the duo.

That critical personal element that animates each scene also serves as a foil for showing off the patterns and colors of each context, subverting but also highlighting design details. In some cases, added manipulations warp their surroundings as well. For more on their work, follow the pair’s journeys via their Instagram accounts.

Share on Facebook


[ By WebUrbanist in Art & Photography & Video. ]

[ WebUrbanist | Archives | Galleries | Privacy | TOS ]


WebUrbanist

 
Comments Off on Buildings as Backdrops: Playful Photography Humanizes Built Environments

Posted in Creativity


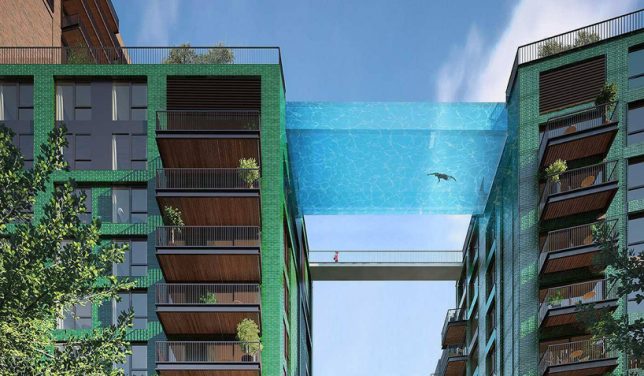
Modern Homes for Mermaids: 12 Houses Built Around Swimming Pools

30 May

[ By SA Rogers in Architecture & Houses & Residential. ]

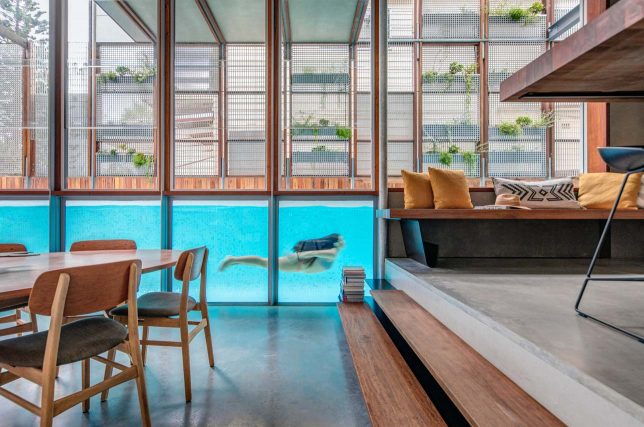
Like oversized aquariums made for humans, these glass-walled swimming pools put bathers on display and making splashing in shimmering waters the defining feature of the homes, hotels and apartment blocks they’re built into. Transparent sides or floors allow them to peer into adjacent interiors or look down onto landscapes, blurring the lines between these watery worlds and the spaces around them.

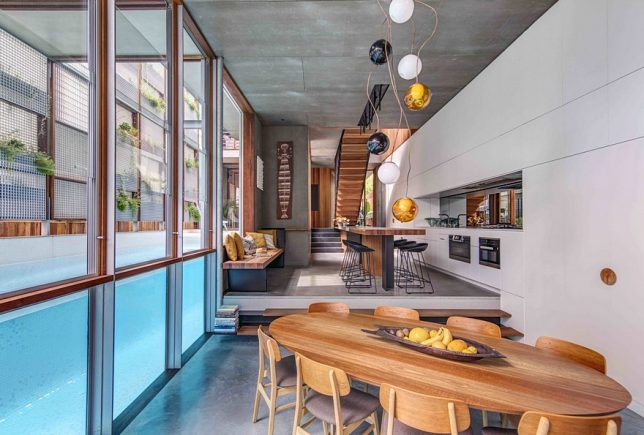
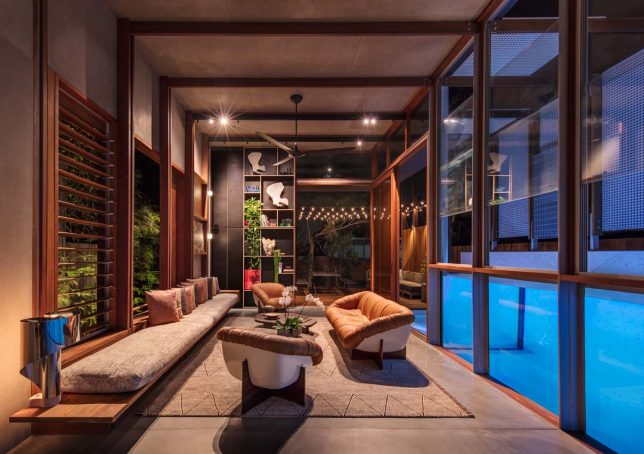
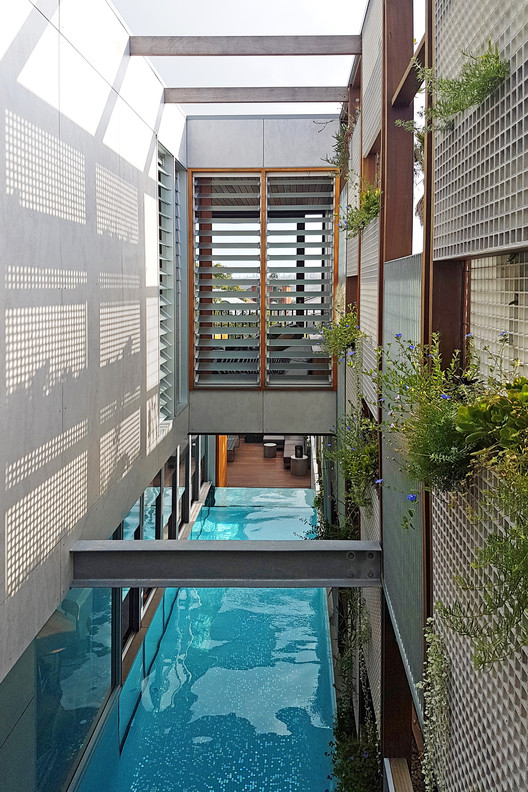
North Bondi by CplusC Architects

A glass-walled lap pool runs along the edge of the North Bondi residence by CplusC Architects, hemmed in on the other side by an envelope-like perforated privacy screen that protects the home from noise and the eyes of neighbors.

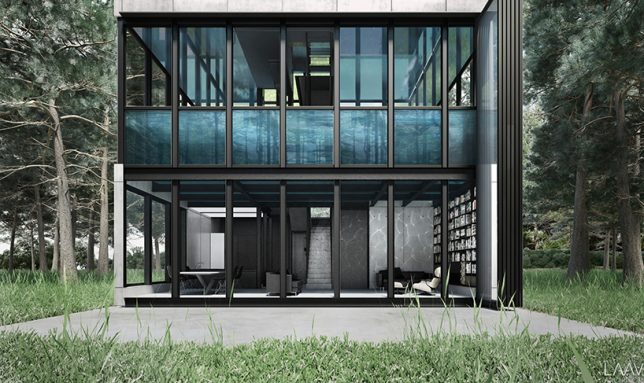
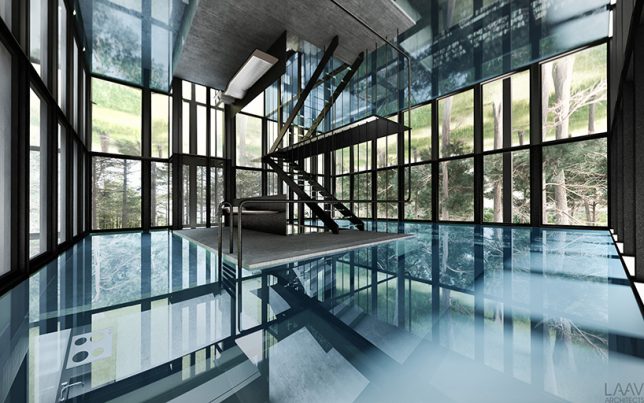
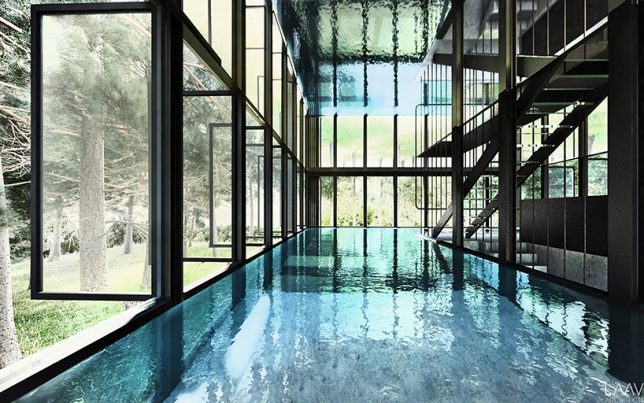
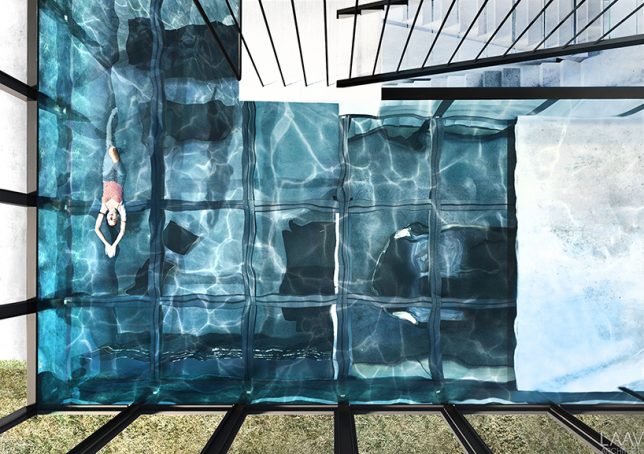
Villa Clessidra by LAAV Architects

Villa Clessidra by LAAV Architects is a modern three-story vacation home in the forest for relaxing getaways, sliced right through the middle by a swimming pool occupying a ‘transparent zone’ with glass walls, floors and ceilings so it’s visible from all around.

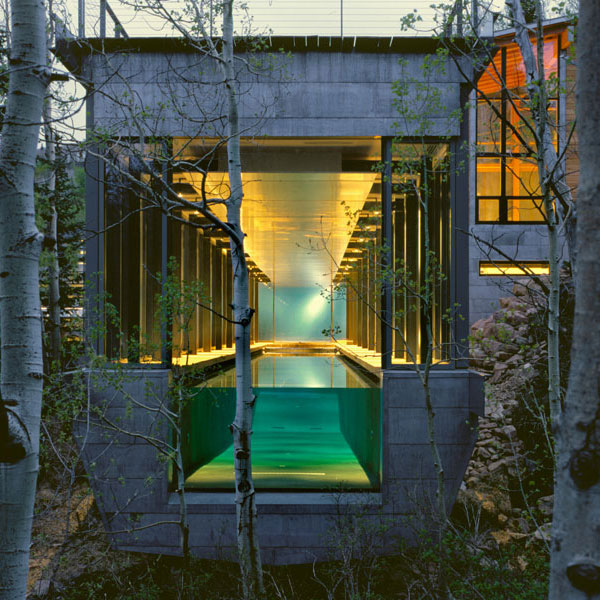
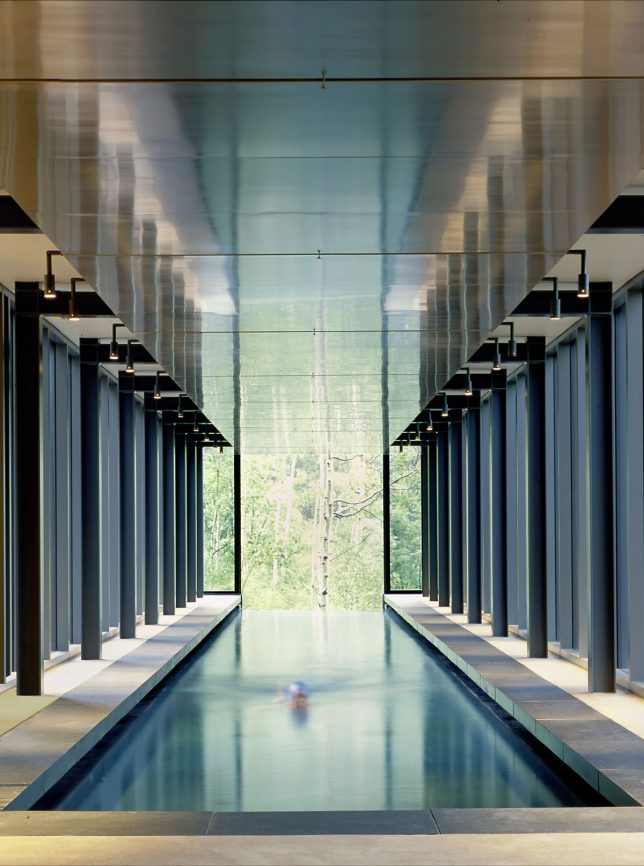
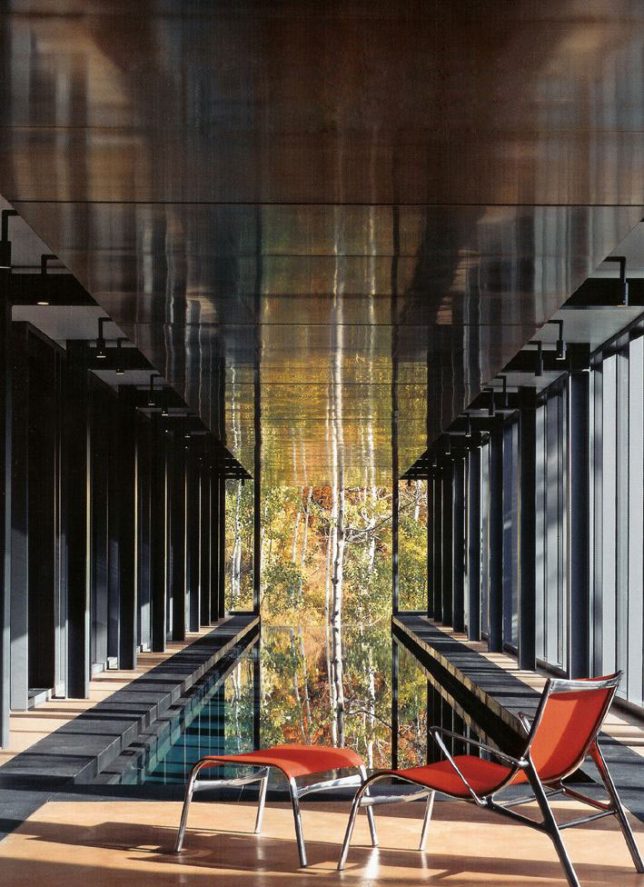
Farrar Residence by Peter Bohlin and Greg Mottola

A glass-ended infinity pool overlooks an aspen-covered mountainside in Park City, Utah, extending out over a tumbling stream. “The rhythm of columns that flank the pool progressively tightens, creating a false perspective,” says Bohlin Cywinski Jackson architects. “The line between interior and exterior is blurred. The relation to earth, sky and the materials of the house shifts with the changes in light and season on the mountain.”

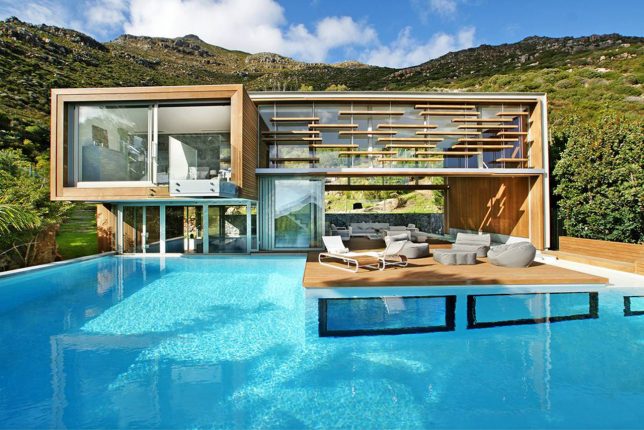
Spa House by Metropolis Design

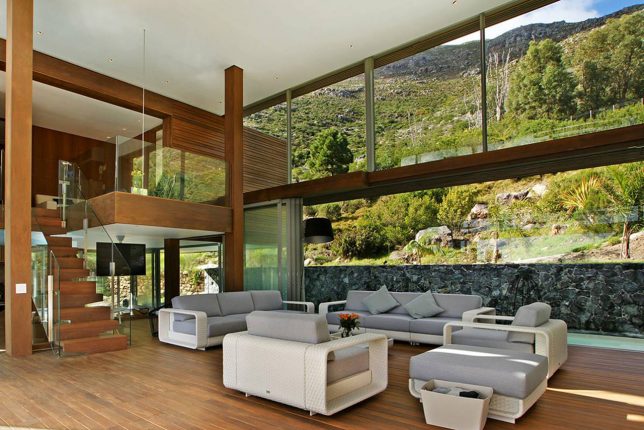
Not only do operable glass walls slide all the way open to welcome a lap pool into this home’s interior – as well as the larger connected swimming pool out back – but glass windows in the water connect the pools to the home’s lowest level, creating the feel of being in a submarine.

Next Page – Click Below to Read More:
Modern Homes For Mermaids 12 Houses Built Around Swimming Pools

Share on Facebook


[ By SA Rogers in Architecture & Houses & Residential. ]

[ WebUrbanist | Archives | Galleries | Privacy | TOS ]


WebUrbanist

 
Comments Off on Modern Homes for Mermaids: 12 Houses Built Around Swimming Pools

Posted in Creativity