RSS
 

Posts Tagged ‘Build’

How to Build Relationships in Photography

01 Sep

What’s the most important thing to maintain in any business? Confidence, market knowledge, technology? Sure, keep any one of those at the top of your list. But there’s also something else. Perhaps the most sought after and powerful asset you can ever hope to have when it comes to making yourself successful is – strong relationships.

JD Hancock

By JD Hancock

That’s right, good relationships with those who you are seeking to do business with is the most most crucial aspect of any type of business venture. This is especially true when you become a photographer. No matter what kind: landscape, commercial, portrait, wedding, lunar, Martian. It is the cultivation of relationships with other people that will make or break you in this industry – and make no mistake, it is an industry.

Gentlemen and ladies, before we begin, take a moment to congratulate yourselves on an accomplishment that is at the very least extraordinary. We, as photographers, are the jockeys of an art that has been melded with a science. We possess the skill to take time, hold it in our sometimes shaky hands, and pass it on to our clients to be forever held. We don’t just capture light, or moments, or events – we capture memory. Memories, that without us there to tend, would surely shift out of sight, and out of mind.
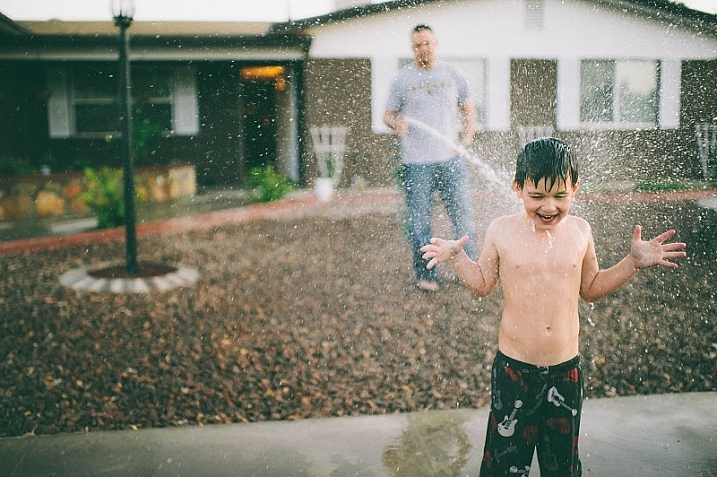
Amanda Tipton

By amanda tipton

Now, back to what we’re here to discuss – why relationships are so important in photography. Thank goodness you’ve found this article on dPS if you don’t already know the answer to that question. The purpose of this writing is not to give you any ironclad formula of success. In fact, I feel I should remind you that you will most likely meet with more failure than success if you plan to become a photographer of any magnitude. It is our failures that teach us, that enable us to move forward, not our successes. So, if you’ve got the guts, keep reading.

We are nothing on our own. True, I often make photographs that I never show (or intend) to show to anyone other than myself. I keep some places where I go to photograph secret, and return to them sometimes even without a camera. This is all well and good. Honestly, I usually advise such exercises because they often spark more creative thinking down the road. In this case, what I mean is that we cannot realistically be successful as photographers without the support of other people.

Portrait photographers need subjects to sit. Wedding photographers need brides and grooms to direct their cameras. Epic landscapes pass from dawn to dusk in extraordinary light without a camera to capture them and put them on walls. What I’m saying here is that we cannot reach our own potential, both artistically and commercially, without some type of audience.

Thomas Hawk

By Thomas Hawk

How do you get that audience? Well, that’s the difficult part of the photographic equation. The answer, fortunately, is fairly simple. Here are four steps to ensure you are doing your best to cultivate and maintain the relationships that will help you build and grow a career as a photographer.

STEP ONE: Be nice

When dealing with the public, and make no mistake, you WILL inherently have to deal the public, be sure to ALWAYS be polite. Even in the face of the most insulting and anger conjuring client – you must always be polite. Smile, be firm, and always remain true to yourself and your personal policies, but always be polite. This is where most new (and even experienced) photographers run into trouble. Overt politeness can go a long way in maintaining and building relationships with those who are willing to exchange money for your services. Learn to accept that you will have conflict, and that not everyone will like or appreciate your work. When you come to the realization that you don’t need to meet hostility with more hostility, you will be able to remain much calmer and relaxed. Remember, you are better at everything when you are relaxed and focused.

Roberlan Borges

By Roberlan Borges

STEP TWO: Be humble

Just as you will certainly run into those people who test your patience and civility, you will also encounter those who think you hung the moon. The bride who just can’t stop complimenting your work, or the Facebook friend that likes and comments on every single image you post. This is an unexpected accompaniment of being a well-liked photo maker. Train yourself to take a compliment with grace. Say thank you and don’t play out the situation more than it needs to be played. The key here is to stay humble. Of course, in the back of your mind you know when you make an exceptional image, or pull off a one in a million shot. That doesn’t mean that you have to be boastful or even worse, brag about your prowess. Take it from me, no client wants to deal with a photographer who is pompous or inflexible – well, most clients.

Tanakawho

By tanakawho

STEP THREE: Be honest

Hopefully, we all follow some ethical subscription be it in life or in our careers. As photographers, we must know what we can and cannot do, and in turn be honest about those facts. If your client requests you to cover a wedding and you don’t physically have the speedlights or lens to cover it, be honest. Never promise what you you can’t deliver, and most definitely don’t accept compensation for a job you’re not qualified to perform. Granted, the only way to learn is by doing. By all means, stretch your photographic legs and push the boundaries of your skills. However, always be mindful of your weaknesses, and when it comes down to it, you’ll know your limitations. Always be sure to let your employer be aware of what you can do. It will go a long way in building a lasting business relationship. That leads us to step four.

Thinkpublic

By thinkpublic

STEP FOUR: Be willing to step outside your comfort zone

This is perhaps the most difficult part to decipher as a fresh new photographer. When do you draw the line between expanding your skill and having no idea about what you’re doing? This can be troubling, yes. It can also be absolutely exciting. The bottom line, be willing to step outside of your comfort zone for your client. If it’s something you simply cannot do (and you will know), refer to the honesty principle above. That being said, most likely you are your own worst critic, and you can do more than you ever dreamed. So don’t be afraid to try something new. Your client will remember you as the photographer who was honest with them about your abilities, and communicated your willingness to try something unique.
The Shopping Sherpa

By The Shopping Sherpa

It’s tough to start out in a new field. It’s extremely tough to be a new photo maker in a market saturated with photographers. Get the best gear you can afford. Learn as much as you can. Do as much as you can. At the same time, don’t forget that you are a provider in an industry that caters to the wants of others. As such, your success is dependant on the good graces of those with whom you do business. Be honest, humble, and competent. Be bold, but never be reckless. Build relationships with your clients based on mutual understanding, and I guarantee you be a more satisfied, and dare I say a more successful photographer.

googletag.cmd.push(function() {
tablet_slots.push( googletag.defineSlot( “/1005424/_dPSv4_tab-all-article-bottom_(300×250)”, [300, 250], “pb-ad-78623” ).addService( googletag.pubads() ) ); } );

googletag.cmd.push(function() {
mobile_slots.push( googletag.defineSlot( “/1005424/_dPSv4_mob-all-article-bottom_(300×250)”, [300, 250], “pb-ad-78158” ).addService( googletag.pubads() ) ); } );

The post How to Build Relationships in Photography by Adam Welch appeared first on Digital Photography School.


Digital Photography School

 
Comments Off on How to Build Relationships in Photography

Posted in Photography


MotoCMS 3.0: The Best Option to Build a Photo Portfolio Website

18 Jul

Photography and web design are going hand in hand. A good-looking website requires stylish photo content to attract audience, as well as to compete with other web pages. And as photography gains more popularity year by year, this rivalry becomes much fiercer. So, acquiring good looking, attractive, creatively different photo web page is a high-priority task for every photographer who Continue Reading

The post MotoCMS 3.0: The Best Option to Build a Photo Portfolio Website appeared first on Photodoto.


Photodoto

 
Comments Off on MotoCMS 3.0: The Best Option to Build a Photo Portfolio Website

Posted in Photography


How to Build an Impressive Photography Portfolio from Scratch

08 Jun

Creating a photography portfolio can be a daunting experience. As a rule, photographers have basic or no knowledge of design at all. Moreover, creating a site with the pictures in focus can be a tricky task.

Being a photographer makes you a wearer of many hats. It’s critically important to have an online portfolio, so you can easily show your potential clients what you’re capable of. If you have no idea how to start, where to take pictures, how many of them you need for a site, and how to make your portfolio work for you, these tips may help you get started:

What is a portfolio? How Many Shots Do You Need?

A portfolio is an opportunity for you to present your work, but it’s important to consider why you need this portfolio. Are you going to use it to apply for a job? Do you want to use it to start your own photography business? Or do you just want to exhibit your work?

1

Portfolio by Marcus Smith

Also, you have to think about how many images you need to upload to your site. The layout usually looks good with a small amount of images uploaded on the home page. There should be a balance between the number of images you’re going to show and the negative spaces you leave between, or around them. If you have many images, consider separating them into categories.

When it comes to the home page, there should be something to pull the user in, then let them decide what to look at next. Value visitors’ time – they don’t need to see all the photos you took since 2008. Rather, display only your top-notch work and then show the potential client more photos if they request it. Don’t overwhelm them with pictures. Put the best pictures on the first page to stand out, and leave your other good work on the second page.

Think of Your Audience

Once you have decided why you need an online portfolio, you need to consider the audience you’re going to reach. Think of the reaction you want to evoke – do you want your clients to be touched, surprised or even shocked by your pictures?

2

Portfolio by Brian Ingram

If you’re aiming to specialize in wedding or portrait photography, it’s logical to include these shots first in your portfolio. There is no need to demonstrate your awesome landscape shots if you are aiming to attract clients for portrait photography. Keep your target audience in mind and do your best to create a site that solves their problems and provides answers to their queries, rather than simply bragging about your versatility as a photographer.

Brainstorm Project Ideas

If you have no idea what photos to upload to your portfolio, or you have no photos yet, you need to do some brainstorming. You’re building your portfolio in hopes of getting more clients, meaning that you don’t have hundreds of photo models knocking at your door. Start photographing your friends for free, shoot some events for charity, or even ask a popular wedding photographer from your area to hire you as an assistant, just to get wedding photos for your portfolio.

3

Portfolio by  Brett Arthur

There are many options when trying to find new project ideas: you can start a 365-day or 52-week project which will give you a great chance to practice as a photographer. This could lead to you shooting a subject that you never thought about and may result in a set of great shots for your online portfolio. Look at the work of other photographers to get new ideas for shooting, analyze their portfolios and try to make your own.

Present Like a Pro

Your portfolio website is nothing but a presentation, so when creating it, refer to some iconic presenters like Steve Jobs for better results. For instance, here are three presentation techniques from Apple’s founder you can apply to your own portfolio:

1. Make your passion prominent.

Jobs was passionate about every product he was involved in, his enthusiasm was obvious to anyone who heard him speak. There are few things in the world that spread as quickly as enthusiasm. Connect with your website visitors on an emotional level by showing your passion for what you do. This can be achieved through things like personal notes or comments on every image in your portfolio, a funny story told on your About page, or a set of behind-the-scenes photos shown in your main image slider or website background.

2. Build a clean, visual interface.

In his iPhone presentation, Steve Jobs used 19 words compared to the average 40 words used in a PowerPoint presentation. Make your website less wordy by utilizing a spacious preview page layout, big image sliders, and clean typography. Your business is about good pictures after all, not about writing essays. Make sure your site looks great on mobile devices and tablets, as that’s where the lion’s share of your visits will come from.

4

Defrozo

Among some free website builders that enable you to create beautiful, mobile-friendly websites are Defrozo and Koken. The first one is actually a multi-tool marketing platform that includes a full-fledged photography CRM (customer relation management), shopping-cart system, and other photo business tools in addition to a website builder. While Defrozo is a hosted service offering automatic updates and user support, Koken needs to be deployed on your own server.

3. Inspire your audience.

Every presentation by Steve Jobs was a great source of inspiration and education for his listeners. Images are a powerful medium that you, as a photographer, take advantage of by default. On your website, create a combination of images and words that would make people want to act and achieve something.

5

Portfolio by Estevez & Belloso

For instance, using a famous quote next to a photo, or telling a story behind one of your projects, can do the job of creating an extra layer of interactivity and inspire your web viewers.

Tell a story

Who doesn’t like a good story? Storytelling has become a powerful marketing engine lately and there’s no reason you can’t leverage it for your own business.

When uploading photos to your portfolio, you must describe them. A description is even more important than a title. Remember, when people see your photos for the first time, they want to know who or what is displayed in the image, what the context is behind the image. Maybe there were some interesting facts connected to the image. Feel free to share this with your audience.

Ask for Feedback

Getting your portfolio in front of other eyes can help you pick up on the omissions and bugs in the site’s design and performance. Submit the preview link to some forums and photography communities you’re a member of, or simply let your friends and family play around the site. Create a quick survey for them to fill in after they have checked it out – keep it short and to the point, asking only questions you plan to act on, and include some open-ended questions at the end.

Have different options

You need to decide what kind of portfolio you need: digital or paper? In the past, everything was on paper.

6

Portfolio by Michael David Adams

While a digital portfolio seems the ultimate solution these days, it’s also good to have a print portfolio for meetings with clients. Digital cannot fully replace print because of the special feel a printed photograph gives to the viewer. Consider creating your printed portfolio in a smaller format for portability purposes.

A beautifully designed image slideshow with emotional music added to it is also an essential element to your portfolio package. Along with a responsive website and personalized client photo galleries, it will make your digital showcase toolkit work at full power.

Over to You

What are your top techniques of building your photography portfolio? Share your proven tips with fellow photographers in the comments below.

googletag.cmd.push(function() {
tablet_slots.push( googletag.defineSlot( “/1005424/_dPSv4_tab-all-article-bottom_(300×250)”, [300, 250], “pb-ad-78623” ).addService( googletag.pubads() ) ); } );

googletag.cmd.push(function() {
mobile_slots.push( googletag.defineSlot( “/1005424/_dPSv4_mob-all-article-bottom_(300×250)”, [300, 250], “pb-ad-78158” ).addService( googletag.pubads() ) ); } );

The post How to Build an Impressive Photography Portfolio from Scratch by Nancy Young appeared first on Digital Photography School.


Digital Photography School

 
Comments Off on How to Build an Impressive Photography Portfolio from Scratch

Posted in Photography


Mobile Village: Seattle Teens Build Micro-Homes for Homeless

13 May

[ By WebUrbanist in Architecture & Houses & Residential. ]

seattle shack designs

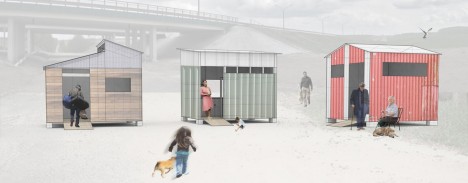
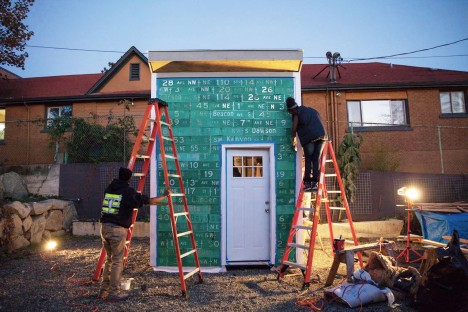
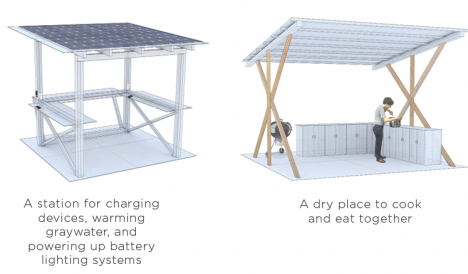
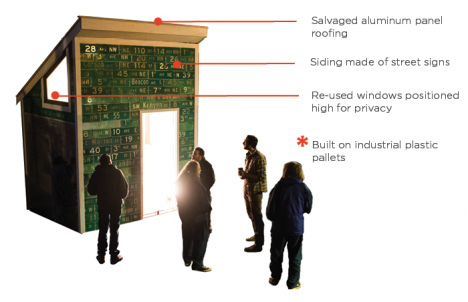
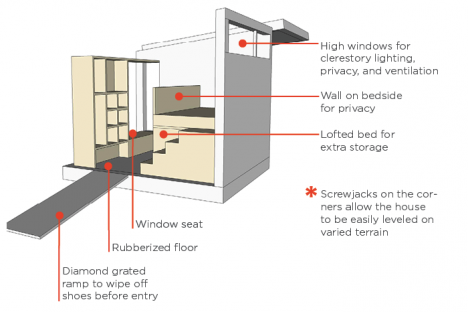
Serving a nomadic homeless shanty town known as Nickelsville, the Impossible City project involves a group of a teenagers who are creating not just tiny houses but also solar power stations, composting latrines and a community kitchen.

seattle homeless build

seattle homeless camp help

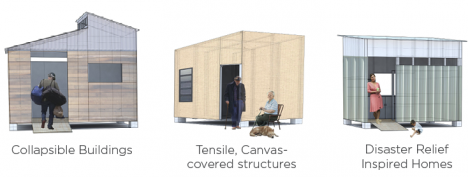
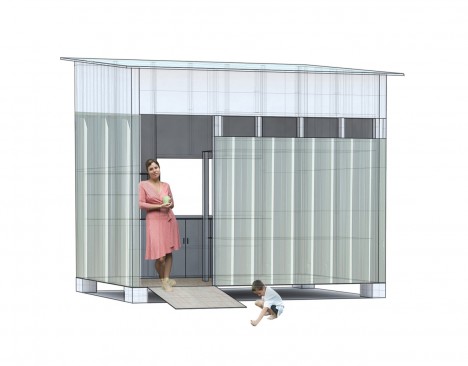
Nickelsville moves from place to place, going where land is available since its residents cannot afford to pay rents. Slowly but surely, thanks to this project, its rickety collection of tarps, tents and donated Home Depot shacks are being replaced by modest but functional shelters.

homes for homeless

seattle homeless home

The challenge is non-trivial – the structures need to be somewhat easy to disassemble and move while also meeting city code and basic safety standards. Backing the youth builders is Sawhorse Revolution, an area non-profit that teaches kids how to use tools and build structures.

seattle homeless project

seattle homeless shelter

While many institutions, organizations and governments take an all-or-nothing approach, trying and generally failing to get the homeless off the streets, this project attempts to take on the actual situation on the ground, bridging the gap between sleeping on the streets and having a permanent residence.

Share on Facebook


[ By WebUrbanist in Architecture & Houses & Residential. ]

[ WebUrbanist | Archives | Galleries | Privacy | TOS ]


WebUrbanist

 
Comments Off on Mobile Village: Seattle Teens Build Micro-Homes for Homeless

Posted in Creativity


Itty City Blocks: Build Your Own 3D-Printed Physical SimCity

15 Feb

[ By WebUrbanist in Art & Sculpture & Craft. ]

itty city modular blocks

At a scale of 1/1,000, these beautiful little models bring famous buildings to life but can also be fitted into whole blocks or assembled to form micro-metropolises.

itty block plug play

itty modular block shapeways

itty model roadway ramps

Car fanatics got Micromachines, but architecture enthusiasts have few options for collecting their favorite models – sure, there are great LEGO architecture sets, but those are more about the building process than the aesthetic of the finished product.

itty nyc city block

itty city simcity block

itty model lit up

Available on Shapeways, IttyBlox features everything from stereotypical New York townhouses to world-renowned works of architecture, including a lovely rendition of the Guggenheim at a thousandth the size of the original. Illumination from below and different thicknesses of materials above combine to allow these neat buildings to light up at night as well.

itty bitty guggenheim museum

itty city block park

Parks, highways and on/off ramps are also available to provide connective tissue between the core structures – sidewalks and streets are effectively built into the base plate pieces.

itty blocks world cities

itty city model hand

Where the real fun comes in, though, is in mixing and matching – using a modular base plate, you can remix blocks to your liking, picking favorite structures from London, New York or anywhere else and seeing how they might work when set side by side on the same street.

Share on Facebook


[ By WebUrbanist in Art & Sculpture & Craft. ]

[ WebUrbanist | Archives | Galleries | Privacy | TOS ]


WebUrbanist

 
Comments Off on Itty City Blocks: Build Your Own 3D-Printed Physical SimCity

Posted in Creativity


Skinny Portable House for Singles Takes Just 1 Day to Build

29 Jan

[ By Steph in Architecture & Houses & Residential. ]

skinny portable house 1

These narrow, movable, single-person residences provide affordable housing for young people shut out of more conventional options by the housing crisis in Europe’s major cities, while also finding uses for a proliferation of vacant lots. The Heijmans ONE project by Netherlands firm Moodworks Architecture can be placed temporarily in virtually any location and takes just one day to set up on the site.

skinny portable house 2

skinny portable house 3

Designed for a single occupant, the house measures 484 square feet and features an energy-efficient solid wood skeleton as well as solar panels to produce its own energy. It features everything you’d expect in a similarly sized apartment, including a kitchen, bathroom, living room, bedroom and patio, and can be transported via truck to its destination, whether urban or rural.

skinny portable house 4

The target occupants are young professionals who want to buy their own home but are unable to afford quality housing as prices skyrocket well beyond the average person’s means. The project also addresses the issue of derelict sites in cities, taking advantage of all manner of vacant spaces, from construction sites that have been put on hold to lots that are currently up for sale.

skinny portable house 5

The prefabricated houses are available for just 700 Euros per month, and two pilot homes have been placed on Zeeburgereiland in Amsterdam. Contact Heijmans to see them in person by appointment.

Share on Facebook


[ By Steph in Architecture & Houses & Residential. ]

[ WebUrbanist | Archives | Galleries | Privacy | TOS ]


WebUrbanist

 
Comments Off on Skinny Portable House for Singles Takes Just 1 Day to Build

Posted in Creativity


DIY How to Build and Use a Reflector to Take Better Portraits

09 Sep

Photography is essentially capturing light. Beginners to photography can find the learning curve quite steep. To start with, there is the technical side. You need to understand what the camera can do and its limitations. Then there is the theory aspect, simply put you need to know what exposure is and how to achieve this with your camera if you want to get that creative shot.

About four years ago, I was shooting a couple of models in my city of Dublin outdoors with a few fellow photographers. The day was overcast and I was just hoping it wouldn’t rain. Thankfully, it didn’t. One of the photographers had this big reflector, a 52 inch, translucent one. I was amazed at how effective it was, especially as it added these wonderful catchlights in the model’s eyes.

Model with catchlights

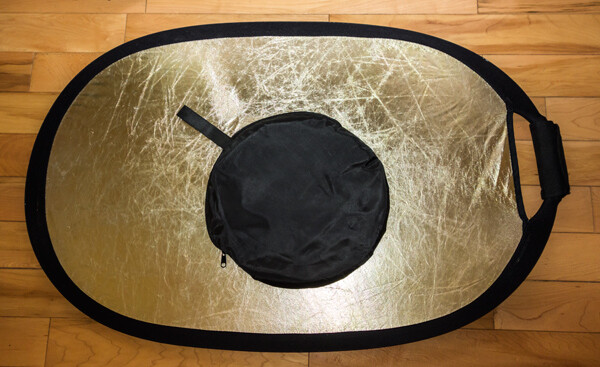
Think in terms of directing the light when photographing your subject or object. This is why a collapsible reflector is an excellent piece of additional camera gear. They are relatively inexpensive to buy, so portable, and lightweight. They do come in various sizes but a 42″ 5-in-1 collapsible reflector can be bought online for under $ 40 USD.

Collapsible Reflector 36x24 GoldSilver

Recently, at a family get together, my sister wanted me to take some headshots of her. We were outdoors, it was early in the evening around 6 p.m., and the sun was a ball of amber. I positioned her with the sun behind and it had created a wonderful rim light on her hair. But I didn’t have enough fill-light on her face.

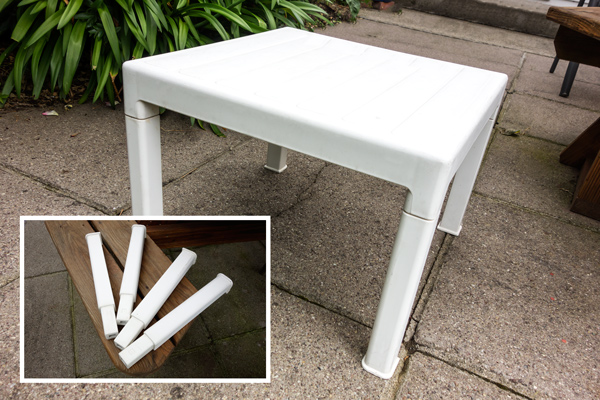
Then I realized, I didn’t have my reflector with me. On this occasion I had simply forgotten to bring it with me. After all, I wasn’t on a professional assignment. Anyway, I saw the small white plastic garden table. I grabbed it, turned it upside down and yanked the legs off. I got my youngest daughter to hold the table top slightly to the right and below my sister’s face.

Small white plastic garden table

Technology is speeding along at a very fast pace. The latest DSLR/mirrorless camera of today is fast becoming yesterday’s news in a relatively short time. As a newcomer to photography, it can be difficult to choose what gear and accessories to buy.

The basics of exposure havn’t changed with technology, nor has light. So practice with the camera that you have and learn to shoot with it in available light, and low light. Learn to see the different ways light can make a difference to your imagery.

I came up with five DIY options to serve as a reflector and tested them out. Here are some tip on how to use a reflector to take better portraits:

  1. White mount card from an art or hobby craft shop, size A1(33.1 x 23.4inches) 300g
  2. Kitchen aluminum foil crumpled up before fixing it on the back of the white card using spray
    adhesive
  3. Radiator reflective foil
  4. White plastic garden table
  5. Silver car mats

I still have, and use, the white card for demo purposes when I give workshops for beginners. It is so simple and affordable ,and the impact is quite dramatic. This option is the easiest to buy for a few dollars(USD). This piece of card can enhance your shots whether you are inside or outside. It’s great.

A simple indoor set-up for a portrait shoot using the white card

Have your model or subject seated (or stand) beside a large window. The model will be facing the camera, so one side of his or her face will be in shadow. Take a shot. Then have someone hold the white card near the model’s shadow side, at an angle so that a nice even light is cast across your subject’s face. Take numerous shots as you will need to direct your assistant on how close or far they hold the card up to the model. When you have taken a number of shots, you will get a clearer understanding of how to reflect the light upon your subject in a more pleasing manner. When you have uploaded your images to the computer, you will have the initial shot as your frame of reference to see the difference.

Tip – if the surface of your card starts to get grubby, I have covered up dirt marks using white interior matt paint.

Using kitchen aluminum foil is really simulating a silver reflector, which adds a cool light on your subject.

Becky silver reflector

If you don’t have spray adhesive or photo mount, an alternative method would be to water down a little PVC glue and paint this on one side of the white card. Then lay the aluminum foil (crumpled first) on top and smooth it out. This needs a good 24 hours to set. Also be careful when reflecting the light onto your model. Keep your distance as it reflects a large amount of light.

This roll of radiator reflector foil was inexpensive to buy. I can’t remember exactly but I think it was less than ten dollars (USD). Similar to above, this option works in the same way.

Becky radiator reflector foil

I recreated a similar test of my daughter in my Mum’s back garden using the small white plastic table. Unfortunately, I didn’t have the wonderful sun shining in the background, like I had for my sister’s shot. This was a quick test but as you can see there is an improvement in the after image. The light was cast more evenly across her face. Catchlights were created in the eyes which are key to good portraiture and shadows were eliminated under the chin.

Amy before and after small table

I included the silver car mats more as a tongue-in-cheek test! However, I decided to test them out to see would they actually work. I chose a bottle of wine so that you could see the silver car matt reflected in the bottle.

Wine bottle

Have you tried using a reflector before? What are your thoughts? Please give it a try if you haven’t and share your results and comments below.

The post DIY How to Build and Use a Reflector to Take Better Portraits by Sarah Hipwell appeared first on Digital Photography School.


Digital Photography School

 
Comments Off on DIY How to Build and Use a Reflector to Take Better Portraits

Posted in Photography


Cargo Home Videos: 10 Films on How to Build Container Houses

20 Aug

[ By WebUrbanist in Architecture & Houses & Residential. ]

cargo shipping container home

You see them all the time as polished finished products, but for those looking to try the ultimate do-it-yourself home-building project, these videos will help show you how various ISO container houses were really built in different environments and at various budgets and scales. From timelapses and diagrams to interviews and walkthroughs, they will help introduce you to what someone attempting a similar endeavor could or should expect along the way.

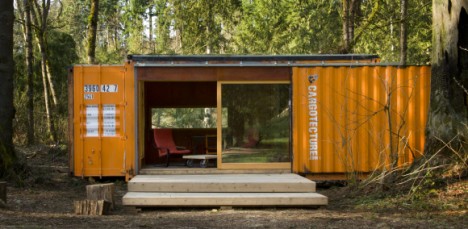
cargotecture home finished design

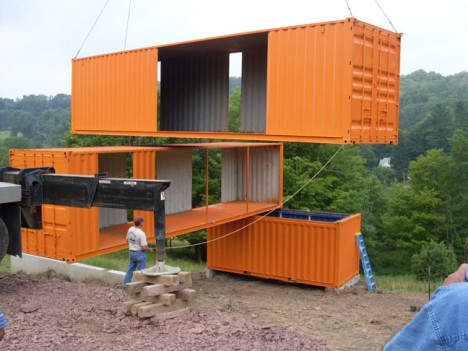
In this HGTV segment, you can get an overall sense of how the Seattle architects of Cargotecture shifted two containers to create a livable container retreat of their own. The result is as much an experiment and demonstration model as a working residence, and a good introduction to what is possible and what can be problematic.

modulus shipping container home

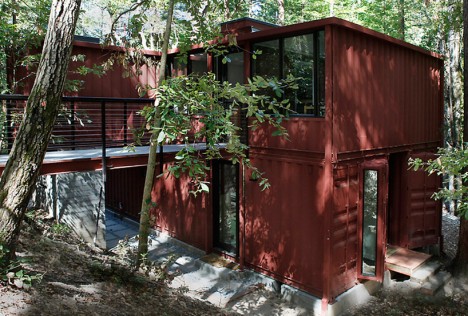
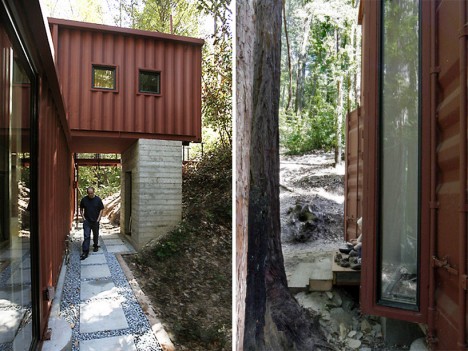
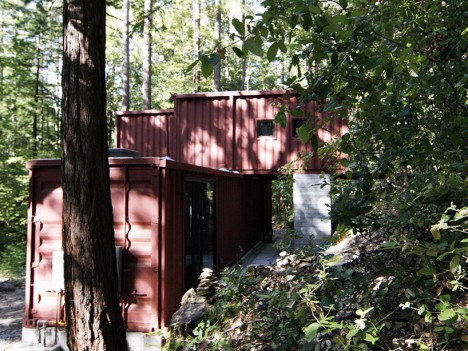
In this timelapse footage and subsequent tour, you can see a whole multistory house, designed by David Fenster (filmed by FairCompanies) for the Redwoods in the Santa Cruz mountains, coming together in a single day. The structure celebrates the industrial aesthetic of its containerized components, but also reflects the difficult reality of moving building materials out to such a remote location.

cargo home exterior build

shipping container home build

Part of the building is cantilevered over one side, supported by a hollow concrete column below (that in turn also contains an outdoor shower). The layout uses the space between shipping containers to let in light and widen spaces beyond containers while also framing views. The steel shells also make the building more robust, resistant to natural disasters like falling trees and forest fires.

The Kuziel Residence consists of a series of shipping containers set around a central space on concrete foundations, taking a half-year in total to build – the video above shows photos throughout the process. On the builder’s website, you can “read about the idea, all required prep-work, creation of the foundation, six months long endeavour of making of a chassis, build of the timber roof structure and pouring of lots of concrete for floor slab, work on the house exterior and interior and [all the other] things happening along the way.”

Perhaps one of the most audacious shipping container structures ever attempted, this dream ‘Sea Can’ home of Bill Glennon will have 31 total containers when it is completed, using solar for heat and electricity and boasting a windmill as well. Amazingly, some containers are turned vertically, creating turret-style protrusions making the whole thing look like a modern-day castle in its early stages. In the first film, Bill introduces the project. In the second, he gives a brief tour of the interior and explains some of the passive and other sustainable strategies going into the design. In the third, you can see how massive the almost-finished project turns out to be.

Meanwhile, a series of videos from ContainerHomes.net shows the step-by-step process of constructing a small-sized, single-shipping-container abode DIY-style in Costa Rica, highlighting the actual tools and time required for such an undertaking. After all, a container is made of metal and can require a great deal of additional work, particularly when it comes to adding doors and windows, even if it is in a location that does not require a foundation or insulation. Unlike some of the other video series shown here, this is a start-to-finish look at a low-budget cargo home solution, including a walk-through of the modest final product.

Not sure where to look next for inspiration on what or how to build your own cargo container home? Here are 30 additional cargo container homes, 30 container offices, 20 cargo city and container shelter concepts, and some additional cargotecture. Whatever you do, keep in mind that building codes vary between cities, states and countries, and climactic demands also impact what degree of finish your shelter may require.

Share on Facebook


[ By WebUrbanist in Architecture & Houses & Residential. ]

[ WebUrbanist | Archives | Galleries | Privacy | TOS ]


WebUrbanist

 
Comments Off on Cargo Home Videos: 10 Films on How to Build Container Houses

Posted in Creativity


Dubai to Build New 50 Million Sq Ft Climate-Controlled City

13 Jul

[ By WebUrbanist in Architecture & Cities & Urbanism. ]

indoor mall of the world

Always pushing the limits of posh possibility, this latest endeavor aims to put an entire urban center in a temperature-controlled bubble of indoor spaces, centered around a vast Mall of the World.

indoor city street view

Everything one can imagine will be found inside the complex, including 100 apartment and hotel buildings, various medical services, a huge shopping mall and the world’s largest indoor amusement park.

indoor city giant billboards

Its designers have unabashedly drawn from sources of inspiration around the world, including culturally central parts of New York, London and other historic metropolises.

indoor city faux exteriors

Like some surreal voluntary version of Stephen King’s Under the Dome, the whole thing can be experienced without stepping outside, particularly in hot summer months.

indoor city terraces rivers

In cooler winter months, some pedestrian street roofs and park domes will be retracted to allow for natural air circulation.

indoor city domed spaces

indoor city dubai design

The goal, as expressed by Sheik Mohammed bin Rashid al-Maktoum (and envisioned by Dubai Holding), is to create a beacon for year-round tourism both from local visitors and those coming from abroad, transforming the UAE from a seasonal vacation spot to a place people can come at any time.

indoor city exterior view

indoor city cultural hub

Its architects also claim the system will be eco-friendly, in part because the active and passive systems integrated throughout will work in concert with one another. Whether such a vast system in the desert can be green in the end (or willed be added to the growing list of failed abandonments in Dubai) remains to be seen .

Share on Facebook


[ By WebUrbanist in Architecture & Cities & Urbanism. ]

[ WebUrbanist | Archives | Galleries | Privacy | TOS ]


WebUrbanist

 
Comments Off on Dubai to Build New 50 Million Sq Ft Climate-Controlled City

Posted in Creativity


Highly Intelligent ‘About Me’ Page Tips for Photographers to Build Their Brand

09 Jun

Crafting a compelling bio and writing the perfect pitch are quite challenging. Working in a service industry requires its own rules. Nobody wants to hire a person he doesn’t know, doesn’t trust or doesn’t like. That’s why talking about yourself is extremely important while creating your own brand. If you check your Google Analytics, you’d see that the ‘About Me’ Continue Reading

The post Highly Intelligent ‘About Me’ Page Tips for Photographers to Build Their Brand appeared first on Photodoto.


Photodoto

 
Comments Off on Highly Intelligent ‘About Me’ Page Tips for Photographers to Build Their Brand

Posted in Photography