RSS
 

Posts Tagged ‘Bracketing’

Google shares a deep dive into its new HDR+ with Bracketing technology found in its latest Pixel devices

26 Apr

Google has shared an article on its AI Blog that dives into the intricacies of the HDR capabilities of its most recent Pixel devices. In it, Google explains how its HDR+ with Bracketing technology works to capture the best image quality possible through clever capture and computational editing techniques.

To kick off the article, Google explains how its new ‘under the hood’ HDR+ with Bracketing technology — first launched on the Pixel 4a 5G and Pixel 5 back in October — ‘works by merging images taken with different exposure times to improve image quality (especially in shadows), resulting in more natural colors, improved details and texture, and reduced noise.’

Using bursts to improve image quality. HDR+ starts from a burst of full-resolution raw images (left). Depending on conditions, between 2 and 15 images are aligned and merged into a computational raw image (middle). The merged image has reduced noise and increased dynamic range, leading to a higher quality final result (right). Caption and image via Google.

Before diving into how the behind-the-scenes work is done to capture the HDR+ with Bracketing images, Google explains why high dynamic range (HDR) scenes are difficult to capture, particularly on mobile devices. ‘Because of the physical constraints of image sensors combined with limited signal in the shadows […] We can correctly expose either the shadows or the highlights, but not both at the same time.’

Left: The result of merging 12 short-exposure frames in Night Sight mode. Right: A single frame whose exposure time is 12 times longer than an individual short exposure. The longer exposure has significantly less noise in the shadows but sacrifices the highlights. Caption and image via Google.

Google says one way to combat this is to capture two different exposures and combine them — something ‘Photographers sometimes [do to] work around these limitations.’ While this works fairly well with cameras with larger sensors and more capable processors inside tablets and laptops to merge the images, Google says it’s a challenge to do on mobile devices because it requires ‘Capturing additional long exposure frames while maintaining the fast, predictable capture experience of the Pixel camera’ and ‘Taking advantage of long exposure frames while avoiding ghosting artifacts caused by motion between frames.’

Google was able to mitigate these issues with its original HDR+ technology through prioritizing the highlights in an image and using burst photography to reduce noise in the shadows. Google explains the HDR+ method ‘works well for scenes with moderate dynamic range, but breaks down for HDR scenes.’ As for why, Google breaks down the two different types of noise that get into an image when capturing bursts of photos: shot noise and read noise.

Google explains the differences in detail:

One important type of noise is called shot noise, which depends only on the total amount of light captured — the sum of N frames, each with E seconds of exposure time has the same amount of shot noise as a single frame exposed for N × E seconds. If this were the only type of noise present in captured images, burst photography would be as efficient as taking longer exposures. Unfortunately, a second type of noise, read noise, is introduced by the sensor every time a frame is captured. Read noise doesn’t depend on the amount of light captured but instead depends on the number of frames taken — that is, with each frame taken, an additional fixed amount of read noise is added.’

Left: The result of merging 12 short-exposure frames in Night Sight mode. Right: A single frame whose exposure time is 12 times longer than an individual short exposure. The longer exposure has significantly less noise in the shadows but sacrifices the highlights. Caption and image via Google.

As visible in the above image, Google highlights ‘why using burst photography to reduce total noise isn’t as efficient as simply taking longer exposures: taking multiple frames can reduce the effect of shot noise, but will also increase read noise.’

To address this shortcoming, Google explains how it’s managed to use a ‘concentrated effort’ to make the most of recent ‘incremental improvements’ in exposure bracketing to combined the burst photography component of HDR+ with the more traditional HDR method of exposure bracketing to get the best result possible in extreme high dynamic range scenes:

‘To start, adding bracketing to HDR+ required redesigning the capture strategy. Capturing is complicated by zero shutter lag (ZSL), which underpins the fast capture experience on Pixel. With ZSL, the frames displayed in the viewfinder before the shutter press are the frames we use for HDR+ burst merging. For bracketing, we capture an additional long exposure frame after the shutter press, which is not shown in the viewfinder. Note that holding the camera still for half a second after the shutter press to accommodate the long exposure can help improve image quality, even with a typical amount of handshake.’

Google explains how its Night Sight technology has also been improved through the use of its advanced bracketing technology. As visible in the illustration below, the original Night Sight mode captured 15 short exposure frames, which it merged to create the final image. Now, Night Sight with bracketing will capture 12 short and 3 long exposures before merging them, resulting in greater detail in the shadows.

Capture strategy for Night Sight. Top: The original Night Sight captured 15 short exposure frames. Bottom: Night Sight with bracketing captures 12 short and 3 long exposures. Caption and image via Google.

As for the merging process, Google says its technology chooses ‘one of the short frames as the reference frame to avoid potentially clipped highlights and motion blur.’ The remaining frames are then aligned with the reference frame before being merged.

To reduce ghosting artifacts caused by motion, Google says it’s designed a new spatial merge algorithm, similar to that used in its Super Res Zoom technology, ‘that decides per pixel whether image content should be merged or not.’ Unlike Super Res Zoom though, this new algorithm faces additional challenges due to the long exposure shots, which are more difficult to align with the reference frame due to blown out highlights, motion blur and different noise characteristics.

Left: Ghosting artifacts are visible around the silhouette of a moving person, when deghosting is disabled. Right: Robust merging produces a clean image. Caption and image via Google.

Google is confident it’s been able to overcome those challenges though, all while merging images even faster than before:

Despite those challenges, our algorithm is as robust to these issues as the original HDR+ and Super Res Zoom and doesn’t produce ghosting artifacts. At the same time, it merges images 40% faster than its predecessors. Because it merges RAW images early in the photographic pipeline, we were able to achieve all of those benefits while keeping the rest of processing and the signature HDR+ look unchanged. Furthermore, users who prefer to use computational RAW images can take advantage of those image quality and performance improvements.’

All of this is done behind the scenes without any need for the user to change settings. Google notes ‘depending on the dynamic range of the scene, and the presence of motion, HDR+ with bracketing chooses the best exposures to maximize image quality.’

Google’s HDR+ with Bracketing technology is found on its Pixel 4a 5G and Pixel 5 devices with the default camera app, Night Sight and Portrait modes. Pixel 4 and 4a devices also have it, but it’s limited to Night Sight mode. It’s also safe to assume this and further improvements will be available on Pixel devices going forward.

You can read Google’s entire blog post in detail on its AI blog at the link below:

HDR+ with Bracketing on Pixel Phones

Articles: Digital Photography Review (dpreview.com)

 
Comments Off on Google shares a deep dive into its new HDR+ with Bracketing technology found in its latest Pixel devices

Posted in Uncategorized


Hasselblad firmware includes video and focus bracketing for X1D II, 907X cameras

05 Jun

Hasselblad has released new firmware updates for its X1D II and 907X medium format cameras that will allow users to shoot video for the first time. The firmware also offers a focus bracketing feature that will help when an extensive depth-of-field is required in landscape or macro photography.

Firmware version 1.2.0 brings 2.7K 2720×1530 pixel video at 29.97p in 4:2:0 8-bit color, with a 1920×1080 option for those wanting FHD. The X1D II camera has had a video icon on the dial since it was launched, so now it can be made active.

The firmware also a white balance sampling tool and an Auto White Balance option for use on already captured images. The cameras already have a WB picker for sampling neutral areas of a scene in live view mode before the picture is taken, but these new options allow stored images to be used as a reference. The purpose of this is to allow the picker and AWB features to work when flash is being used, as sampling flash during live view isn’t possible – unless you are very quick. White balance settings also now display their color temperature and tint values to make matching light sources easier.

A new ratings system for captured images has been added to the playback menu to allow users to select favorites and to order images in-camera with a system that transfers in the EXIF data to image manipulation software. The press release doesn’t specify which software but we can safely assume that Hasselblad’s Phocus application will be able to read and display the ratings.

The focus bracketing feature allows users to specify the number of shots taken and the incremental differences between the focus positions. There’s also the facility to delay the first exposure to allow all vibrations from the camera to subside before the sequence begins.

A separate release sees new firmware for the XCD 45P lens that will make it compatible with the new focus bracketing feature and fixes an issue which saw the AF being cancelled if the user was holding the focusing ring of the lens.

For more information see the Hasselblad website, and download the firmware here.
There’s also a Firmware 1.2.0 walk-through video on YouTube

Press release:

HASSELBLAD BRINGS POWERFUL UPDATES FOR EXPANDED CREATIVITY TO X1D II 50C, 907X SPECIAL EDITION AND XCD 45P

Introducing its largest firmware update to any Hasselblad camera at one time, Hasselblad launches Firmware Update 1.2.0 for both X1D II 50C and 907X Special Edition medium format cameras, in addition to Firmware Update 0.1.24 for the XCD 45P lens. A multitude of powerful features are added to the X1D II 50C and 907X Special Edition, including 2.7K/29.97 Video Recording, Focus Bracketing with all XCD lenses, Image Rating for simple image sorting and selection, White Balance Picker Tool, and more, resulting in further enhanced digital medium format camera systems that provide a wider breadth of creative possibilities. With the latest update to XCD 45P, Focus Bracketing can now be enabled on all X System cameras and 907X Special Edition cameras in addition to improved stability of auto focus and manual focus. Constantly striving to improve its camera systems with new updates and enhanced features, Hasselblad is determined to create even more powerful medium format shooting experiences for all types of visual artists.

FIRMWARE UPDATE 1.2.0: NEW FEATURES FOR BOTH X1D II 50C AND 907X SPECIAL EDITION

  • Video Recording: Expanding the imaging options of the X1D II 50C and 907X Special Edition, 2.7K (2720 x 1530) & HD (1920 x 1080) video capture has been added. Video can be recorded at 29.97 fps with 4:2:0 8-bit colour. The 2.7K resolution option delivers improved capture of detail, whilst balancing the storage space.
  • Focus Bracketing: Expanding the feature set of the?X1D II 50C and 907X Special Edition even further, Focus Bracketing allows a photographer trying to capture a subject with very limited depth of field, such as in macro or product photography, to capture a series of exposures of their chosen subject at a fractionally different focus point in each and then combine these captures in their chosen stacking software. The photographer will have full control over the number of frames in the sequence, the step size between each capture and an initial delay to allow any support system vibration to diminish. Note: Requires lens firmware?0.5.33 or later for all XCD lenses excluding XCD 45P. XCD 45P requires firmware 0.1.24 or later.
  • Image Rating: Image Rating can now be applied to all still image captures in camera, making image sorting and selection much easier when the captures are transferred to the user’s computer system. When in image playback mode, with the capture details overlay on screen, the photographer simply presses the star button or presses the displayed stars. All ratings are stored in the metadata of the captured image.
  • 2/3 stops added in Exposure Bracketing: The Exposure Bracketing function step options have been expanded to support 2/3 stops steps in addition to the existing steps.
  • Expanded White Balance Tools: The menu organization and selection of White Balance presets has been improved with display of colour temperature and tint at each setting. For the most precise colour, a Picker has also been added where the photographer can sample a neutral portion of the image to balance colour.
  • Auto White Balance based on captured image: Auto White Balance is now based on the captured image which means that AWB can also be used when shooting in Manual Quick Mode (Manual Quick Mode specific to X1D II 50C only). It also solves the issue when working with flash in tungsten lighting where, previously, the correct white balance showed in either Live View or the captured image – now the correct white balance is present in both Live View and the final still image.
  • New language: Traditional Chinese has been added to language options.

FIRMWARE UPDATE 1.2.0: NEW FEATURES SPECIFIC TO X1D II 50C

  • EVF proximity sensor settings: It is now possible for users to adjust the sensitivity of the EVF proximity sensor. The improved setting accommodates users whose typical handling style does not always engage the sensor or prefer to disable the EVF completely.
  • Reset custom buttons option: A menu option has been added that will allow the custom buttons to be returned to factory defaults.

FIRMWARE UPDATE 1.2.0: NEW FEATURES SPECIFIC TO CFV II 50C DIGITAL BACK IN 907X SPECIAL EDITION

  • Additional camera support: Cable-free operation with CFV II 50C Digital Back on 2000-cameras and unmodified 200-cameras added. Note: some cameras may not fully work due to mechanical tolerances of old cameras.
  • Auto White Balance: It is now possible to automatically set White Balance for captured images.

FIRMWARE UPDATE 0.1.24 FOR XCD 45P

  • Support for Focus Bracketing: Focus Bracketing is now available on the X1D II 50C and the 907X Special Edition. Firmware update 0.1.24 enables Focus Bracketing to be used on the XCD 45P.
  • Improved stability of AF & MF: Full time Manual focus input sensitivity has been modified, to reduce the possibility of AF stopping when holding the lens.

Articles: Digital Photography Review (dpreview.com)

 
Comments Off on Hasselblad firmware includes video and focus bracketing for X1D II, 907X cameras

Posted in Uncategorized


Fujifilm GFX 50S firmware update adds Focus Bracketing and 35mm Format Mode

14 Mar

Earlier today, Fujifilm released firmware version 3.0 for its GFX 50S medium-format camera. And with the update come two new features: Focus Bracketing and 35mm Format Mode.

Focus Bracketing enables focus distance bracketing for up to 999 frames, shifting the focal location with each shutter activation at a scale from 1 to 10. The new 35mm Format Mode, meanwhile, results in the camera using the central 36 x 24mm portion of the sensor, producing 30.5MP Raw and JPEG images.

“When using 35mm format adapters,” the company explains in its changelog, “it will be easier to adjust the image size to 35mm format image circle lenses by changing the setting.”

The GFX 50S v3.0 firmware update can be downloaded now from Fujifilm’s website. Additionally, Fujifilm has also released a compatibility update for the H Mount Adapter G accessory.

Update Notes

GFX 50S Camera Body Firmware Update Ver.3.00

Addition of “Focus Bracketing”

The update will enable the photographer to shoot focus distance bracketing up to 999 frames. When the photographer start shooting, the focal location is shifted with each activation of the shutter by the step of focus shift set from 1 to 10.

Addition of “35mm Format Mode”

The update will enable the photographer to shoot central 36.0mm x 24.0mm (30.5M) cropped images as both JPEG and RAW files. When using 35mm format adapters, it will be easier to adjust the image size to 35mm format image circle lenses by changing the setting.

H MOUNT ADAPTER G” new firmware

The firmware update will expand the compatibility for the “H MOUNT ADAPTER G” accessory. Regarding the compatibility of lenses and accessories with H MOUNT ADAPTER G, refer to this URL.

Articles: Digital Photography Review (dpreview.com)

 
Comments Off on Fujifilm GFX 50S firmware update adds Focus Bracketing and 35mm Format Mode

Posted in Uncategorized


6 Types of Bracketing Your Camera Can Do and How to Use Them

06 Dec

Bracketing is a method of taking multiple images of the same scene at different settings in order to capture more detail in your shot.

You might not be aware that there are actually a number of bracketing techniques besides the most common method which is exposure bracketing.

Exposure bracketing allows you to retain more dynamic range in your final image. However, other bracketing techniques which we’ll discuss in this article can help you capture more detail in different focus planes, different color temperatures, or even detail in the amount of noise or grain that is captured.

Let’s go ahead and begin with the bracketing technique that you’re most likely already familiar with – exposure bracketing.

#1 – Exposure Bracketing

In exposure bracketing, we take the same image several times at different exposure values or (EVs) in order to accommodate for the brightest highlights and the darkest shadows in the shot. The resulting images can be merged together either in camera or by using editing software. This produces an image with superior tonal range than what you’d have gotten if you had taken only a single shot.


Most cameras can do this automatically in HDR mode, however, the majority of them are only able to save the resulting image in a JPEG format. That is a huge limitation if you want to change some parameters in post-production like White Balance, Exposure, Saturation, etc.

Your camera will usually have a number of options for you to choose from, like the total number of shots to be taken, drive mode (continuous or single), and the exposure difference between each image (1EV or 2EV). ). The exposure bracketing settings can be found under the drive mode menu on most cameras.

#2 – Focus Bracketing (Stacking)

This bracketing technique is most useful when you have a limited depth of field giving you a narrow sliver of focus in your image. Several images are taken at different focal planes, from the nearest focus distance or plane to the furthest focus distance.

All the other in-camera settings must be constant, your exposure should remain untouched because none of the three pillars of exposure (shutter, aperture, ISO) are changed. Really all that’s changing is the focus point.


In macro photography, this can be very useful because the images can be stacked in order to produce one where the subject is fully in focus as opposed to just a certain part. You can think of this method as slightly widening the depth of field on your subject without losing any silky smooth bokeh you get at wider apertures.

After merging or focus stacking the three focus bracketed images. It’s not perfect but it has more of the bear in focus than any of the other three images.

Not many cameras will have a focus bracketing function or feature, however, if your camera does, I encourage you to read the manual to learn how it works. For those with cameras that don’t have this feature then it’s really simple to do it manually. You want to have your camera on a tripod and you also want to make sure you’re shooting a static subject.

All you have to do is take multiple images at the same settings (I advise the use of manual mode or aperture priority), between each image you want to adjust your focus plane manually from the closest to furthest. You can experiment with different distances between focus planes to get the results you want. In post-production, you the have the freedom to make the entire image sharp, or just all the parts of your subject, or even just select areas.

#3 – Flash Bracketing

In flash bracketing, multiple images are taken of the same scene with varying light intensities from your camera flash or speedlight especially a fill flash. The light intensity from the flash is varied in steps from low to high intensity as images are captured.

You then have a number of images all with different flash exposures from which you can pick the best one.

Neutral or normal intensity


This can be very handy in low light situations or in general where you are unsure what flash intensity is going to correctly expose your image.

Flash exposure bracketing (FEB) can be found as a feature on many speedlights, you might want to read through the manual first to figure out how to find and activate it. For some cameras, it is in the camera menu. Once found it’s as simple as picking the number of photos to take, as well as the flash exposure compensation between them.

The final step is taking the images, it’s important to note that FEB can be very slow due to the limitation of the speedlight recycle rate (the time it takes your speed light to be ready to fire again after an actuation). So always keep that in mind when shooting.

Here’s another example which was done outdoors. Notice how the exposure changes on the girl (due to the amount of flash) but the background remained the same.


#4 – White Balance Bracketing

This is one of the more unusual bracketing techniques available in digital photography. As the name suggests, White Balance bracketing allows you to take several images of the same scene at different color temperatures.

This method mostly applies to photographers that only shoot JPEG since the White Balance of an image can always be changed in post-production if it’s recorded in RAW format. Images are taken at blueish color temperatures in stages all the way to reddish temperatures.


This bracketing technique is particularly useful in scenes where there is mixed lighting and it may be difficult for the Auto White Balance mode to correctly pick a color temperature.

You can then pick the image with the most accurate (or pleasing) color temperature afterward. You can manually set the color temperature range within your camera settings in degrees Kelvin.

White balance bracketing can be found in the camera settings, and you should be able to pick the number of photos to take as well as the white balance difference between them in degrees Kelvin. If your camera does not have the feature then you can individually take the photos manually, changing the white balance between them. Just make sure you shoot in RAW + JPEG so you have more creative freedom in post-production. Use the JPEGs for previewing so you can pick the image with the right color temperature, then match that to your RAW file and you can make all your other edits.

#5 – Depth of Field Bracketing

This is a bracketing technique that is very similar to the focus bracketing (stacking) method mentioned earlier. Multiple images are taken of the same scene at different apertures, your exposure must remain constant meaning that your shutter speed and ISO can change (Aperture Priority is recommended).


Just like in focus bracketing, you are able to get a varying depth of field in your shot when you stack the resulting images in post-production, effectively allowing you to get more in focus while not sacrificing any smooth bokeh you got at your widest aperture.

Depth of field bracketing is a technique that won’t be found on many cameras as a function or feature. You will have to do it manually, the good news is that it’s very easy to do. You want to make sure your camera is in Aperture Priority then take images of the same scene while changing your aperture between each image, it might be handy to use a tripod so that the frame is identical. In post-production, you have the freedom to stack your images and get everything in focus or just the subject in its entirety while keeping some satisfying bokeh.

#6 – ISO Bracketing

The final bracketing technique in digital photography is ISO bracketing. As the name suggests, this method involves taking several images of the same scene at different ISO or sensor gain values.

What might come as a surprise to you is that your aperture and shutter speed must stay constant which results in a number of images all with different signal to noise ratios and also different exposures.

ISO bracketing is useful because you get images with different amounts of noise. So you can pick the aesthetic that’s most pleasing to your eyes in that respect.


ISO bracketing can also be used for HDR in situations where your aperture is closed all the way down but you don’t want a shutter speed that’s too slow (in order to correctly expose) such that things in the scene change between images; like water, people or even marine traffic.

ISO bracketing is one of the less common bracketing methods that can be found as a function in your camera. I advise that you check your camera manual to make sure your camera has this feature. If it doesn’t, then you can put your camera in Manual Mode, then select Auto ISO and activate your exposure bracketing, you can also pick your exposure range as well as the number of pictures to take (note: this only works on some camera models).

If your camera isn’t able to do ISO bracketing via the method mentioned above then you can do it the old school way; manually! Put your camera in Manual Mode, make sure you select an aperture, shutter speed, and an ISO between 800 to 1000 that correctly exposes your image. Take your first image as your base at 0EV, the next step involves lowering and raising your ISO while taking images to get your shots at different exposures.

Conclusion

Most of the bracketing techniques mentioned here in this article are not actually available as built-in features or modes in a lot of the cameras that you and I can buy. However, with the power of full manual controls, you can always try them for yourself and see what kind of results you’re getting.

The post 6 Types of Bracketing Your Camera Can Do and How to Use Them by Fadzai Saungweme appeared first on Digital Photography School.


Digital Photography School

 
Comments Off on 6 Types of Bracketing Your Camera Can Do and How to Use Them

Posted in Photography


How to Use Bracketing to get Your Best Shot – 3 Different Methods

29 Jun

One of the most difficult and frustrating parts about shooting with film, back before the days of digital photography, was the limited amount of attempts you had to get the photo you wanted. I remember carrying around spare rolls of film in a fanny (waist) pack on a trip to Walt Disney World years ago, and carefully considering each photo, lest I get one setting wrong and blow the entire shot.

How to use bracketing3 Different methods(1)

Back then you had to wait days, or even weeks, to get your pictures back from a processing lab, and if a picture was too dark, grainy, or out of focus there was nothing you could do about it at that point. Fortunately, digital cameras are far more forgiving than their film-based counterparts, and have many systems in place to make sure you do get the shot you want. But even then, sometimes things still don’t quite work out.

Thanks to a technique called bracketing, you can use the power of your camera, combined with the space available on most memory cards, to make sure you always end up with just the right photo every time.

What is Bracketing?

bracketing-typewriter

There’s a classic children’s tale called Goldilocks and the Three Bears, in which a young girl enters the home of the bears and helps herself to their food, furniture, and futons. With each set of items there are three options: two that don’t quite work out and one that is, as the story goes, just right. While the story could be seen as a cautionary tale about the dangers of sneaking into the home of wild animals, and sleeping in their beds uninvited, its lessons can also be applied to photography.

Essentially, Goldilocks demonstrates the concept of bracketing, by giving herself many options so she can make sure to have at least one that is precisely what she is looking for. In photography there are various types of bracketing, but all involve taking multiple photos, so as to ensure you have at least one good picture. Bracketing can also be used to combine different elements of various photos together to get the best of all versions. The three most common versions of bracketing involve exposure, focus, and white balance.

If you have ever struggled to get just the right shot, or want to learn a new technique to improve your photography, this might be just the thing you’ve been looking for.

Exposure Bracketing

Modern digital cameras are pretty good when it comes to evaluating a scene, and giving you just the right exposure. You can even use different metering modes where your camera looks at either the whole scene, just the center, or even a specific part of the photo like the highlights or some faces. If you know precisely how to control your camera to get the shot you want, you can use these various metering modes, in tandem with your camera’s built-in light meter, to get just the right exposure.

However sometimes it pays to take a few extra pictures to make sure you, like Goldilocks, get an image that is just right. This is where exposure bracketing comes in handy since you can take several additional photos, some underexposed and some overexposed, to make sure you go home with the perfect picture.

bracketing-exposure-tree

There are several ways to go about using the bracketing technique, and one of the most simple is to put your camera in Program Mode and use your camera’s exposure compensation function.

First, take a picture that appears to be properly exposed. Then use the exposure compensation option to intentionally underexpose your image by one or two stops (-1 or -2). More than two stops is generally unnecessary. You are of course free to do so, but it’s quite rare that your camera’s meter would be off so much as to require more than two stops of exposure compensation to get the picture you want.

Then use exposure compensation to intentionally overexpose your image by one or two stops (+1 or +2), and in the end you will have at least three photos from which to choose: one that your camera thinks is properly exposed, one that is underexposed, and one that is overexposed. This may seem kind of redundant, but it’s a nice insurance policy to make sure you get just the right photo you want. It works especially well if you are shooting landscapes, or other outdoor scenery, as the bright sunlight coming from overhead can sometimes cause your camera to meter a scene improperly, even if you think you have everything set up just right.

Bracketing for HDR

Another benefit of using exposure bracketing, is that it lets you create stunning works of art using a technique known as HDR, or High Dynamic Range. This requires the use of exposure bracketing, a tripod, and often some special software like Photoshop, Lightroom, or Aurora HDR Pro, to combine several photos into one.

To get started with HDR you need at least three images, bracketed in full stops of exposure. Take one image properly exposed, then underexpose by one or two stops, and then overexpose by one or two stops. Some cameras do this bracketing automatically with a built-in bracketing function (AEB) but I often find that I like to control the exposures manually with exposure compensation, or by using manual mode. You can use more than that, but if you are just starting out three bracketed photos should be sufficient.

Once you have your bracketed photos, load them into the software of your choice, and you can instruct it to combine them into a single photo that takes the best parts of all the images and creates a single frame-worthy masterpiece. To see this in action, first look at the following image, which despite having a fairly even exposure overall, still suffers in a few areas.

This is an un-retouched JPEG image straight from my camera. The overall exposure is good but the sky is bright white and the hallway is a bit too dark.

This is an un-retouched JPEG image straight from my camera. The overall exposure is good, but the sky is bright white and the hallway is a bit too dark.

I used exposure compensation to overexpose the image by two stops, which lost almost everything in the sky, but brought out much more detail and color in the darker areas of the hallway.

The same image, over-exposed by two stops.

The same scene, overexposed by two stops.

Then I took a third image, this time underexposing by two stops, which made the dark parts really dark, but brought out much more color in the sky.

This image was intentionally under-exposed by two stops.

This image was intentionally underexposed by two stops.

Finally, I used Aurora HDR Pro to combine all three bracketed JPEG images into one that contains the best of all worlds. This shows how useful bracketing can be, and might give you some ideas for how to use it in your own photography.

This final image was made using Aurora HDR Pro to combine all three bracketed shots into one, and final edits in LR including correcting the tilting building.

This final image was made using Aurora HDR Pro to combine all three bracketed shots into one, and final edits in LR including correcting the tilting building.

In recent years the image sensors on many cameras have gotten so good, that the use of exposure bracketing is not as critical as it was in days gone by. If you shoot in RAW instead of JPG, a single image will often contain so much information in the highlights and shadows, which you can recover using Lightroom or Photoshop, that you simply don’t need to take separate images and combine them later. One major disadvantage of this is the file sizes, which on some RAW formats can be anywhere from two to 10 times as large as a JPG file. At the end of the day though, exposure bracketing is still a valuable technique that many photographers rely on to get just the right result, and you might enjoy trying it out to see if it works for you.

Focus Bracketing

Another way to apply the bracketing technique is to take several images that are focused at various distances, which is especially critical when doing close-up photos or taking macro shots. On most cameras the autofocus generally works great to make sure things are crystal clear and tack sharp. But, when using very shallow depth of field, or focusing on objects that are extremely close, it’s not always going to produce the most reliable results.

Often when doing this type of photography you will end up with pictures that are just slightly out of focus in one direction or another, either in front of the subject or behind it, and there is no way to fix that in Photoshop, or any other image editor.

I made this image by slowly adjusting the focus on my lens while I took several shots. Only one had the single strand sharp and in focus, but that one picture was all I needed.

I made this image by slowly adjusting the focus on my lens while I took several shots. Only one had the single strand sharp and in focus, but that one picture was all I needed.

The solution to this problem is to take not one picture, but several, and use manual focus instead of automatic. I start by intentionally focusing not on the subject but slightly behind it, then I slowly turn the focusing ring on my lens as I take several images in a row. I know it can be a bit intimidating to shoot using manual focus, but once you try using this technique, you will probably start to see how useful it can be.

When you have your set of images loaded in Lightroom, or another image editor, you can then pick out the exact one you want, instead of hoping you got one in focus while relying on your camera’s built-in autofocusing algorithm. If you want to get into an even more advanced technique with focus bracketing, you can actually combine all your photos into one super-sharp image using a technique called focus stacking. But if that seems like a bit much for you, it’s still worth your time to try regular focus bracketing, just to make sure your close-up subjects are tack sharp.

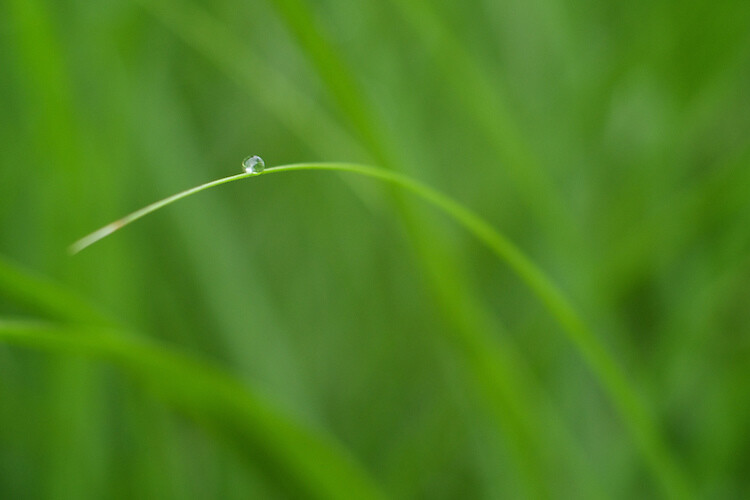
Nailing focus on the water drop was almost impossible, so I took several images while focusing manually to make absolutely sure I got at least one good image.

Nailing focus on the water drop was almost impossible. So I took several images while focusing manually, to make absolutely sure I got at least one good image.

White Balance Bracketing

The final technique I want to discuss here is similar to the other two types of bracketing in that it also involves taking several photos of the same scene, while adjusting a single parameter. In this case it’s the white balance, instead of the exposure or focus. Most casual photographers use the Automatic White Balance setting on their cameras, which does a pretty good job most of the time. But every now and then it can leave an image with an ugly green or red tint, or all pale and washed out, because of improper white balance.

The lighting conditions here wreaked havoc with my camera's Auto white balance, so I took five separate exposures and manually adjusted the white balance each time in order to make sure I got one good shot.

The lighting conditions here wreaked havoc with my camera’s Auto white balance. So, I took five separate exposures, and manually adjusted the white balance each time, in order to make sure I got one good shot.

White balance bracketing can be very useful if you shoot JPG, because your camera’s Auto white balance setting is not always as reliable as you want it to be. However, if you shoot RAW you have complete freedom to alter white balance as much as you want using a program like Lightroom, Photoshop, or almost any other image editor. Because the RAW format does not discard any photo data like JPG does, white balance bracketing is not needed when you are shooting. That gives you far more flexibility for fine-tuning things like white balance, as long as you are willing to take the time to do it.

Do you find bracketing to be useful in your own photography? When have any of these techniques been especially useful to you? Share your thoughts, and any pictures as well, in the comments below.

googletag.cmd.push(function() {
tablet_slots.push( googletag.defineSlot( “/1005424/_dPSv4_tab-all-article-bottom_(300×250)”, [300, 250], “pb-ad-78623” ).addService( googletag.pubads() ) ); } );

googletag.cmd.push(function() {
mobile_slots.push( googletag.defineSlot( “/1005424/_dPSv4_mob-all-article-bottom_(300×250)”, [300, 250], “pb-ad-78158” ).addService( googletag.pubads() ) ); } );

The post How to Use Bracketing to get Your Best Shot – 3 Different Methods by Simon Ringsmuth appeared first on Digital Photography School.


Digital Photography School

 
Comments Off on How to Use Bracketing to get Your Best Shot – 3 Different Methods

Posted in Photography


Make-up bracketing and selfie boutiques help shoot Casio to record levels of profit

16 Dec

Casio’s TR series of Exilim compacts has propelled the Japanese company to record profitability this year after the cameras caught a firm grasp of the massive Chinese selfie market. According to a report from Nikkei Asian Review, Casio is on-track to make a $ 403 million profit this year, and a good part of that has come from the sale of its unusually shaped EX-TR compact cameras that the company has designed to appeal to female selfie shooters.

Just after the launch of the first TR – the Exilim TRYX EX-TR100 – in 2011, Casio’s photography business was in such trouble that it pulled distribution in the majority of territories it operated in. At the time Casio concentrated on the ‘cool’ looks of the camera and its ART modes that created HDR and painting-effect images, but since 2013 the TR cameras have proved such a hit with the Chinese that its imaging division expects to make a ¥4.2bn (about $ 34.5 million) operating profit. That comes after four years of losses, up to 2012. 

The secret of the camera’s success has been a combination of a growing fashion-conscious design and the product’s suitability for shooting selfies. With a hinged frame the TR models can support themselves standing upright so are ideal for placing on a table facing the subject. They also have a number of ways to trip the shutter including squeezing the frame, using a ‘selfie pad’ on the side of the body, using a count-down-display self-timer, by the camera detecting the subject putting his/her hand in a certain part of the frame and by touching the 3″ LCD. The 921,600-dot LCD also acts as a digital mirror so the subject can check hair and make-up before the picture is taken – as the camera lens and the LCD face in the same direction. 

It has become common to feature digital retouch shooting modes in compact cameras, but Casio’s Exilim TR models go a step further with make-up modes that offer up to 12 levels of skin smoothness as well as skin tone adjustments to suit the way you want to look. A step beyond that even is make-up mode bracketing that provides three images with smoothness levels either side of the setting you chose yourself. In the latest model, the EX-TR70, make-up mode is now available when shooting movies too. 

For those not sure of their best side, pose bracketing gives you five chances to look good as the camera’s voice guidance counts down three-two-one between pictures so you have the opportunity to ruffle your hair, bend a knee or pout a little bit more. 

All of the EX-TR models use a lens with an angle of view equivalent to a 21mm on a 35mm system. Such a focal length would seem excessively wide for general purpose photography, but when holding a camera at a short-arm’s length it has proved perfect for getting you and your friend in the frame. Instead of a flash the cameras are equipped with an LED light that’s positioned very close to the lens axis to create soft and shadowless lighting – and the LED is round to form an attractive circular catch-light in the eyes. Genius. 

The cameras have proved so popular in China that Casio has opened three stores that sell only TR series models. The stores are designed like make-up boutiques, to set the products apart from other cameras in the market. At up to ¥100,000 (about $ 800) a pop these are not low-cost novelties priced for the mass market, so clearly Casio has been doing something very right indeed. 

For more information on the Casio Exilim TR series see the Casio digital camera website.

Articles: Digital Photography Review (dpreview.com)

 
Comments Off on Make-up bracketing and selfie boutiques help shoot Casio to record levels of profit

Posted in Uncategorized


Pentax firmware v1.02 for K-3 allows bracketing by AA filter mode

06 Feb

shared:download-button.png

Pentax has released new firmware for its flagship K-3 DSLR, allowing users to bracket exposures by AA filter simulation mode. As a reminder, the K-3 lacks a physical anti-aliasing filter, but simulates the blurring effect via minute movement of its sensor, with two intensity levels available (three if you include ‘off’). Firmware v1.02 allows you to shoot a burst of sequential images at each AA filter level, to fine-tune the optimal balance between resolution and artifacts like moiré.

News: Digital Photography Review (dpreview.com)

 
Comments Off on Pentax firmware v1.02 for K-3 allows bracketing by AA filter mode

Posted in Uncategorized


How to use auto exposure bracketing on your Canon EOS 40D Digital SLR

05 Feb

How to use auto exposure bracketing on your Canon EOS 40D Digital SLR, from the Canon 40D Digital Field Guide


Camera Bracketing for HDR Photography tips (Photomatix)

27 Sep

dombowerphoto.blogspot.com Photography book now available www.blurb.com Here in this video i show you what the function of bracketing is on your camera and what it is for. After shooting you then edit your photo for an HDR image (High dynamic range) and I take you through the editing process of the HDR software called photomatix. Ifyou enjoy my photography related videos please post them on your facebook page and let others know about this channel, To keep up to date Please join the facebook fan page www.facebook.com twitter page twitter.com flickr account www.flickr.com

READ THIS!!!! DO YOUR RESEARCH!!!! All info supplied here is my opinion and I (or Youtube) am NOT responsible for anything that happens from you using this info. No animals were harmed in the making of this video (My simple disclaimer). Maybe this will work for you and maybe it won’t but it might be worth a look. Check it out for yourself. Now, I suggest you learn some simple photoshop skills. There are plenty of videos on how to use photoshop on Youtube and the web. RESEARCH!!! Next, Google image banks & royalty free photos. You will find several sites that will represent your works. Now, actually go to those sites and learn all you can. RESEARCH!!! Again, look at the photo categories & then sort by “download” and you will see the most downloaded images. That will give you an idea of what type of images are in demand. Next check the requirements of the image banks that interest you. Example: If an image bank needs photos to be at least 3GB in size and you only have a 1GB camera, well then you’ll have to overcome that problem won’t you? ADDITIONAL: This simple principal can be applied to artistic illustrations and video footage as well. IMPORTANT NOTE: This video is NOT an endorsement for any service. If someone uses this video to promote their book, DVD, etc on how to make money selling digital images (as they surely will), I suggest you use care before you decide to buy it. I have given you all the information you really need to get started. Good luck! Make money with


Nikon D90 Bracketing

06 May

Learn all about Bracketing on your Nikon D90.
Video Rating: 4 / 5

With the Nikon Coolpix S4000 26217 Digital Camera use the touch control is the intuitive and fun way to shoot, view and retouch images. The 3-inch HVGA (460k-dot) touch control LCD for the COOLPIX S4000 maximizes the fun and efficiency, whether navigating the user-friendly menu interface or enjoying fingertip control over most shooting and playback functions. This kit also includes a Nikon Case and a 2.0 GB SD Card. Order your Nikon Coolpix S4000 & Case & 2 GB SD Card Kit today!
Video Rating: 4 / 5