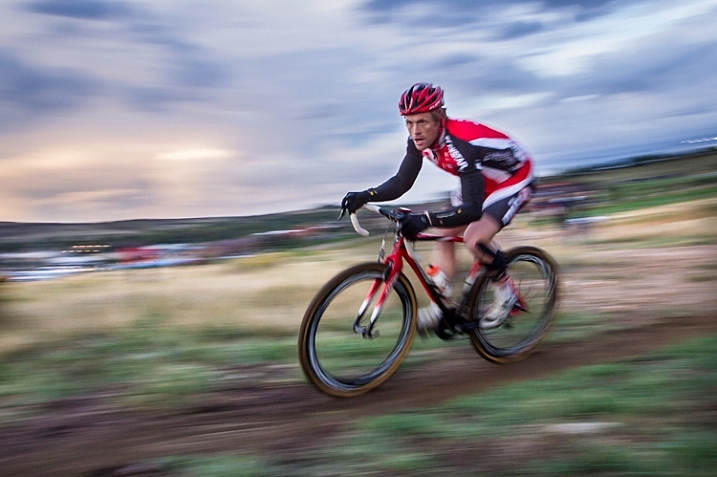
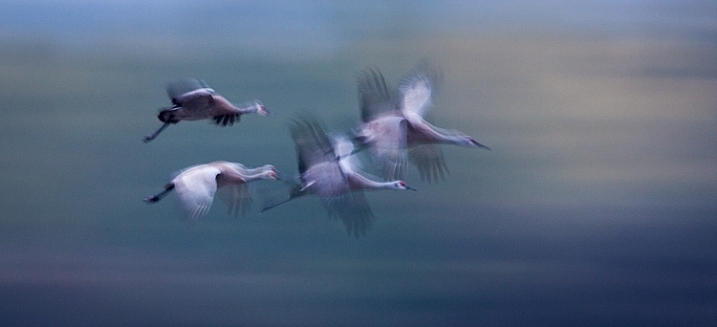
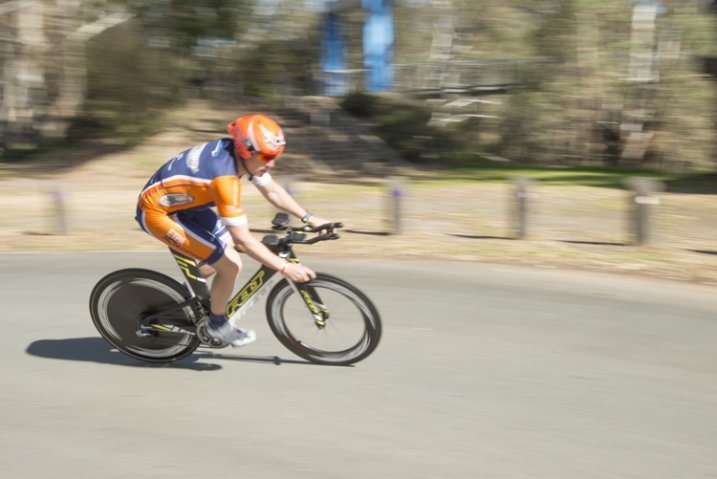
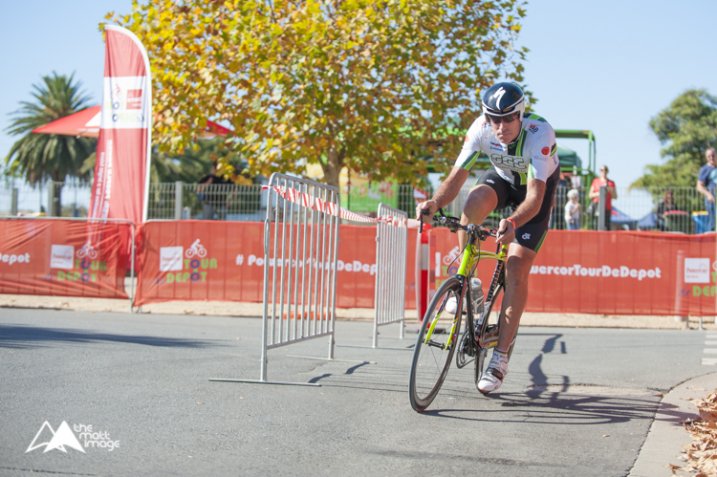
RSS
 

Posts Tagged ‘Blur’

How to Blur the Background of a Portrait Using the Magnetic Lasso Tool in Photoshop

25 Nov

Have you ever taken a portrait and wished that the background were just a little bit more blurry? You can address background blur in-camera by changing either your aperture or the distance of your subject from the background. However, there’s also a relatively quick way to make slight adjustments to background blur in post-processing. In this article, we’ll be walking through how to use the Magnetic Lasso tool in Photoshop to slightly blur the background of your portraits and people photography.

Getting started

First, open your desired image in Photoshop, and duplicate your background layer (Layer > Duplicate Layer). Next, select the Magnetic Lasso tool. If you’ve not used this tool recently, you may need to right-click on the original lasso tool and then click on the magnetic lasso tool from the fly-out menu.

How to Blur the Background of a Portrait Using the Magnetic Lasso Tool in Photoshop

Selecting the subject

Using the Magnetic Lasso tool, begin by clicking at any point right next to your subject. You’ll notice that the magnetic lasso tool begins to “stick” to what it thinks is the outline of your subject. Continue to click your mouse to create anchor points periodically all around your subject.

If the magnetic lasso tool jumps somewhere you don’t want it to go, press the delete button on your keyboard to return to your last anchor point.

How to Blur the Background of a Portrait Using the Magnetic Lasso Tool in Photoshop

Definitely be aware that once you’ve started using the Magnetic Lasso tool, you’re pretty committed! You won’t be able to do much else with Photoshop until you’ve either completed the lasso loop by connecting your endpoint to your starting anchor point or until you hit “Esc” on your keyboard to delete all your anchor points.

Once you’ve closed your lasso loop, navigate to Select > Modify > Feather (or Shift + F6) and feather your selection by 5-10 pixels.

How to Blur the Background of a Portrait Using the Magnetic Lasso Tool in Photoshop

Feather your new selection 5-10 pixels.

Invert to select the background

Next, you’ll want to invert your selection so that you’ll be blurring the background rather than your subject. To do that, navigate to Select > Inverse (or Ctrl + Shift + I). If you see a dashed outline appear around the border of your image, then you’ve correctly inverted your selection.

How to Blur the Background of a Portrait Using the Magnetic Lasso Tool in Photoshop

Notice where the marching ants are – if they appear like this around the outside of the image you’ve correctly inverted the selection.

Adding the blur effect

After you’ve inverted your selection, it’s time to blur the background of your image. Click on Filter > Blur > Gaussian Blur. Next, play with the radius slider a bit.

Please keep in mind that this technique isn’t designed to take a tack sharp background and transform it to the creamy bokeh of an 85mm lens. Rather, it’s designed to slightly enhance the bokeh that you’ve already got going on in your image. As such, I usually select a radius of 5-10 pixels for the blur filter.

Don’t be afraid to play around with this a bit. Utilize the preview check box, and see what your image looks like when using different amounts for the radius!

How to Blur the Background of a Portrait Using the Magnetic Lasso Tool in Photoshop

Gaussian blur added.

Finishing up

Once you’ve run the Gaussian Blur filter, press Ctrl + D to deselect your image, and you’re about finished! If there are any parts of your image that are blurry and shouldn’t be, go ahead and add a layer mask to your top layer, and mask off any of those blurry areas, and then you’re finished!

How to Blur the Background of a Portrait Using the Magnetic Lasso Tool in Photoshop

Original image on top; image blurred with magnetic lasso tool on the bottom.

As you can see, this technique is subtle, and helps to soften (but not eliminate) slightly distracting elements from the background of your image. I most often find myself using this technique on one or two person portraits, including newborns. It’s a really simple trick to have in your tool bag!

Have you ever utilized the magnetic lasso tool for people photography? What’s your favorite way to use it? Chime in below and tell us in the comments section.

The post How to Blur the Background of a Portrait Using the Magnetic Lasso Tool in Photoshop by Meredith Clark appeared first on Digital Photography School.


Digital Photography School

 
Comments Off on How to Blur the Background of a Portrait Using the Magnetic Lasso Tool in Photoshop

Posted in Photography


Take Your Photography into Hyperdrive with Zoom Blur Photos

26 Sep

Warning: preg_replace(): The /e modifier is no longer supported, use preg_replace_callback instead in /home/forge/content.photojojo.com/content.photojojo.com/wordpress/wp-content/plugins/ozh-better-feed/inc/feed.php on line 134


Photojojo

 
Comments Off on Take Your Photography into Hyperdrive with Zoom Blur Photos

Posted in Equipment


Asus ZenFone 4 Pro dual-cam comes with 2x zoom and portrait blur

18 Aug

Taiwanese manufacturer Asus is a pioneer in the area of smartphone zoom, and so it does not come as a surprise that its latest flagship model, the ZenFone 4 Pro, comes with a quite impressive looking dual-camera setup that offers 2x zoom capability.

The main sensor in the dual-camera is a 12MP 1/2.55″ Sony IMX362 that comes with large 1.4um pixels and sees the world through a fast F1.7 aperture and 4-axis optical image stabilization. In terms of autofocus, Asus bundles PDAF with laser-based time-of-flight technology for reliable performance in all light conditions.

The main camera also comes with a manual mode that allows for up to 32 second shutter speeds, and 120 fps slow-motion video at 1080p resolution in addition to a 4K mode. Finally, a super-resolution mode can create 48MP images out of four 12MP captures.

The secondary camera uses a smaller Sony IMX351 sensor with 1um pixels and a slower F2.6 aperture. The camera offers both 2x optical zoom and a background-blurring bokeh-effect, but the smaller sensor and a lack of OIS and PDAF in the tele-module probably means those modes are best reserved for bright-light shooting.

In the front camera you’ll find an 8MP Sony chip with 1.4um pixels and an F1.9 aperture, alongside other flagship-worthy specifications: the Android OS is powered by a Snapdragon 835 chipset, images can be viewed on a 5.5″ 1080p AMOLED display, and the phone is wrapped up in a glass-metal-glass sandwich design body.

Prices for the ZenFone 4 Pro start at $ 600.

Key Specifications:

  • Dual-cam with 2x zoom
  • Main camera with 12MP 1/2.55″ Sony IMX362 sensor, F1.7 aperture and 4-axis OIS
  • PDAF and laser AF
  • 4K video, 1080p slow-motion at 120 fps
  • Tele camera with Sony IMX351 sensor with 1um pixels and F2.6 aperture
  • 8MP / F1.9 front camera
  • Snapdragon 835 chipset
  • 5.5″ 1080p AMOLED display
  • up to 6GB RAM
  • up to 128GB internal storage
  • microSD support

Articles: Digital Photography Review (dpreview.com)

 
Comments Off on Asus ZenFone 4 Pro dual-cam comes with 2x zoom and portrait blur

Posted in Uncategorized


How to Have Fun with Shutter Speed and Added Motion Blur

21 Jun

If you think learning is a boring task, you definitely haven’t studied photography. To make this point, I decided to explain the relationship between shutter speed and movement by spending the day at a theme park.

Image blur – unwanted or not

When you get an unwanted blur in your photograph it can be very frustrating. However, this shouldn’t stop you from experimenting with your camera’s shutter speed. Perfectly sharp images can be great for composition and color but they don’t really reflect everything that’s going on and can fail to convey the atmosphere.

Composition - shutter speed

Shutter speed 1/640th, f/9, ISO 200.

Movement shutter speed

Shutter speed 1/50th, f/22, ISO 200.

Theme parks can be the most fun, but even so, they can appear a bit dull in still images. However, just adding a little movement can do the trick. Don’t you agree?

Still shutter speed

Shutter speed 1/1000th, f/3.5, ISO 200.

Moving shutter speed

Shutter speed 1/15th, f/22, ISO 200.

If you are comfortable using Manual Mode on your camera, then please do so. However, if you are not used to adjusting your settings you can always do these exercises by using Shutter Priority Mode. To do this you have to set the dial of your camera to the S (Nikon, Sony) or Tv (Canon) symbol on your mode dial. This mode gives you the flexibility to choose the shutter speed that you want, and the camera figures out the rest of the settings for you in order to have a well-exposed photo.

However, there is one thing that you do need to know first . . .

What is shutter speed?

The shutter is a curtain inside your camera that opens to allow light to enter the camera and hit the digital sensor (or film) in order to create your photo. Shutter speed refers to how fast or slowly it opens and closes. The longer you leave the shutter open, the more light will come in.

Therefore, as long as it’s opened everything in front of your lens is leaving an imprint. In the case of a moving object, this results as a halo or a ghost and is why you get blurry photos when using slower shutter speeds. The longer the exposure time, the blurrier the subject will be.

Faster shutter speed

Shutter speed 1/60th, f/22, ISO 200.

Slower shutter speed

Shutter speed 1/30th, f/29, ISO 200.

Creative effects of shutter speed

#1 Blurry subject sharp background

Now that you have that clear, let’s dive into the fun part and start doing some creative effects with this knowledge. First, we’ll start with a sharp background and a blurry object/subject, as this is the easiest one to achieve. For this one, you need to be standing still and have something or someone in motion in the scene in front of you. As for your camera, you need to use a slow shutter speed. How slow depends on the speed your subject is moving, so just make a few tries.

Note: All movement gets registered in the image when you are using slow speeds, including your own. So if your subject requires for you to shoot lower than the length of your lens (i.e. slower than 1/50th with a 50mm lens) it’s better if you use a tripod or else your fixed background will look blurry as well.

Cars shutter speed

Shutter speed, 1/6th, f/22, ISO 200 and an 18mm lens.

Twirls shutter speed

Shutter speed, 1/50th, f/29, ISO 200 and a lens focal length of 33mm.

#2 Blurry background sharper subject

For the second effect, let’s do the opposite; a blurry background and a sharper subject. You don’t want the moving subject completely sharp because then you can lose the purpose and it will look dull or worse, fake (as in Photoshopped into the image). So it’s always better for the subject to have a small halo around it that shows its movement, direction, and speed.

This one is a little bit trickier because, on top of choosing the correct shutter speed, you also need to follow the moving subject with your camera, matching its speed (this is called panning). So please don’t get frustrated if you don’t get it right on the first try because the results are worth the effort!

Follow Circular shutter speed

Shutter speed, 1/50th, f/29, ISO 200. The camera was moved in a circular motion to follow the subject.

Follow Vertical shutter speed

Shutter speed, 1/40th, f/32, ISO 200. The camera was moved in a vertical motion to follow the subject.

Follow Horizontal panning shutter speed

Shutter speed, 1/60th, f/22, ISO 200. The camera was moved in a horizontal motion to follow the subject.

#3 Mix it up

When you feel comfortable with the previous techniques, try introducing some mixed movements. In other words, your subject moving one way and you in another.

Mix shutter speed

Shutter speed, 1/50th, f/22, ISO 200.

Mix shutter speed

Shutter speed, 1/40th, f/32, ISO 200.

#4 Still objects

Liking it so far? It gets better! You can even put some movement into photos of still subjects.

Ducks shutter speed

Shutter speed, 1/50th, f/22, ISO 200 with an 18-35mm lens.

To achieve this effect you need to use a zoom lens. What you have to do is to twist (zoom) so that you go from one focal length to another while the shutter is still open. The bigger the zoom, the more intense the effect.

Barrel zooming shutter speed

Shutter speed, ½ a second, f/29, ISO 200, focal length 18-28mm.

Barrell shutter speed

Shutter speed, 1/50th, f/29, ISO 200, focal length 18-45mm.

Barrell shutter speed zoom

Shutter speed, ½ a second, f/29, ISO 200, focal length 18-55mm.

Your turn to go try it

There you go, you are ready to enjoy your day in the park while making some amazing looking shots. Take a ride, have fun, and let all your problems all blur away!

Blur

Shutter speed, 1/15th, f/22, ISO 200.

Please share your comments, questions, and motion blurry images below.

The post How to Have Fun with Shutter Speed and Added Motion Blur by Ana Mireles appeared first on Digital Photography School.


Digital Photography School

 
Comments Off on How to Have Fun with Shutter Speed and Added Motion Blur

Posted in Photography


Tips for Using the Blur Filters in Photoshop

09 Oct

For most photographers before they even press that shutter button, they have already pictured the type of shot in their heads. What exactly do I mean by that?

Well for example, a sports photographer may use a panning technique to shoot a moving sports car so that the background is out of focus to convey a dynamic shot of motion. Or maybe you are a portrait photographer and you want your subject set against a wonderful bokeh in the background.
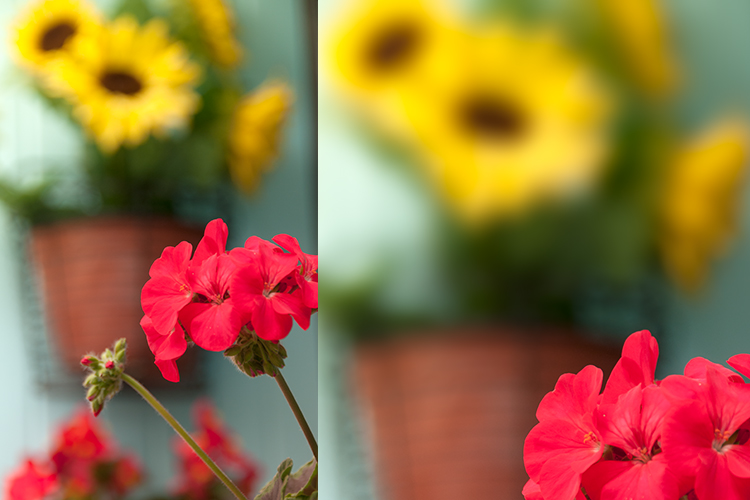
Field Blur in Photoshop

Shallow DOF on the photo to the left. A Field Blur filter using Photoshop was added to create a greater depth of field look to the photo on the right.

In-camera blur versus done in Photoshop

All these techniques can be done in-camera. But sometimes due to time, technical constraints, or other factors, getting that desired shot in-camera isn’t always possible.

In this article, I will take a look at the Blur filters in Photoshop and demonstrate how useful these effects can be when applied in post-production. Whether you want to create a motion blur effect or simply blur part of the image to create a shallow-depth-of-field look.

When Photoshop CS6 was released Adobe added three new filters: Field Blur, Iris Blur, and Tilt-Shift. This brought the tally up to 14 different types of Blur effects in Photoshop. These new blur features were impressive.

Blur filters in Photoshop

First, let’s take a look at few and where you access them in Photoshop. I’m using Photoshop CS6. Go up to the Menu Bar > Filter and select Blur. I’m not going to describe all of them. Instead, I will concentrate on the few that I use the most but feel free to experiment with the others.

different-blur-filters

Where the different Blur filters are located in Adobe Photoshop.

Some of the filters I’ve never used let alone tried, such as Blur and Blur More. Here are some blur filters which include my personal favorites:

  • Gaussian Blur
  • Field Blur
  • Radial Blur
  • Motion Blur
  • Average Blur
  • Lens Blur

If you take a look at the following images, you can see the subtle, and not so subtle differences, each blur filter has on the same image, which are white lines on a black background.
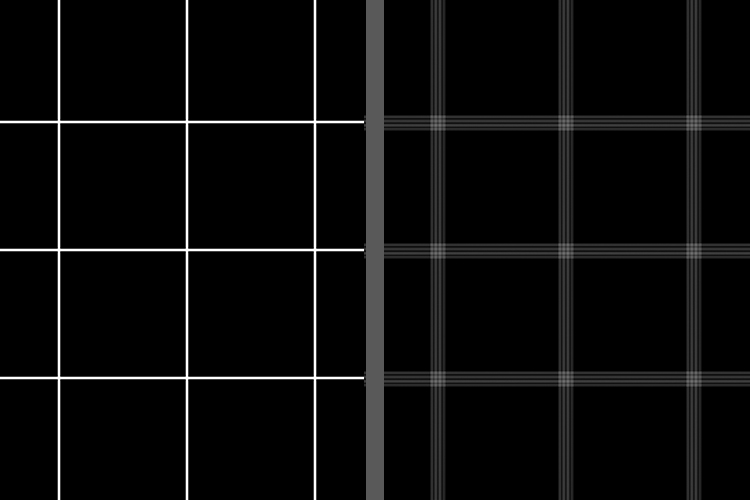
white-lines-and-shape-blur

Normal whites lines on a black background – no blur effect. A Shape Blur filter was applied to the same image on the left.
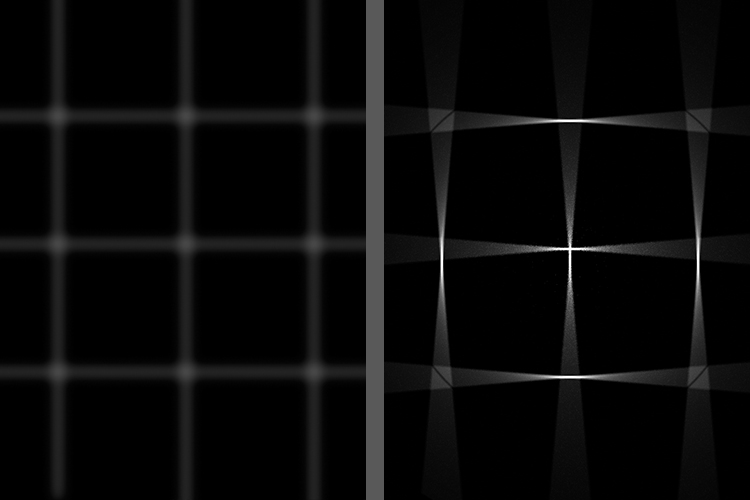
gaussian-and-radial-blur

Gaussian Blur was applied to the image on the left and Radial Blur was applied to the image on the right.
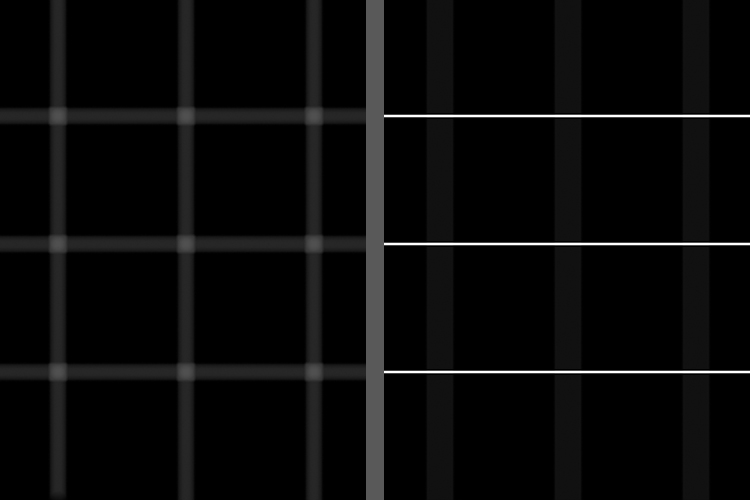
lens-and-motion-blur

A Lens Blur was applied to the image on the left and a Motion Blur was applied to the image on the right.

Gaussian Blur

I use Gaussian Blur the most out of all of the blur filters. It is my general workhorse for blurring parts of an image and for softening the edges of a layer mask. It can also reduce noise in an image.

Field Blur

Field Blur works great when you want to focus on an area of your photo, such as the foreground or background. You apply a pin on the part of the image where you want the focus left as it is. Then reduce the Radius to 0px, which can be done either by using the slider in the top right part of the menu or by dragging the white bar around the pin until blurring disappears. Place another pin or pins on the image where you want to blur the focus. The default setting is 15px Radius.
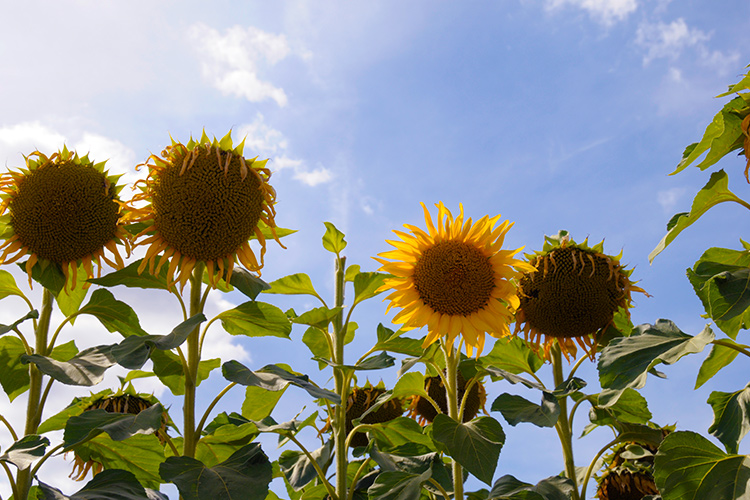
sunflowers

Sunflowers in France – one is smiling while the others are wilting due to the intense heat.
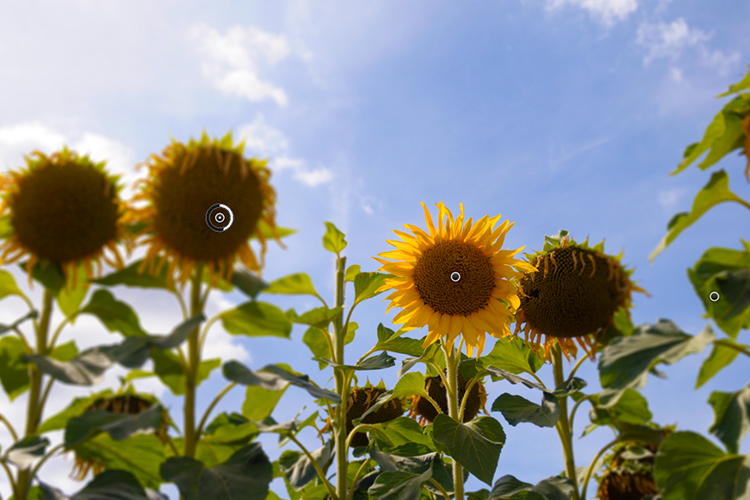
sunflowers-pins-field-focus

Applying the pins on the image where I want the focus to remain, and others where I want it blurry.
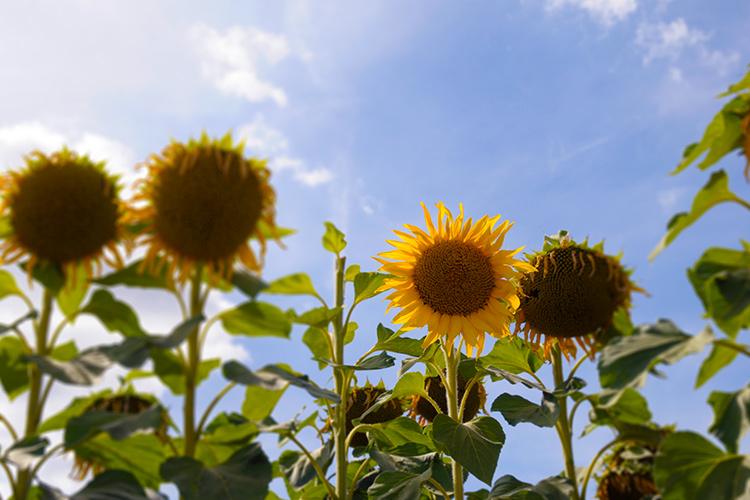
sunflowers-field-focus

I applied the Field Blur to blur out the poor wilting sunflowers so that the focus was on the smiling sunflower.

Note: If you have version Photoshop CS6 13.1 or Photoshop CC, you can apply these blur filters to Smart Objects. That’s a big plus.

What I found particularly impressive when either of these three blur tools are accessed is the separate panel for creating Bokeh. Read this dPS article if you want to know how to create a Bokeh effect in Photoshop.

Radial Blur

Pick up any magazine or newspaper where you see photos of cars being advertised. If you look closely, you will see some images of cars where the motion effects were applied in post-production. Reflections, the wheels of the car, and the background are the usual tell-tale areas.

animated-car

An animated Gif to illustrate the Radial and Motion Blur effects applied to the wheels and parts of the car and the background.

Let’s take for example, the wheels of a car. A Radial Blur could be used here to create the effect of the wheels spinning around.
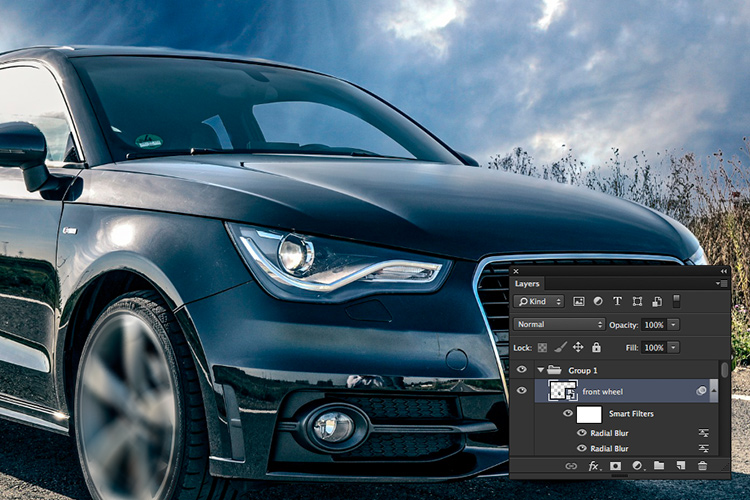
2-radial-blurs-to-front-wheel

Radial Blur applied twice to the front rim part of the wheel.

In the example above, I first selected the wheel rim and part of the tire using the pen tool (See Note below). The pen tool saves the selection and I can edit it later if needed. This selection was placed on its own layer and converted it to a Smart Object. I applied two Radial blurs. For the first method, I used Spin; Quality Best with a 8px blur. I then applied another Radial blur using the Zoom method; Quality Best at 6px blur.

Motion Blur

For the background and other parts of the car, I used the Motion Blur effect. I duplicated the image and converted it to a Smart Object. The car was isolated with the pen tool and I applied a layer mask so that when the motion blur is applied, it affects the background only and not the car. You will notice a little ghosting around the rear of the car.

car-with-radial-and-motion-blur-effects-applied

Radial Blur was applied to the wheels. Motion Blur was applied to the side panel, rear side window, and to the background.

Ideally, you would also cut out the car from the duplicated image and clone the area back in with the surrounding sky, trees, and road.

Disclaimer: I’m in no way inferring here in this article that to convey motion to a static shot of a car that all you need to do is apply Radial and Motion blur effects. Far from it. I fully appreciate that more techniques are involved, along with time, skill, and effort, to pull off a professional retouching job.

Note: I feel the Spin Blur Filter in Photoshop CC is definitely a much improved version of the Radial Blur. You add a pin over the part of your image. Click and drag the ellipse’s borders to resize it, or you can also click and drag the handles to reshape and rotate it. It’s much faster and intuitive to use. You have more control and it works on Smart Objects. The effect is also more realistic in my opinion.

Average Blur

This is a filter I don’t use that often but I wanted to demonstrate how to use it to remove color casts on your photos.

With your image already opened, duplicate the layer. Go up to Filter > Blur > Average. It will turn the image to a solid color by producing an average of all colors in the image. Add a Levels Adjustment layer. Click on the middle eyedropper tool and click anywhere on the solid color layer. This samples a gray point in your image. Turn off the visibility of this layer and you will see the difference, the color cast has been removed. It’s not perfect though, and you may find that further editing is required.
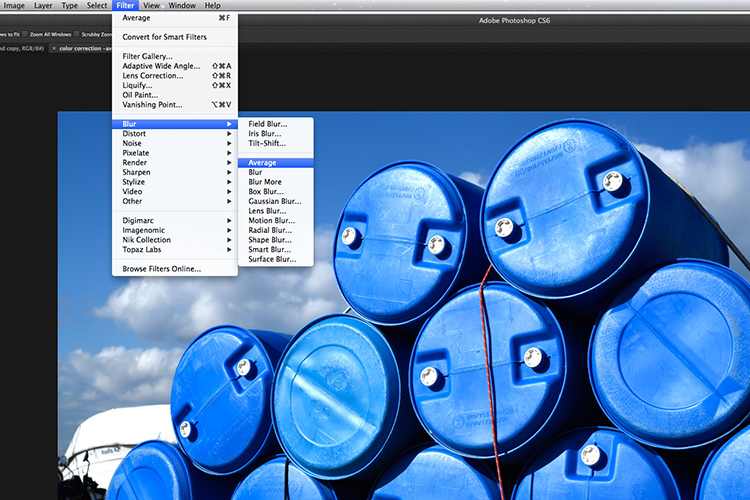
Average-blur-blue-drums

How to apply the Average Blur in Photoshop.
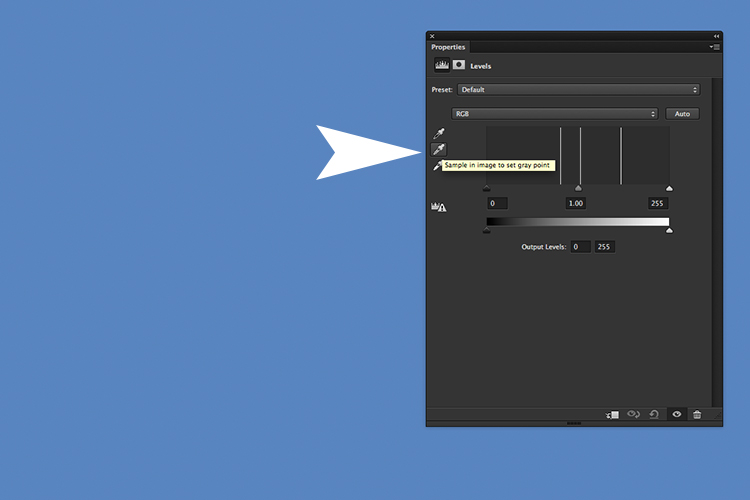
click-on-gray-eyedropper-tool

A solid average colour is calculated, which is blue. Add a Level Adjustment Layer and click on the middle eyedropper tool.
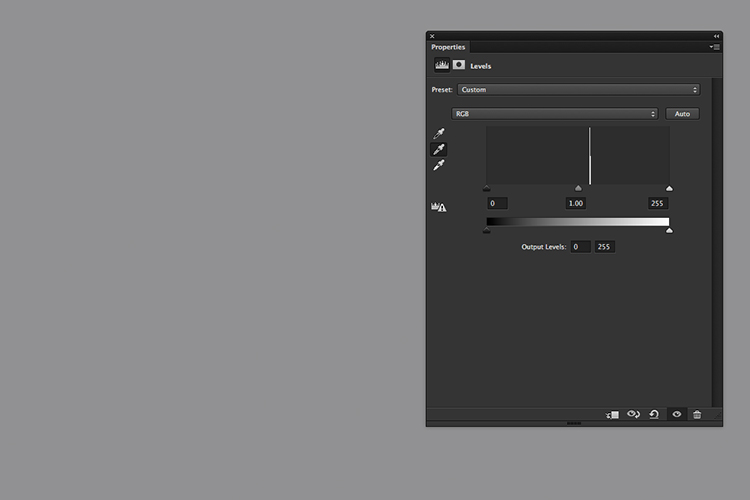
the-blue-color-changes-to-grey

By selecting the gray eyedropper tool and clicking on the image, the blue colour changes to grey.

color-cast-removed

The colour cast has been removed.

Lens Blur

The Lens Blur filter is probably my favorite of all of them if I had to choose one. It does a fantastic job of replicating the shallow DOF (Depth-of-Field) look normally achieved in-camera. While Field Blur also does a great job of this, I still prefer the Lens Blur method as you can import a depth map. That is an alpha channel which stores the selection as an editable grayscale mask in the Channels panel.

An example

In this image of the rhino taken at Dublin Zoo, I was too far away and I didn’t have a telephoto lens with me to get a nice shallow depth of field to blur out the background.
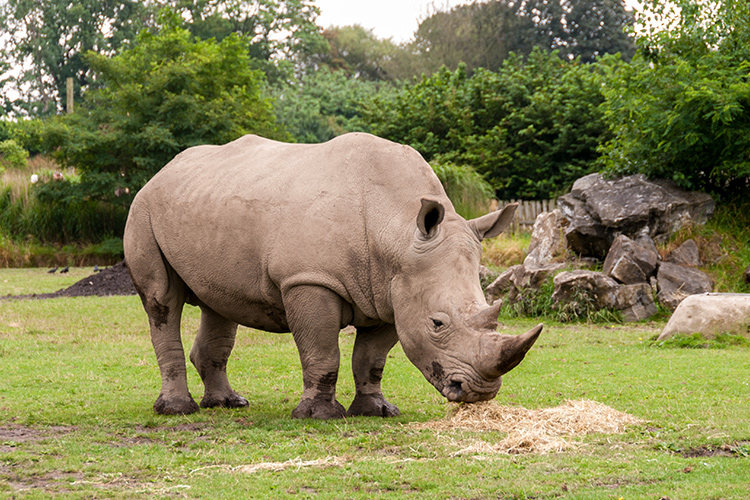
rhino-at-Dublin-Zoo

A rhino taken at Dublin Zoo.

So in Photoshop, I selected the rhino using the Quick Selection and Refine Edge tools. I saved this selection and named it. The selection or mask is now permanently stored as an alpha channel. To access it, I opened up the Channels panel and selected the alpha channel called rhino. By holding down on the Cmd/Ctrl key and pressing the letter I, it inverts the mask. The rhino is now black. Remember black conceals, white reveals on masks. Next, I clicked on the RGB layer to go back to the Layers panel.

I now need a layer mask for the foreground as I only want the background to appear blurred. Follow these steps to do the same:

Create a new layer and click on the Gradient Tool. Go up to the Gradient Editor and make sure you choose the preset Foreground to Background. Start near the bottom of the image while holding down the Shift key and drag upwards. It may take a few tries but you want a nice transition from black to white, similar to the image below.
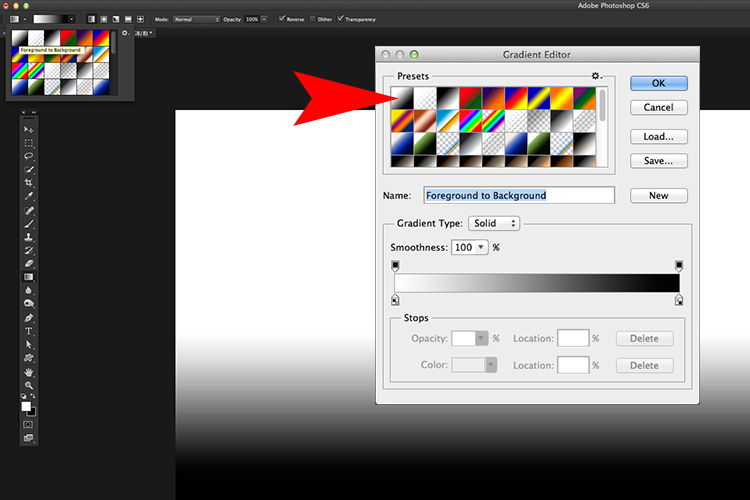
Gradient-Toll-Editor-set-to-Foreground-Background

Open up the Gradient Editor and set the preset to Foreground-Background.

Open up your Channels panel again and duplicate any of the red, green, or blue channels and name this gradient. You now have two separate channel layers; one with the rhino and the other with the gradient for the foreground.
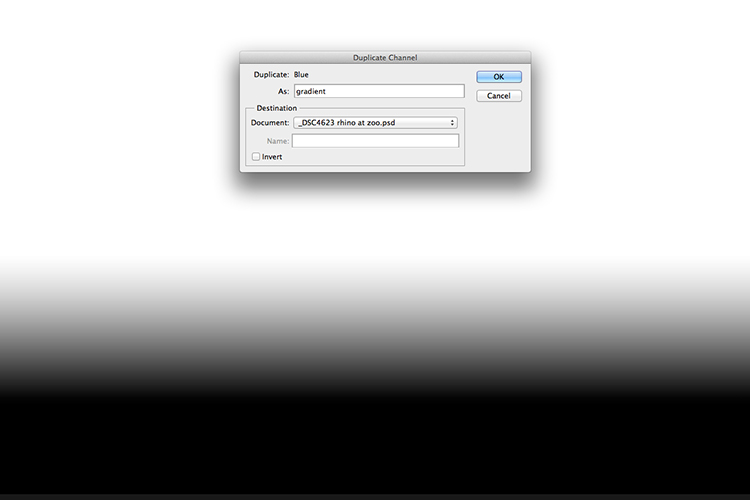
duplicate-channel

Duplicating the gradient channel to create one alpha channel.

Bear with me for the next few steps!

In order to create just one alpha channel to load as a depth map for the Lens Blur filter, we need to copy the rhino selection onto the gradient layer. So duplicate the gradient channel by right clicking on the layer or dragging the layer to the bottom of the Layers panel to the icon “Create new channel”. Name it rhino mask in this instance.

Hold down the Cmd/Ctrl key and click on the rhino layer. You will see the marching ants around the rhino and the border. Go up to the Menu Bar > Select > Inverse. Now the marching ants are just around the shape of the rhino. Go back up to the Menu Bar > Edit > Fill with Black. Click on the RGB layer and go back to the Layers panel.
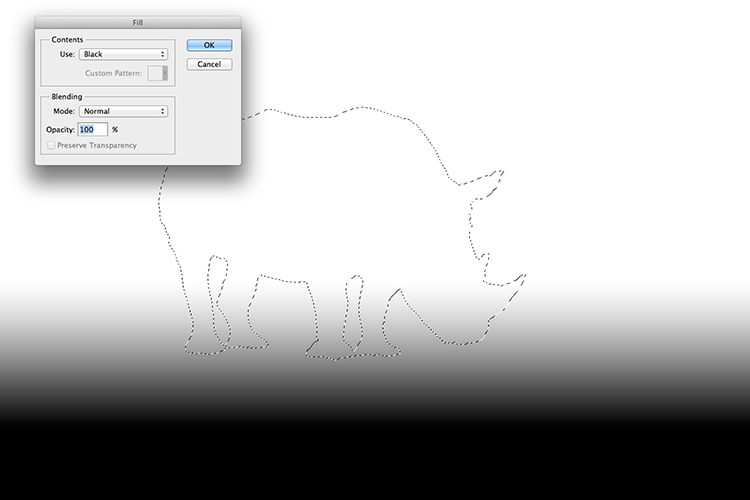
fill-with-black-rhino

After inverting the selection of the rhino, you can now fill it with Black.
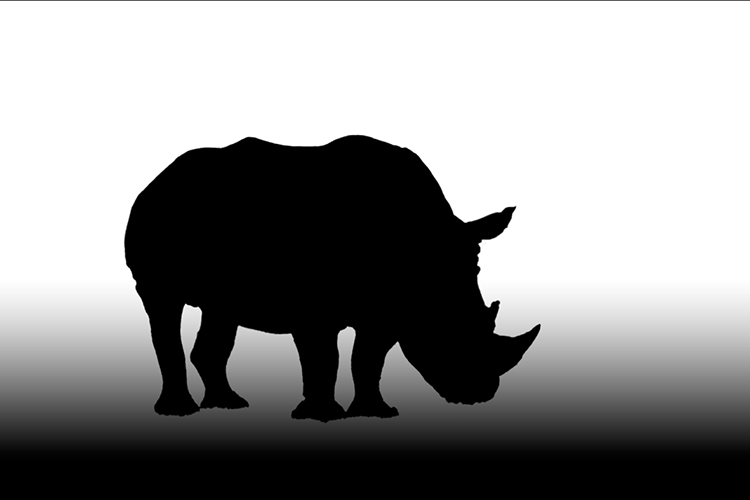
alpha-channel-for-rhino-photo

Now we have the rhino mask and the foreground mask on the one channel ready for the Lens Blur filter as a depth map.

Now we are ready to load this channel as a depth map into the Lens Blur filter. Duplicate the layer, or if you have a new version of Photoshop convert it to a Smart Object.

A separate dialog box appears and the image will initially be blurry. Go to where it says Source and click on None. A drop down menu appears and you can select the channel you have just created, in this case “rhino mask”. Adjust the radius value and click the Ok button.
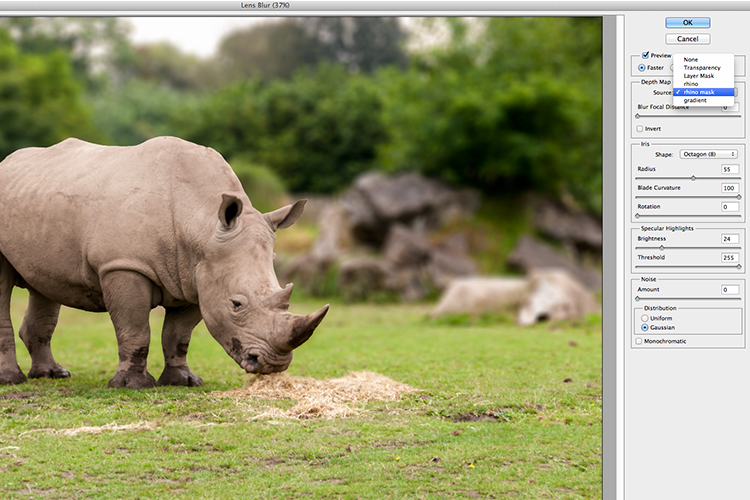
loading-alpha-channel-in-the-lens-blur-filter

Selecting the channel rhino mask in the Lens Blur filter
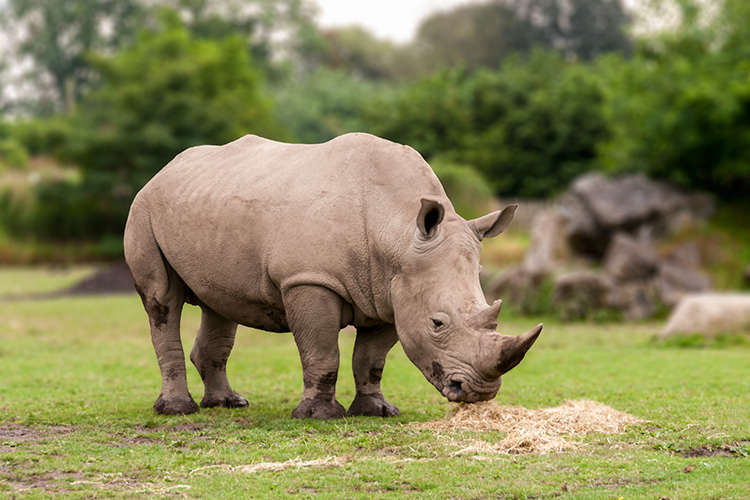
Lens-Blur-applied-using-alpha-channel

The depth map has been applied and a shallow depth of field has been created.

Conclusion

I hope this article was helpful and your eyes aren’t too blurry from reading it.

Do you use Blur filters in Photoshop? What are your favorite ones? Please share your comments below.

googletag.cmd.push(function() {
tablet_slots.push( googletag.defineSlot( “/1005424/_dPSv4_tab-all-article-bottom_(300×250)”, [300, 250], “pb-ad-78623” ).addService( googletag.pubads() ) ); } );

googletag.cmd.push(function() {
mobile_slots.push( googletag.defineSlot( “/1005424/_dPSv4_mob-all-article-bottom_(300×250)”, [300, 250], “pb-ad-78158” ).addService( googletag.pubads() ) ); } );

The post Tips for Using the Blur Filters in Photoshop by Sarah Hipwell appeared first on Digital Photography School.


Digital Photography School

 
Comments Off on Tips for Using the Blur Filters in Photoshop

Posted in Photography


How to Achieve Background Blur or Bokeh

31 Jul

If I show you two different portraits, one with a blurred background and one with a sharp background, you will automatically prefer the one with the creamy bokeh. Why? Because that’s just how it is. No, the bokeh effect is very flattering because it isolates the main subject by separating it from the background.

If you did not know, bokeh means blur in Japanese, and it is purely aesthetic.

Most portrait photographers blur their backgrounds, and I certainly do it because when I take a picture of someone, I want the viewer to focus on the person’s face and not what’s going on behind them.

IMAGE 1

Portrait with nice bokeh in the background.

I always want good background blur when I shoot portraits, that’s one of the main reasons why I shoot on Aperture Priority and let the camera do all the rest of the work. My minimum shutter speed has to be 1/100th, so I increase my ISO to 400 to compensate – this is for portraits with natural light.

Bokeh basically depends on how shallow your depth of field is (note that the further the background is from your subject, the smoother the bokeh). Depth of field depends on three main things

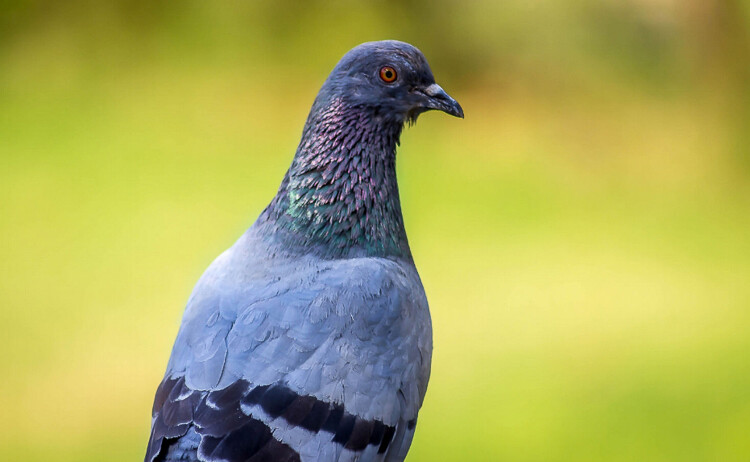
IMAGE 2

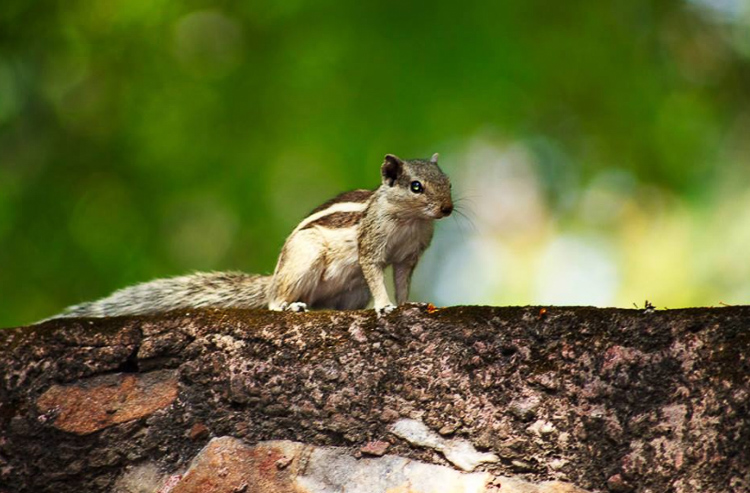
In this image, the bokeh looks really good because the background was really far from the subject (the bird).

The Aperture Matters!

The bigger your aperture (smaller the f-number), the shallower your depth of field (e.g., f/2.8 is a large aperture opening, and it creates shallow depth of field).

The first thing I did not understand when I first started photography is that I used the biggest aperture on my lens but the background was not completely blurred.

At that time I used the 18-55mm canon kit lens with its maximum aperture of f/3.5. The user’s manual on my camera told me to just use the smallest f/stop on my lens and I would automatically blur the background. However, they did not mention a lot of other factors to get this result, like how big should my aperture be. After hours of trying to get a background blur with my aperture of f/3.5, I was left very frustrated because I did not get the results that I saw on the internet.

I later understood that bokeh depended a lot on how big my aperture was – I wanted to get bokeh for portraits with a focal length of 50mm. I had to buy a lens with a bigger aperture to get a completely blurred background, and the Canon 50mm f/1.8 was the answer. It is a relatively cheap lens to get started with portraits. You can find other lenses with an aperture of f/1.4 or f/1.2 but the bigger the aperture, the more expensive the lens.

IMAGE 3

Portrait with an aperture of f/1.8

With a regular lens like 50mm, you will start getting nice bokeh starting from f/2.8. So lesson number one is to buy a lens with a really big aperture – this is the first way to achieve flattering background blur. You probably know this already, but this is important to mention before giving the two other points.

With a big aperture, you will be sure to get a nice background blur. But, there are other ways you can blur your background without having a wide aperture.

The camera to subject distance controls the depth of field

Let me show you my point: lift your right thumb (or left thumb -it doesn’t really matter) in front of your right eye and stare at it while closing your left eye. While focusing on your thumb, notice that you cannot clearly see the background. Now move your thumb farther away from your eye, keeping your thumb in focus. You will notice that the background won’t be blurred anymore. This works with your camera the same as it down with you eyes. The closer you get to your subject, the more blurred the background will be.

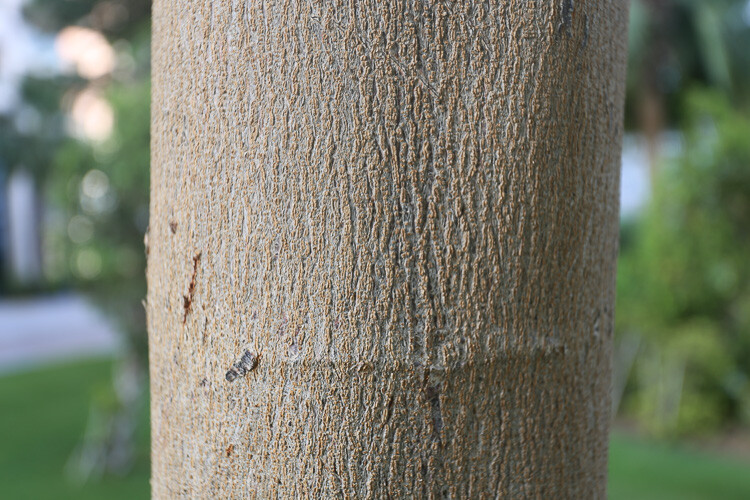
IMAGE 4

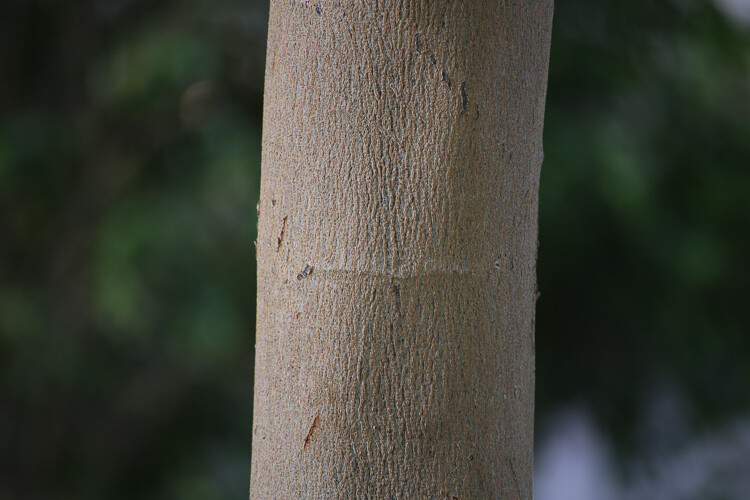
At 40mm, f/5.6 you can see that I’m not getting any bokeh in the background.

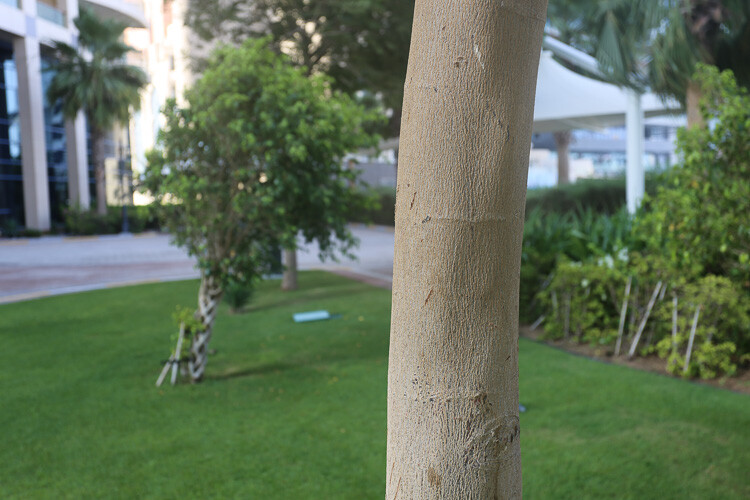
IMAGE 5

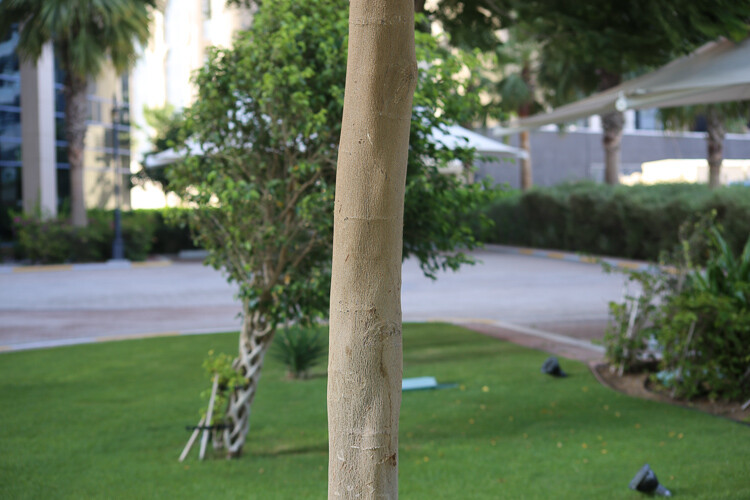
At 40mm, f/5.6 you can see that with the same focal length and aperture I can get a nice bokeh by getting closer to the tree.

IMAGE 6

At f/1.8 I get a nice bokeh with the 50mm lens.

IMAGE 7

Still at f/1.8 with the 50mm, if I get closer the effect gets more intense.

I understood this when I finally managed to get nice bokeh with my kit lens (I still did not have my beloved 50mm f/1.8). I used to practice my photography, and background blur on a tree. The f/3.5 aperture was not good enough for me so I tried different things. The first satisfying bokeh I got was when I focused my camera really close to the tree.

If you take a second and think, you will realize that all the macro photography images have a shallow depth of field, therefore a smooth bokeh. This is because macro photographers get really close to their subjects.

IMAGE 8

By getting close to your subject you will blur the background.

IMAGE 9

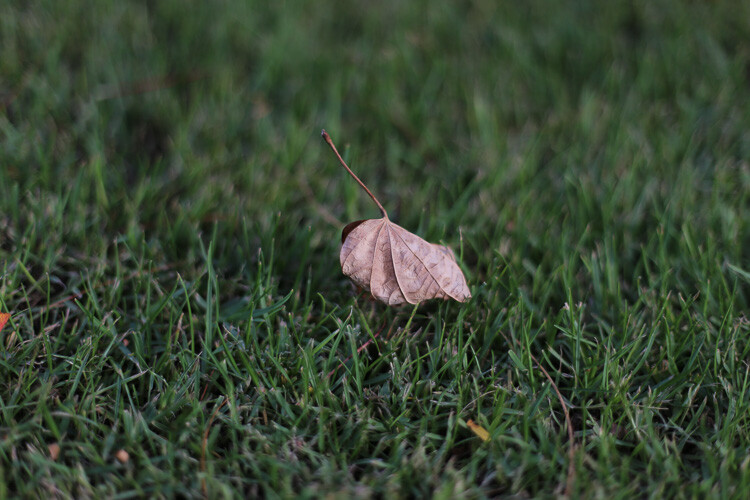
Here I used a zoom macro lens (at 300mm) and got as close as possible to the leaf.

IMAGE 10

Here I used an aperture of f/1.8 with the 50mm, and got as close as possible.

Even if you have an aperture of, let’s say f/5.6, if you get your camera really close to your subject, you will have a blurry background.

Note that macro photographers use special lenses that enables them to take images really close to their subjects. Standard lenses have a limit regarding their focussing distance. If you cannot afford a lens with a big aperture nor a macro lens, extension tubes are a good solution to extend your focusing distance.

The shorter the distance between your subject and the camera, the shallower the depth of field will be. The bokeh really depends on that distance, because I can shoot a landscape scene with an aperture of f/1.8, and there will be no background blur. That is because there is a huge distance between my camera and the subject I’m trying to photograph.

The lens focal length changes the perceived depth of field

If you cannot get close to your subject, but still want to isolate it with a background blur, then use a long focal length lens.

IMAGE 11
Image taken with a long telephoto lens.

The cool thing with longer focal length lenses, is that you can photograph portraits, wildlife, macro, and isolate anything you can’t get close to. The other advantage is that you don’t need a large aperture, an aperture of f/6.3, for example, will give you creamy backgrounds.

A longer focal length will appear to give you a shallower depth of field, because the subject is compressed, and the isolation between your subject and the background is more important.

IMAGE 12

A shorter focal length will appear to give you a larger depth of field. Let’s go back to the example of the tree. If I put my aperture at f/4 on a 16mm lens in front of the tree, the background will appear quite sharp. Whereas if I focus on the tree from the same distance, with the same aperture, but with a focal length of 50mm, I will notice that I get a background blur and a shallow depth of field.

IMAGE 13

Taken at f/5.6 and 70mm.

IMAGE 14

Taken at f/5.6 and 300mm without moving.

Conclusion

So you must be thinking: the best bokeh you can get is to have a long telephoto lens, focused really close to your subject, with a really wide aperture. That’s pretty much it!

The sad part is that these lenses are very expensive. But, I have two portrait lenses, and together they cost less than $ 400 – and, I am still able to take good looking portraits with nice bokeh. So it’s about combining these things, the best you can with the tools you have.

IMAGE 15

Using a telephoto lens and getting really close.

googletag.cmd.push(function() {
tablet_slots.push( googletag.defineSlot( “/1005424/_dPSv4_tab-all-article-bottom_(300×250)”, [300, 250], “pb-ad-78623” ).addService( googletag.pubads() ) ); } );

googletag.cmd.push(function() {
mobile_slots.push( googletag.defineSlot( “/1005424/_dPSv4_mob-all-article-bottom_(300×250)”, [300, 250], “pb-ad-78158” ).addService( googletag.pubads() ) ); } );

The post How to Achieve Background Blur or Bokeh by Yacine Bessekhouad appeared first on Digital Photography School.


Digital Photography School

 
Comments Off on How to Achieve Background Blur or Bokeh

Posted in Photography


Intentional Blur- How to Create it and Why it’s Awesome

18 Feb

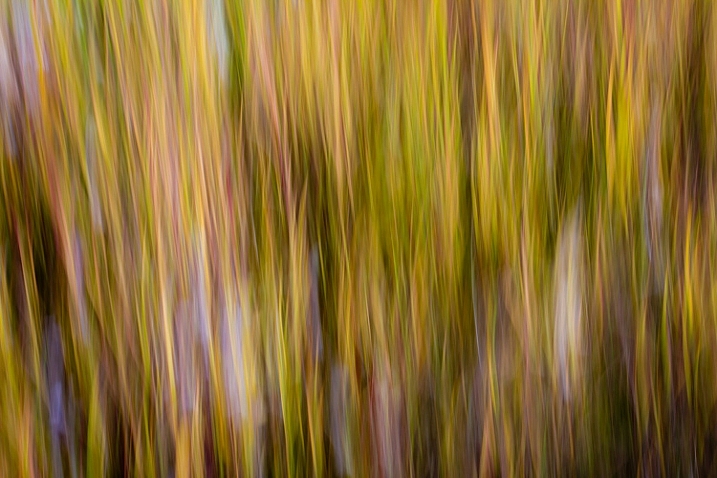
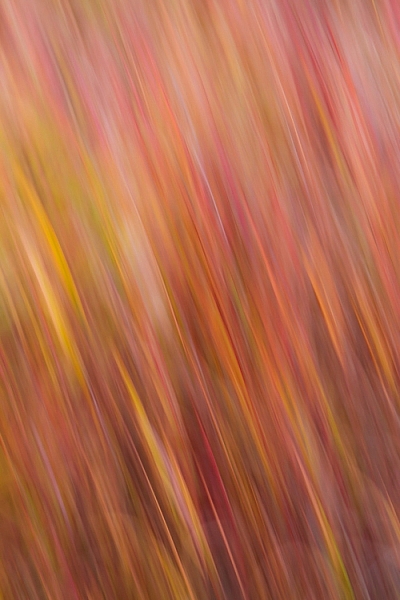
An abstract blur of cotton grass, Fairbanks, Alaska, in autumn.

Open up any photography magazine or website, and I promise there will be at least one article, and a half dozen ads, discussing image sharpness and how to get it through technique or gear. Don’t get me wrong, sharpness is great. When I’m shooting a classic landscape or portrait, if the image is a hair out of focus, it goes in the trash. But, at times, blur is exactly what you want, and occasionally, it’s exactly what your sharpness-obsessed brain needs. All you need, is a camera that allows you to manually control shutter speed.

Abstract Panning Blur

Creating abstract blurs is a chance to explore color, and pattern, and forget about the nit-picky details of composition. Frankly, it’s a fun way to screw around with your camera, and the results can be very cool.

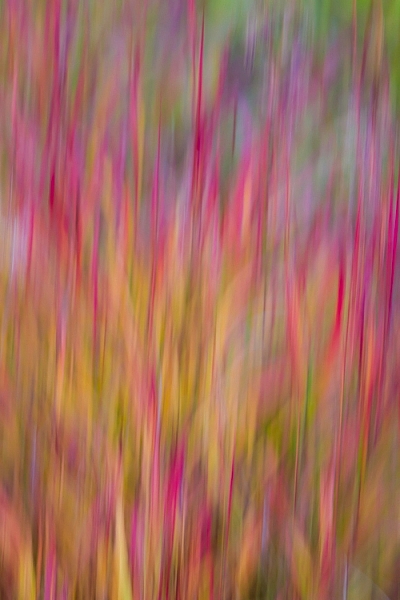
An abstract blur of Fireweed, Fairbanks, Alaska, in autumn.

I made the above image in the small wetland below my home in Alaska. In the autumn, the fireweed fades from green, to orange and red, and these plants erupted from the background. Photographically, I didn’t care about the fireweed itself, I wanted to create an image with the feeling of an explosion. After a moment of pondering, I decided a blur might do the trick. I set the camera shutter to 1/10th second, and panned the camera parallel to the direction of the stems (up and down).

The process is simple, but can feel strange. The camera must be in motion for the entire length of the exposure (usually longer than 1/15th of a second). If you pause, start too soon, or end too early, then elements of the image will retain detail, and the clean washes of color will become confused.

Below are a couple of examples using a patch of autumn foliage. In the first (below left), I moved the camera slowly, while the second (below right) is a quicker motion:

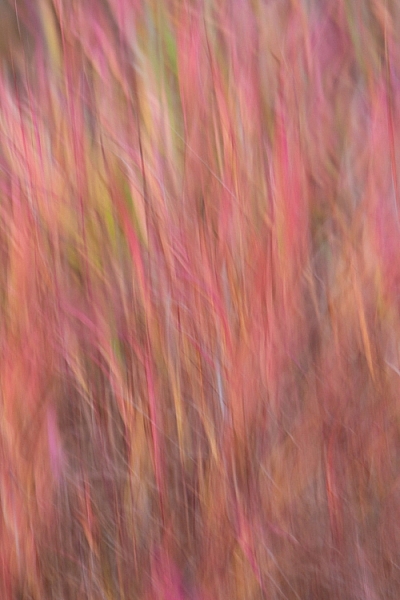
AK-FAI-autumn-blur-abstract-11 An abstract blur of Fireweed, Fairbanks, Alaska, in autumn.

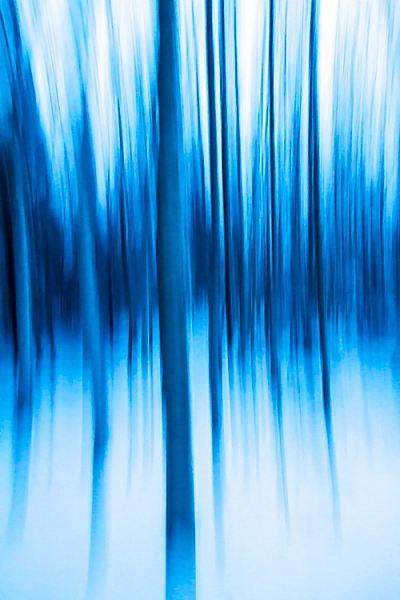
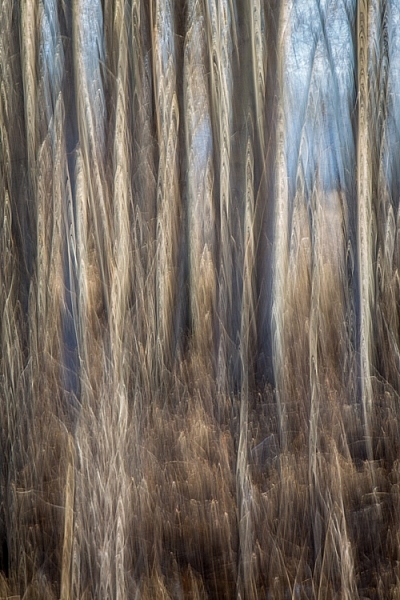
Linear patterns, like the fireweed stems I noted above, or trunks of trees, make great subjects for this kind of image. Below are two interpretations of a forest. The first of these images was made during the blue hour of a snowy winter morning, the second is a very fast vertical pan of cottonwoods, on a bright spring day.

AK-FAI-winter-abstract-6
AK-FAI-CreamersField-abstract-104284-25

You can also experiment with jiggling the camera as I did in the image below. The results can be very painting-like, and are quite unlike any other type of image I know how to create.

AK-FAI-CreamersField-abstract-104284-33
Zoom Blurs

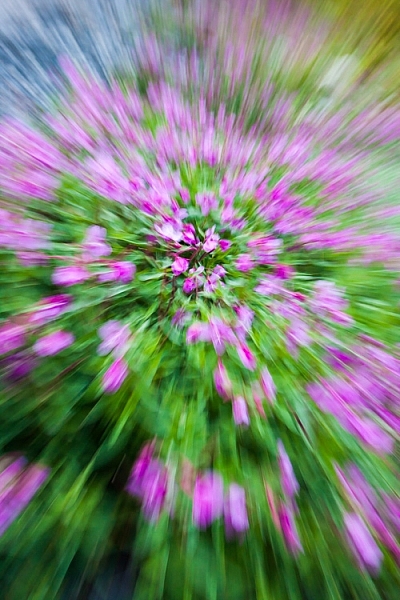
A zoom blur, as is obvious from the name, requires a zoom lens to execute. The result is an image that appears to blur outward, from a comparatively sharp center point. Often, it gives the impression of forward motion, or viewing the subject down a long tunnel of color and pattern. Bright subjects, like flowers, often work well. When done properly, this technique yields an image that is a celebration of color.

AK-Girdwood-fireweed-abstract-3

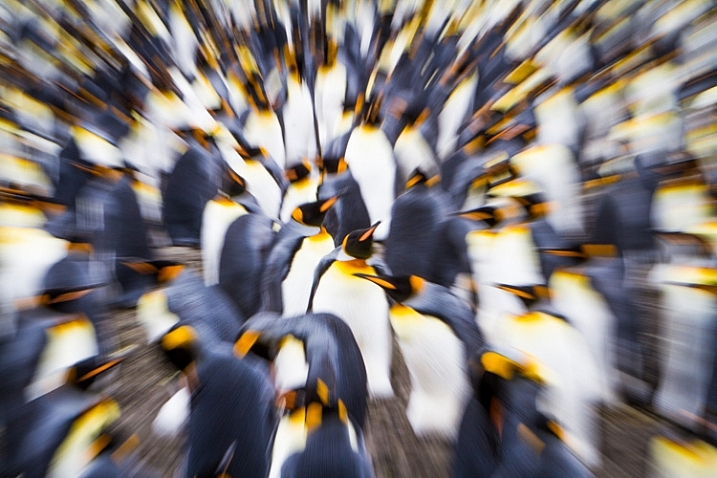
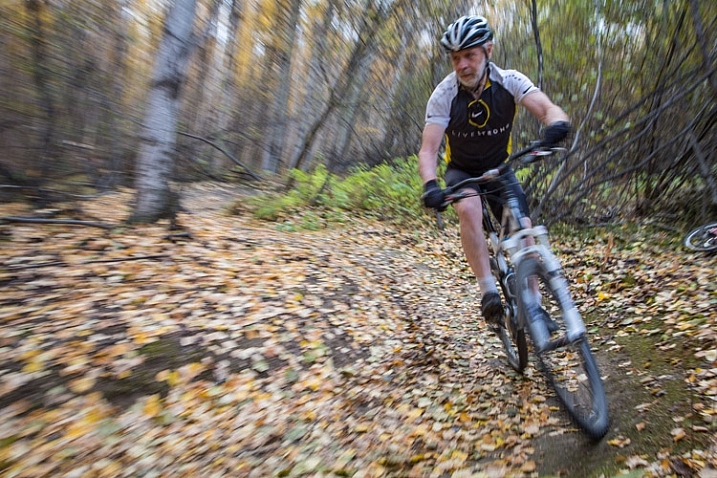
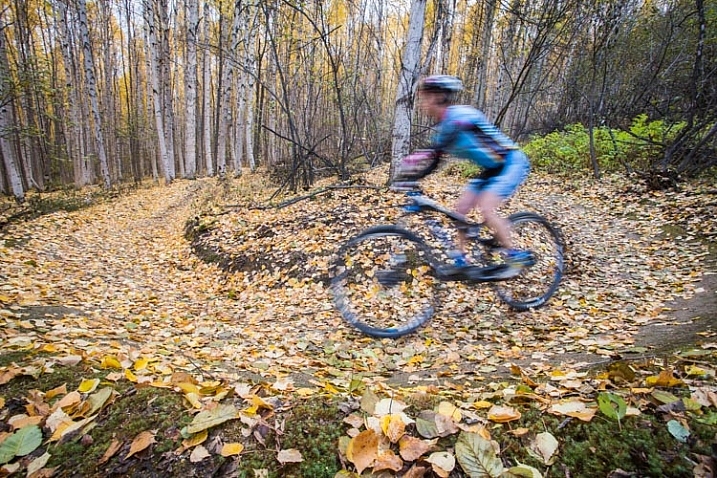
Just as you need the camera in constant motion to create an effective panning blur, you’ll need to make sure the zoom is activated throughout the exposure. Try 1/10th second as a starting point. I’ve experimented with this technique in a variety of situations, even on a colony of King Penguins (below), where I think the technique emphasizes the chaos and noise of the tightly packed birds. It can also be effective for portraying motion, as I did in the image of the mountain biker (second image below). For this image I used a small zooming motion, instead of a dramatic pull back, as the cyclist approached me.

SGeorgia-9Jan10-SalisburyPlains-53
AK-FAI-GoldstreamSports-Sep13-121

Subject Blur

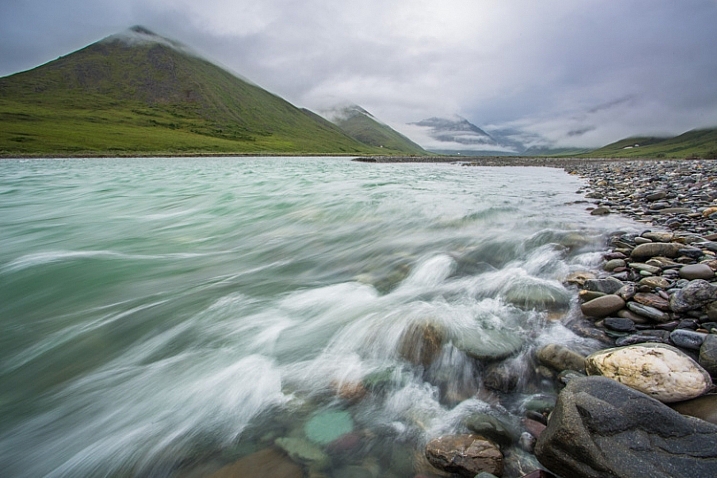
In the techniques I described above, either the camera, the lens, or both must be in motion, but blurs can also be effective when it’s the subject that’s moving. Most landscape photographers will already be familiar with the technique of blurring moving water through the use of a slow shutter speed. This technique requires a tripod to be effective, and composition, unlike in abstract blurs, now plays an important role.

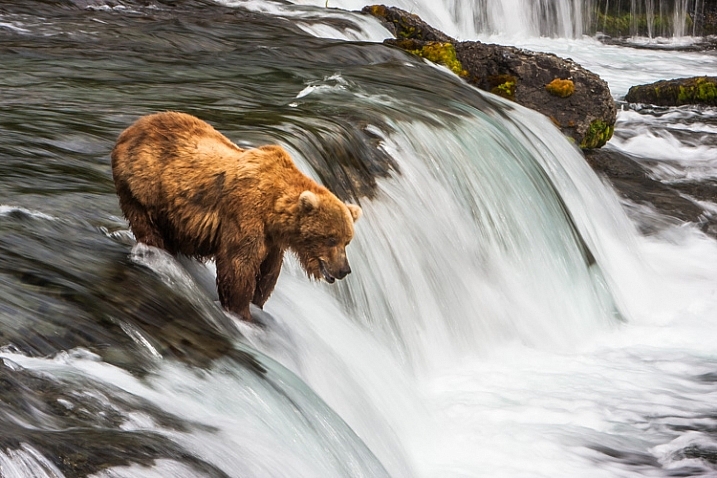
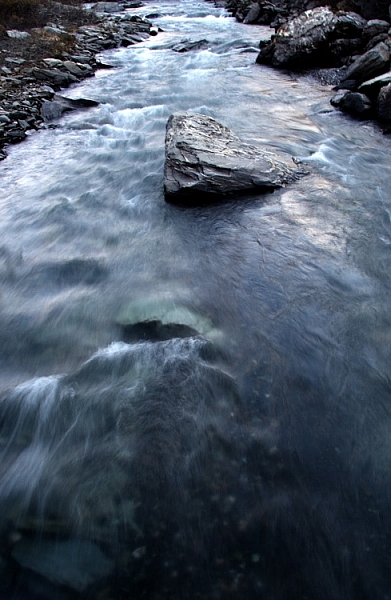
Your shutter speed will dictate how the blur appears in your final image. Slowly moving subjects like rippling waves, may require several seconds to blur, while a fast tumbling creek or waterfall may only need 1/15th second. Experiment, and see what you get. In the two images below, the bear and waterfall required only 1/15 second to blur, while the slower moving creek required nearly a half second.

A Brown Bear fishes for salmon at Brooks Falls in Katmai National Park, AK, USA.

AK-Denpark-Savageriver-01

1/8th second at f16

1/8th second at f16

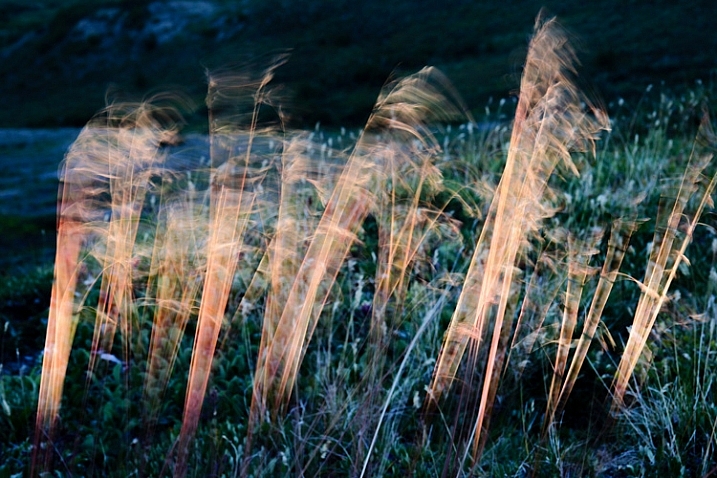
Water is the obvious subject for this kind of photography, but don’t limit yourself. Several years ago, I was hiking atop a ridge in the Alaska Range. It was mid-summer, a few minutes before midnight, and the sun was just setting behind the mountains. It was windy, and tufts of golden tundra grass were waving rapidly back and forth in the breeze. I knew that when the last light of day departed, those tufts of grass would be lit up, and all the rest of the world would be shadowed. Quickly, I set up: tripod placed low, long shutter speed (1/4 second), and waited. Sure enough, for just a moment, the only thing lit by the sun was the blowing grass stems:

Blowing tundra grass lit by evening sun, Alaska.

Action Blurs

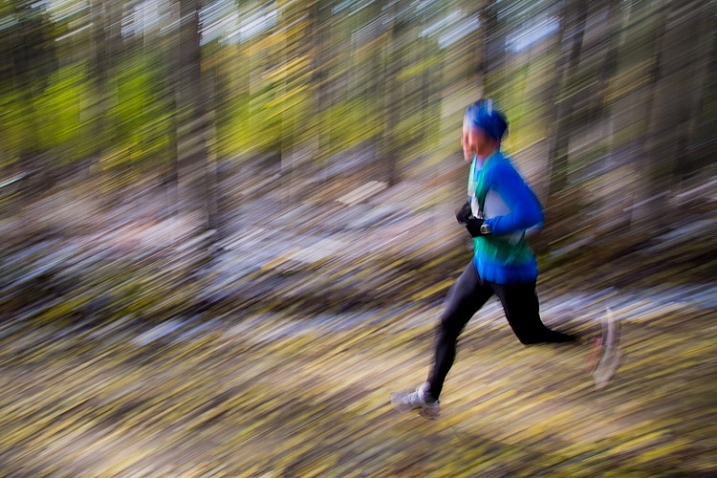
This last technique is frequently used to give the impression of movement and speed, and is often used in sports and wildlife photography. There are two flavors of action blurs. The first is when the camera is panned to track a moving subject. This results in an image with a sharp, or semi-sharp subject, and blurred background like the image below.

AK-FAI-Equinox-marathon-109203-3

The second is when the camera is still, and the subject is in motion. The outcome is a blurred subject, with a sharp background. Both result in an image that clearly tells the story of motion.

AK-FAI-GoldstreamSports-Sep13-128

Results using this technique are hard to predict. The combination of long shutter speeds, and moving cameras and subjects, can result in many failed images. But when it works, the results can be awesome.

CO-Golden-Cyclocross-26Sep2012-87

Rapidly moving subjects may require only 1/60th of second (or faster) to provide blurred motion, but slow subjects may need substantially longer shutter speeds. It’s a game of trial and error. Running and cycling races, or other sporting events, are great places to practice the technique, as you can shoot again and again while experimenting with different shutter speeds. Once you’ve mastered the method, you can break it out on higher stakes subjects like fast moving wildlife, where you may only get one opportunity to get the shot.

AK-FAI-CreamersField-Migration-Aug2009-54

Go out and experiment. Blurs, be they abstract, impressionist, or realistic, can be great fun to play with. For me, it’s a fallback technique when I need to jumpstart my creativity.

Have you tried making blurs? I’d love to see what you get. Feel free to post them in the comments below.

googletag.cmd.push(function() {
tablet_slots.push( googletag.defineSlot( “/1005424/_dPSv4_tab-all-article-bottom_(300×250)”, [300, 250], “pb-ad-78623” ).addService( googletag.pubads() ) ); } );

googletag.cmd.push(function() {
mobile_slots.push( googletag.defineSlot( “/1005424/_dPSv4_mob-all-article-bottom_(300×250)”, [300, 250], “pb-ad-78158” ).addService( googletag.pubads() ) ); } );

The post Intentional Blur- How to Create it and Why it’s Awesome by David Shaw appeared first on Digital Photography School.


Digital Photography School

 
Comments Off on Intentional Blur- How to Create it and Why it’s Awesome

Posted in Photography


PhotoshopUser TV: Style Blur and Pinching Pennies – Episode 424

18 Sep

This week on PSUTV, Corey has a tip on using style blur. Pete shows an design trick on pinching pennies.

This Week’s Sponsors:

Wacom | mpix | B&H Photo | Kelby Training | NAPP | onOne Software | Peachpit | Squarespace | Expo Imaging | Intel | Athentech

Photoshop User TV Episode 424 is now playing!

Download Episode 424
(In order to download this file directly to your computer, right-click (Control-click on Mac) on the Download link and choose the Save As option.)

Photoshop User TV

 
Comments Off on PhotoshopUser TV: Style Blur and Pinching Pennies – Episode 424

Posted in Photography


Shooting Fast Moving Subjects – How to Stop the Blur

24 May

In this article you will see how to deal with fast moving objects. For me shooting action is the most fun you can have with your photography. You can freeze that instant split second that the human eye couldn’t even comprehend, and capture it in an image for all time.

Image 4

1/6400, f/6.3. ISO 800

Last weekend I was lucky enough to shoot a bicycle charity event in the countryside. The sun was out, the birds were singing and there was enough distractions for me to completely leave my imagination at home.

As I was shooting fast moving road cyclists I had two lenses that I used. One which is the bread and butter lens of most photographers, the 70-200mm f/2.8. On a full frame body it has a good focal length that can capture subjects at a medium distances and the fast aperture allows for shooting in quite low light conditions. The second lens was a wide angle, for capturing some different looking shots. You don’t want to have a memory card with all the same style of shots, boring for you, and if this is for work, definitely not what the client wants to see.

image 7

Shutter speed: 1/50th, f/16, ISO 200

Although I just listed pro lenses, honestly you can do this with any kit zoom lens, a 55-200mm variable aperture or a 70-300mm like the Nikon VR which is a great value for money zoom lens.

As with most shoots I make sure I get the classic shots that I KNOW I can nail first. For me this is frozen action, nice background, and the subject at approximately a 45 degree angle.

Image 1

1/2500, f/3.2, ISO 200

As you can see in this image, it’s not mind blowing, however it has all the ingredients for a nice photograph that meets the criteria of what you are trying to capture. To create this type image, shoot with your zoom lens using the following settings as a rough starting point:

  • Camera mode: Aperture Priority (Av in Canon, A in Nikon and most other brands)
  • Aperture: As you want to freeze the action you need as much light entering the camera as possible, so choose a large aperture setting. With most kit lenses go down as low as possible, at this focal length that may be f/5.6.
  • Shutter speed: No need to worry about this as the camera will adjust this automatically in this mode.
  • ISO: If it is a sunny day like above, then ISO 100 or 200 is fine. However, if it is a little bit gloomy you may have to increase your ISO, I’ll talk about this in a minute.
  • Focus: Set your camera for on Continuous or Servo focus depending on your brand. This means that while your shutter button is held halfway down, or your AF on button is pressed, the camera will continue to adjust its focus, which is what you need when tracking moving objects.

Your camera is now setup and ready to go. Get yourself in a position where the subject, in this case the cyclist, will be at approximately 45 degrees to you. Full side-on image and straight-on images can seem a bit odd unless it’s the style you are going for; at this angle you can see most of the rider and it’s more flattering.

Smoothly follow the rider with your camera; this might be easier in a crouch or if you have a monopod, utilize it. Once they are in a good position click off a shot or two. With any luck you have a nice photo of the rider, somewhat frozen in time.

Image 2

1/1600, f/3.2, ISO 200

It didn’t work? Okay, there are two main things that could trip you up here, firstly the shutter speed wasn’t fast enough and the rider is blurry (??? and secondly???). As you are using Aperture Priority (which means you set how much light is allowed in the camera and the camera adjusts the amount of time the shutter is open automatically) it’s possible that there just isn’t enough light. So the camera has slowed the shutter speed way down to let more light in to exposure your photo properly, which has caused blurring of the subject.

When looking through your viewfinder. check your shutter speed down the bottom. You should be aiming for at least around 1/500th of a second. If it is slower than that, it’s time to bump your ISO up to compensate. Your ISO is how sensitive your camera sensor is to light. As a general rule you always want to keep this as low as possible to guarantee grain and noise-free images. However, it is a tool to be used, and on modern DSLRs shooting at ISO 800 yields incredible results over the older generation digital.

image 6

1/4000, f/3.2, ISO 400

Adjust your ISO up to 400 and try again. If you are still experiencing motion blur bump it up to 800. Unless it’s a very dark and gloomy day this should give you a crisp clear image with a fast shutter speed.

The next issue you might encounter is that the focus isn’t right. Maybe the rear wheel of the bike is in focus, but the riders face isn’t. Or even worse, the background is sharp and the rider is way out of focus. This is a simple fix.

All DSLRs give you the ability to change focus points, the square which the autofocus uses to target the focal point. Move this point to where the riders head will be in your frame. You may have to change your focus mode to Single Point Focus, as many cameras have the ability to change which focus point they use automatically, depending on the situation. You will have to consult your manual to find out where this is located in your menu system.

image 5

1/3200, f/3.5, ISO 400

Now when your rider is in frame, and you are focusing, it will focus on the rider’s face. Honestly, as long as their face is in focus the rest could be a blur, it doesn’t matter, faces are the most import thing in nearly all photos.

These guide lines should give you most of the info you need to shoot this type of photo. However, as with all photography, it’s trial and error to get things right and to get it looking the way YOU want.

Practice this week. Get your kids out on their bikes, go to the park and try to get some photos of dogs running around (this is fantastic practice for tracking subjects) or head down your local racetrack and take photos of cars, motorbikes or horses!

Image 3

1/2500, f/7.1, ISO 500

Once you get this dialled in. it can be moved to many other subjects and situations, the photos of a skier (above) and snowboarder (top of article) were shot using exactly the same technique.

Do not dismay if things aren’t working out straight away. A lot of learning photography is trial and error and practice. Any entry level, or higher DSLR setup, can do this. Learn your gear and practice, you will be surprised at the caliber of photos you can get from even the least expensive setup.

Thank you for reading, I hope this helps you on your photography quest this week. Please post up your photos and practice shots, if you have any questions I will try to answer them all and get you on the right track to photography perfection. Happy snapping!

googletag.cmd.push(function() {
tablet_slots.push( googletag.defineSlot( “/1005424/_dPSv4_tab-all-article-bottom_(300×250)”, [300, 250], “pb-ad-78623” ).addService( googletag.pubads() ) ); } );

googletag.cmd.push(function() {
mobile_slots.push( googletag.defineSlot( “/1005424/_dPSv4_mob-all-article-bottom_(300×250)”, [300, 250], “pb-ad-78158” ).addService( googletag.pubads() ) ); } );

The post Shooting Fast Moving Subjects – How to Stop the Blur by Matt Hull appeared first on Digital Photography School.


Digital Photography School

 
Comments Off on Shooting Fast Moving Subjects – How to Stop the Blur

Posted in Photography


[UPDATED] Nikon announces new firmware for 300mm F4 VR to fix blur at certain shutter speeds

17 Apr

Nikon has announced a firmware update for its new AF-S NIKKOR 300mm f/4E PF ED VR, to fix an issue where at certain shutter speeds on D800-series cameras, images can exhibit ‘noticeable blur’. According to Nikon, the problem can occur at around 1/125sec with the lens’s VR function enabled in either ‘Normal’ or ‘Sport’ modes. Users of affected units are encouraged to return their lenses to Nikon where the update will be applied free of charge. Click through for more details

Articles: Digital Photography Review (dpreview.com)

 
Comments Off on [UPDATED] Nikon announces new firmware for 300mm F4 VR to fix blur at certain shutter speeds

Posted in Uncategorized