RSS
 

Posts Tagged ‘Between’

How to Understand the Difference Between TTL Versus Manual Flash Modes

01 Sep

It is no secret that the popup flash which comes built-in to your digital camera simply isn’t enough in most situations. For a variety of reasons, shooting using just the popup flash is not a feasible option. That is why you will find photographers everywhere you look, going for an external flash and using it increasingly during their shoots.

External flash, also known by the term “speedlight” provides many benefits and advantages to photographers, even while shooting in extremely low light conditions. They allow us to have a far superior control over the lighting of an image. Flashes are available in the market from a variety of manufacturers including camera makers like Canon and Nikon, or third-party companies like Godox, Yongnuo, Nissin, etc.

How to Understanding Your Flash Settings: TTL Versus Manual Mode

If you step out in the market to buy your first flash, you will come across two variants, a fully manual flash, and a TTL (Through The Lens) flash. You may end up getting confused over which flash will suit you the best and which one you should invest your money in. Both the Manual and TTL flash have their own plus and minus points which appeal to photographers. What is important is to properly understand their systems, functionalities, advantages, and disadvantages.

Understanding Manual Flash

On a fully Manual flash, there is no control (d either by the camera or the flash) over the intensity or duration of the light emitted from the flash. Instead, it is the photographer who controls the output of the flash by adjusting the settings, either in-camera or on the flash itself.

While using a manual flash, there are four controls you can use to set your flash output manually as per your requirements:

  • Adjust the ISO on the camera.
  • Raise or lower the level of output from oyur flash (½, ¼, 1/8th power, etc.)
  • Alter the distance between the subject and the flash (light source).
  • Adjust the aperture value on the camera.
How to Understanding Your Flash Settings: TTL Versus Manual Mode

Manual mode – check the user manual for your flash to see how to set it.

Not all flashes are equal

An important point to remember and consider is that the majority of flashes can shoot in manual mode, but not every flash can shoot in TTL mode. A manual flash also gives you specific control over the light and exposure, and allows you to set it exactly to your requirements. You do not have to use exposure compensation while using a manual flash as your composition, frame, etc., does not have any affect on the overall exposure and lighting of the scene.

Pros and cons of manual flash

In situations where the distance between the flash and the subject is constant and fixed, you can opt to use manual flash settings. A manual flash is extremely useful in situations where you have to fire away a series of shots of the subject repeatedly, under similar exposure conditions. E.g., in food photography, product shoots, and more this is the case. The power level is fixed, and it remains the same, which ensures that the exposure does not vary from shot to shot.

How to Understanding Your Flash Settings: TTL Versus Manual Mode

Manual flash works best when the subject is not moving like this setup, posed shot.

One of the main drawbacks of using a flash in manual mode is that you still need to figure out the optimal power output needed to obtain the correct exposure, which can be a time consuming process. And thus, a manual flash can mainly be used while shooting portraits, headshots, and fine art. In other words, in situations where you can take time to setup the scene.

Many also believe that manual mode is the best to use to learn about external flash photography. You choose the output, click the picture and then review it. If it does not come out the way you were expecting and wanted it to, then you can tweak the settings and try again. So you end up learning more in the process.

Understanding Automatic or TTL Flash

When the flash output is directly controlled by your camera, it is called Through-the-Lens metering or TTL. In the case of an Automatic or TTL enabled flash, the flash output is directly controlled by the flash or by the camera’s exposure metering system. Thus, using a flash in TTL mode will give you varied flash output.

How to Understanding Your Flash Settings: TTL Versus Manual Mode

Flash in TTL or Automatic mode.

The only method to control a TTL enabled flash is to use the flash exposure compensation function on the flash or through your camera settings. Also, while using a TTL flash, your chosen Aperture and ISO levels do not affect the flash output because the camera tells the flash to emit a particular output based on the camera’s readings. If the settings change, so will the output to compensate automatically.

When you half-press our shutter release button on your camera to focus, your camera not only focuses, but it also takes a metering of the scene and its exposure. It measures the amount of ambient light which is being returned “Through the Lens” to the sensor.

How to Understanding Your Flash Settings: TTL Versus Manual Mode

How it works

A TTL enabled flash fires a “pre-flash” before the actual shot is taken. The camera then measures the pre-flash with the ambient light level to calculate the power needed from the actual flash to make a correct exposure. This pre flash happens really quickly, only micro-seconds before the main flash, and thus cannot be seen by the human eye. Based on the model of your flash, this pre-flash can be an actual white light flash or an infrared one.

Using a TTL enabled flash is extremely helpful in situations when you are moving around a lot, shooting in different or changing lighting settings, etc., and do not have the time to fire a series of test shots before the shoot.

How to Understanding Your Flash Settings: TTL Versus Manual Mode

One of the drawbacks which accompany the use of a TTL flash is less control and less precision over the lighting. If you get an incorrect exposure while using a flash in TTL mode, it is really difficult for you to know the power setting which was used for that shot.

Conclusion

If you have recently purchased your first digital camera and plan to buy an external flash, then you have two options.

Either go for a manual flash, as it will urge you to learn more about how to control and adjust the lighting in various situations. But if you want to take up professional assignments and cannot afford to experiment with a manual flash, then go for a TTL enabled flash.

Which do you use? Do you have a flash that does both? Which do you prefer for different situations? Please tell us in the comments below.

The post How to Understand the Difference Between TTL Versus Manual Flash Modes by Kunal Malhotra appeared first on Digital Photography School.


Digital Photography School

 
Comments Off on How to Understand the Difference Between TTL Versus Manual Flash Modes

Posted in Photography


How to Understand the Differences Between Full-Frame Versus Crop-Sensor Cameras

14 Jun

I remember how excited I was to get my first DSLR several years ago. My wife and I had a newborn and wanted to get better shots of our little baby than what a pocket camera could provide. So we soon found ourselves with a new-to-us Nikon D200 that produced stunning images of our precious little boy. The pictures wouldn’t win any prizes, but they were leagues beyond what we could get with our pocket camera or cell phone and that was fine with us.

However, the more I learned about cameras in the coming months, the more I started to think we had made a mistake because our camera was, I discovered, a crop-sensor model. Unbeknownst to us, we had spent hundreds of dollars on what was clearly an inferior camera! Or so I thought at the time. The truth, as is so often the case, is much more nuanced. I’ll explore it a bit in this article so you can understand the practical differences between these two types of cameras and hopefully decide which one is right for you.

How to Understand the Differences Between Full-Frame Versus Crop-Sensor Cameras

This duck is rushing to get the latest full-frame camera he read about on the internet.

Different, not better

Before I get too deep into this article I want to make one thing clear; neither crop, nor full-frame, nor medium format, nor micro-four-thirds are any better than the others. All of them are different, and each format has its strengths and weaknesses (yes, even full-frame cameras have weaknesses!) and each is ideally suited to different types of photography. Moreover, all types of cameras are capable of taking great photos. Even mobile phones, which are basically super-duper-ultra-crop sensor cameras, can take breathtaking award-winning shots that grace not only social media feeds but billboards, walls, and pages of magazines across the world.

The term crop-sensor or full-frame refers solely to the size of the imaging sensor inside a camera. A full-frame sensor is the same size as a piece of 35mm film which was, and still is, the most widely-used type of film in analog cameras. The most common size that the term crop-sensor refers to is known as APS-C, which is the same size as a piece of film from the mid-1990’s Advantix format (also called the Advanced Photo System or APS) invented by Kodak.

How the smaller sensor affects your images

Using a smaller sensor has interesting effects on things like depth of field and apparent focal length of lenses, but it’s not a subjective measure of how good or bad a camera is. Think of it like going to an all-you-can-eat buffet with different sized plates. Shooting with a full-frame camera is like taking a normal size plate to the serving area, whereas using a crop sensor camera is like using a plate that is about 30% smaller. Both will get the job done, and both are great for different types of people. So what’s all the fuss about? Understanding some of the practical differences between these two types of plates…er…cameras will help you know which type is best for you.

So what’s all the fuss about? Understanding some of the practical differences between these two types of plates…er…cameras will help you know which type is best for you.

How to Understand the Differences Between Full-Frame Versus Crop-Sensor Cameras

Crop-sensor versus Full-Frame…it’s not about which is better, but which will suit you better.

ISO performance

For years one of the immutable truths about shooting with a full-frame camera was that it automatically gave you better performance at high ISO values. While this is still mostly true today, it’s also safe to say that for a majority of practical scenarios crop-sensor cameras have picked up the slack and can hold their own fairly well when pitted against their large-sensor counterparts.

If you are looking for the ultimate in high ISO performance though, you might want to ditch that Canon Rebel and start shopping around for a 5D Mark IV or a 1DX. The reason for this discrepancy is due to physics. The pixels, or tiny individual light-sensitive bits on a camera imaging sensor, are usually larger on a full-frame camera.

Bigger buckets

For example, pretend it’s raining and you want to collect some of the water that’s falling freely in your front yard. To do so you set out 24 large buckets (so big you call them mega-buckets) next to each other and wait a few minutes for them to start filling up. Your neighbor, meanwhile, sees your plan and rushes to do the same thing but uses 24 ultra-mega-buckets that are about 30% larger than yours. When the sun comes out and the birds start to sing, who will have collected more water? I’ll give you a hint, it’s not going to be you.

How to Understand the Differences Between Full-Frame Versus Crop-Sensor Cameras

Even though you and your neighbor were both harvesting rainwater with 24 mega-buckets, hers were larger in size and therefore able to collect more water. It’s kind of the same with cameras in that a model like the Nikon D5500 has a 24-megapixel image sensor which is the same as a full-frame Nikon D750. However, since the pixels on the D750 are bigger they are more sensitive to light. So, when there’s not much light available, such as a situation where you may need to shoot at ISO 6,400 or 12,800, they do a better job of collecting the light.

How to Understand the Differences Between Full-Frame Versus Crop-Sensor Cameras

ISO 6400, crop-sensor Nikon D7100. Note how grainy much of the dark areas look, and the somewhat desaturated feel of the bright colors.

How to Understand the Differences Between Full-Frame Versus Crop-Sensor Cameras

Shooting the same scene with a full-frame Nikon D750 yields much better results, with less overall noise and cleaner colors.

Technology advances

This analogy quickly breaks down when you consider the advances in modern technology. Most crop-sensor cameras today significantly outshine their forebears from just a few years ago when shooting at ISO 3200 or 6400. The Fuji X-T1, a modern crop-sensor camera, is about equal to the full-frame Canon 5D Mark III in terms of high ISO performance. Granted the latter is a few years old and has since been bested by other full-frame cameras, but still, the point remains that today’s crop-sensor cameras are no slouch when it comes to shooting at high ISO values.

However, if you want the absolute best in terms of high ISO sensitivity, a modern full-frame camera is usually going to be your best bet. It’s not a zero-sum game though, and there are many other practical considerations to think about. Lastly, just because a camera can shoot at ISO 25,600 doesn’t mean it’s the right one for you.

Cost and Size

There is a principal of mathematics known as modus ponens which is used as a way of showing a certain thing to be true because it follows a logical progression. Basically, it’s a formal way of saying that one thing P naturally implies Q. If P is true, then Q must also be true.

Camera Size

When we apply this rule to photography we can immediately see one disadvantage of cameras with larger sensor sizes. It goes like this; full-frame sensors are larger than cropped image sensors (i.e. condition P). Larger sensors need larger camera bodies in order to compensate for the increase in sensor size (i.e. condition Q). Therefore, cameras with larger sensors are larger than cameras with smaller sensors. Quod erat demonstrandum.

How to Understand the Differences Between Full-Frame Versus Crop-Sensor Cameras

The sensor in a full-frame camera is much larger than the sensor in a crop-frame camera. Therefore, the camera itself needs to be larger too.

Price – $ $ $

Thus, we can see another key difference between cameras with various sensor sizes, and it’s something to keep in mind when considering which type of camera to buy. Image sensors range from the size of a tic-tac breath mint to that of a postage stamp, to a potato chip, and even larger when you consider highly specialized imaging devices like those used at NASA. These image sensors are not cheap to manufacture, which is why full-frame cameras can easily cost twice as much as their crop-sensor counterparts. If you go all the way up to medium format, with sensors that are significantly larger than full-frame, you can easily spend $ 10,000, $ 20,000, or more on the camera alone, without any lenses.

How to Understand the Differences Between Full-Frame Versus Crop-Sensor Cameras
Crop-sensor cameras like the Nikon D3300 or the Canon Rebel T6i are smaller, less expensive, and also more portable than their full-frame counterparts. If you’re shopping for a camera, don’t need crazy-high ISO performance, and also don’t want to empty your pocketbook in the process, then a crop-sensor or micro-four-thirds camera (which has a sensor that’s about 25% as large as a full-frame camera) will suit you quite nicely.

However for many photographers, the size of their camera is of little concern, and they don’t mind the increase in size, weight, and cost that comes with venturing into the full-frame territory. Just know that bigger isn’t always better, especially because along with bigger sensors comes bigger lenses that are required to fit on them as well.

Lens Size and Selection

When considering a camera system, whether crop-sensor or full-frame, it’s not just the size of the camera that you will need to keep in mind but the size and price of the accompanying lenses as well. Lenses designed for smaller sensors are generally smaller and less expensive than lenses for full-frame cameras. A 70-200mm f/2.8 lens for full-frame cameras, which is fairly standard for many photographers, can easily cost upwards of $ 1500. Whereas a similar piece of glass like the Sigma 50-100mm f/1.8 lens for crop-sensor cameras will set you back about $ 1000. It’s even better when you look at the micro four thirds system, where lenses are significantly smaller and often less expensive than comparable full-frame models.

How to Understand the Differences Between Full-Frame Versus Crop-Sensor Cameras

The classic 70-200mm f/2.8 lens. Designed for full-frame cameras, it’s a fantastic lens that will give you great photos but it’s also expensive and heavy. Similar lenses for cameras with smaller sensors are smaller, lighter, and often cheaper.

However, one advantage of going with a full-frame system is the sheer quantity and variety of lenses that you have available at your disposal. Since all 35mm film cameras ever made are full-frame, you can use most of those lenses on modern cameras and sometimes you don’t even need an adapter. Many modern full-frame cameras are capable of autofocusing with older lenses too, making it easy to find high-quality glass that will suit your needs if you don’t necessarily need to buy brand-new. There is a growing selection of lenses for crop-sensor cameras, particularly in the micro-four-thirds ecosystem. But if you need access to the largest possible array of lenses than a full-frame camera might just be your best bet.

Lens Performance: Depth of Field and Focal Length

At this point, it might sound like I’m less than enthusiastic about full-frame cameras, but I promise you that’s not the case. I shoot with both crop-sensor and full-frame gear. There is a reason why full-frame cameras and lenses are highly sought-after despite their larger size, heavier weight, and greater cost. Most glass made for full-frame systems costs more and weighs more because it is higher quality. They also produce superior results compared to some of the cheaper lenses for smaller cameras. (Note that I said most, not all. Certainly, there are many outstanding lenses for APS-C and micro-four-thirds cameras. But it’s safe to say that lenses made for full-frame cameras are, for the most part, going to produce outstanding results.)

There’s also the fact that when shooting full-frame you get the benefit of a shallower depth of field. For example, portrait photographers often prefer shallow depth of field. When shooting with a large sensor and a 70-200mm f/2.8 lens you can get results that are difficult to replicate with crop-sensor gear. The math is a bit tricky, but shooting a subject at 200mm with an aperture of f/2.8 on a full-frame camera gives very different results than using a crop-sensor camera.

Examples

How to Understand the Differences Between Full-Frame Versus Crop-Sensor Cameras

Shot with a 200mm lens on a full-frame camera.

I shot the photo above at 200mm with my full-frame camera, but it would have been quite different if I shot it on my crop-sensor camera. A 200mm lens behaves like a 300mm lens when mounted on an APS-C camera. That means I would have had to move much farther back to get this same composition and therefore would have significantly increased the depth of field. The background would not have been as blurry, and the pillar behind the boy would have been more in focus as well.

85mm lens on full-frame versus crop-sensor

Here’s a photo that I took with my crop-sensor D7100, using an 85mm lens at f/4.

How to Understand the Differences Between Full-Frame Versus Crop-Sensor Cameras

85mm lens at f/4 shot with a crop-sensor camera.

After I took that picture I put the same 85mm lens on my full-frame D750 and while standing in the same spot, took the following image:

How to Understand the Differences Between Full-Frame Versus Crop-Sensor Cameras

85mm lens at f/4 on full-frame, same physical position as the first picture.

It looks like I zoomed out, but in fact, I was using the exact same lens but on a full-frame camera. To get a picture like the one I shot initially, I had to move forward which then changed the background elements and also gave me a shallower depth of field with a background that was more out of focus.

How to Understand the Differences Between Full-Frame Versus Crop-Sensor Cameras

85mm lens at f/4 shot on a full-frame camera.

The reason this happens is that with the former you are getting a picture that accurately reflects a lens’s true focal length, whereas on a crop sensor camera you are seeing a cropped version of what the lens sees.

Wide-angle

This picture of the Edmond Low Library on the Oklahoma State University campus was taken with my 35mm lens on my Nikon D7100 (crop-sensor).

How to Understand the Differences Between Full-Frame Versus Crop-Sensor Cameras

35mm lens at f/4 on a crop-sensor camera.

I took the next picture sitting in the exact same spot on the library lawn, using literally the exact same 35mm lens mounted to my full-frame Nikon D750.

How to Understand the Differences Between Full-Frame Versus Crop-Sensor Cameras

35mm lens at f/4 on a full-frame camera.

Nothing changed here except the camera on which the lens was mounted. The shot of the library on my crop-sensor camera is, in a very real sense, a cropped version of what you see on a full-frame camera. The implications of this are profound since it means a 35mm lens on a crop-sensor body actually behaves more like a 55mm lens. (The exact value varies just a bit depending on whether you shoot Nikon or Canon, which each use a slightly different crop factor.)

Implications – how it affects you

So what are the practical implications of this phenomenon? It means that if you are primarily interested in landscape, architecture, or other shots that are suited for wider focal lengths, a full-frame camera will generally be a good choice. However, if you like to shoot wildlife or sports, a crop-sensor camera can give you a lot of extra reach with your lenses and effectively transform a 300mm telephoto lens into a 450mm birdwatching, goal-scoring powerhouse.

How to Understand the Differences Between Full-Frame Versus Crop-Sensor Cameras

I like to do close-up photography on my full-frame D750 not because it’s objective a better camera, but because there are specific features about it that I like for this type of photography.

The Final Word

After examining various differences between crop and full-frame cameras, I hope it’s clear that neither one is inherently better. Both are uniquely suited to different types of photographic tasks.

I’m always eager to hear from the dPS community on topics like this though, and if you have thoughts you would like to share on this issue please leave them in the comments below. Which system do you use and why? Are you satisfied, or are you considering switching from one format to another?

Do you have any questions after reading this article? Post a reply and in the meantime, no matter what type of camera you have, remember to get out there and use it to take pictures you enjoy.

The post How to Understand the Differences Between Full-Frame Versus Crop-Sensor Cameras by Simon Ringsmuth appeared first on Digital Photography School.


Digital Photography School

 
Comments Off on How to Understand the Differences Between Full-Frame Versus Crop-Sensor Cameras

Posted in Photography


NASA puts it all in perspective with this image of Earth between Saturn’s rings

22 Apr
Earth, photographed from 1.4 billion kilometers / 870 million miles away. Photo: NASA/JPL-Caltech/Space Science Institute

NASA’s Cassini spacecraft will soon meet its demise in Saturn’s atmosphere, but one of its last photos of Earth is making for a heck of a swan song. The image, dated April 12, 2017, shows Earth as a bright white dot framed by the planet’s rings. For comparison, it’s about the same size as your standard speck of dust. Our entire planet.

Cassini has been orbiting Saturn since 2004 and has spent the last decade and then some beaming back information about the ringed planet and its moons. But all good things must come to an end, and as the spacecraft’s fuel supply runs low, NASA will begin the process of safely putting it out to pasture.

Articles: Digital Photography Review (dpreview.com)

 
Comments Off on NASA puts it all in perspective with this image of Earth between Saturn’s rings

Posted in Uncategorized


dPS Writer’s Favorite Lenses: I’m Torn Between My Nifty Fifty and 70-200mm F2.8

09 Mar
My Favourite Lenses: I'm Torn Between My Nifty Fifty and 70-200mm F2.8

I use my 50mm lens almost exclusively when I’m shooting abstract images.

I won’t lie to you, I’m genuinely torn here. There are two lenses that I could probably say were my favorites. One of those lenses became my favorite out of necessity. It was the only one I owned when I first started shooting with a DSLR. The other became favorite because of its versatility and something much more personal than professional.

My Favourite Lenses: I'm Torn Between My Nifty Fifty and 70-200mm F2.8

This image was shot with my 50mm lens. It was one of my first attempts at fine art photography. It’s so sharp.

My Favourite Lenses: I'm Torn Between My Nifty Fifty and 70-200mm F2.8

The large aperture of the 50mm allowed me to shoot during low-light situations.

It all started with the 50mm lens

Let’s head back in history to 2006 when I bought my first DSLR. I found a used Canon Rebel for sale online for $ 200. It came with a 50mm prime lens. That was fantastic; it was in my budget. I didn’t have a lot of money at the time as I was raising three kids under the age of six. I struck a deal with the seller, and I was in business.

When I went to my first camera course, the instructor laughed when he saw my gear. I thought, at first he was making fun of my gear. But, I was wrong, he was excited for me. He said having just the one lens would push me to be creative and to learn and find out how to take great photos. I would have no choice but to think about my composition because of the limitations of my gear. He said he wished all of his students were as limited as I was and that relying on gadgets and a zoom lens stunted creativity. They could essentially cheat instead of learning to see the photograph and position themselves correctly. He inspired me to push myself to learn everything I could about 50mm.

My Favourite Lenses: I'm Torn Between My Nifty Fifty and 70-200mm F2.8

The 50mm lens is ideal for portraits. It’s lightweight and easy for me to move around with.

I shot landscapes, portraits, macros, and everything in between. I love my 50mm lens because it’s light-weight and affordable. But, I love my nifty 50 because my photos are tack sharp. The bokeh with it is beautiful too, and I love experimenting with the larger aperture. The lens offers photographers so many creative possibilities. Seriously, what lens could be better?

My Favourite Lenses: I'm Torn Between My Nifty Fifty and 70-200mm F2.8

This is one of the rare times that I was able to use my 50mm with my family.

My second love – the 70-200mm f/2.8

I love the bokeh in this shot. The 70-200mm f/2.8 is awesome for this feature.

Well, it’s time for my second love to make an entrance. I love my 70-200mm f/2.8. This lens was also my first big glass purchase. I scrimped and saved for months to be able to buy it. At the time it seemed like an immense sacrifice, but it was worth it.

The lens is very versatile. I can use it for portraits, indoor sports, macro shooting, and candid images on the street. Really, I can use it for anything. It’s not overly heavy so I can hand hold it for extended periods of time, which is very nice. The large aperture is helpful for low light situations or when I need a fast shutter speed. It’s tack sharp, and the bokeh is beautiful. I take it everywhere. My 70-200mm has been on canoe trips and suffered rainstorms (albeit covered with a large garbage bag). It is my workhorse.

dPS Writer's Favorite Lenses: I'm Torn Between My Nifty Fifty and 70-200mm F2.8

The focal length of the 70-200mm is perfect for so many types of shots including street shooting or silhouettes at the beach.

All the reasons I listed, however, are not why this lens is my favorite. There is one thing about this lens that makes it unique. This one thing is more personal than it is professional. Those of you who have children will totally connect with me on this element. The longer focal length of this lens means that I can capture authentic images of my family.

My kids are very much sick of their mother taking their photos. They’ve been there and done that far too much. I can never get them to cooperate when I use my 50mm. Instead, my 70-200mm allows me to capture them from a distance. I can be discreet and not invade their fun. I can catch them laughing and acting naturally. Some of my most cherished shots have come from moments like this.

I’m sure my family knows I have my camera out and pointed at them, but because I’m not right in their faces they forget about me. Or at the very least they can ignore me. It’s the one thing I can’t do with my 50mm, and for this reason, the 70-200mm wins a special place in my heart.

dPS Writer's Favorite Lenses: I'm Torn Between My Nifty Fifty and 70-200mm F2.8

I like shooting landscapes with the 70mm range on this lens.

There are emotional ties to this lens

dPS Writer's Favorite Lenses: I'm Torn Between My Nifty Fifty and 70-200mm F2.8

He was just having fun. He wasn’t aware of my presence with my camera. Yes, his face is a little soft, but this shot is emotional and personal, not professional.

Forget all the features and the specs. I’m not overly worried about chromatic aberration or vibration reduction controls. The 70-200mm holds a place in my heart because it allows me to capture the love and adoration I have for my children. I can make precious memories. My 70-200mm is an emotional favorite. It’s a very personal preference. It is a beautiful, durable, incredible lens that helps me succeed in my business – but it also helps me to capture personal memories.

dPS Writer's Favorite Lenses: I'm Torn Between My Nifty Fifty and 70-200mm F2.8

Capturing joy; I think it’s a great reason to love this lens.

dPS Writer's Favorite Lenses: I'm Torn Between My Nifty Fifty and 70-200mm F2.8

I could have zoomed in more, but I wanted to capture the environment too.

Your favorite lens

What’s your favorite lens? Share it with us in the comments below. Maybe you love your inexpensive 18-55mm kit lens. Tell us why. We want to hear your stories. Forget the specs, what kinds of joy does the lens bring to your life?

My teenager has become so jaded that my 70-200mm is the only way I can capture images of him.

The post dPS Writer’s Favorite Lenses: I’m Torn Between My Nifty Fifty and 70-200mm F2.8 by Erin Fitzgibbon appeared first on Digital Photography School.


Digital Photography School

 
Comments Off on dPS Writer’s Favorite Lenses: I’m Torn Between My Nifty Fifty and 70-200mm F2.8

Posted in Photography


CP+ 2017: the weird, wonderful, and everything in between

01 Mar

Best of CP+ 2017 in Japan

While there weren’t a lot of new announcements at CP+, the theme of the show seemed to be glass: Sigma launched four new lenses, Tamron showed off two, Pentax announced the development of two full-frame primes, Fujifilm showcased a line of affordable cinema primes for Sony E-mount users and a ton of third-party brands had their latest glass creations on display.

So take a peek through our gallery for a rundown of the best of CP+ 2017… and some other stuff we found along the way.  

Fujifilm GFX 50S

While not newly announced, CP+ 2017 was the first time we were able to shoot with a final production Fujifilm GFX 50S medium-format digital camera. As you might expect, it’s an absolute peach to use. Barney and I spent most of the time in Japan fighting over who’d get to use it, which should tell you all you need to know. Simply put, we both found its form factor to be fabulous (it’s surprisingly light), and as for image quality – well, take a look for yourself.

Sigma 14mm F1.8 DG HSM

Sigma announced four new lenses at CP+, three of which join the growing ‘Art’ series. They include a 24-70mm F2.8, a 135mm F1.8 and the one we are most excited for: a 14mm F1.8. In addition, the company also launched a 100-400mm F5-6.3 DG OS HSM lens which is part of the company’s more modestly-priced ‘Contemporary’ series. 

But back to the 14mm F1.8. It’s the fastest 14mm in existence, yet despite its wide angle of view, distortion appears almost non-existent. It also appears to be crazy sharp! We’re hoping to be able to post some sample images very soon to prove it. 

Nikon D5 100 Year Anniversary Strap

Nikon didn’t launch any new products at CP+, but as part of its continuing 100th year anniversary celebration, it did unveil several special edition 100 year anniversary items including this swanky leather strap (and a gunmetal grey edition D5 and D500). We have no idea if these straps will eventually be for sale, or if acquiring one also means buying a D5/D500, but we’d hang them round our necks.  

HandeVision Iberit 75mm F2.4

We stumbled on a bunch of cool mirrorless lenses from HandeVision, including this matte grey Iberit 75mm F2.4 (shipping versions will be finished in chrome or black). Build quality seems good, and at just over $ 700, it’s a semi-affordable option for mirrorless (and Leica M) manual focus shooters. On crop sensor bodies it gives a 112mm effective field of view. Check out the other lenses HandeVision had on display. 

Sigma 135mm F1.8 DG HSM

In addition to the 14mm F1.8, Sigma also dropped a 135mm F1.8 at this year’s show. It’s pretty large, and a little heavy, but it sure is pretty, especially that big front element. The lens mount also has a rubber gasket to keep dust and water out, something not offered in previously released Sigma’s ‘Art’ series lenses. And a 9-blade aperture should ensure attractive bokeh (as much as you can expect at 14mm, anyway) and hopefully nice sunstars, too. Simply put, we’re pretty jazzed to get it in the office and getting shooting. 

Exploded gear/gear cut in half

There was a lot of bisected and exploded gear at this year’s show (as always). As has become tradition, we made this gallery to highlight some of the best examples. 

Ricoh Pentax D FA* 50mm F1.4

Ricoh added two new full-frame prime lenses to its lens lineup this year, including this 50mm F1.4 as well as an 85mm F1.4. The 85mm wasn’t on display, but we were able to lay eyes (and our cameras) on a mockup of the new 50mm, tucked inside a very reflective and very secure plastic case. Details about the lens are forthcoming, but it’s certainly large. 

Canon EOS 77D

We didn’t get our hands on Canon’s new EOS 77D at the show, mainly because of the sizable crowds in the Canon booth, but we’d already seen it a few weeks ago back in the US. The EOS 77D is built around a 24MP APS-C sensor, Digic 7 processor and 45-point AF system. Take a look at our hands-on for more info. 

Sigma 24-70mm F2.8 DG OS HSM Art

We’ve included all three new Sigma Art lenses in this gallery because frankly, they’re all really enticing. The 24-70mm F2.8 is impressively small and light weight (for an Art-series prime). And like the 135mm it has a rubber gasket at the base to keep dust and moisture out. Even more impressive: it’s stabilized. Check out our hands-on for more. 

Pigeon camera

Every year, in the back corner of CP+ is a small camera museum exhibit. And one of my absolute favorite cameras on display was the Michel Pigeon Camera, which is exactly what it sounds like. Though the pigeon is no longer with us (we assume – it could just be very well-trained), the camera still looks pretty functional. You can read more about the Michel Pigeon Camera here. 

Used camera fair

Another fixture of CP+ is the used camera fair, which takes place upstairs. A great place to find weird old rangefinder lenses, camera cases, obscure film compact cameras. As such, a great place to spend money. We were disappointed when we missed the end of the fair when we returned on Sunday, but to be honest, it was probably for the best. 

Voigtländer Macro APO-Lanthar 65mm F2

Voigtländer unveiled three new manual focus Sony E-mount lenses at CP+ including this 65mm F2 macro. The build quality on these lenses, as you might expect, is marvelous. And unlike older Voigtländers, these lenses have electronic contacts, so they’ll communicate with the camera body to which they are attached. the 65mm F2 offers a 1:2 max magnification. Take a look at the other two lenses Voigtländer announced in our hands-on slideshow. 

Canon EOS Rebel T7i

Canon’s flagship Rebel, the T7i is the first in the series to incorporate Canon’s Dual Pixel AF. Take a look through our previously-published hands-on to find out more.

Ricoh Pentax KP

We were able to get closer look at the insides of Pentax’s latest APS-C DSLR. How cool is it to see the pentaprism cut right down the middle? In many respects a miniature Pentax K-1, the KP is well-featured, and weather sealed (when it hasn’t been cut in half). Also in the Pentax booth was a pretty cool demo showing off the company’s image stabilization. You can find a short video of that here. And for more on the Pentax KP, check out our hands-on. 

Tamron SP 70-200mm F2.8 Di VC USD G2

There’s a lot of buzz surrounding Tamron’s 2nd generation SP 70-200mm F2.8 lens and we were pretty excited to check it out in person. Compared to its predecessor, Tamron promises faster autofocus and better stabilization. It also offers a completely overhauled optical and mechanical design. Available in Canon, Nikon and Sony mounts, this high-end telezoom will only set you back $ 1500, making it a bargain compared to it’s non-third party counterparts.

Tamron was also showing off its new 10-24mm F3.5-4.5 Di II VC HLD. You can read more about both lenses here. 

This poor man

It was freaking hot on the tradeshow floor! And this poor man had to spend all four days dressed in what seemed like fairly un-breathable getup all while posing with anyone who passed by and wanted to get a photo. Did he lose a bet? We have no idea.

Fujifilm MK cinema lens series 

Fujifilm is entering the affordable cine lens market with the launch of the MK series for Sony E-mount (and X mount, coming later). These lens are an affordable alternative to much more expensive cinema lenses and cover a Super 35 or APS-C imaging area. The lenses include an 18-55mm T2.9, and a 50-135mm T2.9. 

We recently made a short video using the MK18-55 T2.9. Take a look. 

Sony a7S rig for the International Space Station

Did you know that the International Space station has a Sony a7S mounted on it for low-light photography? Here’s a copy of the rig it sits in, in while flying around the Earth at 17,150 miles per hour. 

Mini space station

And just for reference, here’s a full-size model of the ISS. It’s smaller than you expect.

Articles: Digital Photography Review (dpreview.com)

 
Comments Off on CP+ 2017: the weird, wonderful, and everything in between

Posted in Uncategorized


New Canon EOS 77D sits between Rebel T7i and EOS 80D

15 Feb

$ (document).ready(function() { SampleGalleryV2({“containerId”:”embeddedSampleGallery_2664912895″,”galleryId”:”2664912895″,”isEmbeddedWidget”:true,”standalone”:false,”selectedImageIndex”:0,”startInCommentsView”:false,”isMobile”:false}) });

Canon today has announced the EOS 77D (known as the EOS 9000D in some regions), which will sit between the company’s established Rebel line of entry-level DSLRs and the more enthusiast-oriented 80D. (The 77D is essentially the replacement to the Rebel T6s/EOS 760D.) But despite sitting below the 80D in the lineup, it shares that more advanced model’s 24.2MP sensor with Dual Pixel autofocus and adds an updated Digic 7 processor to the mix. Users opting to focus using the optical viewfinder will be greeted with a 45-point all-cross-type AF system and 7650-pixel RGB+IR metering system, which work together for better accuracy and subject recognition.

Rounding out the package is an ISO range of 100-25600, continuous 6 fps burst shooting with autofocus (4.5 fps when using Live View), 1080/60p video capture and wireless connectivity featuring NFC and Bluetooth LE.

Users opting for the 77D over the T7i will gain built-in interval and bulb timers, greater custom controls including an AF-On button, a top LCD panel and an eye sensor to shut off the rear LCD when the camera is raised for shooting.

The Canon EOS 77D is scheduled to be available in April 2017 for $ 899.99 body only, $ 1049.00 with the new EF-S 18-55mm F4-5.6 IS STM lens and $ 1,499.00 with the 18-135mm F3.5-5.6 IS USM lens.

Press release:

NEW CANON EOS REBEL T7i AND EOS 77D CAMERAS POSSESS STUNNING AUTOFOCUS CAPABILITIES

New DSLR Additions are Joined by New Compact EF-S Lens and Canon’s First-Ever Remote Utilizing Bluetooth® Technology3

MELVILLE, N.Y., February 14, 2017 – Developed and designed to meet the varying needs of entry-level and advanced amateur photographers, Canon U.S.A., Inc., a leader in digital imaging solutions, today announced two new additions to the celebrated EOS system – the EOS Rebel T7i DSLR camera, which adds to the popular Rebel series of entry-level DSLR cameras, and the EOS 77D DLSR camera, which represents a new category of cameras for advanced amateur photographers. Canon also introduced today the new EF-S 18-55mm f/4-5.6 IS STM lens and Wireless Remote Control BR-E1, as well as added functionality for the Canon Connect Station CS100. “In what marks the 30th year since the introduction of the Canon EOS System, the announcement today of these two new DSLR cameras exhibits Canon’s commitment to providing our customers with the tools they need to grow their passion for capturing the best possible pictures of the moments in time that mean the most to them, or inspire them to one day shoot professionally,” said Yuichi Ishizuka, president and COO, Canon U.S.A.

Focused on Innovation

The EOS Rebel T7i and EOS 77D both feature an optical viewfinder with a 45-point All Cross-type AF system* to help enable more precise focusing. In live view mode, both cameras utilize Canon’s Dual Pixel CMOS AF to deliver the world’s fastest AF focusing speed of 0.03 seconds.1 This technical achievement allows users to find their subject, focus accurately, and capture the shot more quickly than ever before. Both models also have built-in Wi-Fi®2, NFC3 and Bluetooth®4 technology for easy transfer of images.

In addition to the focusing enhancements, common features of the EOS Rebel T7i and EOS 77D cameras include:

  • Optical Viewfinder with a 45-point All Cross-type AF System*
  • Fast and accurate Dual Pixel CMOS AF with Phase-detection
  • 24.2 Megapixel CMOS (APS-C) Sensor
  • DIGIC 7 Image Processor, ISO 100–25600
  • Built-in Wi-Fi®2, NFC3 and Bluetooth®4 technology
  • Vari-angle Touch Screen, 3.0-inch LCD
  • Movie Electronic IS
  • HDR Movie & Time-Lapse Movie
  • High-speed Continuous Shooting at up to 6.0 frames per second (fps)

Canon EOS Rebel T7i Camera

The EOS Rebel T7i is the first camera in the EOS Rebel series with a 45-point, all cross-type AF system* within the Optical Viewfinder. It is also the first in the series with Dual Pixel CMOS AF with Phase-detection and the first with a DIGIC 7 Image Processor. Creative filters for both still images and video will allow users to customize the look and feel of their content in new and imaginative ways.

When designing the new EOS Rebel T7i, Canon took into consideration feedback from entry-level photographers who expressed interest in learning to go beyond the program mode of a DSLR camera. Users will now be able to see on-screen how switching modes on the mode dial or tweaking settings can alter the image they are about to capture, guiding photographers on their way to capturing more compelling images, such as ones with a shallower depth-of-field or being able to give moving-subjects a frozen or flowing look.

The Canon EOS Rebel T7i is scheduled to be available in April 2017 for an estimated retail price $ 749.99** for the body only, $ 899.99** with the new EF-S 18-55mm f/4-5.6 IS STM lens and $ 1,299.00** with the EF-S 18-135mm f/3.5-5.6 IS STM lens respectively. For more information please visit, usa.canon.com/eosrebelt7i.

Canon EOS 77D Camera

For advanced amateur photographers looking to expand their knowledge and experience with DSLR cameras, Canon’s new EOS 77D is the ideal next step camera for them. The EOS 77D represents a new category of advanced amateur EOS cameras, a step above the Rebel series. Users of the EOS 77D DSLR camera will benefit from features like the 7650-pixel RBG+IR Metering Sensor, similar to the one found in the EOS 80D camera and Anti-Flicker shooting mode to help combat the on-and-off repetitive flickering from artificial lights found in high-school gyms or auditoriums. The EOS 77D also features a top LCD panel and quick control dial for photographers who desire quicker and easier access to changing and controlling settings on the camera.

The Canon EOS 77D is scheduled to be available in April 2017 for an estimated retail price $ 899.99** for the body only, $ 1,049.00** with the new EF-S 18-55mm f/4-5.6 IS STM lens and $ 1,499.00** with the EF-S 18-135mm f/3.5-5.6 IS USM lens respectively. For more information please visit, usa.canon.com/eos77d.

EF-S Lens and Remote Accessory Utilizing Bluetooth® Technology

The new Canon EF-S 18-55mm f/4-5.6 IS STM lens is nearly 20 percent smaller than the EF-S 18-55mm f/3.5-5.6 IS STM lens, without sacrificing image quality. Features of the lens include:

  • Compact-size, Standard Zoom Lens with High Image Quality
  • Lead Screw-type STM
  • Image Stabilization at up to 45 Stops of Shake Correction
  • Stylish Design

The Canon EF-S 18-55mm f/4-5.6 IS STM lens is scheduled to be available in early April 2017 for an estimated retail price of $ 249.99**. For more information please visit, usa.canon.com/efs1855stm.

In addition, Canon is introducing it’s first-ever remote utilizing Bluetooth® technology3, the Wireless Remote Control BR-E1. This new remote allows photographers to capture images from within a 16-foot radius of the camera. This camera accessory is useful for photographers who are looking to capture images remotely in situations where there could be issues with signal reception or line-of-sight to the camera. The Canon Wireless Remote Control BR-E1 will be compatible with both the EOS Rebel T7i and EOS 77D cameras. The Canon BR-E1 is schedule to be available in April 2017 for an estimated retail price of $ 50.00**.

CS100 Firmware Update
Both the EOS Rebel T7i and EOS 77D cameras are compatible with the Canon Connect Station CS100 device, a go-to-photo and video hub that allows family and friends a way to quickly and easily store, manage view and share unforgettable memorable moment’s wirelessly6. Canon is also announcing today a firmware update to the Canon Connect Station CS100 device and mobile application. The firmware update includes the following improvements:

  • Compatibility for select Canon and non-Canon cameras, with a wider range of supported file formats7
  • Support for video playback of computer-edited movies8
  • Improved smartphone connectivity and compatibility

For more information about the Canon Connect Station firmware update, please visit usa.canon.com/cs100mobile.

* The number of AF points, cross-type AF points and Dual cross-type AF points vary depending on the lens used

** Availability, prices and specifications subject to change without notice. Actual prices are set be individual dealers and may vary.

1 Among all the interchangeable lens digital cameras incorporating the APS-C size image sensors with phase-difference detection AF on the image plane As of February 14th, 2017 (Researched by Canon). Calculated based on the resulting AF speed measured according to the CIPA guidelines. (Varies depending on the shooting conditions and the lenses used.) Internal measurement method. [Measurement conditions] Focusing brightness: EV 12 (room temperature, ISO 100) Shooting mode: M Lens used: EF-S18-55mm f/4-5.6 IS STM (at focal length of 55mm) Live View shooting AF method: Live 1-point AF (with Center AF point) AF operation: One-Shot AF

2 Compatible with iOS® versions 8.0/8.1/8.2/8.3/8.4/9.0/9.1/9.2/9.3/10.0, Android™ smartphone and tablet versions 4.1/4.2/4.3/4.4/5.0/5.1/6.0/7.0. Data charges may apply with the download of the free Canon Camera Connect app. This app helps enable you to upload images to social media services. Please note that image files may contain personally identifiable information that may implicate privacy laws. Canon disclaims and has no responsibility for your use of such images. Canon does not obtain, collect or use such images or any information included in such images through this app.

3 Compatible with Android™ smartphone and tablet versions 4.0/4.1/4.2/4.3/4.4/5.0/5.1/6.0/7.0. 4Compatible with select smartphone and tablet devices (AndroidTM version 5.0 or later and the following iOS® devices: iPhone 4s or later, iPad 3rd gen. or later, iPod Touch 5th gen. or later) equipped with Bluetooth® version 4.0 or later and the Camera Connect App Ver. 1.3.20 or above. This application is not guaranteed to operate on all listed devices, even if minimum requirements are met.

5 Based on CIPA (Camera & Imaging Products Association) standards. Testing performed using the EOS 7D Mark II digital SLR camera at a focal length of 55mm, 35mm-equivalent 88mm. The number of stops may vary based on the camera model used.

6 Compatible with iOS® versions 8.4x/9.2.x, Android™ Smartphone and tablet versions 4.4.x, 5.0.x/5.1.x, 6.0.x. Data charges may apply with the download of the free Canon Connect Station app. The application is available in the apple app store or google play store.

7 Support for playback of all images on this device cannot be guaranteed.

8 JPEG and RAW (CR2) still images, and MOV/MP4 and AVCHD movies are supported.

Canon EOS 77D / EOS 9000D specifications

Price
MSRP $ 899 (body only), $ 1049 (w/18-55 F4-5.6 IS STM lens), $ 1499 (w/18-135mm F3.5-5.6 IS STM lens)
Body type
Body type Mid-size SLR
Body material Composite
Sensor
Max resolution 6000 x 4000
Image ratio w:h 1:1, 4:3, 3:2, 16:9
Effective pixels 24 megapixels
Sensor photo detectors 26 megapixels
Sensor size APS-C (22.3 x 14.9 mm)
Sensor type CMOS
Processor DIGIC 7
Color space sRGB, Adobe RGB
Color filter array Primary color filter
Image
ISO Auto, 100-25600 (expands to 51200)
Boosted ISO (maximum) 51200
White balance presets 6
Custom white balance Yes
Image stabilization No
Uncompressed format RAW
JPEG quality levels Fine, normal
File format
  • JPEG (Exif v2.3)
  • Raw (14-bit Canon CR2)
Optics & Focus
Autofocus
  • Contrast Detect (sensor)
  • Phase Detect
  • Multi-area
  • Center
  • Selective single-point
  • Tracking
  • Single
  • Continuous
  • Touch
  • Face Detection
  • Live View
Autofocus assist lamp Yes (flash)
Digital zoom No
Manual focus Yes
Number of focus points 45
Lens mount Canon EF/EF-S
Focal length multiplier 1.6×
Screen / viewfinder
Articulated LCD Fully articulated
Screen size 3
Screen dots 1,040,000
Touch screen Yes
Screen type TFT LCD
Live view Yes
Viewfinder type Optical (pentamirror)
Viewfinder coverage 95%
Viewfinder magnification 0.82×
Photography features
Minimum shutter speed 30 sec
Maximum shutter speed 1/4000 sec
Exposure modes
  • Program
  • Shutter priority
  • Aperture priority
  • Manual
Scene modes
  • Group Photo
  • Kids
  • Food
  • Candlelight
  • Night Portrait
  • Handheld Night Scene
  • HDR Backlight Control
  • Portrait
  • Landscape
  • Close-up
  • Sports
Built-in flash Yes
Flash range 12.00 m (at ISO 100)
External flash Yes (via hot shoe)
Flash X sync speed 1/200 sec
Drive modes
  • Single
  • High-speed continuous
  • Low-speed continuous
  • Self-timer
  • Self-timer + continuous
Continuous drive 6.0 fps
Self-timer Yes (2 or 10 sec)
Metering modes
  • Multi
  • Average
  • Spot
  • Partial
Exposure compensation ±5 (at 1/3 EV, 1/2 EV steps)
AE Bracketing ±3 (3 frames at 1/3 EV, 1/2 EV steps)
Videography features
Format MPEG-4, H.264
Modes
  • 1920 x 1080 @ 60p / 60 Mbps, MOV, H.264, Linear PCM
  • 1920 x 1080 @ 30p / 30 Mbps, MOV, H.264, Linear PCM
  • 1920 x 1080 @ 30p / 12 Mbps, MOV, H.264, Linear PCM
  • 1920 x 1080 @ 23.98p / 30 Mbps, MOV, H.264, Linear PCM
  • 1280 x 720 @ 60p / 26 Mbps, MOV, H.264, Linear PCM
  • 1280 x 720 @ 30p / 4 Mbps, MOV, H.264, Linear PCM
Microphone Stereo
Speaker Mono
Storage
Storage types SD/SDHC/SDXC (UHS-I compatible)
Connectivity
USB USB 2.0 (480 Mbit/sec)
HDMI Yes
Microphone port Yes
Headphone port No
Wireless Built-In
Wireless notes Includes Bluetooth LE and NFC
Remote control Yes (via smartphone or Bluetooth remote)
Physical
Environmentally sealed No
Battery Battery Pack
Battery description LP-E17 lithium-ion battery & charger
Battery Life (CIPA) 600
Weight (inc. batteries) 540 g (1.19 lb / 19.05 oz)
Dimensions 131 x 100 x 76 mm (5.16 x 3.94 x 2.99)
Other features
Orientation sensor Yes
Timelapse recording Yes
GPS Optional

Articles: Digital Photography Review (dpreview.com)

 
Comments Off on New Canon EOS 77D sits between Rebel T7i and EOS 80D

Posted in Uncategorized


Ten important differences between Panasonic’s GH5 and GH4 (and one key similarity)

16 Jan

In-body IS

Panasonic’s new GH5 flagship will be hitting the streets soon, joining the GH4 in the company’s line of video-centric cameras. With our eye on video features, we take a look at the ten biggest differences between these two cameras.

Although this article is mainly looking at video shooting, the biggest physical change between the GH5 and its predecessor promises benefits both for stills and video shooters.

The addition of five-axis image stabilization is a major step forwards for the GH series. Using Panasonic’s latest version of its I.S. system, the camera will combine internal stabilization with in-lens stabilization when shooting with own-brand lenses. For video shooters, this includes a digital stabilization element for dealing with larger or faster translational movements than physical stabilization can correct for.

Although most serious film makers won’t consider in-body stabilization to be an effective replacement for stabilization hardware, it will significantly extend the GH5’s appeal for run-and-gun video, where a little camera shake just adds a little vérité atmosphere.

Full width 4K video

Using the full width of the sensor has three hugely significant benefits. First, it means that all the lenses designed for the Four Thirds format provide the angle of view that they were designed to give (putting to one side the slight crop as you move from the 4:3 aspect ratio down to 16:9). This makes it easier to find lenses that will give a wide-angle view of the world. This use of the full sensor width also means that focal length reducers (such as Speed Boosters) with Super 35 lenses will give the same field of view as they were designed to give.

Second, using the full width of the sensor means using a larger area of the sensor, which means more light capture and better noise performance. Using this larger region should mean up to a 1/2EV improvement over the cropped region the GH4 used for UHD 4K. Add to this improved noise reduction algorithms (that seem particularly effective for combating temporal noise, based on what we’ve seen), and the GH5 should be a significantly better performer as light falls.

Finally, there’s the resolution benefit that comes from oversampling. Capturing the sensor’s full resolution and then downsampling allows the capture of finer detail than is possible with just using a 4096 or 3840 x 2160 region of the sensor.

Internal 10-bit recording

The addition of ten bit internal video capture is a big deal. To really understand why, we’ve gone into a bit more depth in our First Impressions Review, but at its most basic, the move to 10-bit recording means 4x the number of ‘steps’ available in each channel: 64x as much data in total. This means much more subtle gradation can be captured, meaning more tolerance for subsequent grading and processing. On top of this, the GH5 can capture with 4:2:2 chroma sub-sampling, effectively meaning twice the color resolution of the GH4.

The GH4 was one of the few cameras we’ve encountered to allow 10-bit output to an external recorder, so it’s a big deal that 10-bit 4:2:2 footage can be recorded internally on the GH5 (though you’ll still need an external recorder if you want to use the camera’s highest frame rates).

The increased grading flexibility should be especially useful for any users who buy the optional V-Log upgrade, since it gives more bit-depth to compress the camera’s dynamic range into: decreasing the risk of banding and posterization when the footage is pulled back into a end-use color space.

60p 4K capture

The GH5 is only the second camera we’ve yet encountered that can shoot 4K footage at above 30 frames per second. The GH5 gains the ability to shoot UHD 4K video at 48, 50 and 59.94p.

60p (and 50p if you’re shooting for PAL output) is great for capturing fast movement, rather than giving the blurred impression of movement that 24p brings. Several shooters in the office have become big fans of the look. Alternatively, of course, It can be slowed back down to 24p, giving UHD footage at 1/2.5th speed. Either way, it’s another creative option in your toolbox to use (or not) as suits your style.

Pro video tools

Dig a little deeper into the GH5 and its videographer-focused features and you’ll find it moves beyond the already impressive array offered by the GH4. In addition to existing features such as time code, SMPTE bars and the option to limit output to broadcast-safe data values, the GH5 add a series of features and capabilities.

For instance, the GH5 can present Waveform and Vectorscope representations of the scene being shot. This ability to visualize your shot using video-industry standard tools is a welcome step forward, and the first time we’ve seen them in a hybrid stills/video camera.

And, while the GH4 could already be upgraded to shoot with a Log profile (another first for a camera coming through our office), the GH5 VLog upgrade adds the ability to load Look Up Tables (LUTs) onto the camera, so that the camera can show a ‘faux-graded’ preview while shooting in the harder-to-interpret Log gamma and color mode.

The other video-friendly feature that stood out to us was the ability to pre-define a series of up to three focus distances before you start shooting, meaning that the camera can rack focus between these points in a controlled manner. It means it’s possible to refocus smoothly without a dedicated focus puller or any of the uncertainty of autofocus.

User interface (Menus and My Menu)

The GH5’s user interface has received a significant overhaul. Enough of it remains the same that existing users will be able to start shooting straight away but the menus have been revamped to make them easier to navigate and remember.

In addition to the better menu categorization and improved location indication, Panasonic has also added a ‘My Menu’ tab, meaning that users can get fast access their most-used settings. These settings can then be saved onto an SD card, meaning this customization doesn’t need to be repeated every time you switch cameras.

On top of these menu changes, Panasonic has made a host of small tweaks that make a big difference to everyday operation. One such example is that the camera now remembers different focus settings for its stills and video modes, meaning that you don’t have to constantly reconfigure the camera to the differing demands of still and video work.

Secure, full-size HDMI socket

Another seemingly small change to the camera’s body is the move to using a full sized HDMI socket, acknowledging the likelihood that the camera will be connected to an external monitor or recorder.

On top of this, Panasonic has included a cable retainer that screws into the camera body, in the box. This greatly decreases not only the risk of a cable coming loose, mid shoot but also significantly decreases the risk of breaking the HDMI socket, which is not unheard-of on hard-working video cameras.

XLR accessory

One challenge when shooting video on still cameras is how to record high quality sound. Most still cameras include a simple audio-in mini jack, meaning that if you want to record using proper XLR-connected microphones you need to use an third party adapter or record sound off camera and sync in post.

On the GH4, Panasonic solved this with its optional YAGH unit, which included XLR inputs as well as four SDI outputs. A good solution to be sure, but it cost $ 2000!

On the GH5 Panasonic is offering what appears to be a reasonable compromise: the DMW-XLR1 microphone accessory. The XLR1 mounts to the camera’s hot shoe, includes two XLR inputs, physical switches and dials similar to what you would find on a pro video camera, and records 96kHz/24-bit sound. It even has a dummy shoe mount on top in case you need to mount another accessory, such as a wireless receiver, above. It doesn’t include SDI connectors, but we’re guessing that most GH5 users will be satisfied with HDMI-out.

We don’t have pricing information yet, but we’d like to think it will cost less than $ 2000.

Auto ISO in M movie shooting

It’s a little thing, but one we very much welcome: with the GH5, Panasonic has added the ability to shoot with Auto ISO in Manual video mode.

Allowing the camera control settings in a ‘manual’ mode may seem like a head-scratcher at first but, particularly for run-and-gun shooting, it can be a really useful combination. It means that the camera operator can set their aperture and shutter speed to maintain the depth-of-field and sense of movement that they want to convey, while trusting the camera to maintain the correct exposure even if the lighting changes.

Offering exposure compensation means that the user retains control over what ‘correct’ exposure is.

Viewfinder

The GH5’s rear screen has been updated but it’s the viewfinder that’s most immediately striking. Its step up to 3.68m dots means it is able to offer 1280 x 960 pixel resolution: a 25% increase in linear resolution compared with the GH4. This may not sound like a major benefit for video shooters but a to-the-eye shooting stance gives a much steadier grip for hand-held shooting than holding the camera at waist level.

The excellent, detailed viewfinder, along with built-in stabilization is only likely to encourage shooting this way, even if only for a shot here and there.

The rear screen moves from 1.04m dots (720 x 480 pixels) to 1.62m dots (900 x 600 pixels). The GH5’s panel should also be more efficient or brighter as it uses an RGB pattern with white pixels interspersed into the array, rather than the conventional RGB pattern used on the GH4.

Battery and media

For all the things that have changed, Panasonic has done a good job keeping as much as possible the same. [REC] button aside, the new camera’s ergonomics are broadly unchanged, compared with its predecessor. But it’s the decision to use the same batteries and media type that’s likely to please existing GH4 users.

The GH5’s promised 400Mbps capture (due in a summer 2017 firmware update) will be too much for most current SD cards, which could have prompted a move to a different capture media. Instead, Panasonic has stayed true to the SD format and added a second slot, compatible with the forthcoming V60 class cards that will guarantee to support the appropriate data rates.

Sticking to the same DMW-BLF19 battery as the GH3 and 4 means any money invested in spare batteries won’t be wasted. The new camera is rated at 410 shots per charge, down from 530 on the GH4 but it’s unlikely many users would have welcomed the larger body and need for a whole set of extra batteries that a change in power supply would have necessitated.

Articles: Digital Photography Review (dpreview.com)

 
Comments Off on Ten important differences between Panasonic’s GH5 and GH4 (and one key similarity)

Posted in Uncategorized


Timelapse Tour: Watch How Cities Grow Between 1984 to 2016

07 Jan

[ By SA Rogers in Culture & History & Travel. ]

google-earth-timelapse-san-francisco

Human civilization has grown and expanded at an amazing rate – or alarming, depending on who you ask – and you can watch the last 32 years of it unfold via satellite imagery thanks to Google’s Timelapse feature. Originally released in 2013, Timelapse has been updated to add four more years of data and tons of new imagery data from two new satellites, offering clearer views with more detail than ever before. Choose any location in the world to see how it has changed – from cities to the shrinking ice caps.

google-timelapse-3

google-timelapse-gif-2

Some of the most dramatic changes have occurred in Las Vegas, Los Angeles, Dubai and Chongqing, China, but you can also watch the Aral Sea dry up and the Shirase Glacier of Antarctica melt into the sea.

Aral Sea

Miami, Florida

Beijing, China

Las Vegas, Nevada

Shirase Glacier

Hangzhou, China

Look for the location of your choice and create your own annual time lapse at Google’s Time Engine Tour Editor.

Share on Facebook


[ By SA Rogers in Culture & History & Travel. ]

[ WebUrbanist | Archives | Galleries | Privacy | TOS ]


WebUrbanist

 
Comments Off on Timelapse Tour: Watch How Cities Grow Between 1984 to 2016

Posted in Creativity


DIY Loft Kits Bridge the Gap Between Furniture & Architecture

09 Jan

[ By Steph in Design & Furniture & Decor. ]

loft kit 1

Add 160 square feet to your tiny, high-ceilinged apartment without consulting an architect or getting a permit thanks to DIY loft kits that fall somewhere between a renovation and the lofted beds you can snag at IKEA. A company called Expand Furniture makes the process of creating a mezzanine level as easy as installing a large piece of furniture, with models ranging from a bed platform to a entire extra room.

loft kit 2

loft kit 5

The three kits don’t come cheap, ranging from about $ 1,500 to over $ 4,000, but they’re still less pricey than permanent additions, and don’t require owning your apartment or getting your landlord’s permission to remodel. The DIY Loft Bed Kit has enough room for a mattress, nightstands and a bit of free floor space, and takes just four hours for two people to set up.

loft kit 3

loft kit 4

loft kit 6

The modular Vancouver DIY Loft T8 Kit is height- and width-adjustable, and you can add on all sorts of accessories, like stairs of varying steepness, skylights and a variety of guard rails. The priciest kit, the New York DIY Loft T15, is large enough to be used as an entire elevated bedroom or office. All of the kits ship flat-pack from North American warehouses.

loft kit 7

loft kit 9

desk

table

Expand Furniture also offers a range of impressive transforming items for compact spaces, including murphy beds, pop-up coffee tables and bookcases that flip around to reveal either a fold-down work surface or a mattress, all in one slim unit. The website is full of fun stuff for small-apartment-dwellers to fantasize about purchasing, if only they had $ 8,000 to drop on a king-sized bed hidden behind a sofa.

Share on Facebook


[ By Steph in Design & Furniture & Decor. ]

[ WebUrbanist | Archives | Galleries | Privacy | TOS ]


WebUrbanist

 
Comments Off on DIY Loft Kits Bridge the Gap Between Furniture & Architecture

Posted in Creativity


The Fine Line Between Travel Photography and Having a family Vacation

15 Oct

A simple Google search for travel inspiration yields thousands of beautiful images and motivational quotes. Words like, “The Best University is to travel”, “We must take adventures in order to know where we truly belong” and “To travel is to live a full life” flash across your computer screen amidst jaw-dropping travel photography imagery. It brings forth such great feelings of wanderlust and longing to hit the road.

However, for those of us who travel with families and/or young kids there is a nagging voice somewhere in the back of our heads that speaks up and says, “Be practical, can you really make this journey with the kids?”. Then if you add to this mix, a parent who is very emotionally attached to his or her camera, you have just stirred up a pot full of trouble for yourself.

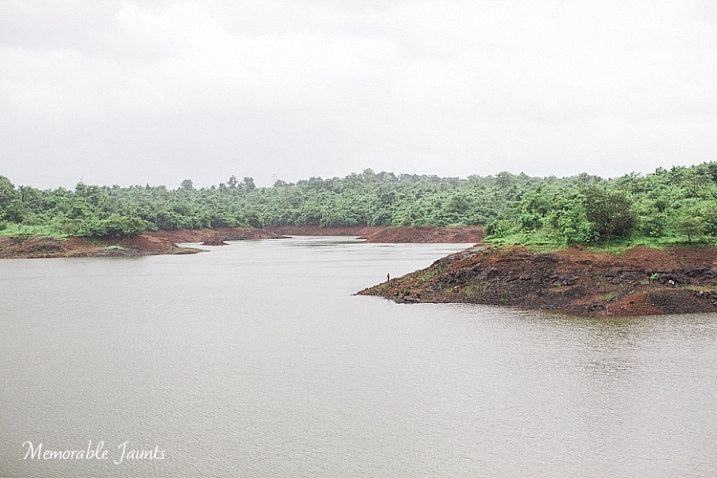
Landscape Image Near Bombay Memorable Jaunts for DPS

Being my family’s designated photographer, and having spent the past two months traveling across my home country of India, I experienced much of these same emotions on a day to day basis. India is a country like no other, where every part of the country has such a strong impact to the senses. It is big, busy, loud, and colorful – and is a photographer’s delight. The parent in me wanted to experience this magical journey with my family, and see my beautiful country through their eyes. Whereas the photographer in me was on a creative high and I wanted to document each and every thing I was seeing through my mind’s eye, and my camera’s viewfinder. I constantly struggled to find the right balance between being a mom, and being a professional photographer. 4000+ pictures later, I feel like I finally figured out what worked for me!

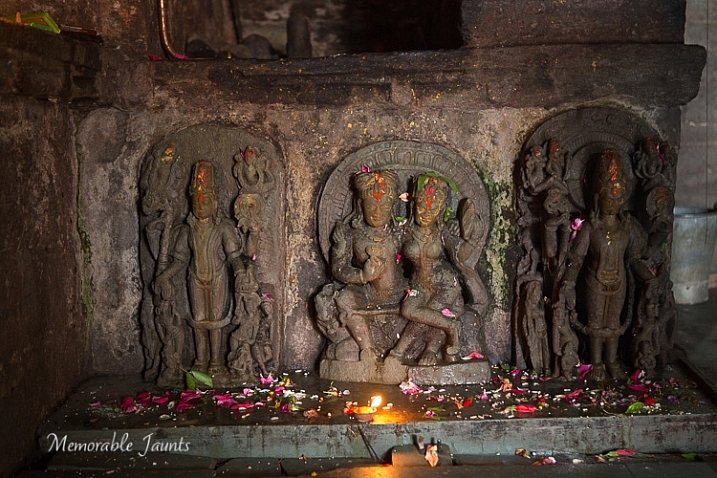
Memorable Jaunts Finding Balance as a photographer Article for DPS-1-2

A quick detour on our road trip led to an ancient temple where I was able to take some amazing and interesting pictures inside the inner sanctum.

Research locations for photo opportunities ahead of time

Just like kids, we adults too crave structure and routine, especially when it comes to photography assignments. Just like you would carry a shot list for a wedding photography gig or a commercial assignment, knowing what to expect with every place you visit gives you a certain peace of mind. This is particularly true if you are visiting famous locations and monuments. I found that often in such places photography was not allowed, or you needed special permission, or had to pay a fee.

Research your travel destination as much as you can. Look for information online, or even ask in photography forums specific to your needs. I learned early on in my trip, that most religious monuments and places of worship don’t allow any type of photography. Even cell phones are not permitted. So I would often leave my gear at home, or in the car, and just enjoy the location with my family.

Minimum gear for maximum effect

Packing for months on the road is never easy, especially when you have a ton of equipment, and suffer from an acute case of separation anxiety with your gear. Once you have researched your travel destination and know what types of imagery to expect, only pack the appropriate gear. Maybe even challenge yourself to only use certain types of lenses and cameras. The more practical you are about your gear, the less frustrated you will be for taking stuff you don’t end up using. My goto setup was my Canon EOS 5D MK III and Canon 24-70mmL lens. I used that combination 75% of the time when I was traveling. I found that I could switch easily from photographing wide angle landscape shots, to narrowing in on my kids playing effortlessly with my zoom lens. I also carried my Canon 70-200mmL lens, but found it was very impractical in terms of its weight. Additionally, professional DSLRs and multitude of lenses tend to get heavy and uncomfortable to lug around for a 20 day road trip, and several flight journeys. If you are going off the grid, or visiting remote places, err on the side of caution, and perhaps travel with minimal gear like a small point and shoot camera.

Set aside some “me” time with just with your camera

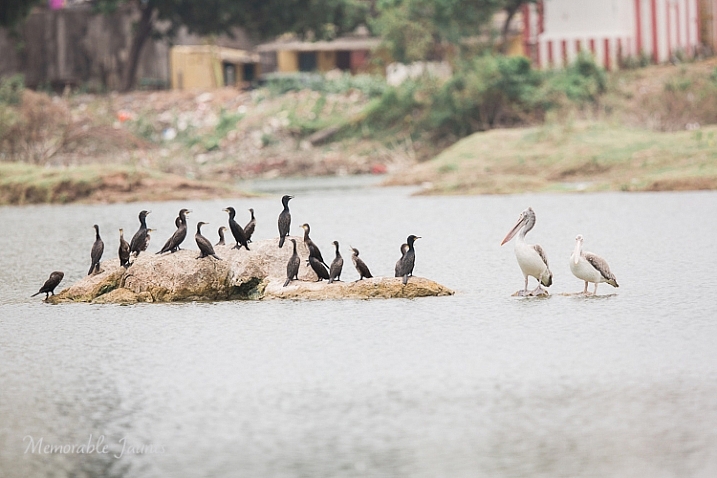
Memorable Jaunts Finding Balance as a photographer Article for DPS-1

During a ‘me’ time photowalk close to my home in Chennai, I spent 30 minutes photographing these birds without any interruptions or disruptions!

The deal I stuck with my family is that at every new place we visited, I would get one hour just to be with my camera. Any photography assignment specific pictures would be taken at that time. The rest of the day was time spent with my family, and capturing those moments on camera sparingly. There were times when the camera was completely banned because I really wanted to treasure the moments, and not just focus on documenting the experience. And guess what, I found I was a much happier, and nicer person, at the end of the day!

Engage your family in your photo trips

Do you have old outdated gear sitting in your gear cabinet? You know those old first generation DSLRs that you will probably have to pay someone to take off your hands? Use them to get your family engaged in photography. My kids share my old DSLR with a kit lens, and they love it. They love playing photographer, and some of the images they capture are so adorable. I always make it a big deal to praise their budding photography skills, and in turn, they are generally more tolerant when mom wants to spend an extra 10 minutes photographing the waves crashing against the rocks at sunset (because it is the most magical sunset ever!)

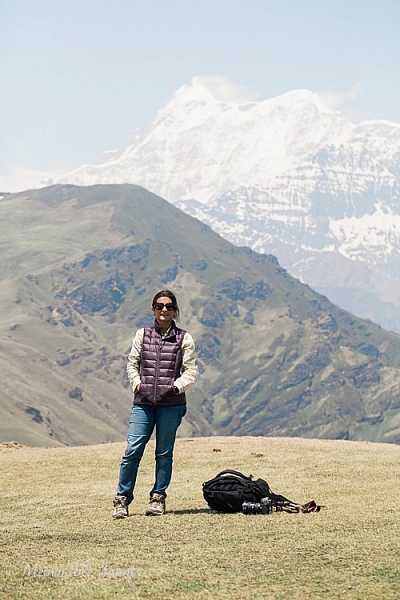
Memorable Jaunts Finding Balance as a photographer Article for DPS-1-3

A rare image of me as taken by my daughter! – this was during a four day hike in the mountains, and it’s the only picture I have to prove that I was there too!

Memorable Jaunts Finding Balance as a photographer Article for DPS-2

But 10 days later, this was the best I could get of them! – No amount of negotiation could get them to turn around and face me.

Make memories and not pictures

Give yourself permission to not take any pictures occasionally. Put the camera away and just enjoy the experience of being on vacation. After all, you have probably spent a lot of money, and precious time, to get to your destination. Soak in the essence of the space and place, and make memories that will last a lifetime.

After my long summer break, I still felt that I never really had any time off. To me, every minute was a working one, whether was I being a full-time mom, or a travel photographer. While I did walk away with some amazing imagery, a part of me regretted not spending more time with my family. What are some of your strategies for finding a good balance?

googletag.cmd.push(function() {
tablet_slots.push( googletag.defineSlot( “/1005424/_dPSv4_tab-all-article-bottom_(300×250)”, [300, 250], “pb-ad-78623” ).addService( googletag.pubads() ) ); } );

googletag.cmd.push(function() {
mobile_slots.push( googletag.defineSlot( “/1005424/_dPSv4_mob-all-article-bottom_(300×250)”, [300, 250], “pb-ad-78158” ).addService( googletag.pubads() ) ); } );

The post The Fine Line Between Travel Photography and Having a family Vacation by Karthika Gupta appeared first on Digital Photography School.


Digital Photography School

 
Comments Off on The Fine Line Between Travel Photography and Having a family Vacation

Posted in Photography