RSS
 

Posts Tagged ‘Before’

8 Factors to Look at Before You Choose a New DSLR or Mirrorless Camera

29 Jul

Not too long ago, the path to choosing your gear was very clear. If you wanted to take professional quality images, the DSLR reigned supreme. Yet, the landscape of available camera gear is constantly evolving, and today there are more options than ever before. Instead of just one or two dominant companies, you now have outstanding systems from no less than seven manufacturers. Mirrorless cameras have matured from a niche product to a complete solution, while DSLRs have been further refined. This may sound daunting at first, but with a bit of research, it’s possible to find a model that meets your specific needs. Here are the main points to review when considering whether you get a DSLR or mirrorless camera next.

1) Availability of Lenses

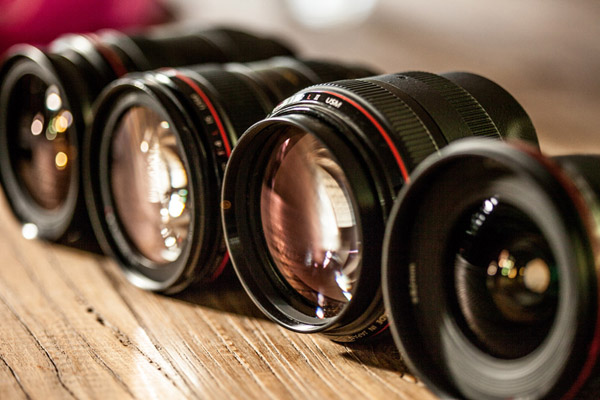
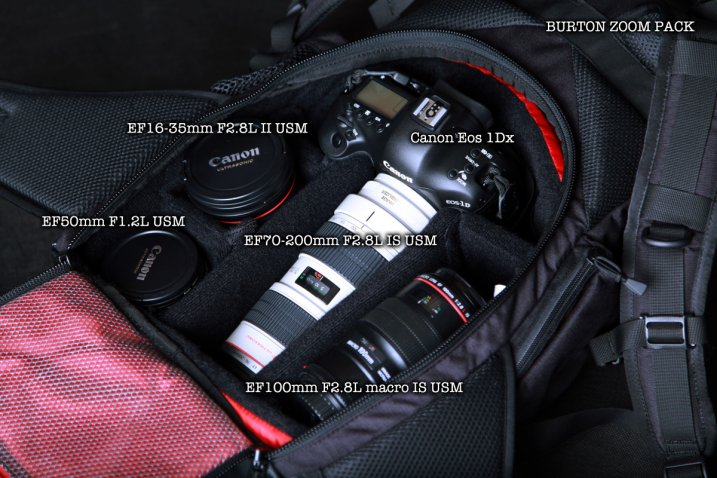
Buying a high megapixel camera body won’t spare you from the the negative effects of a poor lens. In fact, more resolution can bring greater attention to the lens’s optical flaws. For example, if you pair a full frame sensor with a kit lens you’ll have soft corners and mushy detail. Alternatively, high quality lenses can maximize every pixel of your camera’s sensor providing tack sharp focus from corner to corner. There may be some who will argue this theory and point to studio tests and technical charts. Yet in practice, a camera with a smaller sensor and less megapixels paired with a stellar lens can provide more clarity than a high resolution full frame coupled with an average lens. For this reason, the selection of available lenses is the first consideration when deciding on a camera.
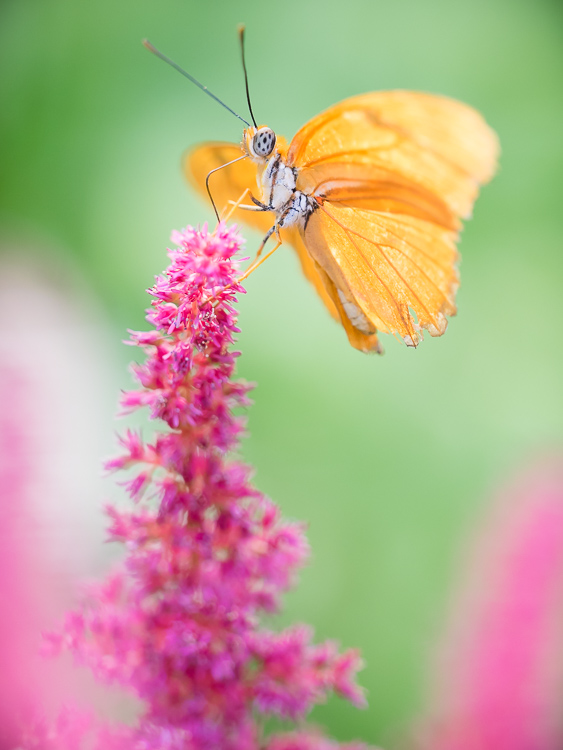
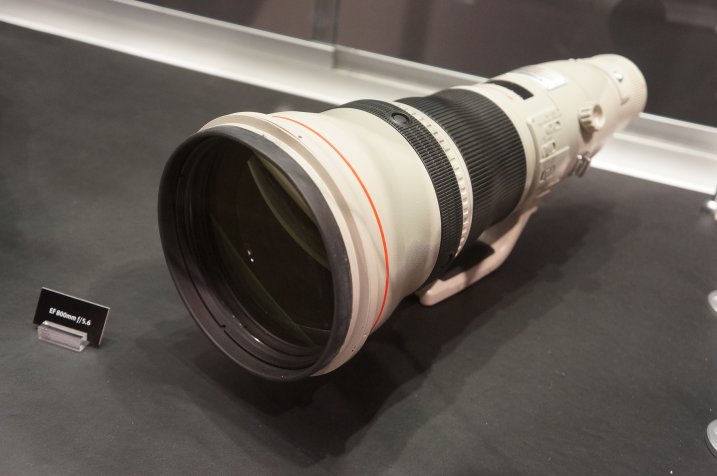
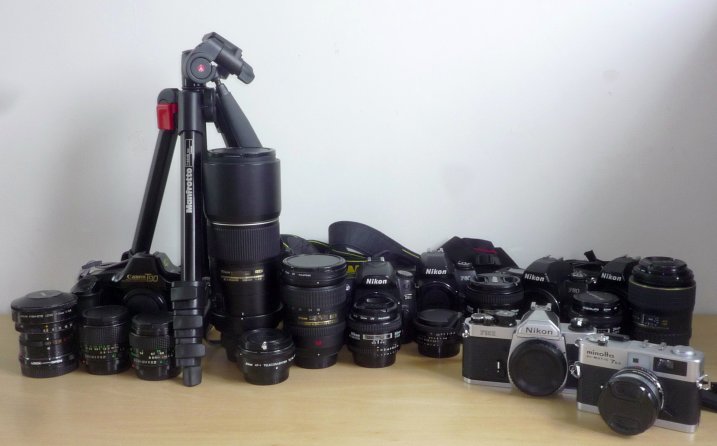
Sharpness is not the only part of this decision, but also the speed in which the lens achieves focus. A constant aperture is also a nice convenience for low light shooting as opposed to slower variable aperture lenses that span from f/3.5 to f/5.6. Finally, if you envision a super shallow depth of field in your images, f/5.6 will not be as desirable as f/2.8. Map out your kit with each manufacturer using your dream scenario. For example, can you build a system with f/2.8 lenses that span from ultra wide to super telephoto? How much would this cost for each manufacturer, and what would it weigh? While it’s true that DSLR users once enjoyed a significant advantage in lens availability, that gap is quickly closing. Most mirrorless systems now offer a complete line of professional quality glass that is of equivalent quality to a DSLR counterpart.
2) Image Quality

Ultimately, the image quality from a camera is only as good as the person controlling it. The best photographers in the world can capture stunning imagery, with the most basic cameras. Simply put, they know how to maximize the potential of any situation, and work around the limitations to get the shot.

Ideally, you want to find a camera that doesn’t get in the way of your creative process. If you’re fumbling with confusing menus and buttons, chances are you will miss a number of fleeting opportunities. Still, photography is also a game of confidence, and you want to feel as if the photo you are capturing will have all of the detail you need it to. I have good news for you! Nearly every DSLR and mirrorless camera today has more than enough resolution for professional work. Whether you are shooting for large prints, billboards, magazine spreads, stock submissions or your own personal satisfaction, today’s modern cameras are up to the task. This is a game changer, as a DSLR is no longer a prerequisite for professional work.

3) Sensor Size

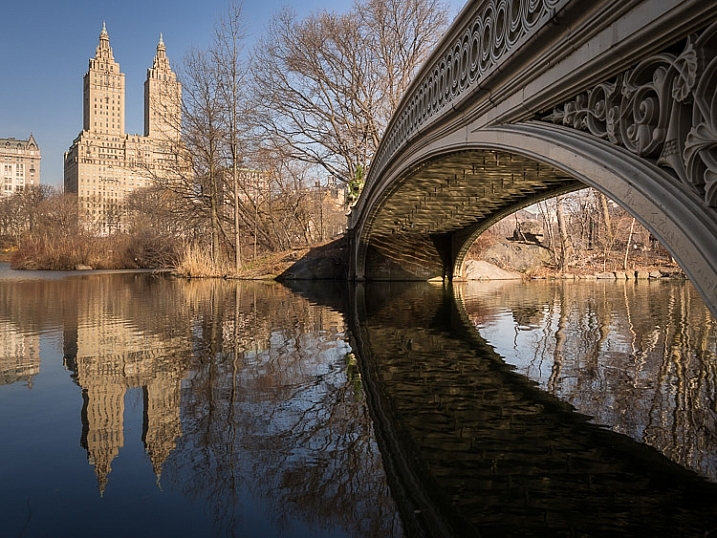
At the same effective focal range and aperture, the actual depth of field each format provides will appear different based on sensor size. For example, a full frame camera at f/2.8 dramatically throws a background out of focus. This is ideal for reducing distractions and bringing attention to the subject. To achieve the same look with an APS-C sensor you would need to open the aperture to f/1.8. With micro 4/3, you’d need f/1.4. Clearly, this makes shallow depth of field easier to achieve with a full frame. Having said that, micro 4/3 users can create similar results with fast lenses like the Voigtlander 42.5mm f/0.95.

While larger sensors enjoy a slight advantage for shallow depth of field, the opposite happens with great depth of field. This means f/5.6 on a micro 4/3 camera provides the equivalent depth of field to f/8 on APS-C and f/11 on a full frame model. This provides the micro 4/3 user with 1-2 extra stops of light while still creating sharp focus from near to far. As a result, the ISO doesn’t need to be as high, providing better image quality. For the same exposure and equivalent depth of field, here is an example of how the sensor size would affect the settings.

  • Micro 4/3: 1/125, f/5.6, ISO 200
  • APS-C: 1/125, f/8, ISO 400
  • Full Frame: 1/125, f/11, ISO 800

This is summed up nicely by Cambridge in Colour who noted, “Larger sensors (and correspondingly higher pixel counts) undoubtedly produce more detail if you can afford to sacrifice depth of field. On the other hand, if you wish to maintain the same depth of field, larger sensor sizes do not necessarily have a resolution advantage.”

4) Features and Functionality

The technology you’ll find, in even the most entry level mirrorless camera, can make a DSLR feel like stepping back in time. This is not solely due to the weight, but the glaring absence of useful features that make simple tasks more convenient. No longer do you need to stand beneath a shaded tree to check your images on the LCD. The quality of EVF in today’s mirrorless cameras is astonishing. It’s similar to using live view, but the image appears in the viewfinder where the display is not affected by harsh sunlight. Without removing your eye from the viewfinder you can check critical focus and exposure while viewing the histogram, highlight alert, and exposure settings.
With in-viewfinder image magnification and focus peaking, manual focus has never been easier or more accurate. Tapping the shutter lightly will activate the shooting mode so you’re always ready to capture the action. This can certainly reduce time spent chimping, and helps one remain focused on the subject in front of them. Depending on the model, you may enjoy other features like double exposures, silent electronic shutter, keystone correction, live time, time-lapse, touch screen autofocus that covers most of the frame, and built-in wifi. It’s these little things that ultimately make the shooting experience more enjoyable.
For those who are struggling with depth of field, the EVF on mirrorless cameras offers a huge advantage. As you look through the viewfinder and adjust your aperture, you will see a real-time look at how the depth of field will alter your image. This makes it so convenient to establish your settings for any given shot. In fairness, some DSLRs have a DOF preview button, but its functionality is far from ideal. Using that method the screen gets very dark, and you have to really look hard to determine what will truly be sharp. The EVF simplifies all of this as what you see is what you get.

5) Size and Weight

A DSLR is a commitment. You make a decision to take pictures, pack your gear, and head out. This has proven to be an effective formula for a very long time. Yet, I’ve spoken with countless photographers who leave their DSLR home to avoid carrying extra weight. Some even purchase expensive telephoto zoom lenses only to complain they’re too much of a hassle to bring along. If you do the math, DSLRs are about twice as heavy as mirrorless cameras and approximately 40% bulkier. When you’re traveling to distant places, or hiking deep into the woods, every ounce matters. I’ve been on small international airplanes with a strict 25 pound luggage limit, which included personal items.

Advances in technology can allow us to go places that were previously inaccessible. No longer do you need to leave important things behind. That’s one of the reasons carbon fibre tripods have become the preferred choice for many. Since they are much lighter than aluminum models, you can go further. Couple this with a lighter camera system, and it’s possible to reach remote locations faster, giving you the competitive edge.

6) Familiarity

15 years ago, on countless pages of photography magazines, experts debated the topic of film versus digital. What followed was undoubtedly one of the biggest revolutions in the history of photography. Despite some of the early limitations, digital imaging forged ahead, ultimately winning over many of the initial naysayers. While this current shift in camera gear may not be quite as dramatic, there are many who are still resistant to change. Yet, as George Bernard Shaw said, “Progress is impossible without change, and those who cannot change their minds cannot change anything.” If you’ve never tried a modern mirrorless system, you are short changing yourself. Visit a local camera store and have a look, or better yet, rent one for a weekend photo adventure. It may take a real world test to experience the benefits that don’t translate well on paper.
7) Durability and Battery Life

DSLRs take the crown when it comes to battery life. Where one DSLR battery can go a full day with 1000 plus shots, a mirrorless camera will require approximately three batteries. The obvious workaround is to carry several spares, but it’s worth noting as it is one definitive area that requires improvement. The issue is largely due to the heavy power demand from the EVF. As a result, it’s a concern for all mirrorless manufacturers with no one brand having a distinct advantage.
If you’re looking for a camera that’s weather sealed and built like a tank, both types of cameras have models to check out. Still, in order to enjoy a fully weatherproof system, the lenses need to have the same level of durability. With a DSLR this build-type is often reserved for the professional models. These are typically more expensive and heavier than non-sealed lenses. Alternatively, Sony, Fuji and Olympus all have rugged systems that boast features like splash, dust, and freeze resistant. If you find yourself in extreme situations often, this may be the better option for you.

8) Cost Savings

Do you rely on image stabilization as part of your photography routine? With a DSLR, this convenience comes at a significant cost. Lenses with this feature are often priced hundreds of dollars more than a non-stabilized model. Perhaps a more cost effective method would be a camera with built-in 5-axis stabilization. This will work on any lens you mount, making it possible to capture sharp hand held images at 1/15th of a second or slower. If you’re skeptical, as I certainly was, there are a myriad of tests that prove its accuracy.
This is an important development that changes the way you works in low light scenarios. For example, if you’re photographing a dark interior where tripods are not allowed, a typical setting would be around 1/125, f/4, ISO 6400. That same shot with 5-axis IS could be captured at 1/15, f/4, ISO 800. Noise won’t be nearly as prevalent at the lower ISO, and you’ll still have a tack-sharp image. This cutting edge feature gives photographers yet another tool to solve common everyday problems.

Conclusion

There have never been as many viable options as we have right now. It is indeed a great time to be in the market for a new camera. The system you decide on will certainly have a big impact on your work, so do thorough research and choose wisely. Remember, the ideal selection should not be based on what everyone else is doing, but what will allow you to realize your unique vision. This can only be decided by you, not a salesperson, or forum chatter. Above all, your next camera should be one that inspires you to pick it up and use it more often.
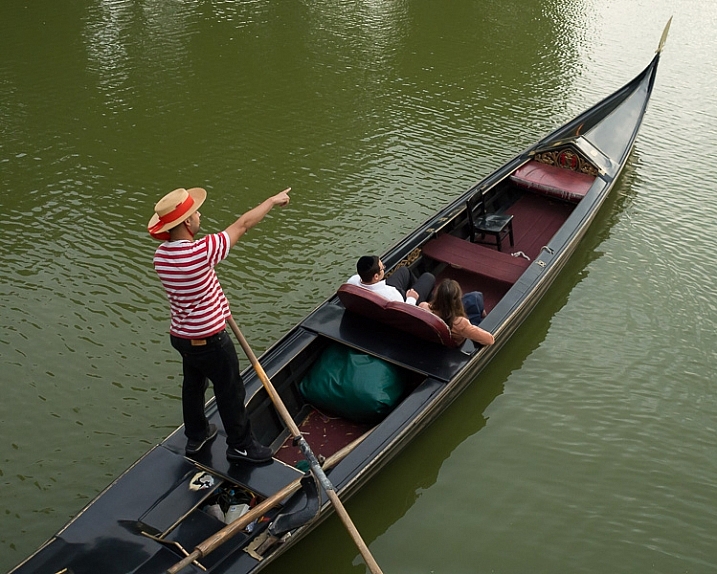
As for my gear, I don’t leave the house without my Olympus OMD EM1. Sometimes I also carry an EM10 as a backup body. I recently sold a Canon 40D, retired the old 10D, and am still determining the fate of my Canon 6D.

googletag.cmd.push(function() {
tablet_slots.push( googletag.defineSlot( “/1005424/_dPSv4_tab-all-article-bottom_(300×250)”, [300, 250], “pb-ad-78623” ).addService( googletag.pubads() ) ); } );

googletag.cmd.push(function() {
mobile_slots.push( googletag.defineSlot( “/1005424/_dPSv4_mob-all-article-bottom_(300×250)”, [300, 250], “pb-ad-78158” ).addService( googletag.pubads() ) ); } );

The post 8 Factors to Look at Before You Choose a New DSLR or Mirrorless Camera by Chris Corradino appeared first on Digital Photography School.
Digital Photography School

 
Comments Off on 8 Factors to Look at Before You Choose a New DSLR or Mirrorless Camera

Posted in Photography


The Advantages of Renting Photographic Gear Before you Buy

22 Apr

We have all heard the expression “The gear does not make the photo. The photographer makes the photo.” That being said, the gear does certainly help in perfecting the art of photography.

If you are a professional photographer or even a serious amateur, you know that photography is quite an expensive profession/hobby. Good equipment can be expensive and by the time you build your day-to-day gear bag, it can set you back several thousands of dollars. Just when you think you have the perfect setup,  you hear about the latest camera or a faster lens than what you have just being released for pre-order. Gear lust is very real among photographers!

Kenichi Nobusue

By kenichi nobusue

This is where renting gear or even borrowing becomes a viable option for many professional as well as serious amateurs.

Benefits of renting photo gear

There are several advantages to renting photographic equipment.

  • The cost of renting is typically much lower than cost of buying the gear. This becomes more relevant if it is not something you are going to use too often (like a mega telephoto lens, fish-eye, or tilt-shift lens).

    Jon Fingas

    By Jon Fingas

  • Ability to try out the equipment and see if it suits your style of photography. Once you know you like a piece of gear, you can make the investment and know you’re making the right choice.
  • Using a rental as a backup system for assignments especially events like weddings or concerts.
  • Traveling light and having gear shipped directly to your hotel is an option many photographers mention as a plus for renting. This also eliminates travel-related anxiety around lost luggage and excess baggage charges.
  • Using a rental when your main gear is out for repair. This let’s you keep working while you wait for repairs to be completed.
  • Eliminating buyer’s remorse. It is true that not every piece of gear works for everyone. Often times we buy gear because a certain photographer that we admire has the same equipment, only to be disappointed that our pictures are no where like theirs.

Renting – online versus local stores

Richard Fisher

By Richard Fisher

There are many different options for renting photographic gear. You can do so from local stores in your area or online vendors. In the US, big camera chain stores like CalumetPhotographic and AdoramaRentals sell as well as rent photo gear. CalumetPhoto, one of the local camera retailers in my area, also has local stores where you can go to pick up and drop off rental equipment. They tend to have a wide variety of equipment but definitely recommend reserving gear, especially if you want it for a specific event like weddings, to ensure you get what you want.

There are online stores like Borrowlens and Lensprotogo that also offer a wide variety of lens, cameras and other equipment for rent. You order online and have the gear shipped to your home or location of your choice. Once you are done, you ship it back to them. There is definitely more flexibility in renting gear online but there is the added cost of shipping and insurance, as well as a slight risk that the gear might not arrive in time (any unforeseen circumstances like extreme weather).

Benefits of borrowing photo gear

Giyu (Velvia)

By Giyu (Velvia)

Sometimes you get lucky and have other photographer friends who let you borrow their equipment for a photoshoot, or just to test out – definitely one of the more cost effective ways of trying out photographic gear. However, for those of us who don’t have such awesome friends, there is another method of renting temporary gear that is starting to become popular.

Online companies like CameraLends provide access to a lending community where you can rent cameras directly from local photographers and film makers. On the CameraLends website, they offer a peer-to-peer lending community for photographers and videographers. Owners post unused gear to rent out to other photographers and you can rent gear directly from local photographers, faster and cheaper than traditional means. But this service is somewhat dependent on the market you are in. Not every market will have every piece of equipment available for rent.

Screen Shot 2015-04-15 at 10.51.13 AM

Regardless of what method you choose to borrow or rent camera equipment, definitely try out gear before you make the investment to purchase it. The last thing you want to happen is buying equipment you think you want or need, only to find that it is really not benefiting your particular style of photography.

googletag.cmd.push(function() {
tablet_slots.push( googletag.defineSlot( “/1005424/_dPSv4_tab-all-article-bottom_(300×250)”, [300, 250], “pb-ad-78623” ).addService( googletag.pubads() ) ); } );

googletag.cmd.push(function() {
mobile_slots.push( googletag.defineSlot( “/1005424/_dPSv4_mob-all-article-bottom_(300×250)”, [300, 250], “pb-ad-78158” ).addService( googletag.pubads() ) ); } );

The post The Advantages of Renting Photographic Gear Before you Buy by Karthika Gupta appeared first on Digital Photography School.

Digital Photography School

 
Comments Off on The Advantages of Renting Photographic Gear Before you Buy

Posted in Photography


6 Things to Consider Before Becoming a Professional Photographer

15 Apr

192

So, you’ve got a nice camera, you really love photography, and you’ve been thinking that maybe it would be nice to make a little bit of money from this passion you’ve discovered. Before you decide to make that leap, read on. You may be convinced to throw that idea out the window, or you may find that you truly are ready, and it’s time to try your hand at photography as a career.

Before we go any further, I have to clarify something about the photos in this article. First of all, I had to include photos, because every article is better with pictures, right? Secondly, this session was inspiring, fun, and an example of every reason that I LOVE being a photographer. This client does not exemplify any of the cons of the business. Also, for this article “professional photographer” is defined as someone who gets paid to take photos, particularly portrait photographers.

137

1. You’re not good enough…yet

Maybe you love photography, and maybe you get a lot of compliments on your photos, but you may not be a good enough photographer to actually take money from people yet. Do you sometimes take a bunch of photos where the majority of them are garbage? Do you often say to yourself, “I’ll fix that later in Photoshop?” If your photos aren’t consistently in focus, exposed correctly, and great IN CAMERA, before you get to Photoshop, you’re not ready.

If you look at other professional photographers’ work and wonder how on earth they got their photos to look like that, you are not ready. I don’t mean that you have to be able to produce photos exactly like the photographers that you admire. I’m saying that you should have an understanding of how they achieve the look they get. You should know how light, depth of field, angles, etc., contribute to the photo. You should have an idea of how much of the photo is a result of post-processing.

Having a nice camera does not qualify you to be a professional photographer.

151

2. You don’t have enough experience

This goes along with not being good enough, but experience is important. You have to be consistent every time. You have to know that every single session you do will result in good photos, and that you can roll with the punches if conditions aren’t ideal. You have to know your camera settings inside and out, because when you’re chasing a naughty toddler around, you don’t have time to try to figure out what your shutter speed should be.

I’ll admit that I didn’t have enough experience when I started. I did some sessions for friends and family, then requests started coming in. I didn’t really have the goal of making money with my photography, but when people started asking me, I thought, “Hey, why not?” Some of my early sessions are dear to my heart, but some of them I look at and cringe. I feel bad that people paid money for me to experiment and find out who I was as a photographer.

182

3. You don’t want to lose the love of photography

Once you turn a passion into a job or career, you have a very real possibility of it turning into something you do because you have to, and not because you want to. I’m not saying this happens to everyone, but I’ve seen enough professional photographers burn out and quit, that I know it’s a very real thing. You may think that it will be fantastic to make money doing something you love, but are you ready for the possibility of not loving that thing anymore?

True confession here: I rarely get my camera out anymore for anything except a paid session. When I’m on vacation, sometimes the last thing I want to do is “work” while I’m there, and I certainly don’t want to drag my camera around when I’m supposed to be having fun.  Then, if I do take some photos just for the heck of it, they sit there on my computer forever, because I don’t really feel like sorting and editing yet another batch of photos. This doesn’t happen to every pro photographer, but I’m being real here. Sometimes I wish that I could just take photos because I love it, but the truth is, I’m often too tired after my paid sessions for the week to get my camera out again. I still love photography, but it’s more that I love my job; I love the photos and what I can create, I love working with people, but I don’t love photography just for photography’s sake anymore.

186

4. You don’t want to deal with business stuff

Taxes, business licenses, contracts, equipment upkeep, scheduling, email, phone calls – it’s all a very real part of running a photography business, and it takes far more time and effort than you’d like to believe. Being a professional photographer is not just happily snapping some photos, collecting money, and then spending all of that money on anything you’d like. There are expenses, lots and lots of expenses. There are boring, repetitive tasks. There are hours spent doing behind the scenes stuff.

No matter how great of a photographer you are, if you aren’t good at the business side of things, you are going to struggle as a photographer. It’s hard. It’s frustrating. Sometimes it’s overwhelming. Some days horrible things happen, like The Cloud losing your entire photography calendar (yes, speaking from experience). Sometimes you have to ask people for money, and that’s not easy for everyone. You have to be able and willing to run a pretty tight ship with scheduling, collecting money, and sticking to your policies. You have to decide your policies, and your fees, and how you are going to do business beforehand, because believe me, people will ask you to change all of it for them, and you have to be ready for it.

165

5. You don’t like to deal with difficult people

Luckily for me, I actually really love working with people, but even then, sometimes some people are hard to deal with. When people are paying you money to photograph them, sometimes they expect you to do anything and everything they want, and sometimes, even when you’ve done your best, they aren’t happy with you. If you are sensitive, like I am, that kind of criticism can be very hard to take.

Most of the people you will take photos for are fantastic, wonderful people, who love your work, and love you, which is why they hired you. That doesn’t happen every time though. Sometimes you have to spend lots of time on the phone talking to a worried client (what about the weather? what about junior’s bad haircut? what about clothes they’ll wear? what if they smile awkwardly?). Or someone who has lots of ideas they saw on Pinterest, and wants to discuss every one of them with you, in depth, even if they aren’t even remotely your style of photography. Sometimes you’ll show them their gallery and they’ll say they love it, except can you photoshop every single wrinkle off of their face? Questions are great, and most people don’t have unreasonable demands. But, you have to know that sometimes people are just not on the same page as you are, and you have to be able to work with them, and do your best to keep them happy.

155

6. It isn’t the fairytale job you think it is

I hear from people all the time about how much fun it must be to be a photographer, and how much they wish they could be a photographer too. Many people who jump into the photography business, without doing a lot of research and self-evaluation, get a harsh slap to the face when they realize that it’s work. A lot of work. Many people pop in the “professional photographer” scene on a whim, and pop right back out of it within a year or two, and sometimes don’t even last a few months. It’s work to get clients. It’s work to keep clients. They don’t just fall in your lap, waving hundred dollar bills and smiling their pearly whites for your camera.

You’re going to have competition, and sometimes criticism from others. Sometimes the world of photographers can get pretty nasty. You will find wonderful people to collaborate with, and those who encourage you, but you will also find some that will tear you down if they get the chance.

There are many benefits of running your own business, but it’s also hard. You have to know what you are doing, and if something goes wrong, it’s all on your shoulders. Being a professional photographer is much more than loving to take pictures. When you realize all of the work it’s going to be, you might decide that taking photos for the love of it, and because you’re an artist, may be much more fulfilling in the end.

169

Do I sound a little bitter? I know that I might, but I want to be realistic here. I think being a photographer is such a romanticized notion, that there are oodles of people just itching to jump into photography as a business, without really knowing what they’re getting into. I’ve learned so much over the years, and sometimes I wonder if I would have even started had I really understood all of the cons.

Then, remember why I do this. Yes, it’s a job, and it’s hard. Yes, I hate the business side of things sometimes. Yes, some days I want to go hide in a hole and bury my camera there. But most of the time I feel blessed beyond measure to be a photographer. I love the people I get to work with. I love creating beautiful photos, and capturing real personalities. I love happy clients, and I love that I can create memories for them that will last forever. Right now I wouldn’t trade this job for any other, because now, that I’ve learned and lived through the hard parts of my job, I know that it’s all worth it, for me.

Now you get to decide: will it be worth it for you?

googletag.cmd.push(function() {
tablet_slots.push( googletag.defineSlot( “/1005424/_dPSv4_tab-all-article-bottom_(300×250)”, [300, 250], “pb-ad-78623” ).addService( googletag.pubads() ) ); } );

googletag.cmd.push(function() {
mobile_slots.push( googletag.defineSlot( “/1005424/_dPSv4_mob-all-article-bottom_(300×250)”, [300, 250], “pb-ad-78158” ).addService( googletag.pubads() ) ); } );

The post 6 Things to Consider Before Becoming a Professional Photographer by Melinda Smith appeared first on Digital Photography School.


Digital Photography School

 
Comments Off on 6 Things to Consider Before Becoming a Professional Photographer

Posted in Photography


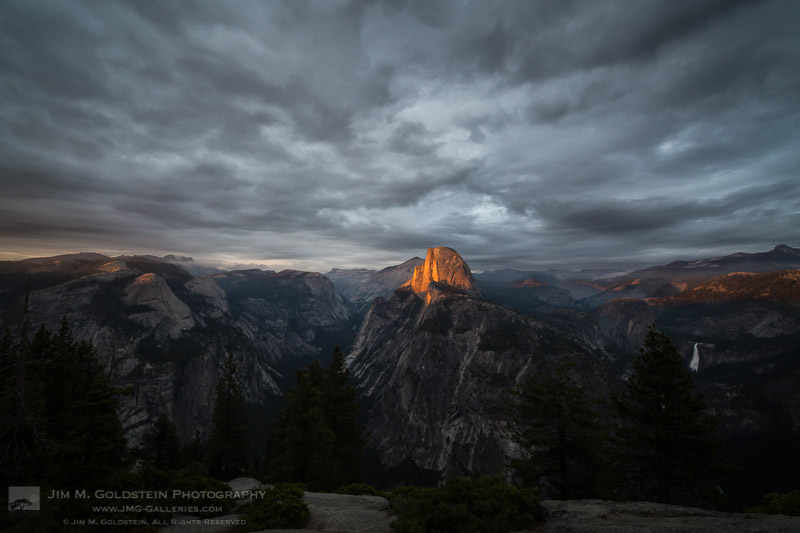
Before the Tempest, Yosemite

31 Mar
Before the Tempest, Yosemite National Park

A final pipe of light hits Half Dome before the clouds burst into rain.

Sometimes a short break in the clouds is all you need…

along with a lot of patience, a nap in your car, and a notion something might develop out of nothing. All that being said the Sun and the clouds do the hard part in these situations.  While waiting for conditions to unfold the hardest part is fighting the nagging doubt that you made the wrong call on where to shoot.  This self-doubt is particularly potent when you have limited travel time, but at the same time it is what keeps you on your toes as a photographer to not miss that fleeting moment when everything lines up. If you’re particularly fortunate then maybe that moment you thought was the special moment isn’t the most special moment of the evening.

Copyright Jim M. Goldstein, All Rights Reserved

Before the Tempest, Yosemite

The post Before the Tempest, Yosemite appeared first on JMG-Galleries – Landscape, Nature & Travel Photography.


Related Stories

  • Before the Tempest, Yosemite – Enclosure
  • Best Photos of 2014 by Jim M. Goldstein
  • Best Photos of 2014 by Jim M. Goldstein – Enclosure
Feed Ads by FeedBlitz
powered by ad choices


JMG-Galleries

 
Comments Off on Before the Tempest, Yosemite

Posted in Equipment


5 Things You Should Know About Lightroom Before Starting

27 Feb

So you just installed Lightroom, now what?

You could spend some time just playing around and learning through doing, but if you’re looking for a nudge in the right direction here are a few simple concepts that I wish I’d thought about before starting my own Lightroom journey – hopefully it helps you! Five things you should know about Lightroom before you start:

#1 Your organizational strategy

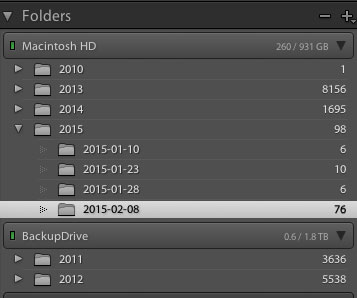
organize-in-lightroomThis might not seem important at first, but Lightroom is an amazing organizer of your photographs if you choose to use it as one. So before you start haphazardly uploading photographs into your Lightroom catalog try to come up with some sort of basic organizational strategy first.

Some ideas for organization include:

Organizing by date, by location of shoot, or by specific events. Think about your style of photography and the subject matter you plan on shooting. For example a wedding photographer would probably want to organize by date/bride-groom name, where as a wildlife photographer may organize by location/animal.

Lightroom has many different tools for organizing your photographs from colors, star rating and flags. You could for example use flags as a simple yes/no option to quickly cull images, while colors could be for various states of post production workflow (i.e. blue is for images that need to be processed and green is for images that are finalized and shouldn’t be touched).

This might sound overwhelming at first, but if you get into this habit early on, it will simply become a part of your Lightroom workflow, and trust me an organized Lightroom library makes things a lot easier when you’re dealing with thousands of photographs.

#2 How you want to import photos

This is a simple question, but one that you should know the answer to before you get started with Lightroom. When you first open up the import dialog box you’ll be asked whether you want to Copy as DNG, Copy, Move, or Add. Knowing the difference between these four options will help you make the best choice for your workflow. So here’s the Cliff’s notes version:

  1. Copy as DNG – Converts the file type to Adobe’s .DNG format. Read all about Adobe’s DNG format here.
  2. Copy – Retains the original file type of your image (on your computer or memory card) and copies it to a new location on your computer or hard drive.
  3. Move – Moves the image from one place to another on your computer (or from the memory card).
  4. Add – Adds the image to a Lightroom catalog without moving its physical location on your computer or copying it.

For a more detailed look at importing photographs in Lightroom check out: Quick Tip: Importing to Lightroom Made Easier

#3 How to use the Lightroom Develop Module

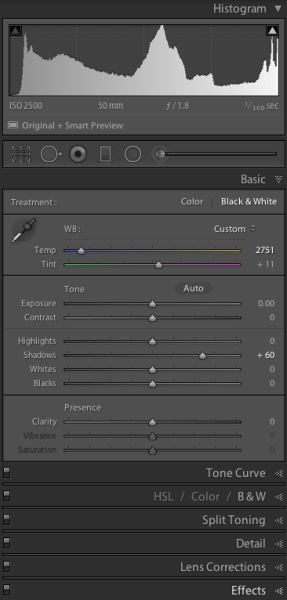
lightroom develop moduleNow that you’ve got your organizational strategy situated you’re starting to get into the fun stuff, before you go all hack and slash post-production on your first photograph it does help to learn some basic fundamentals. Here’s three quick points to get you started.

  1. Learn what the basic tab does – The basic tab is the workhorse of Lightroom it is what will bring your image to life. At a minimum master these five Lightroom sliders and you’ll be on the road to successful image processing.
  2. Learn the art of local adjustments – Once you’re comfortable with Lightroom’s basic tab you’ll probably want to move onto learning things like how to apply adjustment brushes, graduated filters and radial filters to your images. These tools function in much the same way as the sliders within the basic tab, however, they allow you to have more isolated and local control over your images.
  3. Learn the finishing touches – Finally within the develop module you’ll want to learn a bit about the finishing touches that Lightroom is capable of providing. Things like the clone/heal tool, sharpening, and noise reduction are a good place to start. You may also want to learn about how to remove chromatic aberrations and correct for lens distortion as well. These types of tools are subtle, but powerful, and really will bring the entire image together as a final printable work.

#4 What are presets and how you should use them

While you may be tempted to start with presets it’s better that you learn your basic tab and various other tools first – why? Simply because all presets are created from these settings so once you learn those settings not only will you know a lot about the presets you’re choosing, but you’ll also be able to create your own.

When it comes to presets think of them as a starting point, not a finished product. Learn how to use them to speed up your workflow by creating your favorite looks within a preset, then applying what you know about the various sliders in the basic tab to fine tune the results.

For more info on Lightroom presets: A Concise Guide to Lightroom Develop Presets

#5 What your export settings should be

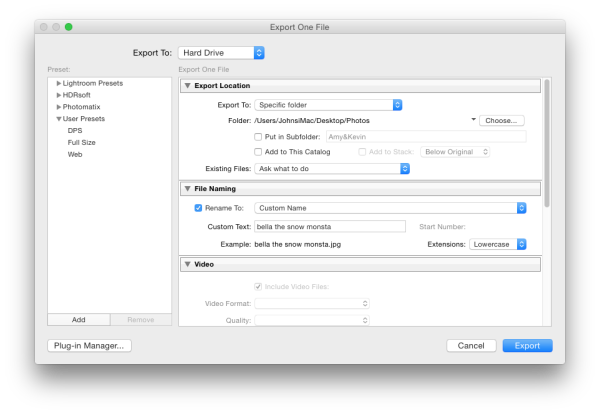
Here you are, ready to export your first photograph from Lightroom, and just when you thought you had everything figured out, this screen pops up. What do you do now?

Lightroom Export

First you’ll want to remember that Lightroom doesn’t save your processed images, only the instructions of how to process them, that’s why you need to export (export = “save as”) a file out of Lightroom. This image is separate from the original camera RAW file, and as a result will need its own name, and place of organization.

You’ll want to determine what file type and size you’re going to export, and whether or not you want Lightroom to automatically add a watermark to your photographs. These things are all going to be preferences for your own work and there’s no right or wrong way to go about doing it, but you should learn about the implications of each before you start exporting hundreds of photographs.

What Else?

What else would you tell someone who’s just getting their feet wet with Lightroom? Leave us a comment below and let us know!

googletag.cmd.push(function() {
tablet_slots.push( googletag.defineSlot( “/1005424/_dPSv4_tab-all-article-bottom_(300×250)”, [300, 250], “pb-ad-78623” ).addService( googletag.pubads() ) ); } );

googletag.cmd.push(function() {
mobile_slots.push( googletag.defineSlot( “/1005424/_dPSv4_mob-all-article-bottom_(300×250)”, [300, 250], “pb-ad-78158” ).addService( googletag.pubads() ) ); } );

The post 5 Things You Should Know About Lightroom Before Starting by John Davenport appeared first on Digital Photography School.


Digital Photography School

 
Comments Off on 5 Things You Should Know About Lightroom Before Starting

Posted in Photography


4 Things You Must do BEFORE Becoming a Professional Photographer

20 Jan

Are you considering making the leap from being an amateur photographer to a professional? Join the club!

There are many pro photographers today making a living off of the craft, but of course there are a fair number of challenges that come with the job. I’ve been a successful full-time professional photographer for two years now, and like most others, I have my share of things I wish I had done to prepare for the lifestyle. Here are four basic things that every aspiring professional photographer should do before they make the leap.

John Lee Maverick

By John Lee Maverick

1. Determine what kind of professional photographer you want to be

The most important thing you should carefully detail is what type of photographer you strive to be, and who is your ideal client. Do you want to shoot weddings and families, corporate events and head shots, or creative portraiture for editorial or advertising use? The answer to this question is crucial to help you identify if the market segment you choose is profitable, and if so, who is your target audience and how best to appeal to them to hire you. You wouldn’t market wedding photography services in the same way that you would sell corporate headshot services because your ideal client is different.

Once you determine the photography skills you want to market, the next step is to make sure that you have demonstrated skill in that area. Do you and the current clients you’ve worked with feel that your photography work to date demonstrates commercial viability (in other words, would enough other people pay for it)? If so, then it’s time to build an online portfolio of images demonstrating your creativity and skill. Make sure your portfolio not only contains a fair number of unique images, but also some words that introduce yourself and establish the qualities that set you apart from your competition. Don’t skimp on the words – remember that some people connect better with words over images.

Jonathan Chie

By Jonathan Chie

2. Establish your baseline expenses and make sure you have some savings

One of the biggest challenges that professional photographers can face is the instability of a reliable paycheck. Unless you can strike up long-term photography contracts with clients or find a steady stream of clients, there’s no guarantee you’ll be getting a monthly paycheck. Even if you do get clients, there’s a huge chance that payments will come in later than expected (to compensate in these instances, be sure to charge a late fee).

As a result of potential payment instability, it’s important that you assess your monthly baseline expenses and know how much you absolutely need to be making in cash each month. Next, match these expenses to how much you currently have in savings and make sure you would have enough saved away to cover yourself in case you don’t bring in enough revenue. Give yourself about six months to a year to establish your business and generate regular income; if over time you can’t cover your baseline expenses with your savings and sales, that’s the first signal that your professional photography career might need some reconsidering.

Kenny Louie

By Kenny Louie

3. Buy and insure all of the gear you will need, and know where to rent if needed

As a professional photographer, you should own, or have regular access to, all of the essential camera gear that is needed to fulfill the photography jobs that you are seeking. For example, wildlife and sports photographers absolutely need to have telephoto lenses, whereas real estate photographers need to have wide angle lenses. Do your homework and know what kind of gear you’ll need, and start acquiring it, or at least know where you can rent the gear that is too expensive or impractical to own. If you’re lucky, you’ll have a brick-and-mortar camera rental center in your town or a nice friend willing to loan out gear; if not, there are several gear rental options online worth looking into.

If you do purchase your own gear, be sure to get insurance on all of your equipment to aid in covering the expenses of needing to fix broken gear or replace stolen gear. As an amateur photographer, you’ll likely be able to have your equipment covered by personal property insurance, which is usually pretty affordable. However, as a professional photographer, you’ll need to get professional or business insurance coverage of your gear, which tends to be a bit pricier, but also more inclusive of business-related problems that could occur such as liability issues.

Vintspiration

By vintspiration

4. Get professional photography memberships

As a professional photographer, you’re entitled to some benefits if you know where to look. One of the first memberships you should look into is Canon Professional Services (CPS for Canon shooters) or Nikon Professional Services (for Nikon shooters) – there will be a membership for your brand in your country, just do some searching. The benefits of each vary but can include expedited shipping on repairs, equipment loans, and on-site support at certain events. To enjoy the full benefits of Professional Services, you’ll have to prove that you are a full-time professional or that you own a set amount of professional gear, and in the case of Canon pay an annual fee. But the value of having quicker repairs is immeasurable for professionals.

Another membership worth looking into is with the Professional Photographers of America (PPA). A non-profit association with over 27,000 members in 50+ countries, the main benefits of membership are equipment insurance and discounts and savings from select vendors, all of which are included in PPA’s annual fee. There are of course many other photography associations, distinguished mainly by the types of photographers they serve, each offering its own set of benefits. Examples include the American Photography Association, National Press Photographers Association, and North American Nature Photography Association, to name a few. This is again when it becomes pertinent to specialize in a specific type of photography. Look for similar groups in your area or country.

Are you considering becoming a professional photographer? What other questions are on your mind as you prepare?

googletag.cmd.push(function() {
tablet_slots.push( googletag.defineSlot( “/1005424/_dPSv4_tab-all-article-bottom_(300×250)”, [300, 250], “pb-ad-78623” ).addService( googletag.pubads() ) ); } );

googletag.cmd.push(function() {
mobile_slots.push( googletag.defineSlot( “/1005424/_dPSv4_mob-all-article-bottom_(300×250)”, [300, 250], “pb-ad-78158” ).addService( googletag.pubads() ) ); } );

The post 4 Things You Must do BEFORE Becoming a Professional Photographer by Suzi Pratt appeared first on Digital Photography School.


Digital Photography School

 
Comments Off on 4 Things You Must do BEFORE Becoming a Professional Photographer

Posted in Photography


Gear Envy: Five Things to Consider Before Buying Your First Camera

07 Jan

GearEnvy 1

1. The Ol’ Gear versus Photographer Chestnut

What’s the best camera and lens you can buy when you’re starting out?

  • Anything by Nikon
  • Anything by Canon
  • Nikon and Canon are overrated; Pentax is what all the cool kids are using
  • Do the best you can with what you can afford right now

A photographer went to a socialite party in New York. As he entered the front door, the host said “I love your pictures – they’re wonderful; you must have a fantastic camera.” He said nothing until dinner was finished, then: “That was a wonderful dinner; you must have a terrific stove.” – Sam Haskins

Believing a great camera will make you a great photographer is like thinking Roger Federer’s tennis racquet will make you a world champion tennis player. Um, it won’t – I’ve tried. I’ve also worn the same jeans as Gisele Bundchen and they didn’t make me a supermodel. Cooking with Wolfgang Puck’s saucepans didn’t make me a master chef either.

Great gear won’t make you a great photographer. Great lenses, however, can improve the sharpness of your images, and great lights and accessories can improve their quality. But all of that can be undone with poorly executed or sloppily composed images.

Just because something’s technically perfect doesn’t necessarily make it great or even good. A good photo should inspire an emotional reaction, and no camera or lens available today can achieve that for you.

I’m blown away daily by evocative photos on Instagram, 500px, and Flickr. Eighty percent or more of these images are taken with smart phones or entry-level cameras with kit lenses. When I share my images online, I get just as big a response from images taken with my iPhone as I do from images taken with pro gear. Because of the Internet, there’s never been a greater time in history to have your work seen and loved, or to inspire a reaction.

The best first camera you can buy is the one you can afford right now.

2. What are you shooting?

GearEnvy 2

Next, you should ask yourself what your your gear is for? Where will you use it and how often?

  1. I only take my camera to church on Sundays.
  2. I’m going to document my trek to the summit of Mount Everest, rodeo rides and my next Tough Mudder event.
  3. I photograph sixty weddings a year.
  4. I’m still learning, but I love to take photographs every opportunity I get.

Are you planning on taking your camera to rugged subzero locations? Will you be shooting thousands of images a day or only taking photos on special occasions? This is the first question to consider before purchasing any new gear – what will you use it for?

If your answer is #2 or similar, you may want to consider a heavy duty pro body that’s built to take rough and tumble handling and extreme weather conditions; a cheaper lightweight camera may not withstand the wear and tear or hold up to the elements.

If you plan on taking thousands of frames daily or weekly, it may be more cost effective to invest in a mid-range camera that’s built to shoot more frames. The shutter on a cheap camera usually rolls over and dies after about 100,000 frames, so spending a few hundred extra may give you more longevity.

The subject matter you’ll be shooting will also influence your choice of lens. For example, if you’re planning on shooting a lot of portraits and head shots, many fashion and portrait photographers use long fixed focal lenses or zoom lenses. If you’ll be doing a lot of weddings, professionals stock their kits with wide and long lenses and lenses that are somewhere in-between. If you’ll be shooting a lot of scenery, landscape photographers get more use out of wider lenses. And lastly, if you plan on shooting a lot of food or products, you may want to consider adding a macro lens to your kit.

3. Brand loyalty. Which brand should you buy and why?

With cameras there’s no definitive answer to this question. Nikon appears to have a slight edge over all the other SLR brands, but there are advantages and disadvantages to each.

I spent the first 15 years of my career shooting with Nikon because both my brother and my first mentor used them. I loved my Nikon and never dreamt of swapping over. I initially invested in secondhand bodies and prime lenses and after I had saved enough coin to buy new, I stayed loyal to Nikon. Later when I switched over to digital, I continued my Nikon love affair.

The decision to convert to Canon was made for me by the lack of decent Nikon upgrades on the market in 2004-2005 and by the fact that Canon’s 1DS MKII blew anything Nikon made that year out of the water. I switched to Canon and invested in two new camera bodies, new lenses, speedlights and accessories.

Fast forward 10 years and you could argue that Nikon now makes better bodies than Canon, and that Canon makes slightly better lenses. For better or worse, I’ve made a commitment to Canon, and I’m sticking to that – for now. I still suffer the occasional bout of gear envy, but hey, I’m only human.

My advice is to test out each camera on offer in your price range. You’ll find that some cameras are more comfortable to use than others. Also factor in the warranty, general after-sales service, and how easy it is to have the brand you’re looking at serviced or repaired in your area. Another good indication of quality is the camera’s resale value. If your potential camera is flooding the low-end of the secondhand market, it may be a good indication you’re about to buy a lemon. Finally, check out camera reviews and look up discussions about the model you want to buy on forums. The photography community is incredibly thorough and generous with information.

4. Holy crop! Does size matter?

GearEnvy 3

I bought my first digital Nikon 13 years ago and paid $ 17,000 AUD (approx. $ 14,000 USD) just for the body. It took 256 MB memory cards and produced raw image files that were around 6 MB. I used that camera to shoot hundreds of covers, poster shots, magazine spreads and advertising campaigns, and nobody ever questioned the file size.

Today my iPhone takes 8 MB photos. So, does that mean my iPhone camera is better? Umm – no. It’s not the quantity of the megapixels that count; it’s the quality of the megapixels and the size of the sensor. Cramming lots of megapixels onto a tiny sensor decreases image quality, making grainier looking files.

So how big are the sensors in the various cameras on the market today? A camera phone sensor is the size of a tic tac, a compact camera sensor is the size of an M&M, an entry-level SLR sensor is the size of postage stamp, and a pro level camera sensor is the size of a 35mm film frame.

So how many megapixels are enough and what’s the best size sensor for you? Well again, the answer comes down to what the output is going to be.

If you plan on shooting images that are going to end up on billboards or really large wall prints, then a full frame sensor that produces raw image files that are larger than 20 MB is ideal. An entry-level camera can produce large enough files to create billboard size images; they just won’t look anywhere near as good.

If you plan on printing midsize images — A4 (8.5×11″) or smaller — then an entry-level to mid-range camera will achieve really good results.

Finally, if you’re mostly going to share your images online, you can get away with a smart phone or compact camera, but any of the above will do the job, as well.

5. Physical size and weight

GearEnvy 4

Does this camera make my bum look big?

This factor is often overlooked until you get home and pull your new camera out of the box and use it a few times. You may think you want the biggest, heaviest camera and the longest lens, but four hours into an eight-hour mountain hike, you may change your mind.

I currently use two different bodies: the 1DS MKIII and the 5D MKIII. My 1DSIII weighs twice as much as my 5D and produces better quality images, but I’m prepared to take a hit in quality when I’m travelling because I know I’ll shoot more if I’m carrying a lighter camera. Having to schlepp a heavy camera around makes me think twice about bringing it out in the first place.

A good camera should feel comfortable and be like a natural extension of your body. Test out how easy it is to change settings with one hand; believe me, this will get frustrating if it’s a difficult process.

Have I missed anything you feel is worth considering? Do you have anything to add to the discussion or have any questions? I’d love to hear from you.

googletag.cmd.push(function() {
tablet_slots.push( googletag.defineSlot( “/1005424/_dPSv4_tab-all-article-bottom_(300×250)”, [300, 250], “pb-ad-78623” ).addService( googletag.pubads() ) ); } );

googletag.cmd.push(function() {
mobile_slots.push( googletag.defineSlot( “/1005424/_dPSv4_mob-all-article-bottom_(300×250)”, [300, 250], “pb-ad-78158” ).addService( googletag.pubads() ) ); } );

The post Gear Envy: Five Things to Consider Before Buying Your First Camera by Gina Milicia appeared first on Digital Photography School.


Digital Photography School

 
Comments Off on Gear Envy: Five Things to Consider Before Buying Your First Camera

Posted in Photography


7 Things You’ll Want to Know Before Turning Pro

18 Dec

Seven Things You’ll Wish You Knew Before Turning Pro

Babb Photo

Do you remember your first job? Your first, proper, grown up full-time job. You probably walked in on your first day, not really having much of a clue about what was expected from you. Your manager probably sighed to themselves at the thought of moulding your young, inexperienced self into a viable member of the workforce.

It probably took time but with some guidance, a bit of a learning curve, and probably a few mistakes along the way, you made it.

Now replicate that situation, but imagine you don’t have a manager, or any colleges to bounce ideas off of and to ask for advice. Welcome to your first tentative steps into self employment as a full-time photographer.

You might have been running your business alongside a day job for a while before making the leap. You might have found a support network and accountant, and you might have a good idea of your own processes and policies.

You never know what you don’t know though, so I picked the brains of a group of full-time, professional wedding photographers to find out what they wish they’d known when starting out.

Babb Photo 2

1) “It doesn’t matter how good you are at taking photographs if you’re no good at marketing your business.” – www.blincpicsphotography.com

Building a brand, working on your organic search engine reach, getting featured, focussing on word of mouth referrals, and paid advertising can all be great ways of getting your name out there. It can be a little overwhelming to know where to start though!

dPS has some great articles on marketing techniques in its archive here.

2) “Don’t be scared to say no. It’s okay to turn away business if it’s not a good fit for you.”  – Smashing the Glass

We’ve all been there, especially early on in our careers. You accept any job that crosses your path, including those who just need a photographer within their budget, rather than specifically wanting YOU and appreciating your value.

Sometimes you take jobs because they pay you money and you need money. In an ideal world, though, it’s all about creating value and making people see that value, and building your business to attract the clients you want to work with.

Babb Photo 3

3) “Creating a good workflow is essential. You need to establish good habits from day one.” – Tux and Tales Photo

You might not think you need a client management system to start off with, but you do need a way of tracking your client work flow.

You also need to establish procedures, processes, and a routine that helps you get things done. How will you know when to send out a final invoice? How will you gather feedback from customers to improve your service going forwards? How will you manage expectations? You could use PDFs that explain procedures to clients and set expectations, or you could publish information on your blog or website that explains the way you work and your timescales.

Just because you work for yourself doesn’t mean you can let go of good structure and procedures.

Also do your accounts weekly. Trust me.

4) “The most unique selling point you have is you.” – Jordanna Marston

Be true to yourself, trust your gut and don’t worry too much about what you think you should be doing. Be true to yourself and you will attract clients that connect with you.

The most successful wedding photography businesses I know have their owner’s personality stamped all over them. They have created a brand, they create work that they believe in and that’s authentically them.

Babb Photo 4

5) “When photography is your passion and your business, you can end up doing it 24/7.” – My Heart Skipped

Don’t forget to explore, discover, be curious and do other things that fill your heart with joy. That joy and creativity will feed back into your photography.

Of course the opportunity issue can occur too and you might find that you only end up shooting when you’re working, rather than shooting for pleasure. Find a balance. Do personal work and have other interests and sources of inspiration.

Babb Photo 5

6) “You can’t make a silk purse out of a sow’s ear.” – Andy Gaines

It’s tempting to focus on editing and throwing a filter on everything to find your style, but your style will come naturally when you’re making good work.

What makes your image is light, composition, expression and moment. Not the latest trend in post-processing.

Babb Photo 6

7) “Keep work and play time separate, not only for yourself, but for those you love.” – Paula Ohara

If you learn how to fully switch off, you’ll be fully switched on when you need to be.

Work/life balance is so important. A huge tipping point for me was when I designated a separate work space. I have an office in my house now, but there was a time that I worked from the corner of my living room. It’s really good to have that separation, so you can switch off at the end of the day.

Keep at least one day a week free for yourself. Sunday is my day off now and I try to take it easy on a Monday, if my work load allows it. In my first year or so I routinely worked seven days per week, to keep on top of my editing and my day job commitments.

Make balance a priority. Although I haven’t quite mastered it myself yet…

Are you a pro, do you have any other tips you’d add to this list?

googletag.cmd.push(function() {
tablet_slots.push( googletag.defineSlot( “/1005424/_dPSv4_tab-all-article-bottom_(300×250)”, [300, 250], “pb-ad-78623” ).addService( googletag.pubads() ) ); } );

googletag.cmd.push(function() {
mobile_slots.push( googletag.defineSlot( “/1005424/_dPSv4_mob-all-article-bottom_(300×250)”, [300, 250], “pb-ad-78158” ).addService( googletag.pubads() ) ); } );

The post 7 Things You’ll Want to Know Before Turning Pro by Laura Babb appeared first on Digital Photography School.


Digital Photography School

 
Comments Off on 7 Things You’ll Want to Know Before Turning Pro

Posted in Photography


How To Evaluate Photo Contests Before Submitting Your Images And Cash

16 Dec
win

Flickr/Crystian Cruz

Barely a day goes by when I don’t see a tweet or Facebook post about yet another photo contest I must enter. “Big prizes! Fame! Exposure! Magazine Cover!” they yell out at me and I’m often tempted for various reasons.

On the surface, most contests seem like a good idea given the potential upside. However, there are many aspects to any contest which photographers should consider. Those considerations will depend upon where you are along the photography spectrum, from beginner to advanced professional.

When I look at a photo contest more closely, there are many questions I regularly ask to see if the contest is a good fit for my desires and time (and pocketbook). I’m going to list out some basic questions you want to ask yourself before entering contests in hopes that it helps you decide the next time you see a listing. There are no right or wrong answers as we all have different needs and desires for our photography. I want to help you make a conscience choice, not a reflexive one.

After the questions I will present a few current contests I feel are worth entering and why.

What is in it for me?

If you are thinking of entering a contest then you want to get something back out of it. It’s important to know what you want before you submit, otherwise you will never find what you are looking for.

Images Money

By Images Money

I break down the three main reasons for entering contests into the the 3Fs:

  • Fame – Are you doing it just for the exposure and fame? Do you want to be known as “X Magazine’s Fashion Photographer of the Day/Month/Year”? If so, will this contest help you with that goal? Will it add to your resume/CV?
  • Fortune – Are you looking for the big bucks and could care less about the fame? Does the contest offer decent prizes to help you meet that goal? What about second and third place, are those good prizes too?
  • Feedback – Some contests offer a chance to receive a critique from one of the judges (sometimes at an additional cost). This is helpful especially if you don’t win a prize. Improvement is likely why you are reading dPS in the first place!

Personally, I go for fame once in a while but mostly go for fortune. After all, I met my wife in Costa Rica after winning a Facebook contest to a surf camp there, so I am a little biased. That being said, there is no right answer for everyone, pick the criteria that works for you.

Who picks the winners?

For me, this is the next big issue. Is the winner picked by a single judge, a jury, or is it an open popularity contest voted on by likes and shares?

I prefer juried and judged contests, especially when I can research those doing the picking. I pick these contests because the judges are typically photographers, or someone with advanced art education and experience. I feel the playing field is more level with these contests.

On the other hand, pictures of kittens, sunsets, rainbows, and oversaturated mountains do very well with the voting internet as a whole. I shy away from popularity contests because A) I’m not ultra-popular and B) they can be rigged and often bury great work in favor of pretty work. The main reason a website will run a photo contest is to make themselves more popular and visited and that’s why these types of contests exist.

Chris Potter

By Chris Potter

What about my rights?

As a professional with a vested interest in protecting the use of my images, I read the full rules of every contest I enter. They aren’t as hard to read as the iTunes regulations, and the key bits are often labeled with a header such as “Rights” or “Permission”.

What you are looking for here is how your image may be used. A good contest will limit their use of the images submitted to only promote that particular contest. In that case, they will display the images so others can see them and potentially share them (with correct links back to the contest which contains proper credit to me as the photographer) and that is all. They will display winners and may also use them in promoting the next contest, such as showing the 2014 winners when advertising the 2015 contest.

Other contests are simply a rights grab. They offer a juicy prize, such as $ 10,000, but state they can use the images worldwide, royalty-free forever, however they wish. These contests are looking to avoid paying stock companies (and their photographers) for a boatload of images they may use later. They receive the images often at less than a dollar per image. These contests make good business sense for the company, but stink for what they do to everyone except the grand prize winner. Avoid these contests if possible.

What does it cost?

Let me state up front that nothing is free. If a contest is totally free, there are great odds that it is looking to grab rights. Be wary of free (except the Sony contest mentioned below).

Second, what is the entry fee? A legitimate contest with judges or jury will almost always pay those judges and juries. There is the cost of running the contest and paying for prizes. These are, after all, businesses that are running the contests and they don’t want to lose money.

You need to decide for yourself if the cost of entry is worth the reward (see the first item to set your contest barometer).

Hans Pama

By Hans Pama

What do they want?

The best way to be disqualified before your images are judged is to mess up the entry procedure and send something in the wrong size or format. Read the entry rules carefully and make sure your images match the size, DPI, and format regulations. Also, read the rules specifically mentioning digital manipulation and compare that to what you have done. Some contests are no-holds-barred (like the Nikon contest below) and let you submit images that have been highly manipulated to the point where objects are removed or inserted. Others stick to what could traditionally be done in a darkroom with an enlarger.

As a starting point, most contests allow for changes to anything for which your editing software has a slider. Things like Exposure, Contrast, Sharpness, as well as Burning and Dodging. Saturation is usually okay too. Realize too that the winning entries in almost every contest have been edited to bring out the life in the image, so expect that you will have to do the same.

Some contests don’t want to see corporate logos in the images or need recognizable people to have a model release on file. If there are images of animals, some contest ban pictures from zoos and game parks, while others allow it. This is why you need to read the rules first to make sure you don’t waste your time and get disqualified.

Where to find contests

I love it when others do the legwork for me and find a plethora of contests which meet my standards. To that end, I am thankful to Photoshelter for regularly putting out a list of worthwhile contests (and notes on some that aren’t worthwhile). They already released their 2015 photo contest guide posted. It’s a great place to start.

The internet is obviously a great place to search. I suggest narrowing the search by defining what you are good at. Don’t type “Photo Contest” into Google, instead, try “West Coast Photo Contest” or “Wildflower Photo Contest”. This will help you find contests better suited to your strengths.

Lastly, don’t forget to look locally. Many communities have contests that can be a great stepping stone for your career or business. It can also help you make contact with your local arts community. Summertime really brings out the contests at art fairs.

Bram Van Damme

By Bram Van Damme

What looks good to me?

Here are a few contest I will be entering in the coming months/year. I chose these contests specifically because they are judged, are not rights grabs, and offer either decent prizes or worthwhile exposure.

Please feel free to link to your favorite upcoming contests (and tell us why we should enter) in the comments section below.

  • The Open – $ 50,000 in prizes and it plays to both fields with 100 entries selected by public vote and 100 from judges. Final selection from 200 finalists is chosen by judges. Emphasizes photographers retain their rights to photos. Entry Deadline May 1, 2015.
  • PDN Photo Annual – 10 categories give you many options and it is a highly regarded contest with good exposure inside the industry. Entry Deadline February 3, 2015.
  • Sony World Photography Awards – Also 10 categories and open to all. Groups for professional, student and open. $ 25,000 top prize and each group winner gets flight to London for showcase gala. Entry Deadline January 5, 2014.

Good luck!

googletag.cmd.push(function() {
tablet_slots.push( googletag.defineSlot( “/1005424/_dPSv4_tab-all-article-bottom_(300×250)”, [300, 250], “pb-ad-78623” ).addService( googletag.pubads() ) ); } );

googletag.cmd.push(function() {
mobile_slots.push( googletag.defineSlot( “/1005424/_dPSv4_mob-all-article-bottom_(300×250)”, [300, 250], “pb-ad-78158” ).addService( googletag.pubads() ) ); } );

The post How To Evaluate Photo Contests Before Submitting Your Images And Cash by Peter West Carey appeared first on Digital Photography School.


Digital Photography School

 
Comments Off on How To Evaluate Photo Contests Before Submitting Your Images And Cash

Posted in Photography


Five Things You Need to Know Before Starting a Pet Photography Business

02 Oct

Pet photography is a fast growing and super fun genre of photography, and it’s awesome to see so many people wanting to celebrate animals and the role they play in our lives! But how do you turn your passion for animals and photography into a thriving and successful business? What do you need to consider before setting up your business? Today I’m sharing the knowledge I’ve gathered over the last three years to help you prepare yourself for what is the best job in the world.

Image Nine

#1 Do you really love animals?

Pet photography is messy, dirty, and at times incredibly frustrating work. You need to be comfortable with being jumped on by Great Danes, pawed by pugs, and scratched by cats. You need to be happy crawling through the mud, and bending and stretching at weird angles.

Image Six

This was shot lying on the wet ground on a freezing cold morning – but totally worth it!

You also need to be exceptionally patient. Often at the start of a shoot your subject will spend about half an hour running around like crazy, and jumping all over the place before finally calming down enough for you to photograph. You also need to accept that you will never have that much control over your subject – try telling a puppy to sit still and tilt his head 45 degrees!

At some point, your camera equipment will get covered in drool, your shoes will get peed on, and you will end up ruining several pairs of pants. So if you don’t really, truly, love animals, you are going to find the whole process miserable and give up very quickly.

#2 Is there a market for it?

I am lucky enough to live in a city (Melbourne, Australia) that has the highest rate of dog ownership in the country. People here absolutely adore their pets. There are high-end pet stores, hundreds of dog friendly cafes and parks, and so many Pet Expos that I have lost count. But that’s not always going to be the case for your area, so do your research. Some good things to find out are:

  • What’s the rate of pet ownership? Your local council is a good resource.
  • What is the general attitude towards pets? Do people see dogs as “just dogs” or are they part of the family or substitute children?
  • Are there lots of pet friendly cafes, restaurants, and parks? What are the pet shops in your area like? Do they sell just the basics or are they a bit fancier?
Image One

Kimbo is most definitely part of the family.

It’s also a good idea to factor in things like the amount of disposable income the average pet owner has, and the general cost of living. One really handy tip – if the area you are in isn’t particularly pet friendly, focus your marketing on areas further afield.

#3 Do you have the right equipment and know how to use it?

Pet photography is similar to sports and wedding photography in the sense that if you miss a moment, it’s not likely to be repeated. We all know that equipment doesn’t make the photographer, but at a minimum you want to have a DSLR, prime lenses that autofocus (the 50mm f/1.4 is a great place to start), a good quality zoom lens, high-speed memory cards, and an speedlight you can use off-camera if necessary.

Image Two

Proof that with the right equipment, you can make it look as if a puppy is standing still.

Get to know your equipment back to front before you start charging for your work. Figure out how to change your shutter speed, aperture, and ISO without looking, and know how to change your lenses quickly. Some of the best shots come without warning, and if you’re staring at your camera wondering why something isn’t working, you’ll miss the shot.

As you know, practice makes perfect, and the only way to get really good at photographing pets and knowing your equipment is to find the most badly behaved animals you can and shoot, shoot, shoot. There’s no point in using well behaved, well trained dogs, because there are so many that aren’t. You know the friend who has a dog that jumps all over the furniture and runs in circles constantly? The friend with the cat who hates everyone? Practice with these sorts of pets and your camera will become like an extension of you before too long.

#4 What’s your style?

You know you’ve made it as a photographer when people can pick out your work from a line up. Having a distinct style is so important for setting you aside from the crowd. Here are some things to consider to help you find your style:

Are you a natural light or a studio photographer?
Do you like clean, clear backgrounds that don’t distract from the pet, or do you like contrasting backgrounds that add to the photo?
Do you like posed shots or natural?
How do you feel about styled shoots? Using props?
Do you want a soft or high contrast feel to your shots?
Do you like obvious post production or a more subtle approach?
Do you want to incorporate the pet owners in the shots?

When I started my business, I saw a gap in the market for really beautiful, shallow depth of field shots of pets. I also happen to love shooting with my lenses wide open, so that became my style. It has been refined over the years, but people hire me because they want beautiful, close up, emotive shots with a sense of warmth and humour to them. I only shoot in soft natural light, no direct sun, and I don’t do high action shots such as agility shows. I also very rarely photograph people with their pets, because it’s not my thing.

Image Four

Props can be an awesome way to bring a bit of humour to your shots.

Remember – do what you love and what feels good for you. Copying another photographer’s style is a waste of time and won’t help you grow.

#5 How are your animal handling skills and knowledge?

This is such an important thing to consider before you start your business. Safety (both yours and your subject’s) is extremely crucial. At best, you can be opened up to a law suit, at worst, you could seriously injure or kill someone’s pet.

Image Eight

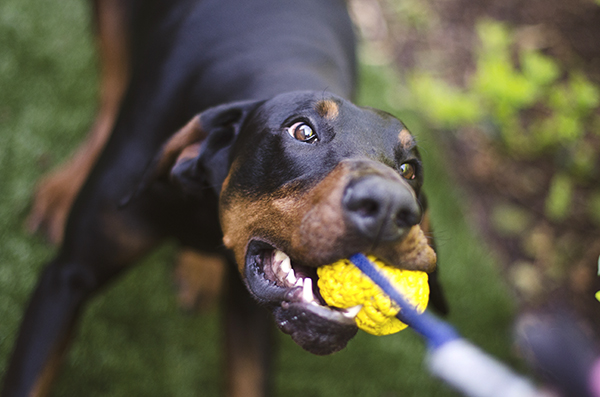
When you’re dealing with 40 kilos (88 pounds) of Doberman, you want to be confident with your animal handling skills.

Be honest with your skill level. For example, I have grown up and volunteered around cats my entire life, and I’m very comfortable with them. I also know their body language, signs of stress, and how to play with them properly. But I didn’t know nearly as much about dogs. I volunteered for a shelter walking dogs, taking photos, and doing general handling, which helped me a huge amount. I also did some basic dog handling courses, as well as reading up on different breeds and their personalities. I’m now at the stage where I’m 100% comfortable dealing with all breeds and sizes of dogs.

Image Three

Ellie is fourteen years old, so I was very mindful of her range of mobility. She was happiest lying on her bed, so I shot around this rather than forcing her to stand up.

Even if you grew up with dogs, it’s a great idea to read up on the different breeds and their traits. This will help you so much when you are shooting, and by knowing what makes a certain breed tick you’ll be able to produce some great pictures.

Image Five

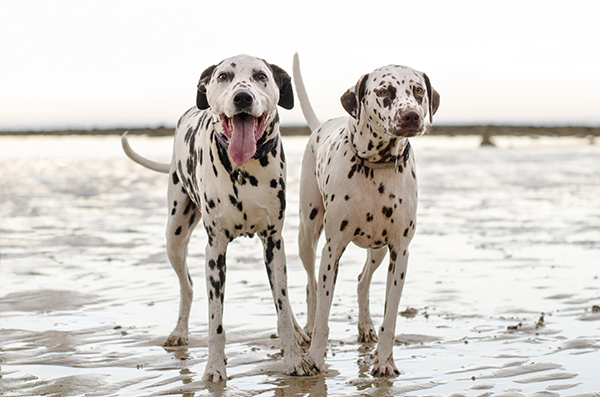
Ralph and Gidget were on lead for this session, and the leashes were removed later in Photoshop. We had so much more fun knowing that there wouldn’t be any unforeseen accidents.

Unless you’re shooting in a fenced in, off-lead area, it’s better to be safe than sorry and keep the dog on a long lead. That way you avoid any accidents, and you can always edit leads out later in Photoshop (a big secret of pet photographers). Never, ever force a dog or cat to do something physically uncomfortable.

Lastly, one final safety tip – always talk to the owner BEFORE you start shooting. Find out as much as you can about their pet. That way, if certain things terrify or stress them, you know what to avoid. Always check for food allergies before offering treats!

Image Seven

Did someone say treats??

I hope that this article has given you some things to consider – and most importantly, don’t forget to have fun!

The post Five Things You Need to Know Before Starting a Pet Photography Business by Erin McNulty appeared first on Digital Photography School.


Digital Photography School

 
Comments Off on Five Things You Need to Know Before Starting a Pet Photography Business

Posted in Photography