RSS
 

Posts Tagged ‘Band’

Video: Removing a stuck lens filter… with a band saw

29 Jun

What do you do when your cheap lens filter is so badly stuck on your very expensive Canon 24-70mm F2.8L II USM lens, that even a specially-designed filter wrench won’t get it off? If you are former MythBuster Adam Savage, you take that puppy to your band saw and scare the crap out of the lens owner.

That’s what he did for one of the latest videos on the Tested YouTube channel, when fellow host Norman Chan got yet another filter stuck (the second one in 6 months) on his $ 1,800 lens.

The footage is a bit terrifying for gear lovers, but have no fear: no lenses were hurt in the making of this video. What Savage does is cut two small notches into the rim of the lens filter, one on either side. Then, after expanding those notches with a file, he slots in a solid metal ruler and uses it to torque the filter clean off.

The moment of truth…

Watch the video up top to see the whole cringe-worthy process for yourself, and then send this video to the biggest Canon gear head on your mailing list. Nothing like a mild heart attack to really get you over that Wednesday hump…

Articles: Digital Photography Review (dpreview.com)

 
Comments Off on Video: Removing a stuck lens filter… with a band saw

Posted in Uncategorized


CMRA band for Apple Watch features front and rear cameras

03 Nov

If you’re worried that having to pull your smartphone out of your pocket might make you miss the decisive moment, the CMRA band for the Apple Watch could be just what you’re waiting for. The watch band comes with not one but two built-in cameras. An upward-facing 2MP module is meant to be used for video calls, via a dedicated app, and the occasional selfie. The outward-facing camera captures 8MP images or HD-video clips right from your wrist.

To do so you have to tap a button that is built into the band or long-press it for video recording. A double-tap of the button switches between cameras. The makers of the CMRA claim you can capture ‘hundreds’ of images with one battery charge or record approximately 30 minutes of video footage. 

Recorded images and videos are accessible via Apple’s stock Photos app, so they can be easily sorted, edited and shared. In terms of storage the CMRA offers 8GB of built-in memory. The band comes with a dual-charging dock that charges Apple Watch and CMRA band at the same time.

The CMRA band is expected to launch in Spring 2017, but those interested can already put a pre-order in at an early bird price of $ 149 for either the 38mm or 42mm version. The estimated retail price after launch is $ 249. More information is available in the video below or on the CMRA website where you can also order the band.

Articles: Digital Photography Review (dpreview.com)

 
Comments Off on CMRA band for Apple Watch features front and rear cameras

Posted in Uncategorized


How to Photograph the Full Band of the Milky Way

16 Mar

Get Grant’s three video instructional series Guide to Post-Processing Night Photos – currently available at 59% off through the SnapNDeals for a limited time only.

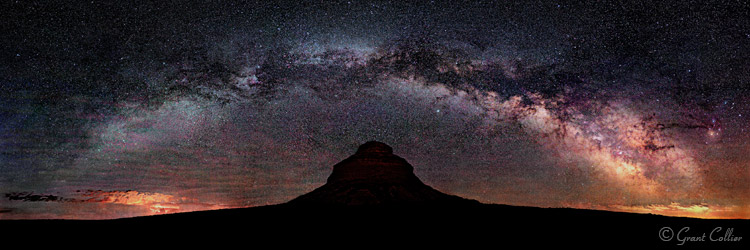
Pawnee Buttes

Our small blue planet is located on a spiral arm, far out from the center of the Milky Way Galaxy. When we look towards the galactic center, we can view one of the most spectacular sites imaginable. Thousands of stars are clustered together, to form a hazy band in the sky, known simply as the Milky Way.

If you enjoy photographing the Milky Way, the winter months can seem especially long. During this time, the Earth is pointing away from the center of the galaxy at night, and you can only see the fainter parts of the Milky Way. It can still be photographed, but the shots won’t likely be as dramatic as they are at other times of the year.

Fortunately, the bright galactic center becomes visible again in the spring. In March, it rises shortly before dawn in the Northern Hemisphere. So you will need to stay up all night or get up very early to photograph it. Every day, it rises a little earlier in the night, and by June it will be rising about the same time that the sun sets.

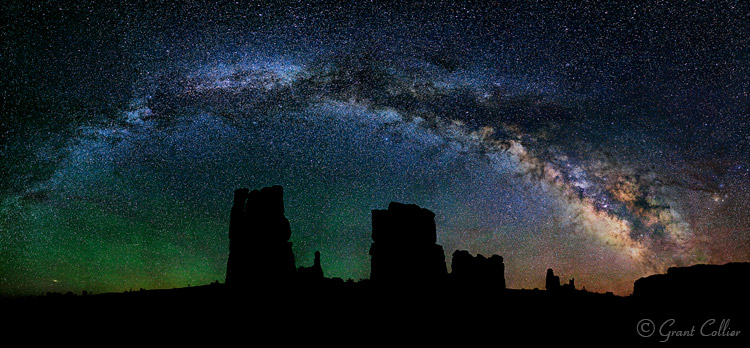
Determination Towers

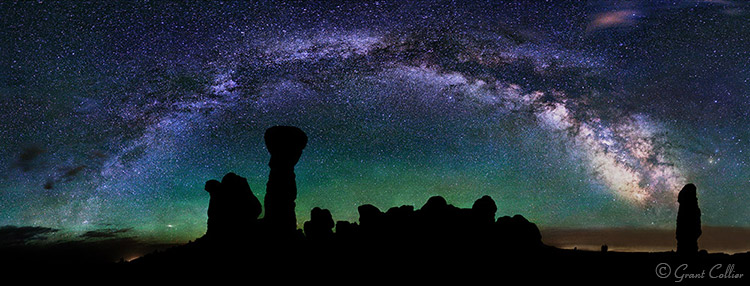
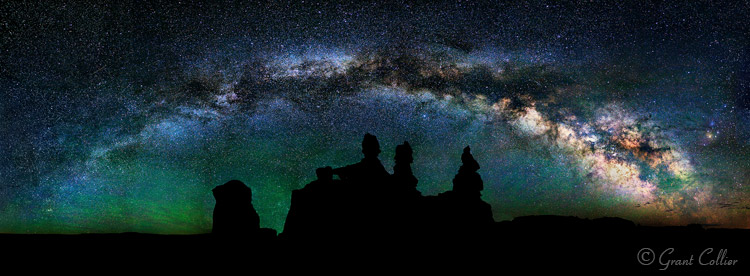
The great thing about photographing the Milky Way in the spring and early summer months, is that you can capture the full band of the Milky Way arcing across the sky. By August, the Milky Way will appear too high in the sky, in the Northern Hemisphere, to capture the full arc.

If you’re shooting from the Southern Hemisphere, you will have a longer time frame to see the full band of the Milky Way. From about February to June, you can capture it in the southern part of the sky, just after the galactic center rises above the horizon. From about June to September, you can capture it just before it sets in the west.

Since the Milky Way spans such a large portion of the sky, you will need to stitch together multiple images to capture all of it in one photograph. I explain how to do this below.

EQUIPMENT

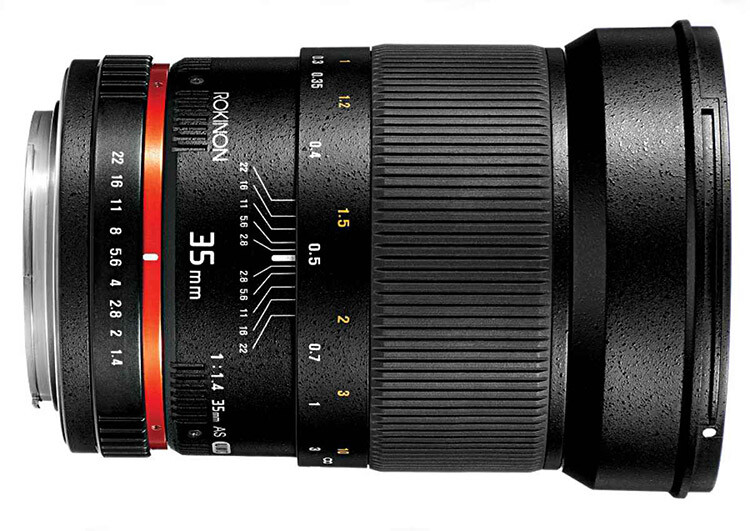
Rokinon35

The Rokinon 35mm f/1.4, all manual lens, works great for this kind of photography.

There is some specialized equipment you can use to capture stitched images of the Milky Way, such as a panoramic tripod head, a leveling base, and even a robotic camera mount. However, the majority of the time you won’t need any special equipment. Anyone with a good tripod and a DSLR can capture the full arc of the Milky Way.

You can use any lens from about 14mm to 50mm to capture your images. If you use a longer lens, like 50mm, you’ll need to take, and stitch, a lot more images together. This can be more time-consuming, but you will also capture much larger image files, with greater detail and less noise.

Ideally, you’ll want to use a lens with a very wide aperture, like f/1.4 or f/2.8. It is also helpful to have a tripod with a bubble level on top of its legs, and a tripod head that has a rotating base.

PLANNING YOUR SHOTS

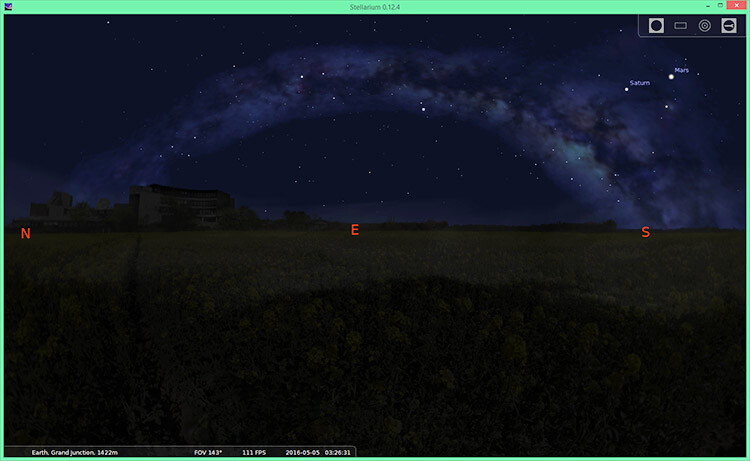
You can pre-visualize how the Milky Way will appear at any time and location using a program called Stellarium. This program can be downloaded for free, it can also be purchased as an iTunes or Android app, or you can use other apps like PhotoPills or Sky Safari.

Stellarium

Stellarium

You will usually want to shoot images of the Milky Way under no moon. If the moon is out, it will obscure the stars, and the Milky Way will not look as impressive. One exception to that, is if you want the moon to illuminate the foreground. You can shoot with a waxing crescent moon that is about 20% illuminated. You’ll need the moon to be directly behind you so it obscures the stars as little as possible. The moon will be in a good position for this shortly after it gets dark on July 8-9th, 2016.

You will want to get far away from any city lights when shooting images of the Milky Way. Light pollution can create an unnatural color cast in the image and it can obscure the Milky Way. And, of course, you should check the weather forecast to make sure there will be clear skies.

COMPOSITION

Once you know how the Milky Way will appear, and have determined the best time to shoot it, you need to decide where to take your photograph. Although the full band of the Milky Way can be spectacular on its own, your images will be more compelling if you include an interesting foreground. If you’re in the Northern Hemisphere, you should find a composition facing east, since that is where the shallow arc of the Milky Way will be visible shortly after it rises. If possible, I recommend arriving before it gets dark to set up your shot. It’s much easier to determine the best composition, and focus your camera, when it’s still light out.

Milky Way Arches National Park

CAMERA SETTINGS

You can use the rule of 500 to calculate the exposure time for your images. Simply take 500, divided by the focal length of your lens, to get the number of seconds to expose the shot. For example, if you’re using a 50mm lens, take 500, divided by 50 = 10 seconds per exposure (this will give you long enough exposures to get good quality images at night without small star trails starting to appear in your shots).

You’ll typically want to use the widest aperture on your lens when shooting stitched images. You’ll also want to use the highest native ISO, that doesn’t cause any highlights to be blown out. As long as you don’t have any close foreground objects in the shot, you can focus at infinity.

You can do this by autofocusing on the moon if it is out, or by focusing on a very distant object before it gets dark. Switch to manual focus afterwards to make sure the focus stays set at infinity. Alternatively, if you have Live View on your camera, you can use it to zoom-in on a star on your LCD screen, then adjust the focus manually until the star appears as a small, sharp point of light.  Don’t rely solely on the infinity marker on your lens, as it isn’t always accurate.

I’ve found that a white balance of about 3800K works well at night with no moon out. However, as long as you’re shooting in RAW (or if you do not have the K setting on your camera), you can set it to Daylight and adjust the white balance later.

Turn off Long Exposure Noise Reduction, as it can take too long, causing the stars to move too much between the exposures, and making it difficult to stitch the images together seamlessly.

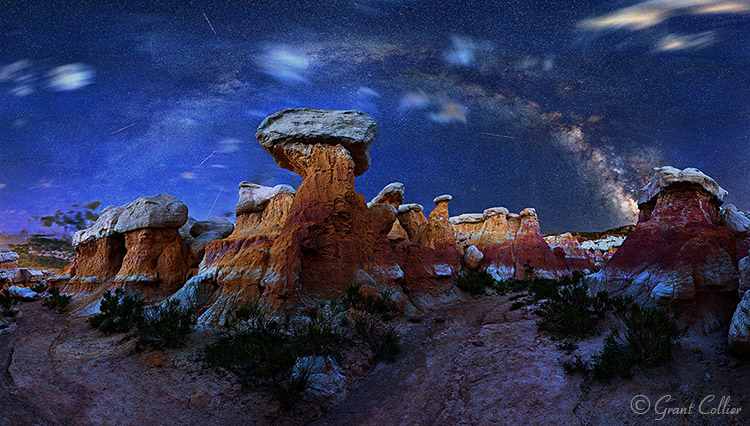
Calhan Paint Mines

TAKING THE PHOTOS

You will need to make sure that your camera is straight, using a bubble level or your camera’s built-in levelling feature. Ideally, you’ll also want to make sure your tripod head is mounted on a level surface by using a bubble level on top of your tripod legs, or a levelling head. This will ensure that your camera remains level as you turn it.

Before beginning the stitched image, I recommend taking a test shot. Point your camera towards the brightest part of the scene you will be photographing, and take an image using the camera settings you have chosen. Check the histogram to make sure you are not overexposing the image. If you are, lower the ISO until you are not clipping any of the highlights. You’ll also want to zoom in on your shot, and make sure everything is in sharp focus.

If everything looks okay, you can start taking your stitched image. I always recommend capturing a wider view of the scene than you want in your final image. You’ll have to crop the image afterwards, since the stitched images will never be perfectly rectangular. So it’s always better to capture too much of the scene, than too little.

Goblin Valley

Position your camera to take an image of the far, bottom left corner, of the scene you want to capture. After you take the first shot, you’ll need to quickly rotate your camera to the right before taking the second shot. Make sure and leave plenty of overlap (about one third of the scene) between the images to make it easier for the software to stitch the images.

Now, continue taking shots, and rotating the camera to the right, until you’ve captured the entire horizontal field of view that you want. To get the full band of the Milky Way, you’ll typically need to shoot a multi-row panorama. You can rotate the camera up and then shoot a second row of images. Keep doing this until you’ve captured the entire vertical field of view you want.

STITCHING WITH LIGHTROOM

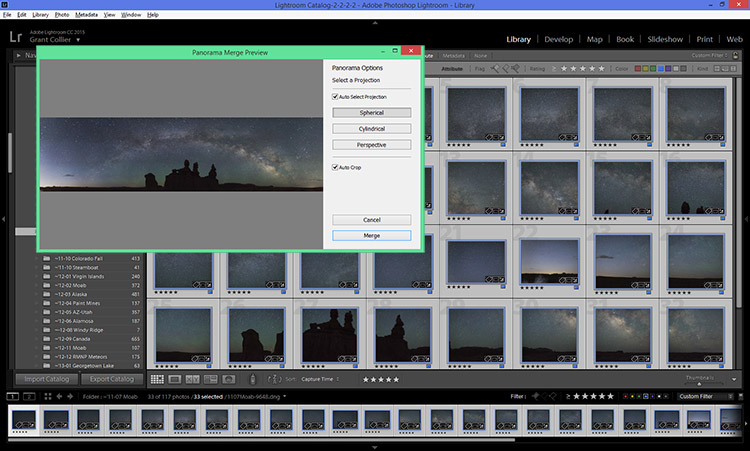
Lightroom Preview

You can stitch images within Lightroom CC. Simply select all of the images you want to stitch, right-click on them, and select Photomerge > Panorama. Lightroom will then attempt to stitch the images. Occasionally, Lightroom will be unable to stitch them together. If this happens, I recommend trying a free program for PCs called Image Composite Editor.

Once the images are stitched, you can process them like any other image. I’ve provided detailed information on post-processing night photos in my instructional videos, which are currently available at 59% off through the SnapNDeals for a limited time only.


googletag.cmd.push(function() {
tablet_slots.push( googletag.defineSlot( “/1005424/_dPSv4_tab-all-article-bottom_(300×250)”, [300, 250], “pb-ad-78623” ).addService( googletag.pubads() ) ); } );

googletag.cmd.push(function() {
mobile_slots.push( googletag.defineSlot( “/1005424/_dPSv4_mob-all-article-bottom_(300×250)”, [300, 250], “pb-ad-78158” ).addService( googletag.pubads() ) ); } );

The post How to Photograph the Full Band of the Milky Way by Grant Collier appeared first on Digital Photography School.


Digital Photography School

 
Comments Off on How to Photograph the Full Band of the Milky Way

Posted in Photography


How to Create Awesome Portrait Lighting with a Paper Bag an Elastic Band and a Chocolate Donut

12 Feb
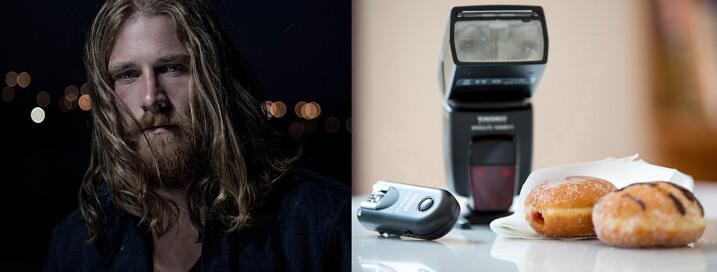
Paperbag main 717

I photographed Luke Deslandes with a homemade modifier and a lighting kit that can be created for less than $ 200

One of my favourite TV series from the 90s was MacGyver, an action-adventure series about a US government secret agent with a fabulous mullet, who improvised and built complicated devices from household objects such as rubber bands, paper clips, pens and a Swiss Army knife.

The show was so incredibly popular that the term MacGyver made its way into the dictionary:

MacGyver (v): To make or repair (an object) in an improvised or inventive way, making use of whatever items are at hand:

  • He MacGyvered a makeshift jack with a log.
  • He has a shock of short red hair and a pair of rectangular-framed glasses, MacGyvered with duct tape.

The other week I was caught short on a night shoot because I’d misplaced my small softbox modifier, and needed to come up with a way to soften and control the from my speedlight to create portrait lighting.

I searched my entire kit and car, found nothing useful, then I asked myself, “What would Macgyver do?”. I rummaged through my bag and found a chocolate donut (Nutella filled, so good!) in a white paper bag, and a hair elastic which would be perfect substitutes for the softbox I’d forgotten to bring to the shoot.

The really cool thing about lighting is that the basic principles will work with any kind of light, regardless of budget, or the type of modifier used. So whether you’re working with a $ 150 lighting kit (similar to the one I used for these images) a $ 1,500 hit, or $ 15,000 one, the light will still react in the same way.
light-modifers

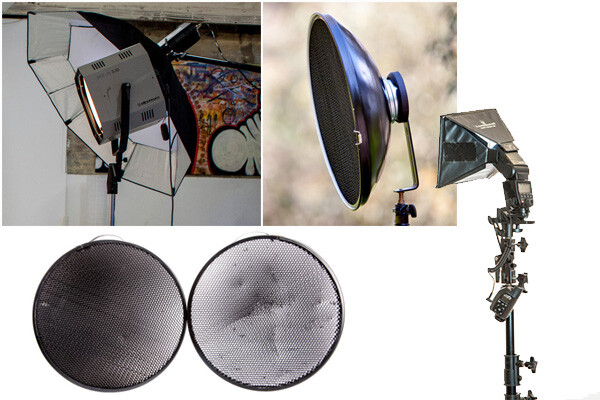
One of the best lessons I learned from working with film and television crews is that ordinary household objects can be used to shape and train light. I’ve seen soft light created using sheets of Perspex, calico, and even shower curtains. A light modifier is basically designed to do two things:

  1. It controls the shape of the flash
  2. It controls the quality of light coming from the flash
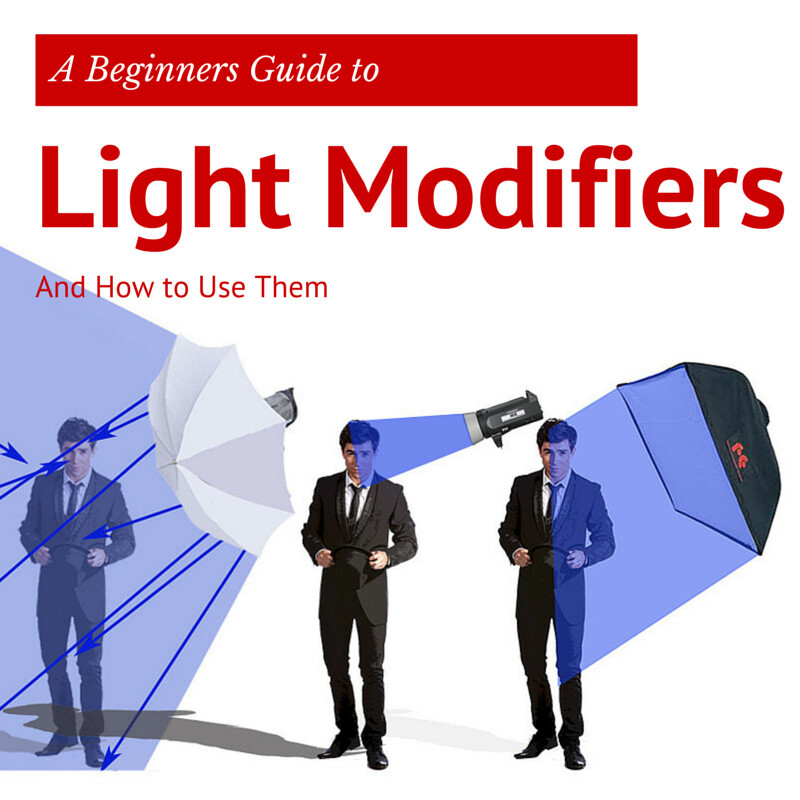
Light Shapers SQ copy

Some modifiers, like umbrellas, will spread the light over a large area and soften the quality of the light. Other modifiers like grid spots contain the light to a very small area and create a hard quality of light (click image above to read more).

The main differences between the high-end options, and MacGyvered lighting are: light quality, consistency, and build. A light modifier that has been cobbled together using found objects is not going to look pretty, and you may attract some odd looks from passers by. On a positive note, I believe a MacGyvered light modifier is a perfect way to get your head around how lighting works, and to vary your lighting styles without having to empty your bank account.

This is how I created my mini softbox using a paper bag, an elastic band, and a chocolate donut.

The Gear
Boom 750
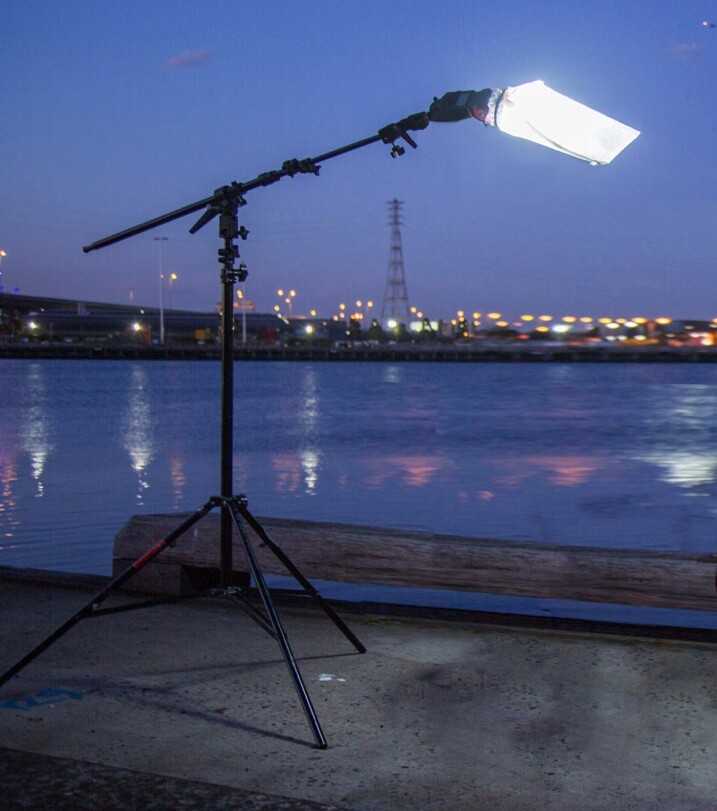
Booms are an awesome way to add light above your model, as they allow the freedom to work without stands getting in the way of your shot. Using a boom is also the best way to position the light exactly where you want it.

I’ve created this lightweight location boom by using a mini-boom arm on an umbrella bracket, attached to a light stand. Always remember to use a weight on the light stand, to avoid it tipping over in high winds. You can buy a sandbag, or MacGyver your own using two-litre drink bottles filled with water in a canvas bag.

A cheaper alternative to the boom is to use a light pole, and to ask a friend to hold it for you. If you are new to working with off-camera flash, I suggest you read one of my previous blog posts: A Beginner’s Guide to Working With Flash Off-Camera.It will walk you through the step-by-step technique of shooting with off-camera flash .

  • A Yongnuo YN-560II speedlight – under $ 80
  • Yongnuo RF-603N flash triggers $ 30
  • CowboyStudio umbrella mount bracket with swivel tilt bracket $ 16
  • LumoPro LP605 compact 7 foot stand with ground spikes $ 45
  • Sandbag $ 7
  • LumoPro mini-boom/reflector arm $ 40
  • Tripod
  • Nutella donut in a white paper bag – you can use plain donut but they are not as good! <$ 1
  • One Hair elastic <$ 1
  • Canon 5DMK111 (use your own camera)
  • Canon 24-105mm L series (use the lenses you have already)

The Way

Paperbag 2 717

Carefully remove the donut from the bag, being careful not to get any Nutella smeared on the bag. Divide the donut into two equal portions. Offer one half to your model and eat the other half. If you can’t find Nutella donuts in your neck of the woods, you can substitute with any other pastry served in a white paper bag.

If you prefer a cleaner style of shooting, just ask for an extra bag when you buy your donut. You can also skip this part altogether, but it’s not as much fun, and just find a white paper bag similar to the one I’m using (see below). They vary in size and thickness so look for bags that are free of any advertising.
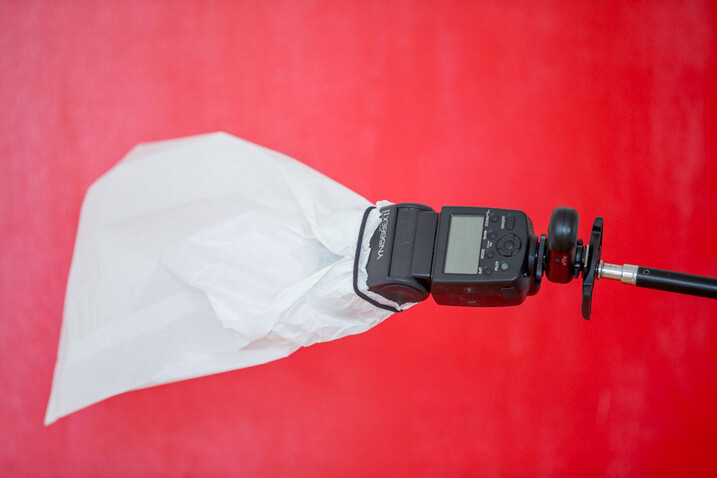
Paperbag 3 717

Place the bag over the flash and secure using the hair elastic. Electrical tape will also work, but it tends to leave a sticky residue on the flash.
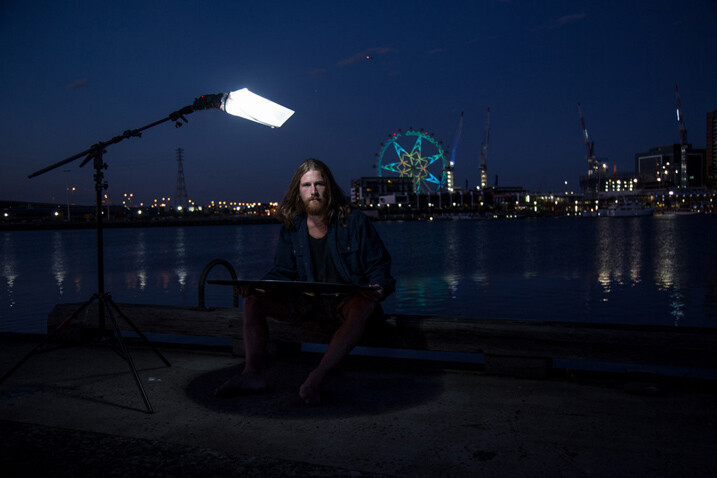
Paperbag 4 717

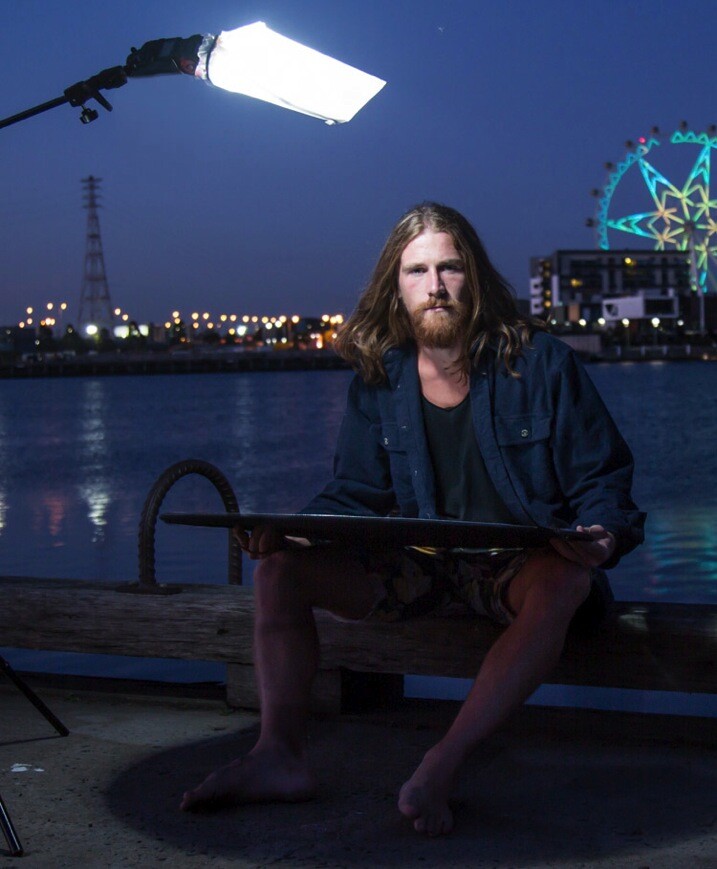
Position the light directly above, and slightly to one side, your model’s head. This lighting style is called loop lighting. I think it’s a flattering style because it leaves the face in partial shadow, and creates the illusion that the face is slimmer.

It’s called loop lighting because of the loop-shaped shadow the nose casts on the side of the model’s face. How prominent the shadow is, depends on how much fill light is used. I use this style of lighting for 80% of my studio and location shoots, as I believe it is one of the most natural-looking lighting techniques.
Paperbag 5

Adding Fill Light

Using one light from overhead looks great, and adds definition to the model’s bone structure. As I prefer a softer lighting style, I’ve also added a white reflector to my shot.

I placed the reflector on Luke’s (my model) lap because I was shooting very tight headshots. If I were shooting a ¾ or full-length portrait, I would position the reflector on the ground, just out of the shot. The reflector fills in the shadows caused by the flash overhead. You can modify the amount of fill light by how close you place the reflector in relation to your light source. The closer the reflector is to the light, the more evenly lit your portrait will look. If you prefer more contrast or mood to your lighting, move the reflector further away from the light or don’t use one at all.
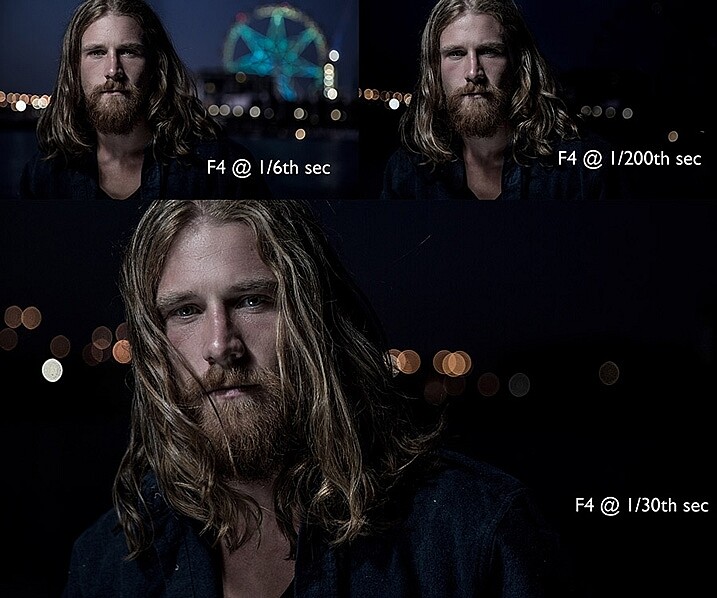
Paperbag_6-717

Changing the shutter speed controls how much ambient light there is in the image. To create a brighter background, I selected a shutter speed of 1/6th second. Shooting at 1/200th of a second removes most of the ambient light and creates a moodier image. I wanted to create the goldilocks effect, not too heavy, and not too light, but just right.

The Final Image
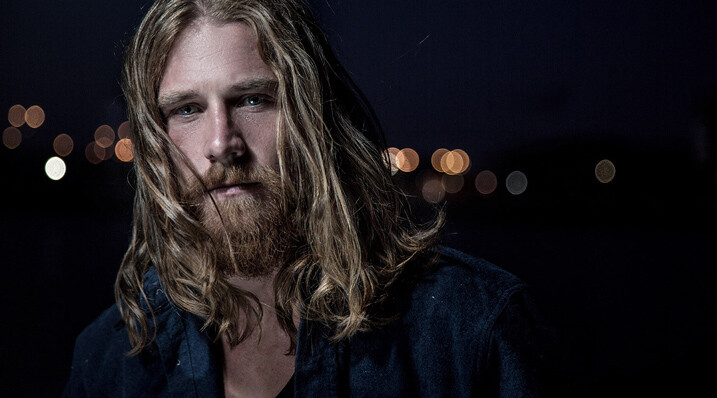
Paperbag final 717

Here are a few more awesome Macgyver lighting hacks that my podcast listeners have shared with me.

Ping pong balls and empty toilet rolls
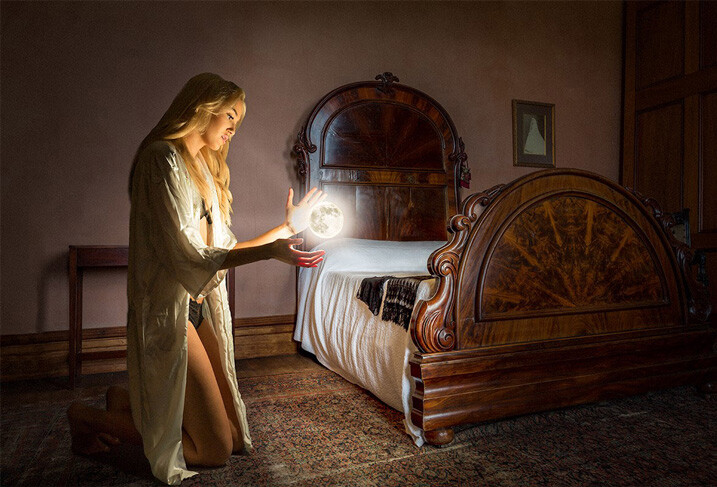
Brett Ferguson 01

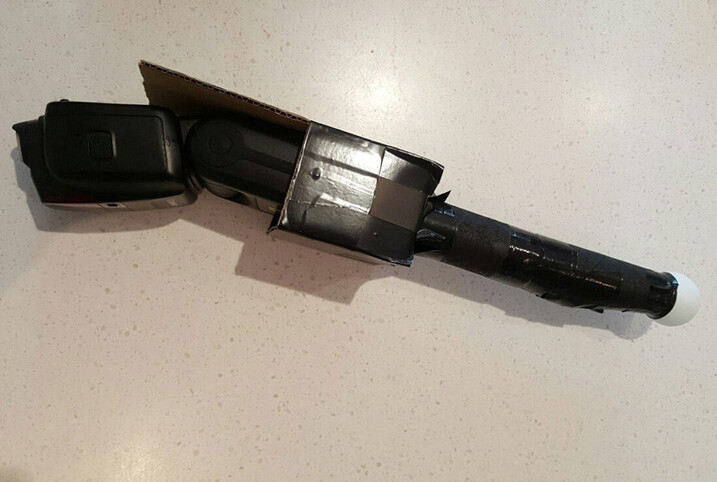
This gorgeous image by Brett Ferguson was created with a light modifier Macgyvered together with a ping pong ball and empty toilet rolls.
Brett Ferguson 02

Hey Gina Milicia, here is a Macgyver light modifier for you. I needed a spot light source to light the model in a convincing way. It was really important to have a soft glow, and realistic shadows, to emulate what the moon would look like. I used a ping pong ball at the end of two empty toilet rolls and then rigged some cardboard to hold the flash. The flash head fits in nicely, and the centre of the toilet rolls are white, allowing it light up to the ball. This image (edited) was shot at 47mm on a 24-70mm f2.8L II lens on a Canon 5D3 at 1/80th, f/3.5 and ISO 500.

You can see a larger version of the finished image at www.brettferguson.com.au.

The Pringles gridspot
GlennDube 717

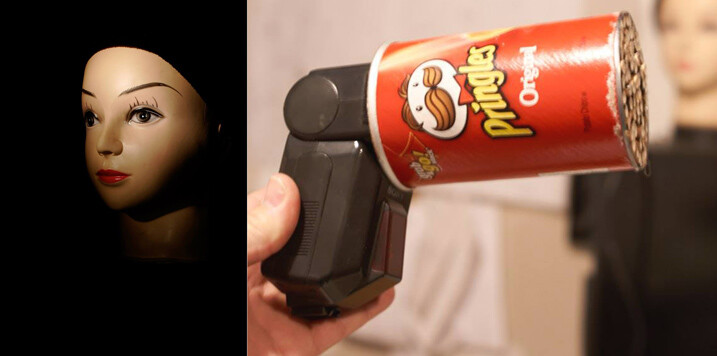
Photographer Glen Dube has Macgyvered this brilliant grid spot using a Pringles container and straws.

This is basically just a Pringles can, with the bottom cut out and replaced by straws, hot glued in place. But I found coloured straws tainted the light, luckily my wife found some paper straws that have a nice bright white inside. The end of the can you get the chips out slides right over all the flashes I have, except this really old Vivitar that has the zoom function on the outside. Pringles has been helpful in providing a variety of lengths of cans for us.

The length (and diameter) of the straws determines the size of the spot and there are even online calculators. I found the flashes zoom function has little effect but the calculators are accurate for determining the spot sizes. The paper straws let you have a sharper fall off (as the plastic straws are translucent and spill light outside the circle). I used 60mm straws, which at 1 meter (3′) gives me a 180MM (7.1″) diameter spot that gets wider the farther away the light is from the subject.

Pop-up flash modifier

Andrej Valko 717

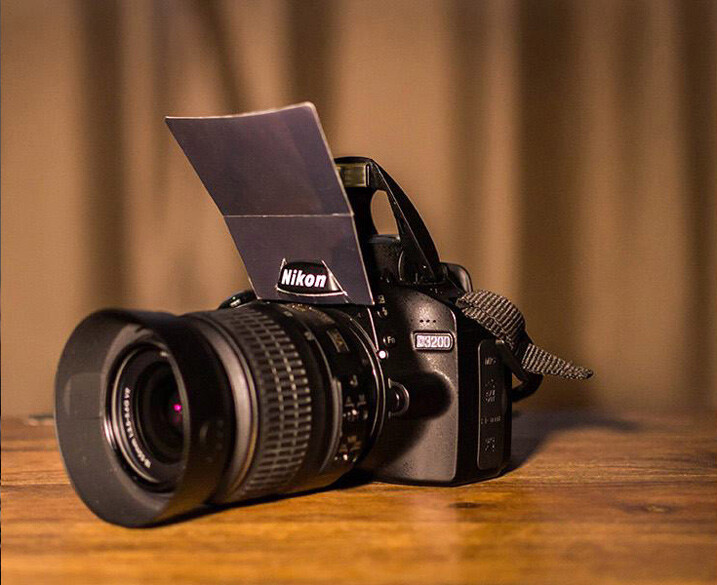
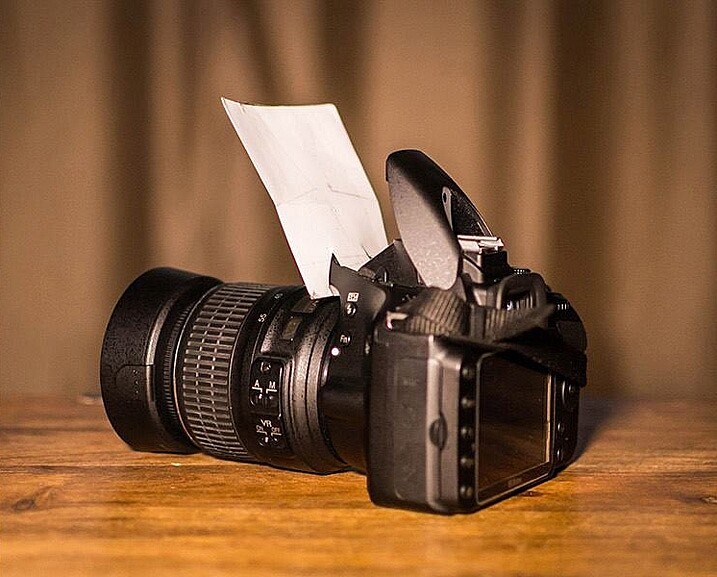
Photographer Andrej Valko created this really simple portable pop-up flash modifier using cardboard.

I saw this idea a couple of years ago – a bounce card for the on-camera flash. I thought: how hard can it be to make one. So I did – I printed black on one side of heavy photo-paper so it didn’t look conspicuous from the front. It was white on the other side to bounce light. I taped it with clear tape so it reflected light more efficiently (it also made it a bit more durable), and I cut it to suit my camera.
Andrej Valko 2

Andrej-Valko-3

It was easy to mount (it just slid in), easy to carry (in a back pocket just like a business card) and it bounced light off the walls and ceiling, as well as off my face! And I, the crazy photographer, shot a wedding reception with just the bounce card! (I didn’t have a single flash unit at the time.) I still cannot believe I actually used this to shoot a wedding.

The drawer liner modifier
MikeHickman 2 717

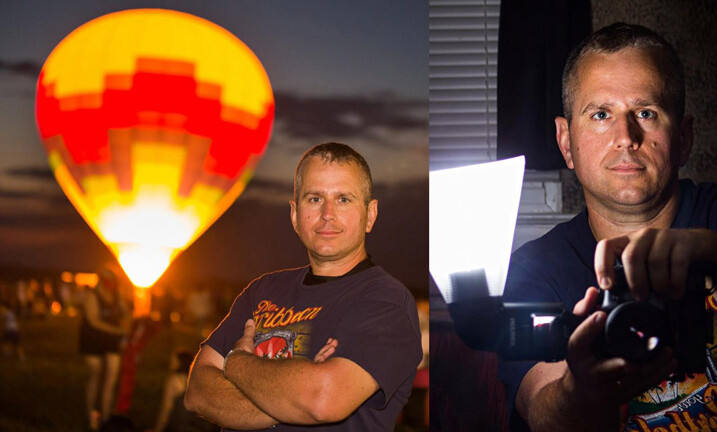
Photographer Mike Hickman created this modifier using a translucent drawer liner.

My “ugly” modifier created from translucent drawer liner which I have used almost exclusively during events, including weddings. The idea came from here.

Cost is about $ 10 for a full liner made by Contact, and attached with Velcro strips for about an additional $ 6. Makes three or four, depending on size. Also, folds up to stick in your pocket when changing locations and I have two in my camera bag at all times. Can’t do that with too many other modifiers!

There are so many awesome ways to MacGyver light modifiers. Do you have one you are particularly proud of? I’d love to see it. Please share your ideas in the comments below.

fastflash_bookIf you want to learn more about using flash for creating portraits, pick up Gina’s brand new dPS ebook: Fast Flash for Portrait Perfection. Now on sale for an introductory price for a limited time only.

googletag.cmd.push(function() {
tablet_slots.push( googletag.defineSlot( “/1005424/_dPSv4_tab-all-article-bottom_(300×250)”, [300, 250], “pb-ad-78623” ).addService( googletag.pubads() ) ); } );

googletag.cmd.push(function() {
mobile_slots.push( googletag.defineSlot( “/1005424/_dPSv4_mob-all-article-bottom_(300×250)”, [300, 250], “pb-ad-78158” ).addService( googletag.pubads() ) ); } );

The post How to Create Awesome Portrait Lighting with a Paper Bag an Elastic Band and a Chocolate Donut by Gina Milicia appeared first on Digital Photography School.


Digital Photography School

 
Comments Off on How to Create Awesome Portrait Lighting with a Paper Bag an Elastic Band and a Chocolate Donut

Posted in Photography


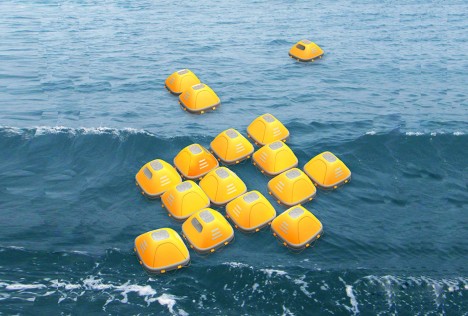
Hive Habitats: Modular Floating Survival Shelters Band Together

04 Sep

[ By WebUrbanist in Conceptual & Futuristic & Technology. ]

survival pod swarm hive

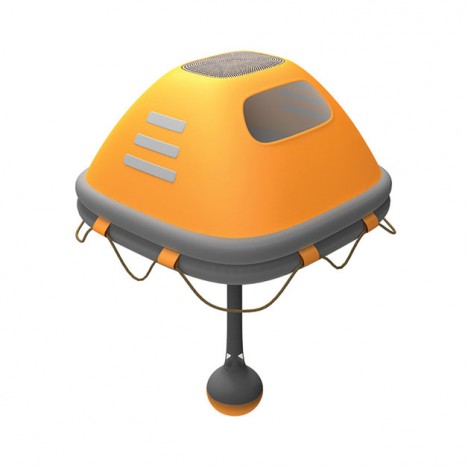
Providing secure enclosures and other critical safety features in the face of tsunamis, floods and accidents at sea, this system of survival pods adds another critical dimension as well: connectivity. The award-winning Duckweed Survival House units come with variable-length tethers and are individually designed to stay upright and keep their occupants sheltered in the harshest conditions.

duckweed pod

Much like the series of independent-but-connectable space habitats proposed in Neal Stephenson’s Seveneves, each individual unit is self-supporting but also benefits by networking with the rest. The rounded-square shape helps allow the different units to be organized in grids, lines or otherwise without sharp corners that could damage adjacent units.

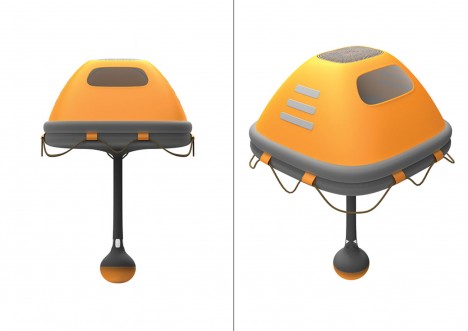
pod survival unit

Together, they provide increased stability, visibility, wave and wind resistance, but the units can be separated as well to avoid obstacles or for situations-specific emergency needs, like jettisoning a defective pod. As in the aforementioned work of science fiction, the idea is to maximize the odds for all survivors by creating options for configuration and collaboration.

survival pod module

A stem projecting beneath each unit stabilizes the crafts while a built-in, reverse osmosis filter turns salty water potable. Pressurized carbon dioxide gas provides quick inflatability while an operable overhead vent allows in fresh air. Bright markers aid in night rescue while also helping people in disparate pods spot one another more easily on the ocean waves.

Share on Facebook


[ By WebUrbanist in Conceptual & Futuristic & Technology. ]

[ WebUrbanist | Archives | Galleries | Privacy | TOS ]


WebUrbanist

 
Comments Off on Hive Habitats: Modular Floating Survival Shelters Band Together

Posted in Creativity


How to Form a Band of Cheerleaders for Your Photography Business

08 Feb

Let’s take a walk down memory lane with the song “One” written by Harry Nilsson. It was made famous by Three Dog Night in the late 1960’s. The song is particularly renowned for it’s opening line :

“One is the loneliest number that you’ll ever do.
Two can be as bad as one.
It’s the loneliest number since the number one.”

I believe there is a lot to be learned from this song. The core message being, don’t go through your life without any social interaction. I am not taking about your Facebook fans or your Instagram followers, but of the actual social connections you make among the people you interact with on a daily and weekly basis. As humans we all crave connections and contact with others. Sad as it may seem, we photographers, in general, are introverts. For the most part, we love to hide behind the camera – one eye looking through the viewfinder and the other closed to the outside world. It can certainly get very lonely and depressing.

We all know and understand the value of friends and co-workers. However, often times we tend to only gravitate towards like-minded people or those in the same profession. I am not undervaluing the importance of having friends in the industry. Personally, I have a select group of fellow photographers whose opinion I really value, appreciate, and am honored to call my friends. Some are local to me while others are through an online community – we not only talk shop but also talk about our families, our kids, and even send holiday cards to each other . But I find it mentally stimulating when I interact with people from many other professions – either related to my genre of photography (weddings and family portraits) or of a completely different field. Trust me, they all are invaluable in your growth as an artist and as a professional.

Here are some tips on how to form your own sphere of influencers and well-wishers for your own personal and professional growth. Some of these tips may seems very technical or business-school like, but are actually very simple to follow and implement for your photography business.

#1 Conduct a social network analysis

As per Wikipedia, Social Network Analysis is the study of network theory in a social analysis. Quite simply, network theory is the study of connectivity among different entities. In a social scenario, it is the mapping of “Who do you know?” also known as, “Who are your friends?” and “Who are your friends’ friends?”. Social media platforms like Facebook and LinkedIn actually have the underlining structure built already. When you friend someone, you can immediately see if you have any common friends or business acquaintances. Use your social media accounts as a starting point and map out who you know, and who those people know. Go as deep and wide as you can without getting confused or lost!

Kenneth Freeman

By Kenneth Freeman

#2 Narrow down your sphere of influencers

Once you have documented your social network analysis, narrowing your sphere of influencers is fairly easy to do. Look to your key friends, well-wishers and family as a starting point. Are there some people who are more invested in you than others? Distinguish those in some way. Are there people who are in the same field as you? What about completely different areas of expertise?

As a photographer, I love colors. A tip that works for me is to color coordinate the different groups. Warm colors like red/orange are people who are in my immediate circle (my core circle of trust). Cool colors like blue/green are people who are important but not as much as my sphere of direct influencers. Neutral colors like brown/peach are acquaintances. Also find a way to distinguish between local connections and online connections. Another tip is to keep your photography and business goals in mind while analyzing your network. This could help you focus on connections and contacts that could help you achieve your specific goals.

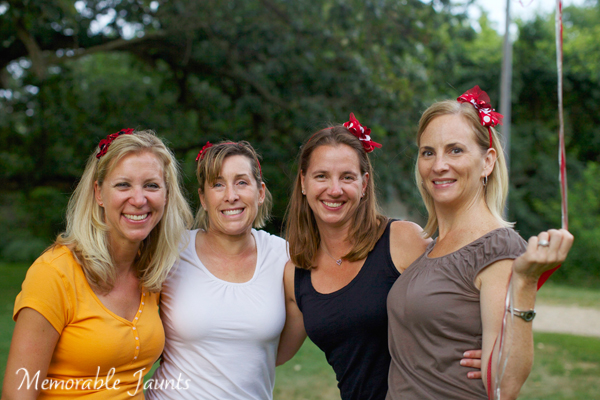
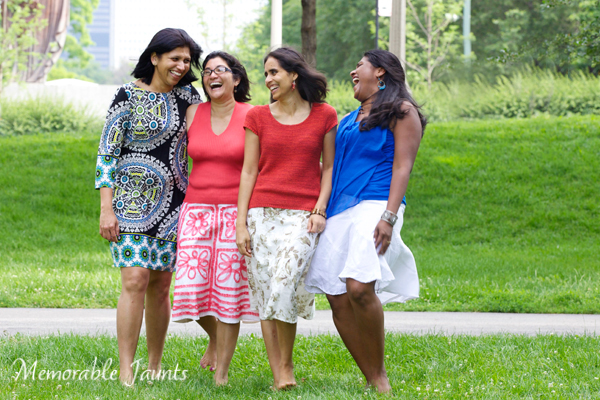
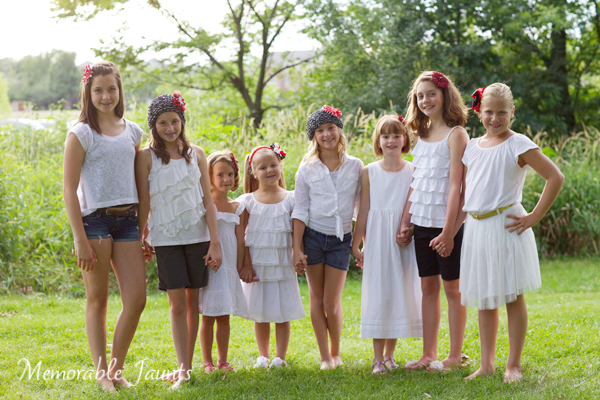
Memorable Jaunts DPS Article How to form your band of wellwishers 02

#3 Invest in meaningful engagement

Now that you have completed the technical part, take the time to engage on an emotional level. Connect with people with genuine intent. Take time to get to know the people you want to connect with. Find commonalities – either common interests, or common friends. Ask your friends to provide an introduction.

I cannot tell you the amount of times I have gotten a random friend request from someone – with or without mutual friends. If I don’t know you at all, chances are I am not going to respond. However if you send me an email, introduce yourself and let me know a bit about you and what exactly you want from the reach out, I am more likely to send a response back. Give me a reason to want to connect with you.

Memorable Jaunts DPS Article How to form your band of wellwishers

#4 Work out a mutually beneficial arrangement

Among the connections you make, some will be social, while others will be purely business and professional. That’s perfectly okay. You cannot be friends with the whole world, but you can certainly be cordial and pleasant with everyone you meet. When you are interacting with a vendor or a business peer, keep it professional and ensure that it is a mutually beneficial agreement. If you are reaching out to a small clothing boutique to do a styled shoot, ensure that you provide them with images from the shoot that they can use to promote their work. If you are asking acquaintances to model for you, provide them with images that they can use however they see fit. My personal rule is to provide watermark-free images, but to ask for image credit when they post the images online.

Memorable Jaunts DPS Article How to form your band of wellwishers 01

Invest in a core group of friends and wellwishers

 #5 Give more than you receive

This one ties in with #4. Don’t forget to thank people for their time and effort – either for promoting you or for helping you in some way. Just because the job is done, does not mean you forget about them and move on. Keep in touch and keep the connection strong. You never know when you may need to reach out to them again. Make sure that your cheerleaders remain your advocates for a long time.

I know what you are thinking. Shouldn’t something like friendships and relationships come from the heart? Does it really need to be plotted and mapped like a cross-country road trip? There really are a lot of benefits to doing just that. We all know that time is limited, and often time is more valuable than money itself. So, why not use that time wisely? When you are strapped for time, engage in relationships that bring the most value. I am not equating value with money or business. Value is a very personal choice and decision, and can mean whatever you choose to matter most to you – true connections, selfless relationships and/or business transactions.

How do you build your team of cheerleaders? Please share in the comments below.

googletag.cmd.push(function() {
tablet_slots.push( googletag.defineSlot( “/1005424/_dPSv4_tab-all-article-bottom_(300×250)”, [300, 250], “pb-ad-78623” ).addService( googletag.pubads() ) ); } );

googletag.cmd.push(function() {
mobile_slots.push( googletag.defineSlot( “/1005424/_dPSv4_mob-all-article-bottom_(300×250)”, [300, 250], “pb-ad-78158” ).addService( googletag.pubads() ) ); } );

The post How to Form a Band of Cheerleaders for Your Photography Business by Karthika Gupta appeared first on Digital Photography School.


Digital Photography School

 
Comments Off on How to Form a Band of Cheerleaders for Your Photography Business

Posted in Photography


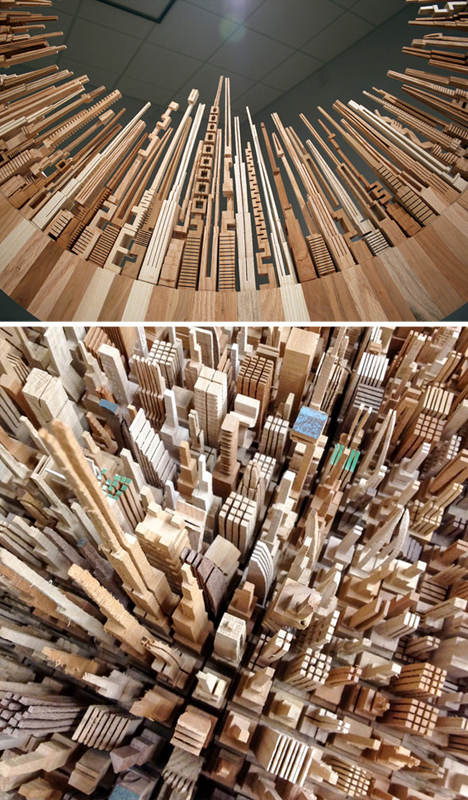
Offcut Cityscapes: Sketching Sculptures with Band Saws

18 Apr

[ By WebUrbanist in Art & Sculpture & Craft. ]

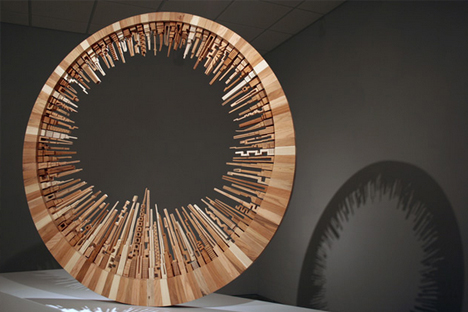
offcut sculptural cityscapes

An adept furniture maker is familiar with scrap – but this designer-and-artist has turned leftover materials into something just as fantastic as his normal finished projects.

offcut wood urban sculptures

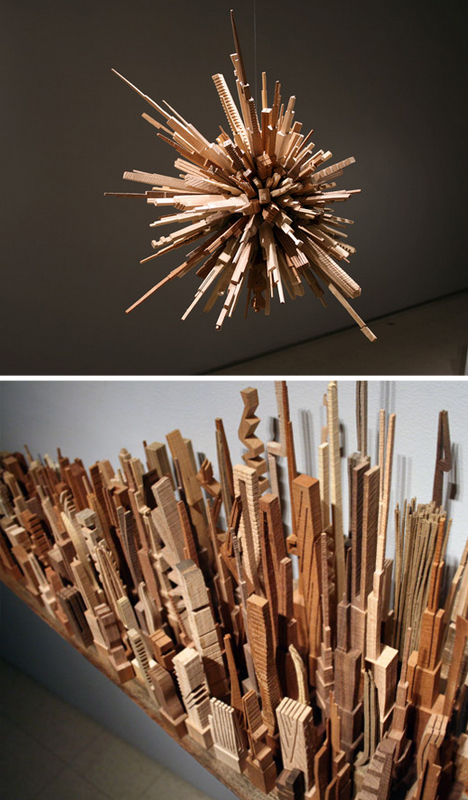
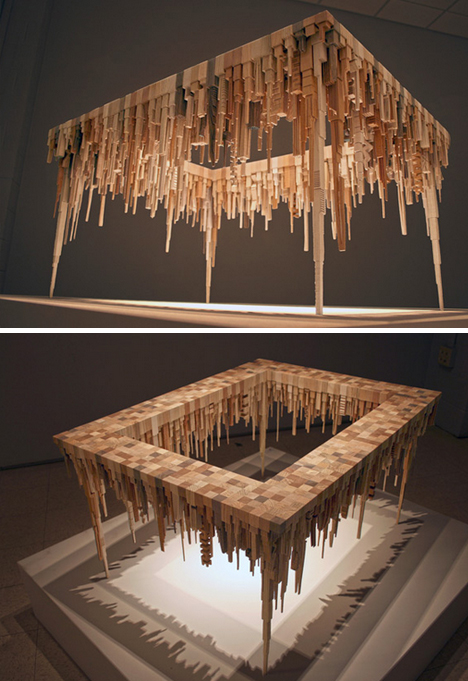
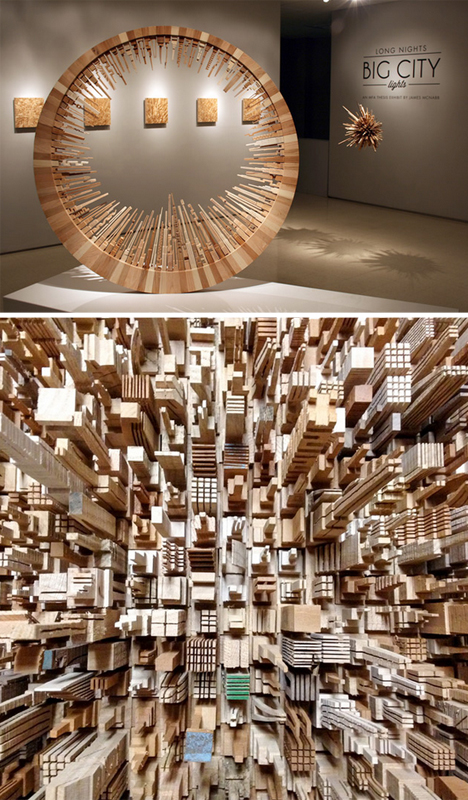
James McNabb has crafted fine wooden designs using lasers and routers, but the band saw drove this stunning series of abstract city landscapes shaped into circles and in some cases patterned after furniture, from tables and shelves to chandeliers.

offcut bandsaw furniture sculpting

He began shaping the individual pieces without picturing them as architectural, but by arranging them on a grid, the sense of buildings emerges from each work.

offcut wooden shadow table

As he assembles each from uniquely-cut shapes, individual structures may be similar but no two compositions are alike.

offcut mfa student debut

offcut wood traditional furniture

Like many stellar artists of history and the present, his creativity comes from a departure from but includes education in traditional forms and techniques – his beautiful furniture forms the basis for these more innovative offshoots.

Share on Facebook


[ By WebUrbanist in Art & Sculpture & Craft. ]

[ WebUrbanist | Archives | Galleries | Privacy | TOS ]


WebUrbanist

 
Comments Off on Offcut Cityscapes: Sketching Sculptures with Band Saws

Posted in Creativity


(Cover) Lemon Tree – Fools Garden – One Man Band by Miguel P. Senent

05 Feb

Well, here is something I’ve been working on these last two weeks in my spare time. This song is simply awesome, everybody knows that, so I decided to do a full one man band cover 🙂 I started transcribing every sound I could hear in the original song, but I arranged it to be played using various instruments that are clearly not used in it, like my old Oboe, which I hadn’t played since I dropped it when I was 14! haha I recorded everything into REAPER using an M-Audio Fast Track Pro interface and the t.bone SC600. The electric guitars, bass, piano and synth were plugged directly into the interface via line in. Sadly I don’t own any drum set, so I had to do that using Addictive Drumms, a really cool vst plug-in. Guitar Rig 4 was used for both electric guitars and bass. The video was recorded using my Nikon D90 and edited in Sony Vegas. I hope you enjoy! And don’t forget to subscribe 😉 And thanks to my friend Jordi for the bass guitar!

Jessops ‘The Shot’ Directed by Dave Thomas. A short documentary shot at dawn following S?awek Staszczuk as he works to capture a unique and illusive image of the Seven Sisters cliffs. Will this talented landscape photographer achieve his perfect shot or not? CREW Dave Thomas (Co-producer /director) editor, camera, composer Nell Garfath-Cox (Co-producer/director), camera S?awek Staszczuk — Landscape photographer
Video Rating: 4 / 5


TI – “I’m Back / Rubber Band Man / U Don’t Know Me” Live at SXSW 2012

21 Nov

TI performs his songs “I’m Back,” “Rubber Band Man,” and “U Don’t Know Me” live at The Warner Sound captured by Nikon during SXSW 2012. The Warner Sound’s SXSW performances were captured exclusively with Nikon D4 HD-SLRs camera and lenses. Director: Michael Thelin. Produced by MTP, Inc. www.nikonusa.com http facebook.com Subscribe to The Warner Sound: goo.gl The Warner Sound on the Web: youtube.com thewarnersound.com http twitter.com
Video Rating: 4 / 5

Learn it all at a workshop: thatnikonguy.com Part 7 of a series to teach you everything you need to know to master strobist photography techniques. That Nikon Guy (Matt Granger) today shows you how to use your DSLRs pop up flash to trigger a single flash, for an interesting strobist portrait. Find used SB 26 flashes here: photography.shop.ebay.com Assumed knowledge: Manual exposure intro: www.youtube.com Example strobist images: www.youtube.com www.mattgranger.com https
Video Rating: 4 / 5

 
Comments Off on TI – “I’m Back / Rubber Band Man / U Don’t Know Me” Live at SXSW 2012

Posted in Nikon Videos


Scott Dunbar One Man Band Singing Michael Jackson’s ‘Billie Jean’ DSC 2092

10 Nov

My “raw” amateur video of Scott Dunbar One Man Band Singing Michael Jackson’s ‘Billie Jean’ has become something of a YouTube “hit” with 250000 views and counting. (Make that 300000 views and still counting now. . .) It was shot with a Nikon D90 DSLR and a Sigma 15-30mm wide angle zoom at its widest setting for the most part. Enjoy! Scott Dunbar has a new website at – www.scottdunbarmusic.com Scott Dunbar One Man Band’s Facebook account is here – www.facebook.com
Video Rating: 4 / 5

 
Comments Off on Scott Dunbar One Man Band Singing Michael Jackson’s ‘Billie Jean’ DSC 2092

Posted in Nikon Videos