RSS
 

Posts Tagged ‘Aurora’

Macphun unveils Aurora HDR 2018: Will come to Mac and PC with new tools and UI

16 Aug

Macphun today announced the upcoming release of Aurora HDR 2018, the latest version of its popular HDR creation software created in collaboration with photographer Trey Ratcliff. After 1.7 million downloads on Mac computers since its launch in November 2015, Aurora HDR will now for the first time be available for Windows PCs as well.

New tools and improvements include a lens correction filter that is capable of removing all kinds of lens distortion, chromatic aberration and vignetting, a redesigned user interface, up to 4x improvement in RAW image processing and up to 200% faster merging and masking performance.

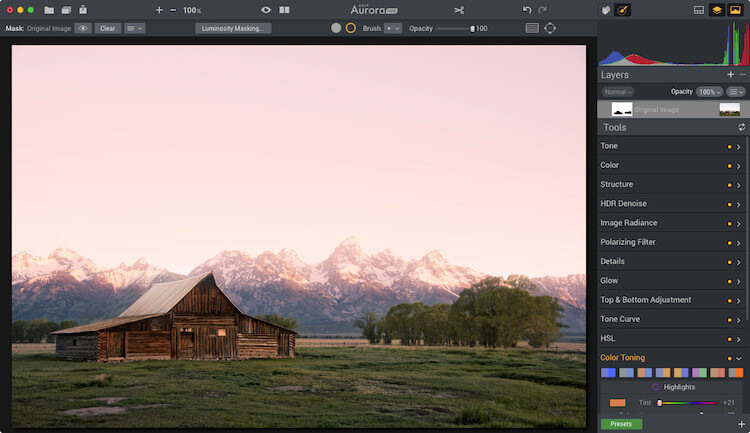
Here are some screenshots of the new UI:

$ (document).ready(function() { SampleGalleryV2({“containerId”:”embeddedSampleGallery_3739521836″,”galleryId”:”3739521836″,”isEmbeddedWidget”:true,”standalone”:false,”selectedImageIndex”:0,”startInCommentsView”:false,”isMobile”:false}) });

And a few Before and After images created by Trey Ratcliff, to show what Aurora HDR 2018 can do:

$ (document).ready(function() { SampleGalleryV2({“containerId”:”embeddedSampleGallery_3067566763″,”galleryId”:”3067566763″,”isEmbeddedWidget”:true,”standalone”:false,”selectedImageIndex”:0,”startInCommentsView”:false,”isMobile”:false}) });

Aurora HDR 2018 will be available for pre-­order starting September 12th, and the released date is scheduled for September 28th. Current users of Aurora HDR will be able to upgrade at a special pre­-order price of $ 50—the pre-order price for new users is $ 90.

You can find more information and sign-up for the pre-order announcements on the Aurora HDR 2018 website.

Aurora HDR 2018 comes in September as the ultimate cross-platform HDR photo solution

Award-winning Aurora HDR, co-developed with Trey Ratcliff, brings major updates that will be available for both Mac OS and Windows users.

San Diego, CA – August 15, 2017 — Macphun, the California-based developer known for making complex photo editing software simple and fun, today announced the release of Aurora HDR 2018, the one-stop solution for HDR photography. To sign up for pre-order announcements and more, please visit https://aurorahdr.com/2018.

Aurora HDR, co-developed with the renowned HDR photographer Trey Ratcliff, made the complex task of HDR editing effortless and unintimidating. Aurora HDR became the industry standard for HDR photo editing on Mac and reached 1.7 million downloads since its launch in November 2015.

In less than 2 years over 100 million photos have been edited in Aurora HDR and 72% of current users have made Aurora HDR their primary HDR photo editor, switching from other software. Today, Aurora HDR is the go-to editing software for such well-known photographers as Trey Ratcliff, Serge Ramelli, Captain Kimo and many others.

“Since the launch of Aurora HDR, Macphun has released more than 10 updates containing tons of new features and improved performance,” commented Trey Ratcliff. “Today, I’m very excited to announce the launch of Aurora HDR 2018. It’s completely new, significantly faster and has even more powerful tools. Plus the BIG news is that it’s now available for Microsoft Windows as well. It’s truly the best HDR software for both Mac and PCs”, concluded Ratcliff.

Aurora HDR is not just a tool for merging brackets: it brings countless options to create perfect HDR photos – from one-click presets and advanced tone-mapping, to layers, noise reduction and powerful luminosity masking controls.

A sneak peek into what’s new in Aurora HDR 2018:

  • Lens Correction Tool – The new Lens Correction filter easily fixes all kinds of lens distortion, from barrel and pincushion to chromatic aberration and vignetting.
  • New User Interface – Redesigned from scratch, the modern and responsive user interface brings a powerful, yet joyful experience to HDR photo editing.
  • Speed improvements – Up to 4x improvement in RAW image processing, and up to 200% faster merging and masking performance means that Aurora HDR 2018 is dramatically faster than the last version.
  • Cross-platform version – Aurora HDR 2018 will be available both for Mac and PC users with interchangeable files, enabling mixed-computer households to share the same product key.
  • A complete list of new features will be announced concurrent with the pre-order.

Availability:

Aurora HDR 2018 will be available for pre-­order on September 12, and released on September 28. To sign up for pre-order announcements and more, please visithttps://aurorahdr.com/2018.

Pricing:

Mixed-computer households can share the same product key for Mac and PC that can be activated on 5 devices.

  • Pre-order:

o Current users of Aurora HDR may upgrade at a special pre­-order price of $ 49

o New users can purchase Aurora HDR 2018 at a special pre­order price of $ 89

o A collection of bonuses will also be included with every purchase

  • Retail price:

o $ 59 for current Aurora HDR users

o $ 99 for new user

Articles: Digital Photography Review (dpreview.com)

 
Comments Off on Macphun unveils Aurora HDR 2018: Will come to Mac and PC with new tools and UI

Posted in Uncategorized


Aurora Aperture launches 16-stop ND filter and rear filters for Canon’s super-wide lenses

28 Apr

US filter brand Aurora Aperture has announced a neutral density filter that it claims reduces exposure by 16 stops. The company has launched a new family of fixed factor ND filters called PowerND and is offering strengths of 6, 12 and 16 stops in screw-in and square formats.

The ND64, ND4000 and ND65000 filters will be available for threads of 37-95mm as well as a special 105mm version that will fit an adapter for the Nikkor AF-S 14-24mm F2.8G ED wide-angle zoom. Those preferring a filter system will be able to use the 100 x 100mm square filters. The 16-stop filter is designed for those wanting to make long exposures in daylight conditions and can knock a 1/1000sec shutter speed situation down to 1 minute.

Aurora Aperture has also introduces a series called Aurora CR with filters designed to fit over the rear mount of Canon super-wide lenses. The arch-window-shaped Gorilla Glass filters slide into a holder that screws on to the rear of the lens, and while aimed at users of the Canon EF 11-24mm F4 L USM the system will work with a range of the company’s wide-angle zoom lenses.

The filters are available via Kickstarter with delivery and general sales due to begin in August. Prices start from $ 34 for small screw-in filters of any of the strengths, to $ 117 for the 150mm circular filter. The CR kit including the holder and three filters is $ 165. For more information see the Aurora Aperture website and the company’s Kickstarter page.

Press release

Aurora Aperture Introduces PowerND Family and an Industry First Rear Mount Glass Filter for Canon EF 11-24mm F4L USM

Aurora Aperture Inc., a Southern California startup, today has introduced the PowerND family of high quality fixed neutral density (ND) filters.

The PowerND family consists of three ratings of light reduction capability: ND64 (6 stops),ND4000 (12 stops), and ND65000 (16 stops). Four different formats are available: circular filters from 37mm to 95mm, 100 x 100mm square filters compatible with popular square filter adapters, 150mm circular filters with an adapter for the Nikon AF-S 14-24mm f/2.8G ED lens, and the Aurora CR format, an industry first, a rear mount glass filter for the Canon EF 11-24mm F4L USM lens.

The 6 stop filter is typically used in low light conditions such as during sunrise or sunset for sub-second shutter speed. The 12 stop filter can slow down shutter speed to minutes in dusk and dawn conditions. The 16 stop filter can do magic on a bright day, allowing photographers to expose up to several minutes or more.

The ND4000 and ND65000 have distinct advantages in having more stops than the typical ND1000 or ND32000. They allow users to avoid diffraction softening by enabling users to avoid very small aperture settings or alternatively allowing for longer exposures. In the case of the PowerND 4000 that means two more stops than the typical ND1000 and for the Power ND65000 there’s one additional stop.

“We introduced a variable ND family last year and it was embraced by photographers and videographers worldwide,” said Jinfu Chen, founder and CEO of Aurora Aperture Inc. “the fixed ND family we introduce today is much more powerful in terms of light reduction capability and offers even better optical performance, along with more formats for different camera lenses.”

A small rear mount filter using Gorilla® Glass for the Canon EF 11-24mm F4L USM is an industry first. Prior to this users would have to use extremely large filters with diameters up to 186mm with a bulky front lens shade adapter. The Aurora CR format filter mounts in the rear of the lens, making it much easier to carry and lower in cost. Other Canon lenses that Aurora CR format filter can be used in* are the EF 8-15mm f/4L Fisheye, EF 11-24mm F4L USM, EF 14mm f/2.8L US, EF 15mm f/2.8 Fisheye, EF 16-35mm f/2.8L USM, and EF 17-40mm f/4L USM.

Designed in California by Aurora Aperture, the Aurora PowerND filters employ up to 128 layers of double sided nano coating** in order to achieve color accuracy and powerful light reduction capability. Hydrophobic and oleophobic coating is applied to filter surface with PFPE coating. The end result is that water droplet on the filter surface can maintain a static contact angle of 110 degrees, one of the best in the industry.

Availability and Pricing
The Aurora PowerND family will be available through Kickstarter starting in April 2017 and to dealers and direct orders in August 2017. List price starts at US$ 42 and varies depending on filter format and size.
http://www.aurora-aperture.com
info@aurora-aperture.com
* As of April 21, 2017
** ND4000 and ND65000

Articles: Digital Photography Review (dpreview.com)

 
Comments Off on Aurora Aperture launches 16-stop ND filter and rear filters for Canon’s super-wide lenses

Posted in Uncategorized


How to Photograph Northern Lights (The Aurora Borealis)

15 Apr

A trip to photograph Northern Lights (also called The Aurora Borealis) often tops the wish list for many photographers. For good reason too; the aurora is a natural phenomenon unlike any other. Lights dancing over the frozen winter landscape is ethereal, beautiful, and at times, jaw-dropping. Living in Alaska has provided me the opportunity to shoot the lights more often than most, and yet more than once, I’ve had to stop clicking and just watch the curtains shift and dance. In fact, let that be my first tip if you are planning an aurora

In fact, let that be my first tip if you are planning an aurora photo shoot – occasionally just stop and watch. Seriously, put that camera down for a moment and relish the sight. Okay, now let’s figure out how to photograph the Northern Lights.

How to Photograph Northern Lights (The Aurora Borealis)

Gear

Tripod

You need one. There is no faking this one, get one and use it. If it’s brutally cold (which, let’s face it, it probably will be) you’ll appreciate carbon over cold-channelling aluminum, but either will work. Bring it, use it, no excuses.

Camera

I’ve seen beautiful images of the Northern Lights made with everything from good point and shoot cameras to high-end mirrorless and DSLRs. So don’t feel too restricted by your choice of camera. That said, a camera with low noise at high ISO is definitely preferable. Though not absolutely necessary, the ability to change lenses, too, is a major asset.

Lenses

As a general rule, you want a lens that is wide and fast (has a large maximum aperture). The faster the better. My primary aurora lens is a 14mm f/2.8, but I’m eyeing a 20mm f/1.8 for the extra speed. All lenses will need to be manually focused, so make sure that is straight-forward. A variety of focal lengths, either in the form of a zoom, or a choice of lenses is also helpful. I’ve used everything from a 70-200mm to my fixed 14mm to photograph Northern Lights.

How to Photograph Northern Lights (The Aurora Borealis)

I’ve got to admit, living in the far north has its advantages. I merely needed to step out my front door to make this image. (If you are wondering what that strange U-shaped white form in the sky is, it’s the exhaust trail from an aurora research rocket fired off by the University of Alaska Fairbanks).

Remote Release

Though not absolutely necessary, a cable or wireless release for your camera will help reduce camera shake when you click the shutter. A jiggly blur in the stars can ruin an otherwise good shot. If you don’t have a release, use the camera’s self-timer, many have a 2-second setting which is useful. Keep in mind that using a timer rather than a release will slow you down.

Clothing

Maybe I should have put this one at the top of the gear list, because it is probably the most important thing for a successful winter shoot of any kind. Right now, as I’m writing this article, I’m sitting in a cabin 70 miles north of the Arctic Circle in the Brooks Range of northern Alaska. I’m leading an aurora photo tour, and the warmest night-time temperature we’ve seen so far was -35F (-37c). Good clothing has not just been important, but vital.

How to Photograph Northern Lights (The Aurora Borealis)

Right now, as I’m writing this article, I’m sitting in a cabin 70 miles north of the Arctic Circle in the Brooks Range of northern Alaska. I’m leading an aurora photo tour, and the warmest night-time temperature we’ve seen so far was -35F (-37c). Good clothing has not just been important, but vital. I don’t want to go into too much detail here, but a thick down coat with a hood, down or synthetic fill pants, mittens, liner gloves, face masks, and warm hats should all be on your list.

That said, I do want to take just a second to talk about footwear. Trips like the one I’m currently leading are not the time to toy around with light winter boots. This is not the time for fashion. Pack boots, god-ugly bunny boots, mukluks, and other extreme-cold footwear, a couple sizes too big (to account for thick socks and toe warmers) are what you are looking for. Nothing will wreck a night of photography more quickly than painfully cold, or (please no) frost-bitten toes. Enough said.

How to Photograph Northern Lights (The Aurora Borealis)

Interesting foregrounds are an important part of any image, and aurora shots are no different. In this case, I climbed a rock outcrop and used a wireless trigger to make this image.

The Day Before

Prefocus – autofocus rarely works in the dark, so you’ll need to manually set your focus. The first thing I do when I’m leading a photo workshop or tour is to take my clients out in the daylight, before our first night chasing the lights, and have them set their focus to some distant mountaintop. After making sure it is tack sharp, I hand out small pieces of electrical tape and have everyone tape the focus in place so it won’t shift around accidentally.

With the excitement of the first aurora show, no one has to worry about messing with their focus points, or worse, find their shots heartbreakingly soft. A caveat: You still need to check your focus periodically. I’ve found that some lenses will shift their focus point slightly when there are extreme temperatures. Pixel-peep occasionally and adjust as necessary.

How to Photograph Northern Lights (The Aurora Borealis)

When the lights are directly overhead, sometimes pointing your camera straight up can be the best option.

In the Field

Have patience. The aurora is a fickle lover, and she only appears when she wants. Even when the forecasts are coming together and everything seems set for success, the lights may take awhile to appear, they may erupt when you don’t expect it, or clouds may obscure the sky. Plan several nights to account for bad weather or uncooperative conditions. Be prepared to stay up late, and again, be patient.

Exposure

How to Photograph Northern Lights (The Aurora Borealis)

This is one of my first images of the aurora. The lights were bright, and while I managed to capture some color, the 20-second exposure blurred the details into an indistinct curtain. I know better now.

In the days of film and early days of digital, long exposures of 15 or 30 seconds for the aurora were the name of the game. This allowed the lights to appear bright and colorful, but details within the aurora, the pillars, and beams blurred away leaving behind an indistinct curtain. Technology has moved beyond this.

You want the shortest shutter speed possible that allows sufficient brightness and low noise. ISOs in the 1600-6400 range are typical. I start with a setting of f/2.8, ISO 1600 or 3200, for 5 seconds. From there, depending on what the lights are doing, the amount of moonlight, and other factors, I’ll adjust up and down.

Last night, for example, for about 10 minutes the lights brightened and started moving VERY fast. Sacrificing some noise, I went to ISO 6400, f/2.8, and a 1-second exposure. The shots needed a bit of noise reduction in post-processing, but I was able to capture the details of the curtains, and that sharpness in the aurora makes the images successful. A shutter speed just a second or two longer would have blurred the lights.
How to Photograph Northern Lights (The Aurora Borealis)

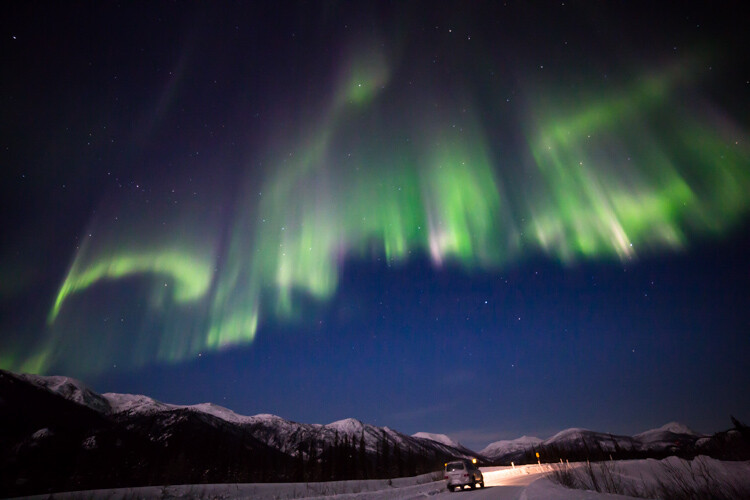
In contrast to the previous image, for this shot of a very fast moving display, I used a shutter speed of just one second at ISO 6400, f/2.8. As a result, the pillars of light and details in the curtains are sharp.

Composition

When the aurora is hopping, your attention will shift to the sky and away from the foreground. This is natural, but try to pay attention to your composition, just as you would with any landscape image. In the dark, a poorly framed image may not stand out the way it does in daylight. But, I’ll guarantee that you’ll notice when the photos appear on your computer the next morning, and you’ll kick yourself.

Consider where you are, provide some context, avoid distractions, and compose carefully.

How to Photograph Northern Lights (The Aurora Borealis)

A red aurora is a very rare thing indeed. Of the hundreds of nights I’ve spent shooting the Northern Lights, this one had the deepest, brightest reds I’ve ever seen. (FYI, I used my headlamp to light paint the trees in this image.)

Where and When to Photograph the Northern Lights

Choosing the right location for an aurora trip is a big decision. The Aurora Borealis can be seen around the planet’s northern regions. Scandinavian countries, Iceland, northern Canada, and of course Alaska, are popular destinations. While your budget and available time may limit you, it is important to consider the likely weather conditions, local tours, lodging and transportation options, and seasons.

The aurora is primarily a winter phenomenon. In the far north, nights don’t get dark enough in the summer for the lights to appear. Here in Alaska, you can see the lights from late August or early September through mid-April, but prime time is late September through early April.

How to Photograph Northern Lights (The Aurora Borealis)

The nearly full moon in this image was not enough to blow out the bright display of lights, but it takes strong aurora to overcome a full moon. Moonlight is great for foregrounds but can cause issues with visibility of the Northern Lights. If you are shooting the aurora for the first time, I recommend making your trip around the new moon.

Research weather patterns. Some months are more likely than others to have clear skies. In Alaska, March is the driest month with the best chance for clear skies, but other locations will differ.

Moonlight is another thing to consider. While great lights can occur regardless of how bright the moon is, during the dark nights of a new moon, even low-grade aurora displays will appear more distinct against the darker sky.

Getting Help

How to Photograph Northern Lights (The Aurora Borealis)

One of my clients on an aurora photo workshop photographs the northern lights in the Brooks Range of northern Alaska.

Like any discipline of photography, learning to shoot the aurora takes practice. This can make aurora photography a frustrating pursuit for people new to it or with limited time. Organized workshops or tours, or private photo-guide services are a great way to assure some success. Even if you prefer to shoot independently, hiring a local expert for a night to get you started may help you dodge the usual pitfalls and find the best locations to shoot.

How to Photograph Northern Lights (The Aurora Borealis)

Patience Pays Off

Last night it was bitterly cold here in the Brooks Range. We started the night about 9:00 p.m. by driving 50 miles north to a spot high above tree line, a stone’s throw from the continental divide. There, we waited in the moonlight for the Northern Lights to appear. They didn’t, not for the three hours we sat patiently watching the sky. I had a sinking feeling that we were about to get skunked.

Half past midnight we gave up, turned around, and headed back to our rented cabin. Another hour later we pulled in and started unloading the gear. I glanced toward the sky, and there, sure enough, was a single, pale band of northern lights. It was nearly 2:00 a.m., and I’ll admit, my warm bed was sounding really good. But stubbornly, we reloaded our camera bags and tripods and drove a few miles back up the road where the mountains loomed close. When the lights exploded 20 minutes later, we were ready. Our cameras popped in the frigid air as the aurora swirled. We made some of the best images of the trip there.

How to Photograph Northern Lights (The Aurora Borealis)

Be Ready

We were patient, had the right clothing to handle the -40 temperatures, and had our cameras and settings ready. That’s really the core lesson here: be ready. The lights sometimes don’t last long and if you are fiddling with camera focus, or clothed improperly, you’ll miss it. However, preparation and research will greatly increase your chances of success. A chance to photograph Northern Lights, or simply observe them, is not an opportunity to squander.

The post How to Photograph Northern Lights (The Aurora Borealis) by David Shaw appeared first on Digital Photography School.


Digital Photography School

 
Comments Off on How to Photograph Northern Lights (The Aurora Borealis)

Posted in Photography


Photographer captures stunning Aurora Borealis time-lapse from airplane

19 Jan

If you’re seated next to a window on a flight to Iceland, it’s a good idea to keep your camera close. Landscape photographer Aryeh Nirenberg did, and was treated to an incredible show from the Aurora Borealis at 35,000 feet. With an empty row and his camera nearby, he created an impromptu rig to stabilize the camera and record the time-lapse above.

Whatever works, right? Nirenberg’s D810 is braced against the window with a tripod, and a blanket cuts glare from the cabin lights.

Nirenberg propped his Nikon D810 against the window using his tripod, and wrapped a blanket around the lens to cut the glare from cabin lighting. We think the effort was well worth it for a unique view of one of nature’s best light shows.

Check out Aryeh Nirenberg’s Instagram to see more of his work.

Articles: Digital Photography Review (dpreview.com)

 
Comments Off on Photographer captures stunning Aurora Borealis time-lapse from airplane

Posted in Uncategorized


5 Non-HDR Things You Can Do With MacPhun’s Aurora HDR 2017

08 Nov

Yes Aurora HDR was developed for creating HDR photographs. But did you ever think of using it for non-HDR tasks?

You’re in luck because in the next few minutes I’m going to open your eyes to some new ideas. Specifically ideas for using Aurora HDR in your photography workflow without using the term HDR.

What is Aurora HDR?

If you haven’t heard of Aurora HDR, it’s MacPhun’s answer to all the other HDR software out there. Developed in partnership with Trey Ratcliff, Aurora HDR has unique tools which rival even non-HDR software. I look at it as a mix between Photoshop and MacPhun’s Intensify.

But this isn’t about HDR. It’s about anything other than HDR. Before we dig in, know that the software can open a single image just like any other app or plugin. Let’s take a look inside:

scott-wyden-kivowitz_dps_1

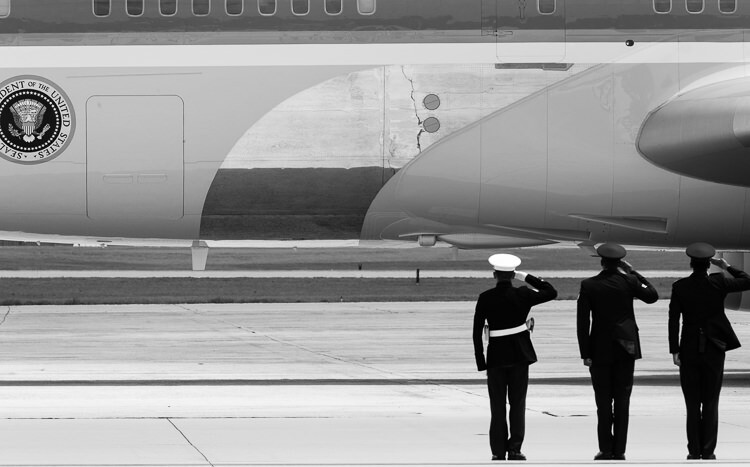
Air Force Airmen saluting Air Force One as it takes off.

1. Local Adjustments

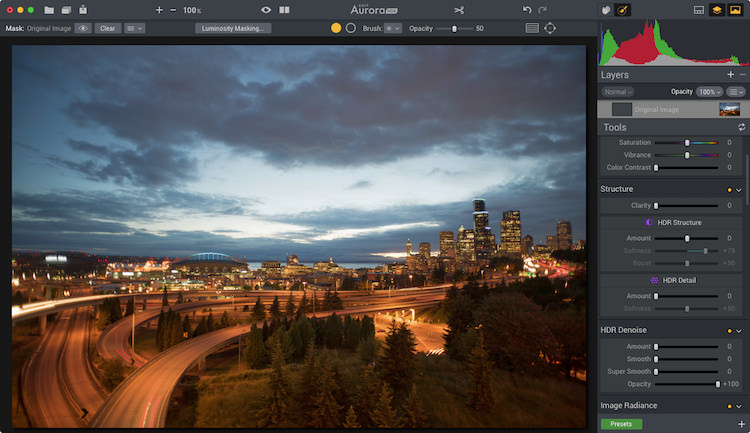
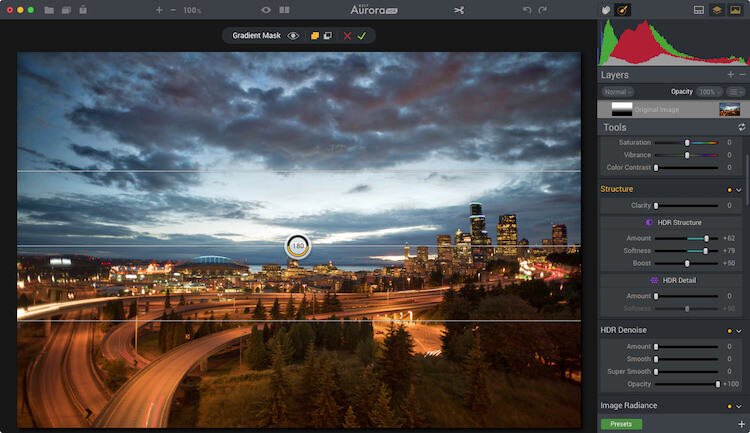
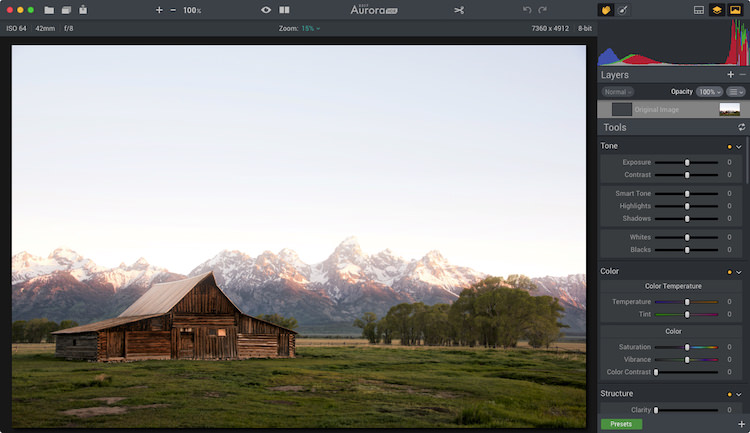
Aurora HDR 2017 includes some local adjustment features which you are used to seeing in non-HDR software, like Lightroom or ON1. It includes things like gradient filters, radial filters, and the new Zone System Luminosity Masking. These are all powerful tools to make unique changes to specific areas of a photograph. The beauty is that any edits made to those local areas do not impact any other region of the image.

One local adjustment feature often overlooked is the Top & Bottom Adjustment module. It’s like the gradient tool but has a few sliders specific to this module. It includes things like exposure, warmth, vibrancy, and contrast. Each of which appears twice; once for the top of the frame and once for the bottom of the frame.

Before

Before

After the Top and Bottom Adjustment.

After the Top and Bottom Adjustment.

What makes this even cooler is the quick slider method of changing the gradient smoothing (blend), X or Y axis location of the tool (shift), and the rotation which makes it vertical or horizontal.

Because the standard gradient tool in Aurora HDR 2017 requires you to make adjustments to the mask, having this module makes quick adjustments to a larger local area really quick.

Local adjustments in Aurora HDR 2017

Local adjustments in Aurora HDR 2017

2. Luminosity Masking

Aurora HDR Pro (pre-2017 version) had Luminosity Masking, but it has been improved in the new version.

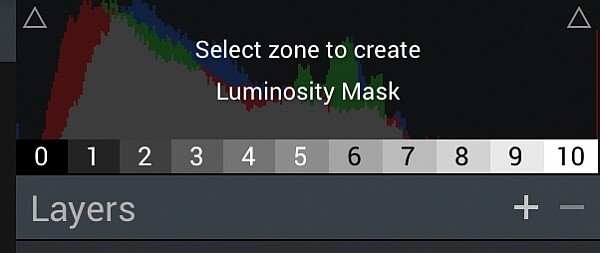
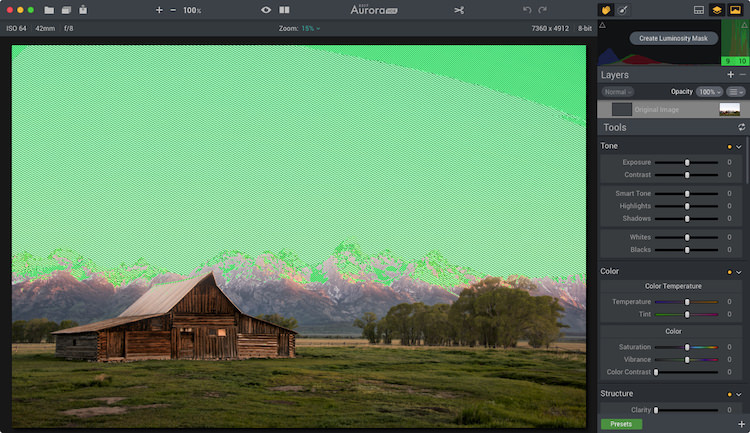
Luminosity Masking is popular in portrait processing, but it’s also useful for other kinds of photography. What MacPhun did in the new version is to take a page out of Ansel Adam‘s book, by adding the Zone System into the Luminosity masking tool. Now you can create a mask based on specific zones of light. And they made it so simple.

Aurora HDR 2017's Zone System Luminosity Masking.

Aurora HDR 2017’s Zone System Luminosity Masking.

luminosity-masking-before

With the Luminosity Mask applied.

With the Luminosity Mask applied (masking the sky).

3. Advanced Masking

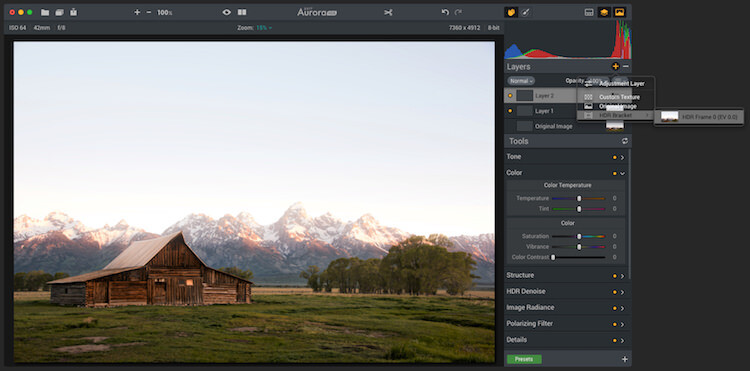
The layers and masking tools in the software are advanced. When you add a layer, you can do it from a single bracket, a blank slate, and other choices. The options enable you to load any amount many brackets you want, and not process them as HDR, but instead do regular masking and editing.

Masking can be implemented using a Wacom Tablet and as a radial or gradient brush, or using the new zone system tool.

adv-masking

This shows both color toning being combined with a brush mask.

4. Color Toning

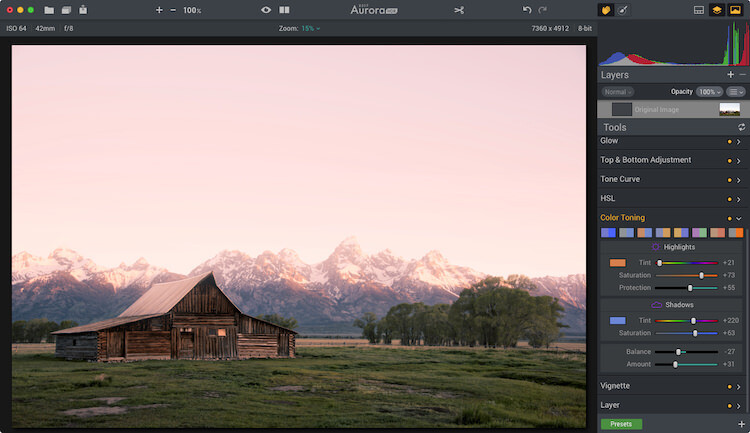
Aurora has heavy duty color toning (split toning) features built into the software. Like Lightroom, users can choose a color to tone the highlights and shadows individually. But Aurora goes beyond that by adding highlight protection of the color. That way you can be more strategic on how much of the highlights are affected by the toning. You also have saturation control of the color for both highlights and shadows.

Like Lightroom, Aurora provides the ability to adjust the balance of the color tone. To add more or less color in either the highlights or shadows. Of course, there is also an amount slider which enables you to reduce the impact of the color on the complete photo.

Color toning applied.

Color toning applied.

Mask applied to keep the color toning off the roof of the barn and other areas.

Mask applied to keep the color toning off the roof of the barn and other areas.

There are also a variety of preset color toning swatches included, or you can make your own by making an Aurora HDR 2017 preset. When combining color toning with the masking tools you have some incredible color options.

5. Batch Processing

Batch Processing might sound silly to some but think about it for a moment. Imagine you like one of the editing tools in the software, like the color grading tool, and you want to add that to a large volume of photos. With the batch processing tool, you can do that. You would launch the Batch Processor and then choose the preset and settings you want to be used. So if you want color grading, make a preset with it. Simple!

The way MacPhun does it is you can drop a folder of images and pick what preset you want to use on the photos. It will then run through it quickly without you having to do anything.

So Much More

Aurora HDR 2017 is made for HDR photography. I think that’s obvious by its name. But I think it’s important for photographers to understand when a tool can be beneficial, even when it is least expected.

This software has made its way into my regular rotation of post-processing tools. The reason is that when using a tool with a different user experience and features my creativity expands. Doors are opened which were once closed, and I walk away with fun edits of photographs I once didn’t know if I would touch.

scott-wyden-kivowitz_dps_3

Not the end!

If you have made it to the end and wanted one more takeaway, here goes.

My last piece of advice for you is this – go for it and try something new. Even if it’s not this software or the next. If you don’t try, you won’t learn and grow. But really, as a wise green man once said, “Do or do not, there is no try.”

googletag.cmd.push(function() {
tablet_slots.push( googletag.defineSlot( “/1005424/_dPSv4_tab-all-article-bottom_(300×250)”, [300, 250], “pb-ad-78623” ).addService( googletag.pubads() ) ); } );

googletag.cmd.push(function() {
mobile_slots.push( googletag.defineSlot( “/1005424/_dPSv4_mob-all-article-bottom_(300×250)”, [300, 250], “pb-ad-78158” ).addService( googletag.pubads() ) ); } );

The post 5 Non-HDR Things You Can Do With MacPhun’s Aurora HDR 2017 by Scott Wyden Kivowitz appeared first on Digital Photography School.


Digital Photography School

 
Comments Off on 5 Non-HDR Things You Can Do With MacPhun’s Aurora HDR 2017

Posted in Photography


Drone footage of aurora over Iceland is just what your weekend needs

27 Aug

Maybe it’s unreasonably hot where you live, like it is here. Maybe you just smashed your phone screen on a sidewalk (and you KNEW you should have paid for that Apple Care). It’s none of our business why, but if your troubled mind needs soothing, we found just the thing for it: this video of the Northern Lights shot from a drone soaring over Iceland. 

The footage comes from OZZO Photography and a Sony a7S II with Sigma 20mm F1.4 strapped to a DJI Matrice 600 (that’s a $ 4600 pro-grade drone, for those keeping score at home). It all adds up to one sweet, nerve-calming minute and a half.

Articles: Digital Photography Review (dpreview.com)

 
Comments Off on Drone footage of aurora over Iceland is just what your weekend needs

Posted in Uncategorized


How to Photograph the Northern Lights or Aurora Borealis

16 Aug

Tips for seeing and photographing the Northern Lights:

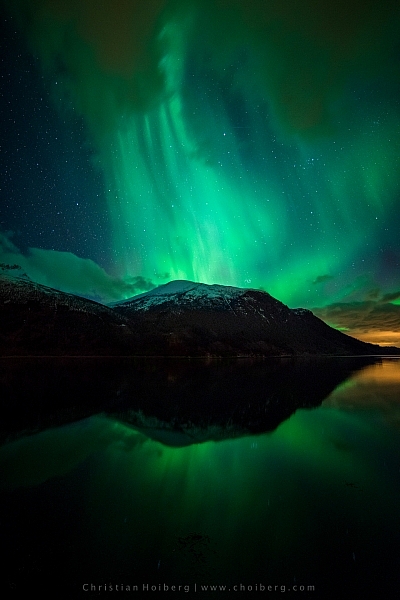
Northern Lights, also known as Aurora Borealis, might be one of the most fascinating phenomena to photograph during the night. Watching the sky turn green, blue, pink and even red, is something that will change you forever. After seeing The Lady in Green countless times, I still find myself shouting in awe when she’s elegantly dancing in the sky.

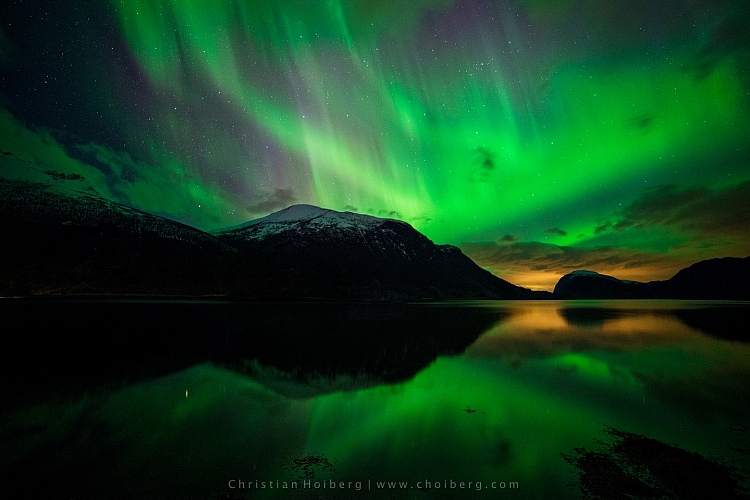
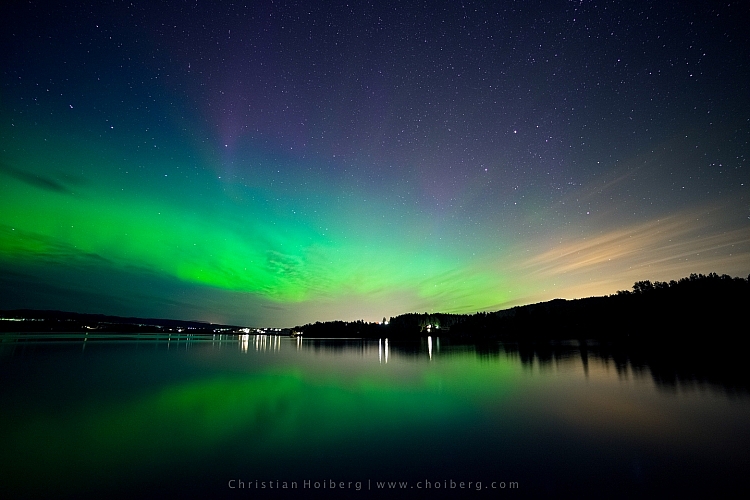
Innfjorden-Aurora-Horizontal-Reflections

Seeing, and photographing, the Northern Lights aren’t something you can do all over the world. The truth is that even if you’ve booked a flight to northern Norway or Iceland, there’s no guarantee that you will see the northern lights at all.

How to see the Northern Lights

Be in the Northern Hemisphere

Unfortunately, the Northern Lights aren’t visible all over the world. As the name might indicate, they are a phenomenon visible in the northern hemisphere. Places such as northern Norway, Iceland and Alaska are typical areas where people travel to witness the Aurora Borealis.

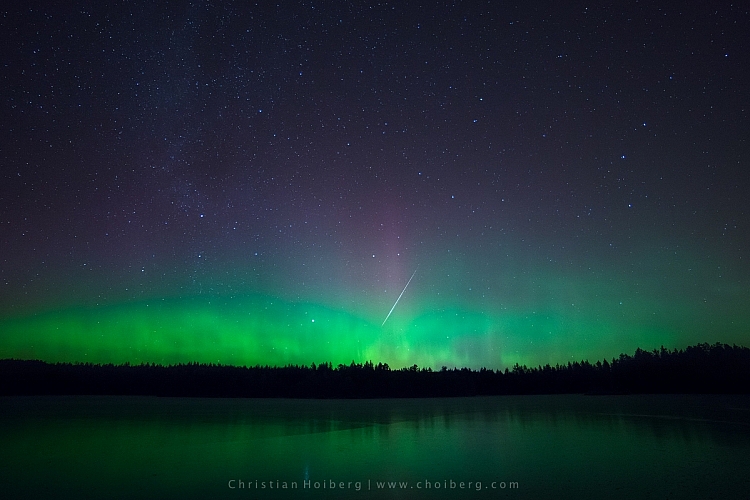
Lauarvann-Aurora-Metorite

That being said, during extreme solar storms your might be able to see the phenomenon further south too, but not as powerful as in the north.

So, the first step in seeing the Northern Lights is to travel to the north. Remember that the Aurora Borealis is a night phenomenon and since summers in the north have up to 24 hours of sun, you should plan your visit for late fall or winter.

Get away from light pollution

It’s nearly impossible to see the Northern Lights if you’re standing in the downtown of any larger city with light pollution. Yes, it is possible; if the KP Index (the strength indicator for Northern Lights) is at its highest. However, to increase the chances of seeing, and capturing a good shot of the Northern Lights, you should get away from light pollution, and find a location where you can clearly see the stars.

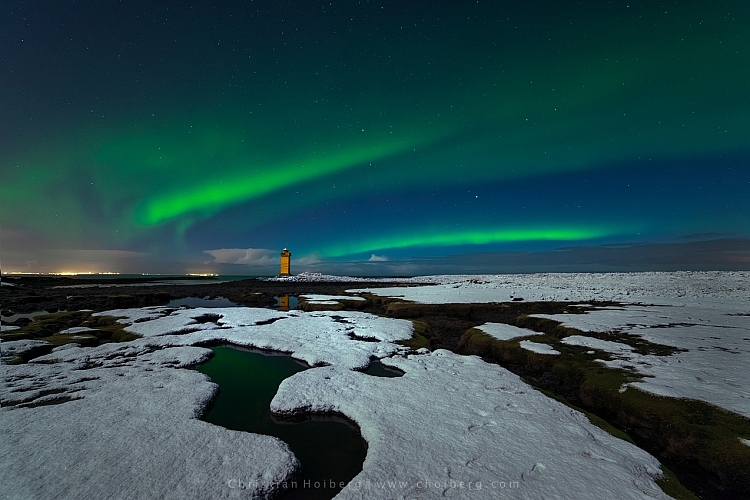
vatnsleysustrandar-aurora-borealis

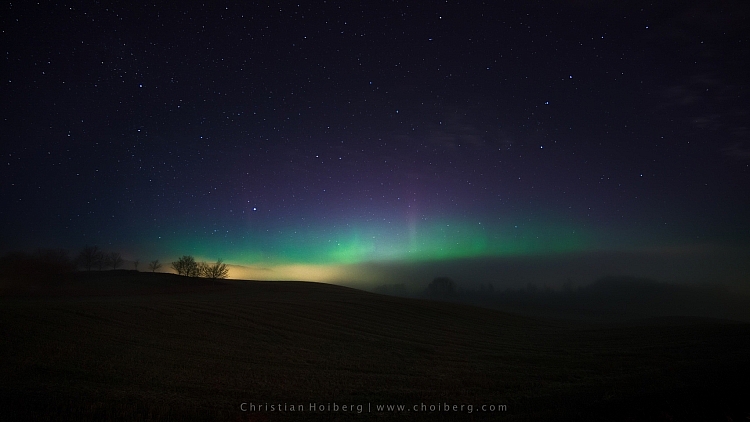
I have lived in a small town not far away from Oslo, Norway for most of my life. Yet, it wasn’t until a few years ago I realized that even here in southern Norway we can see the Northern Lights. In fact, it happens more often than you realize.

There are a few different tools you can use to see what area close to you is dark enough to see the stars, and possibly the Northern Lights. Dark Sky is a great website for this exact purpose, and it shows a detailed map of the light pollution.

How to photograph the Northern Lights

Now that you know where, and how to discover the Aurora Borealis, let’s see how you can capture it with your camera.

Use a tripod and remote shutter release

Since you will be photographing in the dark you’ll be working with long exposures (long shutter speeds), and it’s therefore essential that you use a tripod to ensure you get a correctly exposed image that is still of usable quality.

fiskumvannet-northern-lights

You should also consider using a remote shutter when you’re photographing the Northern Lights. This removes any chance for vibration caused by pressing the shutter. Optionally, you could use the 2-second timer, but sometimes you want to capture the image at that exact moment with no delay.

Use a wide angle lens at a large aperture

When photographing the Northern Lights you want to use a wide angle lens. This lets you capture both the landscape and the sky in one shot. When the Northern Lights are strong you’ll also notice that they stretch all over the sky and it’s impossible to capture all of it in one image, unless you use a wide angle.

northern-lights-hedenstad

During nighttime photography you want to use an open aperture such as f/2.8 to allow enough light to reach the sensor. When using my 14mm I more or less always have it at f/2.8, as I rarely use it at any other time than during the night.

Set the shutter speed according to the KP Index

The shutter speed depends on the strength of the Northern Lights. I’ve experienced when one second at ISO 400 has blown out the green (I’ve never seen the Aurora as powerful as that since) but then it can be barely visible at ISO 3200 and a shutter speed of 20 seconds at other times.

You should also keep in mind the movement of the Northern Lights. If they area quickly changing shape, a long exposure might blur them out too much, and you’ll lose detail. It’s better in that instance to increase the ISO, and lower the shutter speed, so you freeze the motion and capture all its textures.

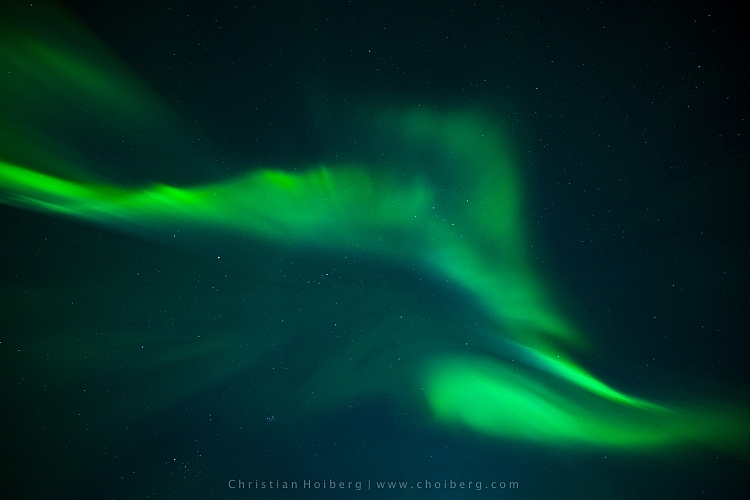
corona-aurora

Another factor you should keep in mind when you choose the shutter speed is the movement of stars. If you go beyond 25 seconds you’ll start seeing small startrails. Sometimes this can give an interesting effect, but if you want to have a sharp and crisp image, be sure to use 25 seconds or less as your shutter speed.

Set a cool white balance (3000-4000K)

I’ve experienced that the ideal white balance is somewhere between 3000-4000 Kelvin when photographing at night. This results in a cooler, and more natural look in the dark sky. If you go above 4000K you’ll also notice that the green in the Northern Lights gets a muddy look, which you want to avoid.

Avoid using Automatic White Balance and other preset modes such as cloudy. While these often do a great job during the day, they’re more of a gamble at night. You could get some okay results with AWB but generally you won’t.

Innfjorden-aurora-vertical

Bring something warm to drink!

I had to include this last tip. Remember, when you’re photographing the Northern Lights that it’ll most likely be winter or late fall. That means that temperatures drop, and since you’ll be out during the night, there’s no sun to warm you.

Bringing a thermos with something warm to drink could be wise during these long winter nights. Especially if you’re planning to stay out for a while or even make a timelapse.

googletag.cmd.push(function() {
tablet_slots.push( googletag.defineSlot( “/1005424/_dPSv4_tab-all-article-bottom_(300×250)”, [300, 250], “pb-ad-78623” ).addService( googletag.pubads() ) ); } );

googletag.cmd.push(function() {
mobile_slots.push( googletag.defineSlot( “/1005424/_dPSv4_mob-all-article-bottom_(300×250)”, [300, 250], “pb-ad-78158” ).addService( googletag.pubads() ) ); } );

The post How to Photograph the Northern Lights or Aurora Borealis by Christian Hoiberg appeared first on Digital Photography School.


Digital Photography School

 
Comments Off on How to Photograph the Northern Lights or Aurora Borealis

Posted in Photography


Macphun Aurora HDR 2017 pre-orders will start September 15

10 Aug

Macphun has teased its customers with a brief preview of Aurora HDR 2017 ahead of its planned launch next month. The new version of the software features an updated user interface that, while similar to the original version, aims to better facilitate fast edits and help keep the user’s focus on the photo. Macphun has also added a new tone mapping algorithm for less noise and better results, a ‘smart polarizer tool’ for adjusting the sky in an image, batch processing, and more tools that haven’t yet been detailed.

According to PhotoRumors, Macphun plans to start taking pre-orders for Aurora HDR 2017 on September 15, and will officially launch the software on September 29. The pre-order will include special pricing for existing Aurora HDR and Aurora HDR Pro customers at $ 69 and $ 49, respectively, while new customers will pay $ 89. Those who pre-order will also get -currently unspecified special bonuses.

Via: PhotoRumors

Articles: Digital Photography Review (dpreview.com)

 
Comments Off on Macphun Aurora HDR 2017 pre-orders will start September 15

Posted in Uncategorized


Macphun offers Aurora HDR Pro 3-month payment plan

27 Feb

Macphun has announced a new 3-month payment plan for Aurora HDR Pro, the image editing application for Mac OS X it launched in November. Rather than requiring the full $ 99 USD price at the time of purchase, the payment plan allows users to pay $ 33 per month for three months, while still gaining immediate access to the software license.

According to Macphun, Aurora HDR has been downloaded more than 150,000 times since its launch. The payment plan doesn’t involve a subscription and does not charge interest. The company’s ‘bonus of the month’ gift to customers is also provided to users who opt for the 3-month installment.

The payment plan is now available through the Aurora HDR website.

Articles: Digital Photography Review (dpreview.com)

 
Comments Off on Macphun offers Aurora HDR Pro 3-month payment plan

Posted in Uncategorized


Macphun Aurora HDR version 1.2 update released

19 Jan

Macphun has released Aurora HDR Pro version 1.2, adding a few new features and several improvements to its image editing software. The update includes support for .EXR and .HDR image files, compatibility with Leica M Monochrom (Typ 246) Raw files, and support for Photos for Mac editing extensions.

In addition to the new features, Aurora HDR 1.2 brings several improvements to the application. Macphun claims that the user interface has been improved for 11-inch and 13-inch laptop displays, chromatic aberration reduction has been improved, and the application’s overall performance has been boosted as tools like HDR Merging are now faster.

Improvements:

  • Better Raw file handling for images created by Panasonic, Olympus and Fuji
  • Updates to Adobe Lightroom and Photoshop plug-ins for enhanced support to keywords, metadata, and “F” Screen mode
  • Enhanced masking brush for better smoothing on edges
  • Improved clipping results for overall HDR effect in shadows and highlights
  • Chromatic aberration reduction has been significantly improved
  • Better UI support for 11″ and 13″ displays at multiple resolutions
  • Improved performance and various bug fixes. Faster HDR Merging, faster Deghosting, enhanced Chromatic Aberration Reduction

Existing Aurora HDR users can update to version 1.2 within the application for free, while new users will need to buy a license for $ 39.99 USD.

Via: Macphun Blog

Articles: Digital Photography Review (dpreview.com)

 
Comments Off on Macphun Aurora HDR version 1.2 update released

Posted in Uncategorized