If you were to look at my computer you would find a folder called textures, and in that folder you would find hundreds of files. I take photos of things everywhere that I think will be good textures. I also make them, and try different things. You can do the same. Any time you see interesting textures in concrete, marble, or maybe cracked paint, take photos of them, add them to your folder for textures.
There are numerous reasons for adding textures to your photos, and one of the best is to give your work an old or antique look. Lots of old photos have marks on them or the emulsion has stained. Photos were often not treated with preservation in mind and they have started to look textured.
In this article we are going to look at how you can apply a texture overlay to your images to give them an aged look.
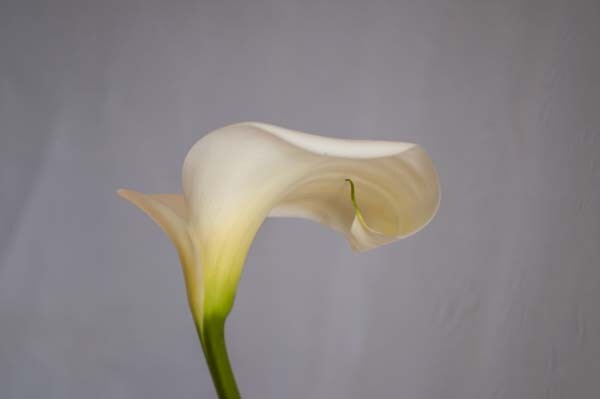
We are going to work on the above image of the lily. It has had basic processing done to it in Adobe Camera Raw before being opened in Photoshop CC (2014).
Cameras and lenses back in the day often didn’t produce super sharp images, so to start off we are going to make a duplicate layer of our image. I do this with the Ctrl+J, keyboard shortcut (Cmd+J on a Mac). There are other ways of doing this, such as; going to the menu at the top and choosing Layer, then clicking on Duplicate Layer, but I find the keyboard shortcut to be the easiest and quickest way.
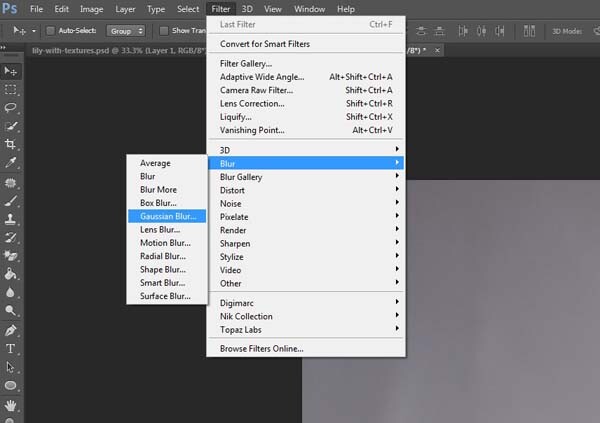
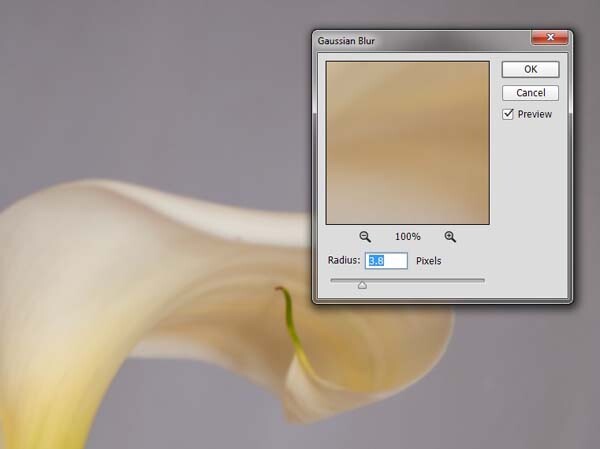
Once you have that duplicate layer then go over to Filters and choose Blur, then Gaussian Blur as in the image above. You don’t want too much blur, or it will look like it is out of focus, and you don’t want too little or it will not be visible or obvious enough. I used 3.8 for the purpose of this image.
Next, you want to try and separate the flower from the background, you can do this with curves. Open a curves adjustment layer and use it to darken the image overall. Then using the Brush tool (which is located on your tool bar in Photoshop) on the layer mask, remove the adjustment from the flower as follows.
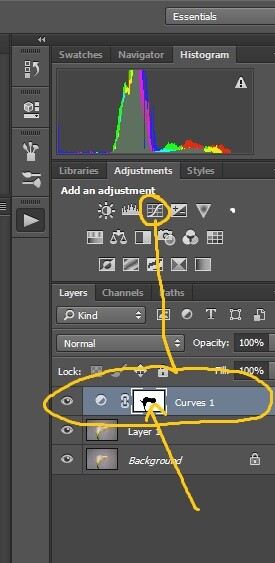
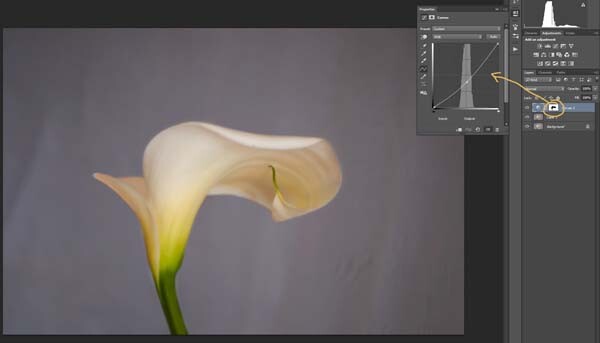
Click on the Brush tool, then set your foreground colour to black. It is the one with the two little squares at the bottom of the tool bar – the colour on top is the foreground color, the one on the bottom is the background color. Go to the curves layer you created in your layers panel and click on the white square in that layer (that is the mask), then go to your image and start brushing on the flower. You should see the flower getting lighter.
Add a warmer color to your image
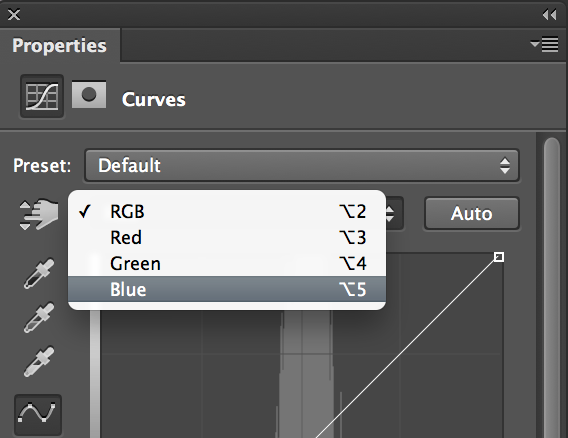 Next you are going to change the colour of the highlights. You don’t have to do this, but it is a nice touch and it helps create a warmer feel to the image.
Open another curves adjustment layer. At the top you should see a pull down menu that says RGB, click on that and choose Blue. Go to the curves line and up in the top right corner (the highlights) click on the dot in the corner and pull it down along the side line. Don’t go too far, but you should see the image turning yellow. Remember yellow is the opposite of blue.
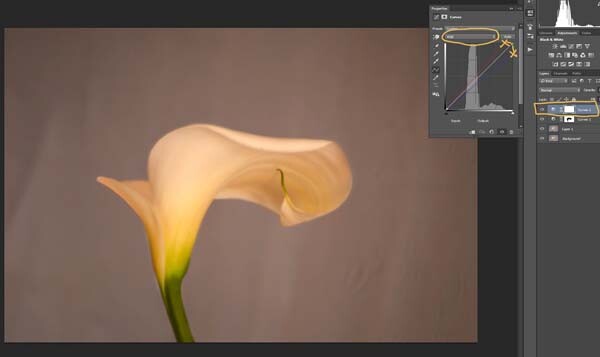
Go back up to the curves window and click on red. You are going to do the same thing, except this time take the dot to the left and across the top. You don’t need to go very far.
Adding the texture overlay
Now it is time to find a texture overlay to put on top of your image. It is always going to be an individual thing and something that you need to work out. Here, I used a texture that I saw on the floor of a building in the city. I liked the cracked look of the floor so I took quite a few photos.
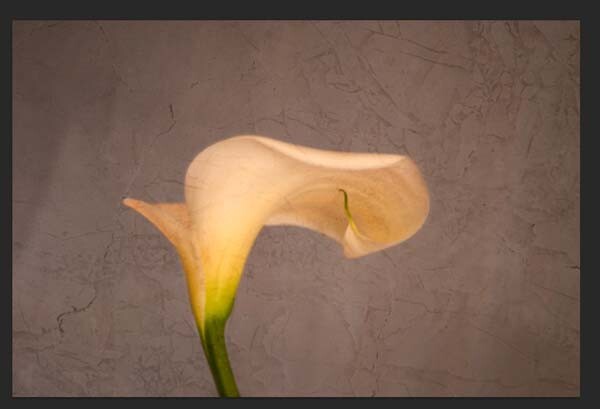
Open the texture file in Photoshop, then using the move tool (the first one at the top of the tool bar) click on the image and drag it over to the image you want to apply it to. You can copy and paste it as well, or use Place (which will add it as a SmartObject).
If you buy textures, or get free ones off the internet, you will often find they are too small for your image. But don’t worry about it because you are going to be blending it into your image, so it doesn’t really matter.
If you need to change the size of the texture overlay you can do this with the transform tool. You can find the Free Transform tool under the Edit button on the main menu across the top, where you found Layer and Filters. You can also the keyboard shortcut, Ctrl+T (Cmd+T on a Mac). You will see a little grid go up around the texture so you can drag one of the corners to make it bigger, or smaller, depending on the size you require. Press enter to apply the transform, or you can double click on it, or click on the move tool and press apply.
Blending the texture into your image
You will need to blend the texture so you can see your image underneath. The layer blend mode options are at the top of the layers panel, it is another drop down menu. The default option is set to Normal, so look for that. There are many options, for this tutorial however, we are going to use Soft Light. Once you change it to that blend mode you should be able to see the texture and the image underneath.
You can also change the opacity of the layer if you like as well. I usually change it slightly so the texture isn’t too strong. You can change the opacity in the window next to the options panel. Just make sure your texture layer is highlighted.
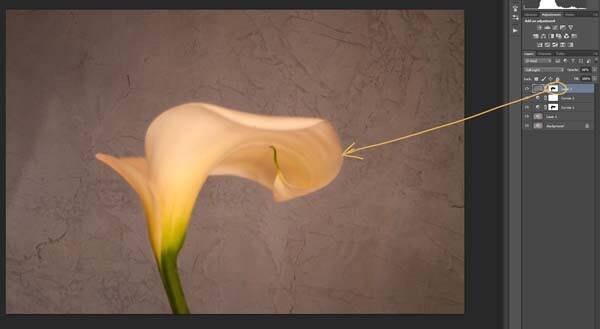
If you go to the bottom of the layers panel you will see a few things across the bottom. If you click the rectangle one with the round hole in it you will give your layer a mask. The mask means you can hide some of that layer from your image, like you did with the first curves layer.
Again, get your brush tool, make sure the foreground colour is black and paint over the flower. You are now making the texture look like it is just on the background.
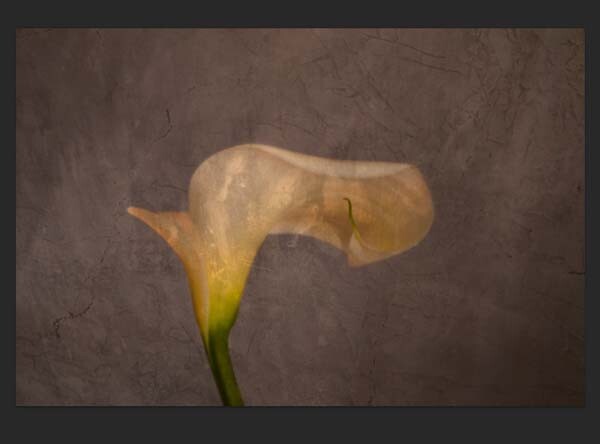
Next we are going to apply a texture to the whole image. This time it is one that will make the image look grungy, and dirty. You can find textures that have marks on them that look like smudges and grease. The one in this tutorial was a polished cement wall outside.
Add the texture to the image the same way you did the previous one. Blend it with the Soft Light Blend mode again. See how you feel about how the image looks, and if you decide it is too strong remember that the opacity can help make it less intense.
Adding a tint to your image
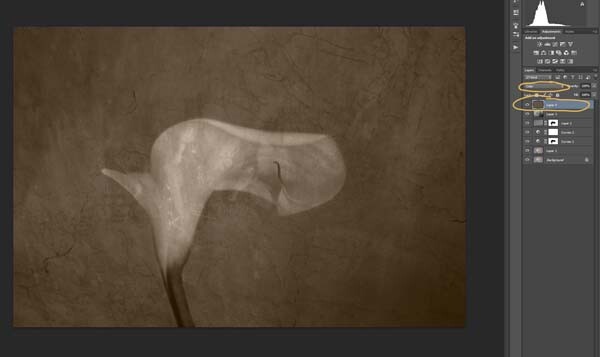
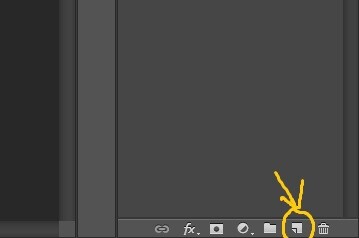
You will need to add a new layer, one that is transparent. At the bottom of the layers panel where you found the layer mask, you should see next to the trash bin a white square with a corner folded over, that is the new layer icon (see below). Click on it.
Next go to the tool bar and find the Paint Bucket Tool. Then go to the foreground colour and click on it. A popup window should come up and you can choose a colour to give your image a new tone. I would recommend you choose a grey, for this demonstration a mid tone grey with a hint of orange was chosen.
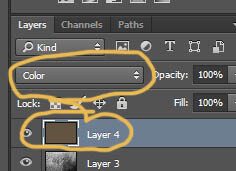
Now go to your image and click on it. The new empty layer should be filled with the colour you chose, and your whole image should look like a solid colour. Go to the blending mode for the new layer and change it to Colour. Your image should be transformed to monochrome. If you change the opacity of that layer then some of the original colour will come through, but that is up to you.
Here is the final image.
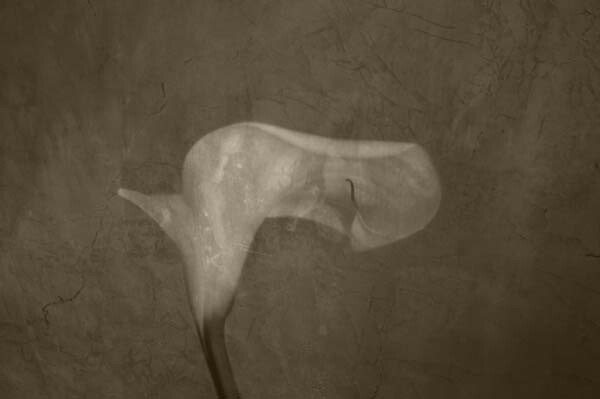
There are lots of other things you can do, but that might be best left for another tutorial.
If you prefer to watch this demonstrated you can check out the video below as I walk you through the same steps:
Have you tried using textures before? Do you have any favorite textures or sites for finding them? Please share in the comments below.
googletag.cmd.push(function() {
tablet_slots.push( googletag.defineSlot( “/1005424/_dPSv4_tab-all-article-bottom_(300×250)”, [300, 250], “pb-ad-78623” ).addService( googletag.pubads() ) ); } );
googletag.cmd.push(function() {
mobile_slots.push( googletag.defineSlot( “/1005424/_dPSv4_mob-all-article-bottom_(300×250)”, [300, 250], “pb-ad-78158” ).addService( googletag.pubads() ) ); } );
The post Applying a Texture Overlay to Your Images to Create an Antique Look by Leanne Cole appeared first on Digital Photography School.

Digital Photography School


 Next you are going to change the colour of the highlights. You don’t have to do this, but it is a nice touch and it helps create a warmer feel to the image.




You must be logged in to post a comment.