RSS
 

Archive for March, 2020

Sigma interview: Smaller, high-quality lenses coming ‘in the near future’

30 Mar
Kazuto Yamaki, CEO of Sigma, pictured in his company’s plant in Aizu, Japan when we visited in 2015.

The photo industry is recovering from the disruption in global supply chains caused by Chinese shutdown, but with the rest of the world still in crisis, companies are preparing for a major drop in customer demand, especially in the US and Europe. Last week I spoke to Kazuto Yamaki of Sigma to get his take on the ongoing situation worldwide, and on Sigma’s strategy for the next generation of cameras and lenses.

Please note that this interview was conducted remotely, and has been edited for clarity and flow.


Mr. Yamaki, I last spoke to you two weeks ago, which feels like a year ago. What has changed in those two weeks?

Two weeks ago I was mainly concerned about the production system, and the supply chain. We make all of our products in Japan and make most of the parts by ourselves or by Japanese local suppliers, but some parts such as electronics are supplied from China, therefore, I was concerned about the supply of parts. But in fact, up to now we haven’t had a serious problem with that. Some parts have been delayed due to confusion in the supply chain but it hasn’t been serious, and we’ve been able to adjust our production planning.

Production and delivery systems in China are starting to normalize

So on the production side, we haven’t had a serious problem. And we don’t expect to have problems in the future, because production and delivery systems in China are starting to normalize.

I was also really concerned about sales in China. At the beginning of March, my worst-case scenario was a halving of sales compared to last year. But in fact our business in China is quite stable, and not too bad, which is a big relief. Sales in China are still doing OK because there’s a very strong online business. Right now the biggest concern is the market situation in Europe and the USA. I had never imagined such a crisis in Europe and America.

How are things in Japan?

It’s not a crisis situation, like in some parts of the US or in Europe. People are walking in the streets, and coming back to stores. It’s not as bad as it is in other countries. But for the photo industry it’s really bad. Since the beginning of March, we’re seeing a decline in sales in the Japanese market, but we will have to wait for a while to get a picture of the full situation.

Sigma’s Aizu factory in northern Japan is still where all of the company’s lenses and cameras are assembled, with a primarily domestic (i.e., Japanese) supply chain. This makes Sigma unusual among modern manufacturers in the consumer digital imaging space.

So to some extent, life is returning to normal in parts of China?

This is what I’ve heard. People are starting to return to the streets, and our staff in China are reporting a positive mood in the towns.

What effect do you think that this crisis will have in the long term?

To be honest I don’t know. Some countries have already decided to lock down cities for weeks, even months, and this will affect our business. I don’t want to be too negative, but the situation may not improve in the short term.

Do you have any idea of what portion of your sales in Europe and the US are online?

It’s a bit too early to say that, but in Europe, it doesn’t look like online business can compensate for the loss of sales from physical stores. Some online retailers are also prioritizing food and sanitary goods because of the high demand, so shipments of cameras and lenses are being de-prioritized.

Sigma’s ‘DC’ trio of native mirrorless lenses (now available for Canon EF-M, Sony E-mount and Micro Four Thirds) has proven a hit, with demand regularly outstripping supply in some markets.

Has this crisis revealed any vulnerabilities in the current structure of the photography industry – for example within the supply chain?

Well, this is not the first time. We had similar problems when the earthquake hit Japan in 2011, and also a flood in Thailand. The global supply chain was thrown into total confusion. I think we’re aware of such risks. Sigma has a relatively short supply chain. As you know, most of our suppliers are located in Japan, and we work with them directly. However, some of those suppliers do outsource certain components to other suppliers, called ‘second-tier’ suppliers.

Most companies have a very complicated structure, with first-tier suppliers, second-tier suppliers, and sometimes even third-tier. But in the case of Sigma, our supply chain is quite simple, so it’s easy to control the situation.

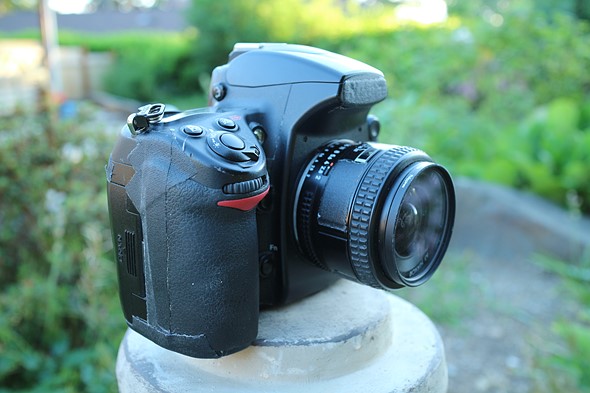
Let’s move on from talking about coronavirus – you recently said that going forward, Sigma would prioritize development of native mirrorless lenses over lenses for DSLR. Can you explain that decision?

It’s simply because we’ve had higher demand for mirrorless lenses. The mirrorless camera market is stable compared to DSLR. If you look at the market statistics you’ll see that the decline in DSLR sales is quite significant. This decline gets steeper every month.

We’re also seeing a decline in sales of our DSLR lenses, so naturally we have to focus our efforts on the development of mirrorless lenses.

Demand for Sigma’s ‘DN’ (Digital Native) range of lenses for mirrorless mounts has outstripped demand for lenses made for traditional DSLR lens mounts. For this reason, Sigma is prioritizing development of native mirrorless lenses.

How have the full-frame ‘DN’ lenses performed in the market since they’ve been released?

They’re doing very well, especially our 24-70mm F2.8. It’s been very well-received. We’re still catching up to demand for that lens. We’ve been enhancing our manufacturing capacity, continuously, but we still can’t meet demand. Even in the current difficult situation, demand for that lens is still very strong.

What portion of your DN sales are L-mount lenses?

It’s tough to say. Most of the lenses we’re shipping of course are for Sony E-mount. It’s too early, and we don’t have a big enough lineup to make our potential customers feel comfortable with the L-mount system. Changing systems is a big decision for the customer. There are a lot of potential customers out there, but I think they’re waiting and seeing how the L-mount system develops. I think we need one or two more years before we have a complete L-mount system. Not only from Sigma but also Panasonic and Leica.

Last year you released your first full-frame camera, the fp. How has it performed in the market?

It sold quite well at the beginning. Early adopters were very interested, and purchased the camera immediately. We’ve received a lot of emails from customers, which I’ve read, and we have a lot of customers who are very happy and satisfied with the fp. We’ve also been monitoring feedback online, through Facebook and Twitter; things like that.

To be honest though, sales have declined considerably [since launch], especially in Europe and America. It’s still selling well in Japan, but overall sales have been lower than expected.

The fp is an ultra-compact full-frame camera aimed at photographers and filmmakers. In order to minimize its size, Sigma designed the fp with a fully electronic shutter. Mr. Yamaki believes that this will act as a model for the ‘camera of the future’.

Why do you think that is?

There are several reasons, I think. First of all, changing systems is a big investment for customers. So even though we have potential customers who are really interested in the camera, I think a lot of them are waiting to see how the L-mount system develops. We don’t have enough compact lenses, suited to the fp. We’re currently developing several lenses of that type. Once we have that kind of lineup, I think a lot of potential customers may decide to buy the camera.

Due to the coronavirus crisis, we had to cancel many events. So we’ve lost an opportunity to let customers try our camera

That’s one thing. The second thing is that in Japan, we’ve found that ‘touch and try’ events have worked really well in convincing customers that the fp is a good camera. After they try it, many of them buy it. We had a plan to conduct many such events, but due to the coronavirus crisis, we had to cancel many events in Japan, in China and in Europe. So we’ve lost an opportunity to let customers try our camera. That’s disappointing, but once things calm down we’ll start again.

So when a show like CP+ or NAB is canceled, what impact does that have on a manufacturer like Sigma?

It’s difficult to evaluate the value of such events, today. But if you take CP+, it’s basically a consumer show. Typically we see people there who are excited by new products, and we can use that excitement to create some momentum. So it’s definitely not a good thing to lose such opportunities.

A typical scene from CP+ 2019, showing the density of the crowd as enthusiasts flock to get their hands on the latest photo gear. This ‘hands-on’ experience is precious when it comes to converting customer interest into sales, and manufacturers are feeling the effect of so many canceled shows in 2020.

Can you talk more about the development of smaller lenses?

Going forward, we will still try to deliver the highest-possible quality products. But we will have two main streams of products. One is for very serious photographers, like our existing ‘Art’ series. But another line will be high quality, premium lenses, but much more compact. And very stylish, like our 45mm F2.8, with metal housings, and high quality aperture and focus rings. We will expand that kind of range for street photographers, or those who need smaller, stylish, high-quality products.

So our readers can look forward to a range of smaller lenses from Sigma, with Art-series optical quality but more modest maximum apertures?

Yes, that’s our goal. You’ll probably see such products in the near future.

Sigma is committed to making more compact lenses, like the 45mm F2.8 ‘Contemporary’ for L and E-mount in future.

Do you think that the fp range will evolve to include things like a mechanical shutter, and viewfinder?

If we made the fp with a mechanical shutter, it would not be so compact. One of the reasons it’s so small is that we eliminated the mechanical shutter. We created the fp as a kind of platform for a ‘future camera’. I think in future, most cameras won’t have a mechanical shutter, because of improvements to the readout speed of sensors. I haven’t made any decisions about future products, but we’ll probably keep that concept.

You recently announced the postponement of your planned Foveon sensor full-frame camera. Can you give us more details about why that project was postponed?

The development of the sensor has been significantly delayed. We are still working on it, but there are still several technical problems we need to overcome. If everything goes well, we should be able to release the camera next year. But if we continue to face technical problems the camera may be delayed further. We haven’t stopped developing the camera, but without the sensor we can’t move very fast.

Are you interested in creating a full-frame alternative to the DP Merrill fixed-lens camera concept?

We don’t have any plans to do that right now. We are researching the market, but it’s difficult to make such a camera really compact. Of course there are cameras like the Sony RX1R II, which is a very small camera, but it’s difficult to make the lens compact. If we wanted to make a really compact lens, our options for focal length and F stop become very limited. Compared to APS-C or M43 cameras with a fixed lens, it’s very challenging, technically.

Our mission is to support as many mounts as possible, but due to limited engineering resources, we have to be selective

Is there anything you can say to our readers about the possible development of Canon RF, Fujifilm XF and and Nikon Z-mount lenses from Sigma?

As a lens manufacturer, we believe that it is our mission to support as many mounts as possible, but due to limited engineering resources, we have to be selective. We are watching the market.

How have your ‘Classic’ cine lenses been received?

Very positively, especially for filmmakers looking for a unique rendering. These lenses create huge ghosting and flare, so they’re not easy to use. Especially if there is a direct light source in the frame. But if you carefully control the lighting, it can create a very nice, soft, ‘retro’ kind of look. High-end filmmakers in Hollywood have received these lenses very positively.

Do you know of any productions that are using these lenses?

It’s still very early, we only started shipping in January and February, so we don’t have that kind of information yet. But we made a film, ourselves, it’s about 30-40 minutes long. We shot the entire thing on the Sigma fp, and we used our regular cine lenses, and in some scenes the ‘Classic’ lenses were used. We need to apply to some film festivals, and after that will release the movie online. Probably in the near future.

Do you think that your DC DN lens lineup will grow? It’s been three lenses now for quite a long time.

Actually, demand for those lenses keeps growing. It’s really surprising. In terms of units, they’re the top seller for Sigma right now. It’s a surprise because in general the market for APS-C cameras and lenses is declining. But sales of those three DC DN lenses keep growing. Most of the sales are for Sony E-mount and Micro Four Thirds [versions], and in peak seasons sometimes we actually can’t keep up with demand.

Do you still see a healthy market for Micro Four Thirds?

Yes, I think Micro Four Thirds is well accepted by filmmakers, and our 16mm is really popular among M43 users. People who need a compact system still love Micro Four Thirds.


Editors’ note: Barnaby Britton

In the two weeks since I spoke to Mr. Yamaki last (for this article) a lot has changed. Only a few days ago, his biggest concern was getting hold of parts from China, and a significant slowdown in Chinese consumer spending. Now, with countries all over the world in virtual lockdown, and US and European governments bracing for a catastrophe in their healthcare systems in the coming days, such worries seem almost quaint.

It remains to seem how quickly – and to what extent – markets will recover, but there are some tentative signs of hope. Mr. Yamaki tells us that the situation in China is stabilizing, and the mood in the country is positive. Japan seems (for now, at least) to have escaped the worst social effects of the COVID19 outbreak, and South Korea has employed pioneering test and trace technologies to address what could have been a catastrophe.

Away from the immediate crisis, Mr. Yamaki tells us that demand remains strong for some of the company’s products, particularly the ‘DN’ range

The same sadly cannot be said of Europe or the US, and with consumers in those territories tightening their belts in the face of economic turmoil, it’s not hard to understand why Mr. Yamaki still characterizes the situation for the photo industry at this early point in the year as ‘really bad’.

There are tough times ahead, without a doubt, for all of us. But away from the immediate crisis, Mr. Yamaki tells us that demand remains strong for some of the company’s products, particularly the ‘DN’ range of native mirrorless lenses. These include the 24-70mm F2.8 DG DN Art, and the trio of ‘DC’ lenses for APS-C. This latter range, in fact, appears to be a genuine success story.

It seems that we’ll have to wait a little longer for Canon RF and Nikon Z support

Support for Canon EF-M has been added to the ‘DC’ range but in the full-frame arena, it seems that we’ll have to wait a little longer for Canon RF and Nikon Z support. As Mr. Yamaki says, he wants to support as many mounts as possible, but his engineers can’t do everything; they have to be selective.

It’s also likely that the communication protocols that make these new mounts work are protected I.P., and need to be licensed. It’s entirely possible therefore that just like their customers, Sigma’s engineers are waiting patiently too: in their case for the original manufacturers to open the protocols up to third parties, before any decisions can be made.

Coming soon though, we’re told, is a range of small, lightweight lenses specifically designed to be a better match for cameras like the fp. A range of more compact, slower maximum aperture lenses but with ‘Art’ series image quality is a longstanding request from Sigma fans, and it’s great to have confirmation from Mr. Yamaki that these are on their way ‘in the near future’ for L and – safe to assume – Sony E mount, too.

Coming soon… is a range of small, lightweight lenses specifically designed to be a better match for cameras like the fp

Meanwhile, Sigma continues to make inroads in the filmmaking community. Sales of the hybrid stills / video fp may be slowing, but Sigma’s range of Cine lenses have proven popular with filmmakers, and Mr. Yamaki tells us that the response from Hollywood to its range of ‘Classic’ cine lenses, designed with minimal coatings to give a retro look to footage, have been received well.

Articles: Digital Photography Review (dpreview.com)

 
Comments Off on Sigma interview: Smaller, high-quality lenses coming ‘in the near future’

Posted in Uncategorized


Loupedeck Launches Loupedeck Profile Creator for Creative Professionals

30 Mar

The post Loupedeck Launches Loupedeck Profile Creator for Creative Professionals appeared first on Digital Photography School. It was authored by Jaymes Dempsey.

Loupedeck Launches Loupedeck Profile Creator for Creative Professionals

The Loupedeck Creative Tool is designed to do one thing:

Make your software workflow easier and faster than ever before.

The Loupedeck CT is a console-type tool, one that allows you to program different actions into its many buttons and dials. While it can technically be used to enhance any application, you’ll be especially impressed by its integration with photo editing software.

For instance, when working in Photoshop, you can use the Loupedeck CT wheel to zoom in and out of images, one button to activate the lasso tool, and another button to create a mask. You can use a small dial to change brush size, a button to select the color picker tool, and yet another button to select the brush.

With the Loupedeck CT in hand, editing speed will advance to a whole new level, as you fluidly edit one image after another by tapping buttons, adjusting dials, and spinning the main wheel. No longer do you have to hunt for keyboard shortcuts or waste time searching for menu options.

loupedeck creative tool

Instead, the Loupedeck CT will get the job done.

But Loupedeck has taken their Creative Tool a step further.

As of last week, you can now use the Loupedeck Profile Creator to generate Custom Profiles for different software applications.

Loupedeck explains in their press release:

The new Loupedeck Profile Creator will enable users…to program custom actions and adjustments using shortcuts, keys, delays, macros, text, links, run application, and mouse movements.

Even better, the Profile Creator is easy to use and can be grasped by an absolute beginner.

In other words, you can create Loupedeck “presets” for different editing applications. You might create one Custom Profile for Lightroom and another for Photoshop.

That way, as soon as you open up your editing program, you know exactly what to do, and you can customize the Loupedeck CT to fit your particular workflow.

Now, while casual photo editors might not find the Loupedeck CT appealing, this tool is ideal for anyone who does frequent editing. It’ll allow you to streamline your photography workflow so that you can cut down on editing time and focus on doing what you love:

Taking pictures.

You can purchase the Loupedeck Creative Tool for $ 549 USD.

The post Loupedeck Launches Loupedeck Profile Creator for Creative Professionals appeared first on Digital Photography School. It was authored by Jaymes Dempsey.


Digital Photography School

 
Comments Off on Loupedeck Launches Loupedeck Profile Creator for Creative Professionals

Posted in Photography


Finding Photography Inspiration in Ordinary Places

30 Mar

The post Finding Photography Inspiration in Ordinary Places appeared first on Digital Photography School. It was authored by Simon Ringsmuth.

Finding Photography Inspiration in Ordinary Places Featured image

Photography is filled with highs and lows. One week you might find yourself overflowing with ideas and see photographic opportunities all around you. The next week, you’re stuck in a vast wasteland where nothing seems to be worthy of your camera. Finding photography inspiration isn’t something that requires exotic travel destinations or even fancy camera gear. Often you can uncover extraordinary picture opportunities in the most ordinary of places.

finding photography inspiration
Nikon D7100, 50mm, f/1.8, 1/2000 second, ISO 400. This mockingbird was sitting in a bush near my office.

Inspiration is a tricky thing. While it can come when you least expect it, I have found that you often have to work for it.

If you’re expecting a brilliant photo opportunity to show up on your doorstep, it probably won’t happen. But if you purposely go out in search of photo opportunities, inspiration is usually close behind.

A quote widely attributed to Thomas Edison says that “Genius is 1 percent inspiration and 99 percent perspiration.

The same applies to photography.

Go on a photo walk. Slowly.

This might sound a bit cliché, but the hustle and hurry of everyday life can be a hindrance to photography. If you’re so busy going to and from work, school, the store, and back, it probably seems like you have no time to take pictures.

When a spare fifteen minutes does come your way, the idea of getting out your camera to take pictures can seem more exhausting than inspiring.

finding photography inspiration
Nikon D750, 50mm, f/8, 1/125 second, ISO 900. Saw this snail on the sidewalk while going from my car to my office. I used a +4 close-up filter which I got online in a four-pack for $ 30.

A local photo walk can be just the ticket to newfound photography ideas and inspiration. It doesn’t have to be expensive, fancy, or exotic. Instead of spending lots of time and money on a bipedal picture-taking excursion, try just going out your front door and walking down the block. But here’s the trick: go slowly.

The pace of my photo walks has changed over time from a steady gait to almost a crawl. Not literally of course, but you have to tell yourself that your goal isn’t to cover a lot of ground or get your steps in for the day. It’s to look for picture opportunities, often where you never thought you would find them.

Everyday locations like the mailbox, the gas station, the park down the road, or even your own kitchen become fertile ground for inspiration to take root if you keep your eyes open and go slowly.

finding photography inspiration
Nikon D7100, f/2.8, 200mm, 1/1500 second, ISO 100. This was literally in my own back yard.

Your daily locations might not seem exotic to you because you see these things every day. A visitor would see familiar objects with fresh eyes, and the trick to taking this approach is to try to emulate that perspective. Just because you see everyday objects as ordinary and unworthy of photographs, doesn’t mean they can’t lead to flashes of inspiration.

The next time you feel stuck in a photographic rut, take a short, slow walk around a familiar setting and try to see it with a fresh set of eyes. You might be surprised at how things can transform from familiar to phenomenal.

And, even everyday objects can be used for finding photography inspiration.

finding photography inspiration
Fuji X100f, 23mm, f/3.6, 1/30 second, ISO 400. This is just a washing machine still spinning after I opened the lid. I was inspired when I saw it whirling, and I really like the photo I was able to get.

Photograph like you just don’t care

One thing that prevents a lot of people from taking more photos is the thought that they might look silly doing it. I’m as guilty of this as anyone, and most times when I am out with my camera, I feel completely awkward and self-conscious. I feel like the whole world is staring at me, pointing and laughing at the weirdo with a camera taking pictures of sticks and leaves and flowers!

In truth, that is almost certainly not the case.

In all likelihood, most people don’t really care about someone minding his or her own business who just happens to be carrying a camera.

When was the last time you stopped and stared indignantly at a passer-by harmlessly taking pictures? If those types of people don’t bother you, then you probably aren’t bothering anyone when you’re the photographer.

finding photography inspiration
Fuji X100f, 23mm, f/16, 1/30 second, ISO 200. This cyclist probably didn’t even notice I was sitting next to the sidewalk.

This kind of advice is easier said than done, but if finding photography inspiration is your goal, then you have to stop worrying about what people think.

Some of my favorite pictures I’ve ever taken were in ordinary places like parks or downtown areas filled with people. And, not once has anyone ever told me I was bothering them.

Make sure you’re not being rude, obnoxious, or intrusive when taking pictures. If you’re just being a nice person and not bothering anyone, you can be almost entirely certain that no one will think twice about your presence. If they do, they probably think you’re some kind of fancy artist who clearly knows a lot about photography!

finding photography inspiration
Nikon D200, 50mm, f/1.8, 1/50 second, ISO 400. I felt incredibly awkward and self-conscious taking pictures in a library. I wasn’t harming anyone, and I ended up with a few photos I really liked. It turned into a fun and inspirational experience!

Don’t try to take good photos

This took me a long time to learn, but it’s a lesson that has repeatedly made a big difference for me.

Years ago when I started getting more involved with photography, I thought only great photos were worth taking. I constantly passed up photo opportunities because I didn’t think the results would be worth the effort, and wouldn’t lead to any sort of photography inspiration.

What I learned was that inspiration takes the exact opposite approach! The images I thought were boring, mundane, or just flat-out bad taught me how to improve my photography by leaps and bounds. By examining my bad photos, I was able to understand why they were bad. They helped me learn how to take good photos as a result.

finding photography inspiration
Nikon D200, 50mm, f/2.8, 1/1000 second, ISO 200. This is one of the most boring photos I can recall taking. It’s just not very good. But it taught me a lot about what does make a photo good.

There’s an old saying, Don’t let a perfect plan be the enemy of a good plan. It applies in a variety of situations, particularly photography.

If you’re waiting for inspiration to strike because you are seeking the perfect image, you might be waiting a very very long time. Try the opposite approach instead: take lots of pictures that aren’t great, and see what they can teach you along the way.

Another thing to consider is the sheer enjoyment of the art.

Stop thinking of your images in terms of objective quantification. Learn to value process over product! It’s the repeated practice of process that leads to superior products.

Take pictures because you enjoy it, not because you think the end result is good or bad. Enjoy the journey, take pictures just because you like it, and let that be your source of inspiration.

finding photography inspiration
Nikon D200, 50mm, f/1.8, 1/125 second, ISO 200. I shot this photo years ago just for fun, and I still think about it when I go up and down stairs in tall buildings.

Take a social media hiatus

While social media sites like Instagram can be a boon to photographers, they can also be a curse.

Finding photography inspiration online can seem like a no-brainer: just follow some accounts with brilliant photos and you’ll surely get ideas for your own!

In reality, what often ends up happening is we compare our own photos to others and conclude that we just don’t measure up. All the other pictures look so amazing, so detailed, so colorful, and so full of life! Yours, by contrast, seem dull and lifeless. Worse, your pictures (even ones that you thought were awesome) only got a handful of likes, hearts, or thumbs-up. Meanwhile, someone else’s shot of breakfast cereal got a thousand. It’s just not fair!

finding photography inspiration
Fuji X100f, 23mm, f/16, 30 seconds, ISO 200. I worked hard to get this shot, and it only got 21 likes on Instagram. If I measured my value as a photographer by social media standards, no way would I ever keep going.

Social media can be inspiring, but just as often it can be downright demoralizing.

The solution?

Get rid of social media!

Don’t delete all your accounts, but turn off notifications for photo-sharing sites and move those apps to the neglected depths of your phone screen. Log off social media sites on your computer, and stop measuring your worth by likes and upvotes.

This has consistently been one of the most effective ways of finding photography inspiration for me. Temporarily shutting out social media, removes any temptation to take photos for online accolades and attention. I start to take pictures that are interesting, challenging, or fun. Then I soon find inspiration flooding back.

finding photography inspiration
Nikon D200, 50mm, f/1.8, 1/2500 second, ISO 200. I shot this long before I was sharing photos on social media. It’s nice to return to those halcyon days sometimes.

Conclusion

Finding photography inspiration isn’t always easy, but it can be simpler than you think. It doesn’t have to involve a lot of time, money, travel, or fancy camera gear either.

Inspiration can come in ordinary ways from ordinary places, and lead to some outstanding results.

What about you? What are your favorite ways to get inspired as a photographer? Share your thoughts in the comments below.

The post Finding Photography Inspiration in Ordinary Places appeared first on Digital Photography School. It was authored by Simon Ringsmuth.


Digital Photography School

 
Comments Off on Finding Photography Inspiration in Ordinary Places

Posted in Photography


Lomography launches new high-contrast, ISO 8 panchromatic 35mm film stock

30 Mar

Lomography has announced the impending release of Fantôme Kino B&W ISO 8, a new high-contrast black and white 35mm film stock.

The panchromatic film is cut from a roll of German cinematic production film, according to Lomography, who calls it a ‘monochrome masterpiece [that] evokes the theatre in your everyday.’ As the ISO speed in the film name suggests, this isn’t exactly a high-speed film. So, to help you figure out how best to use it in nearly any 35mm camera system, Lomography has provided this handy exposure and development guide.

Below are a few sample photos provided by Lomography:

$ (document).ready(function() { SampleGalleryV2({“containerId”:”embeddedSampleGallery_7904848315″,”galleryId”:”7904848315″,”isEmbeddedWidget”:true,”selectedImageIndex”:0,”isMobile”:false}) });

The film is set to start shipping in June 2020, according to Lomography. You can pre-order it now for 20% off, in a 5-pack ($ 35.60) or 10-pack ($ 71.20). Lomography is also offering ten photographers the chance to test the film before it launches publicly. All that’s required to be considered is to fill out this Google Form.

Articles: Digital Photography Review (dpreview.com)

 
Comments Off on Lomography launches new high-contrast, ISO 8 panchromatic 35mm film stock

Posted in Uncategorized


Why the Fujifilm X100V is one photographer’s perfect camera for the streets

29 Mar

Introduction

Recently, Fujifilm released its fifth-generation Fujifilm X100V camera, an update that has been two years in the making. By now there are a lot of reviews out there, but my goal here is to focus on why I believe this is the best camera on the market for street photography. The X100V works really well as an everyday travel camera and even as a daily a cityscape/architecture camera, but I think that street photography is in the camera’s DNA.

I’ve been using the X100 since the first version, released in 2011, as my everyday camera and my primary street photography camera. Since then, it has transformed the way that I work as well as the quality of my work. Full disclosure: Fujifilm provided me with a loaner camera to review.

How the original X100 transformed street photography

The original X100 rocked the photography world in 2011. It embraced the design and ergonomics of old rangefinder film cameras and combined them with a cutting edge hybrid viewfinder and excellent image quality. And the cost was fairly affordable considering everything that was packed inside it.

While a few other camera companies had come close, no company had yet to put together such a small, tight, and refined (after some firmware updates, admittedly) street photography camera. Many photographers began to ditch their SLRs and prime lenses for the X100 and its later models.

And while many companies have created incredible cameras for street photography, most of them have a significant flaw or two that hold them back in some way (or they cost $ 10,000). I still don’t believe there is a camera company out there that has put together the entire package for street photographers in the way that Fujifilm has. It continues to lead the pack.

What’s new in the X100V?

The X100V comes with a host improvements over the previous models, including:

  • More reliable autofocusing: This may be the major reason for upgrading the camera for some of you.
  • New 26.1-megapixel sensor (shared by the X-T3): You get a modest resolution bump and much faster readout speeds.
  • Newly weather-resistant body: You will need to purchase an attachment to make the lens itself weather resistant, but I have shot significantly with older versions in the rain with an umbrella and never had an issue with it getting fairly wet. A weather-resistant body would make me even more comfortable in doing so.
  • Newly developed lens: The lens redesign is two years in the making and improves corner sharpness and close-distance focusing.
  • Slightly sleeker design: Streamlined lines and new top and bottom aluminum plates with a satin finish make the camera even more aesthetically appealing.
  • Two-way tilting screen: The screen is so thin, you hardly know it can tilt.
  • Updated hybrid viewfinder with a new OLED panel.
  • 4K Video: For any street photography videos you may want to make.

Now let’s take a look at why I think the X100V is perfect for street photography.

Size and ergonomics

While the benefit of the Fujifilm X100 series is its complete package of features, the size and ergonomics of the camera are what stand out the most for me. With its very compact 23mm (35mm equivalent) lens, the camera is tiny and a pleasure to carry around all day. It is both inconspicuous for street photography and light enough that it allows you to photograph in a quicker and more spontaneous manner.

The X100V just makes you want to take it outside and walk around all day

The camera has dials for all the major camera functions, which makes it easy to change your settings on the fly without going into the menus. The viewfinder allows you to move between an optical view and an electronic view, which I do frequently depending on what I am shooting.

The X100V just makes you want to take it outside and walk around all day. And it’s tough to understate that, because that’s really the key to street photography: getting out there with a camera consistently and having as much fun as possible.

Image quality

Part of the genius of the X100-series is the restraint that they showed in building it. The choice to have a fixed lens and an APS-C sensor could have been thought to have been features that held this camera back, but instead, they were the features that defined this camera. Both choices allowed it to hit a perfect mix between size and image quality. The photos that come out of it look great and I easily feel comfortable blowing them up to giant sizes, even at remarkably high ISOs.

I find that the colors and black and white tones that come out of this camera are nothing short of remarkable, and in recent years Fujifilm has provided a wide variety of color and black and white profiles that allow you to create a variety of looks depending on your style and the particular image you’re working with.

High ISO and autofocus

I’ve found the X100V to be a beast for night photography, whether it’s street or architectural. I tested this camera up to ISO 6400, and found the noise was fairly minimal. The photographs were sharp as well. I would certainly be comfortable printing ISO 6400 photographs and I would even be comfortable using ISO 12,800 in a pinch. The level and look of the noise in the newest version of the X100 is something that I could not have imagined even five years ago.

Mix the ISO capabilities with the size and inconspicuousness of the camera, and shooting street photography at night is so much easier. In general, street photography at night is incredibly hard to do, but this camera speeds you up enough to significantly lessen some of the primary constraints with night street shooting.

Autofocus, what was originally one of the main issues with the first X100 camera in 2011, is now one of its strengths. The X100V has incredibly reliable autofocusing and performs remarkably well for a camera of this size. It’s still is not as fast as an SLR, of course, but with each new iteration, they get closer.

Lens(es)

The Fujifilm X100V comes with the option to purchase 50mm equivalent and 28mm equivalent attachment lenses. I’ve found that 35mm and 50mm primes are my bread-and-butter focal lengths for street photography: wide enough to get close and intimate while showing a lot of background, but not too wide. Many street photographers love to use a 28mm equivalent as well, although that is usually too wide for me unless I am on a very crowded street corner.

The act of using a prime lens like this has allowed me to capture so many more split-second moments than I would have missed otherwise. With a zoom, I feel like I am a part of the camera, but with a small prime, I feel like the camera is part of me.

Battery life

The battery life over the last few versions is remarkably improved, particularly for a camera of this size. I still find that I need three batteries for an active day of shooting, but the battery life has been turned from a detriment to a benefit over the five generations of this camera.

Street photography settings and tips

While I think that the silver version of the camera is the prettiest, people tend to notice it frequently. It still works great for street photography, but I suggest getting the black version, which is more inconspicuous and gets fewer comments.

The X100V has a leaf-shutter, so is already very quiet, but you can disable all other sounds and enable an electronic shutter for completely silent shooting. This is particularly helpful for indoor and especially quiet situations.

I also lengthen the time that it takes for the camera to go to sleep. I find this option necessary since the camera will go to sleep occasionally just as a fast-moving moment appears out of nowhere The ‘Boost’ option also enables even faster autofocus speeds. Both of these options will significantly reduce the battery life, but with three batteries, you should have more than enough for a full day of busy shooting.

Street photography accessories

While Lensmate has not yet released a thumb-grip for the new design of the X100V (here it is for the X100F), I’m sure one is coming soon. This type of thumb grip makes the camera much easier to hold, particularly with one hand.

I also find that a soft release button makes the camera more comfortable and sensitive to shoot with: My personal favorite is the Abrahamsson Mini Soft Release. Purchase a couple of these because they can unscrew in your bag and get lost easily. I lose one a year usually and I’m very careful.

The overall aesthetic of Gordy’s camera straps goes very well with the camera and are incredibly comfortable. I typically keep the strap shorter than normal to keep the camera higher on my chest, which makes it easier to shoot quickly with and isn’t bothersome since the camera is so light.

Conclusion

The X100 series has been around for almost 10 years now, and it only gets better as Fujifilm works to find smart and subtle ways to improve it and the photos that come out of it without straying from the initial spirit of the camera.

I’ve found that the Fujifilm X100V has helped turn me into a more spontaneous street photographer. I can react faster, am able to manipulate the camera easier, and have gotten really in-tune with the fixed focal length. If you decide to get one for yourself, I think you’ll feel much less self-conscious and afraid of getting close and intimate with your photographs.

The combination of all of these factors has allowed me to capture images that I would not be able to come back with before. And to be honest, I don’t know what camera I would use for street photography if the X100V didn’t exist. I can’t say I would be as happy or comfortable with any other.

Articles: Digital Photography Review (dpreview.com)

 
Comments Off on Why the Fujifilm X100V is one photographer’s perfect camera for the streets

Posted in Uncategorized


How to Use the Luminar 4 Pro Tools Panel

29 Mar

The post How to Use the Luminar 4 Pro Tools Panel appeared first on Digital Photography School. It was authored by Christian Hoiberg.

How to Use the Luminar 4 Pro Tools Panel

Luminar 4 is an intuitive photo editor that’s used by both complete beginners and advanced photographers. Their popular Artificial Intelligence tools such as the AI Sky Replacement and AI Enhance have been talked about a lot, but I want us to take a closer look at the Luminar 4 Pro Tools category.

Don’t be fooled, though. Despite being named ‘Pro Tools’ and containing more advanced tools, most of them are still easy to use. There aren’t any AI tools in this category, so you will need to do a little more manual work.

Luminar 4 Pro Tools

The Professional Tools category is the final tools category marked with the ‘Pro’ icon. Click it to expand the Professional panel and reveal 7 tools.

Let’s take a closer look at the tools in Luminar 4 Pro Tools panel:

The Advanced Contrast Tool

This is a tool that I recommend you learn and take advantage of. In fact, it’s one of my most used tools in Luminar.

Contrast is important in photography, but it can be difficult to apply it correctly. Globally applying contrast can lead to shadows becoming too dark and highlights becoming too bright.

Luminar 4 Pro Tools

The ‘Smart Contrast’ tool (found in the Essentials Tools), does a good job avoiding this by taking the histogram into the equation. But you’ll often want better control over where contrast is introduced.

That’s where the Advanced Contrast Tool comes in handy. It allows you to manually adjust the amount of contrast introduced to specific zones in the photo.

I find that the Highlights and Midtones sliders work best for landscape images. Midtones contrast is something I regularly work on in my images and this is an easy method to do so.

Remember that each image might react differently to these adjustments, so make sure to experiment a little with the sliders before to find what suits a particular image the best.

The Adjustable Gradient Tool

The next tool in the Luminar 4 Pro Tools panel is the Adjustable Gradient Tool.

This tool is useful when you want to make a quick adjustment to the top or bottom part of an image. It’s also a useful tool for those who prefer an easy solution, but it lacks the possibility to create multiple gradients in different orientations (for this you need to create different gradients on individual layers).

In other words, this is a good tool for more default adjustments if you just need to darken the sky or desaturate the foreground.

The Adjustable Gradient Tool

Top/Bottom defines which area of the image gets affected by the adjustments. You can use both at the same time – applying individual adjustment settings to areas above the gradient and below.

The smoothness of the transition between the two adjustments depends on the distance between the top and bottom line in the gradient.

Luminar 4 Pro Tools

The Dodge & Burn Tool

Dodging & Burning has been around since the beginning of photography. The fact that it’s still used in the digital darkroom is a testament to its effectiveness and a great reason why you could implement it into your post-processing workflow.

Luminar 4 Pro Tools

Click Start Painting to reveal the Dodge & Burn tool tab above your image. This is where you choose to Lighten (Dodge), Darken (Burn) or Erase the effect. You can also adjust the brush size and intensity.

You can switch between the Lighten and Darken brush at any time. If you want to brighten places in the image, simply click the Lighten button and adjust the brush size and strength.

You can now brush along the areas you want to brighten. Should you accidentally brush somewhere you weren’t supposed to, you can use the Erase option to remove it.

When you’re finished with dodging and burning, click the Done button. You can use the Overall Amount slider to adjust the global intensity of the adjustment. Reduce the amount to lower the opacity of the adjustment.

The Dodge & Burn Tool
Before Dodge & Burn
The Dodge & Burn Tool
After Dodge & Burn

The Color Enhancer Tool

Several tools impact the colors in your photos, but none of them are quite as advanced as the Color Enhancer Tool. Here you get several options that give you precise control over both the global and local colors.

You can target Shadows, Midtones, and Highlights individually by selecting them from the Range Selector buttons. Note that the sliders below are linked to the individual tonal region, allowing you to make adjustments to each of them.

Use the sliders to adjust the balance of the Cyan-Red, Magenta-Green and Yellow-Blue colors. You can use these to, for example, correct the colors in your image or to give a creative look to it.

Luminar 4 Pro Tools

The Photo Filter Tool

Another tool in the Luminar 4 Pro Tools panel is the Photo Filter. You can use this filter to add extra warmth or cool down an image by simulating a color filter placed in front of a camera.

You can apply it in order to make a sunset sky ‘pop,’ or to give your image an artistic look; it all depends on how you choose to use it.

Luminar 4 Pro Tools

The Split Toning Tool

The final tool found in the Luminar 4 Pro Tools Category is the powerful Split Toning Tool. It can be used to either introduce color toning to Black & White images or to add a color cast to the shadows and highlights individually.

Amount controls the overall intensity of the applied color toning.

Highlights Hue lets you adjust the colors found in the bright areas of your image.

Highlights Saturation increases the intensity of the colors in the bright areas.

Shadows Hue lets you adjust the colors found in the darker areas of your image.

Shadows Saturation increases the intensity of the colors in the darker areas.

Balance shifts the balance between highlights and shadows and how they’re affected.

The Split Toning Tool
Before Split Toning
The Split Toning Tool
After Split Toning

Conclusion

The Luminar 4 Pro Tools category contains a bunch of powerful tools that can help take your post-processing to the next level. There’s no need to be intimidated because of its name. However, I do recommend spending some time playing and experimenting with the tools.

Several of the tools can quickly become a bit ‘too much’ and need to be applied with some caution. However, when used right, these are the tools that can help your images stand out from the crowd.

Are you using Luminar 4 and would like to learn how you can create professional-looking images with it? Then make sure to have a look at my popular eBook ‘A Photographer’s Guide to Luminar 4′. Here you’ll learn everything you need about mastering this popular photo-editor.

If you have any questions or comments, pop them into the comments section.

The post How to Use the Luminar 4 Pro Tools Panel appeared first on Digital Photography School. It was authored by Christian Hoiberg.


Digital Photography School

 
Comments Off on How to Use the Luminar 4 Pro Tools Panel

Posted in Photography


The Canon EOS R5 Will Be a 5D Series Mirrorless Camera

29 Mar

The post The Canon EOS R5 Will Be a 5D Series Mirrorless Camera appeared first on Digital Photography School. It was authored by Jaymes Dempsey.

The Canon EOS R5 Will Be a 5D Series Mirrorless Camera News

The Canon EOS R5 has been making waves in recent months, ever since Canon officially confirmed several of its features, including 20 frames-per-second shooting speed, true 8K video, and in-body image stabilization.

However, despite such tidbits, we were in the dark about a number of EOS R5 characteristics, including its price, its resolution, and its position in the Canon mirrorless lineup.

Until today.

While Canon has yet to tell us the R5’s price and megapixel count, we have something that could be just as valuable:

That the EOS R5 is a “5-series” camera. In other words, the R5 is designed for the same users as the Canon 5D Mark IV, Canon’s professional/semi-professional body with all-around capabilities.

This comes straight from Canon’s Product Marketing Specialist, David Parry, whose thoughts on the EOS R5 were published in an interview with TechRadar.

When asked about the EOS R5 design, Parry explained that “because this is a 5-series, more people at that kind of level will expect functions similar to what you get on a 5D.”

Parry went on to say that the EOS R5 is “aimed at [the 5D] level of the market,” though it “isn’t a replacement for the 5D Mark IV or anything like that. But this is a mirrorless 5-series, it’s aimed at that segment of the market.”

What does this mean?

For one, the price tag on the EOS R5 is likely to be in the low $ 3000 USD range (comparable to that of the 5D Mark IV at the time of release). Though it’s possible that the edition of some advanced features, such as IBIS and 8K video, will push the price up to the $ 3500-3800 mark.

You can also expect a similar level of weather sealing to the 5D Mark IV, a camera that’s quite tough, and a resolution of at least 30 MP (but probably significantly higher).

And the EOS R5 should be an all-around professional body, good for landscape photographers, wildlife photographers, portrait photographers, product photographers, and more.

In terms of resolution, assuming the 5D Mark IV offers an aspect ratio similar to that of UHD or Cinema 4K, the EOS R5 must feature 33 MP or more. The 45 MP rumor that recently circulated seems plausible and would be a significant bump up from both the EOS R’s and 5D Mark IV’s 30 MP sensors.

One last thing to bear in mind:

While the EOS R5 was expected to ship this summer, supply chain problems due to the novel coronavirus may delay this launch. At worst, you can expect the EOS R5 before the year is out.

Now over to you:

Would you take the EOS R5 over the 5D Mark IV? What are your thoughts about the camera that the EOS R5 is shaping up to be? Let me know in the comments!

Note: There is a poll embedded within this post, please visit the site to participate in this post’s poll.

The post The Canon EOS R5 Will Be a 5D Series Mirrorless Camera appeared first on Digital Photography School. It was authored by Jaymes Dempsey.


Digital Photography School

 
Comments Off on The Canon EOS R5 Will Be a 5D Series Mirrorless Camera

Posted in Photography


The gear that changed my (photographic) life: Nikon’s 35mm F2 AF-D

29 Mar
My workhorse combo for many years (with a cleaner UV filter, I promise).

I finished my undergraduate degree in visual journalism using a Nikon D80 while many of my peers were using Nikon’s D90, D300 and D700 cameras. I was, shall we say, a bit jealous. The change in overall image quality from the switchover of 10MP CCD sensors to 12MP CMOS sensors in all of Nikon’s camera bodies (both APS-C and full-frame) wasn’t lost on me, and I couldn’t help but think one of those cameras was really the key to making me a better photographer.

They weren’t. I got a fancy, brand-new D7000 when I graduated and got my first real job, and a very well-used full-frame D700 after that. They were great cameras (I still have that D700), but it wasn’t so much the cameras that helped me grow. It was my embracing of prime lenses that pushed me photographically, and chief among them, the Nikkor 35mm F2 AF-D lens which was all but glued to my D700 for years.

ISO 200 | 1/160 sec | F2.8

Up until this point, I thought I needed a decent wide-aperture zoom to cover everything. I felt I needed the versatility of varied focal lengths, and the idea of having a zoom became a crutch I leaned on. The F2.8 constant aperture on the Promaster 17-50mm lens (I swear, all the reviews said it was just a rebadged Tamron) mounted to my D80 helped during Bellingham, WA’s interminably short and dark winter days, but ultimately, it was $ 250 USD down the drain for my photographic journey.

Why? Because I spent so much time shooting at the wide end of the zoom range, trying to fit everything in and capture every essence of the scene in each photograph. By looking at the broader picture, I was missing some of the details.

Once I got that D700 and figured I needed some lenses made for it, I picked up a secondhand 35mm F2 on a whim and discovered that – for myself – I had been shooting photographs wrong a lot of the time.


Nikon 35mm F2 AF-D sample gallery

$ (document).ready(function() { SampleGalleryV2({“containerId”:”embeddedSampleGallery_6642767826″,”galleryId”:”6642767826″,”isEmbeddedWidget”:true,”selectedImageIndex”:0,”isMobile”:false}) });


Framing is everything. We ‘crop’ just about everything in our lives, whether we want to admit it or not. This is a philosophical debate in and of itself, but pretending we’ve come out on the other side of that debate, I quickly found that 35mm lenses provide my eyes with a sense of ‘here’s the most important thing in the scene, but with just the right amount of context’. The photos coming out of this lens and camera combo just felt right.

When I twisted my 35mm F2 D lens onto my D700 and peered through the viewfinder, I found that instead of trying to fit everything in a 26-28mm equivalent frame, I needed to pick-and-choose-and-layer things into my 35mm equivalent view. My photographs improved because of that. I thought to myself, this is a great way to document the world in front of me. I can get used to figuring out how to cut out the ‘fat’ in the image, and focus on the most important bits.

ISO 200 | 1/1000 sec | F8

Fast forward many years, and I still tend to judge a new camera system by whether or not it has a decent and affordable 35mm equivalent prime-lens option. I know that it’s not to everyone’s taste (sorry, Chris, I know you hate 35mm), but with the 35mm F2, my D700 was my carry-everywhere camera for years, and I can honestly look back on my time with it and realize how it helped make me the photographer I am today.


If you have a piece of gear that you’d like to write about, we’d love to hear from you – and you might even get featured on the DPReview homepage. Leave us a short note in the comments and if you have a longer story to tell, send it to us, and we’ll take it from there.

Articles: Digital Photography Review (dpreview.com)

 
Comments Off on The gear that changed my (photographic) life: Nikon’s 35mm F2 AF-D

Posted in Uncategorized


Pet Photography 101 – video

28 Mar

The post Pet Photography 101 – video appeared first on Digital Photography School. It was authored by Caz Nowaczyk.

Taking photos of pets can be tricky. In this video, Matt Granger gives you some great tips to get better photos of your furry friends.

1. Establish the scene

Decide on what you want in the scene. Less is generally more, so you may just decide on a nice clean background to really let your pet shine.

2. Use sufficient depth of field and shutter speed.

Ensure you have a wide enough depth of field to get your pet’s entire face in focus. Also, use a fast shutter speed. If your shutter speed is too slow, you may end up with some blur if your pet moves suddenly (and we all know they do!).

Use a flash so that you get enough light into the scene. That way, you can keep your shutter speed fast, and your aperture wide.

Alternatively, consider photographing them outdoors in sunlight to really make their fur and eyes shine.

3. Bribery

You need to get your pet where you want them to be for the shot. To do this, you may need to use a little bribery. This can come in the form of treats.

Have your camera set and your focus ready, and once they get into position, you can fire off some shots knowing that they will be in focus.

4. Get their attention

Once you have bribed them into the position, you need to get their attention so that they look in the direction of the camera.

You know your pet, so use whatever you know will get their attaention – be it their favorite toy, or simply tapping the lens hood.

5. Be patient, and review your shots

Don’t set up a scene that is really unnatural for your pet. Use something that they are used to sitting on so that they are comfortable, and so you are not forcing the scene.

Don’t always expect to get it right on the first attempt. Take many shots to get the one you like.

And, moreover, have fun with your furry friends!

You may also like:

  • How to get the “Money Shot” in Pet Photography
  • 9 Pet Photography Tips
  • Photoshop: Red Eye Fix for Difficult Cases in People and Pets
  • Five Things You Need to Know Before Starting a Pet Photography Business
  • 8 Tips for Better Pet Photography

The post Pet Photography 101 – video appeared first on Digital Photography School. It was authored by Caz Nowaczyk.


Digital Photography School

 
Comments Off on Pet Photography 101 – video

Posted in Photography


DPReview TV: Mirrorless and DSLR microphone pre-amp shootout

28 Mar

We invited a professional audio engineer to test the microphone pre-amps in cameras from Canon, Nikon, Sony, Panasonic, Fujifilm and Olympus. Find out which ones deliver the best sound.

Subscribe to our YouTube channel to get new episodes of DPReview TV every week.

  • Introduction
  • What is a pre-amp?
  • The cameras we tested
  • Recording an ideal signal
  • Recording and boosting a weak signal
  • Recording a hot signal
  • The rankings: from worst to first
  • Conclusion

Articles: Digital Photography Review (dpreview.com)

 
Comments Off on DPReview TV: Mirrorless and DSLR microphone pre-amp shootout

Posted in Uncategorized