RSS
 

Archive for April, 2016

Announcing the All Things Photo Podcast

28 Apr

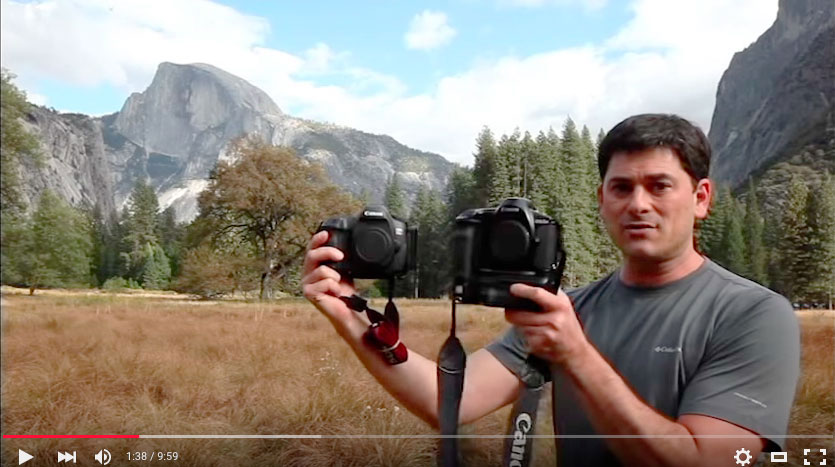
I’m happy to announce that I’ve launched a new podcast titled All Things Photo with Eric Cheng. Between the two of us we have decades of professional photography experience and a unique perspective as industry insiders, Eric with DJI & Lytro and myself with BorrowLenses. Unlike other podcasts this series will also include video vignettes above and beyond our recorded discussions. I welcome you to subscribe on iTunes (listing soon to be available) and subscribe to the All Things Photo YouTube channel. There is a lot still to be done getting the podcast off the ground (including decorating my office), but content begins flowing today.

All Things Photo #1: Lightroom 6.2 Troubles + Light L16 Camera Impressions
Hyped concerns and expectations…

  1. Lightroom releases a buggy update that revamps the beloved Import screen and sparks widespread ire amongst photographers.
    Warranted or overblown?
  2. Light announces the L16 camera promising in camera processing, wifi capabilities, depth of field control and a wide range of optical focal lengths (35-150mm). What we saw at the Light L16 camera launch party in San Francisco.

Additional Content
Essential Resources to Back Out of a Lightroom Upgrade – JMG-Galleries.com

Lightroom 6.2 Release Update and Apology – Adobe Lightroom Journal

Previous import experience to be returned – Adobe Lightroom Journal

Adobe Lightroom Import Screens Before and After – Petapixel

Light.co L16 Camera web site – Light.co

Light L16 Camera promotional video – Vimeo

The Light Story (video) – Vimeo

Robert Scoble Interview of Light CEO Dave Grannan (video) – Facebook

Read more at http://allthingsphoto.libsyn.com/allthingsphoto-1-lightroom-62-troubles-light-l16-camera-impressions#3bUZtXh236Oc2k2E.99
If you’re interested in joining our podcast mailing list visit All Things Photo, our site will be up shortly (much quicker than displayed)

The post Announcing the All Things Photo Podcast appeared first on JMG-Galleries – Landscape, Nature & Travel Photography.


JMG-Galleries – Landscape, Nature & Travel Photography

 
Comments Off on Announcing the All Things Photo Podcast

Posted in Equipment


Color Underfoot

28 Apr
Fallen Aspen leaves with water droplets resting on melting snow

Fallen Aspen leaves with water droplets resting on melting snow

Photographing Fall Color took an interesting turn when snow fell in the mountains above Bishop, California a couple of weeks ago. While the colorful leaves in the trees above me were an obvious choice to photograph I first chose to capture the contrast between colorful leafs past their prime against the snow. To me this photo exudes silence & calm, the quiet after a battle against the elements.

Photo Details
Canon 5Ds R, Canon EF 70-200mm f/2.8 IS USM at 70mm, ISO 160, 1/160/sec at f/8

The post Color Underfoot appeared first on JMG-Galleries – Landscape, Nature & Travel Photography.


JMG-Galleries – Landscape, Nature & Travel Photography

 
Comments Off on Color Underfoot

Posted in Equipment


How Far We’ve Come: Canon 5DS R (2015) vs Canon D2000 (1998)

28 Apr
Canon DSLR comparison between the Canon D2000 and the Canon 5DS R

Over on my YouTube channel All Things Photo I’ve released a video looking at how far DSLR technology has come in 17 years by comparing the first Canon branded DSLR circa 1998, the Canon D2000,  to the latest Canon DSLR, the Canon 5DS R.To my surprise the D2000 still has some tricks up its sleeve!

The amusing thing about creating this video is that it took me down memory lane as to why I held out until 2006 to dive in on buying a very expensive DSLR. I held out on shooting film to avoid unacceptable digital noise in long exposures and to continue shooting full frame.  Now its amusing looking back at how bad things were, but I take solace in having more than decent alternatives. It’s good to remember back to the pain points of old school DSLRs to appreciate how good we have it today.

The post How Far We’ve Come: Canon 5DS R (2015) vs Canon D2000 (1998) appeared first on JMG-Galleries – Landscape, Nature & Travel Photography.


JMG-Galleries – Landscape, Nature & Travel Photography

 
Comments Off on How Far We’ve Come: Canon 5DS R (2015) vs Canon D2000 (1998)

Posted in Equipment


How to do a Simple Inexpensive Setup for Newborn Photography

28 Apr

When I first started taking on clients, as a new photographer I thought newborns would be my favorite. They seemed so easy, lying around, ready to be molded into any pose I desired, nothing to it. Fast forward five years and hundreds of dollars later, they are still my favorite, but I’ve wasted a lot of money, sweat, and tears trying to figure out how to do it correctly. If you are just starting out, either with new clients, or your own baby, this article is for you, before you throw away a lot of money.

How to get started doing newborn photography

Newborn

Keep it simple with props

I figured to get the cutest newborn portraits I needed lots of hats, bows, blankets, and baskets. Then I needed colors that worked for boys, and ones that worked for girls. I bought tiny cribs, and big wooden letters to match the baby’s first initial of his or her first name. My house was so cluttered with photography gear we weren’t able to house our guests in our guest room, and I’m not even done.

I had a fake wood floor that was made of paper so I also had a pull out shelf from our armoire that was big enough to support the fake floor on the carpet. I had heaters, and backdrop stands, and so many blankets and backdrops they over took me. Every time I read an article about a photographer and what gear she used to get ONE specific photo, I would hunt down those items for myself. They mentioned she used rolled up receiving blankets under the baby’s head? Fire up Amazon, I need to get myself some of those. When would I be satisfied? I wanted to spend money on lenses, and photography classes, but I was so sure one more prop would produce the most amazing baby portrait, so that’s where all my money went.

Last year I read a photography article called, Less is More. It opened my eyes. It struck me that the baby is the art, not the props. The props will probably date your photograph (have you seen the photos that are black and white except for a red rose in color?). But a baby, on a simple background, with only the simplest of accessories, will be stunning, because of the baby. That is why I’m here to tell you, save your money, especially if you’re just starting out. You can achieve phenomenal photographs of babies with only the very basics, and it’s so much easier than trying to fit her into that basket while trying to keep her asleep!

Scarf

Setup

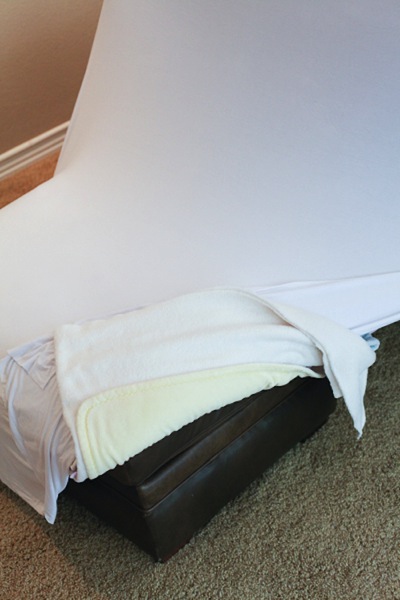
First of all, you need something to put the baby on. If you are working on posing the baby (versus lifestyle photography which requires no posing), you need something that is slightly malleable. Many professional photographers buy expensive beanbags, but you don’t need that. I actually use a leather ottoman we have here in our house, and when I do sessions at client homes I bring it with me.

Of course, last week I forgot to load it in my car for a newborn session. I got to the house and realized it was missing. They didn’t have any ottomans of their own, so instead I pulled the two large bottom cushions off their couch and stacked them on top of each other. For both the cushions and the ottoman I layer multiple blankets on top of each other. In between the blankets I have a few layers of waterproof sheets that are leftover from my own children, and a heating pad. The multiple layers of blankets make it soft and pliable, and the top few layers are the various backdrops I use to photograph the babies on, so I just keep removing layers for the different backgrounds (see below).
Ottoman

I only shoot on black, white, and cream. I have gotten away from colored blankets, but that’s my choice. I used to have colored blankets as well, and you may still want that, but don’t buy the expensive options off of etsy, use blankets you already own. I do recommend neutral colors though because bright reds, pinks, and greens can cause colorcasts on baby’s skin.

Positioning the baby

The stack of blankets help the baby to sink down a little bit if you want her to, and I also bought a stack of white washcloths from Costco, that I bring with me to roll up and stick in between the blankets and the baby to get her propped and curled exactly how I want her. A boppy (feeding pillow) under a blanket may be a good way to get some of the poses you want, and I’ve found that if you can’t use a boppy, another good option is a neck pillow like you’d use on the plane. I actually prefer that to the boppy because it’s small, and perfectly sized for a baby’s body, so it helps keep the baby propped in place if you lay her on her belly with her arms and head resting on the pillow.

Gear

Background

I like a continuous look for my backdrop, so I use the same material under the baby and stretch it up to create the background behind the baby. I own a stand that I bought for the purpose of holding up backdrops (or you can make your own), but you don’t need one of those. Invest in some heavy-duty clips, and you can pin up the material or blanket to anything above the baby. I’ve used bed frames, chair backs, stepladders, tables, etc., it’s just a matter of looking around you to see what will work. When I’m at a client’s house I pull stuff from all over the house to use during the session. I always put it all back the way I found it, and no one has ever had any issues.

Setup

Lifestyle or unposed photography

So I mentioned lifestyle photography. It’s something that is becoming ever more popular. Essentially, it’s about capturing photos without posing the family too much. Of course you will set the scene. You might move some furniture around, lay a blanket on the ground, and tell the family members where to sit or stand. But beyond that, you let them sort of do their thing. The photos are natural, realistic, and lovely. But I think lifestyle alone is not enough when we’re talking about newborn photos. Of course they are easier, and require almost no additional props at all, but most people want at least two or three posed photos of the baby alone.

Details

Accessories

Now for the accessories. Again, you don’t have to spend a ton of money on this stuff, and believe me, it’s easy to rack up a pretty big bill once you start purchasing. My favorite backdrop is a stretchy knit fabric that when smoothed over my blankets, has no wrinkles. I bought it at a craft store. I also bought an extra, smaller piece of the same fabric to wrap the babies in. I love the continuous look. But if you don’t want to buy anything at all, look around – you probably have some scarves, shawls, or small baby swaddling blankets you can use. I’m not a huge fan of big bows, but I do like small tiebacks. You can purchase one of two of them, or make your own with some twine and pretty beads.
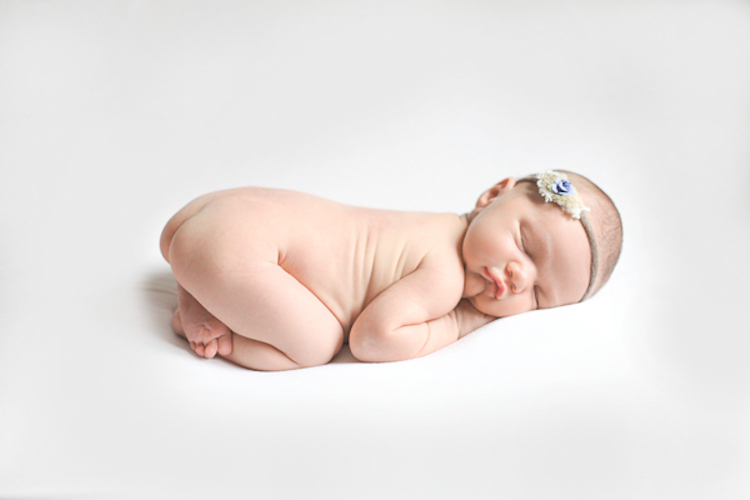
Tieback

Once you start looking around at what you already own, I bet you can find many different options for positioning, backdrops, and wraps. To add some variety you can purchase some scarves, head ties, or small pieces of material at the fabric store that won’t set you back a lot of money, but will bring the needed variety in your photos.

Good luck, and remember it’s the baby you’re trying to capture, not the props. Don’t forget those long eyelashes, those tiny toes, and those perfect pouty lips.
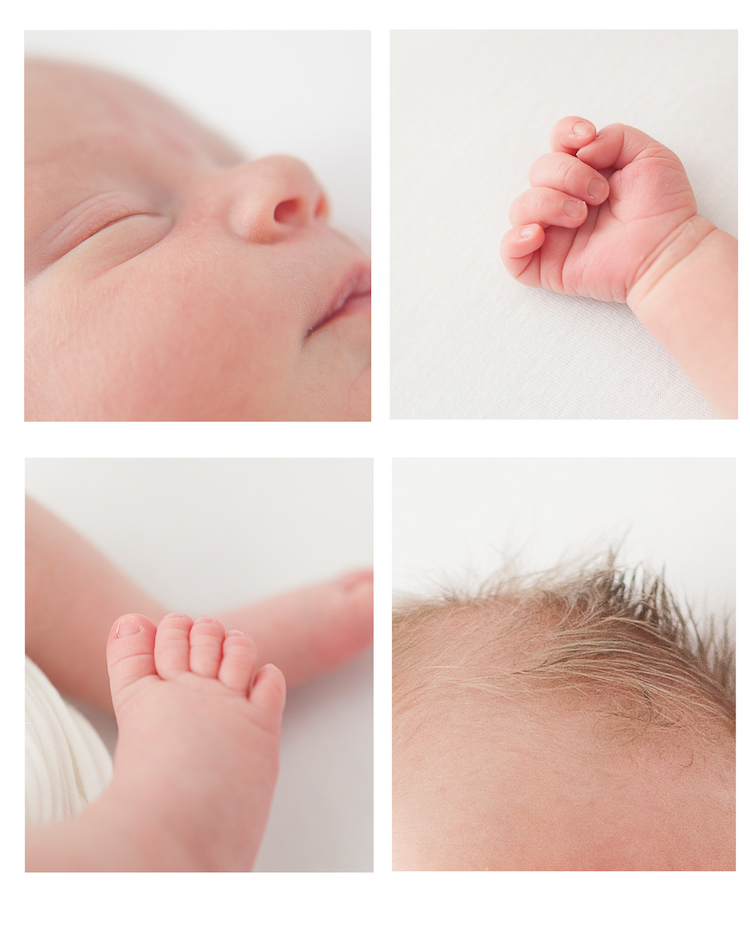
Small details

People photography week

This week on dPS we’re featuring articles all about different kinds of people photography including portrait, event and travel photography. See all the previous ones below, this article is the last one in the series.

  • How to Take Low Key Head-shots
  • How to Do a One Light Portrait Setup and Use it as Your Back-up Plan
  • Travel People Photography – Tips and Pitfalls
  • 8 Tips for Photographing Men
  • 24 Diverse Images That Showcase People Photography
  • Weekly Photography Challenge – People Photography
  • Tips for Getting Yourself to Relax as a Photographer and Have More Successful Portrait Sessions
  • 5 Good Reasons to Add People into Your Landscape Photography
  • 6 Must-Have People Shots to Capture When Photographing Corporate Events
  • 4 Tips to Help You Get Started Doing Lifestyle Photography
  • 3 Tips for Photographing Children Without Losing Your Mind

googletag.cmd.push(function() {
tablet_slots.push( googletag.defineSlot( “/1005424/_dPSv4_tab-all-article-bottom_(300×250)”, [300, 250], “pb-ad-78623” ).addService( googletag.pubads() ) ); } );

googletag.cmd.push(function() {
mobile_slots.push( googletag.defineSlot( “/1005424/_dPSv4_mob-all-article-bottom_(300×250)”, [300, 250], “pb-ad-78158” ).addService( googletag.pubads() ) ); } );

The post How to do a Simple Inexpensive Setup for Newborn Photography by Kim Kelley appeared first on Digital Photography School.


Digital Photography School

 
Comments Off on How to do a Simple Inexpensive Setup for Newborn Photography

Posted in Photography


Revisiting Film Photography After 10 Years: The Readjustment

28 Apr
Early morning light illuminates Skyrock and the eastern Sierra Mountains

Early morning light illuminates Sky Rock and the eastern Sierra Mountains

This is the 1st of a 3 part series on my experience jumping back into film photography after a 10 year hiatus focusing purely on digital photography.

The Camera
10 years ago I vowed I’d never shoot film again. I enjoyed shooting film to a degree, but compared to digital it became unnecessarily onerous. Back in the day I was shooting 35mm and medium or large format photography was both imposing and expensive. As much as I said “never again” to film there was a 0.01% chance I might jump back in, but it would only happen if I ever landed a very special camera. In the late 90’s I always dreamed of owning Fuji 6×17 medium format film cameras. They were used by top landscape photographers and produced amazing panoramic photos. These cameras and their lenses are so good it’s one of the few film camera systems that have held their value the longest. Fast forward to 2013, I set up an eBay alert for GX617 cameras in the event the right camera at the right price surfaced. It only took a couple of years but earlier this year the right camera finally surfaced. I found someone selling a pristine Fuji GX617 with a 90mm lens (20mm equivalent for 35mm cameras) and 50 plus roles of 120 film. Even still it was a bit of a hit to my budget, but I finally took the plunge.


A photo posted by Jim Goldstein (@jimgoldstein) on

Fundamentals
This Fall when I decided to dedicate a trip to using my new 6×17 camera I started to wonder if I’d be able easily transition back to film photography. On one hand I didn’t want to waste any of the film I acquired (Fuji Velvia 50 & 100) and on the other I was concerned I’d take a hit to my pride feeling like a beginner again. As I dove in using the camera it became clear that my nerves were unwarranted in this area. A firm understanding of photography fundamentals will take you far no matter what system you use.

That said the Fuji Gx617 is very different than a modern DSLR and if there was anything that made me feel like a beginner again it was my lack of familiarity with how this camera functioned. The camera doesn’t have a mirrored viewfinder to preview your composition. Instead it has a dedicated viewfinder for each lens to approximate what will be exposed. The lenses are focused based on the approximate distance of your subject from the camera. Aperture is set manually with levers. A roll of 120 film produces 4 exposures and changing lenses mid-roll is not an option as it will expose the entire roll of film. Becoming reacquainted with manual photography versus relying on a variety of automatic systems we take for granted every day with 35mm DSLRs was quite eye opening.

Methodology
If any one thing tripped me up in my use of the Fuji GX617 it was establishing a routine to avoid basic mixups on selecting my camera settings. Even compared to my 35mm film SLR this was quit an adjustment. Film and digital SLRs enjoy a certain degree of automation where as a camera like the GX617 requires every setting to be made manually. After a couple slip ups I finally established a routine of composing my subject with the “external” viewfinder, check distance, set lens focus, using a light meter to determine exposure settings, set aperture, set shutter speed, and finally tripped the shutter via a cable release.

It all sounds logical, but being new to the camera it took some time to get this routine down. Distractions were plentiful so more than a few exposures were lost as a result of breaking from this routine. Sometimes the basic step of recomposing my next shot was enough for me to miss a basic setting adjustment. Complicating things further was retraining my brain to visualize how each focal length and aperture setting will translate to the medium format look versus 35mm. As an example 300mm on this system equates to 73.5mm on a 35mm system. Also depth of field is different for equivalent aperture settings.  The fun was in the discovery.

Intent & Purpose
One thing that I found incredibly refreshing while using the Fuji GX617 was how the manual settings helped me slow down and connect with my subject more. The manual operation of the camera granted me time to take in my surroundings, more thoroughly observer my subject and feel more connected with Nature.  I was far less prone to jump into a scene, rapidly setup & fire off shots and then bolt to the next location. The combination of camera adjustments taking time and only having 4 exposures to a roll put me in a mindset of wanting to get the most out of the location I was photographing. If I was going to use a precious frame of film and devote the time to set up I made sure that my image was going to not just expose correctly, but connect with viewers & myself. The end result was a much more thoughtful effort with less wasted time and film that produced higher quality results.

Continue on to Part 2 in this series – Revisiting Film Photography After 10 Years: Composing Through New Eyes

The post Revisiting Film Photography After 10 Years: The Readjustment appeared first on JMG-Galleries – Landscape, Nature & Travel Photography.


JMG-Galleries – Landscape, Nature & Travel Photography

 
Comments Off on Revisiting Film Photography After 10 Years: The Readjustment

Posted in Equipment


Walk on the Wild Side: 13 Crosswalk Illusions & Interventions

27 Apr

[ By Steph in Art & Street Art & Graffiti. ]

crosswalk dance

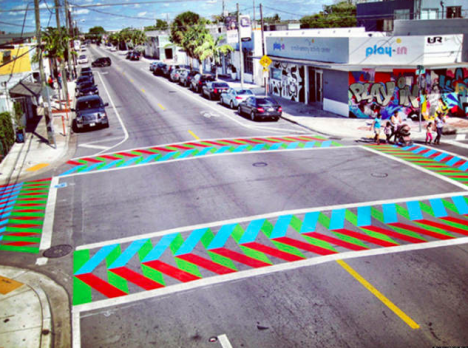
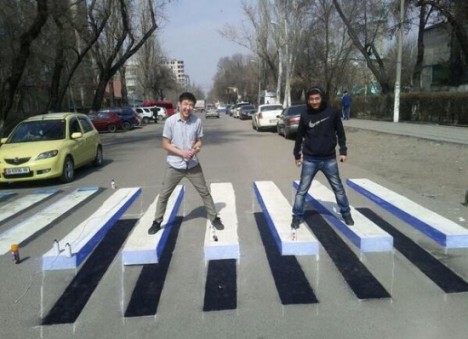
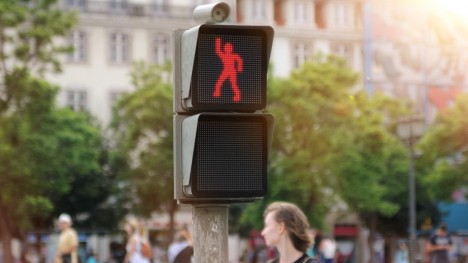
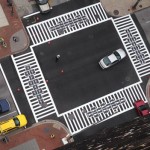
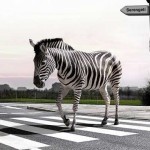
Optical illusions that seem to produce real 3D speed bumps on a flat street may enhance safety by encouraging drivers to slow down, but such colorful crosswalk paintings could soon become extinct in the United States. Now that the Federal Highway Administration started cracking down on anything that distracts from the contrast of bright white crosswalk lines, citing concerns that drivers will get confused, attempts to make intersections more interesting could come to a screeching halt. Bright patterns on asphalt may fade, but other crosswalk interventions will live on, like interactive dancing signals, fist-bump buttons and roll-out guerrilla-style crosswalks for busy areas.

Colorful Crosswalks by Carlos Cruz-Diez
Screen Shot 2016-04-27 at 9.04.17 AM

Screen Shot 2016-04-27 at 9.04.35 AM

crosswalk cruz diez

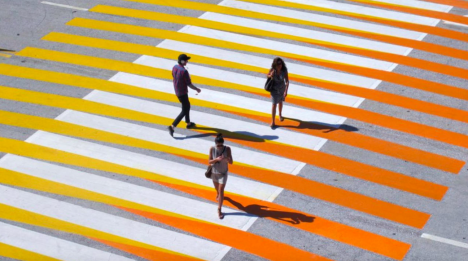
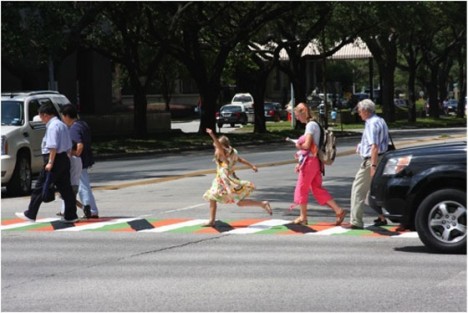
Venezuelan artist Carlos Cruz-Diez has been painting crosswalk interventions since the 1970s, creating potentially disorienting effects for the pedestrians who walk along them. Some of the street paintings seem to morph in color and shape, taking on movements of their own, as you cross. “The daily journey through urban spaces changes our personality and makes us into habitual beings who obey rules that nobody questions,” says Cruz-Diez. “The artist can create ephemeral expressions that, by generating completely new events, transform urban ‘linearity’ and at the same time inject an element of surprise into urban routine. These ephemeral works are a way of producing different readings of urban spaces and of deconsecrating the utilitarian objects of urban furniture.”

Faux Roadblocks Encourage Drivers to Stop
crosswalk 3D safety

crosswalk roadblock 2

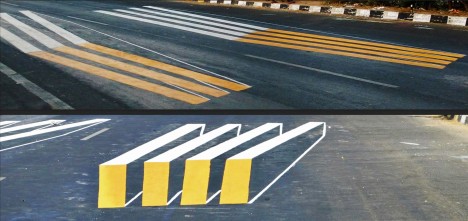
Drivers might actually slow down for pedestrians trying to cross the street if they think their car could get damaged by barreling forward – or at least, so hope two women in India who created this illusion. As you approach the intersection, it looks like there’s a roadblock, but it’s an anamorphic effect. As seen in the second photo, the technique has also been used in China.

Interactive Dancing Crosswalk Signal
crosswalk dance

crosswalk dance 2

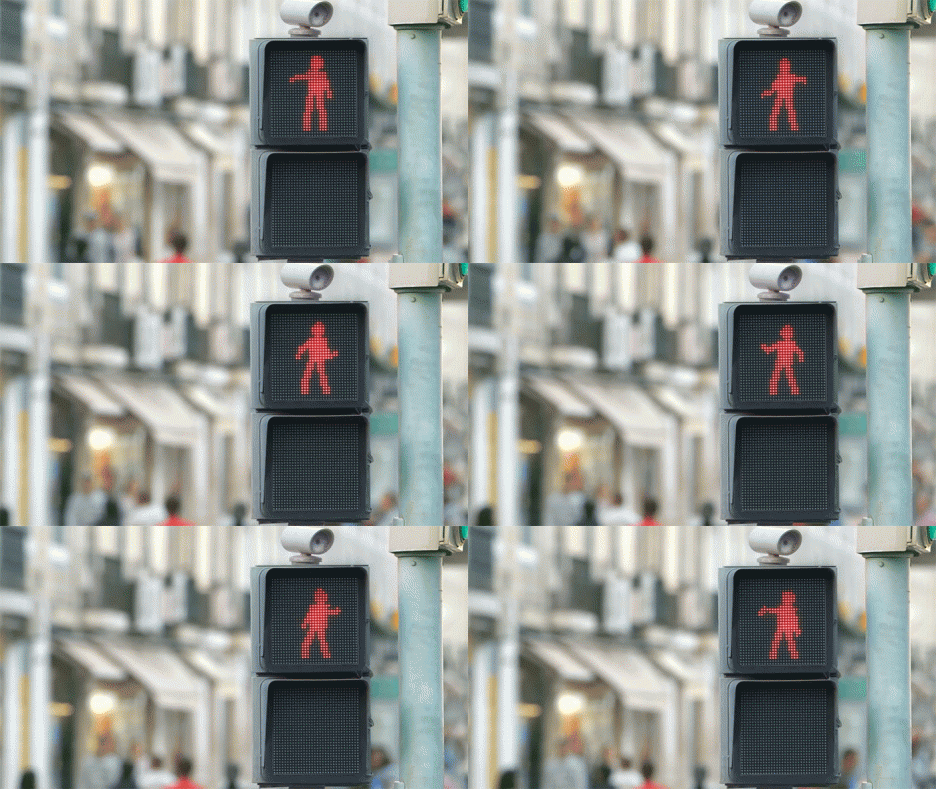
Tiny car manufacturer Smart hopes pedestrians will be so mesmerized by their animated dancing crosswalks signal, they’ll forget to jaywalk. A nearby dancing booth translates the dance moves of passersby into the ‘don’t walk’ silhouette, adding an element of interactivity and making the performance entirely unpredictable. Smart says 81% more people stopped at the light instead of walking out into the street while it was installed.

Virtual Speed Bumps

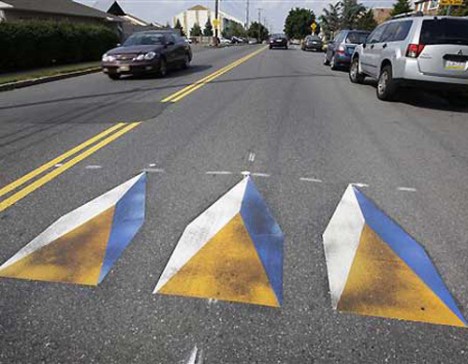
The idea with faux speed bumps like these is to catch drivers’ attention just briefly enough to get them to slow down, but not so much that they cause a traffic disruption. Philadelphia hoped to boost safety in the streets with these triangular 3D markings, which cost a fraction of real speed bumps and require very little maintenance.

Virtual Wall Crosswalk
virtual wall crosswalk

virtual wall crosswalk 2

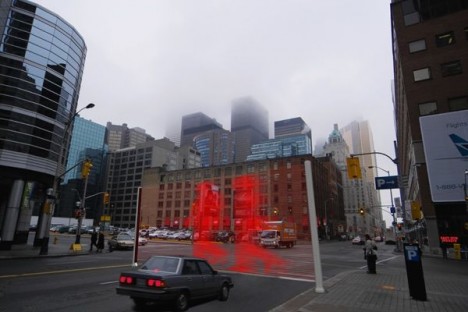
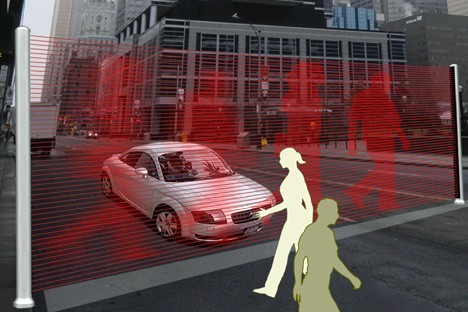
If the illusion of road bumps isn’t enough for you, maybe a virtual wall projected right in front of your car will get you to hit the brakes when approaching a pedestrian crossing. This concept by designer Hanyoung Lee uses plasma laser beams to project oversized pedestrians in front of vehicles, making it very clear that they need to wait a minute before continuing.

Next Page – Click Below to Read More:
Walk On The Wild Side 13 Crosswalk Illusions Interventions

Share on Facebook


[ By Steph in Art & Street Art & Graffiti. ]

[ WebUrbanist | Archives | Galleries | Privacy | TOS ]


WebUrbanist

 
Comments Off on Walk on the Wild Side: 13 Crosswalk Illusions & Interventions

Posted in Creativity


3 Tips for Photographing Children Without Losing Your Mind

27 Apr

photographing-children-9

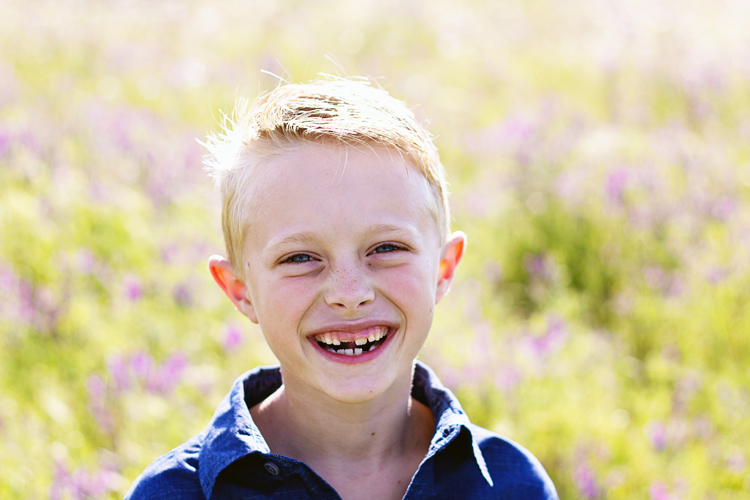
Photographing children is one of my favorite things to do, but at times it can also be one of the most difficult. Sometimes with kiddos, there is a very thin line between capturing memories that will last a lifetime, and capturing tears, tantrums, and meltdowns. After years of photographing nieces, nephews, friends, and my own girls, I’ve made a whole lot of mistakes. But, I’ve also picked up a few tips and tricks that help things go a little more smoothly when it comes to photographing children, that will hopefully make your life a little easier as well.

1. Choose your location thoughtfully

photographing-children-8

When photographing children, heading to a park is a no-brainer, right? Well, maybe. Parks can be really great, free resources for photographers, but it’s important to think about them through the eyes of a child as well. As a photographer, if you take a young child to a park with a playground and then attempt to have them sit still on the grass directly across from the playground for a portrait, chances are that you’re creating an scenario that may not end well. If there’s a playground in view, you’d better be prepared that the kids will want to play on it.

photographing-children-7

Sometimes, letting kids play on the playground is a great way to capture some more candid moments, and other times it is a big distraction. More and more, I find myself scheduling sessions at hiking trail heads, covered bridges, and open fields, which still allow for plenty of room to run and play, but in a location that provides fewer distractions. In addition, I find these sorts of locations to be more aesthetically pleasing for capturing those candid moments, than playgrounds often are.

2. Find ways to make them laugh

photographing-children-6

Anyone who has photographed kids knows that most kids have a fake smile, that makes an appearance any time someone asks them to smile. That fake smile is fine, and may be unavoidable to some extent, but it is always better to get a real smile or laugh whenever possible. There are so many ways to do this, but I’ll share just a couple that I’ve found to be effective with lots of different children.

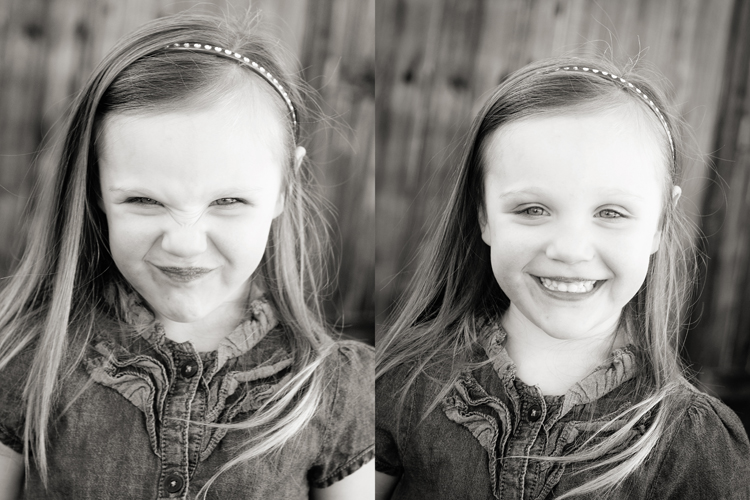
The first is simply to ask them to show you a variety of different faces. It’s fun to capture the silly faces that they make, but the point is really to capture their genuine smiles and laughs at your reaction to their silly faces. In the photo above, I asked my daughter if she would show me her angry face (left), and while I absolutely love that photo, and think it actually captures her slightly mischievous personality very well, my goal was really the more natural smile (right) that came after my laughter and exclamations that her angry face was absolutely terrifying.

In my experience, most kids think it’s hilarious to run through a whole string of different faces: angry, silly, dinosaur face, prince/princess face, hungry face, tired face, surprised face, and happy face all tend to be fun, and often result in lots of genuine smiles and laughs.

photographing-children-3

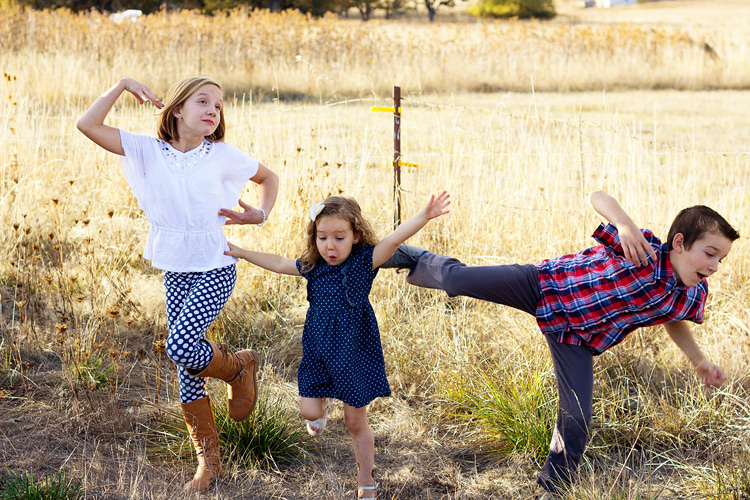
Another thing that seems to work well for most kids is to simply ask them to give you a funny pose. Be ready, because you may get anything from a stuck out tongue, to much more hysterical shenanigans. I truly never know what to expect, but always be ready to capture whatever it is. I often include a few of the most silly photos in the final images, because even if they aren’t 100% perfect or they don’t fit my normal aesthetic, they just plain make everyone happy, and I think there’s value in that. There’s also a practical value during the session as well, in that once again, being silly results in genuine smiles and laughs. Time and time again, my favorite images in a session are often the ones that come directly after the silliest images.

photographing-children-4

3. Be sensitive, and keep a sense of humor

My oldest daughter once cried for a half an hour because I made blackberry cobbler for breakfast, and she wanted toast instead. My youngest daughter laid on the floor, cried real tears, and screamed that I was ruining her whole life because I asked her to put on her shoes this morning. Moments like those are rarely funny at the time, but sometimes an hour or a day later, you find yourself laughing at the absurdity of the situation.

photographing-children-2

When it comes to kids, the reality is that even if you’ve been thoughtful about the timing and location of a session, sometimes meltdowns happen for no identifiable reason, and come from out of nowhere (sometimes they even happen mid-photo, as above). Photo sessions can be kind of stressful, and feel really high pressure for both kids and their parents. Sometimes with a little humor, distraction, or quick change of plans, everyone can get through a tantrum or minor meltdown just fine, and you’ll all laugh about it years later.  Sometimes, it’s more than that, and a child may be having a meltdown because of sensory issues that you are unaware of, or because they’ve been battling a cold or they’re teething and they just don’t feel good.

Regardless of the reason, sometimes it’s clear that the kiddo is genuinely upset, and isn’t going to calm down any time soon. If a child is genuinely upset, don’t force things. If it’s possible, offering to try again on a different day can be a really meaningful good-will gesture. After all, a parent saying, “Stop crying and smile” rarely (if ever) results in those genuine smiles that we so desperately try to achieve as photographers. It’s a fine line to walk sometimes, between being sensitive to the really legitimate feelings that kids may be having, and to also recognize that sometimes kids cry and get hysterical about really silly things, and then get over them equally as fast.  If things go south, just do your best to be sensitive, while also keeping a sense of humor about things. Life is messy sometimes.

photographing-children-5

Do you have any other tips that make photographing children just a little bit easier? Please share in the comments below, and I’d love to see your kid photos too.

People photography week

This week on dPS we’re featuring articles all about different kinds of people photography including portrait, event and travel photography. See all the previous ones below, and watch for more people photography articles over the next few days.

  • How to Take Low Key Head-shots
  • How to Do a One Light Portrait Setup and Use it as Your Back-up Plan
  • Travel People Photography – Tips and Pitfalls
  • 8 Tips for Photographing Men
  • 24 Diverse Images That Showcase People Photography
  • Weekly Photography Challenge – People Photography
  • Tips for Getting Yourself to Relax as a Photographer and Have More Successful Portrait Sessions
  • 5 Good Reasons to Add People into Your Landscape Photography
  • 6 Must-Have People Shots to Capture When Photographing Corporate Events
  • 4 Tips to Help You Get Started Doing Lifestyle Photography

googletag.cmd.push(function() {
tablet_slots.push( googletag.defineSlot( “/1005424/_dPSv4_tab-all-article-bottom_(300×250)”, [300, 250], “pb-ad-78623” ).addService( googletag.pubads() ) ); } );

googletag.cmd.push(function() {
mobile_slots.push( googletag.defineSlot( “/1005424/_dPSv4_mob-all-article-bottom_(300×250)”, [300, 250], “pb-ad-78158” ).addService( googletag.pubads() ) ); } );

The post 3 Tips for Photographing Children Without Losing Your Mind by Meredith Clark appeared first on Digital Photography School.


Digital Photography School

 
Comments Off on 3 Tips for Photographing Children Without Losing Your Mind

Posted in Photography


Blog Project: Your Best Photos From 2015

27 Apr
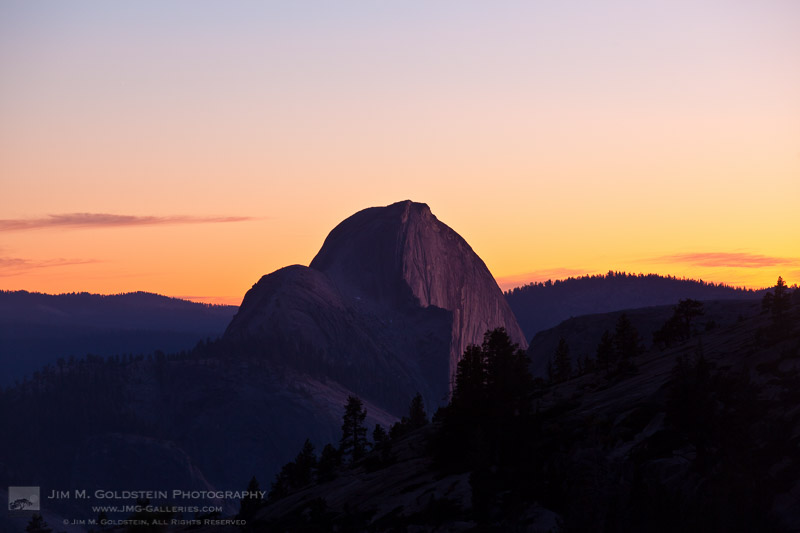
Half Dome Sunset from Olmstead Point, Yosemite

It’s that time of year again and if you’re a regular JMG-Galleries reader that means one thing…
it is time to kick off the 9th annual best photos of the year blog project. This is by far my most popular blog project with over 200 participants taking part last year (see Best Photos of 2014, 2013,  2012, 2011, 2010, 2009, 2008 and 2007). Around this time of year people start to ask if I’d be running this project again. The answer clearly is always YES!
1. I love this project and I love that so many people get excited about it.
2. It’s a great way exercise to improve your photography (10 Ways to Top Your Best 20xx Photographs).
So with out any further delay here is how you take part to submit your best photos of 2015.

How to Participate (Read Carefully)

  1. Review & select your best photos from 2015.
    Note: Photo edit carefully narrowing down your results to your best 10 or 5 photos. Reference Pro Tips: Photo Editing with Gary Crabbe for pointers.
  2. Create a blog post on your web site or a Flickr/500px set containing your best photos from 2015.
  3. Complete the form below by Saturday JANUARY 2nd at 11:59PM PST to take part. The following Tuesday, or there about, I’ll post a link to all submitted sites and photos on my blog. Through out the week I’ll also share the results across all my social media accounts.

Spread the Word!
Feel free to spread the word of this project on Twitter, Facebook, Google+, photo forums you frequent and/or your blogs. All who are interested in taking part are invited.


Loading…

The post Blog Project: Your Best Photos From 2015 appeared first on JMG-Galleries – Landscape, Nature & Travel Photography.


JMG-Galleries – Landscape, Nature & Travel Photography

 
Comments Off on Blog Project: Your Best Photos From 2015

Posted in Equipment


Revisiting Film Photography After 10 Years: Composing Through New Eyes

27 Apr
Aspen Tree Fall Color in the Eastern Sierras of California

Aspen Tree Fall Color in the Eastern Sierras of California

This is the 2nd of a 3 part series on my experience jumping back into film photography after a 10 year hiatus focusing purely on digital photography. You can start here at Revisiting Film Photography After 10 Years: The Readjustment if you missed it.

Mental Math & Visualization
As I’ve been shooting with the Fuji GX617 I’ve had to make a bit of a mind-shift in my approach. On one hand I have to account for slightly different mental calculations regarding how medium format focal distance, depth of field and vignetting might impact my composition. This is rooted with the fact that medium and 35mm formats follow the same mathematics, but the calculations for similar units (focal length, aperture, etc.) result in different visual aesthetics. 90mm focal distance on the GX617 equates to 20mm on a 35mm camera and a 300mm lens on the GX617 equates to ~70mm on a 35mm camera. f/8 on the GX617 is shallow for closer subjects while not so for most images on a 35mm camera. It’s an interesting adjustment, but frustrating if you forget or don’t fully make the right mental calculations as you’re taking photos. After all mistakes on film have a financial cost.

Volume versus Quality
Back in October when I took out the Fuji GX617 and the Canon 5DS R on a trip I found it notable how different my approach to shooting was with each camera. Unsurprisingly I shot less with the film camera and was much more generous in my shooting with my DSLR.  I spent a lot more time on my film shots to focus on correct exposure and composition. With 4 exposures to a roll I took greater care to work a scene by walking around, looking for different angles, check focus, check settings, double check settings and account for various lighting conditions before triggering the shutter. The net result was feeling more connected to the scene I was photographing.

My efforts with the DSLR were much quicker and as a result I took more photos. Shooting RAW affords you to work fast and loose. It was eye opening to see how fast and loose normal shooting has become for me. Jumping back to film made that all too clear. The digital format affords you the ability to:

  1. Salvage an image with +/- 2 stop latitude (potentially more if you use a newer digital camera)
  2. Have virtually no exposure (image count) limitation creating an “insurance” mentality where you take additional photos to account for lighting or weather variations or just to cover lazy technic
  3. Change ISO or lenses during a single composition on a DSLR in the event you realize your initial approach isn’t working


In the end the ratio of digital versus film photos taken on my trip was 1:20. For every film photo taken I took 20 digital photos, but that said I utilized my DSLR to experiment and photograph a much broader array of subjects. As for the photos I considered keepers and worth sharing the ratios broke down as follows:

  • 1 out of every 9 film photos taken was sharp enough and composed well enough to share and/or print.
  • 1 out of every 7 digital photos taken was sharp enough and composed well enough to share and/or print.


Seeing photos that didn’t work out on film were much more painful. Psychologically I felt more angst either because of lost opportunities or the cost associated with a blown roll of film. I’m not sure if my history of shooting film makes me more or less prone to take extra digital photos for insurance than the average photographer, but it certainly has an impact on my emotional state.

Emotive Photographs
Beyond concerns about technical proficiency and productivity I was most concerned about being able to capture images that deeply resonated with me. It’s one thing to say that I got 5 or 100 publishable photos and it’s another to state that they’re photos I think will resonate with others let alone me. Sharp photos, well composed photos, etc. don’t always equate to a great photo.  Images that resonate more deeply are not just about sharpness and composition, but atmosphere, artistic presentation and often “je ne sais quoi”. I’ve yet to compile stats for this as I’m still evaluating images from this trip, but if history is a guide the volume is always low.

The jump back into film has been interesting, fun and even anxiety provoking at times. Most of all it’s been eye opening in how I work, compose and think about photography in general.

Continue to Part 3 in this series – Revisiting Film Photography After 10 Years: Development & Post

The post Revisiting Film Photography After 10 Years: Composing Through New Eyes appeared first on JMG-Galleries – Landscape, Nature & Travel Photography.


JMG-Galleries – Landscape, Nature & Travel Photography

 
Comments Off on Revisiting Film Photography After 10 Years: Composing Through New Eyes

Posted in Equipment


Front-runner: Nikon D500 leads class in studio and dynamic range tests

27 Apr

At long last, a Nikon D500 has found its way into our office (thank you LensRentals!). We put the camera straight into our studio to find out what the long-awaited successor to the D300 is capable of. It’s only the beginning of course, but you can see for yourself below what the D500’s full ISO range looks like in our studio scene (cranked all the way up to ISO 1,638,400) and on the next page you’ll see the results of our dynamic range testing. There’s good news in store – in our initial testing the D500’s performance is class-leading with respect to low light (high ISO) noise performance, as well as dynamic range. In fact, it’s essentially ISO invariant, taking after Nikon’s own D7200 rather than the D5.

$ (document).ready(function() { ImageComparisonWidget({“containerId”:”reviewImageComparisonWidget-64689860″,”widgetId”:346,”initialStateId”:null}) })
Articles: Digital Photography Review (dpreview.com)

 
Comments Off on Front-runner: Nikon D500 leads class in studio and dynamic range tests

Posted in Uncategorized