Light is the main ingredient in any photograph. Without light, you cannot make an image. Photography is all about drawing or painting with light. One book I read on the subject said that light IS the subject in photography, in many ways, this is true. Light is a difficult phenomenon to quantify. Most of the time, we don’t really think about light in our day to day lives.
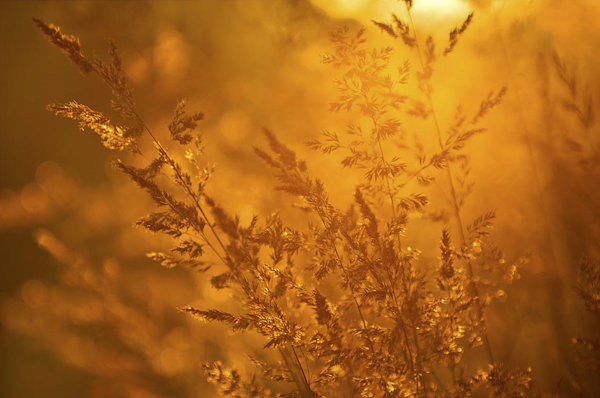
Shoot for the light…
As a photographer however, light is your currency. Without it, you cannot create an image. If you were in a lightproof room, with no light entering the room at all, it would be nearly impossible to make a photograph. However, if you were to light one candle in that lightproof room, suddenly you could make many images. Light is the key to every photograph ever made.
As a result of light being so ethereal, the photography world has tried to make sense of it. Photographers speak about the attributes of light, namely: quality, direction, color and intensity. In this article, I want to look at the first of those definitions, known as quality of light.
What is quality of light?
Light quality is determined by the source of the light. Small light sources that are far from the subject, will create harsh lighting conditions, while a large light source will create soft lighting conditions. Another way to think of it is to look at the shadows what are created by your light source. If the shadows are clear and defined, then your light source is small relative to your subject, and the light is harsh and high contrast. If the shadows are blurry or nondescript, then the light source is large compared to your subject, and the light is soft and low contrast.
A small light source could be something like the popup flash on your camera. This is a small, sharp source of light that will blast bright light into your scene. It creates hard shadows and will create a high contrast scene. A large light source could be the light on an overcast day. The sun’s light is scattered, or diffused, by the cloud cover so the light becomes larger, soft, and less defined.
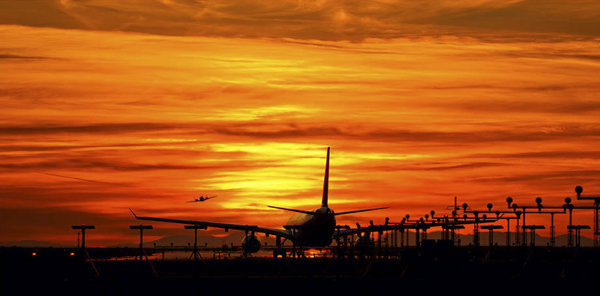
Warm sunset colours over the Vancouver runway
Time of day is key
You will be shooting either in daylight or nighttime conditions and often in the soft light between day and night. Each situation comes with its own challenges. If you are serious about taking your photography to the next level, you need to be shooting more often during the golden hour of the day. The golden hour occurs from about half an hour before, until about an hour after sunrise in the morning, and then an hour before sunset, to about 20 to 30 minutes after the sun has gone down in the evening. If you are going to shoot in this soft light, you will need a tripod, the rewards will be well worth the effort. It is not always possible to shoot at these times of day, so below are some guidelines about shooting throughout the day. Another good time to photograph is during the blue Hour which is the hour after the sun has set (more on this later).
1. Shooting in the middle of the day
Many of us were taught to shoot under bright sunlight, in the middle of the day, with the sun behind us. Sure, that can work, but you won’t get dramatic results every time, in many cases, your images will look very average. This is because light is harsh at this time of day.
Generally, when the sun is high in the sky, it is a small light source compared to the subject. This means that your subject will have very bright highlights and very dark shadows. This is high contrast scene. Also, the shadows will be very well defined and the light will be very directional. In other words, you will be able to see clearly where the sun is because the shadows will be very well outlined.
If you are photographing a wedding at midday in the summer (this is often the case) and the bride is in the full sunlight, you will have have some harsh shadows under her eyes to deal with. That’s not to say that you should never photograph in the midday sun, you can, but you need to know how to deal with the contrast situation. That might mean you need to use a reflector to put some of the light back into the bride’s face, or use some fill flash to lighten the shadows under her eyes. Remember, the brighter and smaller the light source, the harsher the quality of light.

Panoramic image taken at midday in full sun. The image works because the image is properly exposed for the bright sun.
2. Shooting during the golden hours
Shooting in the early morning, before the sun has risen, or shooting at sunset as the sun goes down, gives you a great opportunity to capture images, in dramatic light. Many of the scenes that people love to see in photography, are very often low light or golden hour ones. The reasons why these times are so good to shoot at area:
- The light is golden in colour and changes colour from yellow, to orange to magenta.
- The light is soft, i.e. no major contrast such as hard shadows and very bright highlights.
- Colors are more exaggerated, the color of the light is far more emphasized, much more oranges, reds and magentas are visible in the scene.
It is for these reasons that photographers choose to shoot in the early morning or early evening, these times produce the most dramatic images.
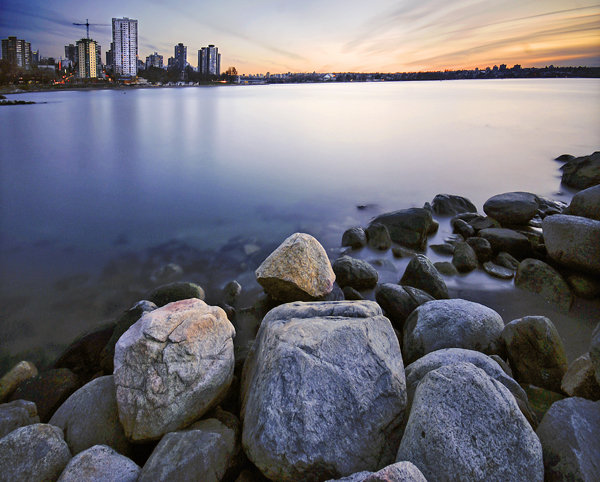
Golden hour shot of the city with a warm glow in the sky.
3. Shooting during the blue hour
Blue hour conditions don’t always occur, but when they do, the results are spectacular. For the best possible blue hour conditions, you will want a sunset with very little, to no clouds in the sky. Summertime is normally good for this, but any time of year can work. If there is 80% cloud cover, you will probably not see the blue light in the sky, so a clear sky is important to make this work. Blue Hour is the time after the sun has dropped below the horizon and the sky goes a radiant blue for a while. The blue lasts anywhere from 40 minutes to an hour, and that’s the time you want to be photographing.
To make sure you get it right, be in position and set up 20 minutes before sunset. That way, when the light starts getting good, you are able to hit the shutter release and make some great images. Cityscapes work really well for blue hour images. The reason is that the sky will go blue, but the city will be reflecting the yellowy, orange light of the sunset. This means that you will have the sun setting behind you.
The beauty of blue hour images is that that the blue and yellow colours work well together, they are complementary colours on the visual colour wheel, so the scene is visually appealing. If you are not sure about when blue hour will be, you can visit this site and simply enter your city name and it will tell you what time it will be occurring in your city, on a given evening and morning. There is even an iPhone app you can download to work this out in the field, pretty amazing!

Blue hour panoramic, the blues and the yellows work well in this image
What do I need to use to get the best images
A tripod is always a good idea. You will be able to make sure that your camera is perfectly still as you make longer and longer exposures. As the light starts fading, your exposures may be a few seconds long, this is impossible to handhold without getting blurred images. Use the best quality lenses you have and a cable release or remote shutter release to avoid any camera shake. You will want to set your camera up in manual mode and have your aperture settings at f/8 or f/11. Set your shutter time accordingly, make sure your ISO setting is at 100 and you are ready to go. When the light show starts happening, click away and enjoy the results!
googletag.cmd.push(function() {
tablet_slots.push( googletag.defineSlot( “/1005424/_dPSv4_tab-all-article-bottom_(300×250)”, [300, 250], “pb-ad-78623” ).addService( googletag.pubads() ) ); } );
googletag.cmd.push(function() {
mobile_slots.push( googletag.defineSlot( “/1005424/_dPSv4_mob-all-article-bottom_(300×250)”, [300, 250], “pb-ad-78158” ).addService( googletag.pubads() ) ); } );
The post Finding the Best Quality of Light During the Day by Barry J Brady appeared first on Digital Photography School.

Digital Photography School






You must be logged in to post a comment.