RSS
 

Archive for February, 2015

7 Uncommon Tips for Winter Sunrise Photos Near Water

26 Feb

DPS3

There are few things in photography that people love more than dreamy sunrise shots full of bold oranges, big suns, washing waters, and burnt horizons. The dawn of a new day is a spiritually significant event as our past misdeeds of yesterday are forgotten under the promise of fresh beginnings. Sunrise also affords us some of the best light to work with in photography.

However, if you live near the coast and you plan to get up early to take some sunrise shots that involve you being in or around rocks on the water’s edge, there are some key things you must remember, especially in the cold, winter months.

1. Set the alarm earlier than you think.

This is stage one. You’ve calculated that the sun rises at 6:00 a.m., you want to get there by 5:30 to set up, it takes you 10 minutes to get there, so you set the alarm for 5:10. But be honest, it never works like this does it? The alarm goes off at 5:10, it’s cold, you’re snug in bed, it’s dark outside, you were in the midst of a dream, and you roll back over. Missed sunrise. How often do you ever jump straight out of bed at 5:10 to take photos, in the midst of winter? By learning this mistake, I set the alarm for 4:40 then give myself three hits on the snooze button to take me to 5:10. It never fails (unless it’s cloudy!!)

2. Make sure you have shoes with spikes on the bottom.

Think about it – you’re an avid photographer who has set up a kit to your liking with lenses, filters, batteries and your camera. You put it in your bag, put your shoes on, head to the wet, rocky location then bammo, you fall over on the freezing, slippery moss. Either you or your bag gets wet, and neither is a desired result. There’s nothing scarier than trying to keep your bag on your back and out of the water as you slip around the rocks on ill-equipped shoes.

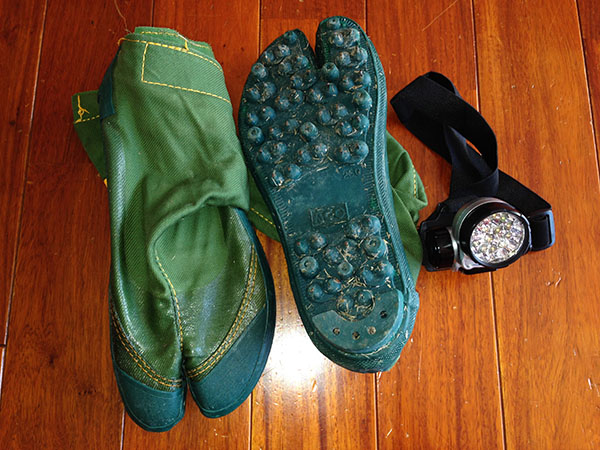
I have fisherman’s boots that cost $ 40. They have small metal spikes on the sole, perfect for getting across the rocks, and for scurrying to new locations quickly. They’re waterproof too. Alternatively, you could try the little clamp-ons that hikers use in icy conditions. They work well too, but your shoes will get cold and wet.

3. Use a head torch (headlamp).

The first time I brought mine I felt utterly ridiculous, like I was a miner heading down into the pits. Now, I wouldn’t dream of not having one. The convenience of having both hands free to see where you’re going, to open and close your bag, and set your camera up in the dark is without comparison. Especially if you are trying to get filters and holders attached to the ends of lenses.
DPS5

4. Have at least two lens cloths and other lens cleaners or pens.

Imagine this scenario: you are changing your lens out on the rocks and you put your cleaning cloth down to free your hands. There is a little bit of residue on the rocks so when you pick up your cloth and started wiping the lens, it gets coated in a film of goo. You may be able to clean the lens with different parts of the cloth (depending on the type of rock goo!) but it will likely leave most of the cloth dirty. Therefore, you will be unable to clean other lenses later on when they inevitably get hit by sea-spray.

How can I picture such a scenario? Sadly, I have lived it, and there is nothing worse than getting up early to a prime location, only to have your single cleaning cloth ruined before your shooting appetite has been satisfied, leaving you unable to do anything with other lenses that need cleaning. Now I always carry at least three cleaning implements in my bag.

5. Study the tides.

Ideally, you should know exactly what you want to shoot, so you can frame the shot before you go and know where the water will be. This is not always possible, but at least you should know what the tide will be at sunrise. You might go somewhere the day before and see a perfect shot in your head, only to return at dawn the next day and find those beautiful rocks covered in two metres of water. There’s no point setting the alarm for 4:40am if the subject you want in your shot is submerged like a sunken ship.
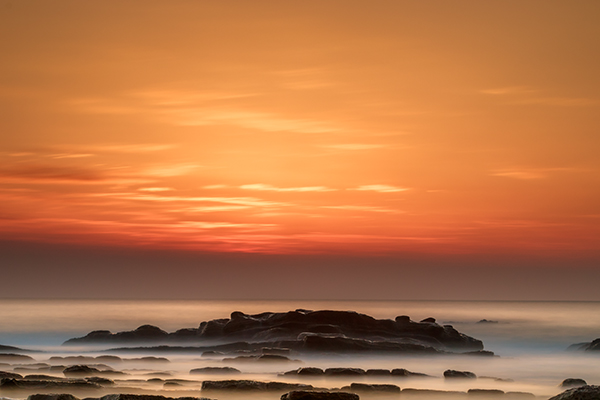
DPS1

6. Know where the sun rises. This may seem ridiculous – east you say! Well yeah, the sun rises in the east, but exactly where on the horizon will it rise for you? The angle changes every day. I once woke at 4:00 a.m. to get a shot in at sunrise only to realize after setting up that even my Sigma 10-20mm couldn’t get the sun and subject in my frame. East isn’t just east. Know exactly where the sun rises on the horizon in order to frame the shot you want.
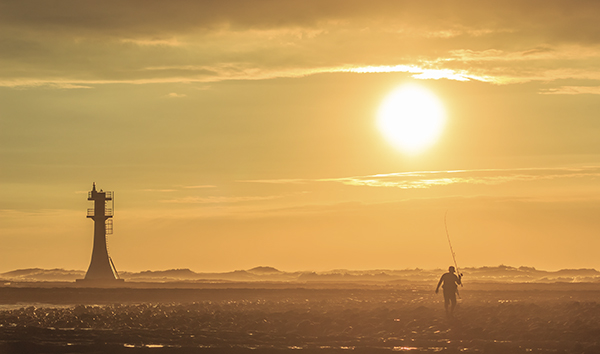
DPS2

7. Mittens not gloves.

In the wintertime, near the coast, you need something to cover your hands. But not gloves. Mittens are those cute, little gloves that have all the tops of the fingers cut off. The very reason you need mittens is to keep the tips of your fingers free to play with the camera and to get everything set up. This is very difficult with padded, woolly gloves on. Also, don’t make the mistake of buying woollen gloves, then cutting the tops off yourself. This leaves threads hanging that get longer and longer every day, and more and more annoying.

DPS6

The joy of getting those early morning shots makes a perfect start to the day. Follow these tips and all you’ll have to worry about is framing that perfect shot.

googletag.cmd.push(function() {
tablet_slots.push( googletag.defineSlot( “/1005424/_dPSv4_tab-all-article-bottom_(300×250)”, [300, 250], “pb-ad-78623” ).addService( googletag.pubads() ) ); } );

googletag.cmd.push(function() {
mobile_slots.push( googletag.defineSlot( “/1005424/_dPSv4_mob-all-article-bottom_(300×250)”, [300, 250], “pb-ad-78158” ).addService( googletag.pubads() ) ); } );

The post 7 Uncommon Tips for Winter Sunrise Photos Near Water by Iain Stanley appeared first on Digital Photography School.


Digital Photography School

 
Comments Off on 7 Uncommon Tips for Winter Sunrise Photos Near Water

Posted in Photography


The High Life: 12 Incredible Residential Tree House Designs

25 Feb

[ By Steph in Architecture & Houses & Residential. ]

residential treehouses

We’ve seen tree houses that function as oversized sculptures, play structures for kids, sky-high tea houses and elevated retreats for work or meditation, but how many tree house designs actually fulfill dreams of living in the forest canopy full-time? These 12 residential tree houses range from traditional huts built over a hundred feet above the forest floor to a stunning ultramodern cylindrical glass house that envelops an entire tree.

Amazing Cylindrical Glass Treehouse

cylindrical glass treehouse 1

cylyndrical glass treehouse 2

cylindrical glass treehouse 4

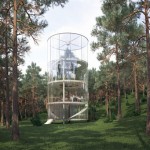
This ultramodern, all-glass cylindrical house isn’t just in the trees, it contains one. ‘Tree in the House’ by Masov Aibek is a four-story residence in the woods of Almaty City, Kazakhstan with a spiraling staircase leading to each completely transparent level. A few plasterboard walls provide privacy for the bathroom and sleeping areas. The house will be available for rent, and though it may seem like it’s only suitable for exhibitionists, its location deep in the forest makes privacy less of a concern.

Traditional Residential Treehouses of Asia

traditional treehouse

korowai treehouse

traditional treehouses 2

Papua New Guinea’s Korowai Tribe is just one example of people who have traditionally built their homes in the canopies of trees, some as high as 115 feet off the ground. The houses are typically built in a single sturdy Banyan tree, with poles added for extra support. Each house accommodates as many as a dozen people. Elevated houses can also be found in flood-prone areas of India, Cambodia and other Asian nations.

Finca Bellavista Treehouse Community, Costa Rica

finca bellavista treehouses 1

finca bellavista treehouse 2

finca vellavista treehouse 3

A couple went to Costa Rica in search of a small plot of land and ended up saving 600 acres of rainforest from the chopping block. Uncertain at first what to do with all that acreage, they began to envision a network of tree houses that soon became ‘Finca Bellavista,’ a sustainable treehouse community with individual residences connected by zippiness and suspension bridges. The self-sustaining complex includes a dining hall, open-air lounge, campfire, bath house and ‘wedding garden.’

4Treehouse by Lukas Kos

4treehouse

4treehouse 2

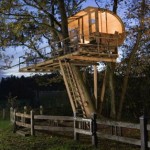
Looking a bit like a Japanese lantern when it’s illuminated at night, the 4Treehouse by Toronto designer Lukasz Kos is a modern take on the classic wooden tree house with a facade of slats that provide shade and privacy. A semi-detached staircase on casters provides a stable, steady entrance to the home no matter how much the structure itself may be rocking in the wind.

Next Page – Click Below to Read More:
The High Life 12 Incredible Residential Tree House Designs

Share on Facebook


[ By Steph in Architecture & Houses & Residential. ]

[ WebUrbanist | Archives | Galleries | Privacy | TOS ]


WebUrbanist

 
Comments Off on The High Life: 12 Incredible Residential Tree House Designs

Posted in Creativity


25. Februar 2015

25 Feb

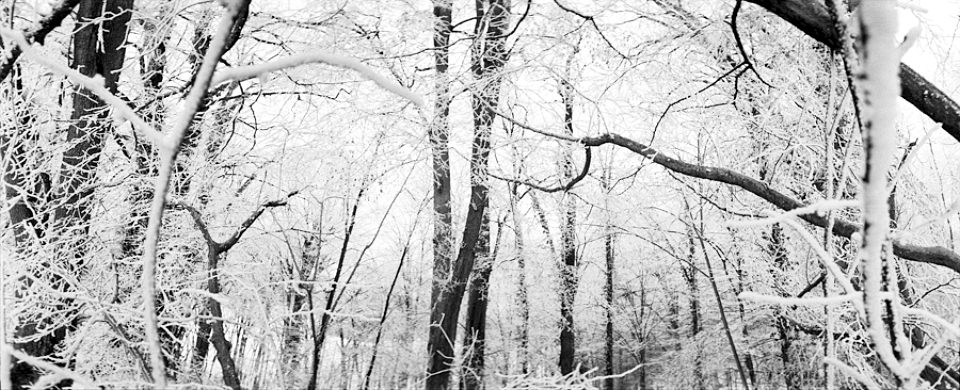
Das Bild des Tages von: Tamara Skudies

Verschneites Waldpanorama

Im Ausblick: Fotografie im öffentlichen Raum, Manipulation im Fotojournalismus und der Sony World Photo Award
kwerfeldein – Fotografie Magazin | Fotocommunity

 
Comments Off on 25. Februar 2015

Posted in Equipment


10 Common Photography Mistakes and How to Overcome Them

25 Feb

You’ve got your DSLR and you are excited to test it out. You might have gone out for the first few days or perhaps weeks and then all of a sudden the excitement wears out. Why?

Because you don’t seem to get what you want out of your mighty DSLR, right? You may have spent countless hours in your college, office, or at home in search of a best DSLR that can take the best photographs you want. All your efforts have gone in vein and you have a frustrating backlog of your actual work.

Next time you feel such frustration about your photography remember this quote:

“You will only fail to learn if you do not learn from failing.” – Stella Adler, The Art of Acting

So, get ready to learn about the 10 common photography mistakes that you may have committed and how to overcome them.

1. Wrong White Balance (WB)

The first and foremost mistake is setting the wrong White Balance. We see white as white under all lighting conditions, but the camera doesn’t. You have to guide the camera to know the light source of the current scene you are photographing.

Say you are shooting in daylight; if you set the camera’s White Balance to Cloudy then the scene will have orange cast. On the other hand if you are shooting in cloudy light and the camera White Balance is set to Daylight then the scene will have blue cast.

Here’s an easy way to remember this:

  • White Balance Temperature (K) setting = Actual light source = No Cast
  • White Balance Temperature (K) setting < Actual light source = Blue Cast
  • White Balance Temperature (K) setting > Actual light source = Orange Cast

Solution: Set the correct White Balance in the field or shoot in RAW mode. If you shoot RAW, you have a choice to set the correct White Balance in post-processing.

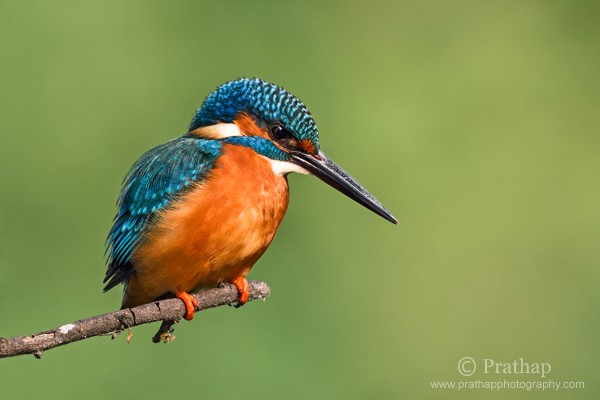
1 Common Kingfisher blue bird Bokeh Effect Bharatpur Bird Sanctuary Keoladeo National Park Nature Wildlife Bird Photography by Prathap

2. Overexposed Highlights

Remember that the dynamic range of your eyes is far greater than the camera’s dynamic range. Dynamic range is the ratio between the brightest elements to the darkest elements in the scene.

You might see the details in both brighter as well as darker regions, but the camera wouldn’t be able to record those details. As a photographer, it is your responsibility to make an exposure that is pleasing to the viewer’s eyes.

Humans are more sensitive to the highlights than the shadows. Overexposed highlights (white patches in a photograph) are more unacceptable to our eyes than underexposed shadows (black patches).

Solution: Expose for the highlights so that nothing gets overexposed, unless you are doing it intentionally. Almost every DSLR will have a blinking indicator (highlight warning, also simply called The Blinkies) that shows overexposed regions in your photograph on the LCD monitor during image playback.

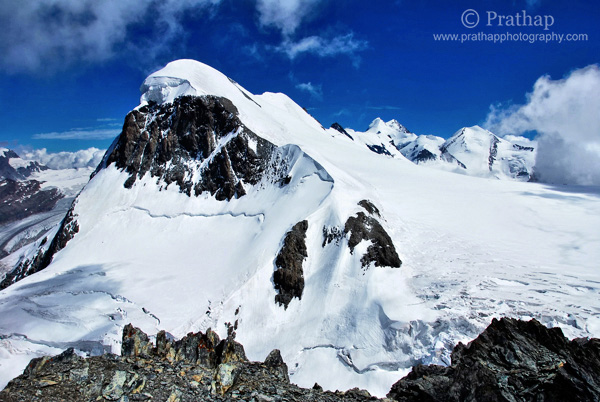
2 Magnificent Swiss Alps Switzerland Mountains Nature Landscape Wildlife Bird Photography by Prathap

If there are blinkies, then go ahead make exposure compensation (underexpose the scene by the required amount) to get that right.

3. Subject in the Center

It is a common tendency of a beginner photographer to keep the subject in center of the frame, which yields a boring, static composition. The viewer has nothing else to look for his/her eye goes straight to the subject and is stuck there.

Solution: Use the Rule of Thirds and keep the subject out of the middle of the frame. An off-centered subject makes the photograph dynamic and uneven negative space creates interest.

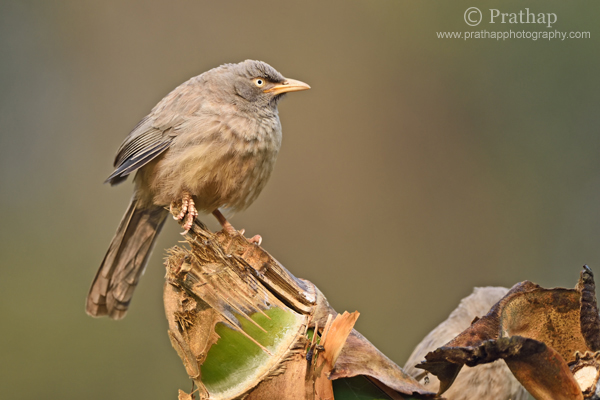
3 Jungle Babbler Shallow Depth of Field Bharatpur Bird Sanctuary Keoladeo National Park Nature Wildlife Bird Photography Prathap

4. Wrong Focus

No matter how good your photograph is technically, if the focus is not sharp enough, then your photograph doesn’t work. The main subject of interest needs to be in sharp focus, otherwise viewers will get distracted and will not find a point to rest on in the image.

We see objects sharp in reality so we expect them (at least one) to be in sharp focus to make any sense.

Solution: Make sure you check the focus by zooming in on your subject after you take a photograph (zoom feature in playback mode). Make sure there is enough light or color contrast between the subject and the background so that autofocus is able to lock the focus properly.

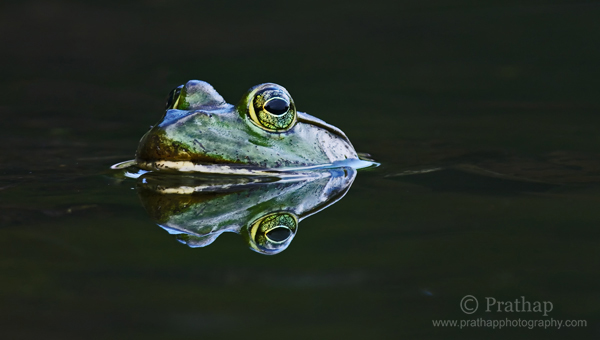
4 Perfect Reflection of Frog submerged in Water Nature Wildlife Bird Photography by Prathap

If you are making a portrait, then focus on the eyes of the person (or bird or mammal), because the viewer needs to make eye contact.

5. Breathing Space

It is quite common to fill the frame with your favorite subject so that it looks big in the frame. But how often does it feel that they are squeezed in the frame? They look suffocated because there is no place to move, forget about the movement there is no place to breathe!

Sometimes there will be enough space around the subject, but in the wrong direction – which is no good either.

Solution: Rule of Thirds is the best composition technique that helps you to give enough space around the subject. Think about the image border as a concealed box where there is no ventilation, you don’t want your favorite subject to suffocate.

5 White tailed Kite Taking Off in Bharatpur Bird Sanctuary Keoladeo National Park Best Bird Sanctuary Rajasthan Nature Wildlife Bird Photography by Prathap

6. Cluttered Background

This is probably the most common mistake of all. Why? Because, it’s a common tendency to take photograph the moment you see something beautiful or interesting. So, what’s wrong with that you may ask.

Nothing. But have you paid attention to the background? Probably not. You are so overwhelmed by the subject, that you hardly notice anything around it.

A cluttered or distracting background plays the major role in ruining photographs.

Solution: The real photography starts after you choose your subject. Once you’ve done that, forget about it. Pay attention to the rest of the scene; include only those things that complement your subject and exclude everything else.

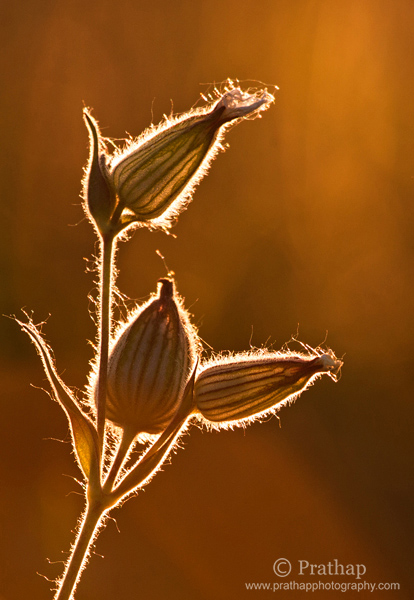
6 Painting with Light Art in Nature Backlit flowers in Golden Hours of Sunset Nature Wildlife Bird Photography by Prathap

The background makes the picture. Cleaner background makes the subject stand out making it the primary focus for a viewer.

7. Skewed Horizon

Another mistake that I see quite often is that horizon is not perfect. This is such a simple thing to notice but still a whole load of photographs have skewed horizons.

How can you miss that? Viewers feel uneasy when the horizon is skewed. It also indicates that the vertical subjects should be perpendicular to the ground. A person, building, bird, or tree tilted to one side makes them vulnerable to fall (unless of course they are tilted in reality like the Leaning Tower of Pisa).

Solution: Use the grid overlay while composing in the field, or correct the horizon using the Crop and Straighten Tool in the post-processing stage. Find a subject in the scene/photograph that should be horizontal or vertical in reality, and use it as a reference when you straighten the image.

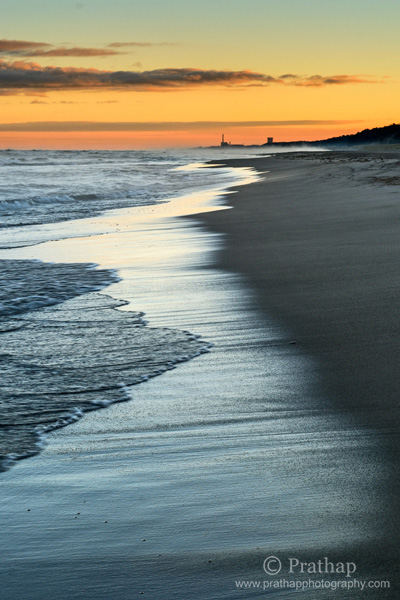
7 Beautiful Sunrise in Indiana Dunes State Park Beach in Golden Hours Nature Landscape Seascape Wildlife Bird Photography by Prathap

8. Lack of Depth

Remember, Photography is two dimensional medium but we see everything in three dimensions. Photographers often miss the depth that is inherent in photography.

You saw that most beautiful scene in 3D and you captured it, but you wonder what went wrong as you stare at your monitor, right? Something is missing. This is not what you saw.

Why? You didn’t realize that you are capturing a 3-Dimensional scene in a 2-Dimensional photograph.

Solution: There are lots of ways to create depth – include a foreground object, use leading lines, use perspective distortion, change the point of view, and so on. But the most important thing to remember when you are out in the field is that a photograph is 2-Dimensional.

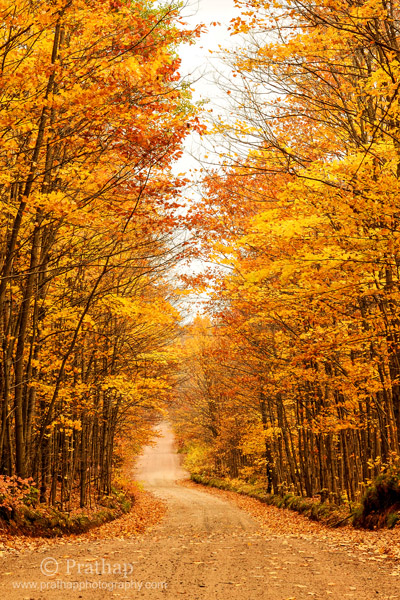
8 Beautiful Fall Foliage on the way to Agate Falls in Upper Peninsula Michigan Autumn Colors Nature Landscape Wildlife Bird Photography by Prathap

9. Too Much in the Photograph

Too much of anything is bad. When you see a scene, you see it as whole, which is natural. But if you try to include everything that you saw in one image then you end up with a photograph that has too much.

When you looked at the scene, were you really looking at the entire scene at once? Think about it. If you do this exercise of how you actually consume a scene you will know a whole lot more.

Solution: Try simple compositions. Instead of making one photo of the entire scene, ask yourself what interests you the most? Then pick that subject and make a photograph that emphasizes only that subject.

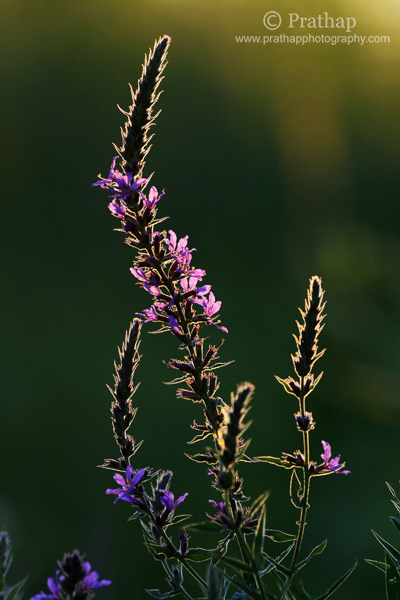
9 Backlit Flowers in Golden Hours in Sunset Rollins Savannas Forest Preserve Gryaslake IL Nature Macro Wildlife Bird Photography by Prathap

What is in a photograph is just as important as what is not in there. Once you master these simpler compositions you will be able to take grand landscapes in a much simpler, but more interesting ways.

10. Bad Light

Photography is all about Light. No light means no photography. But light has quality and direction. The best photographs are normally done in the golden hours and just few hours before and after sunrise and sunset when the light is at its best.

Many photographers don’t seem to care about the direction and the quality of light at all. Either the light is so harsh that there are multiple patches of light and shadows in the scene, or the subject’s eyes are in dark shadows, or light is just flat making the photograph 2-Dimensional, and so on.

Solution: Remember that photography is all about Light. More you learn to see the light better photographer you will become.

10 Double Crested Cormorant Golden Hours Sunset Bharatpur Bird Sanctuary Keoladeo National Park Best Bird Sanctuary Nature Wildlife Bird Photography by Prathap

The best way to appreciate light and its amazing qualities to transform a scene, is to go to the scene before sunrise and stay beyond sunset.

Final Thoughts

Still waiting to hear more?

Go ahead and correct the mistakes now. You will see yourself becoming a better photographer when you take control over these common mistakes.

Good luck!

googletag.cmd.push(function() {
tablet_slots.push( googletag.defineSlot( “/1005424/_dPSv4_tab-all-article-bottom_(300×250)”, [300, 250], “pb-ad-78623” ).addService( googletag.pubads() ) ); } );

googletag.cmd.push(function() {
mobile_slots.push( googletag.defineSlot( “/1005424/_dPSv4_mob-all-article-bottom_(300×250)”, [300, 250], “pb-ad-78158” ).addService( googletag.pubads() ) ); } );

The post 10 Common Photography Mistakes and How to Overcome Them by Prathap DK appeared first on Digital Photography School.


Digital Photography School

 
Comments Off on 10 Common Photography Mistakes and How to Overcome Them

Posted in Photography


Magic for Nothing: The Best Free Photo Editors 2015

25 Feb

If you are serious about photography, you’ll likely want to start editing your photos soon. Or maybe you’re already editing photos, perhaps on a work or school computer, and you’re ready to set up your own photo editing station at home. Either way, the most popular photo editing options, such as Photoshop and Lightroom, while fantastic programs, might be outside Continue Reading

The post Magic for Nothing: The Best Free Photo Editors 2015 appeared first on Photodoto.


Photodoto

 
Comments Off on Magic for Nothing: The Best Free Photo Editors 2015

Posted in Photography


Using the Lightroom Adjustment Brush to add Dimension to a Landscape Photo

25 Feb

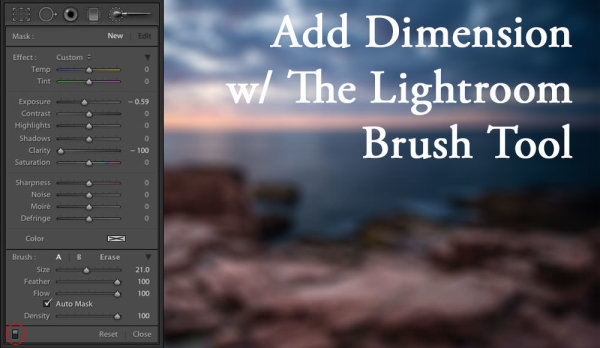
Adding layers of dimension with the Lightroom brush

Lightroom has the power to completely transform your landscape photograph into something far more powerful, something that hits home with viewers, and something that pops off the screen.

By default digital cameras create flatter image files than what you see with your eye. Your eye has the ability to see dimensions like no camera can really capture. Although many try.

What is Dimension?

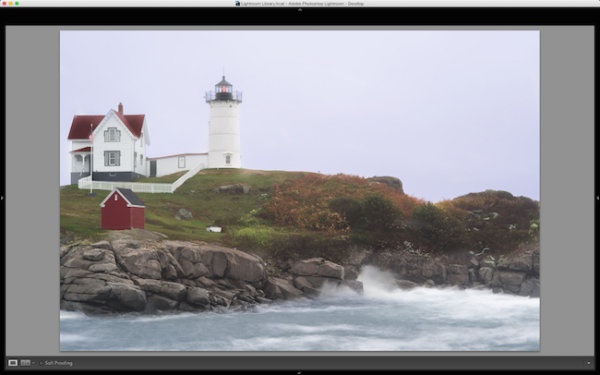
The definition of dimension is: an aspect or feature of a situation, problem, or thing. When utilizing the word dimension in your photograph, think of the features of specific locations and objects within the frame. As an example, in the photo you will see here, there are multiple layers of dimension to play with. There’s the sky, the water, the rocks, the buildings, the grass, and the shed. Each has its own uniqueness to it, and can and should be treated as such.

The Adjustment Brush Tool

Like the other local adjustment tools in Lightroom, the adjustment brush tool has the ability to fine tune specific parts of a photograph. Using the tool can create new dimensions you would never have otherwise seen from a camera rendition. Your eye, however, most likely did see the dimensions.

Lightroom Brush Tool

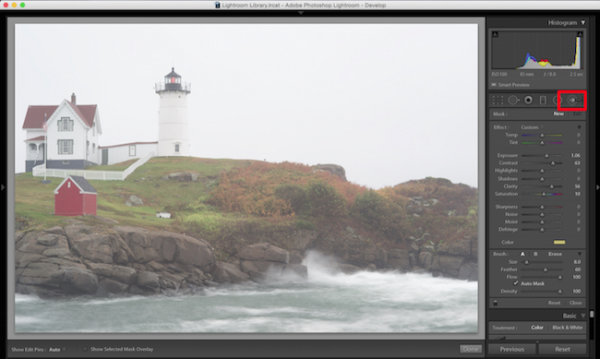
Where to find the Lightroom brush tool

You can see in the first photo that it’s a really cool lighthouse scene, but there is something drastically gone wrong. The photo is super flat. That is because it was a very rainy day with tons of fog everywhere, and mist from the water constantly hitting the camera.

To use the Lightroom Adjustment Brush, open a photo in the Develop module, then select the brush icon at the top right, just under the Histogram (the keyboard shortcut is K).

Once selected, a variety of local adjustments will appear. From there you have a wide range of options that you can make on a very specific section of your photo. For example, sharpness, exposure, or even brushing on a new color.

The first thing you should know before starting with the Adjustment Brush is that Lightroom keeps your last settings whenever adding a new brush. To zero out the settings simply double click on the word Effect.

Also, the Auto Mask feature is very smart. Think of it like a content aware brush. Simply put, it looks at the cross hairs inside of your brush and will try to stay “within the lines” and not brush on what doesn’t match up. This is fantastic for edges. However, the Auto Mask feature uses more Lightroom performance, so you may notice a slow down. My workflow is to fill in big spaces and then turn on Auto Mask when I need it.

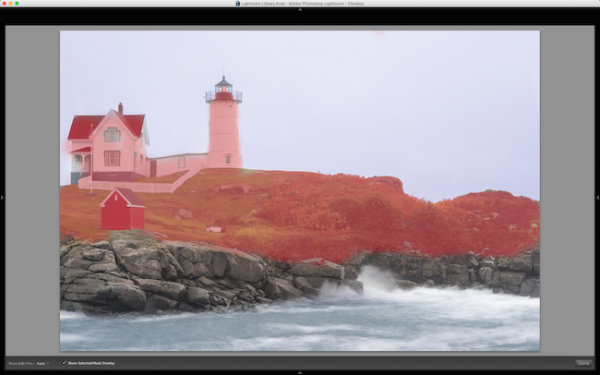
As you are brushing in areas, hit the O key on your keyword to see a red mask of where you have brushed (hit Shift+O to cycle through the available mask colors).

Lightroom masking

Hit the O key to view the current mask in a red overlay

I started brushing the middle section of the photo with more contrast, and reduced highlights and shadows. This broke through the haze and enhanced the greens enough to where I like it.

I then made another brush by clicking on New in the brush panel. This one was to bring down the extreme highlights of the house and lighthouse. I brought it down just enough so it’s still white, but doesn’t blend in with the sky, which is also very white.

Then came a third brush, which was for the rocks. I wanted to make sure they popped out more than anything else. I didn’t want them to just have contrast, so I also used the clarity slider. Clarity will enhance a lot of edge detail, which is awesome on rocks.

Lightroom brush clarity

Add clarity to select objects using the Adjustment Brush

Now that the grass, the structures and the rocks all have different dimensions of contrast, clarity and light, it is time to play with the color dimension. So I created another brush with a hint of transparent blue to the water. This adds more life to the boring gray tone it had previously.

I then did the same with the sky, but with less transparency due to the whiteness of the sky already. Adding a hint of color the white sky helps separate the house and lighthouse from the background even more.

The last brush I added to the photo was on the roof of the house. The intention there was to recover the red color subtly, so it doesn’t take away from the rest of the photo. So I increased the contrast, dropped the exposure slightly and added a hit more red to the roof.

Lightroom brush color

Add color to specific areas using the Lightroom brush

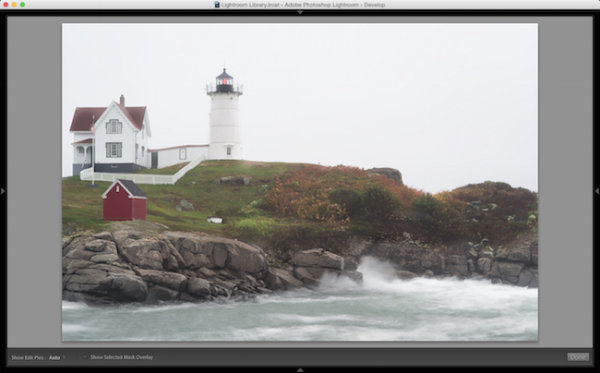
At the end of the day, the photo has multiple layers of dimension. It’s no longer flat, and notone section has the same feel as the rest. Using the brush feature in Lightroom I was able to not only recover color and contrast, but add even more texture and life to the scene.

Think of the Adjustment Brush tool like layers in Photoshop or onOne Software. There are no actual layers but rather brush points which can be adjusted individually.

Below is a video showing what I’ve done with this photograph.

There is a lot more that can be done, like sharpness, noise reduction and even changing color temperature and tinting for specific areas in a photo. But what I have shared here is a handful of what you are capable of doing within your favorite photography workflow software, Lightroom.

I’d love to see some photos you have processed using Lightroom Adjustment Brush tool. Please comment to share with the dPS community.

googletag.cmd.push(function() {
tablet_slots.push( googletag.defineSlot( “/1005424/_dPSv4_tab-all-article-bottom_(300×250)”, [300, 250], “pb-ad-78623” ).addService( googletag.pubads() ) ); } );

googletag.cmd.push(function() {
mobile_slots.push( googletag.defineSlot( “/1005424/_dPSv4_mob-all-article-bottom_(300×250)”, [300, 250], “pb-ad-78158” ).addService( googletag.pubads() ) ); } );

The post Using the Lightroom Adjustment Brush to add Dimension to a Landscape Photo by Scott Wyden Kivowitz appeared first on Digital Photography School.


Digital Photography School

 
Comments Off on Using the Lightroom Adjustment Brush to add Dimension to a Landscape Photo

Posted in Photography


Get Complete Control Of Your Camera with Our Brand New Course

25 Feb

Pnbvideo boxToday I’m very excited to announce the launch of our first Digital Photography School Course – Photo Nuts and Bolts.

The Photo Nuts Journey

Early in 2010 dPS launched a brand new eBook – Photo Nuts and Bolts. Written by Neil Creek it was all about understanding your camera so you can get creative control over it.

It went on to become one of our most popular eBooks ever and each year since we’ve added new eBooks to the series including Photo Nuts and Shots (Tools and Techniques for Creative Photography), Photo Nuts and Post (a Guide to Post-Processing) and Photo Nuts and Gear (Know your gear and take better shots).

These eBooks have helped tens of thousands of dPS readers!

Announcing our Brand New Photo Nuts Course

Today sees the continuation of the Photo Nuts journey with this fantastic course by Neil Creek. Here’s the course intro:

This course brings alive the concepts in the original Photo Nuts and Bolts eBook and is all about putting down your user manual, saying goodbye to ‘Auto’ mode and learning firsthand how to use your camera to its full potential.

The course is delivered through 10 high quality video lessons delivered at your own pace through our brand new courses area here on dPS. It comes with downloadable course notes, exercises and resources.

NewImage

Is Photo Nuts and Bolts for You?

There’s plenty of great information on what this course covers over on the Photo Nuts and Bolts Course page but in short it is for you if:

  • You’re new to photography and/or using a DSLR camera
  • You want to move past the point and shoot approach and get out of ‘Auto’ mode
  • You’d like to understand the fundamentals of how your camera works and start using it to its full potential
  • You’re looking to get more technical and increase the creative control you have over your camera
  • You learn best by visually observing and doing, not reading a manual

Pick Up Photo Nuts and Bolts with a 33% Discount Today

This course is available today for just $ 39 USD. This is a limited time introductory 33% discount (the normal price will be $ 59 USD).

As with all our products Photo Nuts and Bolts the Course is backed by a 60 day money back guarantee. If you pick it up and find it doesn’t suit your needs simply let us know within 60 days and we’ll refund your money.

Sign up today and get immediate access to Photo Nuts and Bolts the Course.

googletag.cmd.push(function() {
tablet_slots.push( googletag.defineSlot( “/1005424/_dPSv4_tab-all-article-bottom_(300×250)”, [300, 250], “pb-ad-78623” ).addService( googletag.pubads() ) ); } );

googletag.cmd.push(function() {
mobile_slots.push( googletag.defineSlot( “/1005424/_dPSv4_mob-all-article-bottom_(300×250)”, [300, 250], “pb-ad-78158” ).addService( googletag.pubads() ) ); } );

The post Get Complete Control Of Your Camera with Our Brand New Course by Darren Rowse appeared first on Digital Photography School.


Digital Photography School

 
Comments Off on Get Complete Control Of Your Camera with Our Brand New Course

Posted in Photography


Tamron SP 15-30mm F2.8 Di VC USD real-world sample gallery posted

25 Feb

After handling a prototype at Photokina, we brought a final shipping sample of Tamron’s new 15-30mm wideangle zoom back from CP+. The stabilized ultra-wideangle lens covers a full-frame sensor, offers a unique double lens hood design for added strength and boasts a very competitive $ 1200 price tag. We’re impressed so far – check out our samples gallery

Articles: Digital Photography Review (dpreview.com)

 
Comments Off on Tamron SP 15-30mm F2.8 Di VC USD real-world sample gallery posted

Posted in Uncategorized


(Not) for Sale: Get Paid $5K to Haul Away ‘Skyway to Nowhere’

25 Feb

[ By WebUrbanist in Abandoned Places & Architecture. ]

skyway as lake superior retreat

280,000 pounds of glass, steel and concrete spanning over 80 feet, this remarkable structure was built to span city streets and sidewalks in Minneapolis but has storied history that goes well beyond its original usage. Today, this historic wonder can be yours for a remarkable sum of negative $ 5,000 – indeed, its owners will pay you to take it away (and hopefully put it to good use).

skyway to nowhere

skyway current condition wheels

buy a skyway

An incredibly robust work of engineering, the structure originally connected two downtown buildings in Minnesota’s biggest city, but when one of the pair it bridged was demolished it became a kind of “skyway to nowhere” that was more liability than asset. Ideas to turn it into a bridge or use it again as a skyway in another location all failed to materialize, but many others have been dreamed up since – a mobile nightclub, kiosk for Nicollet Mall and so forth.

skyway on nicolet mall

skyway interior cabin design

skyway floor plan design

skyway as walkway

It was subsequently listed for sale and bought for $ 1 by the University of Minnesota, which then sold it at blind auction by CityDeskStudio for $ 5,000. Plans to turn it into a modern cabin overlooking Lake Superior have since fallen through, hence its being once again up for grabs. CDS originally relisted the bridge in the early 2000s for close to $ 100,000 – the price was dropped repeatedly before the company decided to not only give away the behemoth but to pay for its relocation.

Share on Facebook


[ By WebUrbanist in Abandoned Places & Architecture. ]

[ WebUrbanist | Archives | Galleries | Privacy | TOS ]


WebUrbanist

 
Comments Off on (Not) for Sale: Get Paid $5K to Haul Away ‘Skyway to Nowhere’

Posted in Creativity


CastAR 3D: See the Future of Work & Play in Augmented Reality

25 Feb

[ By WebUrbanist in Gaming & Computing & Technology. ]

virtual augmented reality headset

In this new video, Technical Illusions, the company behind CastAR, a hybrid augmented and virtual reality headset, shows off a series of amazing everyday applications of their technology, dissolving the distinction between real and digital spaces.

A year after raising $ 1,000,000 on Kickstarter, this technology combines but also goes beyond the AR of Google Glass and VR of Oculus Rift: “You and your friends can share this Mixed Reality experience that blends a virtual world into the real world. Move around naturally through this blended environment as you work or play together.”

ar headset gaming design

In founding Technical Illusions and pushing out a viable product in just over a year, Jeri Ellsworth and Rick Johnson (formerly of Valve) have focused on getting something that works out the door and in the hands of users and developers as quickly as possible – in a world of possibilities, concepts and prototypes, their emphasis is refreshingly pragmatic.

ar desktop gaming

The CastAR system consists of a headset with a built-in projector, camera and works in conjunction with retroflective surfaces embedded with infrared LED lights. “The projectors cast a three-dimensional image onto the surface, while the camera uses the LEDs to track your head movement … you can use this unique projected augmented reality technology to do things like view building projects in 3D, play interactive video games and create three-dimensional presentations.”

Share on Facebook


[ By WebUrbanist in Gaming & Computing & Technology. ]

[ WebUrbanist | Archives | Galleries | Privacy | TOS ]


WebUrbanist

 
Comments Off on CastAR 3D: See the Future of Work & Play in Augmented Reality

Posted in Creativity