RSS
 

Archive for September, 2014

GoPro announces Hero4 lineup

30 Sep

GoPro has announced its new lineup of Hero cameras. The Hero4 Black is a new flagship model capable of 4K video at 30 fps, and will allow for extraction of 8.3MP still images from 4K footage. The Hero4 Silver offers a touch sensitive display and records 2.7K at 30 fps, 1080 at 60 fps and 720 at 120 fps. Both models will be available October 5. Learn more

Articles: Digital Photography Review (dpreview.com)

 
Comments Off on GoPro announces Hero4 lineup

Posted in Uncategorized


Ricoh updates Pentax 645Z firmware for IMAGE Transmitter 2 software

30 Sep

Ricoh Imaging has released new firmware for its Pentax 645Z medium format camera to make it compatible with the latest version of the company’s IMAGE Transmitter software. Firmware version 1.10, which is available to download by users via the Ricoh website, allows Pentax’s second digital medium format camera to be controlled when tethered to a PC via USB cable, so images can be saved directly from the camera into a chosen folder as they are taken. Read more

Articles: Digital Photography Review (dpreview.com)

 
Comments Off on Ricoh updates Pentax 645Z firmware for IMAGE Transmitter 2 software

Posted in Uncategorized


7 Tips for Interacting with People to Create Better Portraits

30 Sep

Sassy kid

Interaction is the basis of a portrait session, in every single way. In the most obvious ways, for example, you must interact with the client to set up the session, during the session, and when the images are done.

The portrait session is also an interaction with self, both for you the photographer and for your subject. You the photographer, who is creating with integrity, must meet with yourself inside to bring about bold creativity. The subject, likewise, is faced with many insecurities that they may have very little experience with in their day to day lives. They are in a vulnerable position. The portrait session brings about all kinds of internal interactions.

The photos themselves are a form of interaction with the future. The way a portrait portrays someone goes a long way to communicating who they are – or, at least, who they’d like to be seen as, which is important in its own right.

It’s for this reason that developing habits for skillful human interactions is so important. They make everyone more comfortable, but, more so, it means capturing images of someone who is comfortable at the moment the image was taken.

The way someone responds to you is the way they will look in their images. The difference may be imperceptible to a stranger, or when simply viewed at a glance; but a strained smile, or nervous eyebrow might be clear as day to the people who care about them. You as a photographer are not a plumber who can still fix the pipes, even if your subject is having a bad time. Among the most important tools you have is the one that elicits an honest and flattering response from the subject:

The way you interact with people is key
Casual kids

Everyone is a Little Kid

If you who wish to bring about a truth and transparency in your subjects, you can take a clue from the rules of photographing little kids; don’t slow the child down for your shot – you keep up with the kid!

Your goal is to keep your subject engaged and having a good time during their session, so what is true of working with children is also true for adults. It’s important to move at their pace. Adults get bored when you move too slowly and then you have pictures of bored adults trying really hard not to look bored. When you’re moving too fast, adults get anxious. They start having trouble understanding and interpreting your instructions. Then, you have photos of anxious adults trying really hard not to look anxious.

Getting a sense of your subject’s natural pace is all about how you interact with them. You can’t simply bark orders at your subject. You can’t withdraw into a technical and creative cocoon, sticking your lens out just far enough to take their picture. You have to actually engage with them personally. Allow time in between arrangements and locations to chat. Be open with your subject; make yourself vulnerable to them. Remember, that is the challenging posture a portrait session puts the subject in: vulnerability.

Pay attention to the things your client is saying, and the jokes they are making. If they say something like “I’m sorry, I must be terrible to work with” pay attention! They are blaming themselves, but it is likely because you are moving too fast and failing to communicate. The client is likely to blame themselves since they have seen all of your amazing photos and assume that all those people must have been able to keep up. Take this as a personal critique to communicate more openly and slow down.
Unexpected circumstances

Learn to Speak in Positive Terms and Say Positive Things

As you are open and communicating with your subject, remain positive as much as possible. When you have to be honest about something challenging or difficult, do so in positive terms. This takes practice, but it’s beneficial to your own well being as well.

I’m not advocating lies, or even twisting the truth. I’m talking about finding a legitimate perspective in whatever you’re saying, so that some form of positivity is also in view.

For example, say you’re shooting in a local park and the shot you’re working on just isn’t working the way you want. When you know the shot that you wanted is dead, there’s no reason to keep wasting time; you should just move on. If you say “Ugh, this spot just isn’t working out, let’s look somewhere else”, you would be telling the truth, but in a negative way, with the focus on what isn’t working right. That’s not the important part. Instead, if you say “Hmm, this spot isn’t turning out how I’d hoped, I think there might be something even better over in that direction” it sounds more hopeful, positive, and encouraging.

Both of those statements are essentially the same. But in the first, the emphasis is on a problem right then and there. In the second statement the problem is acknowledged, but the emphasis is on something positive “over in that direction”.

Keeping an attitude like this helps your subject remain optimistic about the result, which is important. As your subject’s optimism goes down, they will have to work harder to appear comfortable and relaxed. So even if you’re struggling in the beginning, and your subject might have objectively good reason to become more pessimistic, if you allow that to happen, you’ll be damaging your chances of recovering later.

Stay positive!
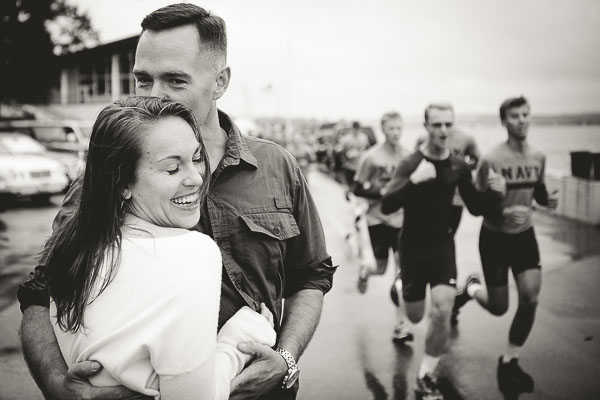
Naval Academy Runners Romance

Use Humor as a Diffuser

The situation your subject is stepping into is a vulnerable one. It’s your job to scrutinize how they look in order to present them in their most flattering light. Most of us feel uncomfortable being under the microscope like, especially concerning the way we look. People don’t like their looks being judged poorly and they spend a great deal of time, energy and money to avoid it. In fact, hiring you might itself, be a part of that desire.

So part of your job is to diffuse that feeling. You need to keep your subject comfortable, which typically means obscuring the overt need to scrutinize them and the way they look. An excellent method for this, without having to resort to being deceitful, is to place yourself under their microscope.

If you make a mistake, be open about it and laugh it off. By presenting your own momentary shortcomings, you make yourself vulnerable, and by contrast make them feel less vulnerable. You’re not lying, or manipulating them. You’re just levelling the playing field.

Likewise, if your subject has said or done something embarrassing, you can use humor to turn the embarrassment on yourself. For example, if my subject accidentally steps in a puddle of water and seems embarrassed, I might use the opportunity to tell them about the time I fell in the water during a portrait session. It’s humanizing.

By positively applying humor to your own shortcomings, you’re able to change the tone of the session from one where the subject feels that they must perform for you, into one where they must engage with you.
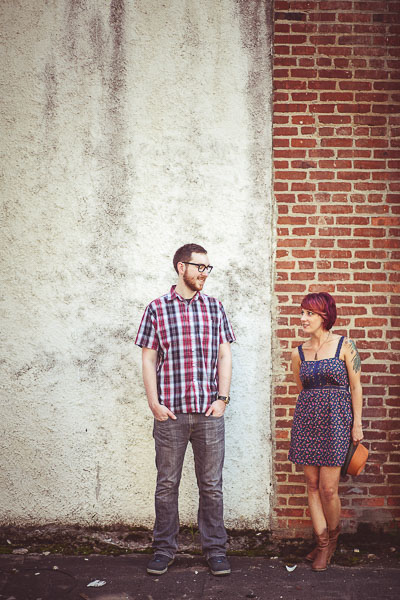
Engaged couple two tones

Speak in Terms Relative to Your Subject

In many cases, unless your subject has been trained as a model, they’re going to spend a fair amount of their mental energy trying to interpret what you’re telling them to do.

If you say, “tilt your head”, that means a lot more to your subject than that specific thing you want them to do, so for them, it has almost no meaning at all. Instead, you could say “tilt your forehead toward your toes”, or “bring your left ear closer to your left shoulder”. The same goes for the direction they’re facing and movements you need them to make. If you tell them to “step forward” they will often move in whichever direction their feet are facing, or they’ll feel confused about what you want them to do, and shuffle around awkwardly. Instead, you could say, “take a step toward me”.

These are specific instructions which are relative to your subject, rather than your vision. Giving subject-relative instructions also sounds a bit funny to many people at first so it acts as an excellent ice breaker too.

If you master no other subject-relative language, master your subject’s left and right. Instead of saying “step to the left”, say “step to your left”. By giving your subject terms that they do not have to interpret, they can devote more mental energy to the intangible elements of the shoot – like having a good time, or interacting with you.
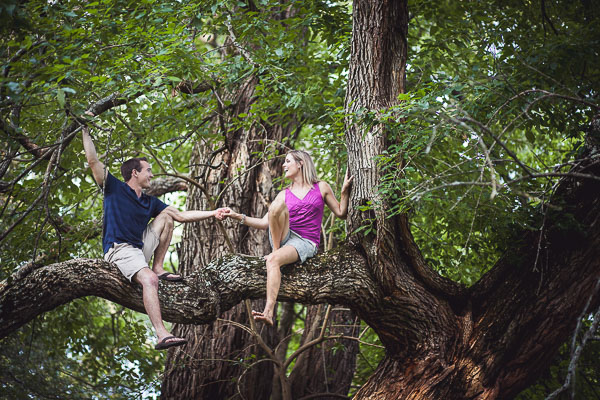
Engaged couple in a tree

Demonstrate Posing

This is an extension of speaking in subject-relative language, except it takes it one step further. Taking a moment to demonstrate how you’d like your client to pose can have multiple benefits.

First, demonstrating a pose can often act as an icebreaker, since the motions you will ask your subjects to carry out sometimes feel a little silly, even though they look great in a photo! When you demonstrate the pose, the subject has a chance to see you feeling a little silly, or not feeling silly and also not minding.

Second, as with speaking in terms relative to them, demonstrating a pose helps remove a big chunk of the subject’s need to interpret what you want them to do. They can more easily just go for it and try, rather than timidly wondering if they’re “doing it right”.
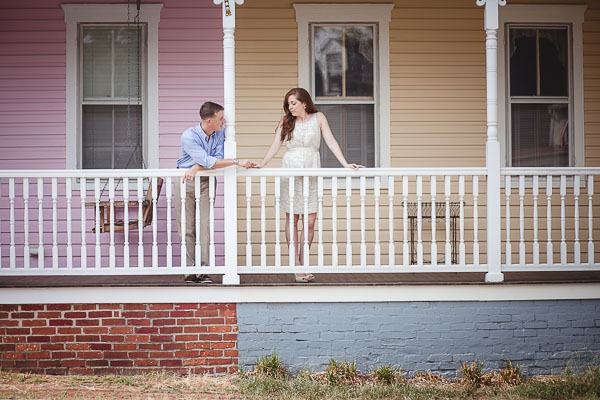
Relaxed romance

When I demonstrate a pose for a subject, I tell them what I’d like them to do, as I do it.

So, I may sit down in the spot I’d like my client in and say, “Okay, I’d like you to sit right about here”. Then I’ll sit down and say, “You can cross your legs like this, or something like this, if it feels more natural for you” as I demonstrate a couple of different acceptable positions for their legs. Then I might point over to where I’m planning on shooting from and say “I will be shooting from right over there, so you’ll want to look in that direction”.

By the time the client sits down, they have a kind of template for what to do and can act more confidently in giving it a try. This also has the added benefit of allowing you to help your subject find their way into a pose that is more natural for them, rather than putting them in a position you’d never see them use in real life.

For more on posing check out this dPS eBook – Portraits: Striking the Pose

Be a Constant Stream of Affirmation for Your Subject
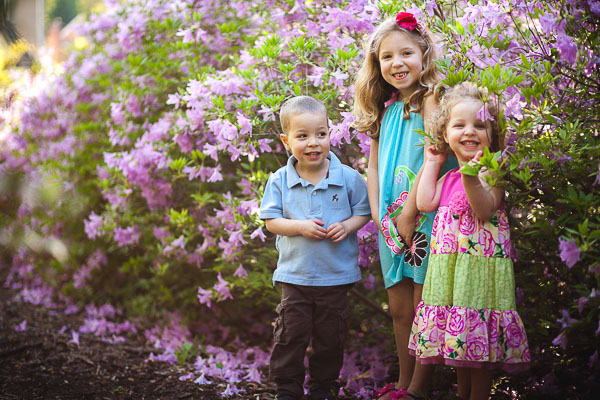
Hide and seek

I’ll say it again; remember what a vulnerable situation your subject is in when they’re in front of your camera. One of the simplest ways to offset that feeling for your subject is to be a constant stream of affirmation.

  • Thank you!
  • You’re doing a great job
  • Yes! That’s perfect, hold onto that!
  • You’re looking great!

Of course, you’re walking a line here, because what if your client isn’t doing a “great job” and they are in fact making your job a lot more challenging. Well, get over it. It’s your job as a photographer to work with who your customer is; some people are easier going with pictures, others need more attention, but the images will be yours and so the responsibility is too.
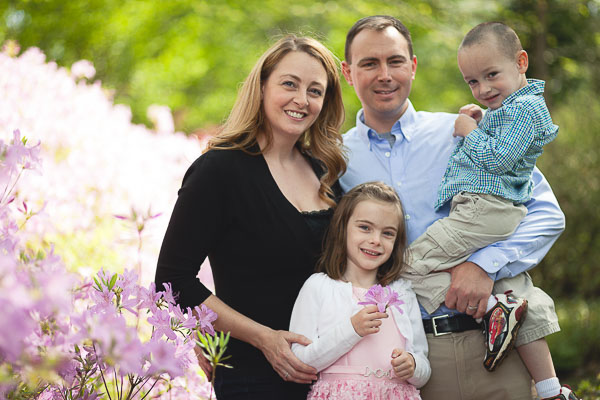
Friendly family

I wouldn’t advise lying if you’re struggling to get something you like while working with your subject. But affirmation is still important. Perhaps even more so. The thing about affirmation in this context is that it doesn’t necessarily have to be affirming anything the subject themselves is doing. Of course, that certainly works best to mitigate the feelings of a subject who is insecure about their appearance, or feels bad at photos. But simply affirming that the shoot is going well and you are excited is often enough to let the subject relax. Keep them coming – seriously, about every 15-20 seconds while you’re behind the camera.

  • Wow, this shot is coming out even better than I expected!
  • I love this background!
  • You and I are like a dream team!
  • The textures in this foreground are so interesting and juxtapose just right with your dress!

Easing a subject’s sense of vulnerability by making positive exclamations about the shoot makes sense logically too. By helping the subject to realize that they are only a part of what you’re paying attention to will relieve the pressure, and let them relax.
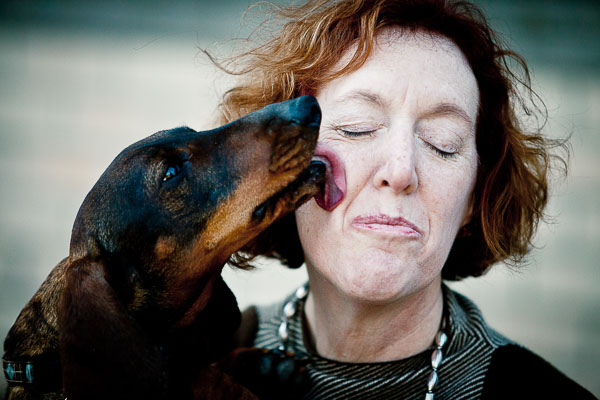
Dog kisses

Don’t Laugh at Anything that Shows up on the Viewfinder

Here’s what I want to leave you with. This advice, I believe, carries with it the heart of everything I’ve said here.

Never laugh at something that shows up on your camera’s screen.

I’m sure you can understand why – your subject’s vulnerability, of course. How might they interpret your laughter? It’s possible that you’ve cultivated an atmosphere of humor. Maybe you have consistently made yourself the butt of many jokes, and your subject might have joined in the fun and so maybe at this point it’s okay to laugh a little, as long as you’re laughing together. But let’s be honest, the average subject is pretty insecure. They’ll probably think you’re laughing at them and they’ll clam up.

But all of that is quite obvious. People don’t like to be laughed at. That’s not what is so important about this though. It’s not that you’re laughing, it’s not even why you’re laughing. It’s why your subject thinks you’re laughing. Truth is not important, your subject is going to respond to what they think, regardless of whether that is true or not.

It’s not that laughing is a problem. It’s that the subject thinks you’re laughing at them in some way. And it’s not just about laughing.

Let’s say you’re having some annoying problem with your camera for some reason. As you’re trying to work it out, you become visibly frustrated. Your subject probably doesn’t know what camera problems look like and their sense of vulnerability is causing them to take on a lot of blame. It’s not that you’re frustrated, it’s that you’re subject thinks you’re frustrated because of them.

Subjects place themselves in a position of vulnerability with photographers to a degree few other professions have access. Doctors and lawyers are a good example example. Doctors need access to the skin and the stuff underneath. Patients have to reveal their bodies to doctors – a vulnerable feeling indeed. Defence lawyers need access to the minute and truthful details of a defendant’s life. You as a photographer need access to their spirit – people must be who they really are with you.

You must take great care not to trample the spirit of your subjects. You must do mental, emotional, and creative gymnastics to avoid crushing the delicate structure of trust and assured respect. That allows their spirit to be reveal itself in honest smiles, cracked jokes, and a temperament of self-confidence standing in front of the camera.

Without your subject’s spirit, there is little reason for the photo.

Do you have any other tips for working with people and taking better portraits? Please share them and any stories you have in the comments below.

The post 7 Tips for Interacting with People to Create Better Portraits by William Petruzzo appeared first on Digital Photography School.


Digital Photography School

 
Comments Off on 7 Tips for Interacting with People to Create Better Portraits

Posted in Photography


Canon EOS 7D Mark II: Real-world samples (beta)

29 Sep

The Canon EOS 7D Mark II is the long-awaited replacement to the 7D, which was launched in 2009. It features a 20.2MP APS-C CMOS sensor and dual DIGIC 6 image processors. It has a new 65-point, all cross-type autofocus system as well as an updated version of Canon’s Dual Pixel CMOS AF system that provides continuous phase detect focusing during video recording. We’ve been using a pre-production camera for a couple of days – just long enough to prepare a quick sample gallery. Click through to take a look

Articles: Digital Photography Review (dpreview.com)

 
Comments Off on Canon EOS 7D Mark II: Real-world samples (beta)

Posted in Uncategorized


David Gibson: „The Street Photographer’s Manual“

29 Sep

Ein Beitrag von: Tilman Haerdle

David Gibson lebt in London und ist eines der Gründungsmitglieder des Straßenfotografie-Kollektivs in-public. Neben seiner eigenen fotografischen Aktivität leitet er regelmäßig in aller Welt Workshops zum Thema Straßenfotografie. Jetzt hat er mit „The Street Photographer’s Manual“* ein Buch vorgelegt, das Interessierten als Leitfaden zur Straßenfotografie dienen soll.

Als ich über den Blog von in-public vom Erscheinen dieses Buchs erfuhr, dauerte es nicht lange, bis ich mich entschloss, es mir auch zu kaufen. Da ich mich vorher intensiver mit der Interpretation von Straßenfotografie aus der Sicht der in-public-Fotografen auseinandergesetzt hatte, kam dieses Buch, zudem noch mit dem Versprechen, ein Handbuch der Straßenfotografie zu sein, genau zur rechten Zeit.

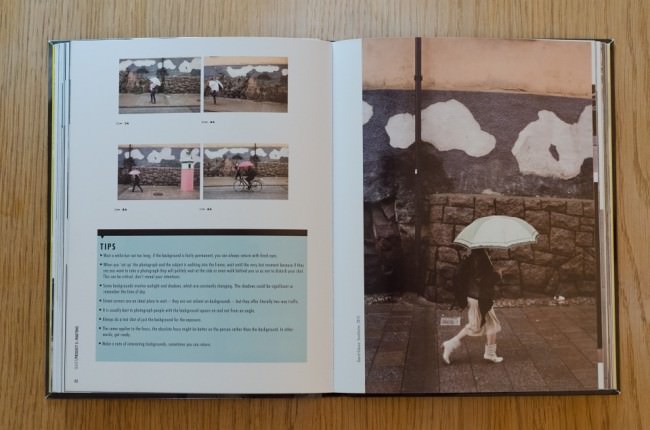
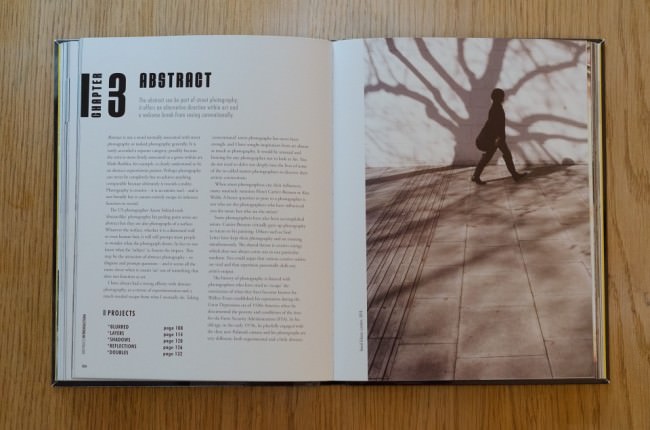
The Street Photographer’s Manual © David Gibson

In seiner tongebenden Einleitung befasst sich Gibson mit der Frage, was Straßenfotografie überhaupt ist. Rein formal kann man hier einige Regeln exemplarisch nennen:

  • Keine gestellten Bilder
  • Bilder sollten nicht zugeschnitten oder anderweitig wahrheitsverfälschend bearbeitet werden – es zählt das fotografierte Bild
  • Gegenstand der Straßenfotografie ist der Mensch und Anzeichen seiner Existenz in unserer Umwelt – es müssen also nicht notwendigerweise Menschen zu sehen sein

In der Fotografie geht es um Beobachtung, nicht um die Manipulation von Bildern.

Elliott Erwitt –

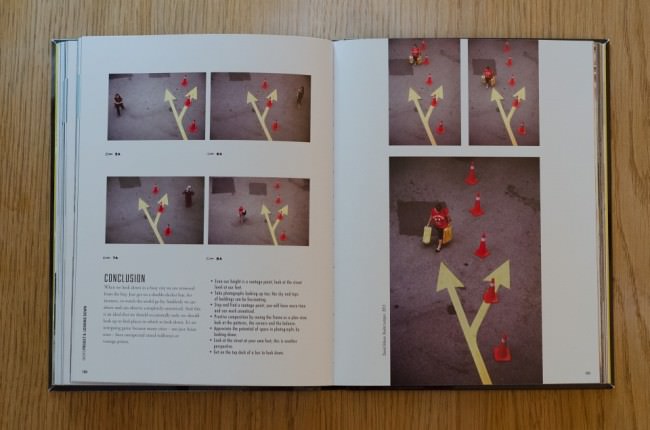
The Street Photographer’s Manual © David Gibson

Die Abgrenzung zu fast jeder anderen fotografischen Kategorie ist damit einfach möglich, er gibt jedoch zu, dass der Übergang zur dokumentarischen Fotografie fließend ist. Bilder, die diesen Regeln genügen, mögen dem Genre der Straßenfotografie zuzuordnen sein, doch gibt sich Gibson mit diesen elementaren Grundsätzen, die er durch Zitate wie das obenstehende in den Text einwebt, nicht zufrieden.

Bei mir blieb nach diesem Abschnitt das Gefühl, dass die Haltung des idealen Straßenfotografen schon fast spirituell zu nennen ist. Ob man diese Maximen in voller Konsequenz umsetzt, bleibt am Ende jedem selbst überlassen.

Jenseits des Formalen betont Gibson, dass die Beschäftigung mit Straßenfotografie zwingend erfordert, dass man jegliche Berührungsängste aufgibt, dass der Gedanke an Zurückweisung oder Ablehnung durch die fotografierten Menschen kein Hinderungsgrund sein darf, ein Bild zu machen. Für viele Einsteiger ist das ein harter Brocken, typischerweise ist man lange Zeit eher zu weit von den fotografierten Menschen weg.

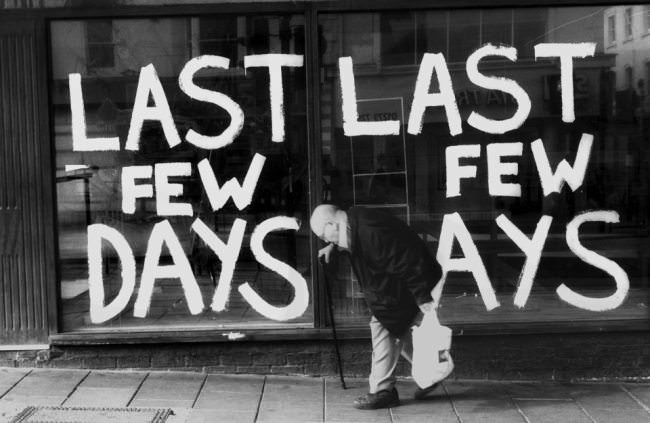
Ein gebeugt gehender alter Mann vor einem Schaufenster mit der Aufschrift „Last few days“.

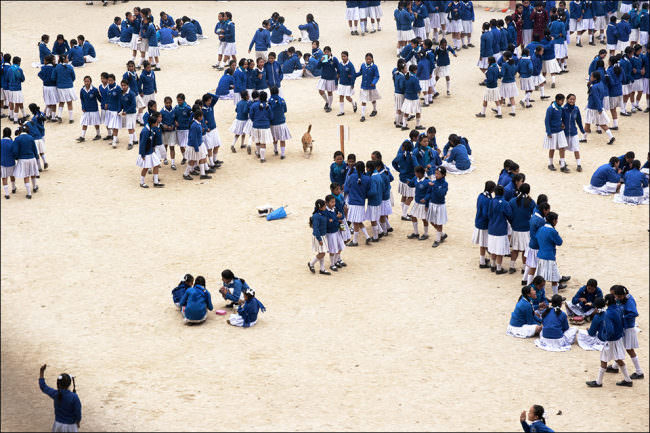
Viele Mädchen in blau-weißer Schuluniform.

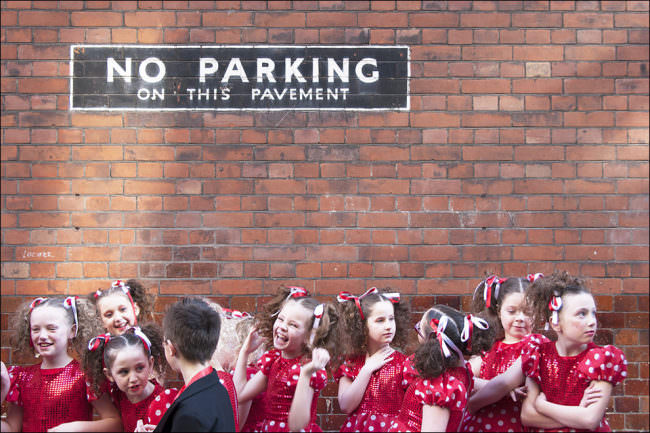
Viele Mädchen in roten Kleidern und ein Junge im Anzug vor einer Backsteinmauer mit der Aufschrift „No parking on this pavement“.

Gibson befasst sich ausführlich auch mit Fotografen-Kollektiven. Er identifiziert den Straßenfotografen als Einzelgänger, wenn er fotografiert, der jedoch den Austausch mit Gleichgesinnten sucht, um von der Rückmeldung anderer zu lernen und selbst durch das Wahrnehmen anderer Fotografien andere Sichtweisen zu erfahren.

Neben den exklusiven, kleinen Zirkeln von Kollektiven wie Street Photographers, in-public, Burn My Eye oder nicht zuletzt auch Magnum geht er auch auf den Austausch auf sozialen Plattformen wie beispielsweise Flickr und Facebook ein. Gerade letzteres identifiziert er als möglichen, aber nicht für jeden passenden Kanal zur Kommunikation mit Gleichgesinnten und Fans.

Das Buch und ein gutes Foto haben Gemeinsamkeiten: Struktur. Gibson gelingt es, durch die Unterteilung des Buches in grössere Kapitel, die die sehr knappen Titel „Busy“, „Quiet“, „Abstract“, „Still“ und „Subjects“ tragen, und Projekte, die die Maximen der Kapitel mit Leben füllen, das weite Feld der Straßenfotografie in begreifbare Abschnitte zu unterteilen.

Über allem liegt ein großer Bogen, das Buch beginnt mit viel Energie und wird immer langsamer, bis es im Kapitel „Still“ dann fast zum Stehen kommt. Das letzte Kapitel „Subjects“ markiert eher einen Abschluss und Ausblick, als noch wirklich zur Reihung der vorderen Kapitel zugehörig zu sein.

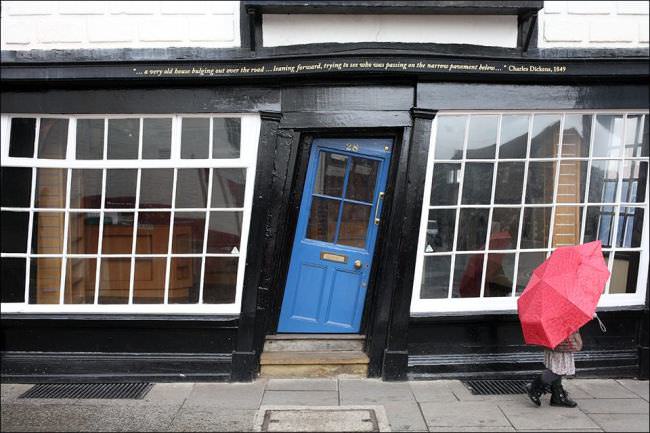
Eine Person mit rotem Regenschirm vor einer schiefen Fassade mit blauer Tür.

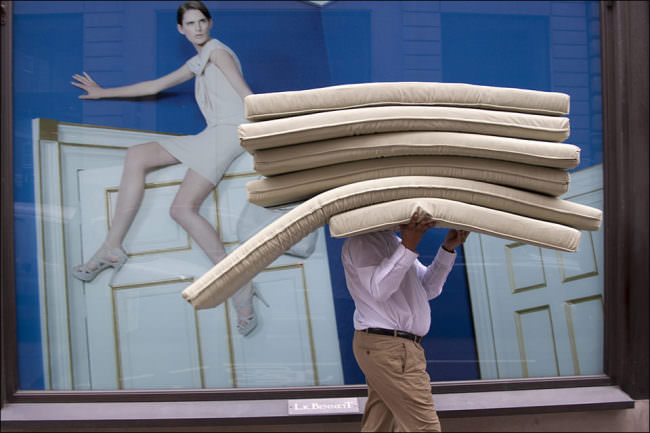
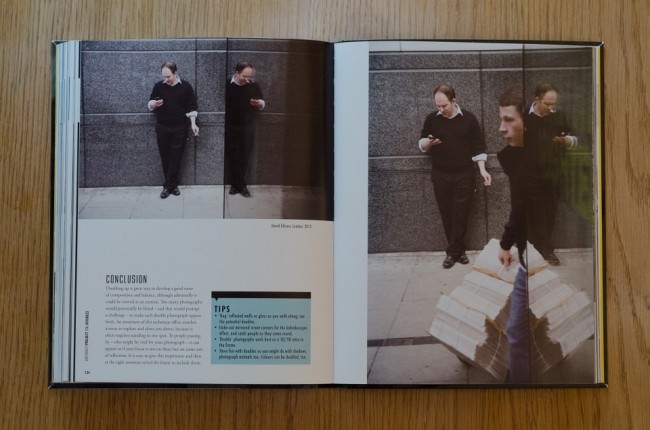
Ein Mann trägt einen Stapel Matrazen vor einem Bild einer Frau, die auf einer Tür sitzt.

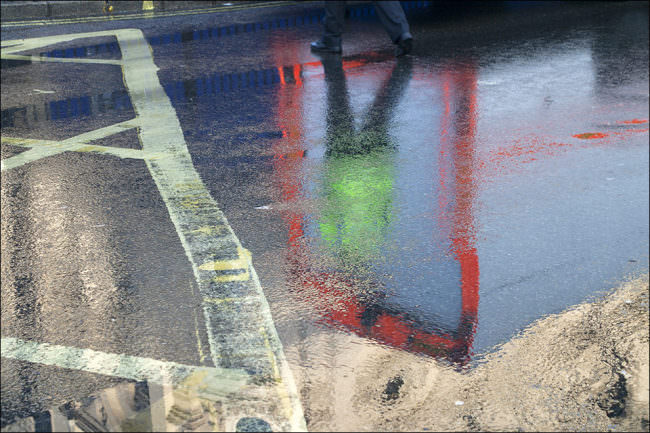
Bunte Spiegelungen auf nassem Asphalt.

Die Wahl seiner Projekte, wie beispielsweise „Order“, „Following“, „Blurred“ oder „Doubles“ mag willkürlich erscheinen, doch sie ergibt Sinn. Vor allem hat diese Strukturierung zumindest mich dazu gebracht, zu hinterfragen, was ich überhaupt darstellen will.

Die einzelnen Projekte führten dazu, dass ich mir beim Fotografieren Gedanken darüber gemacht habe, aus welchem Grund ich genau jetzt den Auslöser drücken will. Die Menge meiner Bilder wurde dadurch nicht weniger, da ich gleichzeitig versucht habe, Situationen aktiver zu bearbeiten und nach Möglichkeit von einer Szene mehr als nur ein Bild zu machen, wenn sie mir interessant erschien. Gibson selbst zur Wahl seiner Projekte:

Es ist wichtig zu wissen, dass die Straßenfotografie keine exakte Wissenschaft ist, dieses Buch also eher wie eine Auswahl verschiedener Gitarrenakkorde – und -einstellungen – sowie ein paar empfohlener Lieder zu verstehen ist.

The Street Photographer’s Manual © David Gibson

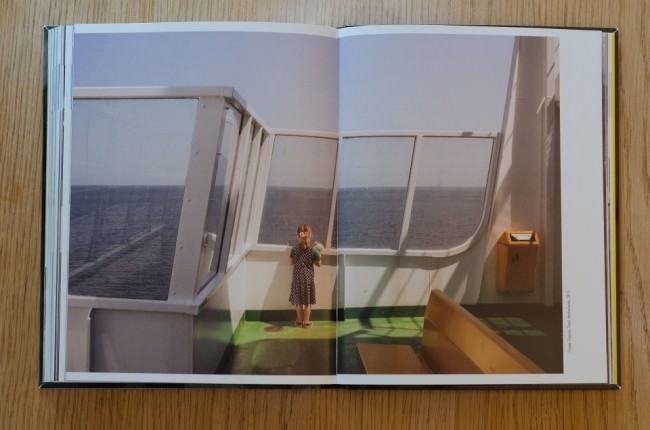
Während Gibson in der Beschreibung der einzelnen Projekte in der Regel auf seine eigenen Bilder zurückgreift und dabei auch nicht davor zurückscheut, zur Illustration des Auswahlprozesses schwächere Bilder zu zeigen, schiebt er zwischen jedes Projekt Kurzportraits von zum Kapitelthema passenden Fotografen ein. Die Bandbreite reicht hier von „Ikonen“ wie Saul Leiter über in-public-Kollegen wie Blake Andrews oder Matt Stuart bis hin zu nur echten Insidern bekannten Fotografen wie Oliver Lang oder Shin Noguchi.

Überhaupt bietet das verwendete Bildmaterial genügend Grund, das Buch auf einer zweiten Ebene zu verstehen, eben nicht nur als Lehrbuch, sondern als exemplarisch für Gibsons Sichtweise der Straßenfotografie.

Somit ist auch klar, dass das Buch nicht nur für Einsteiger in die Straßenfotografie interessant ist. Der Novize profitiert von vielen Anregungen, die einen einfachen Einstieg in dieses Genre ermöglichen. Als erfahrener Straßenfotograf hat man seine Freude am ausgewählten Bildmaterial und an der Möglichkeit, die Entscheidungsprozesse des Autors bei der Bildauswahl nachvollziehen zu können.

The Street Photographer’s Manual © David Gibson

Einziger Kritikpunkt ist die Erscheinungsform als, wenn auch großes, Taschenbuch. Eine etwas robustere Ausführung und Bindung mit Seiten, die auch aufgeschlagen bleiben, wäre schöner gewesen. Dafür ist der Preis mit unter 20 € für ein Buch in dieser Kategorie recht attraktiv.

David Gibson bietet regelmäßig Workshops zum Thema Straßenfotografie an. Termine veröffentlicht er auf seiner Website und auf Facebook.

The Street Photographer’s Manual © David Gibson

Informationen zum Buch

Autor: David Gibson
Taschenbuch: 200 Seiten
Verlag: Thames & Hudson
Sprache: Englisch
Größe: 23 x 17,8 x 2 cm
Preis: 17,30 €

* Das ist ein Affiliate-Link zu Amazon. Wenn Ihr darüber etwas kauft, erhält kwerfeldein eine kleine Provision, Ihr zahlt aber keinen Cent mehr.


kwerfeldein – Fotografie Magazin | Fotocommunity

 
Comments Off on David Gibson: „The Street Photographer’s Manual“

Posted in Equipment


29. September 2014

29 Sep

Ein Beitrag von: Susan

Ein Straßenportrait eines Mannes, der Tee eingießt


kwerfeldein – Fotografie Magazin | Fotocommunity

 
Comments Off on 29. September 2014

Posted in Equipment


Mastering Family Photography: What You Need to Get Started

29 Sep

One thing that I shoot my fair share of is family pictures. I love the family dynamic so much… the “over primpers”, the “get me out of here’s”, the “I’ll be in the picture, but I’m going to ruin every single shot”, the “smile or I’ll beat the snot out of you later’s” and the “gee, we’ve known that we Continue Reading

The post Mastering Family Photography: What You Need to Get Started appeared first on Photodoto.


Photodoto

 
Comments Off on Mastering Family Photography: What You Need to Get Started

Posted in Photography


Street Photography Video Tips With Valerie Jardin

29 Sep

I have been a regular co-host or guest on the popular This Week in Photo podcast. Recently they launched their new website and are going to be rolling out new spin off podcasts including one by our very own dPS writer Valerie Jardin on street photography. There is also one by Doug Kaye on gear, and interviews done by the host of TWiP Frederick Van Johnson. You can check out all their shows here.

In this first teaser Valerie and Frederick chat about various things regarding street photography, and traveling with your gear.

You can see more articles on street photography here:

  • Using Humor In Street Photography
  • 7 Street Photography Tips and Exercises to Try This Season
  • How to Create Amazing Urban Landscape and Street Photography Images
  • Practical Tips To Build Your Street Photography Confidence
  • How to Approach Street Photography in 12 Easy Steps
  • 103 Things I’ve Learned About Street Photography
  • 8 Things You Should Know if You are Dating a Street Photographer

You can also check out my last appearance on TWiP when we discussed the new iPhone6 and the newest releases from Canon and Nikon.

The post Street Photography Video Tips With Valerie Jardin by Darlene Hildebrandt appeared first on Digital Photography School.


Digital Photography School

 
Comments Off on Street Photography Video Tips With Valerie Jardin

Posted in Photography


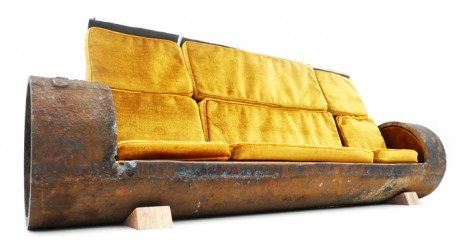
Sewer Pipe Sofa: Rusted NYC Tubes Recycled as Urban Seating

29 Sep

[ By WebUrbanist in Design & Furniture & Decor. ]

modular sewer pipe chair

The latest in a long line of city-centric upcycling projects, this modular couch turns the ultimate in untouchable urban infrastructure into a chic industrial work of furniture.

modular nyc sewer pipe

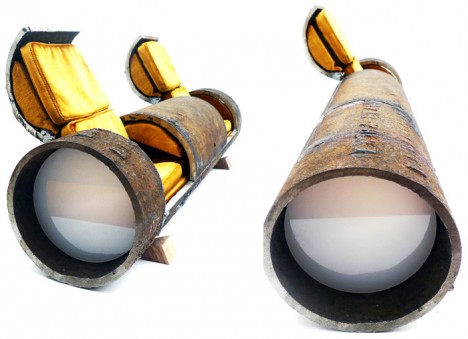
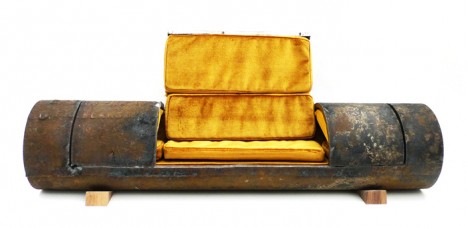
Carlo Sampietro created the Cloche Sofa after seeing a section of sewage pipe abandoned by a construction site, its spot being fit for replacement with a new set of tubes.

modular closed pip sofa

modular pipe sofa full

He then fitted the ends with stabilizing structural circles and plasma-cut sections for seats, welding them back into place, hinging them and creating two locked positions (open and closed). Various configurations can be achieved by opening and closing sections to create a pair of chairs, a love seat or a full sofa.

cloche seat closed opened

cloche chair urban art

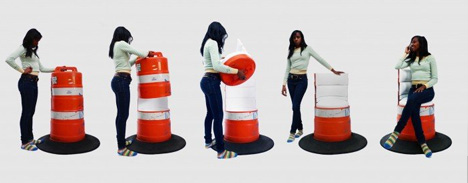
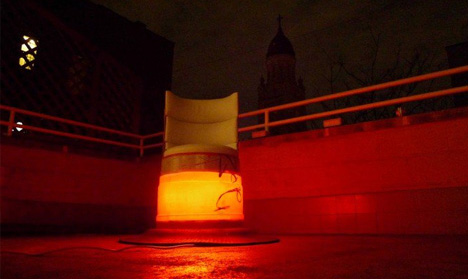
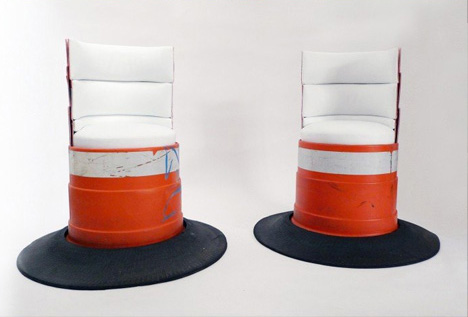
safety barrel traffic cones

This is far from the first time that Sampietro has reworked urban elements into new forms – his Cloche Chairs turned safety barrels from “symbols of caution into objects of comfort.”

police barrier table light

police line table

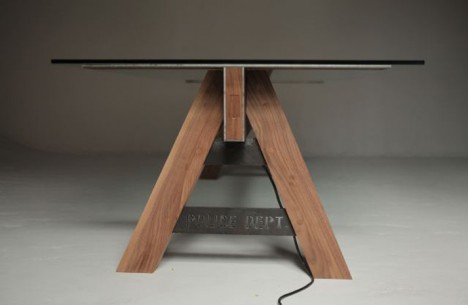
Some of his pieces draw on the visual language of familiar street objects, but interpret them in new ways, like this police barrier table constructed from walnut, steel, resin and using LEDs (which light up through its lettering below).

modular pipe love seat

More about the sofa from the artist: “It represents landscape evolution that dismantles established structural standards and elements of construction materials, and repurposes a found material into sophisticated design, reshaping a common object into a meaningful amalgam. This piece harnesses objects that outlived their original uses, were discarded, reclaimed and renovated. The evolution of this landscape design could be achieved by taking in consideration other material such as concrete, stainless steel, wood or marble, all cylindrical forms present in existing construction materials or natural environment. The tube shape is accented by LED side panels and the conic footing. This renders the object’s hybrid functionality almost invisible, unnoticeable at the first glance.”

Share on Facebook


[ By WebUrbanist in Design & Furniture & Decor. ]

[ WebUrbanist | Archives | Galleries | Privacy | TOS ]


WebUrbanist

 
Comments Off on Sewer Pipe Sofa: Rusted NYC Tubes Recycled as Urban Seating

Posted in Creativity


How to Soften the Light When Using Flash

29 Sep

Same Flash mounted in a Photo Flex Light Dome

Why do flash images look harsh?

Recently, a number of dPS readers have asked the question on Facebook, “How do I use a flash and not have my images look so harsh?”.

Let us first understand the difference in using natural or ambient light and using a flash. With natural light you have little control over intensity, direction, or color. With a flash, you have a lot more control if you can grasp the fundamentals of light and exposure. Using a flash you can control the direction, intensity, color and distribution of the light.

A good understanding of how your flash affects the way the subject is lit, and how it will appear in the final image is important.

Understanding light

The properties of light include: quality of light, quantity of light, and also color of light, but we will exclude that from this article.

Brightness: is a relative expression of the intensity of energy output of a visible light source.

Contrast: is the difference in light between parts of an image.

Shadows and highlights: consider that the absence of light is shadow, so shadows are parts of your subject that are not lit, and highlights are the parts that are lit.

The quality of light: here we use the terms “hard” and “soft” to define the quality of light. Hard light is found on a bright, sunny day. It creates very bright and very dark areas in the same scene. Another good example of hard light is an on-camera flash. When it is used as the only light source it results in a brightly lit subject and a very dark background. Soft light on the other hand can be defined as smooth, diffuse and evenly distributed. This type  of light creates few shadows. Cloudy days and shaded areas are examples of this quality of light.

Size of the light:  small light sources produce hard light while large light sources produce soft light.

Distance: the farther the light source is from the subject, the harder the light it will produce.

Example: although the sun is very large, its relative size to us is small and it produces a hard light. However, on a cloudy day the light becomes a relatively large light source and the sun is no longer a hard light. Not only do the clouds make the light source relatively larger, they take that bright light source and diffuse it. As a result there is no direct light falling on anything in the scene you are photographing.

dps4-1

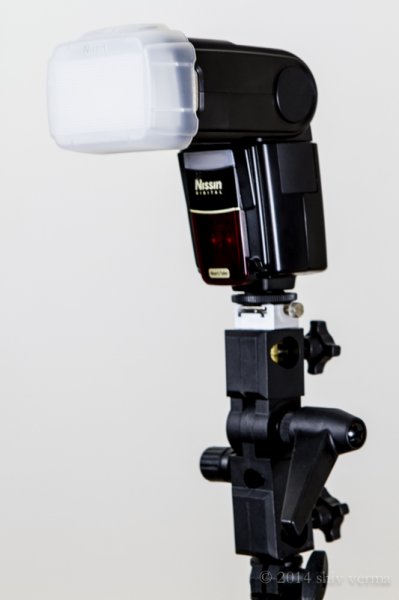
Nissin Flash with Diffuser

You can conclude that on a cloudless day, the light source is small, it is distant, it is bright and therefore is hard light. This light will create sharp shadows that define high contrast. On a cloudy day the relative size of the light source is large, it is much closer (the cloudy sky), less bright, and diffused. This light will create soft shadows and thereby lower contrast.

Photographing different types of subjects require different types of light. In response to the question asked, lets consider people photography. Your portraits will be far more pleasing when they are photographed with less contrast using a soft light. Yet in some cases, like for dramatic portraits of actors, high contrast looks great. High contrast using hard light is good when you want to show texture of the skin in older people. Contrast will exaggerate texture and facial features as the shadows are well defined. Less contrast, or the use of soft light (diffuse light), will deemphasize the texture and give skin a smoother appearance. This is what you are looking for, particularly with the female portrait.

When you use a flash, on or off camera, you are using a relatively small, hard, directional light source. This is a problem, since you end up with high contrast and a harsh appearance to your portrait. To solve this problem you have to make the light softer by making it larger. Remember, soft light is a large, light source, so the key to making your light softer is to make it larger.

Modifying light from the flash

On-camera flash

Here are some ways to make the on-camera flash into a soft light source. We will start with the simplest without using additional products, and move on to the more complex options using modifiers.

Bounce the flash: Bouncing is one way to make the light source larger but the light will also lose intensity. By bouncing the light off of walls and ceilings, the light falling on your subject will originate from a much larger area as compared to a directly aimed flash. Outdoors this may not be possible so you may have to find other means to bounce the flash. You can use large white foam core boards, umbrellas or you can buy a reflector. Reflectors come in various sizes and can have multiple surfaces that bounce or reflect the light. These can be twisted and folded into very compact and portable bags.  If all you have is a white business card or an index card on hand, use an elastic band and affix the card to the top of your flash.  This will serve as a small bounce and help provide catch lights in the subject’s eyes.

Tips:

  • Since bouncing the light reduces light intensity you will need to adjust your flash for higher output.
  • Bouncing off colored walls or ceilings will impart the same color cast on your subject
dps4-2

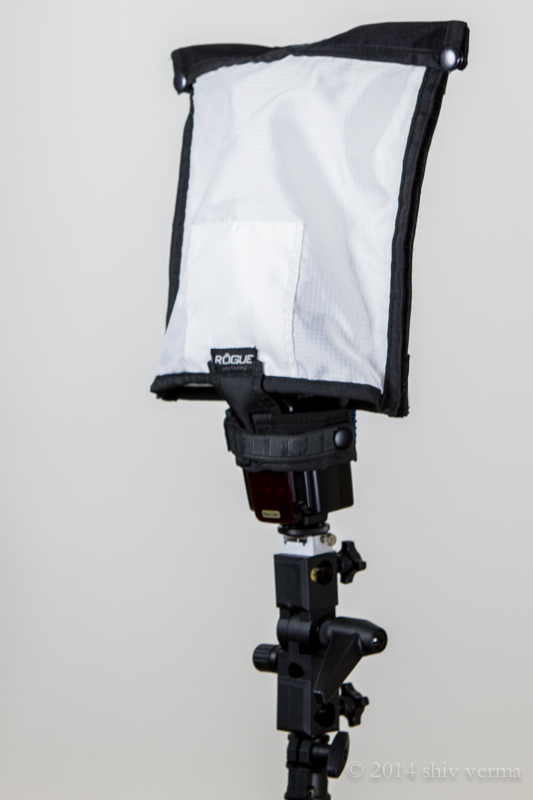
Rogue FlashBender Large

Use a Diffuser: The simplest diffuser is a piece of tissue paper taped in front of the flash lens. Plastic diffusers that either fit over the flash head or are fastened using Velcro or elastic bands, are the next step up. Stofen makes these diffusers in various sizes to fit most flash heads. A number of products that will bounce and diffuse light are available – Rogue Flash Bender products are a good example.  A number of manufacturers make small portable soft boxes designed for use with a flash.

Diffusers work well for indoor flash photography but are not that useful when outdoors. In addition, just as when using bounced light, diffusers also require higher power to achieve the same exposure.

There is one other problem that needs solving – flat lighting. The on-camera flash sits near the axis of your lens, so when you use a diffuser the light will still be coming from the same angle and you portraits will have little dimensionality. The images will appear flat. It gets worse if there is no diffuser. You will get red-eye or the deer in the headlights look.

Off- camera flash

The position and direction of the light source has a great impact on the appearance of your subject. We covered contrast and how contrast is defined, but the visibility of this contrast (visibility of shadows and highlights) depends on the position of the light source, be it diffused or not.

Any subjects, no matter how much texture and dimension it may have, when lit and photographed from the same angle will look flat as shown in the diagram below left. In order to show dimension and texture, the flash direction and the angle of the camera lens must not be coincidental, as shown below right.

Lighting-1 Lighting-2

The maximum dimension theoretically would be when the light source and the camera are at 90 degrees. However, this is a bit extreme. See the diagram below.Lighting-3

If the flash is mounted on-camera the camera will see and capture the side of the subject that is blasted with head-on light. As a result there are few if any shadows and you get the appearance of a harshly lit subject.

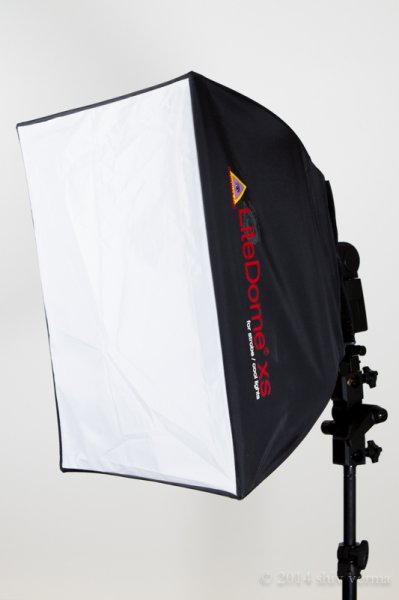
It may not always be possible to use the flash off-camera. Even small extensions using flash brackets to either side or above will help. A flash mounted on a light stand and controlled via wireless trigger is ideal. Flash heads mounted in small softboxes (see below) or with a Rogue Flash Bender style product will defuse the light well.

dps4-3

Photoflex LiteDome XS

If you are in a studio like environment or even at home you can increase the relative size of your flash by directing it through a translucent (white not clear) shower curtain. You can build a PVC pipe frame and drape a shower curtain over it, or buy ripstop nylon and use it as diffusion material.

Finally, remember that the closer the light source is to your subject, the softer the light. The edge of the light source is softer than the center. Keep these tips in your arsenal. Armed with the information in this article you will hopefully make better portraits when using a flash and have a better understanding of controlling the light from your speedlight.

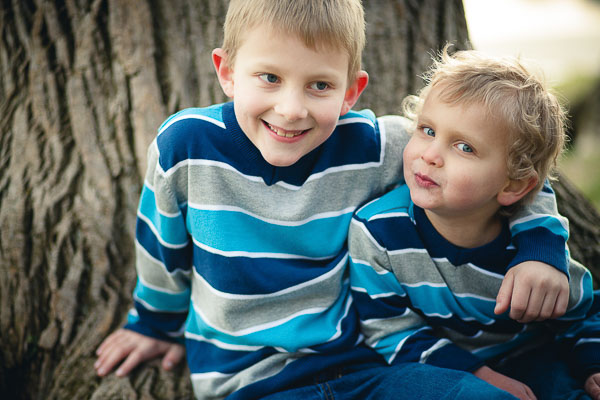
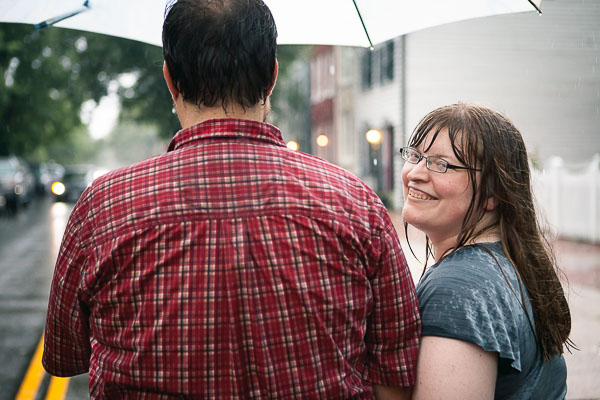
The following two portraits were shot in a casual setting with a white foam core board serving as a fill from the left side of the camera.  For the first image a diffuser that comes with the flash head was used.  As you can see that despite the use of a diffuser the light source is still small and relatively harsh.  The second portrait was shot using the light dome.  Notice how much softer the light is on the subject.  Both images are straight from the camera – no post-processing was done.

Single Flash with a manufacturer supplied Diffuser

Single flash on-camera using a manufacturer supplied diffuser

Same Flash mounted in a Photo Flex Light Dome

Same flash mounted in a Photoflex LiteDome XS Softbox

The post How to Soften the Light When Using Flash by Shiv Verma appeared first on Digital Photography School.


Digital Photography School

 
Comments Off on How to Soften the Light When Using Flash

Posted in Photography