A lot of you have asked for lighting diagrams from my last post on One Light Portraits, so here they are- the finished shot, as well as the arrangement of lights, reflectors, and camera position. Enjoy!
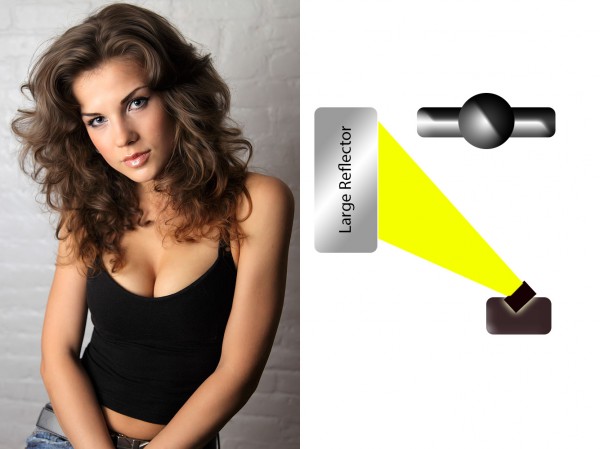
For this shot, the flash is on-camera, and bounced into a reflector at camera left.
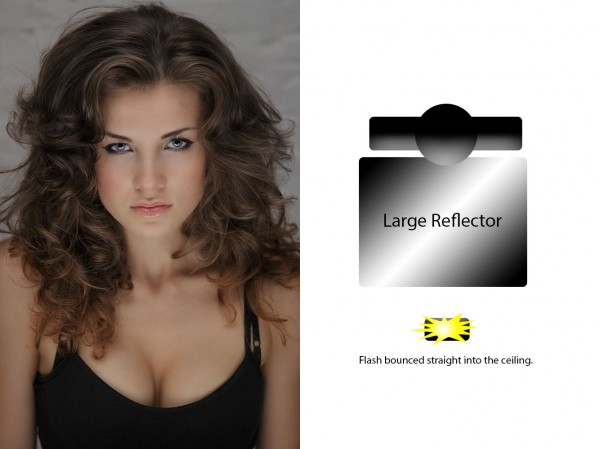
This is a variation on the previous shot. This time, the reflector is placed at the model's waist, facing up. The flash is bounced at the ceiling, and teh reflector then reflects that light up into the model's face.
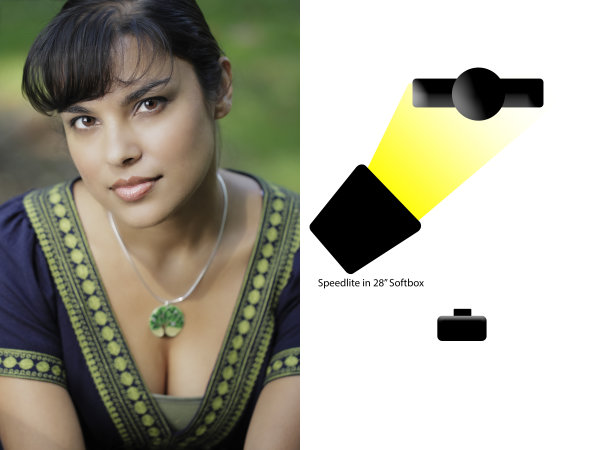
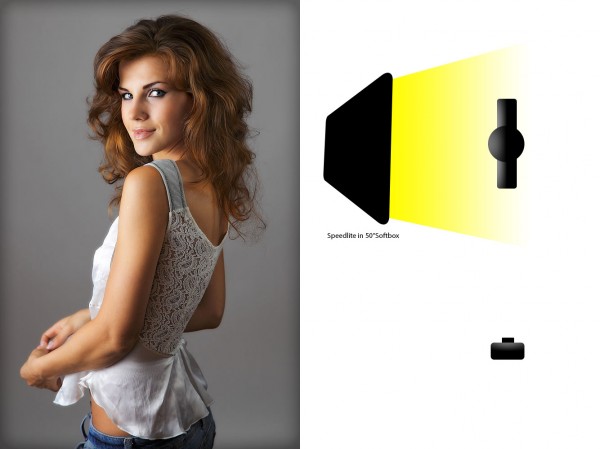
For this shot, a speedlite in a softbox was used. We are outdoors, and our subject is positioned under a tree for shade. The softbox then becomes the main light on our subject, and the daylight fills the background.
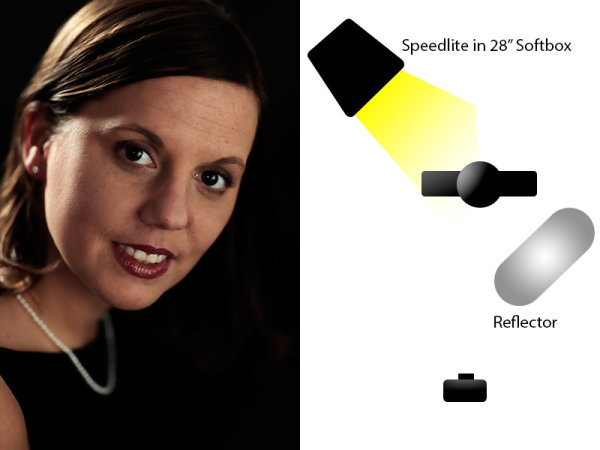
In this shot, a softbox is set up behind the subject, while a reflector is set up directly opposite to bounce light into the face. In this case, the silver side of the reflector was used.
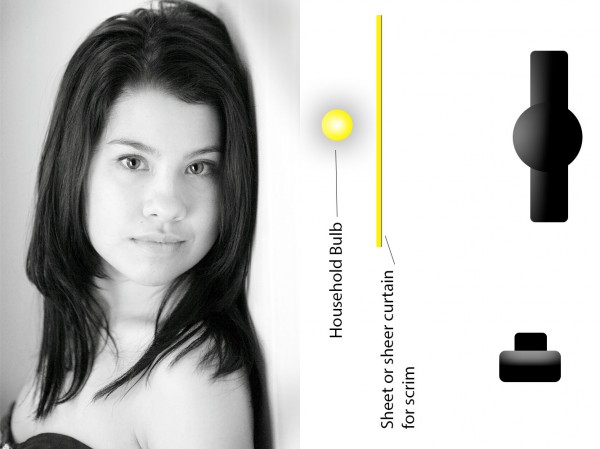
A household bulb can make a perfectly acceptable light source when nothing else is available. In this case, a household lamp was used, with the shade removed. To soften the light, a white sheet was used as a scrim to allow light to pass through. A higher ISO- ISO 2500 – was used. Keep in mind your white balance must be adjusted for the yellowish cast a household bulb creates.
This shot uses one large soft box- 50 inches- to create a soft light.
Post originally from: Digital Photography Tips.
Check out our more Photography Tips at Photography Tips for Beginners, Portrait Photography Tips and Wedding Photography Tips.
One Light Portraits Part 2: The Diagrams
You must be logged in to post a comment.