The post Beginners Tips for Night Sky and Star Photography appeared first on Digital Photography School. It was authored by Phillip Van Nostrand.
Star Photography
My favorite type of personal photography is taking night shots of the stars (long exposure pictures). I am often busy shooting pictures of people at weddings, or apartments, or models, and it’s important for me to make sure I take pictures for fun regularly. Taking pictures for no one other than myself is highly rewarding, soul filling, and fun! I also love taking travel photos and HDR photos, in this article we will take a close look at exactly how you can take your own epic star photographs.

What you need to take jaw-dropping pictures of stars
To take your star pictures, you only need three things:
- a full-frame camera (for better ISO capabilities)
- a fisheye lens (for the widest view of the sky)
- a tripod (for stability during 15 second photos)
(Note: You can do this with a cropped sensor camera, without a tripod, and without a fisheye lens. It will just be a little harder and slightly less jaw-dropping)

Camera settings
You can nail this shot almost every time with these settings: 25 second exposure, f/2.8, ISO 1600
If your lens doesn’t open up to f/2.8 you can try 30 seconds at f/4 with ISO 1600.
Note: this kind of photography won’t work if there is a full moon out (or even a half moon). Don’t compete with large light sources, the stars will be over powered. The best location for star photography is way out in nature, away from city lights that cause “light pollution.”

Why to use these settings
The most important component of these settings is the 25-second exposure. An exposure longer than about 25 seconds will start to show star trails. Photographing star trails is a legitimate type of photography on its own, but not the type of photography you are trying to do here. Since you are limited to about 15-25 seconds max shutter speed, you still need to let in more light.
The largest aperture you can find on a fisheye lens is f/2.8, and still, your picture might not be quite bright enough to look stunning. So this is where the ISO comes into play. On a full-frame camera like the 5D Mark III or the Nikon D800, you can bump the ISO up to around 2000 without seeing much noise.
You’ll learn how to reduce noise in Lightroom in the next section for a super clean photo.

Editing in Lightroom
I do extensive retouching in Lightroom after I take my photos. I’ll usually boost the exposure up by a stop or more, and I’ll use Noise Reduction under the Detail section to reduce any unwanted “noise” (those pesky extra white, red or blue pixels that show up when you push the ISO too high).
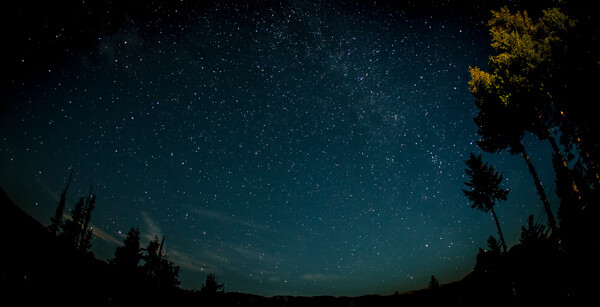
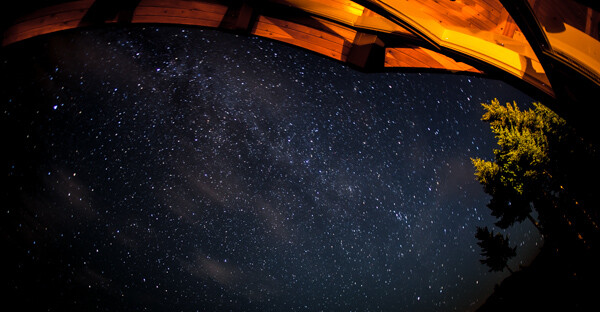
Here is a standard star photo of mine and the Lightroom settings I used to create it:
Here are the Lightroom settings I used to edit the above photo:


1) You can see in the first panel that I bumped the whites up to +46 and brought the blacks down to -52. I really wanted to emphasize the stars against the dark sky and this is a good way to do that. Pushing the clarity up to +55 also helps define the stars against the sky, making them nice and crispy. I boosted the saturation to bring out any colors that are in the sky.
2) In the second panel, you can see that I sharpened up the image a bit, also to emphasize the stars. At the same time, I brought up the noise reduction to 33 to smooth out some of the noise that might show up, and I brought up the color to 25 for the same reasons.
Pro tips

Here is where you can have fun with the editing. Play around with the split toning sliders to make the colors in your sky appear magical. In the photo above you can see a little bit of turquoise in the lower part of the sky, and that comes from boosting that color in the Shadows of the Split Toning slider here:
You can also affect the color of the sky by playing around with the temperature and hue sliders to get some pretty magnificent looking star photos. Take a look at this one photo rendered three different ways:

Another pro tip that you may have noticed in all of the photo examples I gave here is this – shoot your stars in context. It really tells a great story to see a silhouette of a pine tree or a house in the background, and it shows the magnitude of the scene when you have an object in the foreground to compare to the stars.
Lastly, make sure you know which direction the Milky Way is. You can use an app like Sky Map to see exactly what stars are in the sky above you.
Have fun shooting, and please share your pictures below!
The post Beginners Tips for Night Sky and Star Photography appeared first on Digital Photography School. It was authored by Phillip Van Nostrand.
You must be logged in to post a comment.