The process of converting a color landscape photo into a black and white image using Lightroom goes beyond changing the treatment to black and white. That’s just the start. From there you have to tweak and refine, using all tools that Lightroom gives you, to craft an image that matches the vision you carry in your mind.
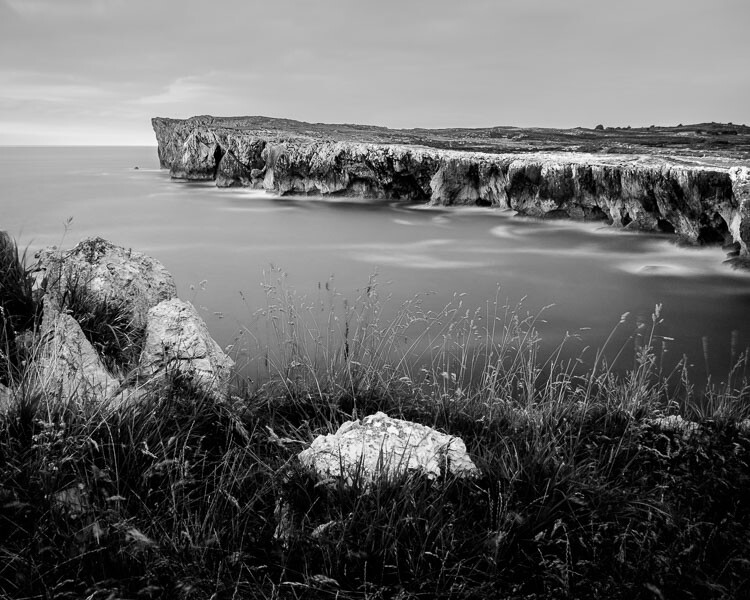
A good way of showing you how this works is to take you step by step through the process that I use when converting a landscape photo to black and white in Lightroom. You’ll see the techniques that I use. and more importantly, the reasoning behind them. This should give you the insight you need to use these tools on your own images.
1. Make sure you have a good image for black and white
The first step is to make sure that you are working with a photo that suits a black and white treatment. Good black and white photos have strong composition that make use of texture, line and tonal contrast.
It’s a good idea to convert only your best landscape photos to black and white. It will take you some time to convert a photo, so why waste it on anything less than your best work?
2. Prepare the color photo
First, open your photo in Lightroom’s Develop module. Then, I do two things before converting a color landscape photo to black and white.
- Use the Spot Removal tool to get rid of any dust spots.
- Set White Balance to Auto so that the color balance of the photo is more or less neutral. Photos with strong color casts are harder to successfully convert to black and white.
If you are converting a photo that you have already processed in color it’s a good idea to make a Virtual Copy and work on that. This way you don’t lose the work you have done on the original color version.
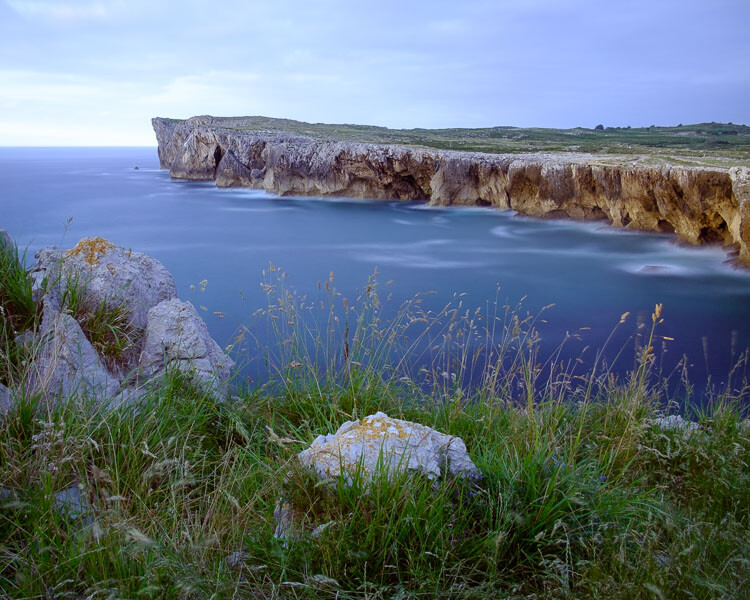
Here’s the color photo that I am going to convert to black and white.
3. Analyze your photo
This takes practice and becomes easier the more you convert photos to black and white. The idea is to make some big picture decisions about what you want to achieve with your conversion. With my photo I can see that:
- The sky is too bright, and I would like to make it darker.
- The distant cliffs have beautiful texture that I would like to bring out
- So do the grass and stones in the foreground.
- The sea and sky are smooth, creating a visual contrast against the heavily textured parts of the photo.
- There is good tonal contrast between the grass and stones in the foreground.
This analysis helps me set some goals for the conversion.
4. Convert the image to black and white
There are three ways to convert the photo to black and white using Lightroom. They all do the same thing, so it doesn’t matter which of these methods you use:
- Set Treatment to Black & White in the Basic Panel.
- Use the keyboard shortcut; V .
- Click on B&W in the HSL/Color/B&W panel.
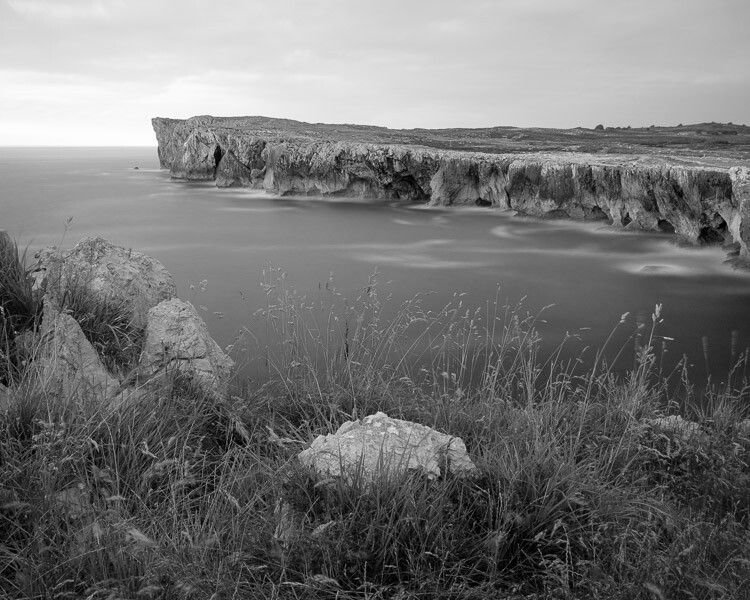
The conversion is likely to look quite flat. That’s okay – it’s easy to add some contrast.
Now go to the B&W tab in the HSL / Color / B&W panel. It will look like one of the these two examples below depending on your Preference settings in Lightroom:
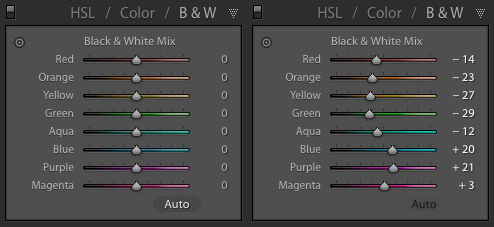
If you go to the Presets tab in Preferences (see below) you’ll see a tick box titled Apply auto mix when first converting to black and white. If this is unchecked, all the sliders will be zeroed, as in the screenshot on the left (above). If it is ticked, Lightroom takes a guess at what settings to use to make a good conversion and you’ll see something like the screenshot on the right (above).

My preference is to leave the box unticked.
When I convert the image to black and white I go to the HSL / Color / B&W panel and click the Auto button at the bottom of the B&W tab. If I like the result, I leave it there. If I don’t, I use the undo command (Ctrl-Z on a PC, Cmd-Z on a Mac) to undo it.
In this case, I liked the result of pressing the Auto button, so I left the settings as they were. I rarely do any work more than this in the HSL / Color / B&W panel.
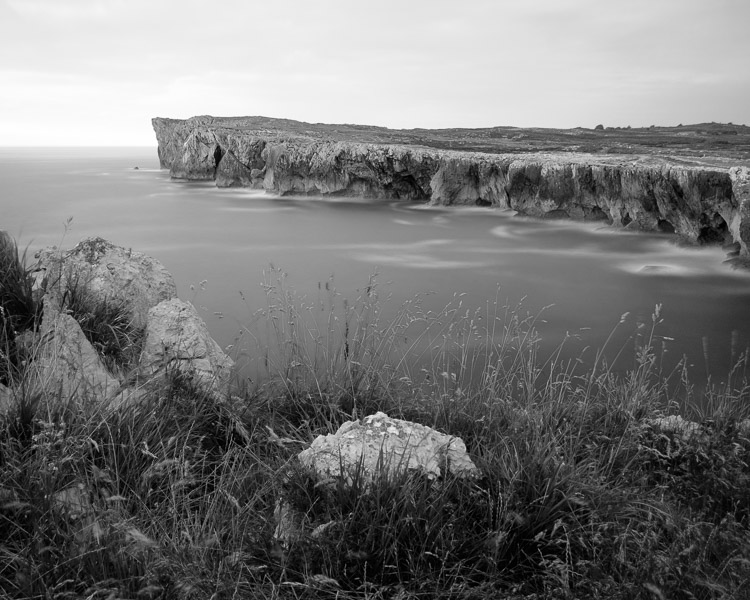
5. Basic panel adjustments
Now it’s time to make some global adjustments in the Basic panel. Global adjustments are those that apply to the entire image.
The image is flat so the first step is to increase contrast.
Going back to the analysis I did earlier, I can see that I want to emphasize the textures in the photo. Clarity is the ideal tool for this. Increasing Clarity also increases contrast. You should adjust both Clarity and Contrast sliders to get the best overall effect, without overdoing it. You can also use the Highlights and Shadows sliders to adjust the brightness of the lightest and darkest tones in the image individually.
In the end I set Contrast to +40, Clarity to +60, Shadows to -13 and Highlights to -49. Remember that every image is different, and that these settings only apply to this one.
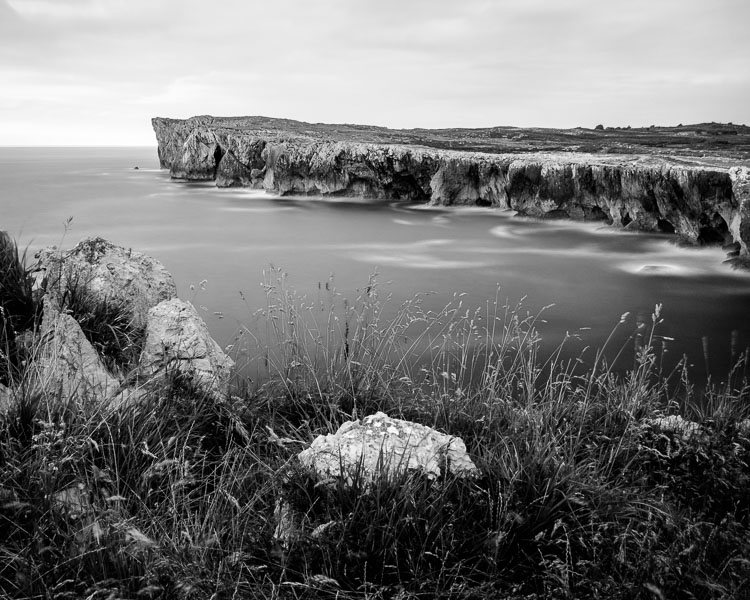
6. Make local adjustments.
Now it’s time to make some local adjustments. Local adjustments are those that just affect part of the image. Lightroom gives you three tools to do this – the Radial filter, the Graduated filter and the Adjustment Brush.
I want to make the sky darker in this photo, so I will do that with a Graduated filter. This screenshot shows the location of the Graduated filter (the area affected by the local adjustment is shown in red).
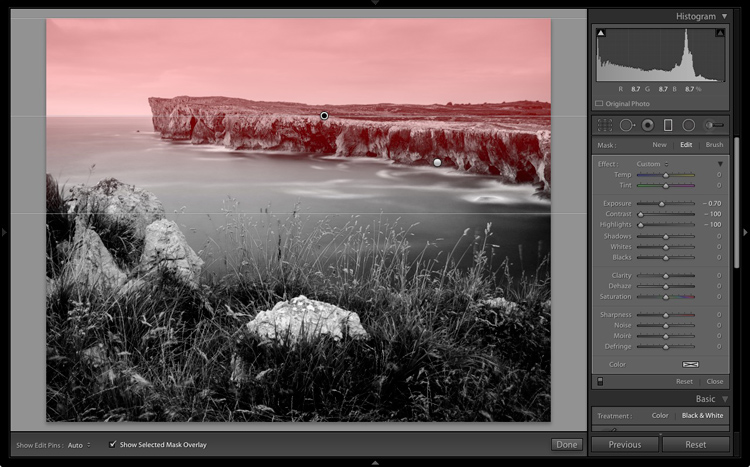
I used the brush to erase part of the Graduated filter so that the sea and cliffs weren’t affected.
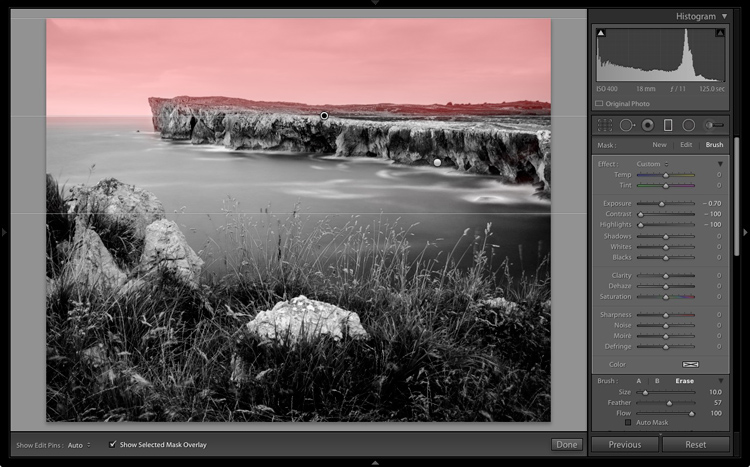
I set Exposure to -0.70, Contrast to -100 and Highlights to -100. Again, the settings required depend on your photo.
My aim here was to make the clouds darker and reduce the contrast so that they appeared smoother. The contrast in this image is in the cliffs, the sea and the foreground, not the sky. Less contrast in the sky means that it won’t compete with those areas for attention.
The next local adjustment is on the cliffs in the background. I used the Adjustment Brush for this. Here’s the area affected by the local adjustment (shown in red again).
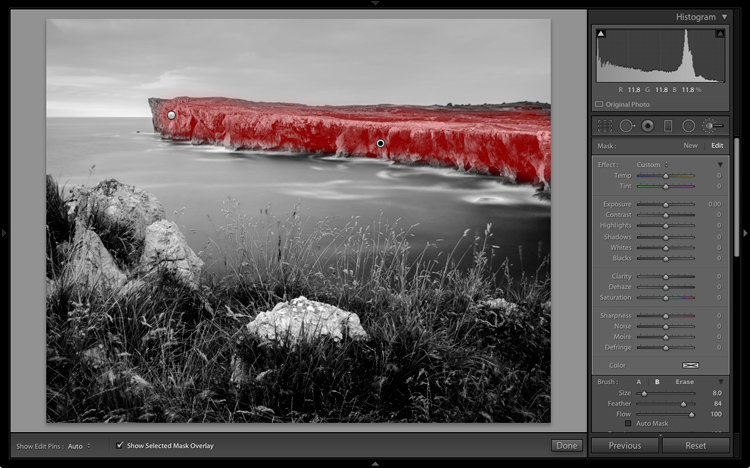
I set Clarity to +86 and Shadows to +16.
You may remember that in my analysis I decided that I wanted to make the foreground darker to emphasize the tonal contrast between the grass and the rocks. I’m going to use the Adjustment Brush for this as well.
First, I added an Adjustment Brush to make the grass darker. Here’s the area affected (shown in red).
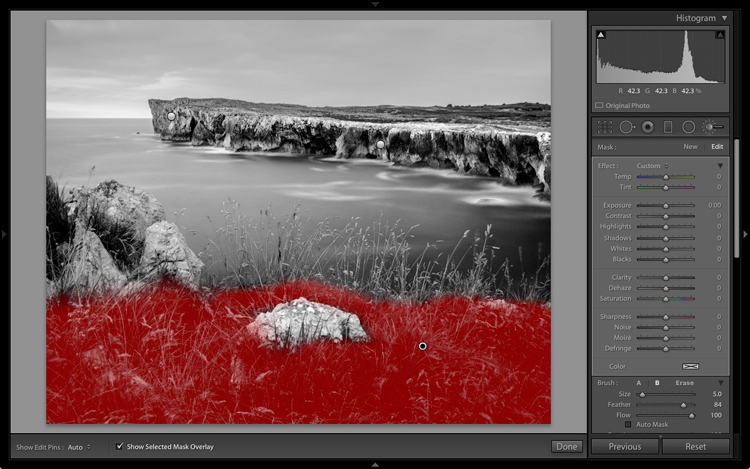
I set Highlights to -64, Shadows to -48.
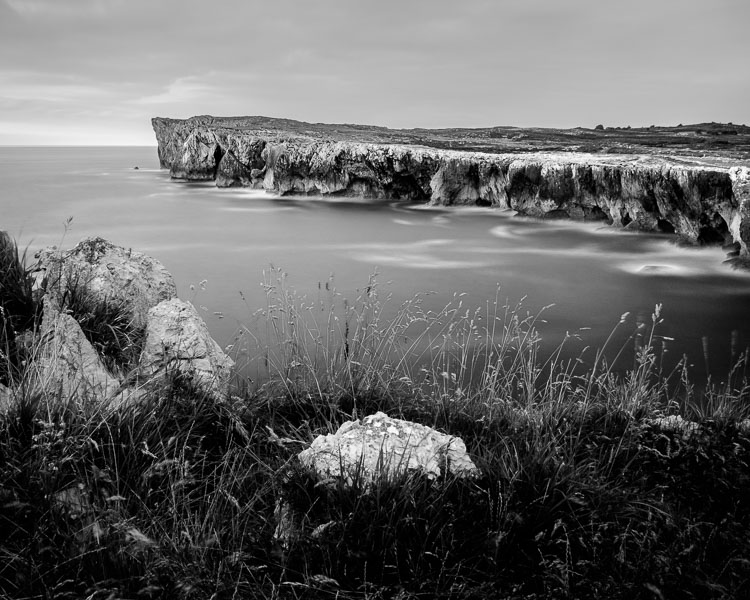
That left a light patch in the bottom left corner, and a dark patch under the stone in the center. I used the Adjustment Brush two more times, to make the light patch darker and the dark bit lighter, creating a more even tone across the bottom of the image.
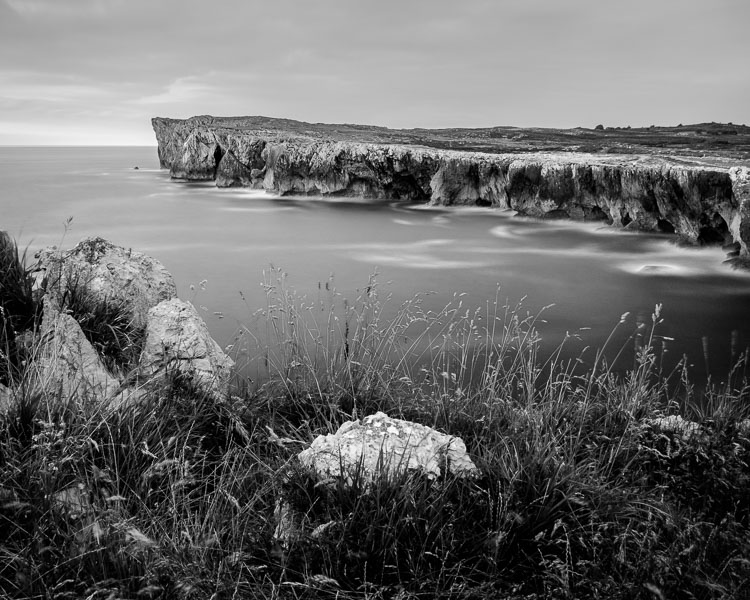
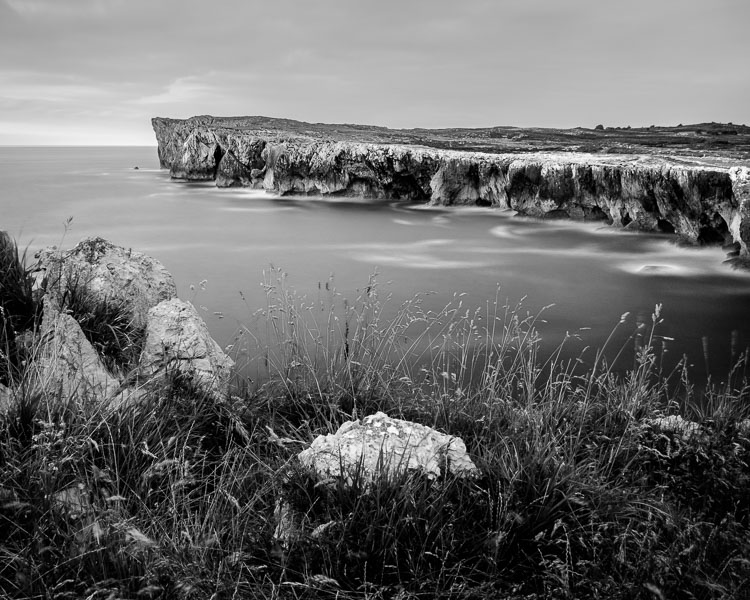
Then I used the Adjustment Brush on the stones, with a Clarity adjustment to bring out the texture. Below is the result of all those adjustments.
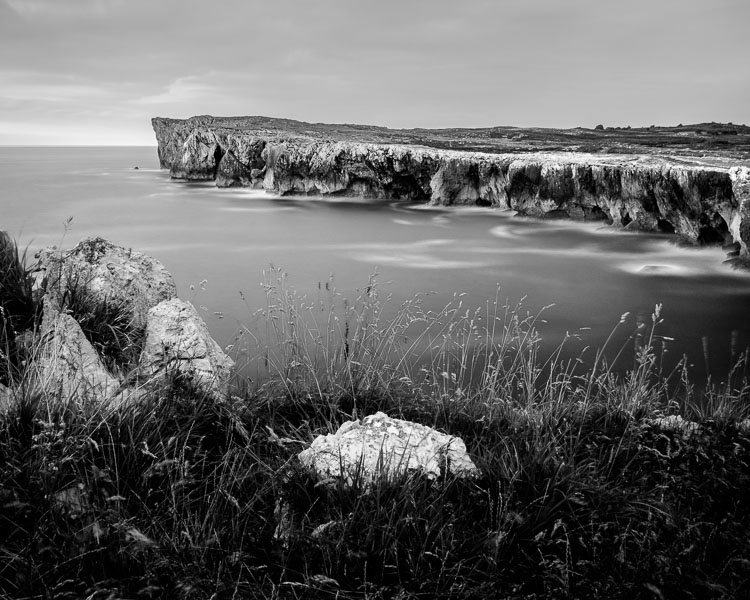
Next I used the Adjustment Brush again and selected the sea and the sky.
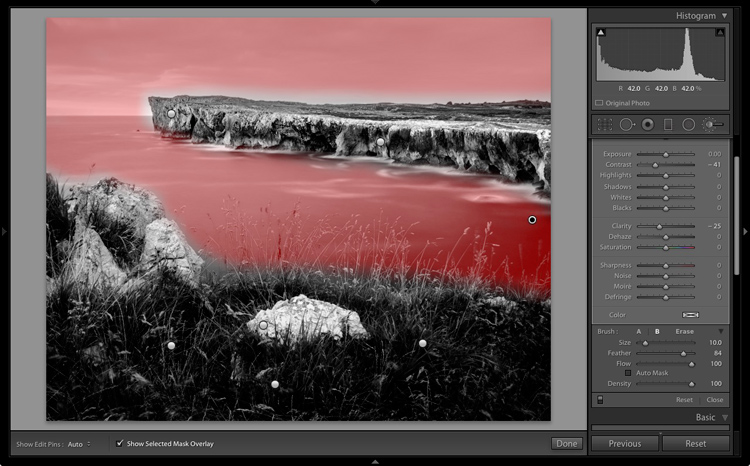
Then I set Contrast to -41 and Clarity to -25. The idea was to remove some of the contrast and texture from these areas, to emphasize the smoothness and lack of texture and set up a stronger visual contrast against the heavily textured cliffs and foreground.

That’s it. The final image could certainly be refined a little further, but it’s important to pick a point at which to stop so that you don’t spend too much time on the conversion. Where this point is depends on how much of a perfectionist you are, and how much time you are willing to devote to a single image.
Here’s the initial black and white conversion and the final result together so you can see the difference more clearly.

Original color image.

First version of black and white conversion.

Final image.
There are lots of ways you can convert landscape photos to black and white in Lightroom. I’ve only touched on the topic here, so if you have anything to add please let us know in the comments.
Mastering Lightroom
If you want to know more about processing black & white photo in Lightroom then please check out my ebook Mastering Lightroom: Book Three – Black & White.
googletag.cmd.push(function() {
tablet_slots.push( googletag.defineSlot( “/1005424/_dPSv4_tab-all-article-bottom_(300×250)”, [300, 250], “pb-ad-78623” ).addService( googletag.pubads() ) ); } );
googletag.cmd.push(function() {
mobile_slots.push( googletag.defineSlot( “/1005424/_dPSv4_mob-all-article-bottom_(300×250)”, [300, 250], “pb-ad-78158” ).addService( googletag.pubads() ) ); } );
The post How to Process a Black and White Landscape Photo Using Lightroom by Andrew S. Gibson appeared first on Digital Photography School.
You must be logged in to post a comment.