Digging around the Internet, there are tons of resources available for constructing the perfect studio lighting setup for photographers, but very little is written about the best travel photography lighting kits. As a result, this article is an entirely DIY approach, comprised of lots of sleuthing and trial and error, to create the ideal lighting kit, that’s compact and easy to travel with. Let’s start with the essentials: the lighting gear!

Best Travel Photography Lights
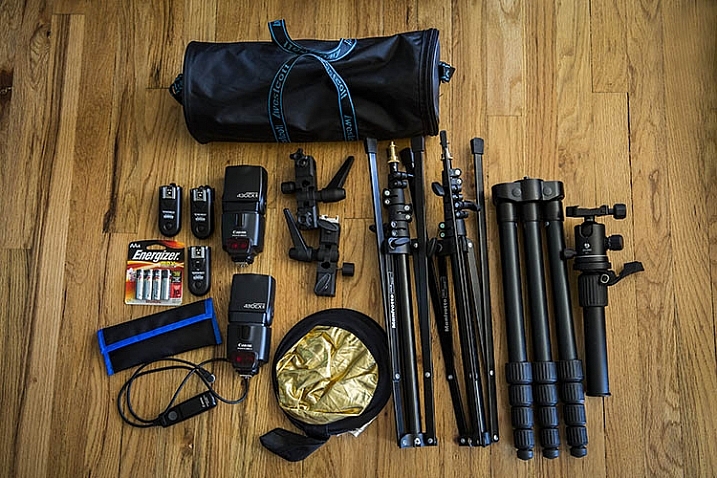
Compared to studio lights, you really can’t go wrong with speedlights when you’re looking for portability. As a Canon shooter, this means having a Canon 580EXII as my main light, and two Canon 430 EXII Speedlites as my secondary lights. A possible lightweight and travel-friendly alternate light source is the Westcott Ice Light, which offers continuous LED lighting, although in general it doesn’t quite have the oomph and output that speedlights do.
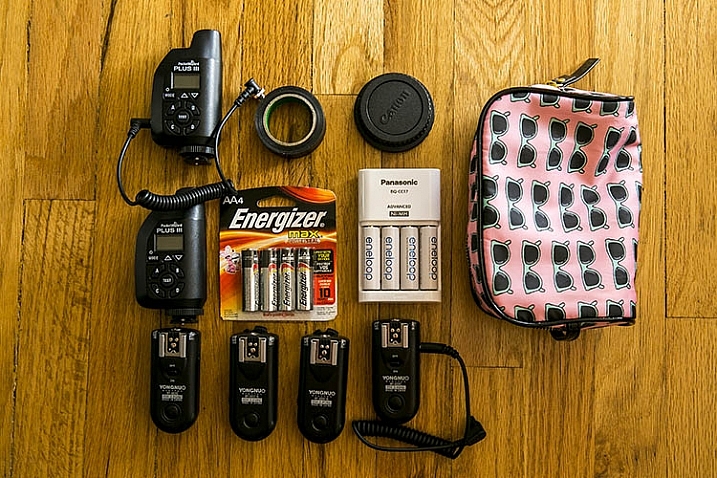
All flashes are powered by Panasonic Eneloop AA batteries, which have been a huge money-saver, thanks to the fact that they are rechargeable, and have all been extremely reliable to date. To sync all three speedlights, I have PocketWizards that I always carry as backups, but primarily rely on Yongnuo RF-603CII-C1 remote flash triggers for two reasons:
- They’re small and low-profile
- They’re incredibly cheap and affordable
Amazingly, the Yongnuos are also very reliable, and haven’t once failed in two years of constant usage.
Compact Light Stands

Next on the list are light stands in the form of Manfrotto 5001B Nano stands. Weighing in at just 2.2 pounds (1kg) each, these light stands fold down to a mere 19 inches (48cm), while still having a maximum height of 74.4 inches (1.9m). They aren’t the most stable or sturdy light stands out there, but they travel extremely well, and work just fine for simple speedlight setups. Two light stands gets their own umbrella adapter and accompanying umbrella, while one lucky stand is adorned with a Westcott Rapid Box lighting modifier.
Lighting Gear Extras
As with most photo shoots, you never quite know what extra accessories you might need when on location, so my lighting kit varies from shoot to shoot. Some common extras include a a Benro Travel Flat Tripod, Canon shutter release cable, mini gold/silver reflector, speedlight color gels, gaffer’s tape, spare batteries, and camera body and lens rear caps, in case of drops and spills (sad to say these have come in handy more than once).
Bonus tip: I recommend using a lightweight zippered women’s cosmetic bag to hold, and organize, your smaller items such as remote triggers, batteries, front and rear caps, etc. This is the easiest way to keep those items contained in one spot for easy access, with less chance of losing them while at a shoot.

Lighting Gear Bags
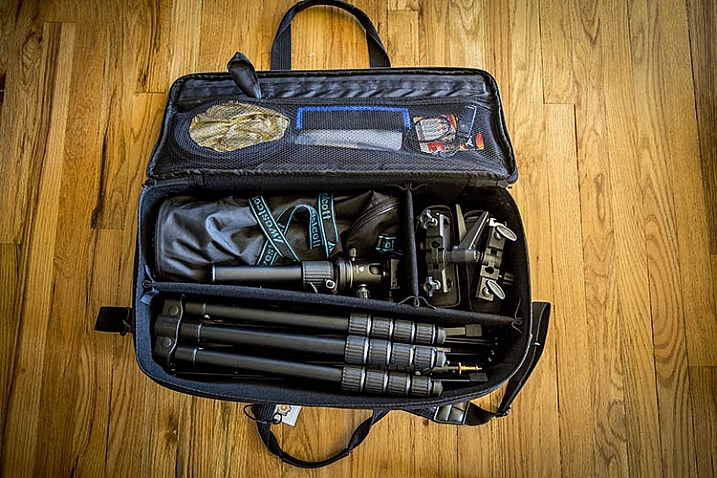
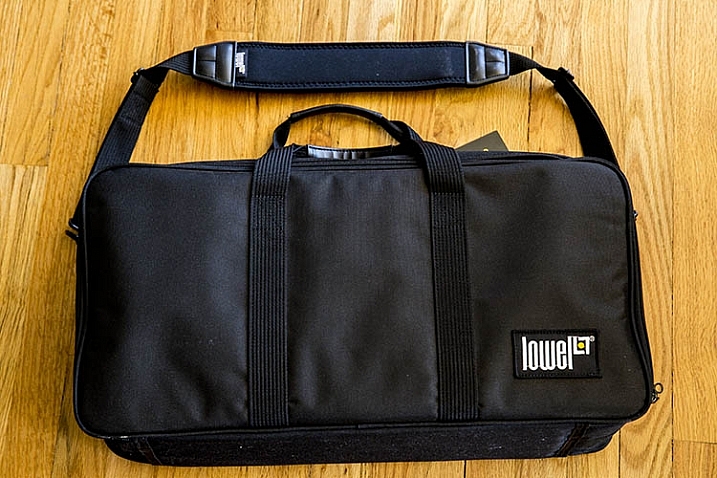
After a huge laundry list of items, you’re probably now wondering how to carry all of this stuff. Finding the perfect lighting gear bag was by far the most challenging part of assembling this DIY kit. But after lots of hunting, I found the best solution to be a Lowel Litebag, which come in a range of sizes.
With a thick and sturdy vinyl exterior and soft interior, this zippered bag has padded partitions that can be removed, or modified to suit a variety of needs. It has an adjustable, nicely padded shoulder strap and handles, making it easy to carry, even when heavy with equipment inside. It isn’t sufficiently padded to take a solid beating, but it will definitely protect your gear to a reasonable extent, without the added bulk and weight. Unfortunately, this bag isn’t the easiest to find, but it is incredibly solid, and holds all of the gear I mentioned above, with room for more!

In Conclusion
As a traveling, or on-location photographer, it’s important to have a go-to travel photography lighting kit that is compact and flexible, while still keeping your gear safe from harm. If you’re searching for a flexible lighting kit, try out the above recommendations, and let me know what you think the comments below! Also, if you have another travel lighting kit setup, I’d love to hear about your own suggestions and modifications.
amzn_assoc_placement = “adunit0”;
amzn_assoc_enable_interest_ads = “true”;
amzn_assoc_tracking_id = “dpsgeneral-20”;
amzn_assoc_ad_mode = “auto”;
amzn_assoc_ad_type = “smart”;
amzn_assoc_marketplace = “amazon”;
amzn_assoc_region = “US”;
amzn_assoc_linkid = “6710d26f550e9793f41475ee806fee9e”;
amzn_assoc_emphasize_categories = “13900861”;
amzn_assoc_fallback_mode = {“type”:”search”,”value”:”digital cameras”};
amzn_assoc_default_category = “Photo”;
googletag.cmd.push(function() {
tablet_slots.push( googletag.defineSlot( “/1005424/_dPSv4_tab-all-article-bottom_(300×250)”, [300, 250], “pb-ad-78623” ).addService( googletag.pubads() ) ); } );
googletag.cmd.push(function() {
mobile_slots.push( googletag.defineSlot( “/1005424/_dPSv4_mob-all-article-bottom_(300×250)”, [300, 250], “pb-ad-78158” ).addService( googletag.pubads() ) ); } );
The post How to Build the Best On-Location Photography Lighting Kit by Suzi Pratt appeared first on Digital Photography School.
You must be logged in to post a comment.