If you’re a photo-fanatic, there is a lot to keep up with. New camera models are being announced way too often, firmware updates, fancy new lenses keep popping up, and on and on.
![]()
I didn’t even mention software yet but now that I have, let’s see what’s new with our old pal Lightroom (LR) and its latest upgrade.
Since this is the default program that you’re likely to find running on almost every photographer’s computer, it’s worth discussing what you might be missing (or not if you’re a minimalist post-processor) if you haven’t upgraded to the latest version – LR 6 or the Adobe Creative Cloud (CC).
If you are like me, you will be happy to hear that the general interface has survived untouched in the latest versions. That is to say, in many respects the program has retained the same look and features, and the tasks which you are accustomed to doing, are the same.
So what do you get for your $ 79 (that’s the price of upgrading from an earlier version) or what more do you get for your $ 149 if you haven’t yet jumped on the LR bandwagon? Let’s take a peek at some of the added features that may prove most useful.
If you are still clicking away on LR 4, the long list of reasons to upgrade is even more compelling than the jump from LR 5 to LR 6 – here are some good reasons to get the latest Lightroom upgrade.
Radial Filter
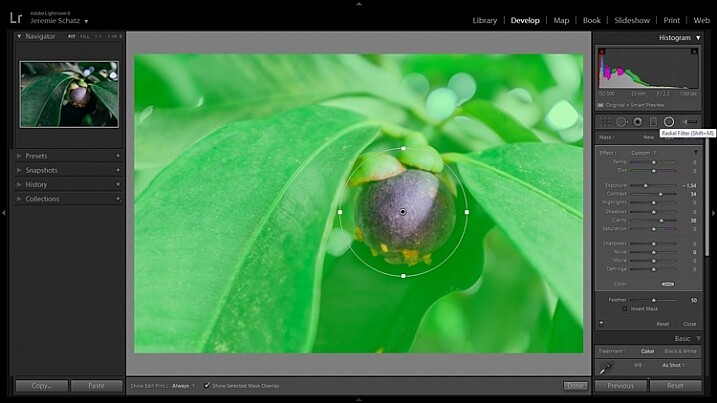
The Radial Filter reveals a new level of editing control.
Probably one of the most welcome features that LR users are grateful for (I know I am), is the Radial Filter (shift+m). This filter allows you a higher degree of flexibility in masking for dodging, burning, and the other adjustments available within the Adjustment Brush.
One handy way to increase the effectiveness of the Radial Filter is after making your initial adjustments, right click on the pin and duplicate the filter. Once it is duplicated you can then choose Invert Mask from the adjustment panel and make another set of changes – perhaps making opposing changes to further the effects you applied with the first filter (this invert selection feature is lusted after for LR’s adjustment brush).
Visualize Spots
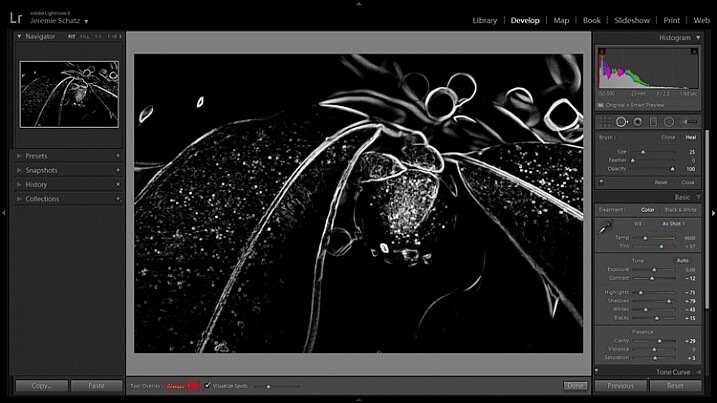
The Visualize Spots filter helps you catch dust spots and other blemishes that you may otherwise overlook.
If you are a user of the Spot Removal tool, you are going to be psyched for a handy little addition called Visualize Spots. This little check box toggles between the normal view and an inverted black and white image which clearly highlights sensor dust or skin blemishes which you may want to eliminate (if you don’t see that option hit the T key to show the toolbar).
I find this feature quite handy when editing on my laptop, as it can be easy to overlook spots on the small screen, or because of glare. It may save you the hassle of having to toss out a big print because you overlooked spots.
Facial Recognition
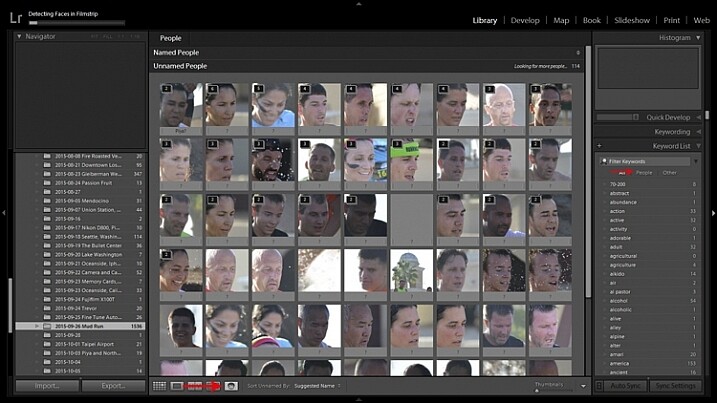
LR’s new Facial Recognition feature can locate people throughout your entire collection.
Facial recognition has also been added to LR’s suite of updates. This is a feature that has existed in other software for some time (such as Picasa all the way back to 2009) so LR was a little behind the curve on this one – better late than never though.
Certainly this addition made many people happy, as it means one less keyword to have to enter into metadata. When activating this mode (keyboard shortcut O) LR searches selected photos for all recognizable faces and compiles a list. You can then plug in names for the different faces which LR can then use to search for in your entire catalog.
Furthermore, LR adds these names as a keyword in metadata and has created a new sub-menu for people within the Keywords panel.
Overlay Guide
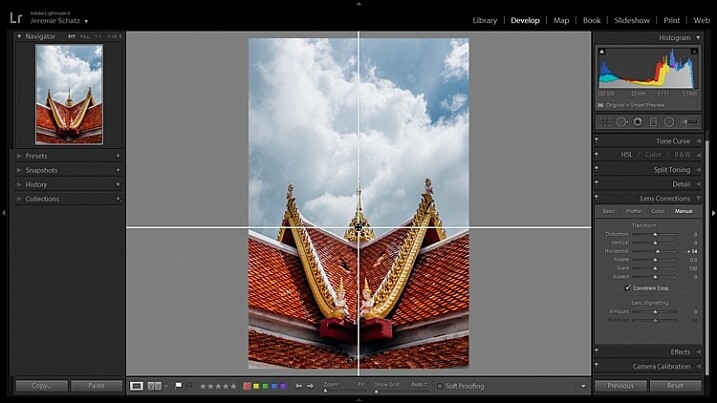
The Overlay Guide is more flexible and less cluttered than the grid overlay.
A simple addition that I find handy is a new movable overlay guide.
All it does is give you a vertical and horizontal line, that create a sort of crosshairs, which you can move around for composition and alignment purposes. It is useful as a less cluttered guide, used in conjunction with transform lens corrections.
It would have been nice to just have this nested in with the crop overlays, instead you have to access it through: View>Loupe Overlay>Guides.
Smart Previews
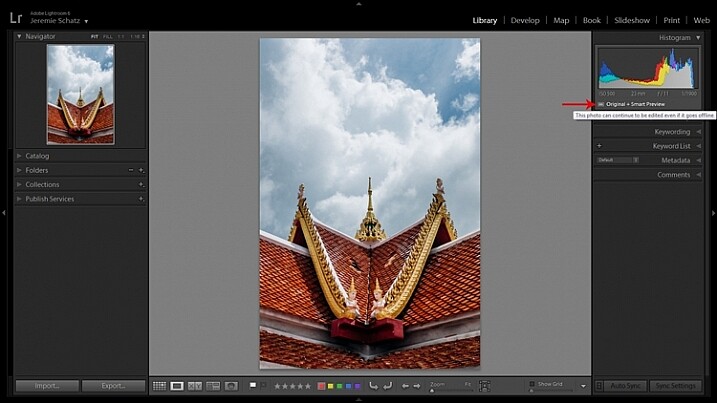
Smart Previews allow you to make edits to offline photos.
Smart Previews are one of those features that I always wished LR had, and my wish finally came true.
This feature enables you to create compressed copies of images which can then be used to make offline edits. This works great if, like me, you store your original images on an external drive but want to be able to make edits on the go.
If edits are made to Smart Previews in LR, your original image will be updated with those new changes when it comes back online (when the external hard drive is reconnected).
You can set LR to automatically create Smart Previews for images upon import, otherwise you can create them manually for any images, folders or collections that you wish. To create Smart Previews, go to: Library>Preview>Build Smart Previews.
Conclusion
Naturally, this is not an exhaustive list of all of LR’s newer features. There are quite a few other sensational new additions such as HDR and Panorama Merge, Cure Pet Eye Effect, Slideshow improvements, new auto-cropping features, not to mention increased performance.
Have you recently upgraded? What are your favorite new features?
googletag.cmd.push(function() {
tablet_slots.push( googletag.defineSlot( “/1005424/_dPSv4_tab-all-article-bottom_(300×250)”, [300, 250], “pb-ad-78623” ).addService( googletag.pubads() ) ); } );
googletag.cmd.push(function() {
mobile_slots.push( googletag.defineSlot( “/1005424/_dPSv4_mob-all-article-bottom_(300×250)”, [300, 250], “pb-ad-78158” ).addService( googletag.pubads() ) ); } );
The post 5 Good Reasons You Should Get the Latest Lightroom Upgrade by Jeremie Schatz appeared first on Digital Photography School.
You must be logged in to post a comment.