RSS
 

Posts Tagged ‘Should’

Lightroom vs RawTherapee: Which Editor Should You Pick?

23 Sep

The post Lightroom vs RawTherapee: Which Editor Should You Pick? appeared first on Digital Photography School. It was authored by Ana Mireles.

Lightroom vs RawTherapee: which editor is best?

Looking for a top-notch photo editor, one that offers a combination of power, user-friendliness, and organizational chops? Lightroom and RawTherapee both fit the bill, but it can be tough to determine which option is perfect for your needs.

And that’s where this article comes in handy. I’ll break down the main aspects of these two programs, from the ease of use to the costs and benefits.

So if you’re ready to determine which program is better, Lightroom vs RawTherapee, then let’s get started.

Lightroom vs RawTherapee: overview

Lightroom and RawTherapee are both photo editing programs with advanced RAW processing capabilities. In fact, Lightroom is one of the most popular choices in the photography world, though many people are put off by Adobe’s subscription model. RawTherapee is less well known, which makes finding learning resources difficult, though the program itself is (get this!) free.

As far as I’m concerned, you can’t go wrong with either option – they both work nicely, though they cater to different types of photographers. Let’s take a closer look.

Ease of use

Is Lightroom the easier program to use, especially as a beginner? Or is RawTherapee the better buy?

Download and installation

Getting started with Lightroom

To install, purchase, and download Lightroom, you’ll need to set up an Adobe account. You’ll also need to navigate through the different plans available and decide which one works best for you. This isn’t as straightforward as you might like; it can be tough to fully understand the difference between some of the options.

Once you’ve decided on a plan, you can subscribe by providing a Paypal account or a credit card. Alternatively, you can start a free trial. Then you’ll need to follow Adobe’s instructions to install the Creative Cloud – necessary for any Adobe app – and then, from the Creative Cloud window, install Lightroom.

RawTherapee home page

RawTherapee is a free open source program. To download it, simply go to the RawTherapee website, choose your operating system, and click Download. You’ll receive the software, which you can install like any other program. You’ll also get a “manual,” which is actually a link to a page with information and tutorials. And if you want an older version of RawTherapee, just click Downloads on the home page to see the entire set of available programs.

Interface

Lightroom Library

Lightroom has seven modules, though the most used ones are the Library module (to manage your files) and the Develop module (to edit your images). The remaining modules are for specific uses and are fairly self-explanatory – for example, Book lets you design photo books, Print lets you prepare prints, and so on. Lightroom’s standard tools are clearly marked, but it might take some time for you to fully explore the interface.

RawTherapee File Browser

RawTherapee is also user friendly, although experienced photo editors may find its lack of similarity to other programs off-putting. By default, it opens in the File Browser section, which is very straightforward and like Lightroom.

On the left side, you’ll find the tabs to change the screen. There’s an Editor screen – to edit your photos – and a Queue option – to export your edited images.

You should be able to apply your first edits without help, but it will take some time and effort to understand RawTherapee’s full potential.

Information and tutorials

Lightroom tutorials

Adobe provides a wide variety of Lightroom video tutorials that will guide you from beginner to pro. And since it’s the most popular photo editing software on the planet, you’ll find countless YouTubers explaining how to do practically anything you can think of. Written tutorials are also available from the official Adobe site, as well as third-party websites (such as dPS!).

RawPedia tutorials

RawTherapee has a RawPedia with all the information you need to get started and perfect your skills, and the material is available in multiple languages. Like most open-source programs, there’s also a big community behind RawTherapee that’s happy to share its knowledge and help you with any problems.

Cancellation

Lightroom is a subscription-based software, and in most cases, plans are annual. If you cancel before the end of your yearly subscription, you’ll be charged 50% of the remaining months of the membership. After that, you can keep up to 2 GB of storage in the cloud, and you’ll have 90 days to delete any files that exceed the limit. You’ll then have a year to export your edited images from Lightroom, but you can’t make any more changes.

Since RawTherapee doesn’t require a subscription, you can simply delete it from your computer (and re-download it) at will. After deleting the program, you’ll still have your original files, and if you exported your edited photos, you’ll have those, too.

Workflow

Both Lightroom and RawTherapee offer complete workflows; you can organize, edit, and export your files, all within the program.

File management

Lightroom file management

When you import images, Lightroom creates a catalog, which it uses to save your edits. You can create collections and search for your photos by keyword, EXIF data, tags, etc. The downside to this is that it works independently from your computer and hard drive – if you move a file outside Lightroom, the program won’t be notified and will subsequently fail to find the image.

All Lightroom edits are stored in an LRCAT file, which contains all the catalog data. That’s why moving a file to another location means losing the edits; even if you import it again, Lightroom won’t associate the new file with the original edit.

RawTherapee file management PP3 file

RawTherapee uses a file browser; this means you don’t need to import files, plus you can move them around outside of the program and still be able to find them again.

Edits are stored in PP3 sidecar files. As long as you copy the PP3 file together with the original image, you’ll always have the edits, even in a new location. Also, you can manage your photos with tags and ratings (the same as in Lightroom).

Photo editing

Lightroom Develop module

To edit your photos in Lightroom, you must import them and open the Develop module. Here, you’ll find tools to manage your files and edits along the left-hand side – for example, the Navigator and the History panel. The image is displayed in the center, and you’ll see all edits applied in real-time.

On the right, you can access all the editing tools, starting with the Basic panel and its essential sliders (e.g., Contrast, Exposure, Saturation, and Clarity). The next sections are designed for advanced editing, and Lightroom offers several tools for targeted adjustments as well. If that’s not enough, you can always send the image from Lightroom to Photoshop (assuming you get Photoshop as part of your membership plan).

RawTherapee Editor module

The RawTherapee Editor module is divided into three panels. On the left, you have Preview, History, and Snapshots; in the center, you have the image; on the right, you’ll find the editing tools.

In RawTherapee, you can do all the standard basic edits and many advanced ones, too. If this isn’t enough and you need to work with layers, you can link RawTherapee with Photoshop, or with GIMP if you prefer to stick with free and open-source programs.

Batch editing

editing in Lightroom

In Lightroom, batch editing is easy. You can use presets, which are automated sets of adjustments, to apply the same edit to multiple images, and there are tons of free and paid presets out there for you to choose from (or you can make your own). You can also batch edit by syncing adjustments from one photo to other photos in the Filmstrip. Another choice is to copy-paste the Develop settings.

batch editing in RawTherapee

RawTherapee also offers batch editing. You can copy and paste the same processing profile to multiple images in the Editor module, or you can batch edit in the Browser module via the batch-adjust option.

Saving and exporting

Exporting files in Lightroom

Lightroom doesn’t have a Save option. To get your edited photos out of Lightroom and save them to your computer or external hard drive, you need to use the Export button in the Library module or select Menu>Edit>Export.

RawTherapee exporting

In RawTherapee, you have two ways of saving your images. If you click on the hard drive icon, you can save the image immediately (as you can do with the Save As option in any standard program). However, this can “distract” your CPU resources and slow down your work, which is where the Queue comes in.

If you send the images to the Queue (which you can access from a tab on the left), you’ll have the benefit of processing all of your images at the end, making the most of your time and your computer’s power.

Cost

Lightroom pricing

Technically, Lightroom can’t be bought; you can only purchase a membership that allows you to use it. Depending on the membership plan and the way you pay (monthly or annually), the price can vary, though it starts at $ 9.99 USD per month.

All Photography plans include Adobe Lightroom, Cloud storage (from 20 GB to 1 TB), Adobe Spark, and Adobe Portfolio. Some upgraded plans may include Lightroom Classic, Photoshop, and other Adobe apps.

With a personal membership, you can download the program on two computers, but you can’t use them at the same time. Whenever you install Lightroom, you also need to download and install Creative Cloud.

RawTherapee pricing

RawTherapee is completely free, and you don’t even need to register before downloading. You get the full software, which you can install and use on as many computers as you want. It can also be installed on a portable hard drive.

Lightroom vs RawTherapee: which program should you buy?

RawTherapee vs Lightroom

As you can see, Lightroom and RawTherapee are both great for processing RAW files and editing pictures. The choice between them comes down to needs and personal preference. Let me go through some example scenarios to help you understand:

If you often edit your photos on your phone and like to easily move from your mobile devices to your computer, you’ll be better off with Lightroom, as there isn’t a mobile version of RawTherapee – though make sure you use Lightroom CC, not Lightroom Classic.

If you have an old computer or you are running low on storage space, you should definitely use RawTherapee. Not only is it lighter, but you only have to download one app, not two (as is required by Adobe).

If you only plan to edit on occasion, you might wish to avoid a monthly fee. In this case, RawTherapee is the software for you.

There are many things to consider when you choose between Lightroom and RawTherapee. Hopefully, this article gave you enough information to make the right decision!

Now over to you:

Have you tried Lightroom? How about RawTherapee? Which did you prefer? Share your thoughts in the comments below!

Lightroom vs RawTherapee FAQs

Is Lightroom better than RawTherapee?

Neither program is better than the other. They are both excellent tools and the choice really depends on personal preference, budget, etc.

Is RawTherapee a good alternative to Lightroom?

Yes. RawTherapee is a fantastic program, whether you are an editing beginner or you want to switch over from Lightroom.

Do I need to stop using Photoshop if I change from Lightroom to RawTherapee?

No. Using the Edit Current Image in External Editor option, you can send your files from RawTherapee directly to Photoshop. You can also send them to GIMP and other editors.

Can I watermark my images using RawTherapee?

No. To watermark your images, you need to use another free program, such as Darktable.

Is there a free version of Lightroom?

Lightroom offers a free trial before purchase – but after the trial is over, you need to buy an Adobe membership. Lightroom Mobile has a free version, but some of its features are only enabled with a paid subscription.

Can I use RawTherapee if I don’t shoot in RAW?

Yes. RawTherapee not only supports most RAW formats, but also JPEG, TIFF, PNG, and other common image file types.

The post Lightroom vs RawTherapee: Which Editor Should You Pick? appeared first on Digital Photography School. It was authored by Ana Mireles.


Digital Photography School

 
Comments Off on Lightroom vs RawTherapee: Which Editor Should You Pick?

Posted in Photography


One-Shot vs AI-Servo: Which Autofocus Setting Should You Use?

10 Aug

The post One-Shot vs AI-Servo: Which Autofocus Setting Should You Use? appeared first on Digital Photography School. It was authored by James Brandon.

One-Shot vs AI-Servo

If you’re just getting familiar with your camera autofocus settings, you’ve likely encountered the big question:

Should you shoot with One-Shot AF? Or should you use AI-Servo AF? (Some cameras also offer a third option, called AI Focus, but it doesn’t work well and so I recommend you ignore it completely.)

Unfortunately, there’s no easy answer, because One-Shot and AI-Servo are both useful depending on the type of photos you shoot.

So in this article, I’ll explain everything you need to know about these two autofocus modes. And by the time you’re done, you’ll know which option is right for you and how you can use it for amazing images.

Let’s dive right in, starting with the basics:

What is One-Shot AF?

One-Shot AF is the most commonly used autofocus method and is likely the default setting on your camera. (Note: On many non-Canon cameras, it’s known as AF-S.)

When you half-press your shutter button, the camera sets focus once (hence the term “one-shot”) and holds that focus until the picture is taken.

As you can imagine, this is hugely helpful if you want to focus then recompose. You can focus on one subject, then maintain focus while adjusting your composition to include other elements. For instance, if you’re photographing a tree next to a fountain, you could set focus on the tree, then freely move your camera toward the fountain to create the best possible composition – while the focus stays locked on the tree.

On the other hand, One-Shot AF isn’t so great if you’re trying to track moving subjects. Lock focus on a biker riding toward you, and the focus will remain locked on the original spot, even as the biker zooms forward. Pretty soon, your subject will be out of focus, and you’ll be forced to lock focus again and again as the biker changes position.

baby in a basket with One-Shot autofocus

For this photo of my week-old son, I used One-Shot AF. I half-pressed the shutter to focus on his body, then adjusted my composition while keeping the focus locked.

What is AI-Servo AF?

AI-Servo AF tracks moving subjects. You half-press the shutter button to tell your lens to start focusing – then, if the area under your point of focus changes, your lens refocuses continuously until you take the photo.

(On non-Canon cameras, this autofocus mode is often known as AF-C.)

AI-Servo is perfect for scenes with moving subjects. Bringing back the biker example from above, if you placed your AF point over the biker and half-pressed the shutter button as she rode forward, the autofocus would do its best to keep the biker in focus.

Unfortunately, AI-Servo isn’t flawless; sometimes, if your subject is moving quickly, the focus will lag behind and you’ll end up with slightly out-of-focus images. Or if your subject moves out from under your autofocus point (and you’re not using some form of broad AF tracking), the AF will focus on the background instead.

But AI-Servo is certainly better for moving subjects than One-Shot AF, which consistently focuses behind the subject.

Make sense?

planes taking off with AI-Servo autofocus

For this shot of two Blue Angels taking off, I used AI-Servo; otherwise, I would’ve failed to track these two jets as they moved.

When should you use One-Shot AF?

One-Shot AF is the way to go when focusing on still subjects, such as landscapes, still lifes, some portraits (assuming your subject isn’t jumping around, running, or dancing), and flowers. Here’s a more complete list of genres that rely heavily on One-Shot autofocus:

  • Landscape photography
  • Architectural photography
  • Cityscape photography
  • Still life photography
  • Macro photography
  • Food photography

Of course, there will be times when you’ll want to switch over to AI-Servo AF – for instance, if your macro scene includes a fast-moving dragonfly – but for the most part, you can use this list to guide your decisions.

And here’s a list of genres that use One-Shot AF some of the time:

  • Portrait photography
  • Street photography

For portrait photography, you must consider the type of photos you’re taking. Will you be doing a fast-paced portrait session with a lot of movement? Or will your subject be sitting or standing in place? For still subjects, One-Shot AF is a good idea, but for moving subjects, go with AI-Servo.

As for street photography, some shooters use One-Shot AF to prefocus at specific points then wait until a subject walks into the scene. Other photographers use AI-Servo AF constantly and snap images as people move toward them. It all depends on your style!

When should you use AI-Servo AF?

Use AI-Servo AF whenever your subject is moving (especially if you’re working with a shallow depth of field).

So if you’re shooting sports players in action, birds in flight, or cars on the move, you should definitely use AI-Servo nearly all the time.

Here’s a list of photography genres that rely heavily on AI-Servo autofocus:

  • Bird photography
  • Wildlife photography
  • Sports photography
  • Car photography
  • Wedding/event photography
  • Underwater photography

If you’re photographing birds, for instance, unless you see an obvious reason to switch to One-Shot AF, I’d recommend you set your camera to AI-Servo AF and keep it there.

Which autofocus mode is best?

As I mentioned at the beginning of this article, such a question has no real answer. In some situations, One-Shot AF is the best option, but in other situations, you’ll want to use AI-Servo AF.

In fact, there are even times when manual focus is the better bet. If you’re doing high magnification macro photography or you’re shooting in the dark, your lens will likely fail to autofocus, so manual focus will be your only good option.

I do have a personal recommendation, though, and it’s what I use for most of my photos:

Use AI-Servo…

…but not with the normal half-press focusing method.

You see, most cameras let you set your focus via a button on the back of your camera, which gives rise to a technique called back-button focusing.

When used with AI-Servo AF, back-button focusing gives you the best of both worlds. Here’s how it works:

Start by programming a button on the back of your camera to autofocus when pressed (and make sure AI-Servo is activated). Then, when you hold down the special back button, your camera will focus continuously, just as if you half-pressed the shutter button.

When you let go of the back button, focusing will lock. You can recompose all you like, you can take shots with the shutter button, etc., without worrying about losing focus as you shift your AF point.

So if you have a biker riding toward you, simply keep the back AF button held down. Then, if the biker stops and you want to position them in the corner of the frame, you can let go of the back button and change your composition – while your focus remains locked in place.

Thanks to its versatility, I use back-button AF 90% of the time. It’ll save you plenty of headache trying to switch back and forth between AI-Servo AF and One-Shot AF!

One-Shot vs AI-Servo: final words

Hopefully, you now know whether to use One-Shot AF or AI-Servo (and you’ve hopefully also been inspired to try out back-button focus). Learn to master your camera’s autofocus capabilities, and you’ll be unstoppable!

Now over to you:

What do you think of these two focusing modes? Which do you plan to use in your photography? Do you think you’ll try back-button focusing? Share your thoughts in the comments below!

The post One-Shot vs AI-Servo: Which Autofocus Setting Should You Use? appeared first on Digital Photography School. It was authored by James Brandon.


Digital Photography School

 
Comments Off on One-Shot vs AI-Servo: Which Autofocus Setting Should You Use?

Posted in Photography


The 3 Must-Have Camera Lenses Every Photographer Should Own

26 Apr

The post The 3 Must-Have Camera Lenses Every Photographer Should Own appeared first on Digital Photography School. It was authored by Guest Contributor.

3 must-have lenses every photographer should own

What are the essential camera lenses every photographer must have?

In this article, I’m going to share the three key lenses that no photographer should be without. These recommendations come from personal experience; I rely heavily on these three lenses in my own photography.

They offer enough versatility to shoot in almost any situation, and they’re available for just about every camera system and lens mount on the market, from DSLR to mirrorless, from Nikon to Sony.

So if you’re ready to discover the must-have camera lenses for every photographer, let’s dive right in, starting with…

1. The general-purpose zoom

must-have camera lens standard zoom

A general-purpose (standard) zoom goes from around 18mm to 70mm. At the wide end, you get an expansive field of view for environmental shots. And at the long end, you get a field of view close to that of the human eye.

These zooms are hugely popular and come in many shapes and sizes. For instance, you can grab an 18-55mm kit lens or a (more expensive) 24-70mm lens.

Out of all my lenses, a standard zoom sits on my camera the most. It lets me shoot fairly wide while also offering decent zoom for objects off in the distance. You can shoot landscapes at 18mm, environmental portraits at 24mm, street shots at 50mm, and tighter portraits in the 60mm+ range.

Ideally, your general-purpose zoom packs a wide maximum aperture for low-light shooting and precise depth of field control (f/2.8 is best, but f/4 also works). Of course, if you can’t yet afford a wide-aperture zoom, that’s okay; a standard kit lens will work fine in most situations.

Consider these general-purpose zooms from Canon:

  • Canon EF-S 18-55mm f/4-5.6 IS STM
  • Canon EF 24-70mm f/4L IS
  • Canon EF 24-70mm f/2.8L II USM
  • Canon RF 24-70mm f/2.8L IS USM

These general-purpose zooms from Nikon:

  • Nikon AF-S DX 18-55mm f/3.5-5.6G II
  • Nikon AF-S 24-70mm f/2.8G
  • Nikon Z 24-70mm f/2.8 S
  • Nikon Z 24-70mm f/4 S

And these general-purpose zooms from Sony:

  • Sony 16-50mm f/3.5-5.6 OSS
  • Sony 24-70mm f/2.8 GM
  • Sony 24-70mm f/4 Vario-Tessar OSS

2. The macro lens

must-have camera lens 85mm macro

A macro lens lets you get up close and personal to your subject so you can capture stunning details of insects and flowers – as well as close-ups of clothing, jewelry, and more.

Note that the length of your macro lens isn’t as important as its magnification capabilities (a 1:1 magnification ratio or higher is best; it’ll let you get insanely close to your subjects).

I currently keep a 50mm f/2.8 macro in my bag because it’s small and light. I carry it around with me all the time, and when I need it, I whip it out for a detail shot or two. My macro lens also doubles as a decent portrait lens (it’s very sharp and the f/2.8 maximum aperture provides a shallow depth of field). And the level of detail you can get when shooting objects up close is fantastic.

Having a macro lens opens up a whole new world of tiny objects to photograph. Also, if you do any type of product photography (jewelry, food, etc.), this lens will allow you to capture a much greater level of detail than is possible with non-macro lenses.

Consider these macro lenses from Canon:

  • Canon EF 100mm f/2.8L IS Macro
  • Canon RF 85mm f/2 Macro IS STM
  • Canon EF-S 35mm f/2.8 Macro IS STM

These macro lenses from Nikon:

  • Nikon AF-S Micro 60mm f/2.8G
  • Nikon AF-S Micro 105mm f/2.8G VR

And these macro lenses from Sony:

  • Sony 90mm f/2.8 Macro G OSS
  • Sony 30mm f/3.5 Macro

3. The telephoto zoom

telephoto zoom essential camera lens

The most useful telephoto zooms span from around 70mm to 200mm – so you can capture standard field of view shots on the wide end and tight shots on the long end.

For instance, you might shoot full-body portraits at 70mm, tighter landscapes at 150mm, and headshots at 200mm. You can also use a 70-200mm lens to photograph sports, architecture, weddings, and more.

Regarding the maximum aperture: f/4 is acceptable and will get you decent low-light capabilities plus a shallow depth of field (especially when shooting at 200mm). But an f/2.8 maximum aperture is the holy grail of 70-200mm lenses; the depth of field is gorgeous at f/2.8, plus you can shoot indoors for basketball games, wedding ceremonies, graduations, etc.

The wider aperture will also let you shoot at faster shutter speeds so you can capture moving subjects such as birds and other wildlife. And a 70-200mm lens is a handy portrait lens; the focal length minimizes distortion and narrows the field of view to fill the frame with your subject.

So check out these telephoto zooms from Canon:

  • Canon RF 70-200mm f/2.8L IS
  • Canon RF 70-200mm f/4L IS
  • Canon EF 70-200mm f/2.8L IS III
  • Canon EF 70-200mm f/4L IS II

These telephoto zooms from Nikon:

  • Nikon Z 70-200mm f/2.8 S
  • Nikon AF-S 70-200mm f/2.8E VR
  • Nikon 70-200mm f/4G VR

And these telephoto zooms from Sony:

  • Sony 70-200mm f/2.8 GM OSS
  • Sony 70-200mm f/4 G OSS

Wait, what about…?

super-telephoto zoom must-have camera lens

I am sure that many of you reading this have other lenses you would consider essential.

For instance, a fast 50mm prime is great for portraits and street shots. A wide-angle zoom is perfect for landscape, architecture, and environmental portraits. A longer zoom lets you capture ultra-tight landscapes, birds, wildlife, and sports.

And it’s true:

All of those lenses are great to own.

But I’m trying to give you the three lenses that are most useful for every photographer, including folks who are new to photography or who have just bought their first camera.

And if you’re new to photography, these three lenses will give you the versatility to shoot in almost any situation.

You can use them for:

  • Family gatherings
  • Sports
  • Wildlife
  • Insects
  • Flowers
  • Landscapes
  • Events
  • Street scenes
  • Portraits

Then, once you hone in on the type of photography that most interests you, you might find that other lenses are essential for that specific subject – but until then, these are the lenses you should be carrying.

3 must-have camera lenses: conclusion

Well, there you have it:

The three camera lenses that every photographer should have, especially when starting out.

If you already own these lenses, great! And if not, consider adding them to your wish list.

Now over to you:

What lenses would you include on your own must-have lens list? Share your thoughts in the comments below!

About the author: Chris Folsom is a hobbyist photographer who spends much of his time photographing abandoned buildings. His photos have been published in newspapers and on numerous websites.

The post The 3 Must-Have Camera Lenses Every Photographer Should Own appeared first on Digital Photography School. It was authored by Guest Contributor.


Digital Photography School

 
Comments Off on The 3 Must-Have Camera Lenses Every Photographer Should Own

Posted in Photography


Adobe Camera Raw vs. Nikon ViewNX-i and Capture NX-D: Which should you be using?

19 Jan

Introduction

Recently, I kicked off a new series of articles comparing the software provided by camera manufacturers with one of their most popular third-party alternatives, pitting Canon Digital Photo Professional head-to-head against Adobe Camera Raw. Now, I’m back with the second in the series, in which we’ll take a look at how Adobe’s raw processing rivals that offered for free with Nikon’s cameras.

Nikon ViewNX-i version 1.4.3’s user interface.

There’s a bit more to discuss this time around, as Nikon offers a choice of two different raw processing apps for free — the somewhat inconsistently-named ViewNX-i and Capture NX-D. As in the previous article, I’ll be limiting discussion mostly to each application’s user interface and image quality in the interests of keeping things to a readable length, and won’t be addressing features like image management, tethering or printing.

The ground rules

In this article, I’m comparing Adobe Camera Raw 12.4 alongside Adobe Bridge 10.1.1 versus Nikon ViewNX-i 1.4.3 and Capture NX-D 1.6.3, all of which are their current versions. My computer is a 2018-vintage Dell XPS 15 9570 laptop running Windows 10 version 1909.

To level the playing field as much as possible, I’ve once again aimed to reproduce the look of already-processed images from our galleries, without any prior knowledge as to the recipes behind them. I’ve chosen images from the Nikon Z6 for use in this comparison, since it’s similar in price and resolution to the EOS R used in the first article, and has been around long enough for Adobe to fine-tune its support.

Adobe Camera Raw version 12.4’s user interface.

To avoid getting too far into the weeds, sharpness and noise reduction were left at their defaults, while lens corrections were enabled for all three apps where possible.

Adobe Camera Raw doesn’t allow built-in corrections to be disabled at all. ViewNX-i doesn’t allow you to change whether or not distortion correction is enabled, and just abides by what’s set in the raw file. Only Capture NX-D allows corrections to be enabled/disabled (although even it prevents disabling distortion correction for certain lenses).

Images processed in ACR were saved at JPEG quality 11, just as used in our galleries. For NX-i and NX-D, I saved at JPEG quality 86, producing similarly-sized files.

The main differences

Click or tap for the full-sized ACR version; here for ViewNX-i version

Of course, the most immediately obvious differences between ACR and NX-i / NX-D are their camera support and price tag. You already paid for NX-i and NX-D when you bought your Nikon camera, so it’s effectively free. While it only supports Raw files from the company’s own cameras, you can expect full Raw support for every Nikon camera to be available pretty much immediately upon release.

By contrast, ACR comes with a recurring subscription fee. While it supports a vast range of cameras from many manufacturers – including every single interchangeable-lens Nikon camera made to date – that support can sometimes take a while to arrive after the release of new models.

It’s also sometimes more limited than that in first-party software, especially for Coolpix compacts. While Adobe offers ‘camera matching’ profiles for almost every Nikon ILC, for example, it’s not available for a fair few compacts, including the relatively recent Coolpix A1000.

As for the differences between ViewNX-i and Capture NX-D, we’ll describe those in more detail when we look at NX-D on the next page. Suffice it to say that NX-i is the simpler, more approachable of the pair, however.

ACR is a little cleaner, but NX-i is approachable too

Click or tap for the full-sized ACR version; here for ViewNX-i version

For the remainder of this page, we’ll focus solely on ViewNX-i. Although its interface isn’t quite as modern as that of ACR, it’s still pretty clean overall, with relatively few controls on offer. Some features like sharpening are combined into a single easy-to-use slider, while others like noise reduction are controlled entirely automatically.

The selection of controls available to the user is sometimes a bit odd, though. For example, I’d wager that most NX-i users won’t have the first clue what “axial color aberration” means, nor will they find any tooltip explaining it if they hover over the control. Yet several more common (and easily-understood) attributes like distortion and vignetting corrections cannot be controlled by the end-user.

The selection of controls available in ViewNX-i is sometimes curious. For example, there are controls for more obscure functions like aberration and diffraction, but none for more easily-understood variables like distortion and vignetting.

The good news is that, with fewer controls on offer, Nikon gives you access to everything up front. Editing functionality isn’t hidden behind buttons or under menus. Nor is it strewn across multiple tabs of controls, as in some applications.

Instead, you’ll find all available editing tools grouped together in a single, relatively short scrollable panel. And sliders move smoothly rather than in large steps, so making fine-grained adjustments is easy.

Like ACR, modern features like support for 4K displays, touch-screens and pen control are pretty good, although if you switch between 4K and Full HD displays — especially while NX-i is running — you’ll often have to resize panels or perhaps even restart the application entirely so it redetects the screen resolution before you can get to work.

ACR is still the speed champ, but ViewNX-i isn’t that far behind

Click or tap for the full-sized ACR version; here for ViewNX-i version

ViewNX-i isn’t quite as fast as ACR, especially when it comes to previewing changes as controls are adjusted. Still, it trails Adobe by only around a third in terms of final rendering times, which is much better than some rivals. All six images in this preview took ViewNX-i around 26 seconds to batch-process, compared to 19.5 seconds for ACR.

And while image previews aren’t adjusted in near real-time as in ACR, they never take more than a second or less to catch up to your changes, and render in a single pass. The accuracy of that preview isn’t perfect when viewing full images, so for the finest adjustments you’ll want to switch to a 1:1 view instead, but it’s certainly good enough to get you close.

Unfortunately, there’s no indicator to show when the preview is updating, which is a bit frustrating when making more subtle adjustments.

ACR gives you much more control, especially over shadows and highlights

Click or tap for the full-sized ACR version; here for ViewNX-i version

As noted previously, ViewNX-i offers a smaller selection of controls than does Capture NX-D, and the same goes doubly when compared to Adobe Camera Raw. A particularly surprising omission in an app aimed at less-experienced users is the lack of a one-click auto control to help get everything in the ballpark. Much like ACR, ViewNX-i includes slider control over brightness, contrast, shadows and highlights.

NX-i also has D-Lighting HS and Color Booster sliders, the latter replacing the separate saturation/vibrance sliders offered by Adobe, and providing a choice of people or nature modes for some control over skin tones. Sharpening control is likewise limited to a single slider with no fine-tuning possible. And Nikon’s app lacks ACR’s sliders for texture, clarity, dehazing or black-points and white-points entirely, as well as its noise reduction and curves controls.

The D-Lighting HS slider makes it really easy to recover shadow detail, but I found its interactions with the shadow protection and contrast sliders in particular to be a bit difficult to predict and control. With D-Lighting HS set in the upper half of its range, as little as a 2-3% change in the contrast slider could have a pretty major effect overall and badly block up deeper shadows. This was particularly true of the shots inside the aircraft hangar, as well as the backlit model shot.

The fixed noise reduction is too heavy-handed by far

Click or tap for the full-sized ACR version; here for ViewNX-i version

With less challenging scenes, though, I thought ViewNX-i did a pretty good job in most respects. It yielded pleasingly lifelike color with relatively little effort, and I found myself preferring its rendering of foliage and skies in particular over those of ACR.

The fly in the ointment is that its noise reduction – which, remember, can’t be disabled – is quite heavy-handed. This is particularly noticeable in portrait shots, where much fine detail is lost in things like hair or thread patterns in clothing, and skin can end up looking unnaturally plasticky. This, more than anything else, will push more experienced photographers to either Capture NX-D or a third-party alternative like ACR.

ViewNX-i’s default noise reduction can lead to slightly plasticky-looking skin.

If your shot doesn’t have much noise to start off with, though, ViewNX-i can extract about almost as much detail as can ACR. (And can appear a little crisper at default settings, thanks to slightly stronger unsharp masking).

Final thoughts on ViewNX-i

Click or tap for the full-sized ACR version; here for ViewNX-i version

Less experienced photographers might, perhaps, find ViewNX-i to be a bit less intimidating than Capture NX-D or Adobe Camera Raw, and it’s certainly capable of providing decent results if you can live with its noise reduction performance. Performance is decent too, especially in terms of final rendering, although Adobe still takes the win handily in this respect. But for many, the limited controls on offer and the heavy-handed noise reduction will push them to Capture NX-D or a third-party alternative instead — and rightly so.

Nikon ViewNX-i

Pros Cons
  • Available free with your camera
  • Excellent support for Nikon’s cameras from launch day
  • Realistic color with minimal effort
  • Impressive shadow recovery from D-Lighting HS
  • Decent performance, albeit still not as good as ACR
  • Only supports Nikon cameras
  • Lacks many controls offered by ACR and other rivals
  • Selection of controls doesn’t make sense for less-experienced shooters
  • No one-click auto control
  • Can’t use distortion correction if it wasn’t enabled at capture time
  • Denoising robs fine detail and can’t be disabled
  • Interactions between controls can prove challenging

Adobe Camera Raw

Pros Cons
  • More modern user interface
  • Supports a vast range of cameras from many brands
  • Great performance and accurate real-time preview
  • Great image quality overall
  • Holds onto more fine detail than ViewNX-i
  • Does a great job with highlights/shadows
  • Recurring subscription fee with no perpetual license option
  • Camera support can take a while to arrive
  • Less pleasing color than Nikon’s software by default
  • Leaves significantly more noise in images by default

And with our Nikon ViewNX-i vs. Adobe Camera Raw comparison complete, it’s time to see how Capture NX-D fares against its third-party rival. Continue reading on the next page!

Articles: Digital Photography Review (dpreview.com)

 
Comments Off on Adobe Camera Raw vs. Nikon ViewNX-i and Capture NX-D: Which should you be using?

Posted in Uncategorized


GIMP vs Photoshop: Which Should You Use in 2021?

24 Dec

The post GIMP vs Photoshop: Which Should You Use in 2021? appeared first on Digital Photography School. It was authored by Ana Mireles.

Gimp vs Photoshop in 2020

Which is the better post-processing program, GIMP vs Photoshop?

That’s what this article is all about. I’m going to take you through the pros and cons of each program – so by the time you’ve finished, you’ll know which option is right for you.

So, if you’re ready to determine the best editing software for your needs…

…then keep on reading!

GIMP vs Photoshop: Overview

Photoshop is proprietary software that is available via paid subscription, whereas GIMP is a free, open-source program.

In the old days, before 2013 when Adobe changed to its subscription model, price was enough to decide between Photoshop vs GIMP.

You could choose Gimp for free, Photoshop CS6 for $ 699, or Photoshop CS6 Extended for $ 999. For most photographers, GIMP would inevitably win out.

Nowadays, you can have Adobe Photoshop starting at $ 9.99 USD per month. That’s a very reasonable price, even for a hobbyist.

Of course, GIMP is still free, so don’t automatically pay for Photoshop without thinking.

Instead, I recommend you take a careful look at the key differences between these two programs:

GIMP pros

  • Portability
  • Light download
  • Faster processing
  • Customizable
  • Free

Photoshop pros

  • Mobile
  • More tools
  • Handles more color profiles
  • Supports RAW and other file formats
  • Non-destructive editing
  • Good value for the money

Mobility and portability

using Photoshop on mobile

If you only have one computer and do all your photo editing there, this isn’t an issue for you. However, most photographers don’t edit that way.

You see, here’s one of the most important differences between GIMP and Photoshop:

GIMP is more portable, while Photoshop is mobile.

GIMP doesn’t have a mobile version, which puts it at a huge disadvantage in today’s world where every smartphone has a camera.

Of course, you can still edit your photos on your phone for free. There are many options out there (including Photoshop, as I’ll explain in a moment). However, you can’t do mobile editing with GIMP.

What GIMP does have is portability. If you need to work on multiple computers, GIMP can be downloaded as many times as you want. You can even install GIMP on a USB drive so you can use it on any computer without having to download it.

This is an excellent choice if you want to edit your photos in a university library or in the business lounge at your hotel or airport, for example.

Photoshop, on the other hand, can only be installed on two computers. Also, the program needs to be fully installed, so you can’t place it on external hard drives.

However, Photoshop does have a mobile version: any paid Photoshop subscription comes with Photoshop for the iPad.

Plus, Photoshop for smartphones has three free versions (though you’ll need a free Adobe account to use them).

In summary:

Photoshop wins if you need to edit on the go. GIMP wins if you need to use it on many computers, including public ones.

Size and speed

Gimp vs Photoshop size

GIMP is a very light program (after all, you can install and use GIMP from a portable USB drive!).

Photoshop, on the other hand, occupies quite a lot of space on your hard drive. It also uses a lot of RAM. So if your computer has limited processing capacity, Photoshop won’t be your friend.

There are some ways to optimize your computer for Photoshop use, but all in all, Photoshop will always be more resource-intensive than GIMP.

For Photoshop, you need 4 GB of available hard disk space (and additional space is required for installation).

GIMP requires 200 MB for the official install. This can grow depending on how you enhance GIMP over time.

As far as memory goes, Adobe recommends a minimum of 8 GB and preferably 16 GB of RAM. I’ve used Photoshop with 4 GB of RAM, and it works – but it’s choppy. GIMP, however, only needs about 20 MB of memory.

Note that the memory required by both GIMP and Photoshop can significantly increase depending on the images you’re working on, so that’s always something to bear in mind.

Ultimately, thanks to its size and processing requirements, I have to give the win to GIMP.

System and tools

I mentioned at the beginning that GIMP is open source while Photoshop is proprietary software.

This means you can modify GIMP as much as you want, from adding tools to directly changing the source code.

Modifying a program is great, but if you don’t know the tech behind GIMP, you probably won’t be able to take advantage of the open-source design. Even installing GIMP plug-ins can be difficult, and without these enhancements, you’ll be left with a program that is too bare to be appealing.

On the other hand, if you can get the hang of it, this flexibility can be hugely helpful. Plus, there is a big community behind GIMP, and many members are constantly creating interesting program additions. That way, you don’t have to wait for the GIMP team to release the next update; you can use community members’ programming to enhance your own GIMP software.

Photoshop is delivered as a finished product. You can’t make many changes, but it also doesn’t require much in the way of enhancements. You can set up your own workspace and add plugins, but that’s about it. On the upside, you get continuous updates included as part of your Adobe subscription – and in every update, you get high-quality improvements and innovations, thanks to a huge team that has maintained Photoshop’s status as the industry standard for many decades.

Photoshop also gives you the tools to create graphics and 3D designs, which is a very big plus if you have use for it.

Otherwise, these features will take up a lot of space in your system, but you don’t have the option to remove them and keep only what you need.

When it comes to tools, I find it difficult to declare an overall winner. Photoshop is a more robust program, but GIMP is more flexible. I’ll call it a tie, depending on your needs and skills.

File formats and color profiles

Photoshop color profile

As you know, digital images are files with information. The file format is the way in which this information is encoded and stored.

Photoshop has its own native format: the PSD, or Photoshop Document. In the same sense, GIMP has native XCF files.

While the PSD is native to Photoshop, it’s very compatible; it can be opened by the Adobe apps, CorelDRAW, and even GIMP.

On the other hand, the XCF file format is not supported by other image editing programs. This makes it difficult to share original XCF files.

As a workaround, you can export the file using one of the common file formats like JPEG or TIFF, but the lack of XCF support does present some problems if you want the file recipient to build on your own edits (assuming they don’t use GIMP).

Also, GIMP doesn’t open RAW files by default. If you want to work with RAW files in GIMP, you have to download and install a plugin called UFRaw, whereas Photoshop has a built-in companion program, Adobe Camera RAW, which handles RAW files with ease.

When it comes to file management, you also have to consider the color profile options.

Gimp can only handle the sRGB color profile, whereas Photoshop has many more options. This is important when you want your images to look their best on the web and for printing.

To recap:

Regarding file formats and color profiles, Photoshop offers more options and is more compatible with other programs – which is why I’d give the win to Photoshop.

Editing and layers

Non-destructive editing

I already covered the tools in a previous section, so you know that, for advanced editing, Photoshop has the edge over GIMP.

Both programs support plugins, actions, and presets. You can find many great options for free. The only difference is that Photoshop has more variety to choose from because it’s more popular overall.

The same rules apply for tutorials:

You’ll find so many more educational materials for the Adobe products compared to GIMP.

Finally, there is one thing Gimp is sorely lacking: non-destructive editing. Photoshop offers both adjustment layers and smart objects, which are extremely important for serious editing and hand Photoshop a definite win.

Cost and value

Gimp and Photoshop pricing

Last, I want to talk about cost and value.

When you download GIMP, there is no cost or subscription involved in the process. You get a photo editing program for free.

That’s not bad at all, considering that you’re not paying any money or giving out any information that many other “free” programs require.

However, you’ll need to download GIMP enhancements separately.

A Photoshop subscription includes the editing program, plus cloud storage space, a free customizable website on Adobe Portfolio, and access to Adobe Fresco, Adobe Fonts, and Adobe Spark. You can also get Adobe Lightroom if you choose the Photography plan.

And you have access to all the perks that come with the size and experience of Adobe, such as thousands of high-quality, creative brushes designed by Kyle T. Webster, as well as the most innovative tools that a big team of experts can develop.

When it comes to value, I have to declare a Photoshop vs GIMP tie. GIMP is free in every sense of the word, and you get excellent software.

For Photoshop, you do have to pay, but considering the low cost, the high quality, and the number of extras that you get, the program offers great value for the money.

It all comes down to what you need and what you can afford.

GIMP vs Photoshop: Conclusion

In my opinion, Photoshop is worth having if you’re into photography post-production.

That is, of course, if you can afford it. If you can’t do that just yet, then GIMP is a magnificent choice.

I actually have and use both programs. There are some things I find easier to do in one software versus the other. So owning Photoshop and GIMP gives me the best of both worlds!

I hope this GIMP vs Photoshop comparison gave you enough information to decide on the right program for you, based on your needs and budget.

Remember that the most important thing is your passion and your skills, so keep on creating – no matter which program you choose!

To download GIMP, click here, and to purchase Photoshop, click here.

Now over to you:

Which post-processing program do you prefer, GIMP or Photoshop? And why? Share your thoughts in the comments!

The post GIMP vs Photoshop: Which Should You Use in 2021? appeared first on Digital Photography School. It was authored by Ana Mireles.


Digital Photography School

 
Comments Off on GIMP vs Photoshop: Which Should You Use in 2021?

Posted in Photography


It’s great, but the Max should be even better: iPhone 12 Pro camera review round-up

21 Oct

Today is the day a number of reviewers are allowed to share their first thoughts on Apple’s new iPhone 12 Pro, the smaller of the company’s two latest flagship mobile devices announced last week. While we haven’t had the chance to take one for a spin yet, we’ve rounded up a few reviews from across the web to see what others’ opinions on the photographic capabilities of the new iPhone devices are.

From more general tech-centric reviews, such as The Verge’s Nilay Patel’s, to photo-specific reviews such as Austin Mann’s in-depth dive, we’ve tried to gather a nice spread of opinions. Overall, the consensus seems to be that while the iPhone 12 Pro is at the top of its game in the photography department, the iPhone 12 Pro Max will likely pack even more punch with its better camera specifications—so long as you don’t mind the extra bulk.

Over the coming days, as more reviewers get units in their hands, we’ll add those to this round-up. If there’s a review (or two) you think we missed, leave it a link the comments below.

Austin Mann

You can’t talk about annual iPhone camera reviews without mentioning Mann’s thorough deep dives. He’s spent some time with Apple’s latest iOS devices while camping out of an Airstream in Glacier National Park, Montana and has wrapped up his thoughts on the photographic capabilities of the iPhone 12 Pro in a very comprehensive guide on his website.

He puts the new ultra-wide-angle lens to the test, pushes Night Mode to its limits and overall provides a comprehensive overview with plenty of sample images to look through. He concludesd by saying, under the headline ‘Buying advice for photographers:’

’The iPhone 12 Pro is a solid camera, and thanks to a bunch of new digital tech I found it to be slightly stronger than the already great iPhone 11 Pro — but if you are serious about photography with your iPhone, wait for the iPhone 12 Pro Max. It looks to be the most significant jump in iPhone camera hardware we’ve experienced in years, and it’s only three weeks away.’

Nilay Patel, ft Becca Farsace (The Verge)

Being a more general technology website, The Verge’s review doesn’t only focus on photography, but author Nilay Patel does have a thorough section dedicated to the imaging capabilities of the iPhone 12 Pro. He also gets the thoughts of The Verge video director Becca Farsace, whose work we’ve featured here on DPReview in the past.

There’s also a video review from The Verge:

Aundre Larrow (via PetaPixel)

Photographer and former Adobe Creative Resident Andre Larrow has teamed up with PetaPixel to share his thoughts on the new iPhone 12 Pro camera system. Taking a departure from the usual type of imagery you expect to see in reviews, Larrow opted to put it to the test by taking a series of intimate portraits with friends and acquaintances who have been quarantining together, as to minimize any health risks with the outdoor portrait sessions.

The series is somehow both serious and lighthearted with an editorial feel you don’t often associate with smartphone photography. It’s a welcomed change of pace and well worth the read.

Raymond Wong (Input)

Despite ‘taking [his] phone photography quite seriously,’ Raymond Wong of Input takes a more casual approach to reviewing the camera technology inside the iPhone 12 Pro. Despite the more casual approach, he does a great job comparing the new iPhone 12 Pro to the iPhone 12, iPhone 11 Pro and Pixel 5 in a number of areas, with sample images for comparison. Head on over to the review to see for yourself.

Articles: Digital Photography Review (dpreview.com)

 
Comments Off on It’s great, but the Max should be even better: iPhone 12 Pro camera review round-up

Posted in Uncategorized


Nikon Z6 II and Z7 II: Should you buy one?

20 Oct
My much-used Nikon Z7, purchased used from a friend (this guy) in late 2018.

Please note that the following article is very much a personal take, written from the perspective of someone who has been using an original Z7 for some time. Your needs (and your experience) may well vary greatly from mine, and I’d encourage you to read our launch content to get a feel for how well (or not) the Nikon Z6 II and Z7 II meet your requirements.

And with that out of the way…

Here at DPReview we get to use a lot of cameras and lenses in the course of our work (lucky us) but despite the availability of free loaner equipment, most of us still own and maintain a personal collection of gear. I’m talking about cameras, lenses and accessories purchased with our own money, for those times when we’re not testing the latest and greatest new thing. Much of my favorite gear of the past few years has – when finances have allowed – made its way into my personal collection.

For two years, my main camera (alongside models from several other manufacturers, I hasten to add) has been the Nikon Z7. The Z7 divided opinion when it was released in 2018 (who knew that so many people couldn’t live without a second card slot…?) but it met my fairly basic requirements very well. I needed high resolution in a compact body, image stabilization, a high–resolution viewfinder (with a priority on detail, rather than refresh rate), and a menu system which I could navigate without getting a headache. Something to replace my D810, with an emphasis on image quality rather than speed.

I had a running list of things I wanted fixed – or at least improved – in a future Z7 replacement

Fast-forward two years and my needs haven’t changed that much. That being said, after spending so long with a single model as my primary ‘creative’ camera (and having used the raft of competitive full-frame options released by Canon, Sony and Panasonic in the intervening time), I had created a mental list of things I wanted fixed – or at least improved – in a future Z7 replacement.

In no particular order, here’s my list – all of which might equally apply to the Z6.

  • Backlit controls
  • More customization for Fn buttons (for example the option to toggle silent shooting on/off)
  • Improved VR
  • Faster AF, better focus reliability in low light
  • A proper analog for 3D AF tracking as found in Nikon’s DSLRs
  • Compatibility with 10–pin MC–30A release (the plug–in MC–DC2 is fiddly and flimsy)
  • A proper vertical grip
  • A less intrusive EVF electronic level
  • Greater articulation of rear LCD (and a less sensitive EVF/LCD switch)
  • More effective sensor cleaning / dust–reduction

Two things not on my list, but I know are very close to some peoples’ hearts: Improved video, and twin card slots.

Of the 12 improvements and additions mentioned above, the Z7 II addresses four of them (highlighted in bold), but only two from my main list. The Z6 II and Z7 II are nearly impossible to tell apart from their predecessors, and that’s quite revealing: They’re extremely similar. Even the old MB-N10 battery grip will fit the the new cameras, which is good news for the five people who bought one.

Unlike the original Z6 and Z7, the new Mark II models are offered alongside a true vertical control grip, which duplicates controls for portrait-orientation shooting.

Is the provision for a proper vertical grip, and improved autofocus enough to make me upgrade from my Z7? Honestly…? probably not. I say ‘probably’ because I’m reserving judgement until I can judge for myself the improvement to AF in low light and the handling difference that the new grip makes when shooting with the Z 70–200mm F2.8 VR S. The fact is that – for me – the original Z7 is still a great camera, and here at DPReview, even two years on, we still consider the Z6/7 to be among the most pleasant to use of the full-frame ILCs currently on the market. If I buy a new camera in the next year or so, it might just end up being a second Z7, if the prices drop low enough. But if I do upgrade, at least I know that the process will be unusually painless (even custom tripod plates for the Z6/7 will fit the new models).

There are a lot of ‘single issue voters’ out there in the camera–buying world

Of course, that’s just me. There are a lot of ‘single issue voters’ out there in the camera-buying world, whether that issue is the number of card slots, USB power, battery life, which way the focus ring rotates (FINALLY something you can customize in the Z6/7 II…) or whatever else.

The Z6 II and Z7 II have twin card slots. They can be powered over USB. They are, undoubtedly, faster and more powerful cameras than their predecessors. Nikon claims that their twin processors allow for improved low light AF performance, as well as more versatile face/eye-AF, reduced blackout time between shots, and faster continuous shooting. Hopefully, the increased processing power will allow Nikon to add more features via future firmware updates, too.

There will be a lot of people reading our launch coverage of the Z6 II and Z7 II and thinking (and no doubt already commenting) ‘these are the cameras that the Z6 and Z7 should have been’. I think that’s unfair (hindsight is cheap – R&D isn’t), but they’re certainly better cameras – and a more convincing entry-point into mirrorless for existing Nikon DSLR owners.

Because the new Z6 II and Z7 II are physically identical to their predecessors, custom plates from the likes of Acratech (shown here) Kirk and Really Right Stuff designed for the older cameras will also fit the new models.

That’s crucial, because while the answer to the question ‘should you upgrade from a Z6 or Z7 to the Z6 II or Z7 II?’ is a resounding ‘maybe…‘, for Nikon users considering whether to move into mirrorless for the first time, it’s much more clear–cut.

If you’re a D750 or D850 (or D5000–series or D7000–series) owner, you’ll probably find these new cameras more attractive upgrade options than the original Z6 and Z7. They work in broadly the same way (if not exactly the same) as the DSLRs that you’re used to, autofocus should be a little better, you can use your existing SD memory cards if you want, without the short–term need to invest in a new media type, and if you need proper vertical controls for portraits or long lens work, you got ’em. Meanwhile the extra processing power makes them a little more future-proof when it comes to firmware updates.

But what if you’re not an existing Nikon DSLR user? Is the Z6 II a better option than (say) the Canon EOS R6, or Sony a7 III, or Panasonic Lumix DC–S5? That’s not a question we can answer yet. They certainly look pretty competitive on paper, and you can see how their specs compare in our database, but bare numbers can only tell you so much. Rest assured though that we’ll be testing both the Z6 II and Z7 II (and adding them to our Buying Guides) as soon as we receive final production samples.

Articles: Digital Photography Review (dpreview.com)

 
Comments Off on Nikon Z6 II and Z7 II: Should you buy one?

Posted in Uncategorized


21 Settings, Techniques and Rules All New Camera Owners Should Know

13 Oct

The post 21 Settings, Techniques and Rules All New Camera Owners Should Know appeared first on Digital Photography School. It was authored by Darren Rowse.

In this article, we’re going to share 21 photography settings, techniques, and rules you should know as a beginner photographer.

Some are very basic while others go a little deeper, but all have been selected from our archives specifically for beginners and new camera owners.

Enjoy!

Introduction to useful modes and settings on your digital camera

Photography settings, techniques, and rules

1. Digital Camera Modes Explained – I spoke with a family friend recently who had just bought a new point and shoot camera. She came up to me with her camera when no one was watching and embarrassedly asked me if I could tell her what all the little icons on the dial on top of her camera meant. This article explains what each of the most common digital camera modes means and does. Knowing these photography modes can take your shots to the next level.

2. Aperture and Shutter Priority Modes – This introduction takes you through these two very useful settings that can be found on many digital cameras. Aperture and Shutter Priority mode take you off of Auto mode, giving you more control over your images without thrusting you fully into Manual mode. They are great settings to explore and master.

3. Introduction to White Balance – One of the most common problems that I see in beginner photography is shots with incorrect colors. We’ve all seen them: portraits where your subject’s teeth and eyeballs (and everything else) have a yellowish tinge. Learn what causes this and how to combat it with this tutorial on white balance.

Photography settings, techniques, and rules histogram 
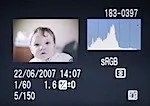
4. Understanding Histograms – “Histograms are scary.” This is what one reader said to me recently when they discovered that they could view these little graphs on their camera. While histograms might seem a little technical, it is amazing how simple a histogram is to interpret. Know what to look for, and with just a glance you can tell if your image is under- or over-exposed. It’s a useful tool to master.

5. Automatic Exposure Bracketing (AEB) – This feature is another of those often-unexplored settings that many cameras have built into them. It will allow you to get well-exposed shots in even the trickiest of lighting situations.

Other basic camera techniques

Photography settings, techniques, and rules: how to hold a camera

6. How to Hold a Digital Camera – This beginner tutorial covers a topic that most camera owners skip over without realizing that it is a foundational lesson in photography. Get this wrong and it can dramatically impact the quality of your shots.

7. Shutter Release Technique – Another basic tip that many do intuitively, but which can drastically improve your photography if you don’t do it.

8. How to Use Focal Lock – Yet another beginner technique that many of us take for granted, yet is at the core of how all digital cameras focus automatically. Get this wrong and you’ll take a lot of shots of out-of-focus subjects and in-focus backgrounds!

9. How to Take Sharp Digital Images – “My shots are fuzzy.” It’s a problem we’re frequently asked about, so we wrote this tutorial to help you get the sharpest images your camera can take.

10. Shooting with an In-Camera Flash – Flash photography with a built-in flash can lead to some terribly blown-out images. This article offers a few tips on how to avoid this. And here are 7 Strategies for Avoiding Flash Blow Out.

11. How to Get Shallow Depth of Field in Your Digital Photos – A great technique to learn if you’re into many types of photography (portraits, macro, etc.) is how to control the depth of field in your shots. That way, you can make your main subject pop by making your background nicely blurred. This tutorial walks you through how to do it.

12. Understanding Exposure – This post takes new camera owners through the three main elements of exposure. Once you’ve read it, also check out our introductions to ISO, aperture, and shutter speed.

Camera care and maintenance

camera care broken camera

13. How to Avoid a Dirty DSLR Sensor – One of the fastest ways to ruin every single shot you take with your new DSLR is to end up with a dirty image sensor. This tutorial gives some basic tips on how to ensure it stays as clean as possible.

14. How to Clean a DSLR Lens – As much as you try to protect them, lenses tend to get grimy over time. This tutorial shares some basic tips on how to clean lenses so that your shots will be as clear as possible.

15. 7 Digital Camera Predators and How to Keep them at Bay – This tutorial takes you through 7 of the most common ways that digital cameras get damaged, what to look out for, and what preventative actions you can take.

Composition tips

rule of thirds composition tips

16. The Rule of Thirds – Whether you follow it or break it, the rule of thirds is a topic you should at least know about.

17. Points of Interest – An image without some visual point of interest is unlikely to hold the eye of anyone viewing it.

18. Getting Horizons Horizontal – The perfect way to ruin that lovely sunset or landscape shot is to make it lean to one side. Get your horizon horizontal!

19. Fill Your Frame – This is not applicable to every shot you take, but many photographers could drastically improve their photography by getting in close to their subject and filling the frame.

20. Getting Backgrounds Right – The background can make or break an image. This tutorial walks you through a number of things to look out for and techniques to use to get the background just right.

21. Adding Randomness to Your Photos – Learn how to set your images apart from everyone else’s by injecting creativity, variety, and a little randomness into your shots.

Of course, these 21 photography settings, techniques, and rules for beginner camera owners just scratch the surface of all there is to learn about the art of photography. Subscribe to our blog here to get more free daily tips to help you keep learning and improving.

Our guide to getting creative control over your camera

If you’re looking for a complete guide to taking control of your camera, then you might like to check out our course, Photo Nuts and Bolts, which walks you through everything you need to know to start taking beautiful photos.

Here’s the intro:


Grab this great dPS course here.

The post 21 Settings, Techniques and Rules All New Camera Owners Should Know appeared first on Digital Photography School. It was authored by Darren Rowse.


Digital Photography School

 
Comments Off on 21 Settings, Techniques and Rules All New Camera Owners Should Know

Posted in Photography


DPReview TV: How to start a YouTube channel Part III – should you shoot in a studio or in the field?

24 Sep

Have you ever dreamed of starting your own YouTube channel? In this video, we discuss the pros and cons of working of shooting from a studio vs. shooting in the field.

Subscribe to our YouTube channel to get new episodes of DPReview TV every week.

  • Introduction
  • Studio: Advantages
  • Studio: Disadvantages
  • Field: Advantages
  • Field: Disadvantages
  • Field: Conclusion

Articles: Digital Photography Review (dpreview.com)

 
Comments Off on DPReview TV: How to start a YouTube channel Part III – should you shoot in a studio or in the field?

Posted in Uncategorized


DPReview TV: How to start a YouTube channel Part II – should you write a script, an outline or just wing it?

11 Sep

Have you ever dreamed of starting your own YouTube channel? In this video, we show you three different ways to plan and script your show.

Subscribe to our YouTube channel to get new episodes of DPReview TV every week.

  • Introduction
  • Scripting
  • Outlines
  • Riffing
  • The wrap

Articles: Digital Photography Review (dpreview.com)

 
Comments Off on DPReview TV: How to start a YouTube channel Part II – should you write a script, an outline or just wing it?

Posted in Uncategorized