What is RAW?
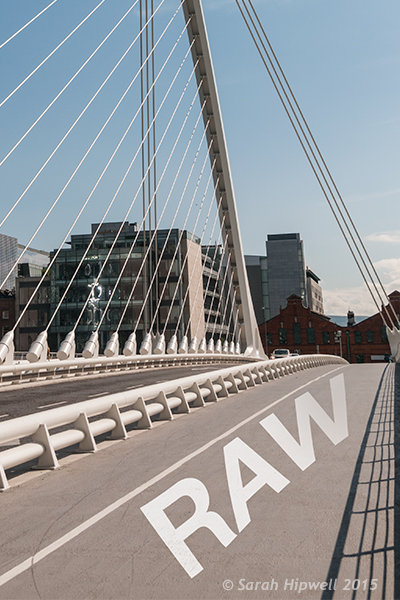 A RAW file is really the digital negative, which means that all the data is stored waiting to be unleashed via a RAW Editor. Unlike a jpeg file which has been edited in-camera (or in post-processing) and is a compressed 8-bit file.
Why shoot RAW?
The main benefit to shooting RAW is simply to have as much information as possible in the file. When you upload a RAW file onto your computer the white balance, and tonal corrections have to be set manually. More detail can be retrieved from the highlights and shadows. It is then saved as a jpeg or some other format. The RAW file always remains in its original state.
Shooting RAW has become more commonplace as cameras have the option, built-in and RAW editing software is more widely available on both Mac and PC. In this article, I will be testing out two RAW editors which are free to download. Yes, no purchase necessary. The main RAW editor that I will go into more detail on is Adobe Camera Raw (ACR), which comes with Photoshop and is my primary go-to RAW editing software.
As a side note, this article is by no means a complete in-depth review of the pros and cons of each of the the three RAW editors. I merely wanted to test Photoshop’s ACR against some of the RAW editors that are available to download for free, such as GIMP and RawTherapee.
A few years back, I was using ViewNX (now ViewNX2), which is Nikon’s RAW free editing software. Canon (DPP) and other major camera manufacturers have their own RAW proprietary software. But I found ACR just got better with each new release. I usually bring my images into Photoshop when I’ve done the initial edits in ACR. It means my workflow is quite efficient as I’m using ACR and Photoshop side-by-side.
The Basics
When you open ACR or any RAW editor, the user interface can be a bit daunting for the uninitiated. The range of adjustments and all the features of ACR would require several articles alone.
So, let’s look at the basic adjustments where I begin the editing process of my RAW files. These adjustments are fundamental to any RAW editor. Similar adjustments can also be found in the Develop module of Lightroom and in Photoshop Elements 12 and 13. Let’s begin with Adobe Camera Raw, otherwise known as ACR.
Adobe Camera Raw (ACR)
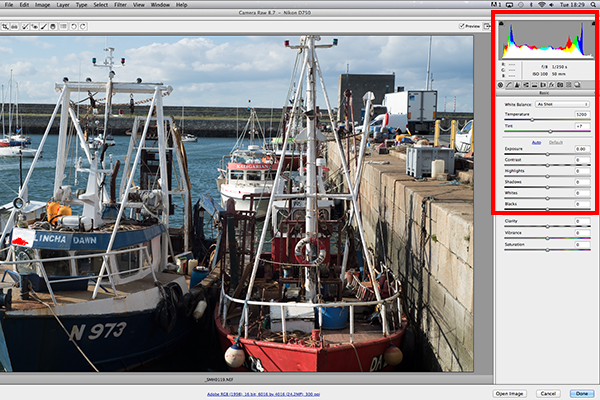
The interface when a RAW file is opened in ACR
When I open a RAW file in ACR, White Balance is my first port of call. This is about the color temperature of the image depending on the light source. If the white balance is incorrect, then a color cast will occur on your image. It may look slightly blue, orange or green.
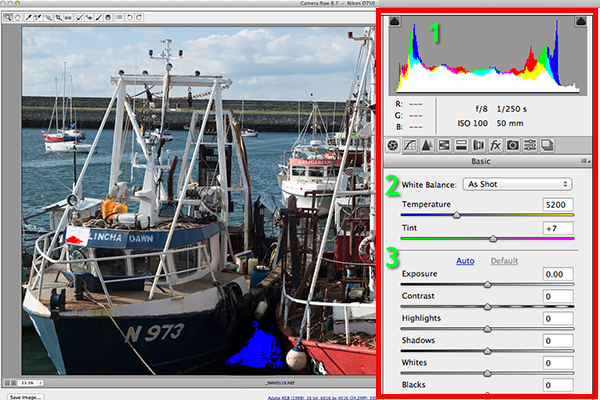
The three important focus points in the Basic panel in ACR
In ACR, there are three ways to adjust White Balance.
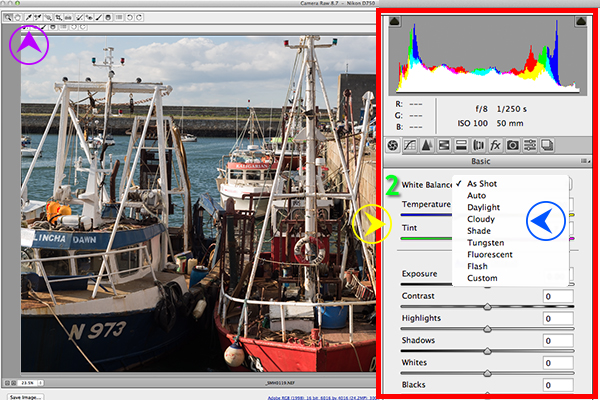
Three ways to edit White Balance in ACR:
1. White Balance Tool
2. Presets
3. Temperature and Tint Sliders
- The White Balance Tool is my least favourite. The idea being that you click anywhere on the image that is suppose to be gray. I find this tool hit and miss.
- There are number of presets that are worth experimenting with, if you are new to RAW editing. Try Auto which is a good place to start.
- You can then adjust the Temperature and Tint sliders for finer tweaking and control. I favour these two sliders the most in my workflow.
Just above the Temperature and Tint sliders, you have the histogram panel. Click on the the two black triangles. These indicate the highlight (left) and shadow (right) areas that have been clipped (see photo below). As you can see in this image, the areas highlighted in red indicate where the clipping has taken place in the whites. Similar to the shadows, blue indicates where the shadow areas have been clipped.
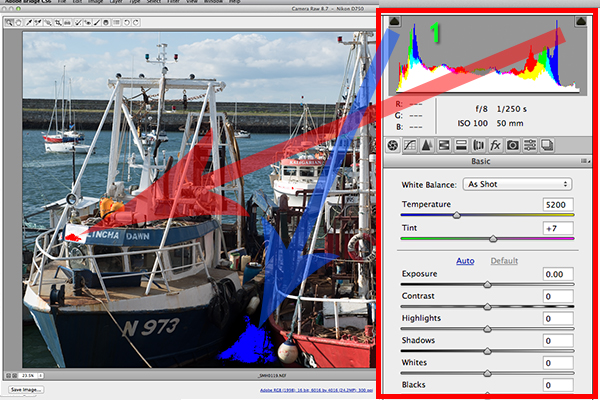
Highlights-shadows-clipping in the Histogram.
When adjusting the White and Black sliders keep an eye on the black triangles in the Histogram chart. These triangles turn green when clipping occurs. Alternatively, you can hold down the Alt key while dragging the Blacks slider across to the left until the darkest area of the image starts to appear. Similar for the Whites slider, hold down the Alt key and drag the slider to the right until the brightest part of the image begins to show.
I tend to leave the Exposure slider until after I have adjusted the Highlights and Shadow sliders.
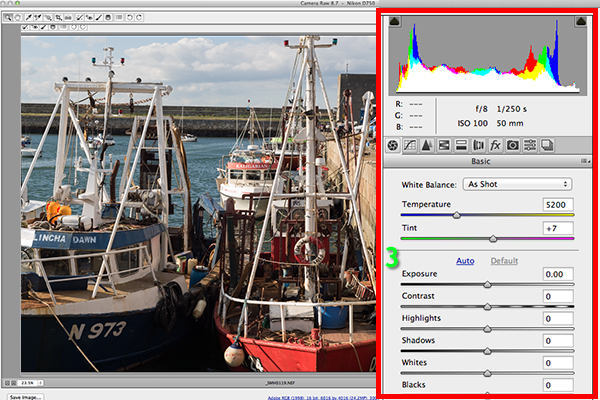
Exposure and Contrast sliders.
The Contrast slider gives your image that final punch but go lightly.
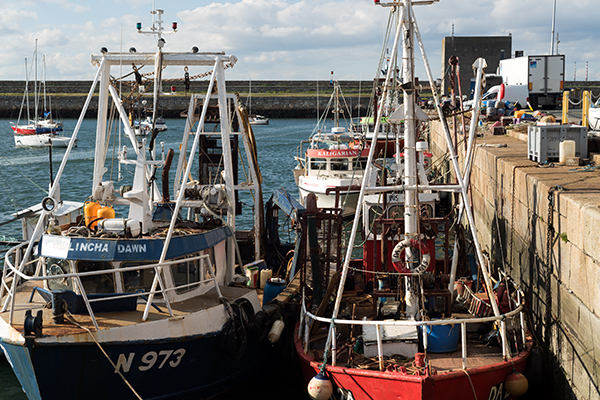
Final edited image from the basic adjustments in ACR
All edits done in ACR are non-destructive. Editing RAW files can be easily done in one pass, especially if you have captured the image that you want in-camera. However, there are no layers in ACR or Lightroom, so if you need further editing where layers are required you will need to use Photoshop or GIMP.
GIMP
So this brings us to the next RAW editor, UFRaw. This comes pre-installed in GIMP, version 2.8. I’ve never used GIMP before now and I was really curious and enthusiastic to try it out. It has the reputation of being as powerful as Photoshop for editing – and the fact that it is free, is a bonus.
I presumed that by opening a RAW file that the UFRaw editor would launch automatically. It didn’t. After a quick research online. I found a solution. I had to go to File>Open>Select file. I then had to Select File Type and scroll down to the bottom of a list and click on ‘raw image’. Once I opened the image in question. It did not resemble anything like the image I had taken on the day. Normally when I launch a RAW file in ACR, it would be similar to the jpeg version.
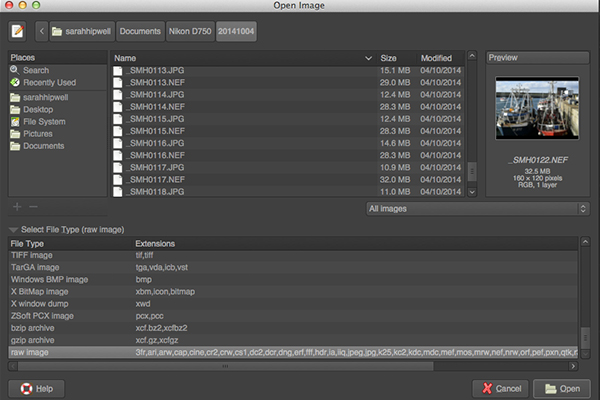
The UFRaw editor does not launch automatically. A few clicks gets you there.
The interface was completely alien to me, and I didn’t find it particularly user friendly. I played around with the sliders for awhile but I couldn’t get the image to look right at all. I tried adjusting the White Balance but I couldn’t get rid of a green/grey color cast on the image. By not having the familiar sliders in ACR, I was a bit lost to be honest. I really wanted to like UFRaw, as it is a free software for Mac and PC. To be fair, this was my first attempt at using the software, so I’ll put the mea culpa (blame) on me as opposed to the software.
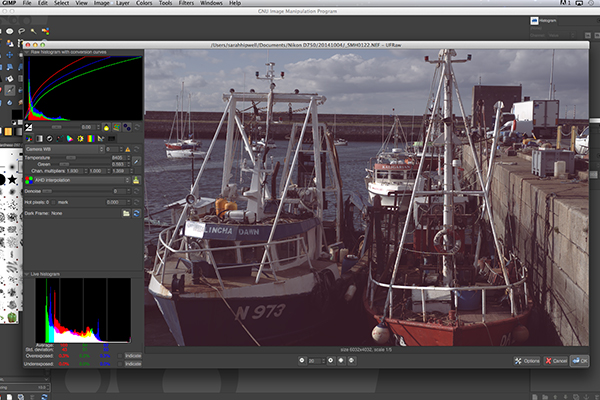
The UFRaw editor UI in GIMP
RawTherapee
Now onto RawTherapee. I love the name. I wasn’t expecting much after trying out GIMP’s UFRaw but I was completely surprised and impressed. RawTherapee is available in 64 and 32 bit forms for Mac OS X and Windows. It also supports a huge range of supported cameras and manufacturer filetypes.
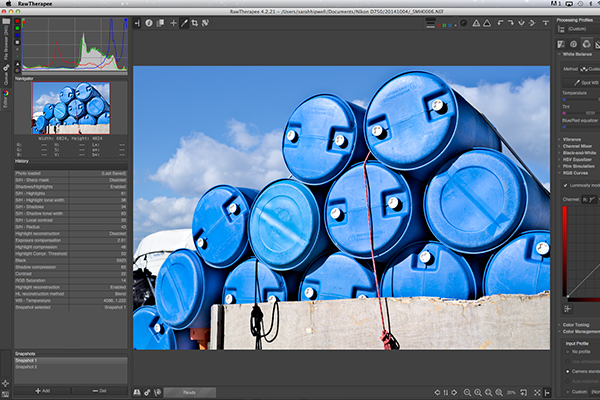
RawTherapee interface
This RAW editor is quite rich in features. Even so I found the user interface very intuitive, and after a few minutes I felt right at home. I quickly adapted to the menu system and found it very easy to navigate around. The editing panels are on the right.
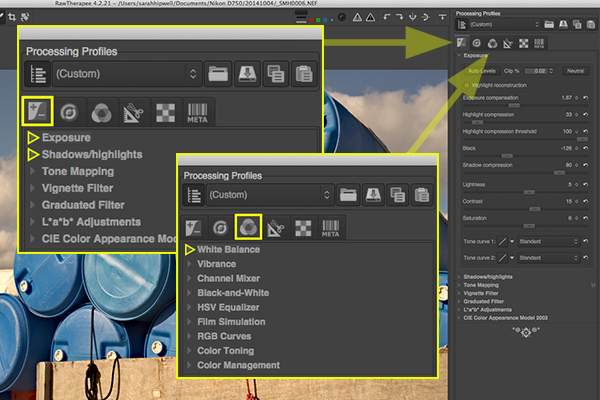
Highlighted adjustment sliders that are similar to the ones in ACR.
Summary
If you haven’t edited a RAW file before, I would highly recommend that you try it out. The options are varied whether you decide to purchase Lightroom, or choose to pick from the many RAW editors that are free to download. The choice is really up to you. Another free RAW editor that has just been launched is Affinity Photo and it looks really promising (currently in beta for Mac only).
googletag.cmd.push(function() {
tablet_slots.push( googletag.defineSlot( “/1005424/_dPSv4_tab-all-article-bottom_(300×250)”, [300, 250], “pb-ad-78623” ).addService( googletag.pubads() ) ); } );
googletag.cmd.push(function() {
mobile_slots.push( googletag.defineSlot( “/1005424/_dPSv4_mob-all-article-bottom_(300×250)”, [300, 250], “pb-ad-78158” ).addService( googletag.pubads() ) ); } );
The post Post-processing RAW Files – ACR Compared to Some Free Software Options by Sarah Hipwell appeared first on Digital Photography School.
You must be logged in to post a comment.