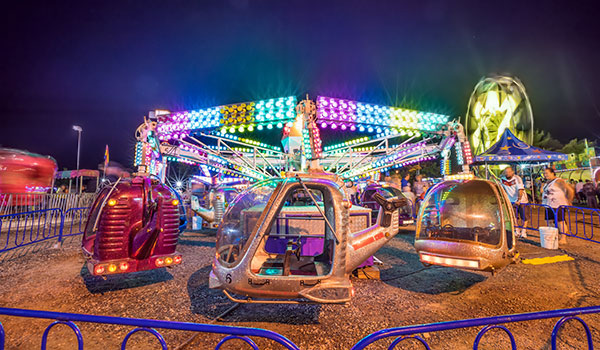
When it comes to taking pictures of the fairground or amusement park, you’ll be amazed at just how easy it is to get super colourful, vibrant, and bright images of those awesome rides. Twilight is the best time to shoot, when all those mega-joules of artificial lights burst into action to give you amazing effects that aren’t possible during the day time.
Here’s what you’ll need:
- A tripod – essential for long exposures
- A DSLR or Mirrorless camera with manual (M) mode
- A wide angle lens
- To shoot in RAW format (always)
When is the best time to shoot?
The optimum time is about 30 minutes after the sun has set. If you’re lucky, there will be a beautiful colourful afterglow in the clouds, but it will still be dark enough for all the artificial light to be the brightest parts of your image. When it gets fully dark you can still get stunning shots, but the sky may just be a dark blanket if there is cloud cover.
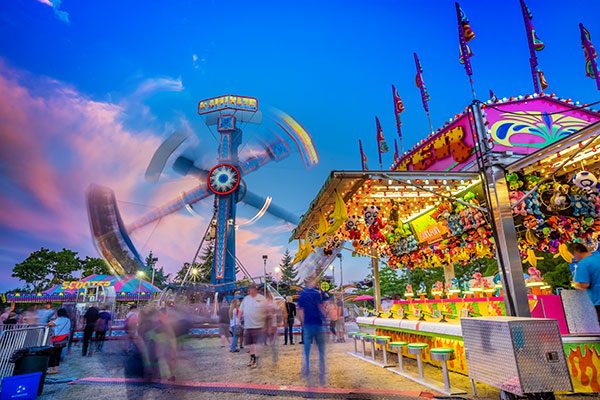
Harness the power of higher ISO
By increasing your ISO settings to around 400, you’re increasing the light sensitivity of your camera. You can try higher settings (larger ISO numbers) but your goal here is to achieve an exposure time of around one to two seconds so that you capture some motion blur in the people and in the rides. Using a higher ISO than 400 will speed up your exposure time and you don’t necessarily want that, unless you want to totally freeze all of the motion in your shot. There’s some trial and error involved, depending on the available light of your scene, so my number of 400 is approximate.
When the rides are static, you won’t capture any motion blur but as soon as they start to move (and they usually move fast), you’ll find that the one to two second exposure time is ideal for capturing a lot of movement.
Shoot in time-lapse mode
By taking pictures every four seconds, you’ll end up with a huge variation of different motion blur as the rides progress through their cycle. It’s almost like shooting video, but by shooting time-lapse, you’ll ensure that every frame is a full resolution image – video can’t compete with that. This technique ensures that you capture lots of images at different stages of the ride. Here’s a one minute time-lapse movie I made while shooting stills at the fair using this technique.
If your camera has a built-in intervalometer or time-lapse app, you’re in luck. Set your interval at four seconds, and your camera will take a picture every four seconds. If you’ve set your exposure time to two seconds that gives you a two second gap after your shot has finished before the next shot will be triggered. Make your time-lapse last for about a five minute duration, and you should be able to capture images of the rides while they are static and while they are moving – it depends on how busy the rides are and how long the ride cycle lasts.
You can then overlay those blurred images with the static images in Photoshop to create the ultimate composite of sharp static scenes, and motion blurred scenes.
Don’t worry if your camera doesn’t have a time-lapse function, you’ll just need to take as many pictures as you think will capture your desired motion blur and static states. Alternatively you could buy an intervalometer which will connect to your camera and trigger the shutter for time lapse shooting.
Top Tip: Be sure to switch off your built-in noise reduction as this will slow down your write times to the memory card, and will mess up your intervals.
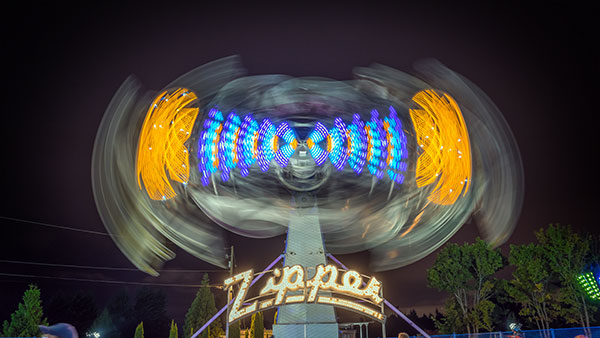
Choose the right white balance
It’s important to set the right white balance on your camera for this type of shooting. Don’t trust the auto setting because there are so many different light sources that your camera won’t know which setting to choose. For all of the shots I took with the Sony A7R, I used the Fluorescent Warm setting.
Experiment to get the most pleasing looking white balance for your scene, try to avoid everything looking super orange. Look at the scene with your eyes, then look at your shot to try and get the most accurate colour temperature.
It’s full of stars!
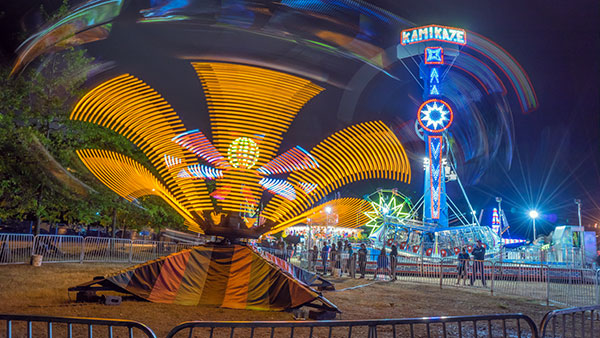
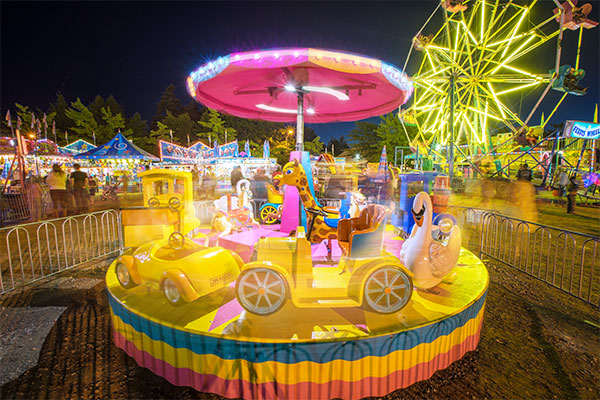
In shots like the one above, you can see a very pleasing looking blue star on the lamp post. All lenses produce their own characteristic stars, some are better than others. One thing you can do to get the best star out of your lens is to select a very narrow aperture like f/16 or f/22. This will also have the added benefit of forcing your shutter speed to be slower which gets you closer to the two second exposure time I mentioned earlier.
Get up close
Remember that wide angle lens I mentioned at the start? That lens will allow you to fill your frame with all the fun of the fair. Wide angle lenses create a pleasing looking distortion that adds drama and intensity to your shot. A 14-16mm shot on a full frame camera can cram in a LOT of action. By getting close to your subject and positioning yourself at a point that creates a nice looking distortion effect, you’ll really make your images POP!
Post-production
Noise reduction
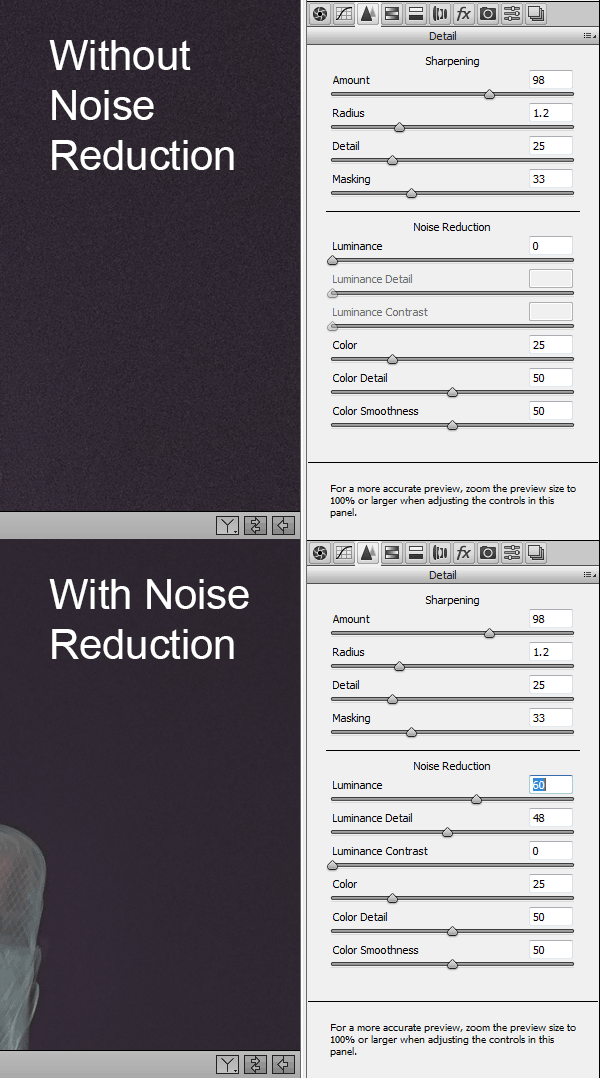
What happens to your image quality when you use higher ISO settings? Noise, that’s what. We don’t like noise do we? No, so lets get rid of it using the brilliant noise reduction of Adobe Camera Raw. Your specific settings will depend on your camera’s sensor, as not all sensors are made equal. Here are the settings that I found gave me the best results for my pictures. Experiment with these sliders to get rid of as much noise as you can while still retaining image detail.
Fix the shadows
You’ll probably want to brighten up your shadows and blacks a little but don’t overdo it. We actually need those dark areas in our image to contrast with the bright lights, that’s what gives our image its PUNCH!
Fix the highlights
If the brightest parts of your image look a little blown out, pull them down a little with the whites and highlights sliders. Again, don’t overdo it or you’ll run the risk of ending up with a totally fake looking image.
Clarity
Increase the clarity a little to introduce some contrast to the mid tones.
Vibrance
Increase the vibrance a little to make the colours pop and give a subtle blue hue to the sky area.
Use graduated filters in Adobe Camera RAW
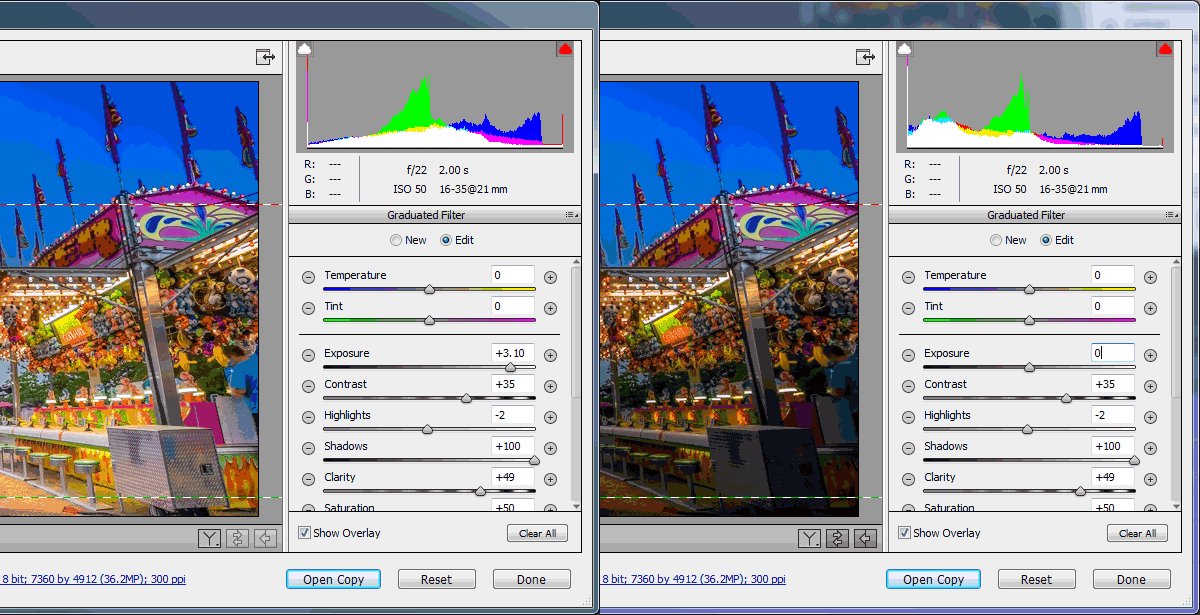
The graduated filter simulator is a really powerful tool, but did you know it’s not just for making a part of your sky darker? You can use multiple graduated filters to selectively brighten or darken large parts of your image. If you want to brighten just your foreground, simply add a graduated filter and increase its exposure value like in the image below. You can further tweak just that selected area with the other powerful ACR tools like shadows, clarity, contrast etc.
Combine your images to make the ultimate composite
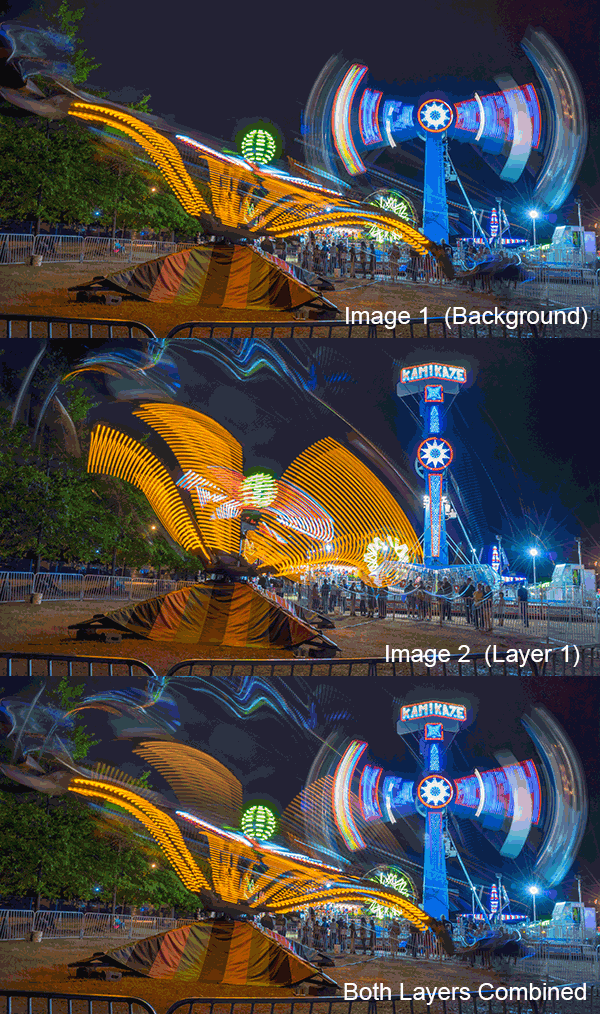
Once you’ve finished tweaking your images in Adobe Camera Raw, it’s time to open them in Photoshop to make a composite image that captures the motion blur and the static state of your fairground ride. It’s worth pointing out that this is just a creative choice, if you’re happy with just a single image, that’s cool too.
Step 1 – Choose and open your Images
From your images, choose one that shows your ride in its static state. This could either be while it’s not moving or perhaps you took a super fast, high ISO shot while the ride was moving and managed to freeze the motion nicely. Either way, pick an image that you like, and open that in Photoshop.
Step 2 – Copy and paste your images
Next you’ll choose an image, or images, that perfectly capture the motion blur of the ride; maybe it’s a roller-coaster ride and you want to catch the long streaking lights of the carriage. Open this in Photoshop so that you’ve now got two tabs, each with their own image.
With the motion blur image open, hit ctrl+a (or Cmd+A for Mac) on your keyboard to select the entire image. You should see the marching ants around the image. Next hit ctrl+c (Cmd+c) to copy that image on to your clipboard.
Now click on the other tab to switch to your first image which shows the static or frozen motion shot, and hit ctrl+v (Cmd+v) to paste your clipboard image on to a new layer above the default (Background) layer. Photoshop will call your new pasted layer “Layer 1″.
Step 3 – Blend your images
Assuming that you used the exact same ACR develop settings for both images, just go ahead and change the blend mode of the motion blurred image (Layer 1) that you just pasted on to the new layer to “Lighten”. The blend mode lives in your Layers panel and defaults to Normal, so change Normal to Lighten.
Now you should see both images combined to give you a lovely composite of both moments in time. If the effect is too pronounced, try turning down the opacity of the second layer to around 50%. For fun you could also try the Overlay blend mode or Screen, for a more intense effect. Remember to play with the layer opacity to get the look you want.
Step 4 – Erase the parts you don’t like
It’s likely that when you’ve blended both layers together by choosing the Lighten blend mode, you’ll want to erase certain parts of Layer 1 if the image gets too complicated. You can do that easily by choosing the Eraser tool and selecting a soft brush size, appropriate to the area you’d like to erase. Simply click on Layer 1 where you’d like to erase and bam – it’s gone (or use a layer mask for non-destructive editing).
That’s it! You’ve now learned how to shoot and process your amazing images of those mind blowing fairground rides. Go out and have some fun with this, just don’t overdo it on the cotton candy and doughnuts like I did, ugh.
If you have another other tips for photographing fairground rides, please share in the comments.
The post How to Photograph Fairground Rides by Gavin Hardcastle appeared first on Digital Photography School.
You must be logged in to post a comment.