EOS-1D Mark IV with EF 24-105 f/4L IS. 1/500 at f/4, ISO 200.
What is Golden Hour?
My absolute favorite time to photograph anything is a time of day called the Golden Hour. The Golden Hour occurs during the time just before sunset, and just after sunrise. When the sun is lower in the sky, near the horizon, it must travel through more of the atmosphere, reducing the intensity of direct light and thus reducing the contrast in the scene. More blue light is scattered, so sunlight will appear reddish and shadows won’t be as deep as when the sun is higher in the sky. In addition, the lower angle of the sun creates longer shadows, which can add interest to images.
EOS 5D Mark II with EF 24-105 f/4L IS. 1/15 at f/14, ISO 100. The low sun casts a longer shadow, creating foreground interest for this shot.
The Golden Hour does not necessarily last an hour. The closer to the equator you are, the shorter the Golden Hour is. The further from the equator, the longer the golden hour lasts. For instance, in Alaska during the summer, there is a period of several hours of Golden Hour light later in the evening, and during the winter, nearly all daylight hours have a Golden Hour quality to them.

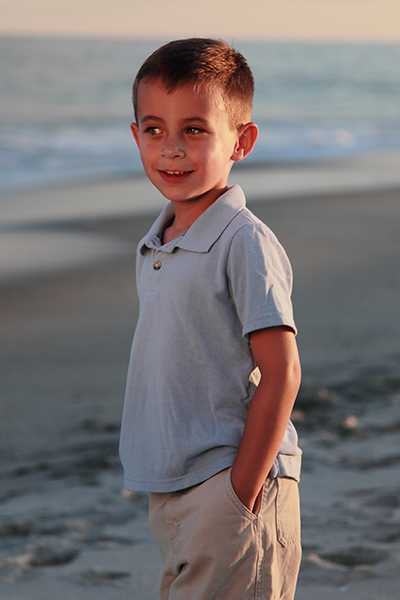
EOS 5D Mark II with EF 24-70 f/2.8L. 1/2500, f/4, ISO 200. The sun was placed over the boy’s shoulder to camera left, and a reflector to camera right.
Golden Hour light is so good, I find it hard to convince myself to photograph at other times. It’s excellent lighting for any subject, but especially lends itself to portraits and landscapes.
Portraits at Golden Hour
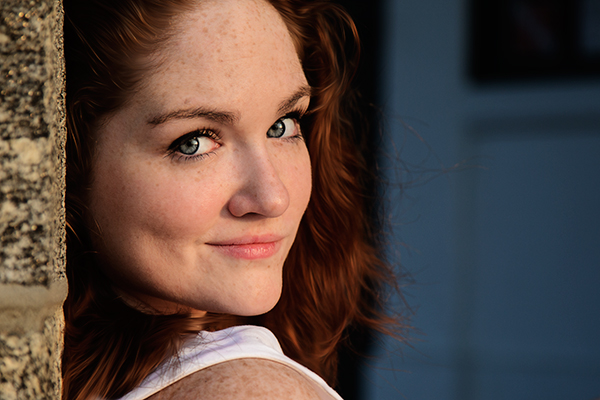
For portraits, I use the light in a couple of ways. First, I will position my subject so that the sun is shining on their face directly, as in the image at the top of this article. The light tends to be so soft, I can put down my reflector and just let the shadows fall and create depth. Simply position your subject so the sun is full in their face, and ask them to turn back and forth to watch the way the shadows fall. Move around your subject to watch how the light changes. Shoot from multiple angles. It will end up being like you changed your lighting setup for each shot.
The only portrait angle that will be difficult to shoot at the Golden Hour will be when your subject is completely backlit. In this case, I will use a reflector. Since the light already has a warm temperature, I use the white side of the reflector, or silver if the reflector has no white. I will position my subject so the sun is behind him and over his shoulder, and will position the reflector in front of him on the opposite side. The effect is similar to having two lights, a hair light, and a fill. Again, move around your subject, and have them turn as well, placing the sun at different angles to them. Do the same with the reflector to see the ways you can make the light fall on your subject’s face. The beautiful thing about Golden Hour light is that it comes from such a low angle, you can hold the reflector higher and position it just above your subject’s head, to get those pleasing downward shadows from the nose and other facial features.
Golden Hour for Landscapes
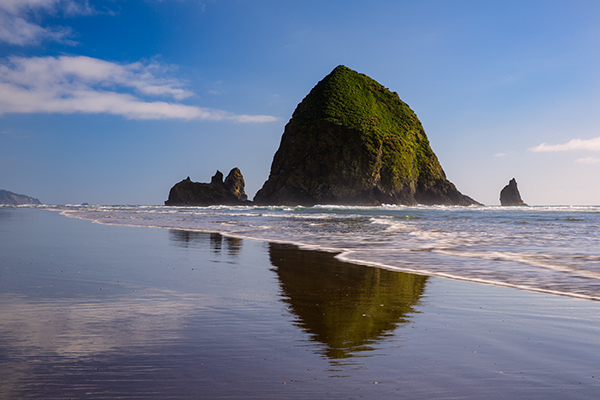
The Golden Hour is also perfect for shooting landscapes. The light creates depth by casting long shadows and defining the character of the landscape. I will often try to put the sun to my side when shooting Golden Hour landscapes. This allows the light to rake across the landscape and create shadows where the surface changes, or create greater detail in grasses, or trees, creating more apparent detail and sharpness than if the light was from the front. This is apparent in the two images below.
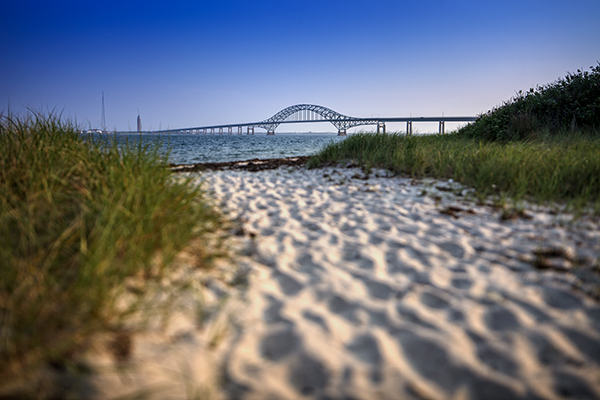
EOS 5D Mark II with TS-E 24mm f/3.5. 1/1250 at f/3.5 ISO 100. The sun coming from camera right creates definition in the sand and dune grass.
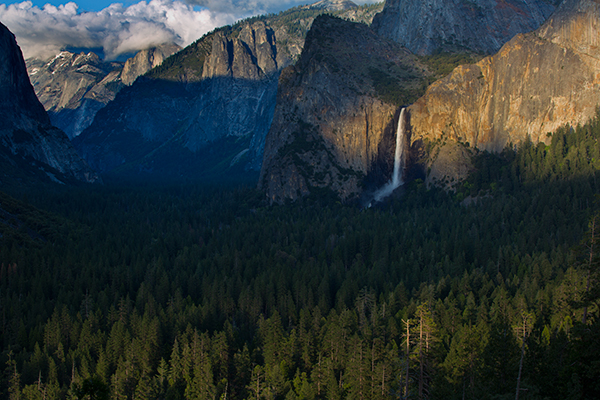
EOS 5D Mark III with EF 70-300 f/4-5.6L IS. 1/13 at f/16, ISO 100. The low angle of the sun and warm golden light creates definition in the foreground trees.
In addition, landscapes shot during the Golden Hour have more color in the sky, especially if there are clouds picking up the warm reddish light. However, shooting directly into the sun, capturing a sunset, creates a very contrasty scene. In cases like that, I use graduated neutral density filters to darken the sky and bring it down so that the foreground and the sky both fall within the dynamic range of the camera, as with the image of the crashing wave and rocks (below). A graduated neutral density filter (ND Grad for short) is half darkened glass, half clear. You can position the filter so the darker area covers the sun and sky, and the clear is over the darker foreground. This helps bring the color back to those sunsets or sunrises, whereas without the filter, the sky would appear washed out and lifeless.
The Golden Hour offers plenty of opportunities for great photos, and the really beautiful thing is that it happens twice a day!
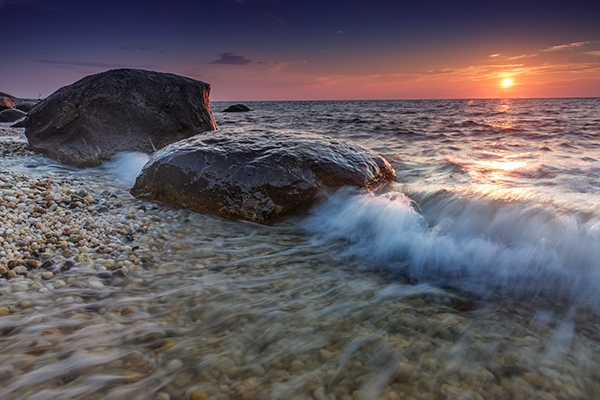
EOS 5D Mark III with EF 24-70 f/2.8L II. 1/6 at f/14, ISO 200. A 4-stop ND grad was used to darken the sky and match the foreground exposure.
EOS 5D Mark III with EF 24-70 f/2.8L II. 1/15 at f/16, ISO 100.
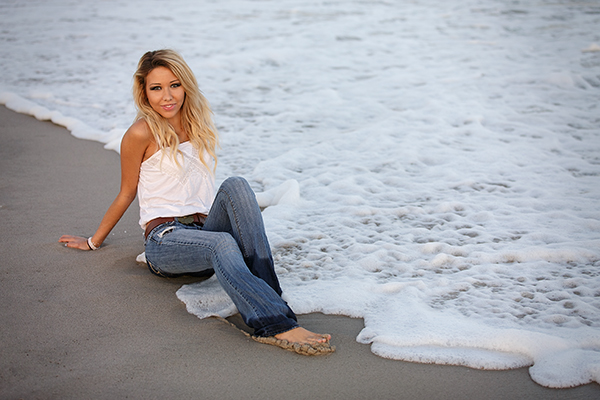
EOS 5D Mark II with EF 24-105 f/4L IS. 1/1000 at f/4, ISO 100. In this case, the sun was positioned more to the side with a reflector bouncing light back into the subject’s face.
EOS 5D Mark III with EF 70-200 f/2.8L IS II. 1/1000 at f/2.8, ISO 100. The soft, warm light of the Golden Hour was perfect for this shot.
More tips on working with light in the Golden Hour:
- The Golden Hour – Perfect Times for Portraits
- Finding and Working with Available Light
- 5 Reasons for Doing Natural Light Portraits
- 10 Reasons to Shoot Portraits During the Golden Hour [Illustrated]
On sale now at SnapnDeals – Golden Hours eBook + Exposure Blending eBook – grab the pair now before the sale is over!
The post The Magic Light of the Golden Hour by Rick Berk appeared first on Digital Photography School.
You must be logged in to post a comment.