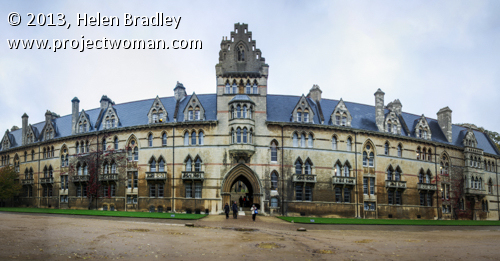
In addition to being able to send single images from Lightroom to Photoshop for editing you can also send a series of images to Photoshop to assemble into a panorama. This is a useful because the Photoshop panorama merge feature is pretty good (certainly since the improvements in Photoshop CS3 & CS4) and other Photoshop tools such as Content Aware Fill and the Lens Correction Filter are handy for finishing your panoramas. When you are done, click Save and the completed panorama will be sent back to Lightroom for further processing.
To see how this is done, begin inside Lightroom and select the images to assemble into a panorama. I like to put these into a collection so they are handy if I want to try multiple panorama options to select the best of them. I don’t typically process the images before sending them to Photoshop and, instead, I process the completed panorama when it returns to Lightroom. One exception to this is fixing the white balance if it were incorrectly set on the camera at capture time, for example.
Photoshop can assemble panoramas both vertically and horizontally and it can also take a mix of images such as I used here. This sequence is six shots horizontally across the front of a building and one extra shot to handle the building’s tower which wasn’t captured in the original sequence. If I’d been thinking, I would have captured some extra sky to use but we can solve that in Photoshop.
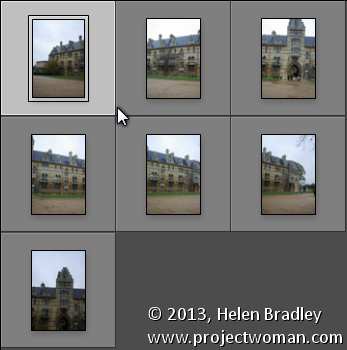
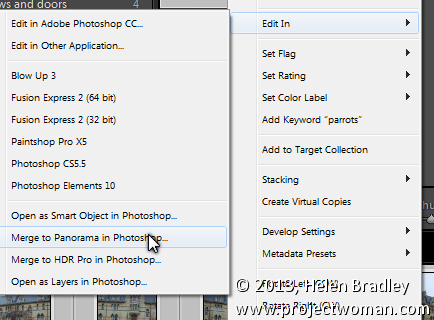
Select the images, right click and choose Edit In > Merge to Panorama in Photoshop.
Photoshop will open with the images you sent to Photoshop listed in the Photomerge dialog. Now you need to determine the Layout to use. In most cases the Auto setting will be a good choice – when you select this, Photoshop will analyze the images and determine the best of the other layout alternatives: Perspective, Cylindrical and Spherical to use.
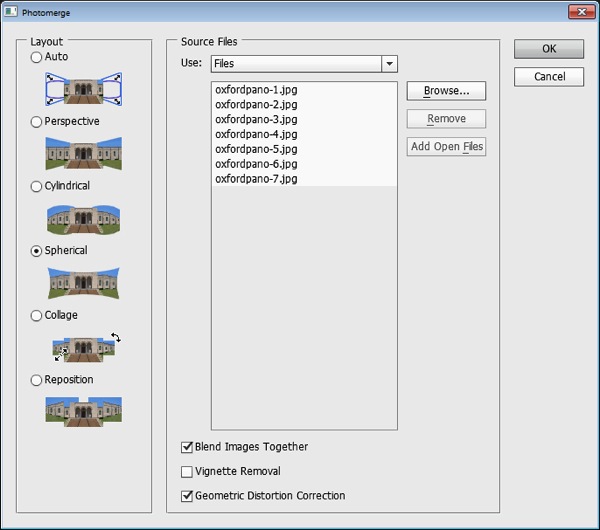
Check the Blend Images Together checkbox so that the images will be seamlessly blended together – then you won’t have to do it yourself. You can also click Geometric Distortion Correction to remove the effect of any barrel, pincushion or fisheye distortion in the original images. If the edges of your images have some edge vignetting click Vignette Removal. If you’re unsure what to choose, check all three checkboxes. Click Ok and wait as the images are aligned and blended.
Once the panorama is assembled you can straighten the image if desired. To do this select all the layers and target the Ruler tool. Now drag along a line in the image which should be perfectly horizontal – you won’t be able to click the Straighten Layer button to rotate the image because you will have multiple layers selected. Instead, choose Image > Image Rotation > Arbitrary and click Ok to straighten the entire image to the angle of the Ruler line.
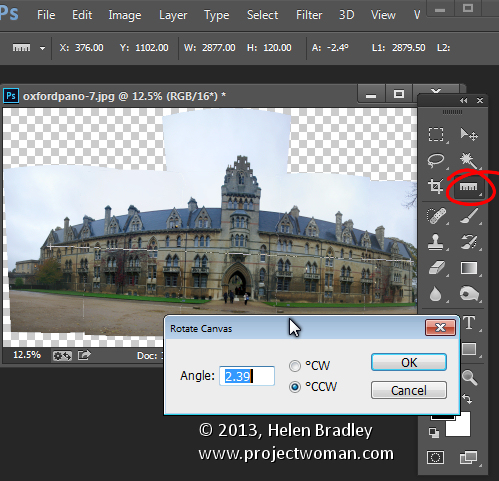
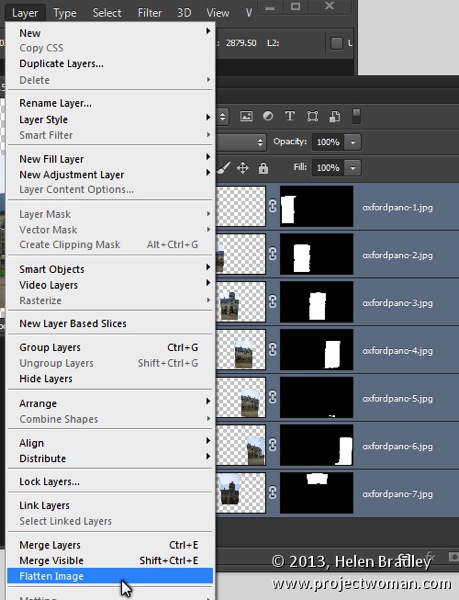
Most panoramas will then need to be cropped to a rectangle to eliminate uneven areas around the edge of the image. However, before you do this you may want to fill in some of the empty areas of the image using the Content Aware Fill tool so you can crop larger than you would otherwise be able to do. To do this you’ll either need to flatten the image to a single layer or you will need to create a new layer with the entire image on it to use. To flatten the image choose Layer > Flatten Image. To make a new layer with the image on it (but still retain the individual layers below) click the topmost layer and press Control + Alt + Shift + E (Command + Option + Shift + E on the Mac).
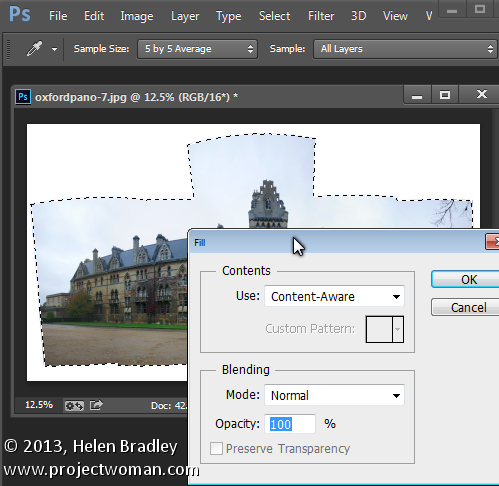
Select the area that you want to fill and then choose Edit > Fill, from the Use list choose Content Aware and click Ok. Photoshop will attempt to fill the missing area with details from the image around it. If the image contains sufficient detail you should be able to build up missing areas of sky and foreground, for example.
If you encounter problems with the Content Aware Fill feature this post will show you how to mask a layer to get better results when using it: http://digital-photography-school.com/smarter-content-aware-fill-in-photoshop. Crop the image when you have filled the edge area.
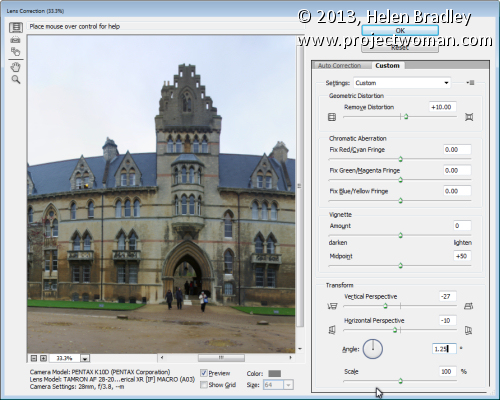
To fix unwanted distortion in an image you can use the Lens Correction tool. This tool works on a single layer and you run it by choosing Filter > Lens Correction > Manual. Adjust the Horizontal Perspective slider to fix problems with an image which has not been captured face onto the point of interest. Use the Vertical Perspective slider to adjust for keystoning – generally you will drag this slider to the left. Use the Geometric Distortion slider to remove barrel and pincushion distortion.
Once you have finished assembling the panorama choose File > Save to save the image and return to Lightroom where your panorama will be ready for further editing.
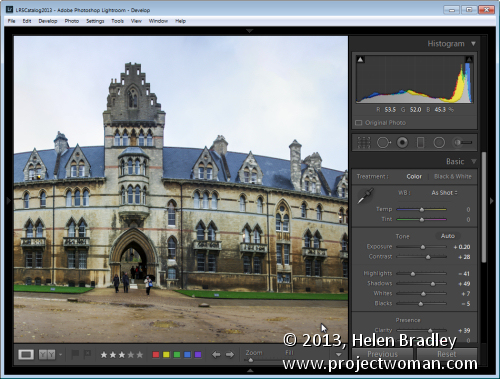
If you are not using Lightroom you can assemble a panorama from Bridge or from inside Photoshop. In Bridge select the panorama sequence and choose Tools > Photoshop > Photomerge in Bridge. In Photoshop, first open the images to use then choose File > Automate > Photomerge and click the Add Open Files button. In either case you will probably want to fix the image in Photoshop once the panorama is complete. If you are using Lightroom you may prefer to finish processing the panorama in Lightroom.
Layout Options
Each of the panorama Layout options in Photoshop results in a different looking panorama. Choosing Auto tells Photoshop to select the best of the options Perspective, Spherical and Cylindrical for your particular sequence of images.
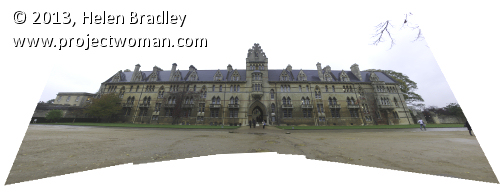
Here is the result of each of the other Layout options used with our image sequence, these results haven’t been edited except to straighten the image and brighten it a little. You may want to experiment with any given sequence of images to see which of these options gives you the most pleasing result:
Perspective Layout
The panorama is assembled in relation to the middle image of your sequence of images. The middle image is placed in position and the other images arranged either side of it and skewed and repositioned as needed. This often results in edges which are taller than the middle giving rise to the term ‘bow-tie” distortion.
Cylindrical Layout
This layout avoids the bow-tie distortion by showing the images as they might look if placed on an unwrapped cylinder.
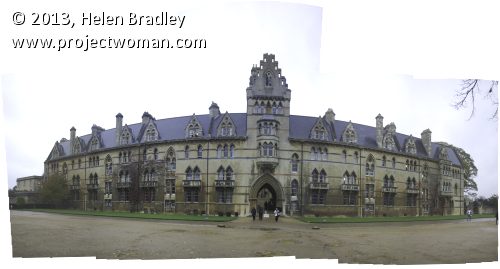
Spherical Layout
This layout arranges the images as if to cover the inside of a sphere. It is a good choice for 360 degree panoramas and can also give good results with other shorter panorama sequences.
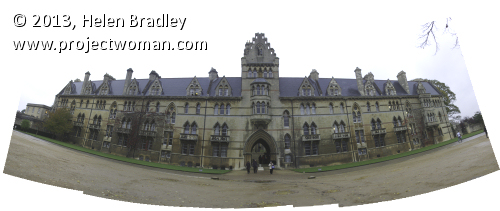
Collage Layout
This layout aligns the images matching overlapping content. If necessary, image layers are transformed and rotated.
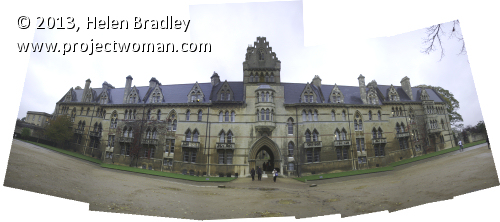
Reposition Layout
This layout aligns the images matching overlapping content but without transforming or rotated the images.
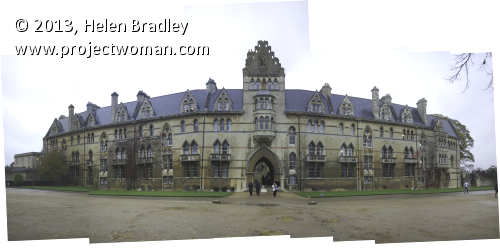
Post originally from: Digital Photography Tips.
Check out our more Photography Tips at Photography Tips for Beginners, Portrait Photography Tips and Wedding Photography Tips.
Sending Panorama Sequences from Lightroom to Photoshop
The post Sending Panorama Sequences from Lightroom to Photoshop by Helen Bradley appeared first on Digital Photography School.