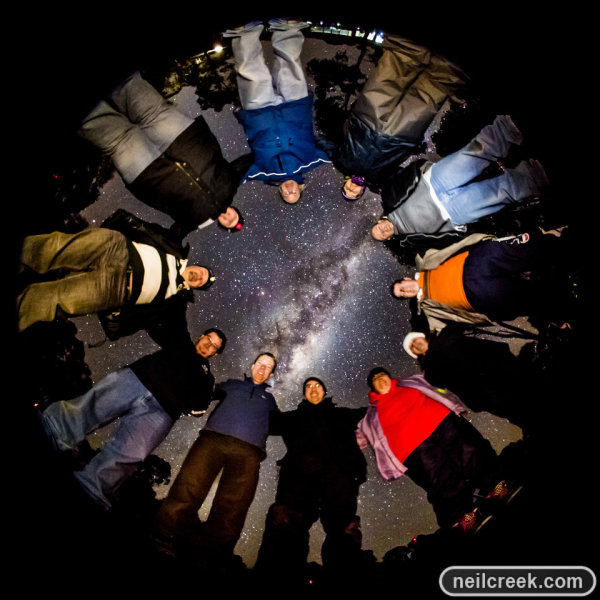
Last weekend one of my photos was selected as a category winner in the national night sky photography competition, the David Malin Awards. The category was “People and Sky”, and Darren asked if I could write a post describing how the photo was created.

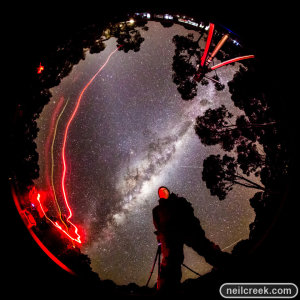
I assist friend and colleague Phil Hart with regular night sky photography workshops under the beautiful dark skies of country Victoria (Australia). Knowing my love of fisheye photography, Phil had an idea for a photo to help promote the course: A group photo under the stars by fisheye lens.
I immediately had a vision in my head of the photo and knew it would look cool, so I set myself to working out how to achieve the difficult task of composition and balancing light. Once night fell and we made sure the students were all confident with their new skills and happily taking photos of the night sky, I put my Sigma 8mm f4 circular fisheye on my full-frame Canon 5D MkIII. To achieve this effect you will need a circular fisheye lens and a full-frame camera, or a fisheye lens designed to give a circular image on a cropped sensor. A diagonal fisheye will not capture the whole hemispherical field of view needed to image the whole sky.

Testing the setup and lighting.
From experience shooting the night sky with this lens, I knew that I would be shooting at the widest aperture of f4 and the full 30 seconds shutter speed. Balancing noise and sufficient exposure I chose an ISO of 8000. These settings give me a good exposure of the night sky and particularly the milky way, which would feature in the shot. This is incredibly faint! My main problem was how to light the faces of the students to approximately the same brightness of the Milky Way.
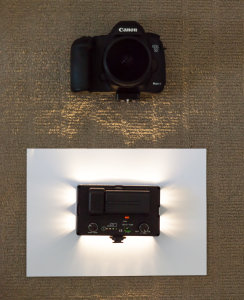
At first I considered using a flash, but even at the lowest setting, even with significant diffusion, the exposure was too difficult to control. The other problem is that I’d need the light to be omnidirectional so that all of the people in the shot would be evenly lit. Ultimately the solution I came up with was to use my LED video light, dialed down to its lowest power setting and laid face down on the ground on a piece of white paper. Only a little bit of light leaked out from around the edges, but it was even and spread out in all directions. Due to the relatively warm white balance of the Milky Way I adjusted the light’s white balance to be warm to match.

A recreation (in my office) of the setup I used. The video light is pointing straight down into the paper.
I took a few test shots to make sure the exposure, focus, white balance and everything else was working just right, and when the galaxy had risen to it’s highest point and was nearly directly overhead we called everyone together. We formed a circle and put our arms over each others’ shoulders to ensure even spacing, and tried to keep where the camera would be in the centre. Linking arms also helped us all to stand as still as possible for the 30 seconds of the exposure. Once we were all ready, I set the camera to 10 second self timer mode and placed it on the ground pointing directly up.
There were a couple of confused comments as people tried to work out how it would look, and jokes about how we all must have looked to anybody watching us from the outside. But once we got a look on the back of the screen, everyone was convinced. This was a truly unique group photo.
Join me on Facebook to learn more and see new photos daily: http://facebook.com/neilcreekphoto.
Post originally from: Digital Photography Tips.
Check out our more Photography Tips at Photography Tips for Beginners, Portrait Photography Tips and Wedding Photography Tips.
How I Took This Award Winning Night Sky Group Photo
You must be logged in to post a comment.