Seeing the Milky Way with your own eyes is what you may call a jaw dropping experience, but one that can be truly achieved only in complete darkness. While stars are visible even in light polluted areas, the Milky Way’s beauty, which is actually caused by concentrations of stars, gas and dust, fades away in the light polluted areas and cannot be seen.

Before going in to practice, you need to understand few things about the appearance of the Milky Way:
- The part that you want to shoot is the center of the galaxy, and it is not visible all year long. In the northern hemisphere the Milky Way is best observed between April and September. During April and May it is almost parallel to the horizon (the best time for Milky Way panoramas) while in June to September it gets more vertical.
- Unlike star trail photography, when shooting the Milky Way your goal is to achieve a sharp image, where the stars are seen as points and do not smudge.
- At the beginning of the Milky Way season, it rises above the horizon late at night – and as the months pass, it rises earlier and earlier.
- Getting a good photograph requires quite a lot of editing, in order to emphasis the Mily Way’s colors and shapes.
Planning ahead
Before going out to shoot the Milky Way, there is some planning that needs to be done.
- Choose your location carefully (there is no place for spontaneity). There are several things to consider, but most importantly you need a dark location, as far as possible from light polluted areas. Consider that city halos are visible at night for a very long distance, so get as far as possible from light sources. The darker the area you’re in, the clearer the Milky Way will be seen.
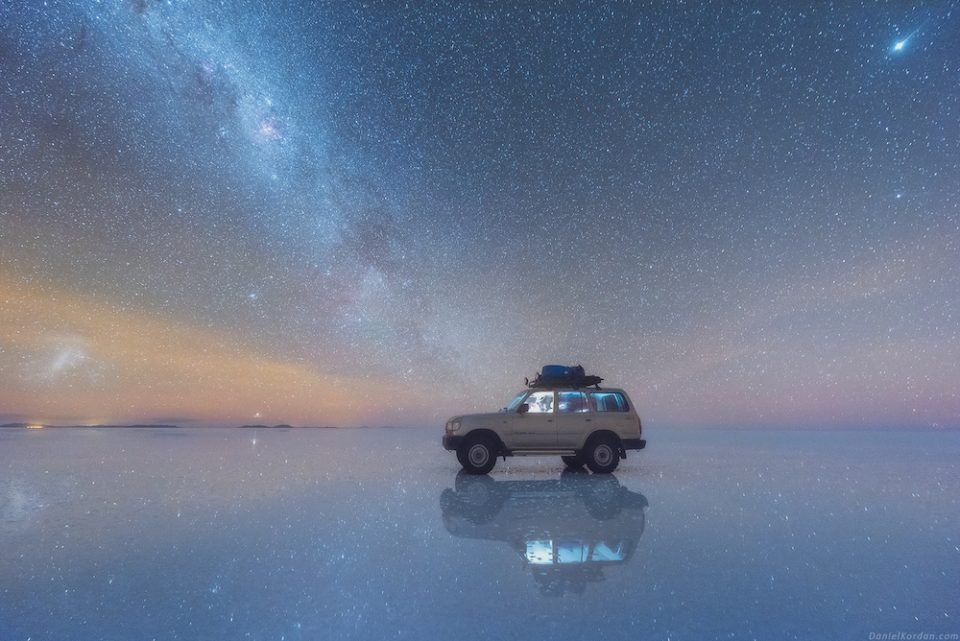
- Consider an interesting item to be used as your anchor in the photo. It is not enough to shoot the Milky Way, you want to have a nice foreground to make your photo interesting and unique. Find yourself a big tree, an interesting rock formation, a pier on a lake, or any other item to be used as your anchor. Try to make your foreground correspond the the Milky Way’s view.
- Learn about the weather and lunar (moon) phases – to get a good, clean shot you need a good, clear and dark sky. Choose that period of the month when the moon is not visible in the night sky, and make sure the forecast does not predict too many clouds. High humidity is also not good, as it may accumulate on your lens and result in blurry frames.

Prepare your gear
Before you head out make sure you are prepared with:
- A DSLR camera with a fully charged battery. Unfortunately – not any DSLR (or mirrorless) camera will work for you. You need to be able to go to a minimum of ISO 2,000 and preferably even higher.
- Plenty of room on your memory card. Shooting in RAW is crucial for post-processing.
- A wide angle lens. Anything between 10-20 mm will give you good results. You can shoot also with narrower lens but results will be less impressive. A wide aperture is also essential to allow lower ISO.
- A strong, steady, tripod. When placing it, make sure nothing will cause it to shiver from a passing wind.
- A remote control can help but it is not mandatory – you can program your camera to shoot in delay mode or self-timer.

Getting started
Single frame option:
Although you may want to show as much of the Milky Way as possible, it cannot stand alone. Your photo must rely on a strong anchor, or foreground, if you want your viewers to be really impressed. You also need to consider that it is impossible to have all of the Milky Way in your frame, and shooting a panorama may be a good solution.
In most cases, it will be quite difficult, to the verge of impossible, to build your composition at night, in total darkness. So, it is better to arrive before night falls and it gets too dark to see. The last minutes of the day are your best time to plan and build your composition. But, remember to consider the expected location of the Milky Way in the sky. Use one of the many sky apps available to help you plan.

Single frame shot.
Take the first shot which will be used as the foreground of the frame. If you want your foreground to be a silhouette then all is good but, if you want details to be shown, you will need to have at least one frame lit. This can be achieved in a few ways:
- Shooting one frame during twilight (to be blended in during post-processing later).
- Using a high ISO and longer exposure.
- Using an outside light source such as flash (with a flash it is better to use a CTO gel for the right temperature).
Your goal here is to get one frame that has good appearance of your chosen foreground. It is better to take a few options; using different ISO level, exposure time, lightning options, to be able to choose the best rest afterward. When satisfied, you can move on.
Set your camera to the widest aperture you have on your lens, the highest ISO bearable, manual focus to infinity, and longest possible shutter speed, considering the rotation of earth (see below).
Choosing the correct shutter speed:
- If your exposure is too long, the rotation of earth will start to have impact, and the stars will start to arch in your frame.
- Calculate the longest possible shutter speed while keeping the stars clear and sharp using the 500 Rule. This rule considers your focal length to determine when star movement will start to be seen in your image. The calculation is 500 divided to the focal length equals time in seconds. This calculation is for full frame cameras and in crop sensors you need to add the crop factor to the calculation (1.6 for Canon / 1.5 for Nikon). Here are couple of samples:
- Using a 10mm focal length on a full frame sensor: 500 / 10 = 50. You can use up to 50 seconds as your shutter speed with this lens/camera combination.
- Using a 10mm focal length on a Canon crop sensor: 500 / (1.6*10) = 31.25. You can use up to 31 seconds as your shutter speed with this combination.
- Using a 10mm focal length on a Nikon crop sensor – 500 / (1.5*10) = 33.33. You can use up to 33 seconds as your shutter speed with this gear.
Panoramic option:

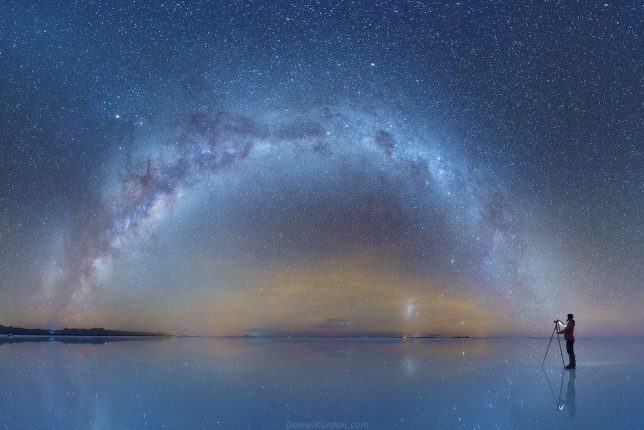
9 frame panoramic shot.
There is no change in the settings for your camera when shooting a panorama.
You may want to consider the appearance of the Milky Way though. If it is relatively horizontal it is a good idea to aim for a wide panorama, showing it from side to side. If it is vertical, you may want to build your panorama upwards.
In a panorama it is recommended that you have a 30% overlap, but when shooting at night it is more difficult to see – so it is even better to have a larger overlap between the frames. Better to be on the safe side, than discover later that you have gaps in your final result.
When shooting a Milky Way panorama you may want to position your camera in portrait orientation (vertical). Although you will need more frames from one side to the other, you will have more sky, and a chance of catching the entire Milky Way. If shooting in landscape position, you may need to shoot two “floors”, in order to catch the entire Milky Way together with the ground.

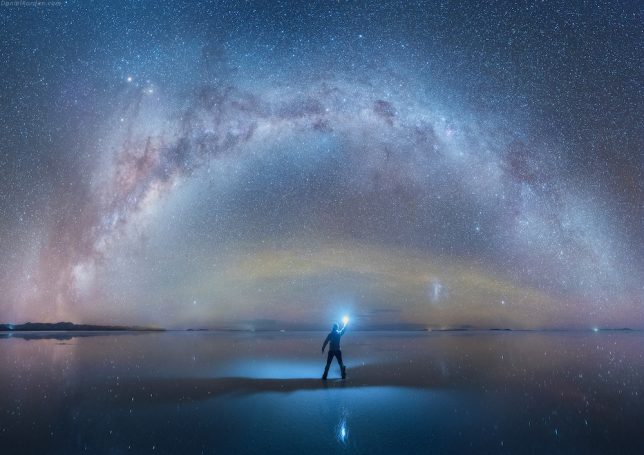
10 frame pano shot.

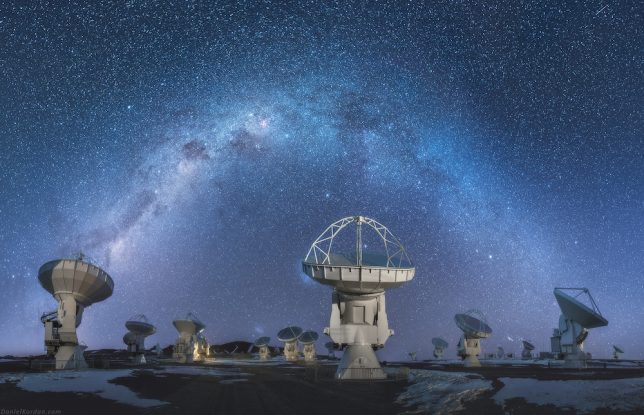
18 frame pano shot.
Post-processing your Mikly Way photos
Milky Way frames require a lot of post-processing work, which deserves its own article. There are also many ways to approach post-processing of the Milky Way, and it depends on the software you are using and your personal taste.
I’m working with Lightroom and Photoshop. Starting with Lightroom, I use the Dehaze and clarity sliders, tone adjustments, saturation and noise reduction. After reaching the best possible outcome, I move to Photoshop for some additional adjustments by playing with curve layers.

Before post-processing.

Final processed image.
Your turn
Have you tried to capture the Milky Way before? Please share your experiences, questions, and your images in the comments below.
googletag.cmd.push(function() {
tablet_slots.push( googletag.defineSlot( “/1005424/_dPSv4_tab-all-article-bottom_(300×250)”, [300, 250], “pb-ad-78623” ).addService( googletag.pubads() ) ); } );
googletag.cmd.push(function() {
mobile_slots.push( googletag.defineSlot( “/1005424/_dPSv4_mob-all-article-bottom_(300×250)”, [300, 250], “pb-ad-78158” ).addService( googletag.pubads() ) ); } );
The post Tips for Shooting the Milky Way by Amir Ehrlich appeared first on Digital Photography School.

Digital Photography School


You must be logged in to post a comment.