RSS
 

Posts Tagged ‘Milky’

How to Photograph the Full Band of the Milky Way

16 Mar

Get Grant’s three video instructional series Guide to Post-Processing Night Photos – currently available at 59% off through the SnapNDeals for a limited time only.
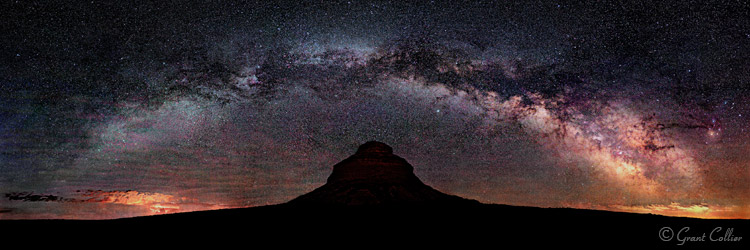
Pawnee Buttes

Our small blue planet is located on a spiral arm, far out from the center of the Milky Way Galaxy. When we look towards the galactic center, we can view one of the most spectacular sites imaginable. Thousands of stars are clustered together, to form a hazy band in the sky, known simply as the Milky Way.

If you enjoy photographing the Milky Way, the winter months can seem especially long. During this time, the Earth is pointing away from the center of the galaxy at night, and you can only see the fainter parts of the Milky Way. It can still be photographed, but the shots won’t likely be as dramatic as they are at other times of the year.

Fortunately, the bright galactic center becomes visible again in the spring. In March, it rises shortly before dawn in the Northern Hemisphere. So you will need to stay up all night or get up very early to photograph it. Every day, it rises a little earlier in the night, and by June it will be rising about the same time that the sun sets.
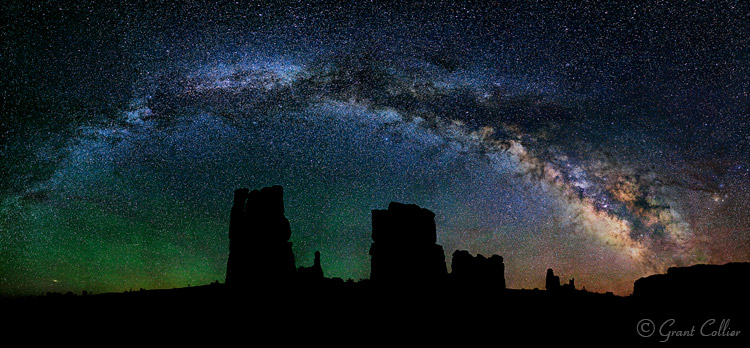
Determination Towers

The great thing about photographing the Milky Way in the spring and early summer months, is that you can capture the full band of the Milky Way arcing across the sky. By August, the Milky Way will appear too high in the sky, in the Northern Hemisphere, to capture the full arc.

If you’re shooting from the Southern Hemisphere, you will have a longer time frame to see the full band of the Milky Way. From about February to June, you can capture it in the southern part of the sky, just after the galactic center rises above the horizon. From about June to September, you can capture it just before it sets in the west.

Since the Milky Way spans such a large portion of the sky, you will need to stitch together multiple images to capture all of it in one photograph. I explain how to do this below.

EQUIPMENT
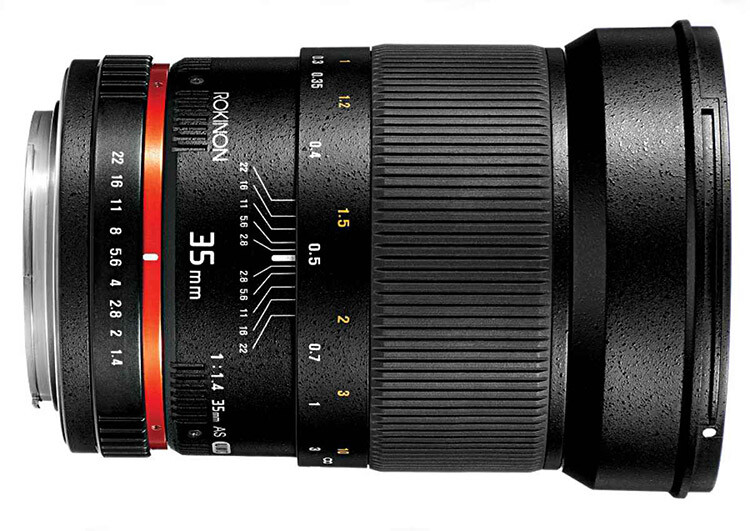
Rokinon35

The Rokinon 35mm f/1.4, all manual lens, works great for this kind of photography.

There is some specialized equipment you can use to capture stitched images of the Milky Way, such as a panoramic tripod head, a leveling base, and even a robotic camera mount. However, the majority of the time you won’t need any special equipment. Anyone with a good tripod and a DSLR can capture the full arc of the Milky Way.

You can use any lens from about 14mm to 50mm to capture your images. If you use a longer lens, like 50mm, you’ll need to take, and stitch, a lot more images together. This can be more time-consuming, but you will also capture much larger image files, with greater detail and less noise.

Ideally, you’ll want to use a lens with a very wide aperture, like f/1.4 or f/2.8. It is also helpful to have a tripod with a bubble level on top of its legs, and a tripod head that has a rotating base.

PLANNING YOUR SHOTS

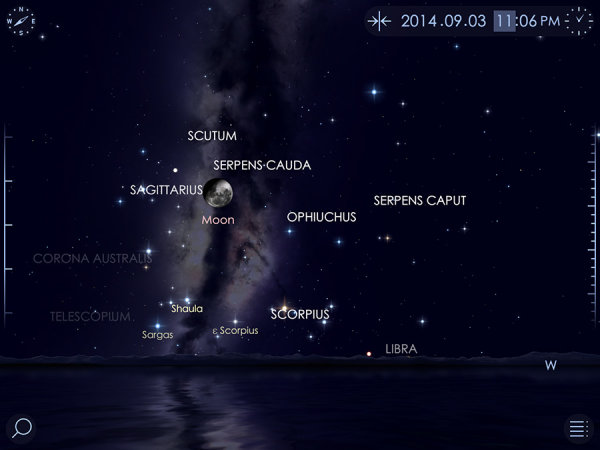
You can pre-visualize how the Milky Way will appear at any time and location using a program called Stellarium. This program can be downloaded for free, it can also be purchased as an iTunes or Android app, or you can use other apps like PhotoPills or Sky Safari.
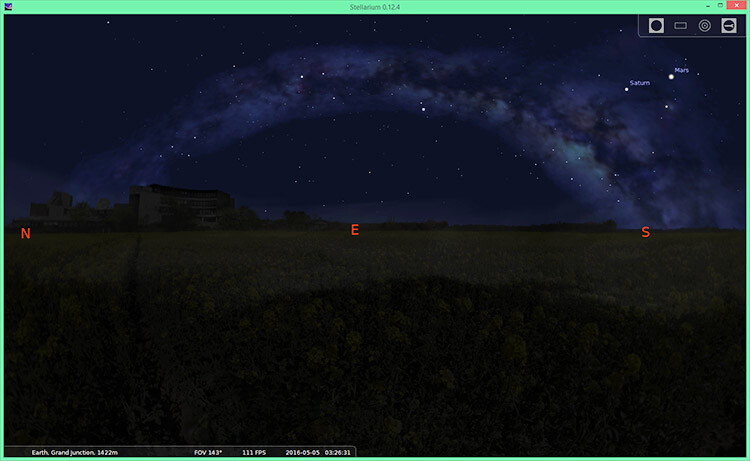
Stellarium

Stellarium

You will usually want to shoot images of the Milky Way under no moon. If the moon is out, it will obscure the stars, and the Milky Way will not look as impressive. One exception to that, is if you want the moon to illuminate the foreground. You can shoot with a waxing crescent moon that is about 20% illuminated. You’ll need the moon to be directly behind you so it obscures the stars as little as possible. The moon will be in a good position for this shortly after it gets dark on July 8-9th, 2016.

You will want to get far away from any city lights when shooting images of the Milky Way. Light pollution can create an unnatural color cast in the image and it can obscure the Milky Way. And, of course, you should check the weather forecast to make sure there will be clear skies.

COMPOSITION

Once you know how the Milky Way will appear, and have determined the best time to shoot it, you need to decide where to take your photograph. Although the full band of the Milky Way can be spectacular on its own, your images will be more compelling if you include an interesting foreground. If you’re in the Northern Hemisphere, you should find a composition facing east, since that is where the shallow arc of the Milky Way will be visible shortly after it rises. If possible, I recommend arriving before it gets dark to set up your shot. It’s much easier to determine the best composition, and focus your camera, when it’s still light out.
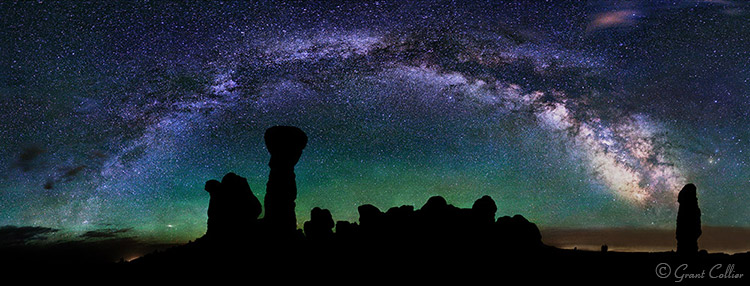
Milky Way Arches National Park

CAMERA SETTINGS

You can use the rule of 500 to calculate the exposure time for your images. Simply take 500, divided by the focal length of your lens, to get the number of seconds to expose the shot. For example, if you’re using a 50mm lens, take 500, divided by 50 = 10 seconds per exposure (this will give you long enough exposures to get good quality images at night without small star trails starting to appear in your shots).

You’ll typically want to use the widest aperture on your lens when shooting stitched images. You’ll also want to use the highest native ISO, that doesn’t cause any highlights to be blown out. As long as you don’t have any close foreground objects in the shot, you can focus at infinity.

You can do this by autofocusing on the moon if it is out, or by focusing on a very distant object before it gets dark. Switch to manual focus afterwards to make sure the focus stays set at infinity. Alternatively, if you have Live View on your camera, you can use it to zoom-in on a star on your LCD screen, then adjust the focus manually until the star appears as a small, sharp point of light.  Don’t rely solely on the infinity marker on your lens, as it isn’t always accurate.

I’ve found that a white balance of about 3800K works well at night with no moon out. However, as long as you’re shooting in RAW (or if you do not have the K setting on your camera), you can set it to Daylight and adjust the white balance later.

Turn off Long Exposure Noise Reduction, as it can take too long, causing the stars to move too much between the exposures, and making it difficult to stitch the images together seamlessly.
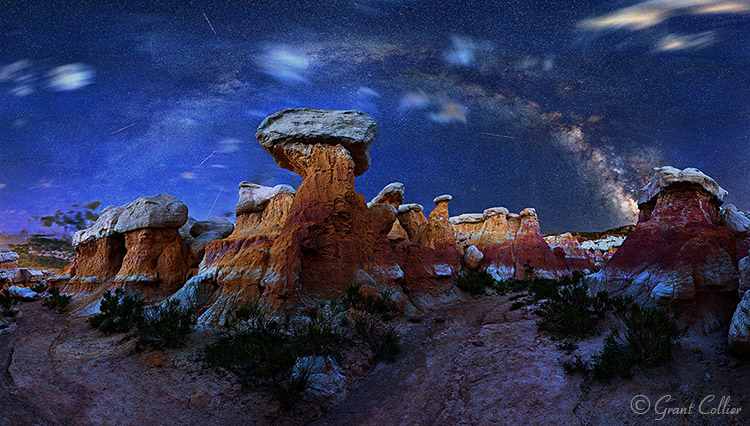
Calhan Paint Mines

TAKING THE PHOTOS

You will need to make sure that your camera is straight, using a bubble level or your camera’s built-in levelling feature. Ideally, you’ll also want to make sure your tripod head is mounted on a level surface by using a bubble level on top of your tripod legs, or a levelling head. This will ensure that your camera remains level as you turn it.

Before beginning the stitched image, I recommend taking a test shot. Point your camera towards the brightest part of the scene you will be photographing, and take an image using the camera settings you have chosen. Check the histogram to make sure you are not overexposing the image. If you are, lower the ISO until you are not clipping any of the highlights. You’ll also want to zoom in on your shot, and make sure everything is in sharp focus.

If everything looks okay, you can start taking your stitched image. I always recommend capturing a wider view of the scene than you want in your final image. You’ll have to crop the image afterwards, since the stitched images will never be perfectly rectangular. So it’s always better to capture too much of the scene, than too little.
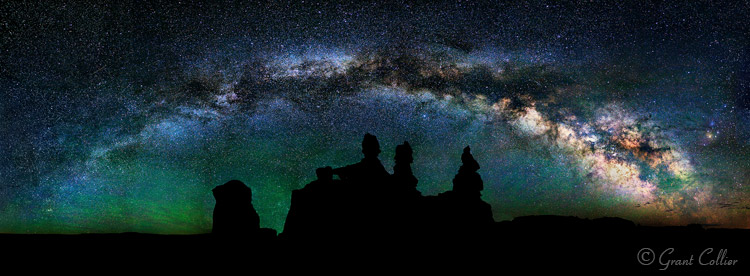
Goblin Valley

Position your camera to take an image of the far, bottom left corner, of the scene you want to capture. After you take the first shot, you’ll need to quickly rotate your camera to the right before taking the second shot. Make sure and leave plenty of overlap (about one third of the scene) between the images to make it easier for the software to stitch the images.

Now, continue taking shots, and rotating the camera to the right, until you’ve captured the entire horizontal field of view that you want. To get the full band of the Milky Way, you’ll typically need to shoot a multi-row panorama. You can rotate the camera up and then shoot a second row of images. Keep doing this until you’ve captured the entire vertical field of view you want.

STITCHING WITH LIGHTROOM
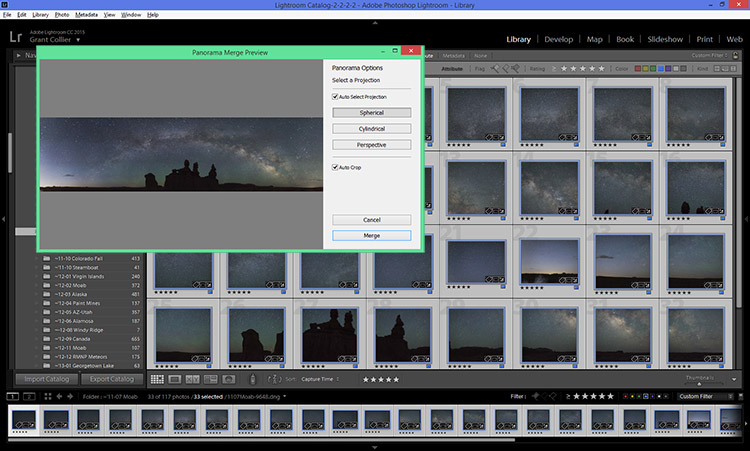
Lightroom Preview

You can stitch images within Lightroom CC. Simply select all of the images you want to stitch, right-click on them, and select Photomerge > Panorama. Lightroom will then attempt to stitch the images. Occasionally, Lightroom will be unable to stitch them together. If this happens, I recommend trying a free program for PCs called Image Composite Editor.

Once the images are stitched, you can process them like any other image. I’ve provided detailed information on post-processing night photos in my instructional videos, which are currently available at 59% off through the SnapNDeals for a limited time only.


googletag.cmd.push(function() {
tablet_slots.push( googletag.defineSlot( “/1005424/_dPSv4_tab-all-article-bottom_(300×250)”, [300, 250], “pb-ad-78623” ).addService( googletag.pubads() ) ); } );

googletag.cmd.push(function() {
mobile_slots.push( googletag.defineSlot( “/1005424/_dPSv4_mob-all-article-bottom_(300×250)”, [300, 250], “pb-ad-78158” ).addService( googletag.pubads() ) ); } );

The post How to Photograph the Full Band of the Milky Way by Grant Collier appeared first on Digital Photography School.
Digital Photography School

 
Comments Off on How to Photograph the Full Band of the Milky Way

Posted in Photography


Out of sight: Astronomers create 46-gigapixel image of the Milky Way

27 Oct

Researches from German university Ruhr-Universitat Bochum spent half a decade creating the largest astronomical image created to date, a 46-gigapixel image of the Milky Way, which is now available via an interactive online viewer. The image is made up of 46 billion pixels, and the file weighs in at a hefty 194GB. Read more

Articles: Digital Photography Review (dpreview.com)

 
Comments Off on Out of sight: Astronomers create 46-gigapixel image of the Milky Way

Posted in Uncategorized


How to do Milky Way Photography – A Comprehensive Tutorial

31 Jul

How to Photograph the Milky Way

You’re spinning through our solar system on a gorgeous blue marble which offers jaw dropping views of an astronomical phenomenon we call The Milky Way. Wait for our marble to line up just right, and you’ll have a perfect opportunity to create awe inspiring images that harness that galactic chandelier hovering over your head.

My students are often delighted to learn that capturing spectacular images of The Milky Way is easy, once you know a few essential tips. Planning when and where to do Milky Way photography is just as important as the techniques and equipment you’ll be using.

If you want to get truly majestic shots of The Milky Way you’ve really got to consider your location and timing. I’ll tackle that first, before we move on to the shooting technique.

1 – Where and when to see the galactic core

How to Shoot the Milky Way

The full galactic core is only visible during certain months, at certain locations. You can see the rest of The Milky Way throughout the year, but for truly eye-popping results it’s the galactic core that you’ll be hunting for, so let’s discuss the best times of year to see it in all its glory.

Northern Hemisphere

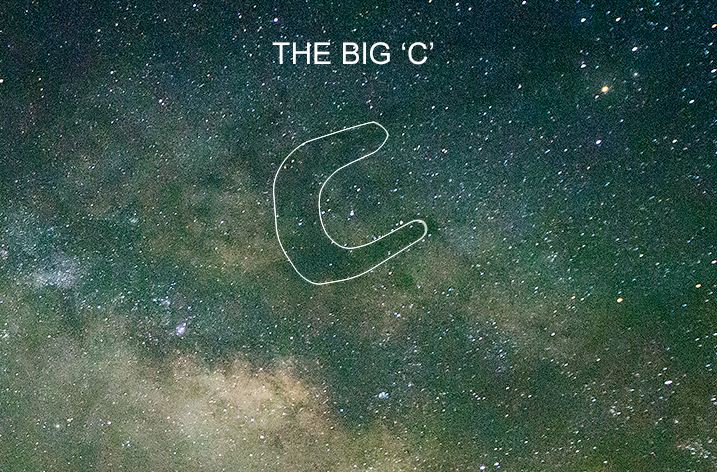
The Big 'C' of the Galactic Core

Parts of The Milky Way are visible all year round but the galactic core is present only from late April to late July and can be seen in the southeastern to southwestern sky. That’s when you’ll get to see what I call The BIG C. As the summer progresses, you’ll see the core move west so that by the end of summer it appears to rise in the southwestern sky.

You have no chance of seeing the galactic core in winter.

Southern Hemisphere

Photographers who live in the southern hemisphere are lucky because they get to see the core from February right through to October, with peak visibility being in June and July. I’m rather jealous.

Don’t forget lunar phase

For super clear Milky Way photography you’ll need minimal light pollution, which means you’ll want to avoid a bright moon. However, I’ve actually captured good shots of The Milky Way even with a first quarter moon in the sky (so don’t feel like it’s not worth shooting when the moon is present) but obviously a full moon is to be avoided.

Milky Way Photography Tutorial

The other thing to consider is the position of the moon in relation to The Milky Way. For example , a first quarter moon isn’t such a problem if it’s way off in the west while your Milky Way appears in the southeast. But, if the moon lines up dead centre in the Milky Way, it could be too bright, right where you don’t want it.

How do you know where The Milky Way is going to be?

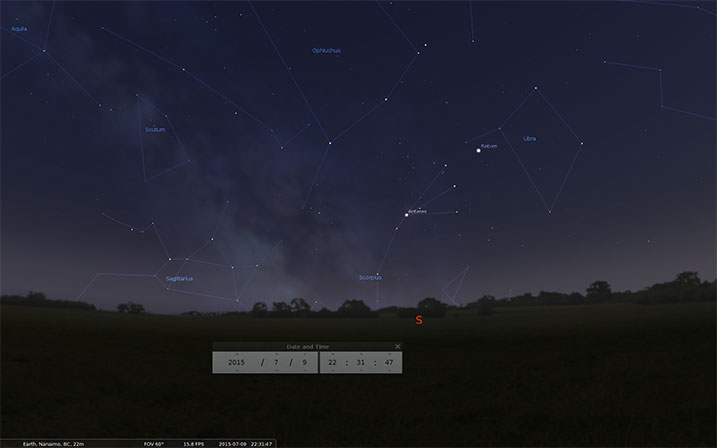
There are a multitude of phone and desktop apps that can help you to plan your Milky Way shoot but my favourite is the free app called Stellarium. There’s a phone and desktop version, I prefer the latter to plan my shoots.

Milky Way Photography Tutorial - Stellarium

You can enter a location and time to see when and where things are going to line up. You’re mainly looking to see where the galactic core is present during a darker lunar phase. Stellarium will show you a picture of The Milky Way, and its position, at the times you specify. You can also see where and how bright the moon will be.

Check out some of the other popular apps like; The Photographers Ephemeris and Starwalk.

2 – Find a dark location

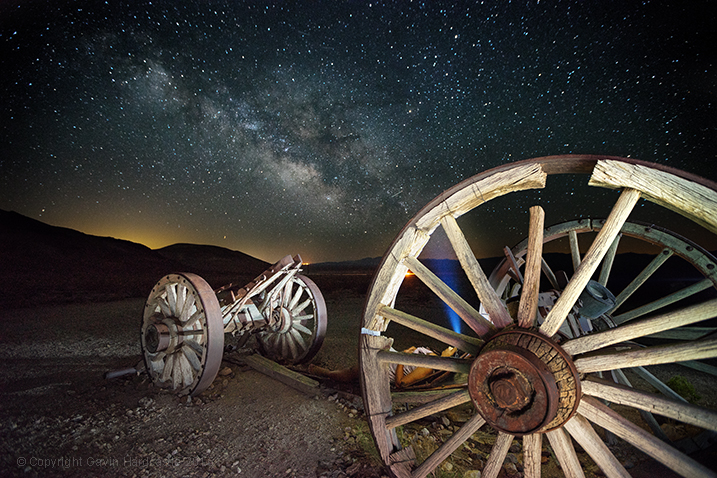
Purists will say that you MUST be in a dark sky area and of course that will give you a much clearer shot, but don’t let a little bit of distant light pollution stop you from shooting The Milky Way. If you can see it, you can shoot it. The image I shot below in Death Valley shows light pollution from two large cities and I honestly think it adds to the contrast in the image. That glow on the horizon adds a great separation of earth and sky.

Milky Way Photography Tutorial - Death Valley

If you want to discover the best dark sky locations, the International Dark Sky Places site is a great resource.

3 – Wait for clear weather

Most landscape shooters love clouds and hate blue skies. Once you get into shooting nightscapes, you’ll quickly reverse that thinking.

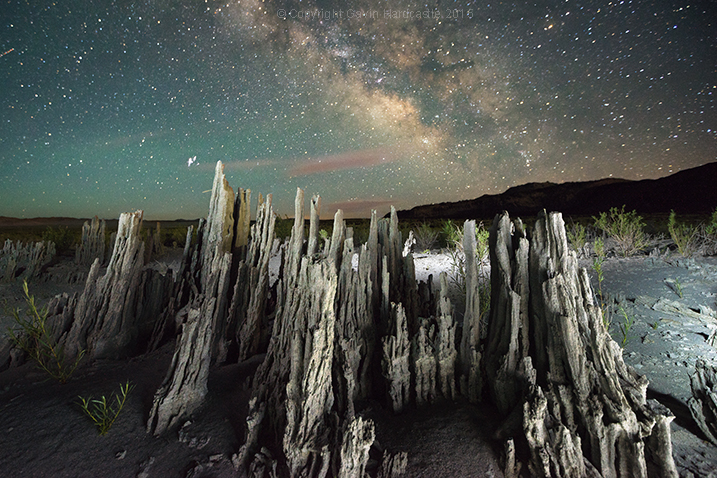
Astrophotography Tutorial - Gavin Hardcastle

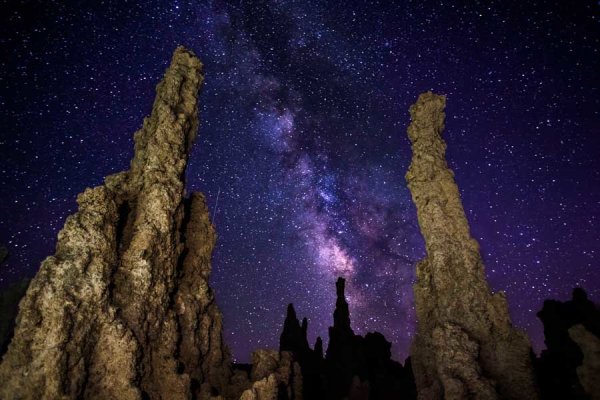
In this shot of Mono Lake the small clouds actually added a little interest to the shot, without obscuring too much of the galactic core.

A blanket of cloud is bad news if you want to get clear shots of The Milky Way, but don’t be put off by the presence of light cloud cover. Sometimes a few clouds can add drama and framing to a Milky Way shot so it’s still worth shooting if the clouds aren’t completely blanketing the entire sky.

4 – The Milky Way is only half the shot

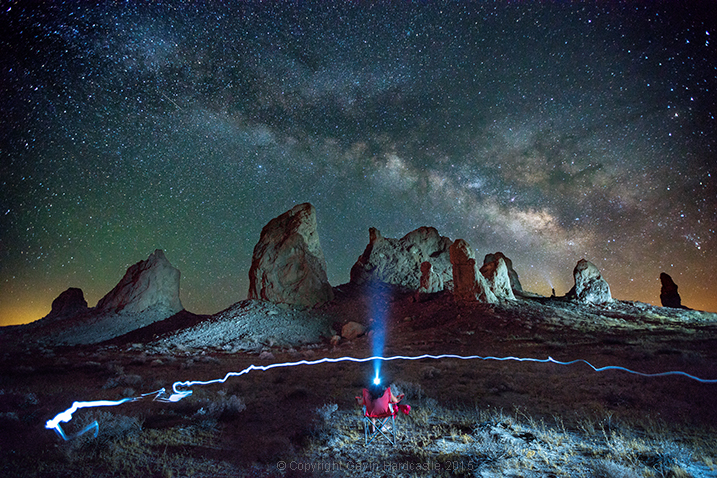
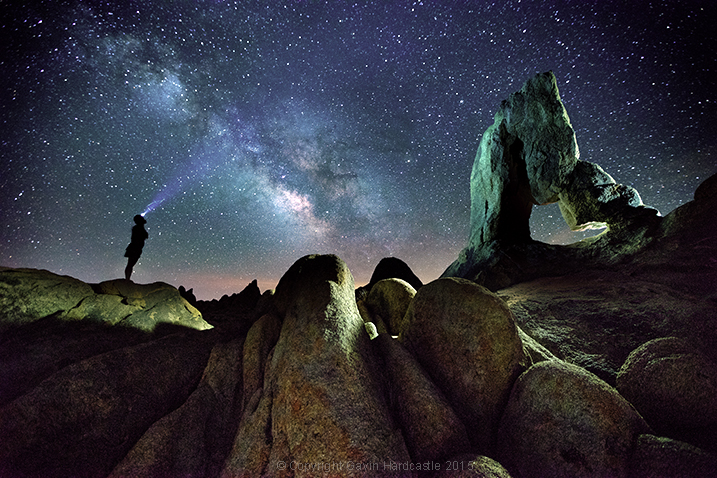
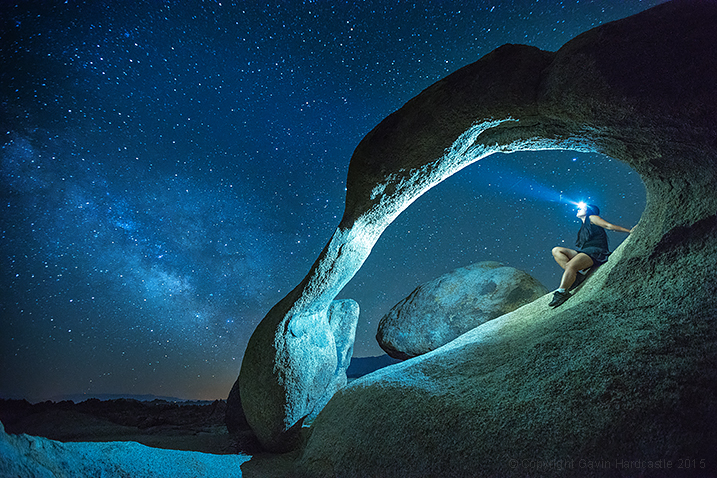
For me, the most awe inspiring Milky Way images are those that show the galactic core in relation to earthly locations and objects. Something as mundane as a person on a camp chair can look really dramatic when framed by the phenomenon of The Milky Way.

Photographing the Milky Way - Tutorial with Gavin Hardcastle

Think hard about what you’d like to put in the foreground of your Milky Way shot. If you get perfect conditions and execute perfect technique you’ll still get a boring shot if you don’t put something else in your frame to ground the viewer. Pick an interesting foreground feature and maybe try a little light painting to make your Milky Way shots truly awesome.

That could be anything from an interesting rock formation like a sea stack or arch, right through to a derelict shed, or an interesting tree. Think about locations that feature a point of interest and then consider how that place lines up with The Milky Way.

5 – Using the right gear

Lens choice

While there’s something to be said for using the gear you’ve already got, night photography is something of a challenge because of the absence of light. You’ll need a fast lens that ideally has a maximum aperture of f/2.8, or even brighter like an f/1.4.

Super wide angle lenses are ideal for shooting nightscapes because they don’t usually produce much bokeh. By that, I mean that even when set to maximum apertures of f/1.4 you’ll still be able to get a great deal of your image in focus – if you focus correctly. The last thing you want is a sharply focused Milky Way with a foreground that is completely blurred in soft, creamy bokeh, so leave the lovely Sigma 85mm f/1.4 at home.

The other great thing about super wide lenses is that you can fit a lot of The Milky Way into your frame, and there’s less magnification which allows for longer shutter speeds before the stars in your shot begin to trail.

It’s not the end of the world if you’ve got a standard, all-purpose, kit lens that isn’t very fast. You’ll still get some decent Milky Way shots because you’ll be using long exposures and high ISO settings to maximize your camera’s sensitivity to light.

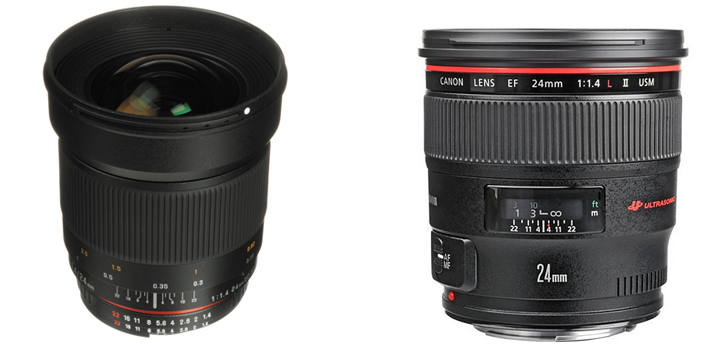
Astrophotography Lens Choices

On the left we have the Rokinon/Samyang 24mm f/1.4 ($ 549) which costs a third of the price of the Canon 24 mm f/1.4 ($ 1549).

If you really get into shooting nightscapes you’ll be glad to learn that some of the most popular wide angle lenses for nigh photography are actually quite affordable.

Rokinon (AKA Samyang/Bower) offer two lenses that have something of a cult following among night shooters with their 14mm f/2.8 and their 24mm f/1.4 lenses. The build quality is atrocious but as long as you treat them with kid gloves (carefully), they usually perform well.

These are popular because they offer sharpness, speed, a wide field of view, and much less coma than other more costly lenses. Coma is the amount of elliptical aberration around stars in the corners of the frame. Some more expensive lenses, like the Canon 16-35mm f/2.8, have really bad coma on stars in the corner of the frame, which isn’t the end of the world, but it’s not ideal.

6 – Camera choice

With night photography you’ll be forced to use high ISO settings during your long exposures so it’s vital to have a camera that can operate at ISO 3200 and above, but more importantly still produce good image quality. No matter what camera you use, the image quality will take a major hit when you start to crank up the ISO numbers, that’s unavoidable.

Camera sensors have come a long way in the last couple of years so even if your camera isn’t top of the range you might be pleasantly surprised at the image quality of your high ISO images.

The Sony A7S for Astrophotography

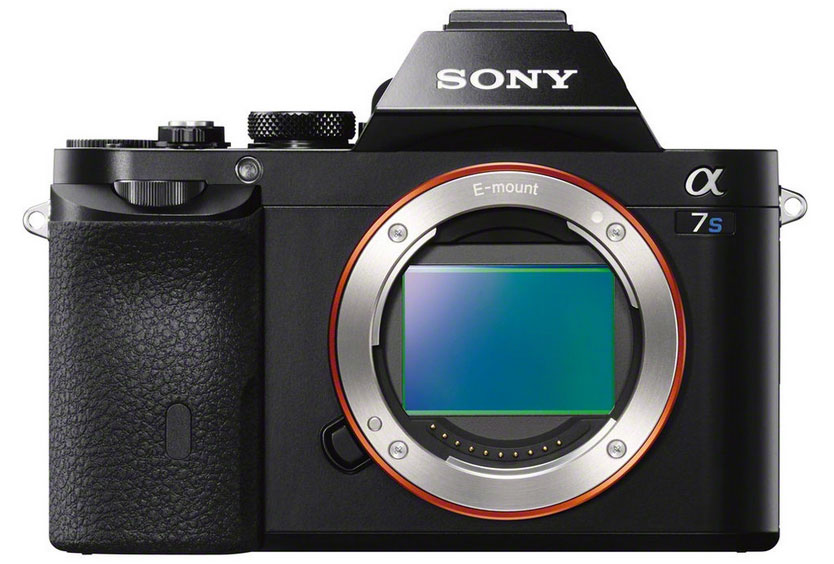
The Sony A7S has become something of a legend among astrophotographers but it isn’t cheap.

Some of the best performers of the last couple of years have been the Sony A7R, Nikon D810 and the absolutely brilliant Sony A7S, which is known for its amazing low light capability. These are all full frame cameras, and will deliver the best image quality as they typically offer better noise performance. But if you’re rocking a MFT (mirrorless four thirds) or APS-C sensor, don’t let that stop you from going out and getting some Milky Way action.

Don’t feel that you absolutely MUST have the most expensive gear. Work with what you’ve got, then upgrade when you become addicted, and can’t resist the temptation to splurge.

The one thing you’re going to really need your camera to have is a good Live View screen or an EVF (electronic viewfinder). You will use this to focus and compose your shots.

7 – You need a tripod

It’s dark, you’re going to be doing long exposures, and that means you have to use a tripod. Read my article on the reasons why a good tripod is essential for any kind of outdoor photography. For night photography a tripod is obligatory.

Shooting technique

Ok, you’ve planned everything right, The Milky Way is looming large above you, and you’ve framed up a lovely composition of it with some fascinating foreground object. It’s time to set up your camera for Milky Way shooting. Here’s where I start:

NOTE: For now you’ll want to turn off your in-camera noise reduction, as this will just slow down your test shots.

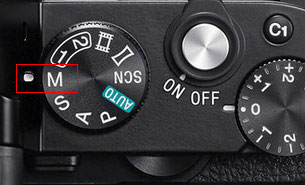
Shooting in Manual Mode8 – Shoot in M (Milky Way Mode) and Shoot RAW

You want full control over every aspect of your shot so set your camera to Manual mode. This allows you to control the ISO, the shutter speed, the aperture and white balance. Always shoot in RAW.

9 – Use Live View or the EVF (if you have one)

This is where we’ll set our focus. Make sure you switch auto-focus OFF as we’ll be focusing manually. Before we do this you need to crank your ISO up to something like 5000 to make your sensor really sensitive to light.

10 – Set your focus on a star

Set your aperture to the widest, fastest setting it can achieve (smallest number such as f/2.8). This wide aperture will expose your sensor to the maximum amount of light.

Using your camera’s Live View or EVF, point it at the brightest star you can see until a small dot of light appears in the centre of your view. Zoom in (magnify the view NOT zoom the lens) so that you see that tiny little dot as large as possible. Now turn the focus wheel on your lens until the star becomes a sharp, tiny pin-point of light. Try turning the focus wheel passed that point until the star blurs again and you’ll have gone too far, so just back it up until you’re able to get the star as sharp and small as possible. Don’t rush this, take your time and get it right.

If your camera has a feature called Focus Peaking or Focus Assist, that can sometimes help you to determine perfect focus on a star. If you’re into calculating hyperfocal distance, you could do that too, but I prefer this method.

Whatever you do, don’t blindly set your focus to infinity by cranking your focus wheel until it reads Infinity (?), you’ll just end up with blurred images.

11 – Compose your shot

Now that you’ve focused your lens on the brightest star, it’s time to compose your shot. Use your headlamp to illuminate the scene so that you can see what you’re looking at in your Live View. If your camera has a digital level for perfect horizon lines use that – if not, you might want to invest in a bubble level for your hot shoe attachment.

Set your shutter speed to about 10 seconds (at ISO 5000 if you have it), and take a test shot. At this point all you’re doing are some rough test shots to get your composition sorted, so there’s no point in shooting a full 30 second exposure and waiting around while you take a whole bunch of test shots.

Once you’ve finished taking test shots and made your final tripod adjustments for the perfect composition, it’s time to dial in your camera settings.

13 – White Balance

When shooting The Milky Way I prefer to shoot with my White Balance set to Incandescent (aka Tungsten) which I believe is Sony’s version of Tungsten. I like the blue hue and it also displays a lot of contrast in my camera’s EVF so that I can clearly see The Milky Way. When I process my images later I often reset the White Balance back to Auto (AWB) mode for a more realistic neutral color temperature.

White Balance Settings for Milky Way Photography

This RAW file was shot with Incandescent White Balance. You can see how it looks in Adobe Camera RAW when set to Auto.

I advise you to experiment with different WB settings to get the colour temperature you like best. Shooting with the Incandescent/Tungsten prest will almost always produce good, neutral results, which you can change later in Lightroom or Adobe Camera RAW.

14 – Set your ISO

You used ISO 5000 for the test shots so that you could compose your shot quickly. But, for your actual Milky Way shot you want to use the lowest ISO setting you can get away with so dial it down to ISO 2000 and see if that gives you good results. You can always increase it to ISO 3200 after a few more test shots. I personally rarely go above ISO 3200 as my RAW files tend to degrade significantly at that point.

15 – Shutter speed versus ISO

From this point on you’re going to be juggling your shutter speed and ISO setting to get the most light sensitivity, while still having a shutter speed fast enough to avoid getting star trails. Star trails are great if you’re going for the that effect (read my star trails photography tutorial here) but even a very small star trail just results in a Milky Way shot that lacks clarity. That may just be okay for web images, but for prints you’ll want more sharpness.

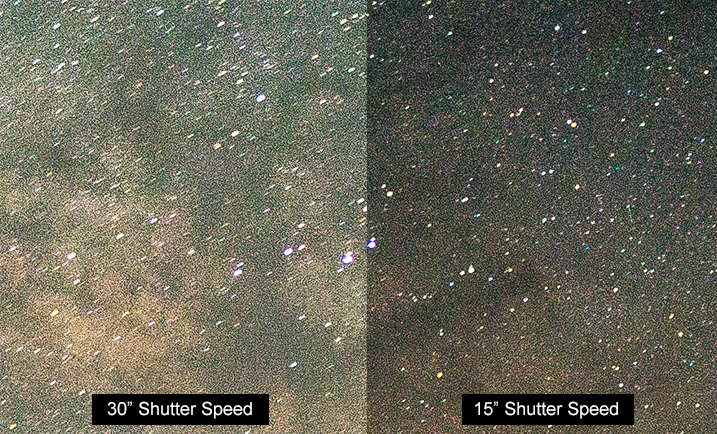
Try to limit your shutter speed to a maximum of 15 seconds so that you can keep the stars in your image sharp and trail free.

Shutter Speeds for Milky Way Photography

As you can see, the 30 second exposure on the left has a motion trail on each star. The 15 second exposure on the right has sharper stars, although it is darker.

With a shutter speed of 15 seconds, take a look at your camera’s light meter reading. If it’s telling you that the image is overexposed you might be able to dial your ISO number down a bit, or shorten your shutter speed to 10 seconds.

Sometimes I like to overexpose the image and ignore my light meter reading entirely. When shooting the Milky Way I’m guided more by what I see in my test shots than what my light meter is telling me to do. With my Sony cameras I use Multi metering mode, for what it’s worth.

After your shot is complete and you’re reviewing it, be sure to zoom in and check the details.

16 – Try a 30 second exposure

Milky Way Photography Tutorial - Alabama Hills, Gavin Hardcastle

I know I just said to keep your shutter speed to a maximum of 15 seonds but I always like to take an additional shot with a 30 second exposure to capture a much brighter Milky Way. I do this if I’m planning on publishing a web-only (low resolution) image because the slight star trail caused by the longer exposure won’t be very evident in a low-res web image. The stars will still look sharp enough but will have a much brighter appearance than a 15 second exposure. For prints, I’ll almost always use the 15 second exposure version for the extra sharpness.

In-camera Noise Reduction

Some cameras do a great job of processing and reducing noise reduction. But, this will double the amount of time it takes to complete your shot, so it’s always a good idea to switch this function off, at least temporarily. If you like the results of your in-camera noise reduction you can always switch this function back on once you’ve finished all of your test shots.

I personally prefer to do my own noise reduction in Adobe Camera Raw and Photoshop which gives me more control and allows me to shoot faster while on location.

Now it’s your turn

Okay, so now you know how to get gorgeous clear photos of The Milky Way. I hope you get some great results and have as much fun as I do when shooting this awe inspiring sight. If you’d like to learn how I process my Milky Way shots please post a request in the comments and if there’s enough interest I’d be delighted to share my techniques.

googletag.cmd.push(function() {
tablet_slots.push( googletag.defineSlot( “/1005424/_dPSv4_tab-all-article-bottom_(300×250)”, [300, 250], “pb-ad-78623” ).addService( googletag.pubads() ) ); } );

googletag.cmd.push(function() {
mobile_slots.push( googletag.defineSlot( “/1005424/_dPSv4_mob-all-article-bottom_(300×250)”, [300, 250], “pb-ad-78158” ).addService( googletag.pubads() ) ); } );

The post How to do Milky Way Photography – A Comprehensive Tutorial by Gavin Hardcastle appeared first on Digital Photography School.

Digital Photography School

 
Comments Off on How to do Milky Way Photography – A Comprehensive Tutorial

Posted in Photography


Down and Dirty Guide to Milky Way Photography

16 Sep
Another World | Mono Lake, California

Milky Way Over Mono Lake | James Brandon

Seeing the Milky Way with your own eyes is a life-changing, mind-blowing experience. It will put your place within the universe in to perspective and remind you just how small and insignificant we all are. The sad part is that most people have never seen it. Over half of our planet’s population lives in cities where seeing the Milky Way is all but impossible.

Even when people get out of the city and have a good view of the stars, they usually don’t focus on them long enough to find the Milky Way. It’s something that you either stumble onto by accident, or something that you have to plan ahead of time. Here’s a few quick tips for getting the Milky Way in your viewfinder and exposing it properly – your guide to Milky Way photography.

Research, Research, Research

Benjamin Franklin said so brilliantly that, “By failing to prepare, you are preparing to fail”. And it was Antoine de Saint-Exupéry that said, “A goal without a plan is just a wish”. So it goes with Milky Way photography. Sure, you can make a point to go out at night and see what you can find, but chances are you will be wasting your time.

saint-john-milky-way-2

The Milky Way by Hemispheres

The Milky Way is only visible in your respective hemisphere during certain months of the year. If you’re in the northern hemisphere your best time to photograph the Milky Way is in the summer, with July being the peak month. Unfortunately, the summer months aren’t typically the best times for clear skies because of the heat and the clouds from all the storm systems. Summer nights are also short, therefore limiting access further to the night sky. Folks in the southern hemisphere have it better, with the winter months being the best time.

Don’t Forget the Moon!

The moon can make or break your Milky Way shots. This is why planning is so important! Don’t make the mistake of finding a perfect subject, waiting for the Milky Way to line up, and then discovering that the moon is right in the middle of the celestial center. Having the moon obstructing the view of the Milky Way will, quite simply, ruin your shot.

There are two ways the moon can help your shot. One is by its total (or nearly total) absence in the sky. The other is by having the moon behind you, with the Milky Way in front of you (thereby providing a light source for your foreground).

The Best Astro App EVER

photo

Oh no! The moon is in the way!

All you need to do to plan a perfect night of Milky Way photography is a beautifully designed app called StarWalk 2 (sorry Android users, you’re simply out of luck here. I have an Android phone and I absolutely hate that I don’t have access to this). Luckily I have an iPad and it works beautifully on there.

StarWalk lets you interactively view the night sky from either your position, or any other position on earth, at whatever time of day you choose. As you change the time of day, the entire sky will magically begin to revolve around your position, revealing or concealing the Milky Way, the constellations and the moon.

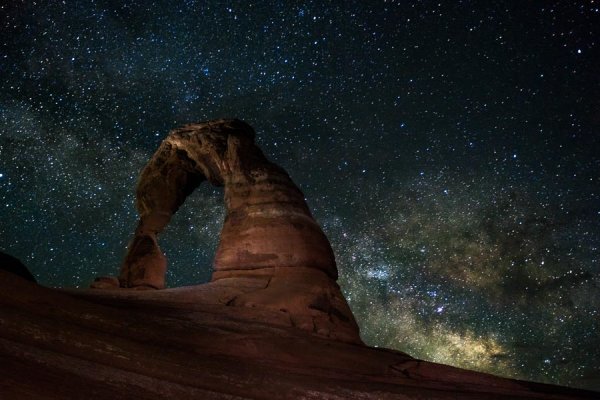
So let’s say you decide to photograph Delicate Arch in Arches National Park. You discover through research that from beneath the arch looking toward it you will be facing east. All you really need to do now is choose a location in that general area, make the app point east and then scroll through the hours in the day to find when the Milky Way will rise above the horizon.

One of the jaw-dropping cool features of this app is that you can actually use it in the field with an image overlay. You can hold your iPad or iPhone out and the app will turn the camera on and look at what you’re seeing. It will then overlay the night sky onto your image so you can see what that view will look like at a certain time of day or night! How cool is that!?

The Milky Way Over Delicate Arch | James Brandon

The Milky Way Over Delicate Arch | James Brandon

Having a Dark Sky is Crucial

While it’s not impossible to photograph the Milky Way in light polluted areas, it’s certainly not ideal. I live in the heard of the Dallas – Fort Worth metroplex and to really get a great view of the Milky Way I have to drive about three to four hours west. A great resource for locating extremely dark skies is the International Dark-Sky Association. They’ve got a list of locations that host some of the darkest skies in the world. Planning a trip to any of these places during the right time of the year will give you some of the clearest views of the Milky Way you will find anywhere. Trust me, you haven’t lived until you’ve stood beneath a Milky Way so bright that it lights the landscape in front of you. It’s truly a spiritual thing to witness.

Camera Settings

Photographing the Milky Way is quite different from any other subject you will attempt to capture. Like I said before, it really is a magical experience. Seeing the Milky Way with your own eyes is one thing, but wait until you see it appear on your camera’s LCD screen! You will quite possibly, literally jump for joy the first time you see it.

ISO is the first thing we’ll cover. In short, it needs to be set as high as possible while still maintaining a useable image quality. While this doesn’t mean that you need a pro level SLR, having one that performs exceedingly well in low light will certainly help. If your camera can produce quality images at ISO 1600 or even ISO 3200 you are going to be in great shape. If ISO 6400 or ISO 12800 is still workable, then you are going to knock it out of the park. Having your ISO set high means that your cameras sensor will be as sensitive as possible so that the maximum amount of light can be collected (which is very important at night).

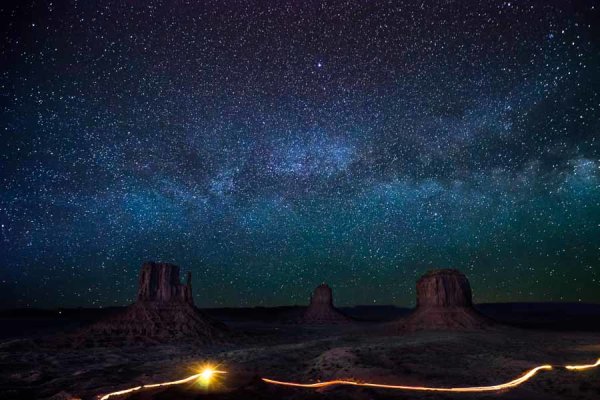
Milky Way Over Monument Valley | James Brandon

Milky Way Over Monument Valley | James Brandon

Next, select a shutter speed. Anywhere between 20-30 seconds is ideal. If you can get away with super high ISO levels, then go with 20 seconds. If you’re around ISO 1600-3200 then you may want to stick with 30 seconds. The only downside to 30 seconds is that you will have just the slightest hint of trails in your stars from the rotation of the earth. Not really a big deal though.

Finally, you need to set your aperture to be wide open, or very close to it. This is where having a lens that can open up to f/2.8, or larger, is really helpful.

All of these settings combined have one goal – to bring as much light as possible back to the cameras sensor.

Other Gear to Consider

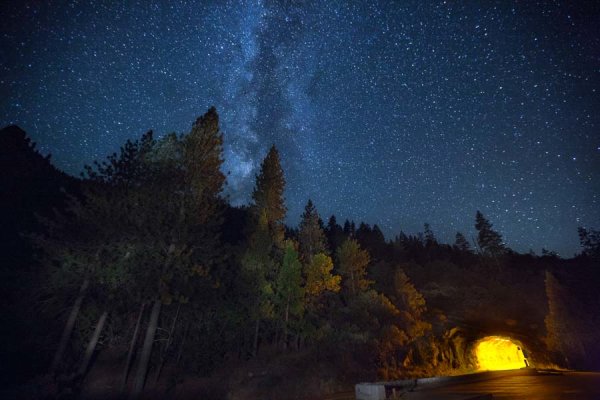
The Milky Way At Tunnel View In Yosemite

The Milky Way At Tunnel View In Yosemite

A good and sturdy tripod is worth its weight in gold. That is almost a literal statement if you go with something like a Really Right Stuff tripod, hehe. I got mine about a year ago (after saving up for quite a while) and will never consider another one. Having a good tripod means that your camera will be steady throughout the entire long exposure. If your tripod is cheap and made from plastic, or just a very flimsy aluminum or carbon fiber tripod, you will definitely have a hard time with long exposures. If your tripod has a hook underneath the center column, be sure to utilize it by hanging your camera bag there to weigh the whole thing down!

You’ll also want to set either a two second timer or use a cable release (remote trigger). Both of these methods get your hands off the camera for the entire duration of the exposure. If you try and press the shutter button down for a 30 second exposure, you will not be happy with the results.

Conclusion

The Milky Way is one of the most challenging and rewarding things you can get out and photograph. Doing it well requires planning and more planning. Don’t leave anything to chance. If you have more tips to add, questions or thoughts about the article, let me know in the comments below.

The post Down and Dirty Guide to Milky Way Photography by James Brandon appeared first on Digital Photography School.

Digital Photography School

 
Comments Off on Down and Dirty Guide to Milky Way Photography

Posted in Photography


How to Photograph the Night Sky, Part 1: The Milky Way

06 Nov

Taking pictures of the heavens can be tricky. Not only do you need a fast camera, but you also need a clear night sky. This can be a tough situation to achieve, as not only are you up against the weather, but you also have light pollution and a number of other factors that can all contribute to making your Continue Reading

The post How to Photograph the Night Sky, Part 1: The Milky Way appeared first on Photodoto.


Photodoto

 
Comments Off on How to Photograph the Night Sky, Part 1: The Milky Way

Posted in Photography


All That Glitters – Milky Way Above Yosemite Forest

01 Aug
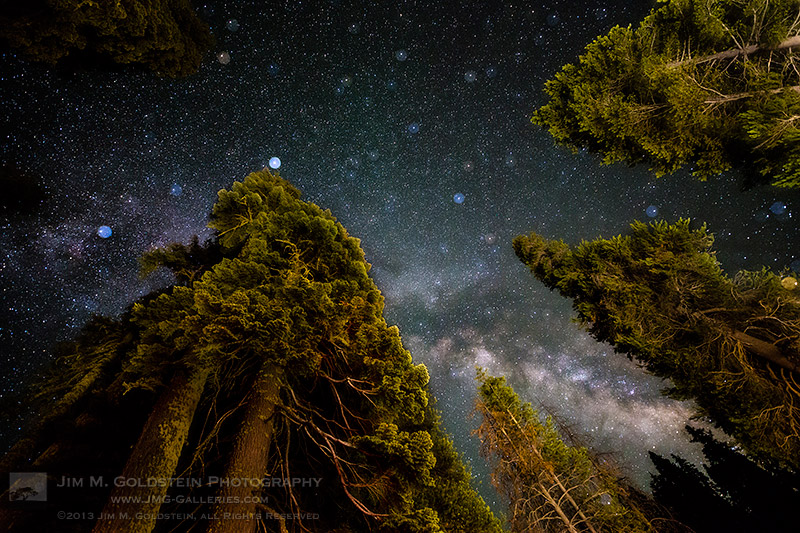
All That Glitters - Milky Way Above Yosemite Forest

The Milky Way rises above the trees in Yosemite National Park, California

One of the most amazing sights often overlooked on dark nights is the Milky Way.  Tired, road weary and focusing on the road ahead its easy for travelers to miss out on the the scene above them at night. On a recent trip to Yosemite National Park I made a conscious effort to stop the car every so often when driving to survey the night sky above me.  It wasn’t an easy thing to do due to a good amount of sleep deprivation, but the results sure paid off.  Seeing the rising Milky Way is a sure fire way to put life’s challenges in perspective.

In this single exposure, trees in the foreground are lit by the ambient light of my cars headlights. The magical halo around some of the stars is an in-camera trick.  Combined I’m fond of how the connection between heavens and Earth came out.

Photo Details

Canon 5D Mark III, Zeiss Distagon T* 2.8/15 ZE,  ISO 6400, 30 sec – single exposure

Equipement courtesy of BorrowLenses.com

Copyright Jim M. Goldstein, All Rights Reserved

All That Glitters – Milky Way Above Yosemite Forest

The post All That Glitters – Milky Way Above Yosemite Forest appeared first on JMG-Galleries – Landscape, Nature & Travel Photography.


Comments

  • Very impressive shot! You have done light painting with your … by Claudio Pia
  • What date and time was this? Was planning a trip up there to … by Michelle
  • What was the aperature? by josh Hagins
  • This looks like a HDR photo. I have not seen better. by Rich
  • That’s fantastic Jim! by Dal68

Related Stories

  • All That Glitters – Milky Way Above Yosemite Forest – Enclosure
  • Transformation: Sunset Rainbow over Yosemite National Park
  • Transformation: Sunset Rainbow over Yosemite National Park – Enclosure
Feed Ads by FeedBlitz
powered by ad choices


JMG-Galleries

 
Comments Off on All That Glitters – Milky Way Above Yosemite Forest

Posted in Equipment


All That Glitters – Milky Way Above Yosemite Forest

02 Jul
All That Glitters - Milky Way Above Yosemite Forest

The Milky Way rises above the trees in Yosemite National Park, California

One of the most amazing sights often overlooked on dark nights is the Milky Way.  Tired, road weary and focusing on the road ahead its easy for travelers to miss out on the the scene above them at night. On a recent trip to Yosemite National Park I made a conscious effort to stop the car every so often when driving to survey the night sky above me.  It wasn’t an easy thing to do due to a good amount of sleep deprivation, but the results sure paid off.  Seeing the rising Milky Way is a sure fire way to put life’s challenges in perspective.

In this single exposure, trees in the foreground are lit by the ambient light of my cars headlights. The magical halo around some of the stars is an in-camera trick.  Combined I’m fond of how the connection between heavens and Earth came out.

Photo Details
Canon 5D Mark III, Zeiss Distagon T* 2.8/15 ZE,  ISO 6400, 30 sec – single exposure
Equipement courtesy of BorrowLenses.com

Copyright Jim M. Goldstein, All Rights Reserved

All That Glitters – Milky Way Above Yosemite Forest

The post All That Glitters – Milky Way Above Yosemite Forest appeared first on JMG-Galleries – Landscape, Nature & Travel Photography.


JMG-Galleries – Landscape, Nature & Travel Photography

 
Comments Off on All That Glitters – Milky Way Above Yosemite Forest

Posted in Equipment


Milky Way Over Half Dome, Yosemite National Park

17 Jun
Milky Way Over Half Dome, Yosemite National Park

The Milky Way rises over Half Dome as seen from Glacier Point – Yosemite National Park

One of the many things I love about Yosemite National Park is that it’s equally photogenic at night as it is during the day. During my last visit I focused on astro-landscapes, but Mother Nature had other things in mind with a lot of clouds. Fortunately for me the heaviest clouds cleared just in time for me to take this photo and several others.

My location of choice was Glacier Point as the increased altitude above the valley floor allows you to see the Milky Way rising a little earlier without obstruction. In addition you have an amazing view of Half Dome and Nevada and Vernal Falls. These of course make for amazing foreground subjects.

One interesting note about this photo is that it was taken with out a tripod. I had two other cameras running time-lapses on a tripod when this was taken and I was left with only my ingenuity to stabilize my 3rd camera. To stabilize my camera for this long exposure I lodged the camera on a rock and used the strap with a great deal of tension to lock it into place. If there is interest I’ll go over exactly how I did this.

Photo Details:
Canon 5D Mark II, Canon 15mm f/2.8 fisheye, ISO 6400, 30sec

Copyright Jim M. Goldstein, All Rights Reserved

Milky Way Over Half Dome, Yosemite National Park

The post Milky Way Over Half Dome, Yosemite National Park appeared first on JMG-Galleries – Landscape, Nature & Travel Photography.


JMG-Galleries – Landscape, Nature & Travel Photography

 
Comments Off on Milky Way Over Half Dome, Yosemite National Park

Posted in Equipment


Time Lapse Milky way at Yumi Lake2 (HD 720p)

01 Feb

mockmoon.sblo.jp Fujifilm S5pro Nikkor DX 10.5mmF2.8G fisheye
Video Rating: 4 / 5


How To – Shoot Time Lapse of the Milky Way – Part 1

11 Dec

In part one of this video series I explain what equipment you need and camera settings are used to get great shots of the Milky Way. The toughest part for most people will be to get out to an area that is dark enough to see the Milky Way. The second part will deal will taking the photos and converting them into a video so please subscribe! Sorry for the poor audio quality, I am getting a mic to improve my videography skills especially in the audio department.

 
Comments Off on How To – Shoot Time Lapse of the Milky Way – Part 1

Posted in Nikon Videos