RSS
 

Posts Tagged ‘zone’

Zone Focusing: How to (Always) Capture Sharp Street Photos

02 Aug

The post Zone Focusing: How to (Always) Capture Sharp Street Photos appeared first on Digital Photography School. It was authored by James Maher.

zone focusing: how to capture sharp street photos

Do you struggle to capture consistently sharp, in-focus street photos? You’re not alone.

In street photography, consistently nailing focus, especially if you don’t have the opportunity to look through your camera’s viewfinder, can be insanely difficult (and often seems impossible).

That’s where zone focusing comes in.

You see, zone focusing lets you set your focus in advance. And then, when your subject steps into the frame, snap – you get the shot.

Not every street photographer zone focuses, but the ones who do swear by it. And while I use autofocus when I can, I swear by zone focusing, too.

So what, specifically, is zone focusing? How does it work? And how can you learn to do it for sharp photos?

All will be revealed in this article! Let’s get started.

zone focused composition of boy in a crowd
Canon 5D Mark II | 17mm | f/11 | 1/320s | ISO 1800

What is zone focusing?

Zone focusing is a technique where you manually prefocus your lens to a certain distance and adjust your aperture for a deep depth of field. Then, when you’re confronted by an interesting subject, you don’t need to focus through your viewfinder; instead, you wait for your subject to enter your acceptable zone of focus and capture the photo.

Note that zone focusing is very flexible. If you like to shoot intimate portraits, you can zone focus just a few feet in front of your lens. And if you prefer wider shots with more distant elements, you can zone focus 10+ feet away.

Why is zone focusing so useful?

Zone focusing works to varying degrees in plenty of photography genres, but it’s most commonly used by street photographers for two major reasons:

  1. When shooting on the streets, the world happens fast. Gorgeous photo opportunities slide by in the blink of an eye. If you take the time to focus, you’ll often miss the shot.
  2. In street photography, putting a camera to your eye often makes your subject (and you) uncomfortable. So if you can focus without looking, you’ll be able to keep discomfort to a minimum while capturing more honest scenes.

In other words, if you’re a street photographer, zone focusing is an easy way to increase your keeper rate while keeping your photos perfectly candid.

Zone focusing and depth of field (dof)

woman walking along outside the subway
Canon 5D Mark II | 28mm | f/4 | 1/250s | ISO 3200

Before I explain how to zone focus, it’s important that you understand the factors that go into creating a zone of sharp focus, also known as a deep depth of field.

As you may already be aware, depth of field refers to the zone of acceptable sharpness in a scene. So when you focus on a subject and you create a deep depth of field (more on how to do that in a moment!), your subject will turn out sharp – but so will a certain area in front of and behind your subject.

For instance, if you focus on a subject that’s 10 feet away, a deep depth of field would ensure sharp focus from around 8 feet to 14 feet, depending on your specific camera settings. Keep in mind that the area behind your subject that is acceptably sharp will always be greater than the area in front of your subject, and in many cases, it will be much greater.

What affects your depth of field? Three simple factors:

  1. Aperture. The smaller your aperture, the greater the depth of field. So if you’re shooting at f/16, you’ll have far more in focus than if you shoot at f/2.8.
  2. Focal length. Wider focal lengths create a deeper depth of field. So if you are shooting at 28mm, much more of your scene will be in focus than if you are shooting at 100mm. (This is why I rarely zone focus with lenses longer than 35mm.)
  3. Distance to the subject (or point of focus). The further away you focus, the more depth of field there will be in a scene. So if you focus on a person 10 feet away, then you’ll have a deeper depth of field than if you focus on a person 3 feet away.

If you want to test out these different factors and see how they affect the depth of field in real life, check out this website, which offers a handy depth of field calculator.

How to zone focus: step by step

man walking with hat and suitcase zone focused
Canon 5D Mark II | 17mm | f/8 | 1/400s | ISO 1600

You can zone focus in three simple steps:

  1. Adjust your camera settings for a deep depth of field
  2. Prefocus your lens in the right area
  3. Hit the shutter button when your subject moves into range

Let’s take a look at each step in greater depth:

Step 1: Adjust your camera settings for a deep depth of field

When zone focusing, you want the range of sharpness (i.e., the depth of field) as large as possible. That way, you have the most room for error, and you’ll end up with the most keepers. Plus, a deep depth of field will allow you to keep multiple subjects sharp, which is useful if you’re capturing a more complex, layered shot.

First, you’ll need to choose a wide-angle lens, such as 24mm, 28mm, or 35mm. My personal go-to focal length is 28mm, but any of these options work for zone focusing. Unfortunately, if you zoom any closer (50mm, for example), you’ll struggle to get a usable depth of field range.

Next, make sure your camera is set to Manual mode, and dial in a narrow aperture. I’d recommend working at f/8 and beyond – so depending on the light levels, you might use f/8, f/11, f/13, or even f/16.

Because zone focusing is often done with moving subjects (and you might be moving, too!), make sure your shutter is at least 1/250s, though higher is better, if you can afford it. And adjust your ISO to keep your exposure sufficiently bright.

Really, it’s the combination of the wide focal length and narrow aperture that’ll give you the deep depth of field you need, but it’s important not to neglect your other settings.

Step 2: Prefocus your lens in the right area

Now that you have your camera settings dialed in, it’s time to determine where you want to focus your lens.

Part of this should be personal preference and may depend on the context. For instance, if you prefer more intimate street portraits, you’ll want to focus a few feet in front of you. Or if you’re shooting in an environment where people are passing at a distance, you’ll want to focus farther away.

But it’s not just about artistry. Recalling the discussion of depth of field, you know that a closer point of focus decreases the range of acceptable sharpness. So if you want to maximize the chances of a sharp shot, it’s a good idea to focus far off in the distance.

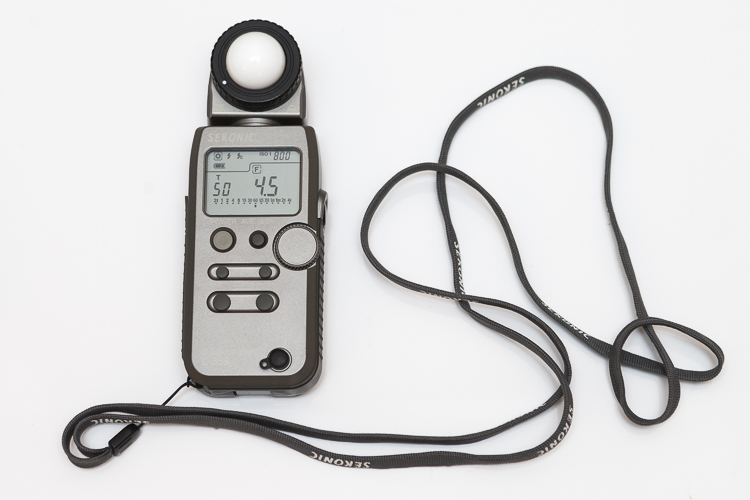
Regardless of where you plan to focus, a lens with a manual focus display is a huge benefit here. I’m talking about something like this:

manual focus display on a 24-105mm lens

That way, you know exactly where your lens is focused (and you can consistently prefocus in the same spot).

If your lens doesn’t include a manual focus display, that’s okay, but you’ll need to spend extra time learning to estimate distances.

Step 3: Hit the shutter button when your subject moves into range

You’ve got the right settings, and you’re prefocused in the right spot.

Which means that all you need to do is take the photo.

Keep an eye out for interesting photo opportunities. Estimate your range of focus.

Then, when something interesting happens, wait until the subject comes into your focusing zone, then take a photo. The closer your subject gets to the center of your range of focus, the better (and don’t be afraid to capture multiple photos to maximize your chances of nailing a sharp shot).

A zone focusing tip: learn to guess distances

Zone focusing works really well, and if you’re shooting in bright light with a narrow aperture, you’ll have a lot of leeway.

But if you’re like me, then you often do street photography in less than ideal lighting, such as on the subway. And thanks to the poor light, you’ll need to widen your aperture – to f/2.8 and beyond.

What does this mean? Well, even with a wide-angle lens and a relatively distant subject, you’ll need to be very careful; your range of sharpness will be quite small.

man standing by the subway tracks
Fujifilm X100 | 35mm | f/2 | 1/250s | ISO 3200

For this reason, you must learn to estimate the distances away from your camera’s lens, all the way up to around 12 feet. I suggest using a tape measure and measuring out the distances. Then just go out and practice.

Find different objects and try to guess their distance. Then, before you head out to shoot, pick an object at a known distance, focus on it, and use it as a sort of “calibrator” for all your future photos.

The other reason to get good at guessing distances? People move and scenes develop. You might want to capture a person walking toward you at 10 feet, then again at 5 feet. To nail both those shots, you’ll need to have one hand on the focusing ring, and practice manually focusing back and forth, from 10 feet to 8 feet to 6 feet and so on.

Eventually, you’ll be able to capture someone walking toward you at both 10 feet and 6 feet, without even having to look through the viewfinder. It’s an incredibly effective technique, and you can use it for some gorgeous results.

couple walking together zone focused
Canon 5D Mark II | 28mm | f/5 | ISO 1600

How to zone focus: final words

Now that you’ve finished this article, you should be a capable zone focuser – though I certainly recommend you spend some time really getting to know different distances (and how to accurately prefocus at those distances, too).

So head out with your camera. Have some fun with zone focusing. You’ll love the results!

Now over to you:

Have you tried zone focusing? What do you think? Do you like it? Share your thoughts in the comments below!

Table of contents

Street Photography

  • GENERAL
    • 10 Tips for the Aspiring Street Photographer
    • 7 Street Photography Rules That Should Be Broken
    • How to Approach Street Photography in 12 Easy Steps
    • 50 Things I Try to Avoid in Street Photography
    • 5 Questions to Ask Yourself to Help Improve Your People Photography
    • 5 Exercises to Improve Your Street Photography
  • PREPARATION
    • 7 Steps to Get Over Your Fear of Street Photography
    • How to Plan a Street Photography Shoot When Traveling
  • SETTINGS
    • Zone Focusing: How to (Always) Capture Sharp Street Photos

    • What are the Best Street Photography Camera Settings and Why
  • LIGHTING
    • There is No Bad Light for Street Photography
    • Make the Most of High Contrast Lighting for Dramatic Street Photos
  • COMPOSITION
    • The Importance of Capturing Gesture and Emotion in Street Photography
    • Seeing and Street Photography
      • 13 Great Subjects for Urban Night Photography
    • How to Avoid Distracting Backgrounds in Street Photography
    • How the Square Format Can Enhance Your Street Photography
    • Tips for Minimalist Photography in an Urban Environment
    • How to Improve the Impact of Your Urban Images Using Lines
    • How to Use Framing in an Urban Environment
  • GEAR
    • 5 Reasons Why Shooting With a Rangefinder Will Make You a Better Street Photographer
    • Pros and Cons of a Telephoto Lens for Street Photography?
    • The Five Key Features on any Street Photography Camera
    • Which Street Photography Lens is Right for You?
    • 6 Reasons Why You Should Use a Standard Lens for Street Photography
    • A Look at the Fujifilm X100V in Action for Street Photography (video)
    • How to Use a Wide-Angle Lens for People Photography
    • Street Photography with $ 10 Ilford HP5 Film Camera
  • ADVANCED GUIDES
    • 8 Advanced Street Photography Tips to Get You to the Next Level
    • Getting Close and Personal: 11 Tips for Close-up Candid Street Photography
    • 7 Tips for a More Anonymous Approach to Street Photography
    • A Cowards Guide to Street Photography
    • 6 Tips for Aiming Low and Going Unnoticed in Street Photography
    • 9 Tips for Creating Great Street Portraits
    • Street Portraits vs Street Photography: What is the Difference?
    • 17 Tips for Shooting Better Urban Portraits
    • What Makes A Great Street Photograph and How Do We Create Them
    • How to Tell a Story With Your Street Photography
    • In the Dark: 10 Tips for Street Night Photography
    • 7 Tips for Urban Landscape Photography
    • A Street Photographer’s Guide to New York City
    • Urban Exploration Photography – Urbex
    • 7 Tips for Capturing the Decisive Moment in Street Photography
    • A Common Misconception About Street Photography – Just Take Photos of People Walking
    • What do I look for on a Photo Walk? Part 1 – City Walk
    • 8 Things You Should Know if You are Dating a Street Photographer
    • 7 Ways to Become More Spontaneous with Your Street Photography
    • 5 Essential Shots You Need to Get for Street Market Photography
    • Using Humor In Street Photography
    • Watch a Street Photographer Going about a Shoot [VIDEO]
    • Using Street Photography to See Beyond the Ordinary
  • CREATIVE TECHNIQUES
    • 5 Tips for Shooting Glass to Enhance Your Street Photographs
    • Window Street Photography ~ Try Something New And Grow!
    • The Pros and Cons of Black and White Versus Color for Street and Travel Photography
    • 4 Ways to Add a Sense of Motion to Your Urban Photography
    • 7 Steps to Create Street Photography Silhouettes
  • POST-PROCESSING
    • How to Enhance Urban Night Photographs Using Luminosity Masks in Photoshop
    • 13 Steps for Editing Street Photography in Lightroom from Start to Finish
    • How to Turn Day to Night Using Photoshop for Urban Landscapes
  • BUSINESS
    • Model Releases: Working with People on the Streets
  • INSPIRATION
    • 20 Beautiful Examples of Urban Decay Photography
    • 30 Street Photography Images to Inspire You
    • 33 Gritty Photos of Graffiti Street Art
    • 28 Diverse Images That Showcase People Photography
    • 39 Street Photography Images That Have Common Threads
    • Focus on Thomas Leuthard – Street Photographer
    • Focus on Street Photographer Eric Kim ~ In your face with a smile!
    • Focus on Chris Porsz ~ It’s All About The People
    • Focus on Scott Frederick – Urban Explorer
  • OPINION
    • The Uncomfortable Truth About Street Photography
    • Street Photography: Exploitative vs Respect
    • To be or not to be a Street Photographer
    • Consent in Photography – What to Think About When Photographing People

var dpsTopics = {
id: 38294,
titles: [{“id”:”what-is-zone-focusing”,”permalink”:”https:\/\/digital-photography-school.com\/ultimate-guide-to-zone-focusing-for-candid-street-photography\/”,”title”:”What is zone focusing?”},{“id”:”why-is-zone-focusing-so-useful”,”permalink”:”https:\/\/digital-photography-school.com\/ultimate-guide-to-zone-focusing-for-candid-street-photography\/”,”title”:”Why is zone focusing so useful?”},{“id”:”zone-focusing-and-depth-of-field-dof”,”permalink”:”https:\/\/digital-photography-school.com\/ultimate-guide-to-zone-focusing-for-candid-street-photography\/”,”title”:”Zone focusing and depth of field (dof)”},{“id”:”how-to-zone-focus-step-by-step”,”permalink”:”https:\/\/digital-photography-school.com\/ultimate-guide-to-zone-focusing-for-candid-street-photography\/”,”title”:”How to zone focus: step by step”},{“id”:”step-adjust-your-camera-settings-for-a-deep-depth-of-field”,”permalink”:”https:\/\/digital-photography-school.com\/ultimate-guide-to-zone-focusing-for-candid-street-photography\/”,”title”:”Step 1: Adjust your camera settings for a deep depth of field”},{“id”:”step-prefocus-your-lens-in-the-right-area”,”permalink”:”https:\/\/digital-photography-school.com\/ultimate-guide-to-zone-focusing-for-candid-street-photography\/”,”title”:”Step 2: Prefocus your lens in the right area”},{“id”:”step-hit-the-shutter-button-when-your-subject-moves-into-range”,”permalink”:”https:\/\/digital-photography-school.com\/ultimate-guide-to-zone-focusing-for-candid-street-photography\/”,”title”:”Step 3: Hit the shutter button when your subject moves into range”},{“id”:”a-zone-focusing-tip-learn-to-guess-distances”,”permalink”:”https:\/\/digital-photography-school.com\/ultimate-guide-to-zone-focusing-for-candid-street-photography\/”,”title”:”A zone focusing tip: learn to guess distances”},{“id”:”how-to-zone-focus-final-words”,”permalink”:”https:\/\/digital-photography-school.com\/ultimate-guide-to-zone-focusing-for-candid-street-photography\/”,”title”:”How to zone focus: final words”},{“id”:”what-is-zone-focusing”,”permalink”:”https:\/\/digital-photography-school.com\/ultimate-guide-to-zone-focusing-for-candid-street-photography\/”,”title”:”What is zone focusing?”},{“id”:”why-is-zone-focusing-so-useful”,”permalink”:”https:\/\/digital-photography-school.com\/ultimate-guide-to-zone-focusing-for-candid-street-photography\/”,”title”:”Why is zone focusing so useful?”},{“id”:”zone-focusing-and-depth-of-field-dof”,”permalink”:”https:\/\/digital-photography-school.com\/ultimate-guide-to-zone-focusing-for-candid-street-photography\/”,”title”:”Zone focusing and depth of field (dof)”},{“id”:”how-to-zone-focus-step-by-step”,”permalink”:”https:\/\/digital-photography-school.com\/ultimate-guide-to-zone-focusing-for-candid-street-photography\/”,”title”:”How to zone focus: step by step”},{“id”:”step-adjust-your-camera-settings-for-a-deep-depth-of-field”,”permalink”:”https:\/\/digital-photography-school.com\/ultimate-guide-to-zone-focusing-for-candid-street-photography\/”,”title”:”Step 1: Adjust your camera settings for a deep depth of field”},{“id”:”step-prefocus-your-lens-in-the-right-area”,”permalink”:”https:\/\/digital-photography-school.com\/ultimate-guide-to-zone-focusing-for-candid-street-photography\/”,”title”:”Step 2: Prefocus your lens in the right area”},{“id”:”step-hit-the-shutter-button-when-your-subject-moves-into-range”,”permalink”:”https:\/\/digital-photography-school.com\/ultimate-guide-to-zone-focusing-for-candid-street-photography\/”,”title”:”Step 3: Hit the shutter button when your subject moves into range”},{“id”:”a-zone-focusing-tip-learn-to-guess-distances”,”permalink”:”https:\/\/digital-photography-school.com\/ultimate-guide-to-zone-focusing-for-candid-street-photography\/”,”title”:”A zone focusing tip: learn to guess distances”},{“id”:”how-to-zone-focus-final-words”,”permalink”:”https:\/\/digital-photography-school.com\/ultimate-guide-to-zone-focusing-for-candid-street-photography\/”,”title”:”How to zone focus: final words”}] };

The post Zone Focusing: How to (Always) Capture Sharp Street Photos appeared first on Digital Photography School. It was authored by James Maher.


Digital Photography School

 
Comments Off on Zone Focusing: How to (Always) Capture Sharp Street Photos

Posted in Photography


‘Disgraceful propaganda’: Fox News under fire for misleading images from Seattle protest zone

16 Jun
A screenshot of an altered photo shared by Fox News, which has since been removed from its website.

Fox News is taking heat after publishing a digitally altered image and a misleading photograph last week in its reporting on Seattle’s Black Lives Matter protests in Seattle, Washington.

Last Friday, Huffington Post reporter Michael Hobbes shared a set of pictures that shows Fox News clearly composited an image of a person carrying a rifle over two photographs of Seattle’s Capitol Hill Autonomous Zone (CHAZ). While the editing job is far from subtle if you look closely – note the lighting discrepancies between the backgrounds and the gun-wielding subject, as well as the extra area of red between his torso and left elbow – the fact the same individual was used in two separate images makes it clear this was a post-production job.

A Fox News spokesperson provided the following comment to Seattle Times:

‘We have replaced our photo illustration with the clearly delineated images of a gunman and a shattered storefront, both of which were taken this week in Seattle’s autonomous zone’

It appears that there are weapons in the autonomous zone, but as The Seattle Times notes, even Fox News’ follow-up statement is misleading, since the photo of the armed man was taken on June 10th in the Capitol Hill neighborhood while the wrecked storefront image was captured in downtown Seattle, back on May 30th, according to metadata provided by Getty Images.

Photojournalism ethics expert Kenny Irby told Seattle Times in response to the posting of the altered images, ‘I think it’s disgraceful propaganda and terribly misrepresentative of documentary journalism in times like this, when truth-telling and accountability is so important […] There is no attribution. There is no acknowledgment of the montage, and it’s terribly misleading.’ National Press Photographers Association (NPPA) executive director Akili-Casundria Ramsess also told The Seattle Times it was ‘completely egregious to manipulate this the way they have done.’

In a reply to Hobbe’s post on Twitter, Seattle Times Editor Gina Cole responded with a screenshot showing Fox News also shared an article under the headline ‘Seattle helpless as armed guards patrol anarchists’ ‘autonomous zone,’ shake down businesses: cops’ with a photo of an individual running through the streets with a burning car in the foreground and a burning storefront in the background.

However, the image Fox News featured with the article was taken not in Seattle this past week, but two weeks ago, 1,650 miles away in Minneapolis. It was taken by AP photographer John Minchillo, during the Black Lives Matter protests in Minnesota’s capital, as noted by Suki Dardarian, Senior Managing Editor & VP of Minnesota’s Star Tribune. Meanwhile, Seattle’s protests remains largely peaceful, and SPD has apologized for repeating the groundless claim that local businesses had been ‘shaken down’.

Note the creation date on AP Image’s website: May 30, 2020 05:13:07 PM

In response to the criticism, Fox News took down the images and shared the following statement on Saturday in the form of an Editor’s Note at the end of the article:

‘A FoxNews.com home page photo collage which originally accompanied this story included multiple scenes from Seattle’s ‘Capitol Hill Autonomous Zone’ and of wreckage following recent riots,” the note read. “The collage did not clearly delineate between these images, and has since been replaced. In addition, a recent slideshow depicting scenes from Seattle mistakenly included a picture from St. Paul. Fox News regrets these errors.’

This isn’t the first time Fox News has been caught altering images or sharing misleading images under unrelated headlines. But it’s not the only offender. CBS was caught this past April using video footage of an Italian hospital while reporting on the COVID-19 pandemic in New York City. CBS apologized at the time for what it called an ‘editing mistake’.


Editor’s note (June 15, 2020): A previous version of this article incorrectly stated it was CNN that was caught using incorrect video footage in April — it was in fact CBS. The article has been updated accordingly.

Articles: Digital Photography Review (dpreview.com)

 
Comments Off on ‘Disgraceful propaganda’: Fox News under fire for misleading images from Seattle protest zone

Posted in Uncategorized


DJI releases ‘GEO zone’ firmware update for the Mavic Mini

03 Jan

When DJI announced the Mavic Mini, its 249-gram drone that doesn’t require registration (unless used for commercial purposes), the general public was disappointed with the fact that it was missing some important features. One of those was the inability to unlock GEO Zones. Right in time for the New Year, DJI has released its latest firmware update, v01.00.0400, which also includes two important safety features.

The latest firmware update for v1.0.4, or later, of the iOS and Android version of the DJI Fly app now allows you to unlock GEO Zones. DJI also added in a feature that prevents you from taking off when the GPS signal is weak (GPS <8) and the environment light is too weak to safely operate the aircraft. This feature has been missing from all previous firmware updates, including those created for the DJI GO app, and will hopefully be implemented there, as well, going forward.

Another pertinent safety update is the requirement for compass calibration before takeoff if environment light is not sufficient or if the compass experiences magnetic interference. The latter is a leading cause of flyaways. The Mavic Mini is an entry-level drone that appeals to beginners who are especially susceptible to losing a drone. Anyone who remembers the disaster that took place in Las Vegas, when a drone flew off and landed on an airport runway, will appreciate this feature. To properly calibrate a compass, make sure you do so in an area absent of any magnetic interference.

A few other new features in the firmware update include:

  • Adjusted flight altitude and distance in payload mode.
  • Added warning prompt for battery cycles.
  • Reduced noise during self-diagnostics after powering on.
  • Fixed issue: linking was abnormal in some regions.

DJI has also noted that ‘the update may reset various main controller settings, such as the RTH altitude and the maximum flight distance, to default settings. Before updating, take note of your preferred DJI Fly settings, and readjust them after the update.’ If the update fails, it is recommended that users restart the aircraft, remote controller, and DJI Fly or DJI Assistant 2 for Mavic, and retry.

Red Zones are Restricted Zones. Users will be prompted with a warning and the flight won’t be authorized. Anyone who believes they have permission to operate in a Restricted Zone has to contact flysafe@dji.com or go through the Online Unlocking portal on DJI’s Fly Safe site.

When it comes to GEO Zones, unlocking a low-risk area requires a few taps or clicks. High-risk zones require prior approval, along with proof of credentials, and can’t be accessed within the Fly app. Basically, don’t attempt to unlock a high-risk or Red Zone, especially in close proximity to an airport, unless you know what you’re doing. Information, and other safety tips, can be found on DJI’s Fly Safe portal.

Articles: Digital Photography Review (dpreview.com)

 
Comments Off on DJI releases ‘GEO zone’ firmware update for the Mavic Mini

Posted in Uncategorized


How Using the Zone System Can Improve Your Photography

05 Mar

The post How Using the Zone System Can Improve Your Photography appeared first on Digital Photography School. It was authored by Kevin Landwer-Johan.

Have you ever wondered how some photographers can produce photos that look so radically different than what we can see with our eyes?

Window Light How Using the Zone System Can Improve Your Photography

© Kevin Landwer-Johan

Digital photography allows you to manipulate photos using a computer to make them look surreal. Some cameras include features that can make High Dynamic Range (HDR), multiple exposure and black and white photographs. These are not techniques I wish to address in this article. I like to keep it more natural.

Having a good understanding of certain techniques and the physics of light, you can produce unreal looking images in camera. You do not have to rely on modern camera technology or heavy use of post-processing.

A brief introduction to the Zone System

The Zone System has been around for decades. It was developed by Ansel Adams and Fred Archer based around sensitometry. It’s a tool designed to be used to help photographers plan and control exposure and processing.

Naturally, as it came about in the 1930s, it was created for use with film. Although there are arguments against applying this technique to digital photography, I believe it to be very useful.

Taking a Rest How Using the Zone System Can Improve Your Photography

© Kevin Landwer-Johan

Adams and Archer divided tone into eleven zones and designated a Roman numeral to each. Zone 0 is black, zone X is white and V is middle gray. Each zone is separated by one photographic stop.

The Zone System

Photographer Alan Ross, who worked as Adam’s darkroom assistant, tells us on his website the system was created “to give the photographer the ability to effectively evaluate the qualities of a scene and follow through with confidence that the information necessary for the photographer’s visualization would end up on the film.”

Most of what I’ve read over the years about the zone system I consider overly technical. I try not to be. Often the photos published alongside articles expounding the virtues of the system in more recent years are dull. This usually happens when photography tools are used for the sake of it and at the expense of creative expression.

Vendors How Using the Zone System Can Improve Your Photography

© Kevin Landwer-Johan

The Zone System – another tool in your kit

More guidelines than actual rules. This is how I prefer to regard the rules of photography.

Many will teach you to learn the rules and then break them. I teach people to learn the rules so well the can apply them intuitively.

The zone system is based on scientific fact, you can’t break it. Learning to apply the technique will give you more freedom to be creative with your camera. Consider it another tool in your kit.

Like any tool, you need to first learn the basics of what it does and how you can make it do what you want it to. I’m not going to get into teaching the ‘how to’ in this article, as there’s already so many books, blogs and videos on the topic already.

My main intention here is to encourage you to check it out and show you some of the benefits of learning the photographic zone system.

Porter Portrait How Using the Zone System Can Improve Your Photography

© Kevin Landwer-Johan

Why bother learning the Zone System?

Averaged metering on modern cameras is designed to render a mid-tone across the whole composition. Camera metering is calibrated on everything being middle gray. But everything we see is not middle gray.

Photographing a black dog on a black rug, or a white rabbit in the snow is challenging. Your exposure meter will want to render both scenes as middle gray because that’s what it’s been programmed to do.

Compositions containing a limited mid-tone range do not pose modern cameras any problems. Especially when photographing them in soft, low contrast light. It’s easy to make a good exposure in these circumstances. But they can quite often look dull unless we boost them in post-production.

Learning the zone system will enable you to make decisions on how to get your photos looking the way you want them to. Using this system well allows you to translate your creative desires into technical choices.

Laughing Lady How Using the Zone System Can Improve Your Photography

© Kevin Landwer-Johan

Use it in line with your intent

Hard light and contrast always involves making decisions about exposure before you take a photograph.

Cameras cannot see the same way we do. At this stage of technological development, they are considerably more limited. This means we may see a scene different than how our camera will record it.

Your camera does not know what you are looking at. When you use the exposure meter, it’s programmed to give you an accurate reading for middle gray. This is why it was common in times past for photographers to carry with them a small sheet of 18% (middle) gray card. They could make a reading from the card in the prevailing light conditions and set their camera accordingly.

Setting your exposure for middle gray every time will often produce poor results when there’s a broad contrast range.

You are best to decide what part of the image is most important and make a meter reading from there.

Black Background How Using the Zone System Can Improve Your Photography

© Kevin Landwer-Johan

In my outdoor studio portraits, I take a spot meter reading from my subject’s face and set my exposure. I’ll use the same setting photographing against the black or the white background. This is because the light value reflecting off the person’s face is the same.

White Background How Using the Zone System Can Improve Your Photography

© Kevin Landwer-Johan

Having an understanding of the zone system equips you to make the best exposure choices in difficult situations.

It ain’t easy, but it’s not rocket science either

Like learning anything, you must practice to become proficient. To become an expert, you must practice a lot more.

The zone system is not so complicated. When you grasp the basics of it you can apply it as a part of your overall skill set. Then you can make extensive use of it and see the difference in your improved photographs.

The post How Using the Zone System Can Improve Your Photography appeared first on Digital Photography School. It was authored by Kevin Landwer-Johan.


Digital Photography School

 
Comments Off on How Using the Zone System Can Improve Your Photography

Posted in Photography


4 Tips to Get You Out of Your Comfort Zone for Photographic Inspiration

03 Jan

The post 4 Tips to Get You Out of Your Comfort Zone for Photographic Inspiration appeared first on Digital Photography School. It was authored by Ana Mireles.

Are you feeling uninspired? Perhaps you’re stuck in your photography practice and feel like you’ve reached the best of your abilities? Don’t worry, we all feel like that sometimes. In most cases, all you need is to get out of your comfort zone to find new and exciting challenges. Here are some tips to get you out of your comfort zone for photographic inspiration.

1 - 4 Tips to Get You Out of Your Comfort Zone for Photographic Inspiration

1. Change your focal length.

All of us have a preferred focal length either because it’s the only lens we have, or because it’s the fittest for the kind of photography that we do. So the problem is not that you have it, it is that it impacts a lot of your photographic behaviors as well. You might think it’s not a big deal, but it’s vastly different working with a fixed focal length than a zoom lens, or shooting with a wide angle lens than a telephoto lens.

2 - 4 Tips to Get You Out of Your Comfort Zone for Photographic Inspiration

The focal length you use affects the physical distance you need between you and your subject. With a telephoto lens, you can be further away and still get close detail. A wide-angle lens allows you to fit in a bigger scene even if you are closer to your subject. Making this change means you walk around your subject to get the shot, which helps you find new perspectives and points of view. Sometimes you can’t get closer or further away as you may need, forcing you to reframe and rethink your entire image.

3 - 4 Tips to Get You Out of Your Comfort Zone for Photographic Inspiration

Another thing that changes when you modify the distance between your camera and subject is the Depth of Field. Depth of Field depends on the Aperture (f/stop). If you take two images with the same aperture but one of them is with a wide-angle lens, and the other is with a telephoto, the latter will have a shallower depth of field. If you’d like to understand this concept in more depth, I recommend you read my article How to Use Still-Life to Understand Focal Lengths. In any case, the results of your images may be different to what you are used to, and this inevitably pushes you out of your comfort zone.

4 - 4 Tips to Get You Out of Your Comfort Zone for Photographic Inspiration

2. Change the type of photography you do

One of the beauties about photography is how versatile it can be. You can photograph practically anything. I don’t mean that any photographer can do every kind of photography. Each one needs its own set of skills, and that’s why I recommend this exercise.

You can be a wedding photographer, a landscape photographer, or a food photographer – it doesn’t matter. There is always another type of photography you can try. For example, if you’re a portrait photographer, used to dealing with people, go and shoot some architecture photography or any subject you can’t move or control. If you usually do macro or abstract details, go wider and try to compose a scene from urban photography. You’ll be amazed at how changing what you see also changes the way you think. It opens your mind to new possibilities.

5 - 4 Tips to Get You Out of Your Comfort Zone for Photographic Inspiration

As a photographer, no matter what your specialty, you are working with light. However, it most certainly different working with studio lights doing a still life than natural light while shooting a landscape. One is not better than the other, nor is it easier. They are just different and as a result, require different skills. Studio lighting means learning to set everything from scratch. You create the amount and type of light you want.

However, natural light means learning what time of the day is best, dealing with weather conditions and so on. It also means having the right equipment. I’m not suggesting that you go and spend a lot of money on something you may not use much as there’s always a way to adapt and improvise. This is also part of going out of the comfort zone.

6 - 4 Tips to Get You Out of Your Comfort Zone for Photographic Inspiration

3. A small change can go a long way

Expanding your creativity can be done by changing a small thing from your photographic routine. Change the time of the day that you go out to shoot, go back to a place you visited in a different season, or walk the opposite way when you go out the door. New conditions or new places spark new ideas.

7 - 4 Tips to Get You Out of Your Comfort Zone for Photographic Inspiration

4. Change equipment

I already mentioned focal length, but the lens is not the only thing you can change to challenge yourself. Try a different camera. I’m not suggesting that you go out and buy an extra camera. You can try renting for a day or exchange cameras with a friend. You can switch from your camera to your phone and vice-versa. The composition is different when shooting full-frame and crop-sensor. It’s challenging to photograph a maximum amount of photos with a film camera instead of the (almost) limitless and immediate result of digital. However, it doesn’t matter what you use (more or less professional than your regular equipment), what matters is that it’s different.

8 - 4 Tips to Get You Out of Your Comfort Zone for Photographic Inspiration

Conclusion

There are many ways to push your photography and creativity further. Try some of these tips or come up with some of your own. See where it takes you. One last piece of advice: don’t be afraid of doing bad photos. There is a reason why your comfort zone IS your comfort zone. You’ve mastered it, you like it, and you create great images. Expect that you won’t achieve the same results when you change photographic genres – that’s all the more reason to try it!

The post 4 Tips to Get You Out of Your Comfort Zone for Photographic Inspiration appeared first on Digital Photography School. It was authored by Ana Mireles.


Digital Photography School

 
Comments Off on 4 Tips to Get You Out of Your Comfort Zone for Photographic Inspiration

Posted in Photography


The Magic of Creativity Rarely Happens in Your Comfort Zone

17 Sep

You’re not likely to ever excel at anything unless you push past what you normally do and exit your comfort zone. That’s unless you’re the type of person who’s not comfortable unless they are constantly taking risks.

Python in a Pit © Kevin Landwer-Johan - The Magic of Creativity Rarely Happens in Your Comfort Zone

Becoming more creative with photography requires you to seek out new subjects. It means trying different techniques. It demands you tackle the difficult and uncomfortable at times.

Most creatives seek to improve on what they have already achieved. This can mean photographing what they normally photograph different and better. It could mean working in whole other genre of photography altogether. Both approaches are challenging and vulnerable to failures.

How can you step out beyond your comfort zone and experience real magic in creativity?

Flag performance at a street parade - The Magic of Creativity Rarely Happens in Your Comfort Zone

Watch Your Attitude

I believe the biggest struggle many people have in growing creatively is that they can be too hard on themselves. When they try something new they set themselves up to fail because of negative thought patterns. Sound familiar?

Taking a step outside your creative comfort zone with a positive attitude is the most important factor towards your success. Acknowledging to yourself that what you are doing is new and difficult and that your initial result will probably suck, is important. If you are broken hearted at your photos the first time you try a new aspect of photography, you will never grow. You will not find the magic.

You need to press on and make the most of what you find difficult to help you improve.

Karen pipe smoker - The Magic of Creativity Rarely Happens in Your Comfort Zone

Commit to Learn

Studying the new technique or subject you’re challenging yourself with is a positive step towards creative magic. If you launch headlong into something new without knowing much about it you will most likely fail. I know this to be true from far too much personal experience.

Taking time to study a little more, step by step, you can become an expert. When I first worked in a photography studio with subjects, lights, props, and backgrounds I could manipulate it was all new to me. I had come from working as a newspaper photographer where I often had no control over these things. I didn’t know what to do.

Initially, I wasted a lot of Polaroids, (instant photos which were used to preview the setup, now we chimp our LCD screens).

Then, I found a gem of a book in the local library, (yes, this was when the internet was still a baby.) Light Science and Magic was a superb teacher. This book taught me so much of how to control the lighting. I am also a big fan of Irving Penn and love his still life arrangements. I have always learned a lot by studying the work of high achieving photographers.

Studio photos of food and cocktails - comfort zone

Creating Photos for Someone Else

The main difference between amateur and professional photographers is not that pros take better photos and earn a living doing so. The most significant difference is that professional photographers must consistently produce photos that fit a brief and please someone else, not just themselves.

Photographing what you are passionate about is meaningful for enjoyment and creative growth. Photographing something you have no interest in is often a huge challenge.

When I first started work at the newspaper I learned very quickly that I was well out of my comfort zone. I was having to not only talk to strangers but to go back to my picture editor with publishable photos of those strangers. I was painfully shy and it was so difficult, but I wanted to keep my job, so I took on the challenge.

Later came other challenges like photographing sports events and other action photo situations I had no experience with. The opportunity to attend top international matches was a good incentive. I learned because I had to and I came to love it.

one day cricket action- comfort zone

Role-Play Being a Pro

You don’t need to get a job working for a newspaper. These photography jobs are few and far between nowadays. You can role play effectively and imagine you are a pro.

Set yourself assignments and treat them as though you are working for a newspaper or magazine. Better still, have someone else task you assignments of their choosing. This way you will begin to photograph subjects and in situations, you may never have chosen.

You will discover that you love some of these assignments as you are being stretched beyond what you normally do. As you are outside your comfort zone you will have to think and behave differently.

Set deadlines. Approach this exercise realistically. If someone else has set your assignment, have them review your photographs with you and make a selection.

By role-playing like this, you may have the advantage of rephotographing the same subject if you can see room for improvement. This is a luxury I did not often have when working at the newspapers.

Forest Waterfall - comfort zone

Photographing What is Familiar

I am not advocating only photographing new and different things with techniques you’ve never used. Making great photos of what you love can be equally challenging.

Taking pictures of what you love over a long period of time your photos may begin to lack flair. This is common. If you are truly passionate about what you are photographing you need to press yourself to remain creative.

We are often at the local markets in Chiang Mai taking photo workshops. I told myself after we’d been going there for about a year that I need to come away with at least one new portrait each time. Not of the same people who I knew and were easy to photograph, but of different people in different locations at the market.

I’d passed this guy many times and felt a little intimidated by his tough looking exterior. One winter’s morning he was standing in the sun outside his flower shop watching the world go by. The light was fabulous and he had on a cool beanie. I had to ask him. Turns out he was happy to pose for me. I took him a print of this photo next time we were there and now he often gives my wife or our customer’s flowers when we are passing.

Street portrait of a Thai man - comfort zone

Photographing People

I have become pretty comfortable photographing people, but still, find it challenging. Like with the tough looking flower seller, initial contact and relating to a stranger is not easy for most people. If you step out and ask often the results can be most rewarding.

Photographing people you know can pose other problems. My friends got engaged recently and asked my wife and me to do a photo session for them. My challenge was pressure I put on myself to excel. I wanted to bless them with photos that made the event special.

Working with my wife is always enjoyable. We work well together. I found I could capture different moments, especially when their attention was on her. My expectations and desire to do well for my friends was my biggest challenge. My fear of failing was my biggest hindrance.

Once I relaxed and enjoyed myself as much as they were I was able to take some photos that they told us later were their favorite image of themselves they’ve ever had. This is feedback every portrait photographer loves to hear.

Thai woman and white man in the street - comfort zone

Two New Personal Photography Challenges

My wife and I recently moved to a new home in the countryside. I have never been particularly interested in landscape photography, but now I need to be.

We are running a homestay and need to show off the wonderful environment so people will want to come and stay here. This means I must make the best landscape photos I can. It’s good to be working with a subject that I have not cared for much and to have a reason to be taking these types of photos.

My second challenge is to use my phone for more photography. I am comfortable with my camera, thank you. I have had little interest in using my phone except to take the occasional snapshot. Currently, I think I am using my phone more than I am using my camera.

Bicycle on a road in the rice field - comfort zone

I am using the panorama mode frequently.

I ride my bicycle in the surrounding region each morning. But I don’t like carrying a camera when I ride so I am using my phone to photograph the local landscape.

Part of my motivation to take up the challenge of photographing with my phone is that this is how most photos are being made in the world now. I need to know more about it so I can teach it. The best way for me to learn is to just do it.

The limitations I have with using my phone are a big challenge. I must innovate and be creative to capture the photos I want. Now I am also beginning to use my phone to photograph more than only landscapes. As the challenges continue I hope my creativity continues to grow.

Thai rice landscape - comfort zone

Be encouraged, find something new that’s not easy for you. You will only reap the rewards if you step outside of your comfort zone and try. Tell me in the comments below how you are getting on with your challenge, I’d love to know.

The post The Magic of Creativity Rarely Happens in Your Comfort Zone appeared first on Digital Photography School.


Digital Photography School

 
Comments Off on The Magic of Creativity Rarely Happens in Your Comfort Zone

Posted in Photography


Why Getting Outside Your Comfort Zone is Good for Your Photography

23 Feb

Getting outside your comfort zone is good for your photography. The single, biggest factor that has helped me to improve my photography was becoming comfortable with being uncomfortable. This has been across all areas of photographic work, from weddings, corporate through to my absolute passion, travel photography.

googletag.cmd.push(function() {
mobile_slots.push( googletag.defineSlot( “/1005424/_dPSv5topic-rhs(300×250)”, [300, 250], “pb-ad-124309” ).addService( googletag.pubads() ) ); } );

Getting Outside Your Comfort Zone 15

Let me explain. From the very beginning I had the same concerns as many beginners in photography, where do I even start? I had built-up an imaginary wall about how I would understand the theory and mechanics of the photographic process as well as being creative in how I approached my photo work. All questions that only served to stop me from getting out there and experimenting so that I could learn by doing and implementing the theory I had poured over so many times.

The moment I let go of concern over the results I would achieve, and more importantly, what other people thought of my images, was the moment I felt free to experiment and make mistakes. That’s where the real learning happens, as I soon discovered.

Play the long game plan

I also realized early on, that becoming proficient in photography is a long game plan. It doesn’t happen overnight. It also requires effort and focus to be able to approach each challenge with a willingness to keep trying until understanding and outcome produce results that meet expectation. After my first year of taking photos, I had improved, and that improving continues to this day. Why? Because I continue to push myself outside of my comfort zone to improve as an image maker.

There is nothing better on the road to discovery and learning than feeling like you have a good understanding of what you are doing while enjoying the breakthroughs of understanding. And ultimately, capturing the images you set out to. However, it is important to remember that staying comfortable in what you are doing and how you are doing it, will reduce your growth and further understanding of different types of photography or more specifically, different approaches.

Getting Outside Your Comfort Zone 20

A few years ago this theory was clarified for me while I was working in Antarctica. We were fortunate to have two National Geographic Photographers on the ship with us who were generous enough to do a couple of presentations during days at sea. One point, in particular, helped me to understand in a different way, what I had already been doing since the early days of my image making. And the beauty is, you can apply this approach to most scenarios, be it landscape, travel, wedding, portrait, or commercial photography.

The 80/20 rule

Devote 80% of your image making time to getting the images you set out to do. Play it safe to a certain degree to be sure you come home with your planned shots. Then for the remaining 20% of the time, throw caution to the wind and experiment with no expectation of any outcome. If you think about this approach, 20% of your image making time adds up to quite a bit. Pushing yourself with the 20% will not necessarily lead you to capture amazing new images every time, but it will allow you to have little discoveries along the way that can add up to thinking of new ways or approaches for the future.

Experimenting with shutter speed, white balance, aperture, ISO, focal length, and movement are all options that can result in new ways of doing and seeing things. Ultimately, this will help you to understand the best approach to a given scenario with controlled, positive results.

Getting Outside Your Comfort Zone 10

The list of possibilities is endless. But without regard for the outcome, you are left with a more innocent, concern-free approach to getting creative and pushing the limits of your knowledge and current space of understanding.

Side benefits of learning outside your comfort zone

The side benefits of further learning of my chosen craft, even if they seem unrelated, have also helped with my ability to shoot under pressure. In regards to my travel photography, I have attributed my ability to get solid images under challenging circumstance with limited time, to having shot and assisted on a lot of weddings. For me, weddings have proven to be the ultimate space for growth with my image making ability, and it is easy to see why.

When shooting weddings you have no control over weather, lighting, time of day, or the environment you are shooting in. You have the responsibility of capturing images in often very challenging environments. It also means you are shooting a lot, with purpose, which I’ve always been a big advocate of for helping improve your photography.

Now I’m not suggesting to go out and shoot a few weddings just to help improve your photography in other areas. Photographing weddings is something you have to want to do. You especially have to respect the responsibility that comes with taking on such a big day in people’s lives. You have no second chance and have to be at the top of your game to consistently get it right. Over time, though, assisting or working as a second shooter for an established wedding professional would be a good way to test the waters to see if this is an area of photography you would like to pursue.

Getting Outside Your Comfort Zone 23

Some practical exercises

You can, of course, replicate these same scenarios without the time pressure or expectation of outcome only a client can have.

An option would be to visit and photograph the interiors of some local churches to gain an understanding of what it means to shoot in low light. Then slowly walk from the inside of the church to the outside (assuming this is during daylight hours) and adjust your exposure to achieve correctly exposed images over what will be a massive change in light levels. This is an extreme example but there will absolutely be situations in the future where the learnings gained from this type of exercise will be put to good use.

Getting Outside Your Comfort Zone 02

Getting Outside Your Comfort Zone 01

Another great exercise is to visit a city (which could be yours) and set up your camera just before sunset when there is still plenty of light. Then slowly take images of the same scene over the next two hours as the sun sets and the lights come on in the city. The best option for this exercise is to have your camera on a tripod so the scene remains the same and you are able to get a solid idea of how the changing light conditions affect your results.

This exercise not only helps you to understand the process of changing exposure on your camera but gives you a solid idea of the mix between natural and man-made light during the change over from night to day.

Getting Outside Your Comfort Zone 06

Getting Outside Your Comfort Zone 07

Getting Outside Your Comfort Zone 08

Getting Outside Your Comfort Zone 09

Getting Outside Your Comfort Zone 11

Visit your local beach maybe an hour and a half before sunset and take images during the changing light conditions. You will see a number of things during this experiment as there are big changes in lighting and color. You will have a greater understanding of what you need to do to continue making correctly exposed images based on the changing lighting conditions which would be different to the city example I gave earlier. Look closely at the changing color and corresponding white balance and the effect it has on your images.

To take this a step further, take your kids or some friends down to the beach and use them to experiment with taking portraits at this time of day.

Getting off Automatic

If you are currently using your camera on an automatic setting, you can start to experiment with a more manual approach to your image making. Let’s assume for a moment, you are using automatic settings for everything on your camera, aperture, ISO, and shutter speed.

Play with aperture

One option would be to experiment with Aperture Priority (setting your camera so you take control of the aperture). You can experiment and start to see what different effects you will have in your images by using specific apertures. Set up an object, focus on it and then cycle through all of the different apertures to see what happens. This is a fantastic exercise to apply to portraiture so you have a better understanding of what results you will achieve based on your chosen aperture.

Getting Outside Your Comfort Zone 31

85mm lens on a full frame camera, ISO 2000, 1/50th, at f/18.

Getting Outside Your Comfort Zone 32

Shot with an 85mm lens on a full frame camera, ISO 2000, 1/320th, at f/8.

Getting Outside Your Comfort Zone 33

85mm lens on a full frame camera, ISO 2000, 1/2500th, at f/2.8.

Play with focal length

Changing focal lengths on a fixed subject is also a great exercise to help develop your learning. The portraits below are perfect examples of a fixed subject with fixed camera settings. The only change was moving backward while zooming in (going to a longer focal length) the subject. The difference between the resulting images is clear.

Getting Outside Your Comfort Zone 35

24mm lens on a full frame camera, ISO 1000, 1/250th, at f/5.6.

Getting Outside Your Comfort Zone 36

50mm lens on a full frame camera, ISO 1000, 1/250th, at f/5.6.

Getting Outside Your Comfort Zone 34

210mm lens on a full frame camera, ISO 1000, 1/250th, at f/5.6.

Play with shutter speed

The same can be done with shutter speed. A popular subject for longer exposures is waterfalls, allowing you to blur the water to achieve a misty look. Keep in mind, a tripod is essential for this type of image. When you have time, find a local waterfall or flowing stream (preferably on an overcast day). Set up your camera on a tripod and cycle through the shutter speeds to see the differing results you will achieve based on long and short exposures and the effect it has on the water.

Getting Outside Your Comfort Zone 14

Practice, practice, practice

The above exercises may seem a little boring, but it is only through continued practice that you will understand with confidence, what you need to do to achieve the images you want. Over time, and through experience, it becomes an instinctive response to what is in front of you based on knowing, or having an idea of what result you are after.

There are many benefits to exploring locations in your area. You are able to revisit them on a number of occasions during different weather, times of day, and different seasons. You can really test yourself and build your understanding and experience in dealing with these differing light and brightness scenarios.

Travel photography

The other area where you may have limited time and no control over the variables earlier mentioned is travel photography. Often when traveling, these limitations will leave you feeling a level of pressure to get the image. It is the practice, understanding, and development you implement before you go traveling that will help you capture images with confidence, even when the time of day and lighting are not at their best.

Getting Outside Your Comfort Zone 29

Getting Outside Your Comfort Zone 30

For example, if you’re traveling to Africa to photograph wildlife, you’ll be using long lenses a lot more than if you are doing a church tour of Italy where wide lenses would often be the order of the day. The important thing here is to push yourself and get out there as much as possible to replicate, as best you can, the type of shooting you will be doing in order to build that skill set before you travel.

Getting Outside Your Comfort Zone 26

Getting Outside Your Comfort Zone 25

Challenges of travel

Travel also often leaves you tired due to the realities of what you need to do to get to your location or full days trying to see and experience as much as possible. Try to be as healthy and fit before you go in order to maximize all the photo opportunities traveling can bring. There is nothing worse than coming home feeling like you have missed opportunities due to needing to rest or not using your time efficiently.

Successful travel photographers are always well-researched and prepared to go as much as possible. The know that they need to maximize their time in order to come home with a full body of work that will help justify all that goes into a travel gig. This usually means starting before sunrise and working through to night time to capture specific locations in all their various forms.

This has been the case for me on many occasions. When working in Antarctica and South Georgia, we had a lot of exploring time in the zodiacs (small inflatable boats). On one particular occasion, we were advised of a one hour cruise which turned into 3.5 hours due to the many photo opportunities we had. It was a cold day and snowed the entire time. That added to the challenge of shooting, often with a long lens from a moving craft amongst 10 other people also working hard to get the shot in the confines of a small boat. Once we were all loaded safely back on board, almost all participants went inside immediately, either for a warm shower or warm drink, and rightly so, it was very cold.

Getting Outside Your Comfort Zone 17

Getting Outside Your Comfort Zone 21

Another photographer and I stayed outside the ship to see if there were any other photo opportunities that presented themselves before we pulled anchor and continued on our way. The images above were just a few that made the effort completely worthwhile. We pushed ourselves and were rewarded with many great images which no one else captured. We were only outside for a further 30 minutes, however, the response from fellow passengers upon seeing our images confirmed we had made the right decision to continue pushing on and taking advantage of the conditions in front of us. This has been a consistent factor with all of my photography based trips over the years.

When you travel, you are surrounded by so many photographic opportunities. Remember to take full advantage of these and everything that travel offers. Of course the most important thing is to enjoy yourself, however, if images are a top priority, be sure to take advantage of the time you have and be out and about as much as possible.

Getting Outside Your Comfort Zone 40

Conclusion

It is also worth researching other photographers to see what they have done in the same locations you are planning to visit. Look at what you like and don’t like, then try and photograph the same scene in a way not yet done by others.

Growth in photography, as with most things, comes from pushing yourself to improve, going beyond your comfort zone and identifying areas you can experiment with and learn from.

googletag.cmd.push(function() {
tablet_slots.push( googletag.defineSlot( “/1005424/_dPSv4_tab-all-article-bottom_(300×250)”, [300, 250], “pb-ad-78623” ).addService( googletag.pubads() ) ); } );

googletag.cmd.push(function() {
mobile_slots.push( googletag.defineSlot( “/1005424/_dPSv4_mob-all-article-bottom_(300×250)”, [300, 250], “pb-ad-78158” ).addService( googletag.pubads() ) ); } );

The post Why Getting Outside Your Comfort Zone is Good for Your Photography by Damian Caniglia appeared first on Digital Photography School.


Digital Photography School

 
Comments Off on Why Getting Outside Your Comfort Zone is Good for Your Photography

Posted in Photography


Get Outside Your Photography Comfort Zone to Learn and Grow as a Photographer

06 Sep

As photographers, we usually start out photographing everything and anything. All subjects are game as we explore our new found passion. When we grow and get more serious about our craft, we often try to find our unique place in the industry. Our niche, our comfort zone, where we can specialize and make a name for ourselves.

This is a good thing! A photographer that has a unique niche is more memorable than a photographer that covers every subject. It’s better to be the dog portrait guy, or the black and white waterfall girl, than to be forgettable.

Convict Lake California by Anne McKinnell

One of my favourite things to photograph: water scenes at twilight.

But just because you’ve specialized in a particular area of photography doesn’t mean you can’t continue to explore your craft. There is much to be learned from photographing other things, and applying any lessons learned to your niche. In fact, there is much you can learn from photographing things that you specifically don’t like to shoot.

Get out of your photography comfort zone

So I challenge you to come up with a short list of things you don’t like to photograph, and then give them a try. Remember, you don’t have to be good at it. Don’t worry about trying to create a masterpiece. You’re not going to show these photos to anyone. But, by getting outside of your comfort zone and giving yourself the permission to play, you’re bound to learn something along the way.

Elephant in Tarangire National Park, Tanzania by Anne McKinnell

Applying lessons learned about shadow and light in portrait photography to wildlife photography.

Afraid of portraits? Photograph one

For example, when I did this exercise, the thing on the top of my list was portraits. I’ve always been somewhat terrified of doing portraits! Also on my list was sports, cars, and architecture.

It was serendipitous when a friend of mine asked me to photograph her newborn. As the terror swept through me, I remembered my list and realized I should take the opportunity. Of course I advised her to hire a real newborn photographer since I had no experience in this area. But I still tried, and I made some images that were pretty good. But more importantly, I learned some things that I could apply to the areas of photography I was more interested in, like landscapes and wildlife.

Working inside was new to me and since I didn’t own any lights, I worked with natural light from the window. As I positioned my subjects around the room, I noticed how the light fell on their faces, and learned to pay very close attention to the direction of the light. I also noticed how important it was not to have any distracting things in the background, which also applies to many other areas of photography.

Great White Egret by Anne McKinnell

Using rim lighting and non-distracting backgrounds (learned doing portraits) in wildlife photography.

Try sports photography

The second thing on my list of things I wasn’t interested in photographing was sports. So I headed up to the local university where there is always something happening on a weekend, and found a rugby game to photograph.

I learned something very important that day. You see, I don’t know a thing about rugby, and it quickly became obvious that I couldn’t capture a special moment, because I had no idea when it was going to happen. I had to sit and watch, and try to figure out how the game worked, and only then did I have a chance.

I didn’t make any good images that day, but I sure learned a lesson that I apply to wildlife photography all the time. I sit and watch, and learn the behaviour of the animals before I try to photograph them. That way I can anticipate what is going to happen, and come away with a photograph that captures a special moment in time.

Lion and cub at Ngorongoro Crater, Tanzania by Anne McKinnell

Anticipating the special moments in wildlife photography.

How about architecture photography?

Another thing on my list at the time I did this exercise was architecture, but after playing with it for awhile I discovered a new passion. Now I love photographing architecture. One thing I learned is that most architectural subjects are inherently symmetrical, and while the rule of thirds works, symmetrical compositions work really well too. Now I apply this principle to other subjects that are inherently symmetrical as well.

Yucca at White Sands National Monument, New Mexico by Anne McKinnell

Using a symmetrical composition in landscape photography.

Challenge yourself! Give yourself time to play! Remember that this is an exercise just for you, to help you explore your craft and grow as a photographer.

Exploring subjects is just one way to accelerate your photography learning curve. (It’s a great way of finding your niche too!) For more ways to speed up the learning curve, check out my eBook “8 Ways to Accelerate Your Photography.”

googletag.cmd.push(function() {
tablet_slots.push( googletag.defineSlot( “/1005424/_dPSv4_tab-all-article-bottom_(300×250)”, [300, 250], “pb-ad-78623” ).addService( googletag.pubads() ) ); } );

googletag.cmd.push(function() {
mobile_slots.push( googletag.defineSlot( “/1005424/_dPSv4_mob-all-article-bottom_(300×250)”, [300, 250], “pb-ad-78158” ).addService( googletag.pubads() ) ); } );

The post Get Outside Your Photography Comfort Zone to Learn and Grow as a Photographer by Anne McKinnell appeared first on Digital Photography School.


Digital Photography School

 
Comments Off on Get Outside Your Photography Comfort Zone to Learn and Grow as a Photographer

Posted in Photography


Photographer captures the ruin of Fukushima’s exclusion zone

14 Jul

Inside the Fukushima exclusion zone

An abandoned supermarket in Fukushima. Photo by Keow Wee Loong

Much of the area around Japan’s Fukushima Daiichi Nuclear Power Station has been closed to the public following the disaster that struck the region over five years ago. The earthquake and subsequent tsunami of March 11, 2011 caused a meltdown at the plant, and some 170,000 people were evacuated immediately from the Prefecture. The area closest to the plant has remained closed since then as the lingering radiation contamination continues to pose a health risk, but one curious photographer would not be deterred.

Keow Wee Loong, a Malaysian photographer currently based in Thailand, snuck into the zone with his fianceé to document the current state of Fukushima’s abandoned towns – and what was left behind. From a supermarket picked over by wild animals, forgotten laundry at a laundromat and a wall calendar forever frozen on March 2011, his photos show the eerie remains of daily life brought to an abrupt halt.

You can see more of his Fukushima photos and his photography on his Facebook page.

Inside the Fukushima exclusion zone

Structure collapse resulting from the magnitude 9.0 earthquake. Photo by Keow Wee Loong

Inside the Fukushima exclusion zone

Abandoned video rental store. Photo by Keow Wee Loong

Inside the Fukushima exclusion zone

CDs and videos still on the shelves. Photo by Keow Wee Loong

Inside the Fukushima exclusion zone

Merchandise litters the floor of an abandoned bookstore. Photo by Keow Wee Loong

Inside the Fukushima exclusion zone

Overgrown parking lot of an abandoned convenience store. Photo by Keow Wee Loong

Inside the Fukushima exclusion zone

Residents left laundry and 100 yen coins behind in this Fukushima laundromat. Photo by Keow Wee Loong

Inside the Fukushima exclusion zone

A calendar page showing the month of the disaster. Photo by Keow Wee Loong

Inside the Fukushima exclusion zone

A mall in the town of Tomioka. Photo by Keow Wee Loong

Inside the Fukushima exclusion zone

An abandoned supermarket that has likely been visited by wild animals in the area. Photo by Keow Wee Loong

Articles: Digital Photography Review (dpreview.com)

 
Comments Off on Photographer captures the ruin of Fukushima’s exclusion zone

Posted in Uncategorized


How to Use the Zone System to Learn about Metering and Exposure Compensation

16 Jun

When you first move off auto, you realize how much control you have over your camera. You get to choose the aperture, shutter speed, ISO, and be able to manually select the autofocus point, among many other things. In short you get control over everything!

You also get full control over the exposure, or brightness, of the image. You decide you where to set the exposure for each image – something that the camera does not always get correct. The reason the camera doesn’t get it right all the time is because the in-camera light meter doesn’t always know how the brightness level of the subject. What tricks the light meter is bright or dark tones.

So how do you take back control of the exposure, and compensate for the camera’s errors? The process of correcting your exposure is referred to as Exposure Compensation. For more on that read: How to Use Exposure Compensation to Take Control of Your Exposure. However, before you add any exposure compensation, you first need to know how much to compensate, and understand exactly what your camera’s light meter is doing. This is why learning how to meter is important. If you are unfamiliar with the term metering, it is the process of measuring light values.

The first thing to grasp when is how your camera’s light meter sees the world. Put simply, it sees everything in grayscale. This means that all your camera sees is a world of tones; a colourless world. It cannot differentiate trees from people, people from snow, etc. (Although more modern in-camera light meters will now also recognize colour, the same basic principles apply.)

The other critical element to know is that your meter wants to make everything middle-gray, commonly referred to as 18% gray. Remember that! Right it down! Keep it with you in your camera bag until it’s firm in your memory! It’s very important!

Everything you need to know about doing exposure compensation correctly hinges off 18% gray. If your scene has a lot of bright areas in it, such as snow or sand for example, your camera will want that to be 18% gray. If you’re photographing a person in dark clothing, your camera will also want to make that 18% gray. Your camera doesn’t know your subject is actually meant to be black, nor does it know that all of that white in the viewfinder is actually snow. Leaving your camera’s meter at zero, or Meter as Read (MAR), can cause your photo to be over or under exposed.

Here is an illustration of what your camera meter will do. Tones will end up 50% grey.

Here is an illustration of what your camera meter will do. All tones will end up 18% or middle gray.

So how does knowing how your camera will meter, help you to decide how much exposure compensation to apply? This is where knowing a little about the Zone System can come in handy.

What is the Zone System?

The Zone System was developed by the late Ansel Adams and Fred Archer. In essence, it was a system used to meter and continue on in the dark room when developing images. I’m not going to discuss the Zone System in its entirety – that could be something for a future article – but at its core, the Zone System will greatly help you decide how much exposure compensation to add or subtract.

The Zone System

The Zone System

Above is an illustration of the Zone System. In it are 11 zones, denoted by Roman numerals. Here is a quick rundown of examples for each Zone:

  • Zone 0: Pure black, no detail. This is would be the edge of a negative film.
  • Zone I: Near pure black with slight tonality, but no detail.
  • Zone II: This is the first Zone where detail starts to show; the darkest part of the image where detail is recorded.
  • Zone III: Average dark materials.
  • Zone IV: Landscape shadows, dark foliage.
  • Zone V: Middle-gray, what your light meter sets to.
  • Zone VI: Average Caucasian skin tone.
  • Zone VII: Very light skin; shadows in snow.
  • Zone VIII: Lightest tone with texture.
  • Zone IX: Slight tone without texture, (e.g., glaring snow).
  • Zone X: Pure white with no detail. This would be light sources, or reflections of light sources.

This next piece of information is the other piece to the exposure compensation puzzle:

Each Zone is separated by exactly one stop of exposure.

Now that you have the information, how do you use it?! You know that you camera is metering for Zone V, or middle-gray, now consider your subject. How light or dark is it? If you were photographing a bride’s white dress, that would be very bright with texture; so going by the chart that would fall into Zone VII or VIII, which makes the exposure compensation required for correct exposure PLUS two or three stops (the difference between Zone V and where your subject should fall).

RV-02383-slideshow

Shot at zero exposure compensation. Black cat is gray or Zone V.

RV-02383-slideshow (1)

Shot at -2 stops black cat is now black or Zone III.

As an experiment, try photographing a piece of plain white paper. First, make sure that there is no exposure compensation added – your meter should be in the middle. Take a photo. Next, add +2-stops of exposure compensation. This will bring your exposure to Zone VII. Then, take another photo. Notice the difference? The first image should be very close to middle-gray, or Zone V, where the last image should be bright white, but still show detail in the paper.

External Light Meters

Another tool that may be helpful to you, is an external handheld light meter. They work the same way as your camera’s light meter in that they meter for middle-gray, but they have the added advantage of being to reading what’s known as Incident Light: that which is falling on the subject, not reflected from it. Your camera’s meter is a reflected light meter; it reads the light that has been reflected or bounced off your subject. This may seem obvious, but there is a big difference between incident light and reflected light. Reflected light is greatly affected by tone – the darker your subject is, the less light that will be reflected, whereas the brighter your subject is the more light that will be reflected. However, the incident light – or light coming from the light source – will remain the same no matter what the tones are in your subject. By using an external light meter, you are reading the light directly from the source; unaffected by the tone of the subject.

However, do be careful when you are using an external light meter that you read the incident light from the subject’s position. You may be in the shade, for example, and your subject in the sun. If you were to read the incident light for your position,you would be getting a reading for the shade area, and not the sun, which is the light that’s falling on your subject!

This is an external light meter. It's a Sekonic L-358, and is able to meter ambient light but also meter flash.

This is an external light meter. It’s a Sekonic L-358, and is able to meter ambient or natural light as well as flash.

Summary and application

Now that you know what your light meter is doing, and how to correct it with exposure compensation, you are on your way to getting more consistent and correct exposures.

Before you press the shutter button next time, do consider what the tones in your scene are like. Are there lots of brighter tones, or more darker tones? If your frame has more brighter tones, the exposure compensation will need to be more on the plus side to render them correctly. However, if there are more darker tones, your exposure compensation will be more toward the minus side of your meter. If you feel there are equal amounts of bright and dark tones, you may find that you don’t need to add any compensation at all.

teaching-eg-028-slideshow

Snow shot at zero exposure compensation is gray, or Zone V.

teaching-eg-028-blog1100

Snow shot at +2 is now white with detail or Zone VII.

If you’re ever unsure of how much exposure compensation to add or subtract, take a test shot at zero, or in the middle. This will help you decide the direction in which you need to go.

googletag.cmd.push(function() {
tablet_slots.push( googletag.defineSlot( “/1005424/_dPSv4_tab-all-article-bottom_(300×250)”, [300, 250], “pb-ad-78623” ).addService( googletag.pubads() ) ); } );

googletag.cmd.push(function() {
mobile_slots.push( googletag.defineSlot( “/1005424/_dPSv4_mob-all-article-bottom_(300×250)”, [300, 250], “pb-ad-78158” ).addService( googletag.pubads() ) ); } );

The post How to Use the Zone System to Learn about Metering and Exposure Compensation by Daniel Smith appeared first on Digital Photography School.


Digital Photography School

 
Comments Off on How to Use the Zone System to Learn about Metering and Exposure Compensation

Posted in Photography