RSS
 

Posts Tagged ‘yourself’

Treat yourself 2017: the ultimate holiday gift guide for that special person (you)

20 Nov

2017 Treat Yourself Buying Guide

The holidays are all about giving, so why not give back to the most important photographer in your life? That’s right, I’m talking about you.

At this time of year there are plenty of gift guides out there geared toward buying for others, but at the end of the day, your own photographic spirit needs nurturing. Also, camera gear can be pretty pricey and no matter how much they love you, your significant other/siblings/parents/friends might not be able to spring for that $ 1600 item on your wish list.

In this guide, we’ve rounded up a list of gear designed to pamper you and your creative spirit. From the ultimate pocket compacts, to nicer ways of carrying your camera, to the perfect rugged, portable hard drive – we’ve got you covered.

Peak Design Everyday backpack, 20L black

Peak Design Everyday backpack, 20L | $ 260 | PeakDesign.com

Treat yourself to one of the most technical and well-thought-out camera backpacks on the market: the Peak Design Everyday backpack. It comes in both a 20L and 30L capacity.

Weather-proof with plenty of ways to expand its carrying capacity including luggage straps, this bag is also real slick-looking. We’re big fans of the origami-style Flex-Fold dividers used to organize the bag’s interior, and we also appreciate the many interior pockets.

DJI Mavic Pro Fly More Combo

DJI Mavic Pro more combo | $ 1300| DJI.com

There are smaller, cheaper drones than the DJI Mavic Pro out there, (like the DJI Spark) but we recommend treating yourself to the Pro because it offers a great balance of portability, features and image/video quality. The Mavic Pro can shoot 12MP Raw files and 4K video and offers 27 minutes of flight time, 3-axis gimbal stabilization and can fly at up to 40 mph. It’s also pretty easy to pick up and start using, especially in beginner mode, though there is a slight learning curve.

In a sense, it’s the perfect drone for the first-time-flyer, long-time-photographer who wants to shoot more than HD video or JPEGs with their drone. We recommend you spend the extra cash on the controller – using your cellphone alone provides a very limit flight range and mediocre flight experience. But there are few things better for changing up your photographic perspective than owning a flying camera.

Affinity Photo for desktop

Affinity Photo for desktop | $ 50 | Affinity.Serif.com

Affinity Photo for desktop is a nifty piece of editing software that rivals Photoshop, all for a one time payment of $ 50.

In our review of Affinity Photo, we found the software more than capable at handling the majority of our re-touching tasks. Editing is mostly non-destructive and there are tools for batch processing, Raw processing, tone mapping, creating panoramas and focus stacking. Plus, if you’re coming from Photoshop, the learning curve is pretty shallow.

Affinity Photo for desktop is available for both Mac and PC.

Polaroid OneStep 2

Polaroid OneStep2 + i-Type film pack | $ 146 | PolaroidOriginals.com

The ultimate treat yourself: Take a step back from the technical nitty-gritty of this modern digital world and try shooting just for composition – it can do wonders for your creative spirit. To get into this mindset may we suggest one of the coolest instant cameras on the market, the Polaroid OneStep2?

The OneStep2 is a modern rebirth of the classic Polaroid OneStep. The controls on this camera are purposely limited: there’s a shutter button, a flash on button and a self-timer. It shoots Polaroid i-Type film which is similar to the original Polaroid 600 film and substantially larger than the Instax film offered by Fujifilm.

The camera itself is pretty affordable ($ 100), but it’s the film cost that’ll get you – at ~$ 2 a shot it’ll definitely have you shooting decisively. Nothing wrong with that!

Sandisk Extreme 500 portable SSD 500 GB

Sandisk Extreme 500 portable SSD 500 GB | $ 170 | ShopSandisk.com

This tiny portable SSD drive is both drop-proof and weather-proof and it weighs less than 80g. For the traveling photographer with limited space, it’s an invaluable piece of gear – one that won’t fail if dropped or knocked around. It also offers super fast transfer speeds and runs cool and quiet.

So treat yourself and your data to peace of mind and pick up what we consider to be the most sensible rugged hard drive currently on the market.

Ricoh Theta V

Ricoh Theta V | $ 430 | us.Rioch-Imaging.com

360-degree photos and videos are pretty darn cool and the technology required to make decent looking 360/VR content is finally coming down in price. Why not get in on the fun and treat yourself to one of the nicest stand-alone 360-cameras on the market in the form of the Ricoh Theta V?

We’ve found found the Theta V to be both easy-to-use and capable of impressive quality stills and video. It offers 4K video capture and shoots 14MP stills. Connectivity and audio capture have both been improved over the previous model, and the camera itself has a slick, Apple-like design.

Olympus Tough TG-5

Olympus Tough TG-5 | $ 450 | Get.Olympus.com

The budget compact may be dead but the rugged compact is still very much alive. And the Olympus Tough TG-5 is a DPReview favorite. We already recommended it as a great gift option for others, but if you’re into outdoor activities it’ll make a great compact option alongside your main camera. In fact, DPR’s Carey Rose deemed it the ‘best rugged compact you can buy right now,’ based on his shooting experience.

The camera offers a 25-100mm equiv zoom lens and the body is completely sealed, making it waterproof down to 50ft, drop proof from 7ft, crush proof up to 220lb and freezeproof to 14F. It also shoots Raw and is capable of surprisingly good image quality. Other features include 4K video capture and 20 fps burst shooting.

There’s something to be said for a go-everywhere-camera that you don’t have to worry about dropping, breaking or soaking. And there’s none we’d recommend over the Olympus Tough TG-5. Treat yourself!

Sony RX100 V

Sony Cyber-shot RX100 V | $ 950 | Sony.com

Speaking of compacts, the Sony Cyber-shot RX100 V is arguably the most advanced high-end pocket camera to ever exist, jam packed with a dizzying array of technology and features. The creme de la creme of small cameras, for many it is a want-to-have, not a need-to-have. To that we say… treat yourself!

It’s got a useful and sharp 24-70mm equiv. F1.8-2.8 zoom lens and can shoot at up to 24 fps with AF and auto exposure. Plus, it uses an impressive 315-point phase detect AF system. But that’s not all: it’s capable of outstanding 4K video and class-leading stills. The RX100 V also offers built-in Wi-Fi, a pop-up electronic viewfinder and a pop-up flash (read our full review).

The RX100 V has come down a tiny bit in price since launch, but if it’s still too expensive, you should consider some of the other also excellent, but more affordable RX100-series cameras.

Fujifilm X100F

Fujfilm X100F | $ 1300 | Fujifilm.com

We’ve enjoyed using every camera in the Fujifilm X100-series, and the X100F is the latest and greatest iteration. A beautifully-designed, retro-looking camera, the X100F offers a fixed 35mm F2 equiv. lens and tons of direct controls.

The X100F gains a higher-resolution 24MP sensor, an AF joystick and improved AF performance. We especially like the hybrid optical/electronic viewfinder. And unsurprisingly, we gave the X100F a gold award in our review.

In short, we think it’s among the nicest-designed compact cameras around and a great companion for travel, or documenting friends and family. So treat yourself to retro-elegance in this fixed-lens beauty.

Canon 85mm F1.4L IS USM

Canon 85mm F1.4L IS USM | Canon.USA.com | $ 1600

If you’re going to buy a portrait lens, you might as well buy one of the nicest primes released this year. We’re talking of course about Canon’s new 85mm F1.4L IS (see our sample gallery shot with it). Sharp, fast and stabilized, this lens is capably of seriously excellent image quality. It’s also dust and weather-sealed and features a 9-blade aperture.

At $ 1600, it’s priced pretty competitively, but Sigma’s stabilized 85mm F1.4 is also excellent, and somewhat cheaper at $ 1200.

Nikon D850

Nikon D850 | $ 3300 | NikonUSA.com

Perhaps you already shoot Nikon, but maybe you are invested in another DSLR system, or you shoot mirrorless. Regardless of the camera your are currently shooting with, we’d urge you to take a look at the best DSLR currently on the market: the Nikon D850. As we stated in its gold award winning review…

‘Offering an impressive 45.7MP of resolution, 7fps burst shooting, full-width 4K video and a focusing system derived from the flagship D5, it looks as though Nikon’s thrown just about everything they’ve got into the D850, and priced it well to boot. Competitors with similarly specced megapixel counts such as the Sony a7R II and Canon EOS 5Ds R may be cheaper at this point in their lifetimes, but they also fall short of the D850 in a number of ways that may make a difference in the way you shoot.’

If that doesn’t have you convinced the Nikon D850 is the ultimate treat yourself purchase, maybe our sample gallery will.


That’s all the self-gifting advice we have for you this year. We certainly don’t expect you to pick up everything on our list, but hopefully there is something here that’ll make you, or a special someone smile.

Articles: Digital Photography Review (dpreview.com)

 
Comments Off on Treat yourself 2017: the ultimate holiday gift guide for that special person (you)

Posted in Uncategorized


5 Questions to Ask Yourself to Help Improve Your People Photography

27 Jul

They say the lines on a person’s face can tell a thousand stories. Getting the photo that tells those many stories is the holy grail of photography. So what can you do to create standout people photography, especially if you don’t already know the person?

The approach that every people photographer takes is different, but below are five questions that all most will have asked themselves. Each photographer may answer the questions differently and yet still produce amazing results, as photography styles are all different, of course. To improve your people photography, take the time to look at these questions, and ask how they apply to you.

5 Questions to Ask Yourself to Help Improve Your People Photography

This is a photo of a Shaman from Malaysian Borneo. A connection had already been formed with this man after my friend told him I’d photographed for National Geographic. So we were able to use off-camera flash as he posed for us.

1 – Long lens or short lens?

The chances are when you start photographing people you’ll use a longer focal length. This can be true of people who you know, it’s especially true of people you don’t know. Photographers who enjoy street photography will tell you that using a 50mm lens is best. But the truth is that it really depends on the situation.

The long lens

This really means any lens over 85mm on a full frame camera. The nice thing about these lenses is that you can photograph from a distance that’s non-invasive. This is great because you don’t need to interact with the person you’re photographing, and this is terrible because you don’t need to interact with the person you’re photographing.

There are good reasons for and against direct interaction with your subject, something we’ll come to later. The reason you may come to use a long lens is that it compresses the scene, and allows you to focus in on the person, without outside distracting elements.

5 Questions to Ask Yourself to Help Improve Your People Photography

A longer lens was used in this photo, resulting in a simpler photo.

The short lens

This means lenses 50mm or below, with the 50mm lens being the street photographers go-to lens. Using a lens like this will force you to interact with the person you’re photographing on some level. It’s far better to build a rapport with the person than going with hit and run. Besides the advantages you will gain from building rapport, wider lenses also allow more context to be seen in the frame.

5 Questions to Ask Yourself to Help Improve Your People Photography

Using a wider lens can improve your portraits. This was photographed at 50mm, and more of the story behind the scene can be seen.

Now, of course, you can get prime or zoom lenses that are both long or short in focal length. When it comes to people photography, the larger aperture that prime lenses offer is a great advantage. Photographing people with prime lenses is, therefore, best and will to improve your portraits.

2 – What technique works best?

There are many different approaches to people photography to improve your portraits. As discussed above, choosing your lens will help. Applying techniques like bokeh can also get you better results. A few ideas that might help you are described here.

Shoot from the hip photography

This means leaving your camera at your hip and photographing without lifting your camera to your eye. How can this be good photography you may ask? Those experienced at this technique know how to use their camera, and can pre-visualise the result without needing to confirm it with their eyes.

  1. To take photos like this focus the lens to a set distance in front of you.
  2. Use an aperture of f/11 or smaller to have more depth of field.
  3. Choose an ISO that allows for a fast enough shutter speed to avoid motion blur.
  4. Make sure your camera isn’t too crooked, although some angles can work for this style of photography.
  5. Walk past the location you wish to photograph, and hit the shutter as you’re walking or with a brief pause.
5 Questions to Ask Yourself to Help Improve Your People Photography

This scene from the New York subway was photographed from the hip.

Use the light

The correct use of light will always improve your people photography. There are occasions when natural or artificial light can drastically improve your photo. At night you will need to look for a strong artificial light that people can stand near, during the day a shard of sunlight through a gap in the roof could also be used.

Here are some tips for using light to your advantage:

  1. Take up position away from the light source. You will want people walking towards you and into the lit up area.
  2. Wait until the magic moment comes, and the person’s face is well lit by the source of light.
  3. Have your camera focused on the area where the person will become lit up, and switch the camera to manual focus.
  4. Expose for the person’s face. This will mean the background appears very dark, or even black. The background may be at a -2 or -3 exposure value.
  5. Wait for people to walk into the lit up area, and then photograph them. You will need to wait patiently for people to walk by, into the correct area.
5 Questions to Ask Yourself to Help Improve Your People Photography

This man was lit up by artificial light, giving the photo a low-key, high-contrast look. Learning how to use light will improve your people photos.

Patience

Waiting for people to walk into the light isn’t the only time patience will be needed. You might have a natural frame like a doorway, so you will need to wait for someone to walk through it. This approach is not unlike fishing, and the time spent waiting for the right moment can be calming. The most important thing is to make sure your composition and camera settings are already set. Now it’s just a waiting game for somebody to walk past. Alternatively, you could speed things up by asking a friend to walk into the frame.

Forming relationships

5 Questions to Ask Yourself to Help Improve Your People Photography

The value of building relationships in photography is important, it will improve your portraits. This was the first time I saw the monk, Cheongsan. I didn’t interact with him at all, and this is the result.

The very best way to take photos of people, time permitting, is to form a bond with them. Taking the time to interact, and find out about the person you want to photograph will almost always give you a much better photo. The chances of them giving you permission to photograph will be much higher, and you can control the scene more.

Once you have permission you then have the choice between a staged or candid photo, since you can ask the person to ignore you when you are shooting. The chance to get a great photo that you can share with them can form a lasting connection with you as a photographer. The level of interaction also depends on time, whether it’s 30 minutes or several hours. The types of photos you may get if you’re able to revisit the person on several occasions will also improve dramatically.

5 Questions to Ask Yourself to Help Improve Your People Photography

The next time I saw Cheongsan, I made the effort to approach him. As a result, he let me take this photo and gave me a business card.

3 – Do you ask for permission?

When the person you’re photographing is your friend or a model, then in most cases asking permission would not be needed, and indeed might be strange to ask. Photographing a stranger is a different proposition though, so to ask or not to ask, that is the question.

There is no one correct answer to this conundrum, but certain situations may dictate your actions. If you want a truly natural moment, with no hint of a staged photos then you’ll want to try and avoid asking permission. The caveat to that statement is that if you have time to build a friendship with those people you wish to photograph in a natural way this is also possible, after getting permission to take the photograph.

5 Questions to Ask Yourself to Help Improve Your People Photography

The next time I visited Cheongsan, I had contacted him ahead of time and asked if I could take some photos of him. You will improve your people photography even more by setting up a shoot with someone.

Asking permission is the polite thing to do, and will often improve your photos. You need to have thick skin when asking people though, as asking on the spot will lead to many rejections. You need to ask yourself how you can form a relationship with someone even quickly to smooth this process, so you’re more likely to have the person say yes. Is the person you want to photograph a vendor, for instance. Perhaps you need to show some goodwill and buy one of the things they’re selling. If you’re in a country where English is not spoken asking permission may involve the use of body language. So perhaps learning a few polite words like please and thank you for going along with those non-verbal cues would be prudent.

The general rule on whether you should ask permission is up to you. When the photo you’re taking is in that person’s personal space, it’s much better to ask permission.

5 Questions to Ask Yourself to Help Improve Your People Photography

I loved this man’s glasses and general style, so I asked if I could take his picture. I got a posed photo, but loved the way he posed.

4 – Candid versus staged?

This is related to the question above, but you can get candid photos even after asking permission. If the quest here is for authenticity, can you capture a great moment with your camera that’s natural? This is the aim of many photographers. However, if your aim is to tell a story through a series of photos you should really try and get a mixture of both. On an individual basis, let’s weigh up both the pros and cons of candid and staged photos.

Candid captures

This requires a keen eye, sharp reflexes, but also absolute patience. When walking around taking photos you have to be hyper aware of your surroundings in order to get photographic moments that last the blink of an eye. Photographing split second moments means you need to be utterly absorbed in your surroundings, you need to become the surroundings.

You almost have to achieve an internal meditative state. Staying on the move means you are going to the moment of capture. This means you need to be very quick to catch it. Alternatively, you can find a location, compose your photo, and then wait for the right moment to come to you. This approach can take hours, so you will need a lot of patience!

5 Questions to Ask Yourself to Help Improve Your People Photography

This photo taken was taken in the harbor in Yangon. There is nothing staged about it, I just had to wait for the right moment.

Staged shots

Once the photo is going to be staged, you have a lot of control over how the photo is taken. At this stage the person you’re photographing has consented and will be actively involved in how the photo is produced. When done well, this often leads to a more striking photo than one produced candidly, you are in the realms of a visual storyteller.

The photograph could be a simple head shot, or a more complex photo when your model interacts with their surroundings. As the photo is staged, you can ask your model to stand in the best position for available light, and the background. Your model should be well lit, with the eyes illuminated by the light in the frame. If you have off-camera flash with you, you might even consider using this to really improve your portraits.

5 Questions to Ask Yourself to Help Improve Your People Photography

In this photo, I asked the lady if she would pose for me. After getting permission, I was able to set up the photo and use off-camera flash to light her face.

5 – Where should you take people photos?

The answer to that is anywhere there are people, which is more or less everywhere. You can also choose a location to visit such as a market. Below are a few ideas you can try, though you may have some better ideas specific to where you live.

  • The market – This is the stock location for many people wanting to take people photos. There will always be people at the market. You can take photos of the vendors, customers, or the vendors and customers interacting. The downside is the people working in the market may not like yet another photographer take photos of them. This is where building relationships with the people in the market can help.
  • Public transport – A great reason to avoid the taxi, and leave your car at home. Getting on public transport is a great way to explore a location, and the people there. Be aware that in some locations you will need to get permission from the transport operator, as well as the people you are photographing.
  • A harbor – Anywhere there is a river will likely have a harbor. The life of people working in these places can produce great photographs. You will need to be prepared to wake up early in the morning to see the fishermen at work. This is another great example of how building relationships help, you might be invited onto one of their boats if you get to know a fisherman.
  • Festivals – This could mean a cultural festival such as Chinese new year, or a rock concert. Festivals will have people dressed in attention grabbing clothes that look great when photographed. You may find people more open to having their photo taken at an event as well, because they’re having a good time, and are often dressed well.
5 Questions to Ask Yourself to Help Improve Your People Photography

Visiting places people work can be good locales for people photography. A sulfur mine is an extreme example, however, going to extremes will improve your photos though.

Getting model releases, and paying your model

Whether or not to pay for a photo is another question many people ask about. It is up to you to judge each situation for yourself. Photos being taken for a specifical commercial usage are the types of images where you should pay the model a percentage of your fee. When the photos you are taking are for personal use, paying the model is at your discretion. Chances are you will find someone who will let you take their photo for free, so it’s a nice gesture to send them an image once you have processed them.

Once you decide to pay the person to take their photo, it’s unprofessional not to get a model release. If the person you’re paying won’t sign a model release then don’t pay them, and move onto somebody else. The reason you are paying for a photo is you intend to use it for promoting your work, or for direct commercial usage. This means you need to get a model release, and there are apps available for smartphones that make this very easy.

5 Questions to Ask Yourself to Help Improve Your People Photography

This is one of the miners at Kawah Ijen in Indonesia. He signed a model release and was paid for this photo.

It takes practice to improve your people photography

Now it’s your turn. It’s time to go out and practice your people photography in your local area. Are there any ways that you like to take portraits that are different from this article? I’d love to hear your ideas as well, so please share them in the comments below.

What’s your favorite people photo you’ve taken? Again share your great photo with us, and describe how you went about taking it. Finally, get out there and get some new people photos. Hopefully, some of the ideas in this article will help improve your images.

The post 5 Questions to Ask Yourself to Help Improve Your People Photography by Simon Bond appeared first on Digital Photography School.


Digital Photography School

 
Comments Off on 5 Questions to Ask Yourself to Help Improve Your People Photography

Posted in Photography


The Importance of Setting Photography Goals for Yourself

23 Sep

A wiser person than myself once said that if someone does not know to which port they are sailing, no wind is favorable. I heard that advice early in my photographic journey and it has stuck with me throughout the years. Learning about photography is important. Developing your skills as photo maker is even more important.

However, one of the most important things that you can do in order to grow as an artist (and business person) is to recognize the importance of finding a direction, setting photography goals for yourself. Without a direction or goals, all the passion, skill, and creativity you possess will not be enough to help you reach your full potential as a photographer.

Direction

Finding your direction

That is the hard part. Figuring out which direction to focus your energy on can be frustrating and at times extremely confusing. There really are no shortcuts. The key is to shoot, shoot, and shoot some more. Shoot a lot. You won’t know what kind of photography you truly love until you let yourself go and become lost in your own work.

Don’t limit yourself to only one type of photo when you’re just starting out in the art; meaning don’t exclusively do street work or only shoot portraits. Make photographs of anything: people, landscapes, architecture, food, toasters – anything. You might find that your true passion strangely discovers you when you least expect it. The important thing is to keep shooting and keep yourself open to new opportunities.

Shoot

Bear in mind, however, that directions can and often do change. Even though you may be firmly set on the path you want to pursue with your photography remember that you are not confined to it exclusively. As you grow as a photographer so will your tastes and your inclinations may evolve. Again, keep your creative mind free and be willing to try something completely different if the muse strikes you to do so. You make the photograph…the photograph does not make you.

Applying your direction

For a moment let’s imagine that you have found your direction. You’re elated and you can’t describe how great it feels to have that overwhelming urge to create photographs. Now what? Do you just go out into the world and hope for the best? Of course not. Instead, take all of that excitement and artistic energy and channel it into something tangible.

Sample 1

In short, you must set clear goals for yourself as a photographer. Setting goals for your photography will help you immeasurably. There are so many things to consider when first starting out. At times it becomes shockingly easy to lose your focus which will lead to frustration. Developing goals will keep you grounded in your work and heading in the direction you have chosen. Not only will having clearly defined goals keep you focused but will also keep you motivated and make you more determined to accomplish what you have set out to do.

Learn to set goals which are realistic

No one that I know of ever had their first photograph published on the cover of National Geographic Magazine. If that’s your goal that’s great. But understand that while setting goals is essential to success, they must also be realistic goals.

Find goals for your work which are challenging but attainable. Examples of realistic goals could be learning a new technique or getting your work in a local gallery. Don’t set yourself up for disappointment because you set the bar unimaginably high. Success is a ladder that must be climbed one step at a time.

Acheive

Confidence

Gaining confidence is somewhat of a paradox because you need confidence in order to find it – think about that for a moment. Boosting your confidence level is perhaps the most important reward that will come out of setting goals for your photography.

Taken as whole, going from a beginner to a professional photo maker is a daunting task to say the least. There is just so much that can go wrong on the journey from point A to point B. Instead of attempting to cover the distance in a single leap, lay out achievable goals that will eventually take you where you want to go. Along the way, with each goal met and overcome, you will naturally build confidence. The next goal will be met and then the next and the next, and so on.

As you become more confident in your work and your abilities each new goal you set will be more and more ambitious. One day you will look back to see how far you’ve come and how much you’ve accomplished just by focusing on each step one at a time.

Steps

Be brave

You found the courage to follow your dreams and take up the mantle of “photographer”. It’s not always going to be an easy road, but by simply finding your direction and setting photography goals you will be able to achieve things you never thought were possible.

Learn to understand what it is that truly gives you a spark when you photograph, then develop a game plan by setting small goals to help you along your way. Those goals will be your signposts. With each goal you achieve you will build skill, confidence, experience, and knowledge. As you learn and grow you will undoubtedly change as an artist. Be mindful but don’t fight the natural current and healthy evolution of your own creativity.

Trees 1

Whether the goals you set are designed to facilitate a transition from hobbyist to pro photographer, or to just reach the next stage in your photographic journey, the important thing to remember is to never stop moving. Always strive to learn something new, set new goals, and reach new heights.

What are your photography goals? Please share in the comments below.

googletag.cmd.push(function() {
tablet_slots.push( googletag.defineSlot( “/1005424/_dPSv4_tab-all-article-bottom_(300×250)”, [300, 250], “pb-ad-78623” ).addService( googletag.pubads() ) ); } );

googletag.cmd.push(function() {
mobile_slots.push( googletag.defineSlot( “/1005424/_dPSv4_mob-all-article-bottom_(300×250)”, [300, 250], “pb-ad-78158” ).addService( googletag.pubads() ) ); } );

The post The Importance of Setting Photography Goals for Yourself by Adam Welch appeared first on Digital Photography School.


Digital Photography School

 
Comments Off on The Importance of Setting Photography Goals for Yourself

Posted in Photography


Don’t get ahead of yourself: Canon EOS 5D Mark IV rolling shutter test

27 Aug

Much of the initial concern about the EOS 5D Mark IV’s video has been about its substantial 1.64x crop (relative to the full width of the sensor, 1.74x compared to the 3:2 region) and its use of the inefficient Motion JPEG compression system (which limits the ability to use SD cards with any dependability).

However, upon shooting with the camera we found it to have significant rolling shutter. We’ve demonstrated the effect alongside the EOS-1D X Mark II, which reads out its sensor fast enough to exhibit pretty low levels of rolling shutter, and the Sony a6300, which shows a relatively high level of rolling shutter.

Obviously we’ve panned faster than you ever sensibly would, to make the difference clearer. If you’re careful with the way you move the camera, this rolling shutter effect may not be too apparent however, for some kinds of shooting, it can be distracting.

Articles: Digital Photography Review (dpreview.com)

 
Comments Off on Don’t get ahead of yourself: Canon EOS 5D Mark IV rolling shutter test

Posted in Uncategorized


Crystal Universe: Digital Maze Invites You to Immerse Yourself in Light

14 Jul

[ By SA Rogers in Art & Installation & Sound. ]

Screen Shot 2016-07-13 at 5.05.53 PM

A kaleidoscopic space filled with reflected and refracted light in all shades of the rainbow makes you feel like you’ve somehow immersed yourself inside a crystal at the DMMPLANETS exhibition in Odaiba, Tokyo. Dreamed up by the art collective teamLab, ‘Wander through the Crystal Universe’ is one of three major interactive installations in place through the end of August for the inaugural show. The work uses accumulated light points to create a sculptural body, “similar to the way distinct dots of color form an image in a pointillist painting.”

crystal universe 2

crystal universe 4


As you walk through the three-dimensional light space, your movement affects the light particles, creating changes in the installation. Each person’s action or change affects the way everyone present experiences the space. The lights are constantly moving and shimmering, going dark to mimic the effect of floating in space and then shifting into new color palettes. Visitors can further interact with the exhibit using their smartphones, selecting certain elements and enhancing them.

crystal universe 3

Screen Shot 2016-07-13 at 5.05.53 PM

crystal universe main

“In Crystal Universe, the particles of light are digitally controlled, and change based on the viewer’s interactivity with the work. The result is an installation consisting of an accumulation of lights, forming a sculpture that expresses the universe.”

floating

floating 2

Equally enchanting is ‘Drawing on the Water Surface Created by the Dance of Koi and People – Infinity.’ In this case, visitors are walking into a pool of water, influencing the movement of projected koi.

floating 3

“When the fish collide with people they turn into flowers and scatter. The trajectory of the koi is determined by the presence of people and these trajectories trace lines on the surface of the water. The work is rendered in real time by a computer program, it is neither a pre-recorded animation nor on loop. The interaction between the viewer and the installation causes continuous change in the artwork. Previous visual states can never be replicated, and will never reoccur.”

Share on Facebook


[ By SA Rogers in Art & Installation & Sound. ]

[ WebUrbanist | Archives | Galleries | Privacy | TOS ]


WebUrbanist

 
Comments Off on Crystal Universe: Digital Maze Invites You to Immerse Yourself in Light

Posted in Creativity


5 Tips to Help Get Yourself Out of a Photography Rut

09 Jun

Shootthroughyourrut 01

Are you in a photography rut?

Tell me if this sounds familiar – you’re the person who almost always has a camera with you. Maybe it’s in a backpack or purse, in your trunk, or strapped right to your hip – you’re always seeking that next level. Yet on the flip side, you also find it excruciating when you hit a rut. You know that terrible feeling when you look at your recent work and feel like it’s the endless blip of a scratched record, when you don’t feel inspired, creative, or excited by your own work.

Friend, when it gets to this point, you’ve officially hit a rut. Ruts are the curse of the artist. but fear not — if you handle this wisely, you’ll come out the other side on the next level. Here are a few tricks that have gotten me through my creative plateaus.

Shootthroughyourrut 02

Tip #1 – put the camera away for a while

First, put that camera down. It’s unsettling, isn’t it? You see the world in a series of beautifully composed photos, and not having a camera feels like you’re missing a limb. Sit in that discomfort. Force yourself to look at your surroundings with a fresh eye — no lens between you and the world — and new frames, new light, new ways of capturing this crazy planet will all slowly unveil themselves to you.

If you keep going in a rush to capture it all before it disappears, you’ll never see it properly. Start slow. Look carefully. Don’t take any photos. Keep things captured in your mind just for yourself. When you do pick up your camera again, it’ll feel like a whole new world of opportunity, because you’ve refreshed your own gaze. In the spirit of always keeping your gaze fresh, is the next point.

Shootthroughyourrut 03

Tip #2 – look for new inspiration close to home or online

Find new sources of inspiration. During one of my “leave the camera at home” phases last month, I was hungrily soaking up inspiration from everywhere and everything BUT photography. I sat in slack-jawed wonder at Kehinde Wiley paintings, examined the brush strokes in Japanese calligraphy, studied ancient mapmaking techniques and short shadowy films, and the impeccable detail on the Manus x Machina gowns at the Met Museum.

You don’t have to travel to new countries to find a street you’ve never walked down. This absorption of every art besides photography reminded me over and over that this world is rife with creativity that bursts from its very pores, in a hundred different manifestations. I felt so small, so unimportant, and so refreshed by the many ways of creativity that humans are capable of, that aren’t my piddly little photography efforts. It’s good to feel small, while also being inspired to be bigger. That being said, we come to the next tip.

Shootthroughyourrut 04

Tip #3 – stop comparing yourself to others

Stop absorbing other people’s work. Seriously, give yourself a break from the comparison game, because no one wins. Either you end up in a fetal position in defeat, after a depressing Instagram session in which you realize you’re a talentless hack, or you’re left with that icky smug feeling when you look at someone’s work who isn’t as good as yours. Either way, the comparison game doesn’t improve your art, nor does it improve the world either. Take an Instagram break, stop looking at how other photographers are doing it, and keep working on your own vision. It’s a smarter use of your time, and will take you further (now if only I could figure out how to actually implement this one).

Shootthroughyourrut 05

Tip #4 – take advantage or your own strengths and skills

Take the photo that only you can take. This is the crux of it. Instead of imitating other photographers’ techniques and subjects, have a good hard think about the photo that literally can only be taken by YOU. What communities are you a part of that others would kill to break into? What skill sets do you have, that will open doors that otherwise would stay latched shut? There are so many little components of you that make you unique — so don’t waste your time trying to recreate your current photography idol’s recent shoot.

Shootthroughyourrut 06

Tip #5 – just get some rest

If all else fails – take a nap. Seriously, sometimes I’m just so damn tired that I can’t come up with a fresh idea to save my life. Have a good lie down, and know that the world will still be there, waiting to be captured when you wake up.

In a rut? Leave your techniques for working through it in the comments section below, I can’t wait to hear how you handle it!

googletag.cmd.push(function() {
tablet_slots.push( googletag.defineSlot( “/1005424/_dPSv4_tab-all-article-bottom_(300×250)”, [300, 250], “pb-ad-78623” ).addService( googletag.pubads() ) ); } );

googletag.cmd.push(function() {
mobile_slots.push( googletag.defineSlot( “/1005424/_dPSv4_mob-all-article-bottom_(300×250)”, [300, 250], “pb-ad-78158” ).addService( googletag.pubads() ) ); } );

The post 5 Tips to Help Get Yourself Out of a Photography Rut by Laura Sullivan appeared first on Digital Photography School.


Digital Photography School

 
Comments Off on 5 Tips to Help Get Yourself Out of a Photography Rut

Posted in Photography


4 Questions to Ask Yourself Before You Shoot to Help Improve Your Photography

09 May

One of the nice things about mobile phones is that virtually all of them have cameras built in, which means almost anyone can be a photographer and has at their disposal quite an advanced piece of technology, capable of creating stunning images with the tap of a button. Some people prefer dedicated cameras like a DSLR or mirrorless model, and others like to carry a small point-and-shoot or even use good old-fashioned film. However, good photography has much less to do with the gear and is more about the person taking the image.

With that in mind, here are four questions to ask yourself the next time you take out your camera and start snapping away. If you stop and think about these, it will help improve your photography and you will take better photos:

  1. What is the purpose of the picture?
  2. What do I want my viewers to see or feel?
  3. How can I use my surroundings to create the image I want?
  4. How can I control my camera to get the image I want?

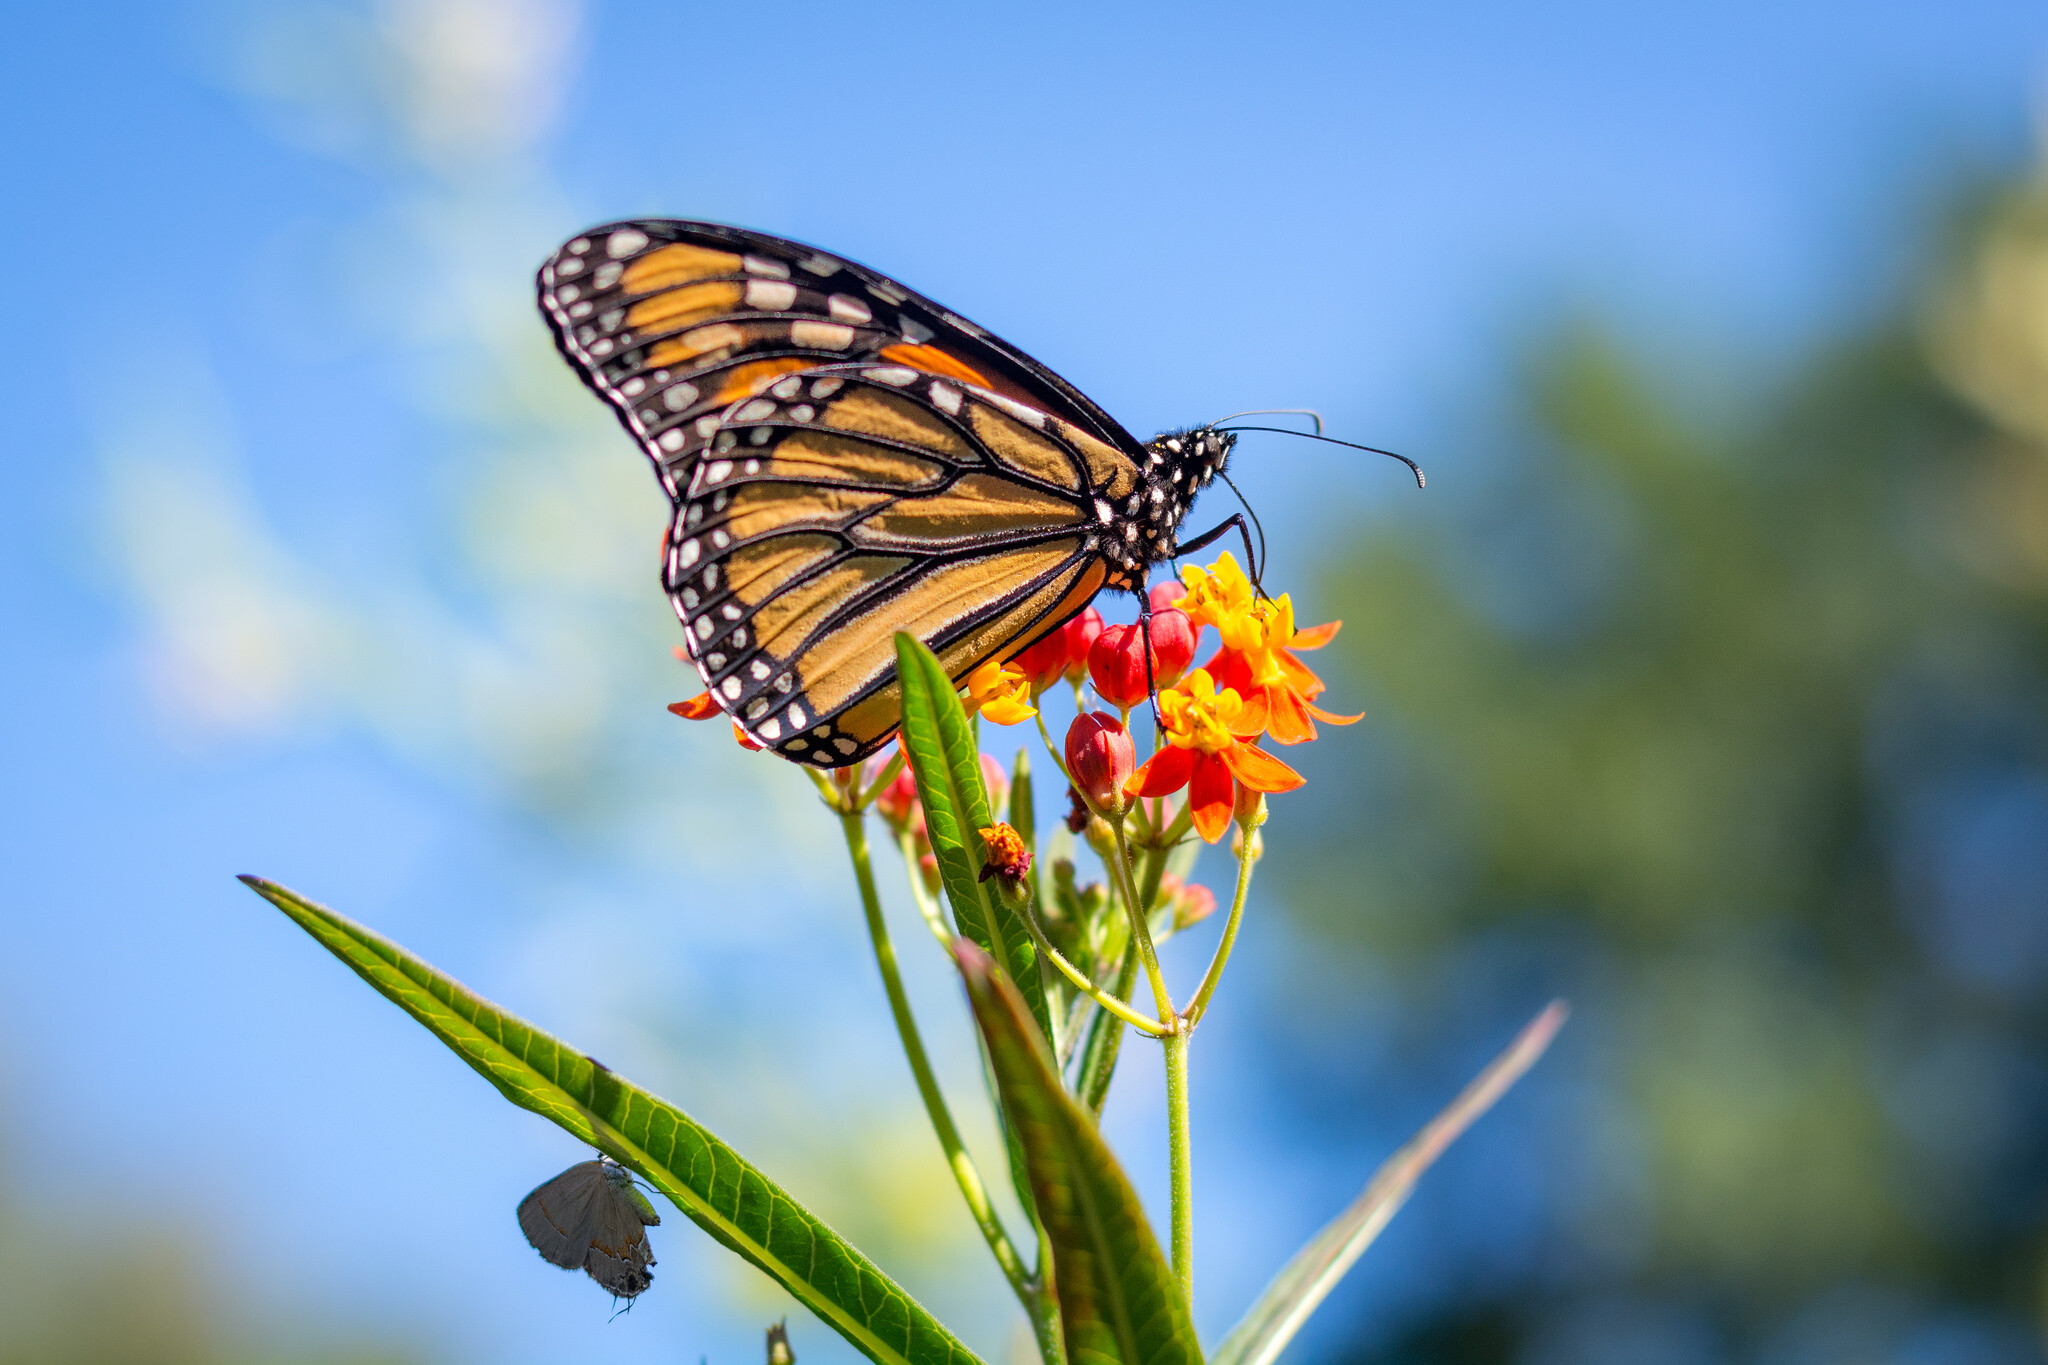
five-questions-before-photos-butterfly-flower

You could stop reading right now after seeing those questions and get to work on improving your photos, but I want to dig a little deeper into each one, to see how answering them can help you improve as a photographer and artist.

1 – What is the purpose of the picture?

Think back to the last time you sat scrolling through images on Instagram, Facebook, Flickr, or another image sharing site. Perhaps you just looked through some pictures at random, and maybe you even gave a precious few the much-coveted like, double-tap, or star rating. What was it about those photos that caught your eye and made you pause for a second or two? Recently a study carried out by Microsoft found that, thanks to smartphones and the rapid pace of our modern tech-infused lifestyles, people have an average attention span of only eight seconds. That’s shorter than a goldfish! A similar study carried out in the year 2000 found that attention spans then were roughly 12 seconds, which means things are only getting worse as we become more and more connected via technology.

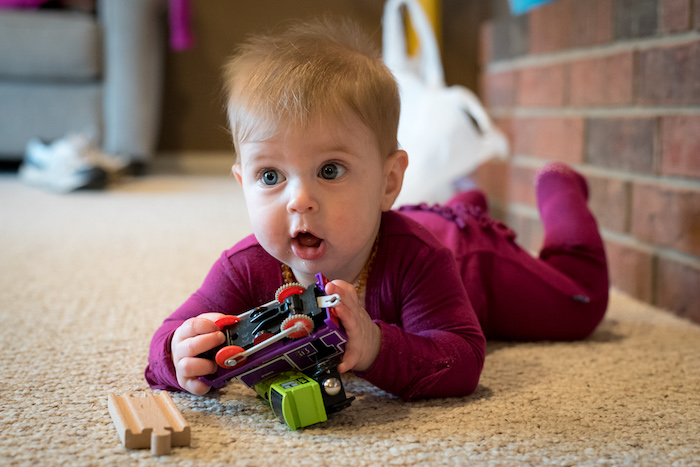
You might very well have a shorter attention span than this infant. And it's a good bet your audience does too.

You might very well have a shorter attention span than this infant, and it’s a good bet your audience does too.

This has profound implications for photographers because it means that in the already-crowded landscape of digital pictures, your photos are not only vying for attention among thousands or millions of other images, but you have even less time to grab the viewer’s attention than ever before. To combat this, you need to make it abundantly clear to your viewers just what precisely is the point, of any given picture you take. In other words, your photos should have a clear subject – whether it’s a person or people, a flower, a kitten, a plane, a train, or even an automobile.

Look through your own pictures and ask yourself, “What’s the point?” If you can’t answer that question, then chances are that the photos won’t mean much to anyone else who sees them either. When I first got into photography I took all kinds of pictures of things that I thought might be interesting at the time, but looking back on them I honestly can’t tell you what is the purpose of many of those images. If I had taken the time to make sure the images had a clear purpose, instead of just pointing my camera at whatever I thought might look cool, I would have more important photos and much richer memories too.

I shot this photo about 10 years ago, and while I'm sure I had some kind of purpose I honestly can't remember what the point of it was supposed to be.

I shot this photo about 10 years ago, and while I’m sure I had some kind of purpose, I honestly can’t remember what the point of it was supposed to be.

2 – What do I want my viewers to see or feel?

So now you have a clear subject in mind for your picture, and you’re all ready to snap the shutter on your DSLR, mirrorless, or even mobile phone. But wait, there’s more to consider before you start eating up that memory card, and flooding your favorite social networks with more photos. Now that you know what the purpose of your photo is, take the concept one step further and ask yourself what feelings, symbols, or other elements you want to impart on your viewers.

Do you want them to feel happy, sad, curious, introspective, or nostalgic? Do you want to stir them up so as to take action for a particular cause? Do you want them to notice things other than what might be the main subject of the image, and spend time digesting and interpreting your photos to gain a deeper understanding of the world around them?

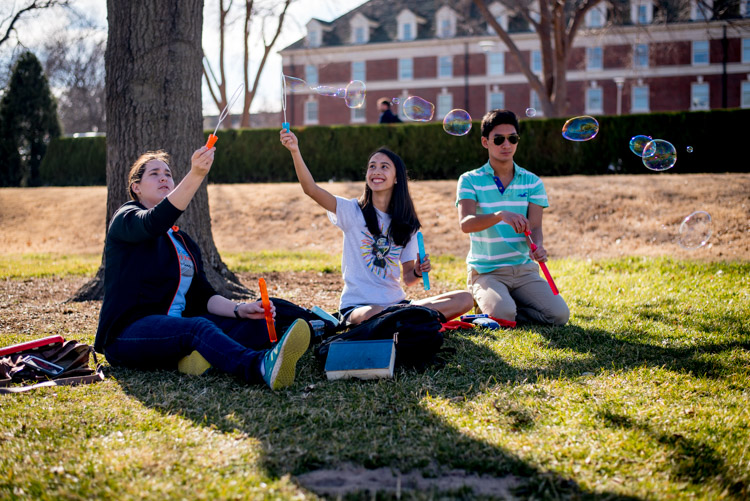
five-questions-before-photos-bubbles

I didn’t just want those who saw this picture to think “Oh, some students playing with bubbles.” I wanted people to smile and feel the same sense of delight as the girl in the middle.

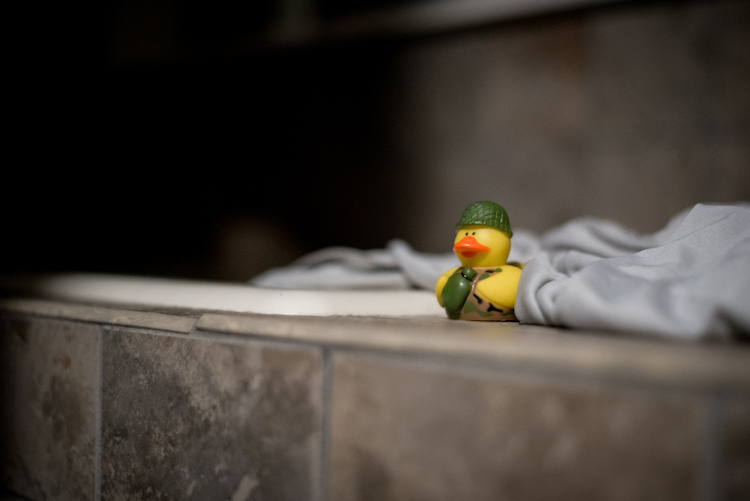
Humans are visual creatures, and as a photographer you are in the unique position of using a visual artistic medium to transmit thoughts and emotions. In this sense, photography is a form of one-way communication as you invite your viewers to engage with your images, and take something away from them. For example, here’s what might appear to be a rather mundane picture of a plastic duck:

Is it a duck...or is it something more?

Is it a duck…or is it something more?

My goal in taking that picture was to have my viewers see more than just a basic rubber duckie. I specifically chose the time of day, angle of my camera, foreground and background elements, and exposure settings (i.e. f/1.8 aperture) to create this image, so that my viewers might see more than a kid’s bath toy. Perhaps they would think back to their own childhood, or maybe even invent a fantasy backstory for this duck standing guard at the edge of a precipice. It might seem like a simple image, but to me there was a lot more going on here, and by asking myself some deeper questions before I took the picture I got a better image as a result.

The same lesson applies to photography in general, and you have a powerful image-capturing tool at your disposal, to not just make snapshots, but tell stories and communicate with your audience. Going through some of these questions might seem like a lot of work when all you want to do is just pull out your camera and snap a few photos. But, as you work on doing this more and more, it will soon become second nature and you will see a noticeable increase in the quality of even your most mundane images.

This picture is just a quick snapshot that's not going to win any awards, but I shot it in such a way so as to provide context, invite the viewer to feel slightly squirmy, and hopefully see more than just the some kids in a room.

This picture is just a quick snapshot that’s not going to win any awards, but I specifically took it in such a way so as to provide context, invite the viewer to feel slightly squirmy, and hopefully see more than just some kids in a room.

3 – How can I use my surroundings to create a better photo?

One of the easiest ways to create a more compelling, interesting, and visually appealing photograph is to take a few seconds and examine the context in which the picture is being taken. Then try to position yourself, your subject, or even just your camera in such a way as to create maximum visual impact, and help you get precisely the photo you are trying to capture.

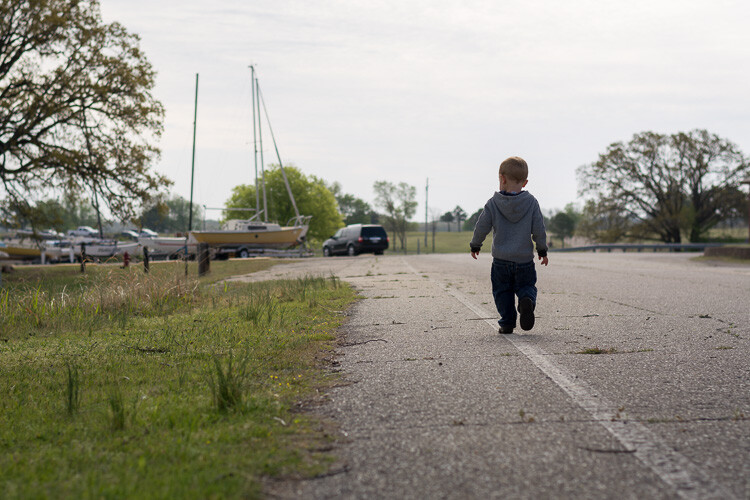
As an illustration of this take a look at the photo below. When I took it, I made several quick decisions with regard to my surrounds in order to get a better picture, than if I had just settled for a quick snapshot. As the child was walking down the street I followed from a short distance in order to get a photo of him, and adjusted my viewpoint so the sailboats would occupy the left side of the frame. I crouched down low to get a better angle, and positioned myself so that the boy’s head and shoulders were above the horizon and showing through a clear portion of sky instead of a tree or building. I also scooted over so the white paint line was leading towards the center of the picture, rather than off to the side. All this was done in a matter of seconds, since I knew this particular moment would be quite fleeting.

five-questions-before-photos-marina

The result is a picture that, in my opinion, is elevated several notches above what otherwise might be a quite ordinary picture of a kid walking down the street. It also provides clear answers to the two previous questions:

  1. What is the purpose of the picture? To show a child walking down the street.
  2. What do I want my viewers to see or feel? A bit of nostalgia, a connection to the boy, perhaps a bit of hopefulness for the future.

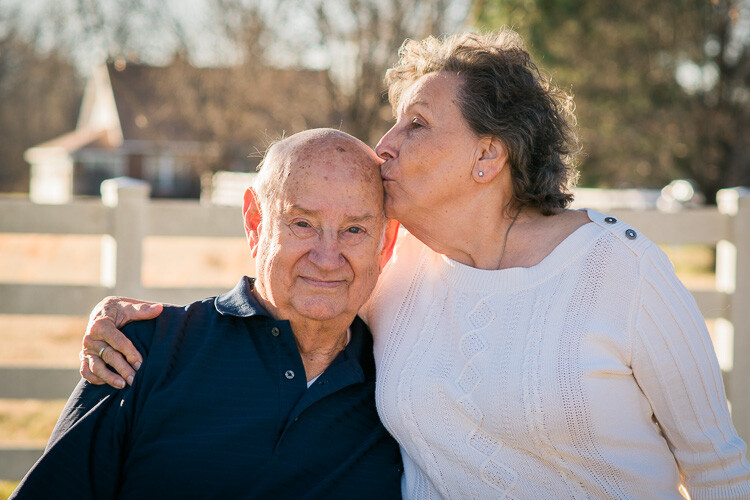
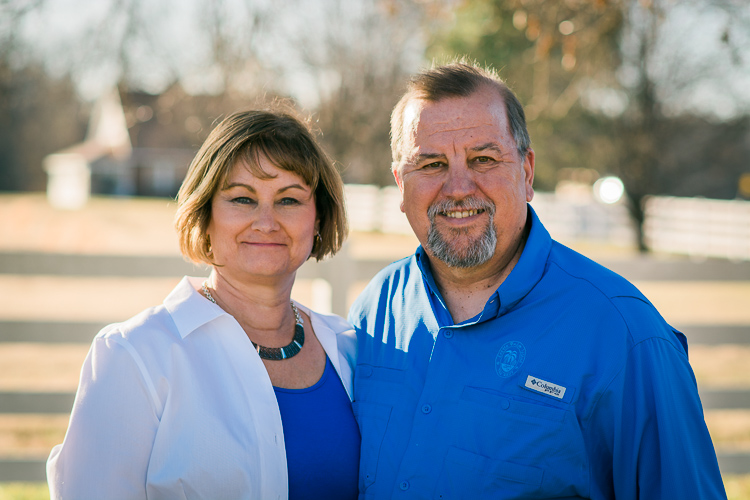
Recently I had the privilege of photographing four generations of one family, so I chose a location that would evoke feelings of a certain time period and place my subjects in a very specific context. What you see below is the direct result of me choosing to use the environment to elevate the impact of the photo. In order to create a sense that the couple had a long and rich history together, I placed them a few meters in front of a white fence, with an old farmhouse occupying the top-left portion of the frame. I could have taken the picture from many other angles, with very different scenery around them, but what you see here is the result of a very specific artistic choice on my part, in order to get precisely the photo I wanted.

five-questions-before-photos-couple-barn

You can do the same thing, and it doesn’t require any special equipment or educational training. All you need is to keep your eyes open, examine the world around you when you take photographs, and use the environment to give your images a richer sense of time, place, and context.

4 – How can I control my camera to get the image I want?

Many people take great pictures without ever straying from the Auto option on their camera dial, and if you have a mobile phone or point-and-shoot you may not have any other options besides Auto. I know from personal experience how scary it can be to move away from Auto. For years I wondered why I would ever bother leaving that safe little green option when it did a pretty good job – especially since every time I ventured into another mode such as Aperture Priority, Shutter Priority, or (gasp!) full Manual, I never seemed to get the results I was looking for. What you may not realize if you stick with Auto, is that a whole new world of photography wonder is right in front of you, just waiting to be discovered if you can learn how to control your camera a bit more.

It's virtually impossible to get pictures like this using the Auto mode.

It’s virtually impossible to get pictures like this using the Auto mode.

Learning to control the aperture of your lens, the shutter speed of your camera, and the ISO sensitivity of your image sensor can make all the difference between a forgettable snapshot, and a wall-worthy masterpiece. It takes a little while to learn the fundamentals, but once you get the hang of it you will find yourself asking technical questions in order to solve artistic problems. I am constantly pressing buttons and flipping dials when I take pictures (even if it’s just my kids in the back yard) so I can get exactly the image that’s in my head, and not the picture that my camera thinks I want to take.

If this sounds hopelessly complicated, look down at the keyboard the next time you are at a computer. Remember when it took you agonizing minutes just to peck out a few words or sentences? Now you probably don’t look at the keyboard at all, and typing isn’t something you really think about anymore. You think of the words you want to appear onscreen, and your fingers naturally move to the right letters on the keys. The same thing happens with practice when you learn to use other modes on your camera, and your pictures will be much improved as a result. The bottom line is that if you, not your camera, decide which aperture, shutter speed, and ISO to use, you will get better pictures.

five-questions-before-photos-butterfly

Now that you have read my four questions, I’m curious to know your side of things too. Are there any tips you have found that work well for you to get better images? What are some of the best practices you have learned over the years? Share your thoughts in the comments below.

googletag.cmd.push(function() {
tablet_slots.push( googletag.defineSlot( “/1005424/_dPSv4_tab-all-article-bottom_(300×250)”, [300, 250], “pb-ad-78623” ).addService( googletag.pubads() ) ); } );

googletag.cmd.push(function() {
mobile_slots.push( googletag.defineSlot( “/1005424/_dPSv4_mob-all-article-bottom_(300×250)”, [300, 250], “pb-ad-78158” ).addService( googletag.pubads() ) ); } );

The post 4 Questions to Ask Yourself Before You Shoot to Help Improve Your Photography by Simon Ringsmuth appeared first on Digital Photography School.


Digital Photography School

 
Comments Off on 4 Questions to Ask Yourself Before You Shoot to Help Improve Your Photography

Posted in Photography


Tips for Getting Yourself to Relax as a Photographer and Have More Successful Portrait Sessions

24 Apr

When I first got started in photography I thought I had things all figured out regarding cameras, lenses, exposure, and even some post-processing. However, the first time I greeted a client on location for an actual photo shoot, I realized just how clueless and ill-prepared I really was, and found myself nervous to the point of almost being nonfunctional. I was so uptight and anxious about the whole photo session, that I’m still not sure how I managed to get any good pictures, but thankfully things have gotten much better in the subsequent years.

Even though I have greatly expanded my knowledge and experience, I still get a little nervous when meeting with clients. I have found several tips that work well to calm the butterflies in my stomach and help make for much more enjoyable and productive portrait sessions, both for me and my clients. I’m going to share them with you.

relaxing-for-portrait-session-couple-farm

Even after doing this type of work for years, I can still get nervous going into a photo session.

The Three Phases of Portrait Anxiety

While this triad of temporal distinctions is entirely nonscientific in nature, I have found that my stress and anxiety regarding a given portrait session generally can be divided into three discrete phases:

  • Phase 1 – The days or weeks leading up to a photo session. This lasts the longest, but thankfully doesn’t require impromptu decisions and instead gives you time to be thoughtful, analytical, and reflective. The downside is it lasts the longest! This unfortunately means you have way too much time to over-think and over-analyze everything.
  • Phase 2 – The short time before you start the session. This is usually five or ten minutes, interacting with the client at the session but before you start taking pictures. This period is brief but critical, as it can set the tone for the entire photo session and if you’re not properly relaxed things can go downhill quickly.
  • Phase 3 – The photo photo session itself, which usually lasts about an hour, unless you are doing a wedding or other type of protracted engagement. Things can get very tricky here, but if you have taken the time to properly relax during Phases 1 and 2 you will probably find Phase 3 to be smooth sailing.

Here are my tips for helping yourself relax, take things easy, and get mentally prepared for the photo session. While not all of these may apply to you, I do hope they are general enough to be useful to you in similar situations.

relaxing-for-portrait-session-child-looking-up

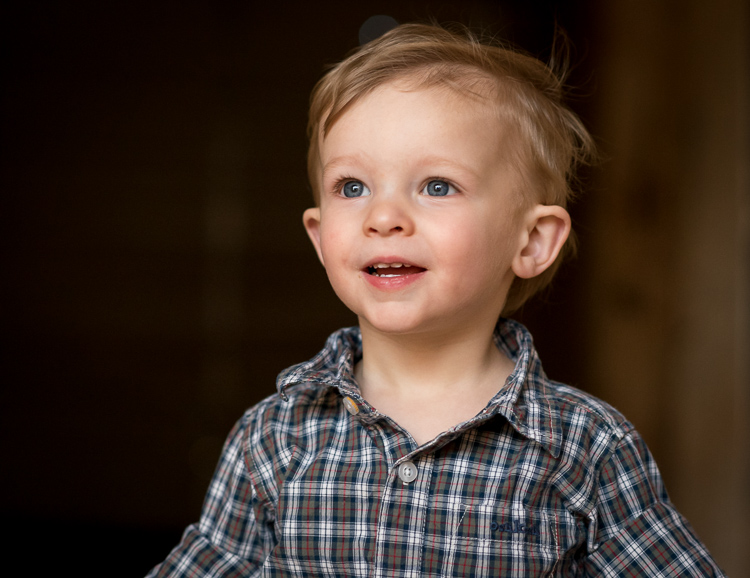
If you aren’t relaxed the kids won’t chill out either, and neither will their parents.

Phase 1: Preparing for the Session

Adele, one of the most popular singers in the world, recently told Rolling Stone that she gets stage fright. “I’m scared of audiences,” she said. “I don’t like touring. I have anxiety attacks a lot.” As a photographer this gives me some degree of comfort knowing that my nervousness leading up to a photo session is not all that different than world-famous singers and actor,s who perform in front of thousands of people every day. Even though I have done many portrait sessions, I still get nervous beforehand, but have found a few tips and tricks to help calm myself down and relax in order to clear my head and do the best job I can.

Talk to someone supportive

Whether it’s a friend, a coworker, a family member, or even a former client, spending time talking about the upcoming session is one of the best ways to clear my head and get some reassurance. For me it’s my wife, who is a solid rock and a constant reminder that I can do the job. She and I discuss my goals for the session, look at examples from other photographers, and talk about what has worked and not worked in past sessions. These conversations always help me calm down, while also giving me a big boost of confidence that goes a long way towards a successful photo session.

relaxing-for-portrait-session-baby-sister

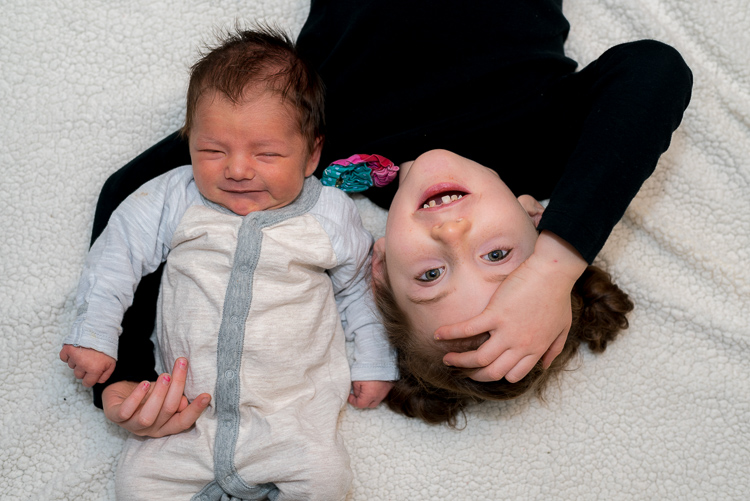
In the days leading up to this session, my wife and I spent a long time discussing the shoot and planning things out. This did wonders to calm my nerves and helped me do a better job at the session.

Look at your own successful images

Look at your own past images as a reminder that you are fully capable of doing the job. Sometimes in the days leading up to a photo session I start to wonder if I really have what it takes to get the shots I want, but looking through my own portfolio always offers enough reassurance to bring me out of that funk and back to reality. Yes, each session has its own unique challenges, but reminding myself of what I have done before, is a great way to relax and prepare for what is about to come.

Have a plan

Have a plan for the session and make a list of poses and shots you want to get. It can be a mental list, but a physical list will help you be sure to get everything you want, and will allow your clients see that you are prepared if you cross items off it during the shoot. One of the last things you want is to get back to your computer and realize you forgot to get a shot of grandma holding her new grandbaby, the happy couple underneath their special tree, or little Timmy in his special new cowboy boots that his mother emailed you about the day before. Making a list will help you avoid this scenario while also helping you to de-stress before the session.

relaxing-for-portrait-session-couple-downtown

This couple sent me a few ideas for different shots, and since the location was 60 miles away I used Google Maps Street View to investigate things beforehand.

Scout the location ahead of time

Visit the location to make sure you know what it’s like, and how you can use it to frame your shots. Ideally this would be at the same time of day as your photo session, so you can make sure you know what the lighting will look like on the day of the shoot. This will help you see all sorts of things you might miss if you just show up the day of the session, and it will make you look like a confident professional as you direct your clients.

Know your gear

Know your gear inside and out. It sounds silly but you don’t want to freeze up in the middle of a session because you can’t find the menu that lets you change white balance, or you forgot which dial changes the shutter speed. If you find that you need a quick refresher re-read the manual, watch online tutorials, or just spend 15 minutes poring through the menus and buttons. When it comes time to do the photo session, you can rest assured that these planning efforts will have been put to good use.

You don't want to scramble trying to locate menu options and camera buttons. Make sure you know your gear beforehand so you can focus on your clients when you're on the job.

You don’t want to scramble trying to locate menu options and camera buttons. Make sure you know your gear beforehand, so you can focus on your clients when you’re on the job.

Practice with test subjects

If you’re going to do a newborn session, practice with stuffed animals. If you’re on location, get a friend or family member to go out with you a week beforehand and do some test shots, so there are as few surprises as possible when you go out there with the client.

Make a gear packing list

Make a list of all the gear you need and check it off one-by-one as you pack up for the session. You don’t want to get to the location and realize you forgot something at home, or left a battery on the charger. I once did an outdoor shoot and realized all too late that I forgot my lens hoods, and almost immediately started hyperventilating into my camera bag when the clients asked for some shots with the sun behind them, just out of the frame. Things ended up working out, but a simple list would have prevented a great deal of stress during the shoot.

Phase 2: On your mark, get set…

relaxing-for-portrait-session-couple-barn

Chatting with this couple as I set up my gear helped put everyone at ease, including myself.

One of the weirdest parts about a portrait session can be the few minutes when you are visiting with the client before you start actually taking pictures. What do you do? What do you talk about? How do you strike a balance between friendly and professional? It’s enough to send even the most seasoned photographer’s blood pressure to the top of the charts, and messing up this brief pre-session period can send the rest of the gig into a tail spin.

In my experience one of the best ways to help you and the client relax is to go on the offence instead of playing defence. Don’t stand around waiting for people to talk to you, as they are probably feeling just as awkward, and are likely waiting for you, the person in charge, to take the lead. Even if smalltalk is not your forté, you need to be willing to strike up a conversation and have a few things ready to talk about as you are getting set up. In a nutshell, make this time all about the client, and helping them feel comfortable.

As you are getting ready to start taking pictures talk to your clients about their life outside of the photo session, and find out what hobbies they have, what they like doing in their spare time, or even what they are doing over the coming weekend. Ask questions to show you are interested, and use this time to also run some ideas past the client in terms of what you will be doing. This helps build a sense of rapport and respect, and can go a long way towards putting everyone at ease. Your clients might be just as nervous as you, but getting the chance to get to know each other will help put everyone at ease and also help them feel comfortable if you have lots of lighting, lenses, or other gear. If there are kids involved, bring some toys or snacks (nothing crumbly as it will get on their clothes) to win them over. At my most recent family session I gave the two-year-old a fake toy camera and asked if he could help me get some photos. This not only won him over but his parents too, and a week later, before they had even seen their photos, they were telling some friends about how much they enjoyed the picture session.

relaxing-for-portrait-session-family

A few minutes chatting sports with the grandparents and playing with the kids went a long way towards a more successful photo session.

Phase 3: Here we go!

Even though you have done everything in your power to chill out, relax, and put your mind at ease leading up to the photo session, things can still be a little nerve-wracking as you go about the process of actually taking pictures. At any moment there are a thousand decisions to be made, and trying to balance everything can be enough to make your palms sweat. My favorite trick for relaxing during a photo session is to simply make things fun. Don’t bark out orders, but instead have your clients do silly things like make faces or try just-for-fun poses. This will help you loosen up, and also give you a chance to build on the rapport you have already established at the beginning. Clients can tell if their photographer is wound up tight and needs to chill out, and if you make things more fun and lighthearted as opposed to all business, you will find yourself loosening up, relaxing, and getting much better results.

These are just a few of my favorite tips and tricks to help me calm my nerves before and during a photo session, but what about you? How do you approach your portrait sessions and what do you do to help yourself relax? Share your thoughts in the comments section below!

People photography week

This week on dPS we’re featuring articles all about different kinds of people photography including portrait, event and travel photography. See all the previous ones below, and watch for more people photography articles over the next few days.

  • How to Take Low Key Head-shots
  • How to Do a One Light Portrait Setup and Use it as Your Back-up Plan
  • Travel People Photography – Tips and Pitfalls
  • 8 Tips for Photographing Men
  • 24 Diverse Images That Showcase People Photography
  • Weekly Photography Challenge – People Photography

googletag.cmd.push(function() {
tablet_slots.push( googletag.defineSlot( “/1005424/_dPSv4_tab-all-article-bottom_(300×250)”, [300, 250], “pb-ad-78623” ).addService( googletag.pubads() ) ); } );

googletag.cmd.push(function() {
mobile_slots.push( googletag.defineSlot( “/1005424/_dPSv4_mob-all-article-bottom_(300×250)”, [300, 250], “pb-ad-78158” ).addService( googletag.pubads() ) ); } );

The post Tips for Getting Yourself to Relax as a Photographer and Have More Successful Portrait Sessions by Simon Ringsmuth appeared first on Digital Photography School.


Digital Photography School

 
Comments Off on Tips for Getting Yourself to Relax as a Photographer and Have More Successful Portrait Sessions

Posted in Photography


Brace Yourself, it’s Time for Back to School!

31 Aug

Headed back to school, or know someone who is? Well, it’s time to prep yourself for the most photogenic year ever!

Check out our list of school supplies that are sure to put the cool in Back to School.

(…)
Read the rest of Brace Yourself, it’s Time for Back to School! (22 words)


© Erin for Photojojo, 2015. |
Permalink |
No comment |
Add to
del.icio.us

Post tags:


Photojojo

 
Comments Off on Brace Yourself, it’s Time for Back to School!

Posted in Equipment


16 Fun Kids Room Ideas Will Make You Want to Shrink Yourself

17 Mar

[ By Steph in Design & Furniture & Decor. ]

treehouse bedroom

Why don’t rooms for adults come with cool tent-shaped beds, oversized Legos, slides, tree houses and secret compartments? These fun and imaginative kids room ideas include furniture with built-in entertainment, fort kits, fully customized themed rooms complete with murals and even a three-story slide built into the design of the house.

Tent, Playhouse and Camper Beds

kids furniture tent beds

kids furniture playhouse beds

kids furniture caravan bed

Design firm Mathy by Bols has created a series of handmade kids beds shaped like tents, caravans and treehouses. The A-frame Cabin Tent Bed features a closable side panel and a bottom section that pulls out to offer storage or a second mattress, the Camper Bed looks like a mini teardrop trailer with a toy box mounted to one side, and the Treehouse Bunk Bed will definitely have kids fighting over who gets to sleep on top.

Fold-Up Staircase to Slide Converter

kids furniture staircase slide 1

kids furniture staircase slide 2

Any staircase turns into a slide in seconds with the ‘SlideRider,’ an extra-long foam mat with safety bumpers on the sides that stretches over stairs and then folds up neatly when it’s time to put it away.

Imaginative Wooden Kids Beds with Slides

kids furniture wooden beds 1

kids furniture wooden beds 2

kids furniture wooden beds 3

Each design in the Rhapsody collection of kids’ beds from CedarWorks is a fantasy world of its own, with a variety of play areas built in ranging from slides to ‘secret’ rooms. They offer so many opportunities for self-entertainment, you might just get a little bit of extra sleep in the morning while the kids keep themselves busy.

LEGO-Inspired Kids Furniture Collection

kids furniture lego inspired

Kids Furniture LEGO 2

The LEGO Furniture Collection for Kids by Lola Glamour uses the look of these iconic plastic brick toys to make a big visual impact in children’s rooms. The ones mounted to the bed hide drawers and cabinets, while the rest are purely decorative.

Custom Treehouse Bedroom

kids furniture treehouse bedroom

kids furniture treehouse bedroom 2

A swing, a fake tree, climbing ropes and a storage platform that doubles as a stage aren’t even the coolest things about this imaginative kids’ bedroom idea – that honor goes to the awesome miniature treehouse tucked up into the corner of the room next to windows overlooking the yard.

Next Page – Click Below to Read More:
16 Kids Room Designs Thatll Make You Want To Shrink Yourself

Share on Facebook


[ By Steph in Design & Furniture & Decor. ]

[ WebUrbanist | Archives | Galleries | Privacy | TOS ]


WebUrbanist

 
Comments Off on 16 Fun Kids Room Ideas Will Make You Want to Shrink Yourself

Posted in Creativity